

Page 1
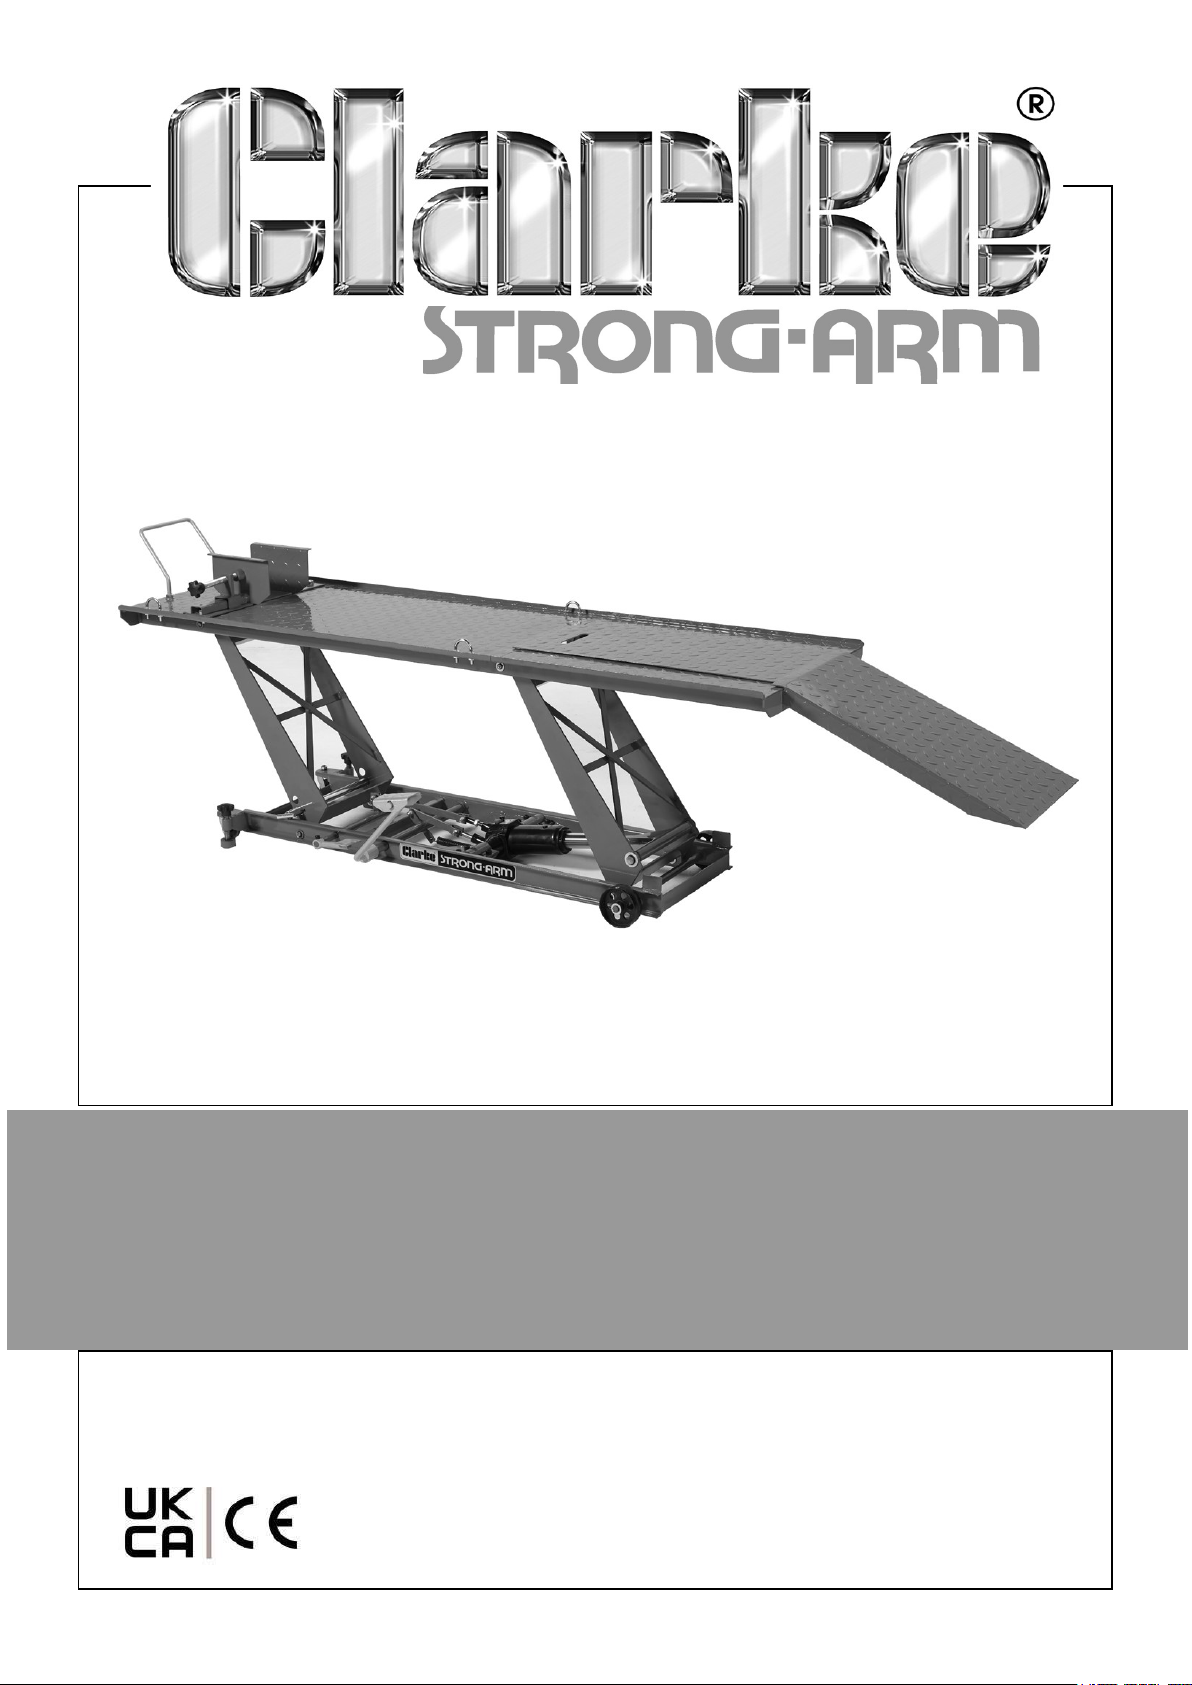
HYDRAULIC MOTORCYCLE LIFT
MODEL NO: CML7
PART NO: 7610201
OPERATION & MAINTENANCE
INSTRUCTIONS
ORIGINAL INSTRUCTIONS DL0525 Rev 2
Page 2
INTRODUCTION
Thank you for purchasing this CLARKE hydraulic motorcycle lift.
Before attempting to operate this product, it is essential that you read this manual
thoroughly and carefully follow all instructions given. In doing so you can look forward
to the product giving you long and satisfactory service.
SPECIFICATIONS
Model Number CML7
Maximum Load 360 kg (800lb)
Minimum Table Height 180 mm
Maximum Table Height 680 mm (excl wheel clamp)
Net weight inc Wheel Clamp 97.1kg
Wheel Clamp Max. Opening Width 180 mm
Table Length 1900 mm
Table Length with Ramp 2545 mm
Table Width 530 mm
Operating temperature range
0oC - 40oC
SAFETY SYMBOLS
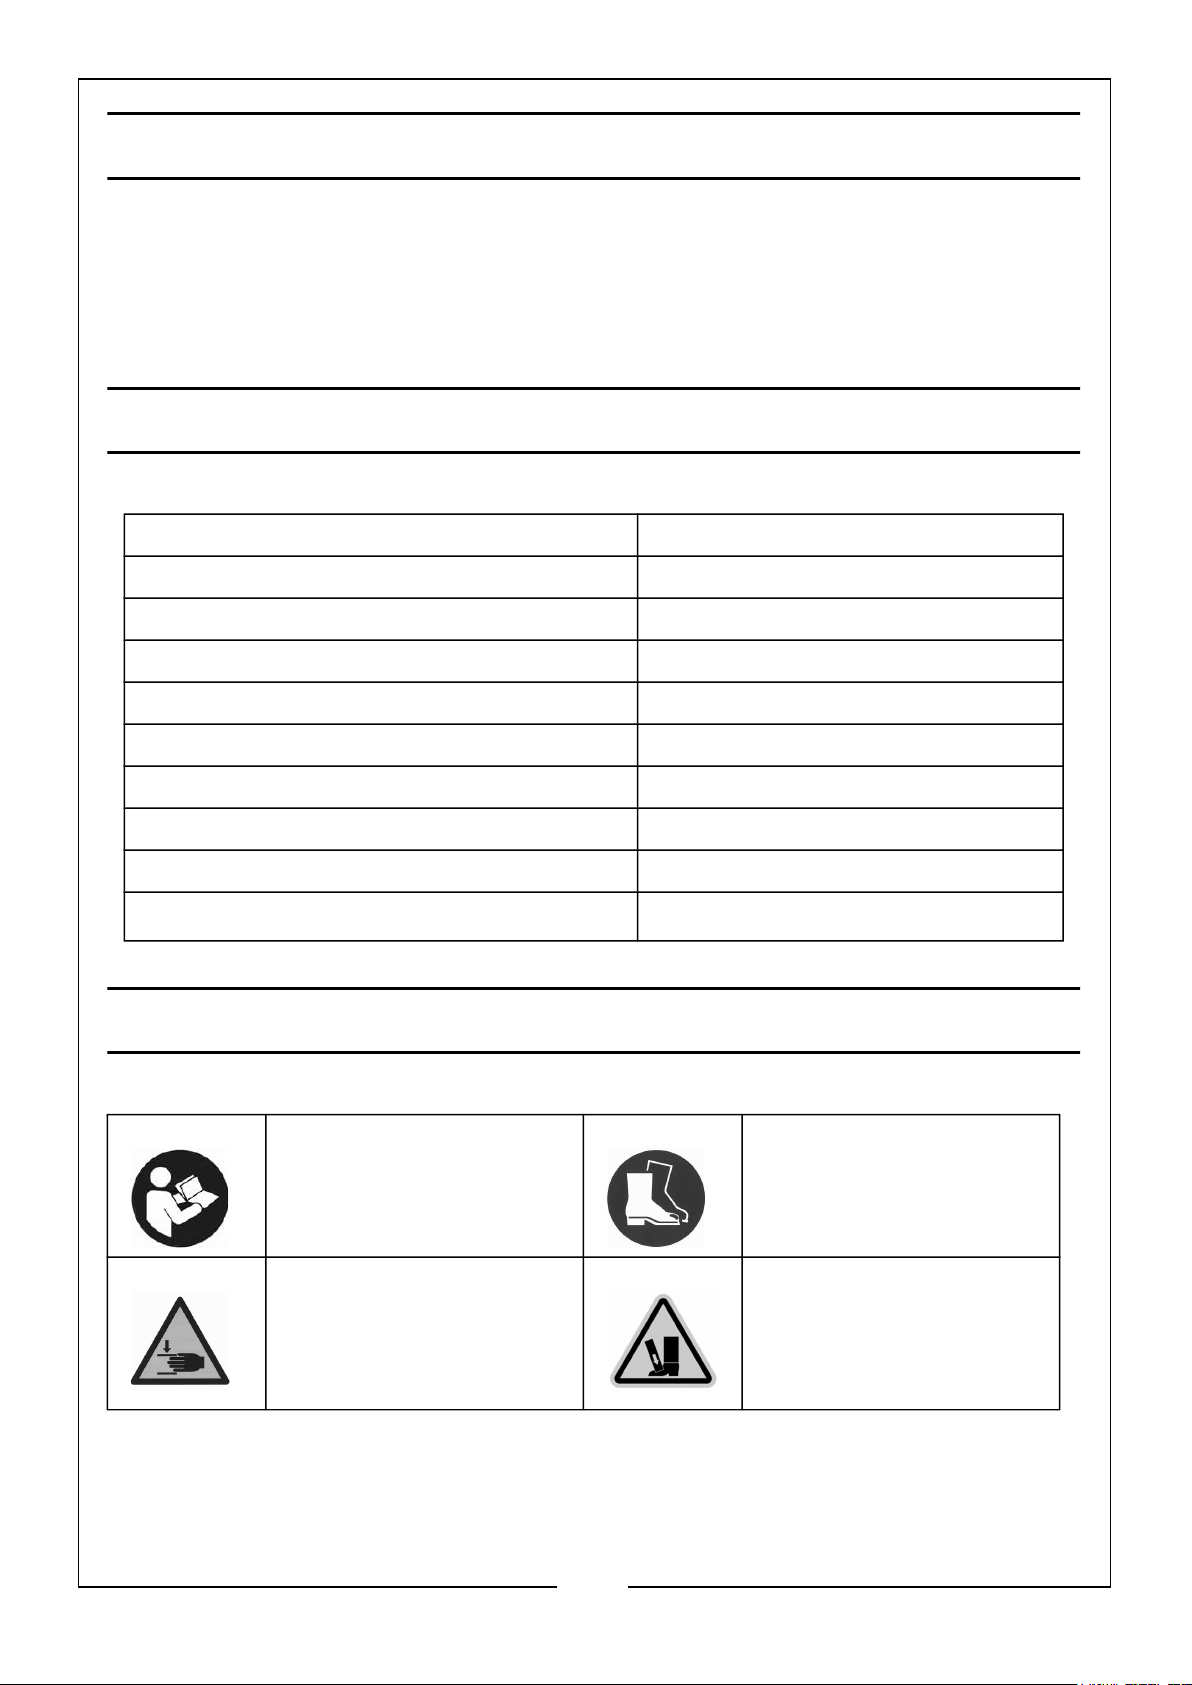
Always read the user
manual before use
Warning: Crush Hazard,
Risk of crushing of hands
Wear foot protection
Warning: Crush Hazard,
Keep feet clear
2
Parts & Service: 020 8988 7400 / E-mail: [email protected] or [email protected]
Page 3
SAFETY PRECAUTIONS
1. NEVER exceed the safe working load of 360kg (800lb) and only use the
motorcycle lift for its intended purpose.
2. NEVER use the lift if it has been subjected to an abnormal load or shock. It
should be removed from service immediately and fully inspected by qualified
personnel before being passed as serviceable before being used again.
3. NEVER rely on the hydraulic ram to support the table when loaded. Always use
the locking bar to hold the table in one of the two positions provided.
4. NEVER crawl or reach under the platform unless it is mechanically locked using
the safety bar provided.
5. ALWAYS use the lift on a solid, flat, level surface.
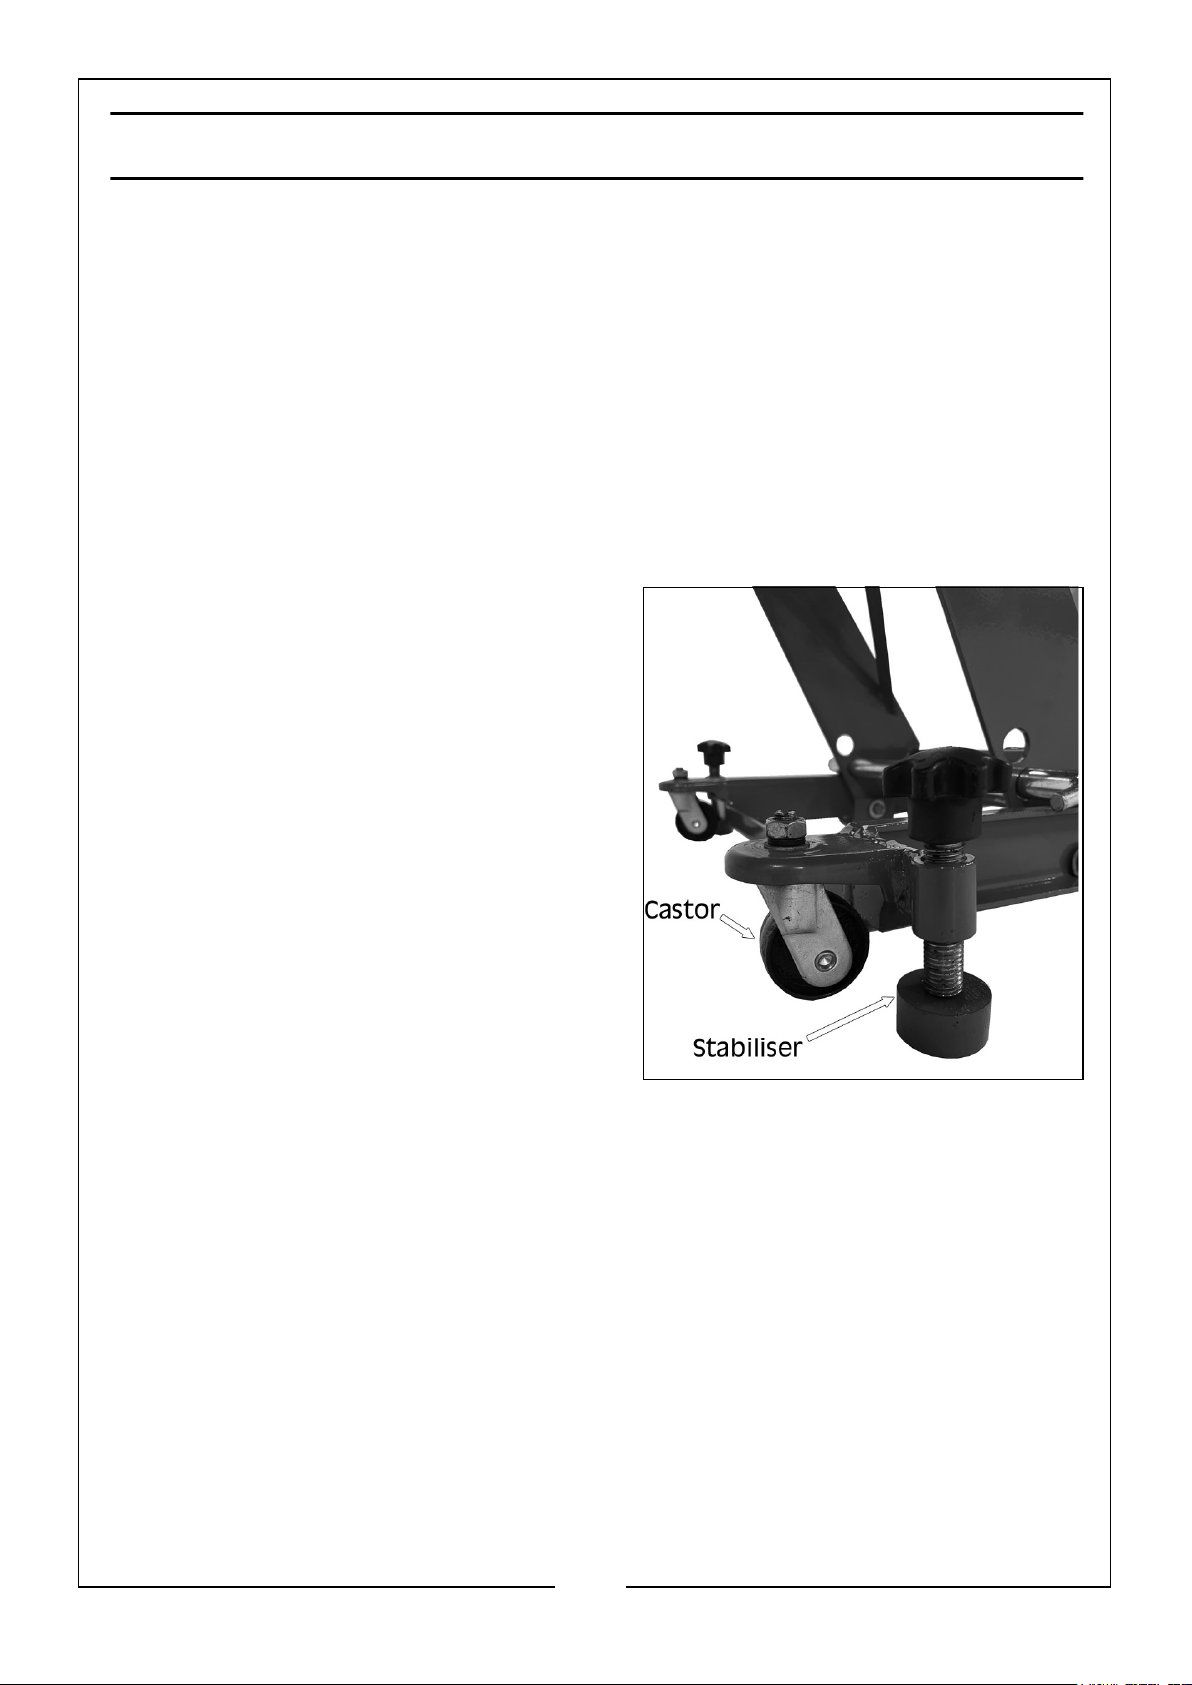
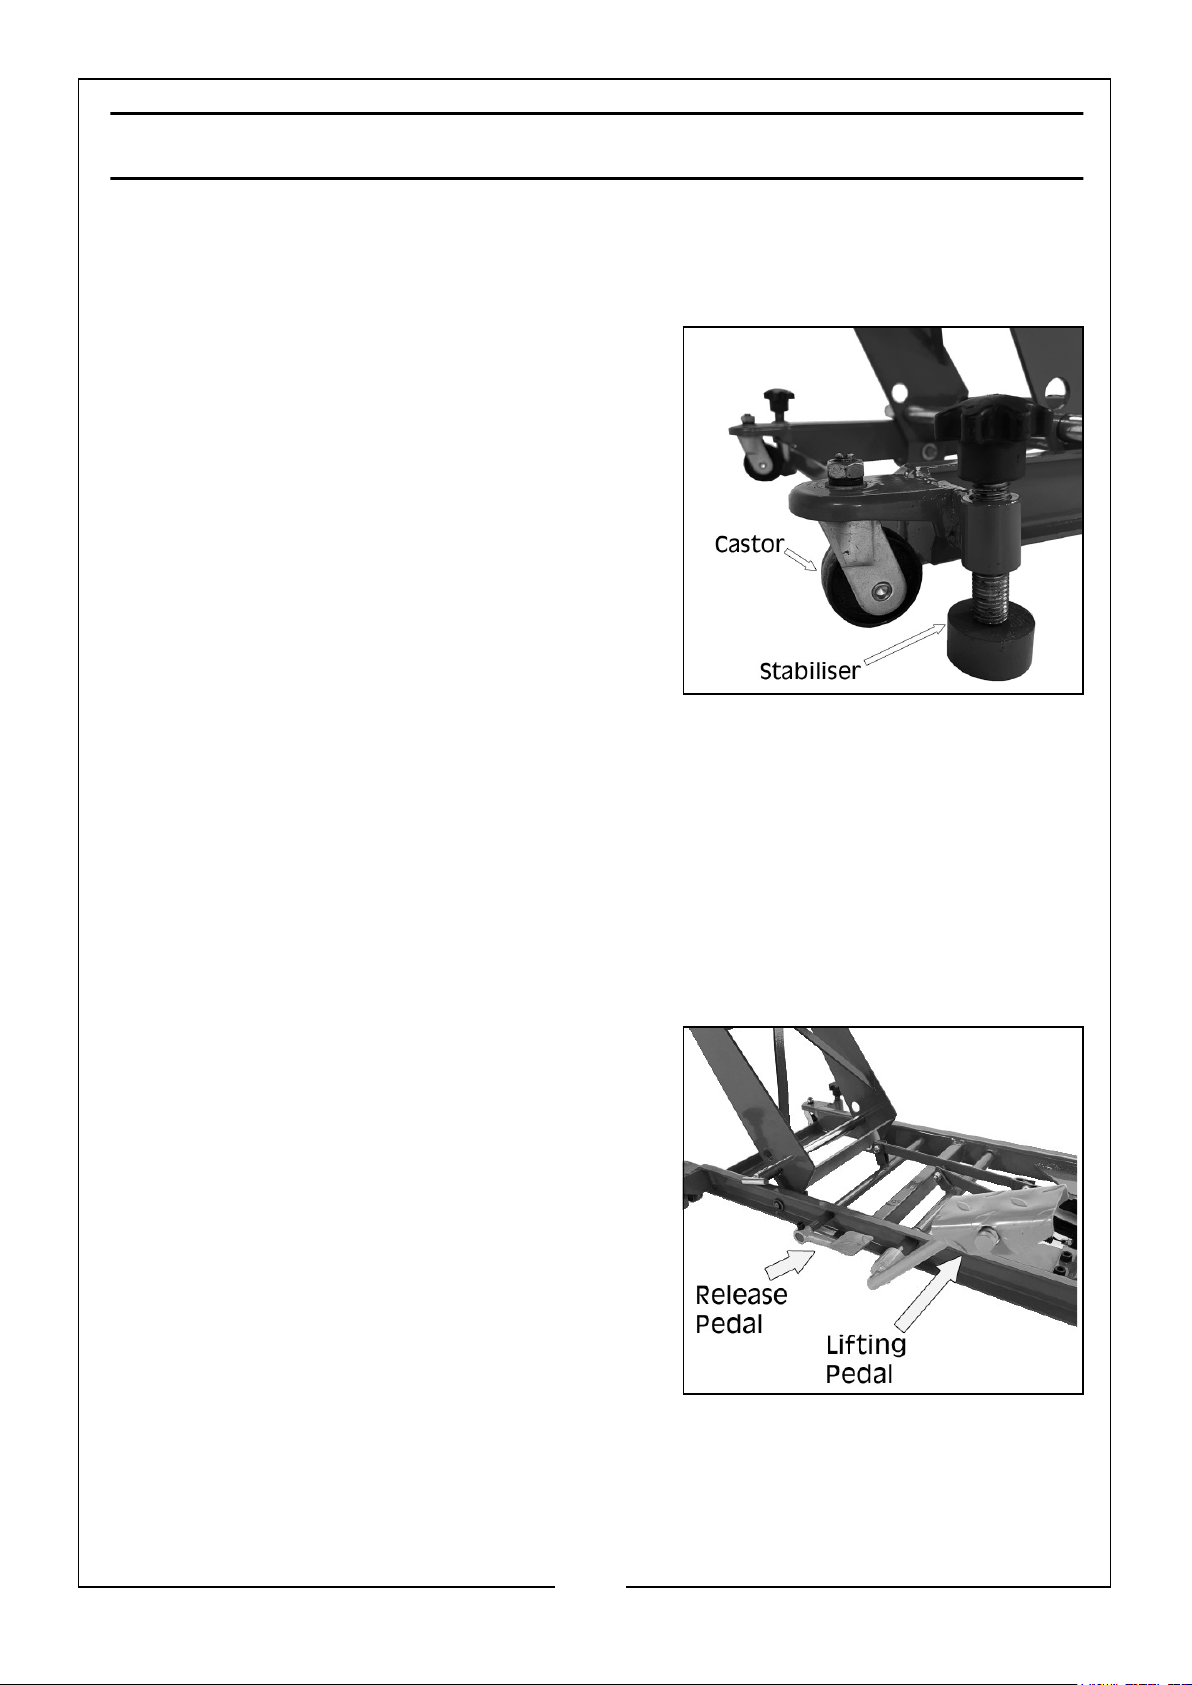
6. ALWAYS screw down the 2 stabilisers
at the front end of the lift before putting
the table under load.
NOTE:
The castors are not designed
to take the weight of the
motorcycle but are used
merely to move the lift quickly
and easily around the
workshop. On no account
must you raise a loaded
platform unless the stabilisers
are screwed down, and NEVER
use the lift to transport a load.
7. NEVER travel on the motorcycle lift, as
it was not designed for this purpose.
8. ALWAYS use appropriate safety
equipment such as protective footwear when using this lift.
9. ALWAYS inspect the lift before use to ensure it is in good condition and replace
any damaged or worn parts.
10. ALWAYS use spare parts supplied by CLARKE International. Using non-standard
parts could be extremely dangerous.
11. ENSURE the operator is trained in both operational and safety aspects of using
this product.
12. NEVER leave this lift unattended whilst there is a load on it.
13. NEVER allow children or bystanders anywhere near this lift whilst it is in use.
3
Parts & Service: 020 8988 7400 / E-mail: [email protected] or [email protected]
Page 4
ASSEMBLY & PREPARATION
Check to ensure that no damage has occurred during transit. Any damage should be
reported to your CLARKE dealer immediately.
Using a clean, level area, unpack the equipment, laying out the loose items as
follows:
• Main Lift
• Stop Plate
• Wheel Clamp
• Lifting Foot Pedal
• Ramp
• Safety Bar
• Removable Plate
• 4 x U Bolts
• Bolts, Washers, Nuts, Cotter Pins
The motorcycle lift is packed flat in its lowest position. It is fully assembled except for
ancillary items which are fitted as follows.
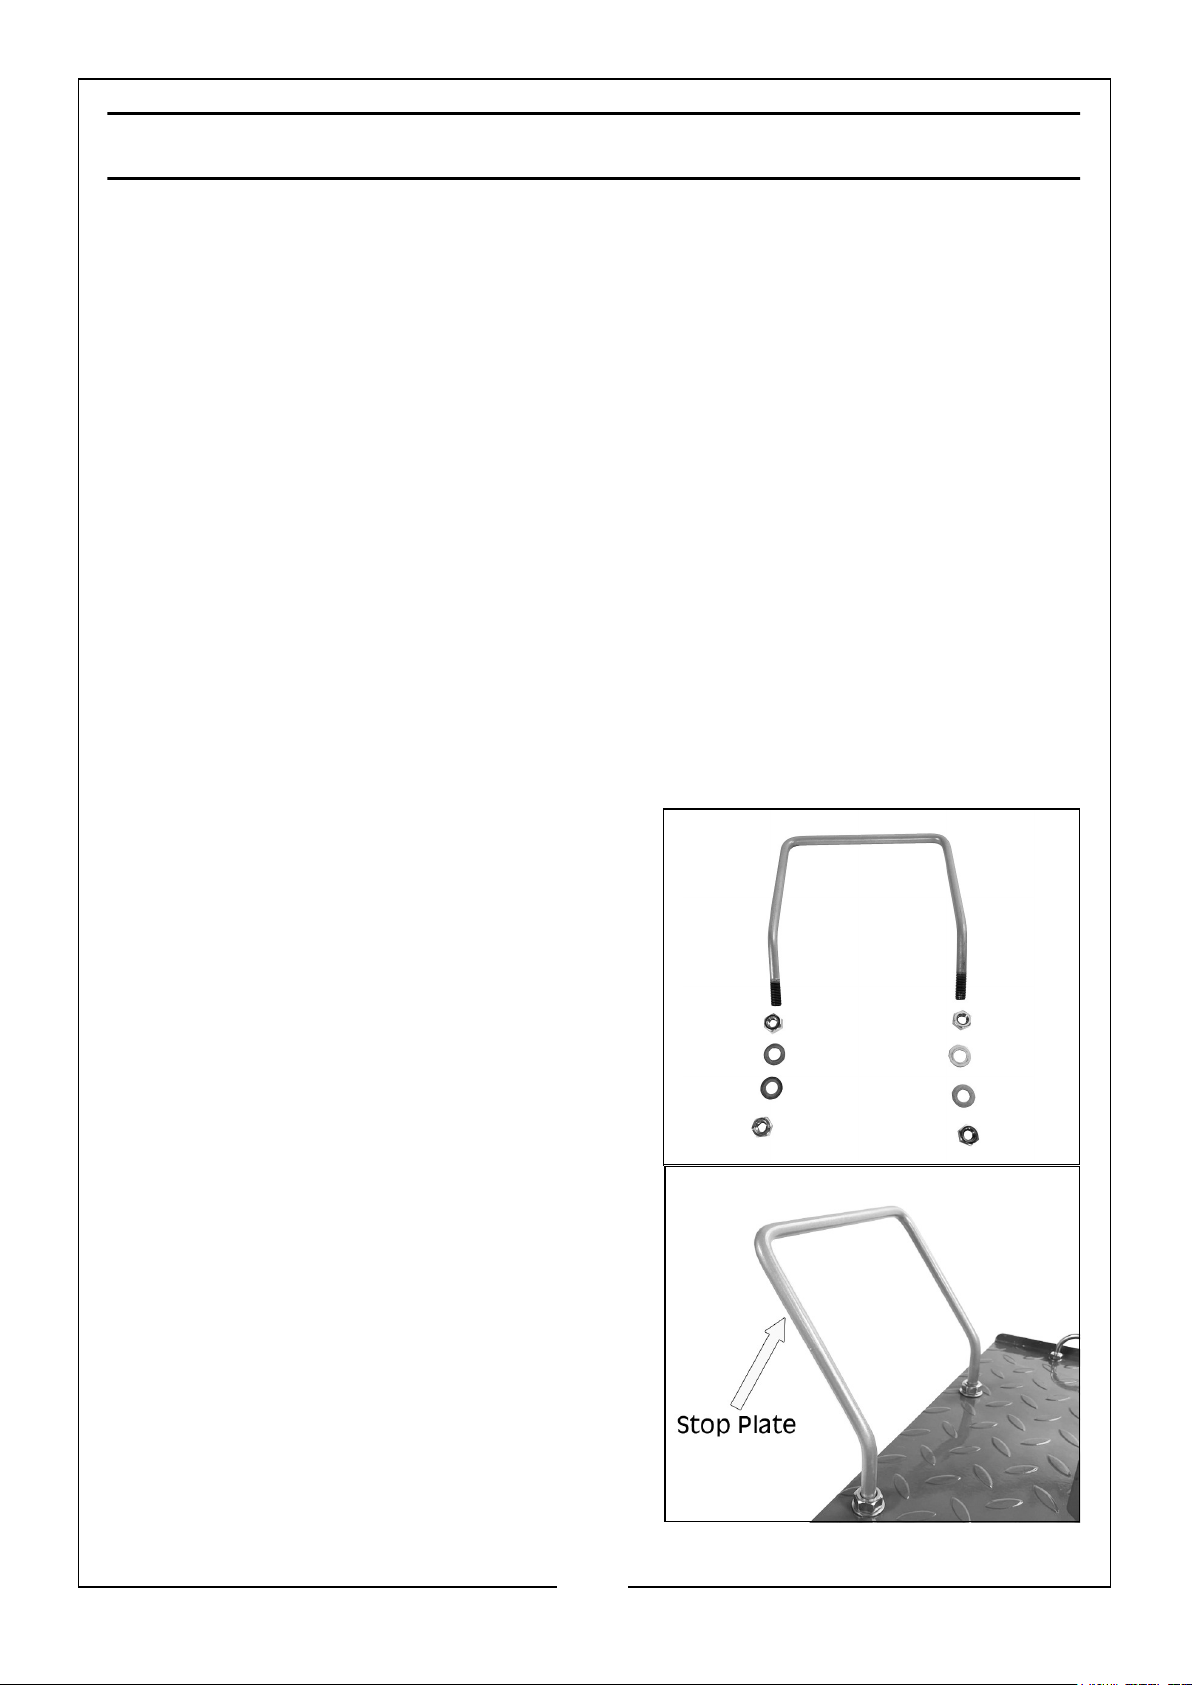
1. Attach the stop plate to the front side of
the platform using the nuts, bolts and
washers provided, as shown.
4
Parts & Service: 020 8988 7400 / E-mail: [email protected] or [email protected]
Page 5
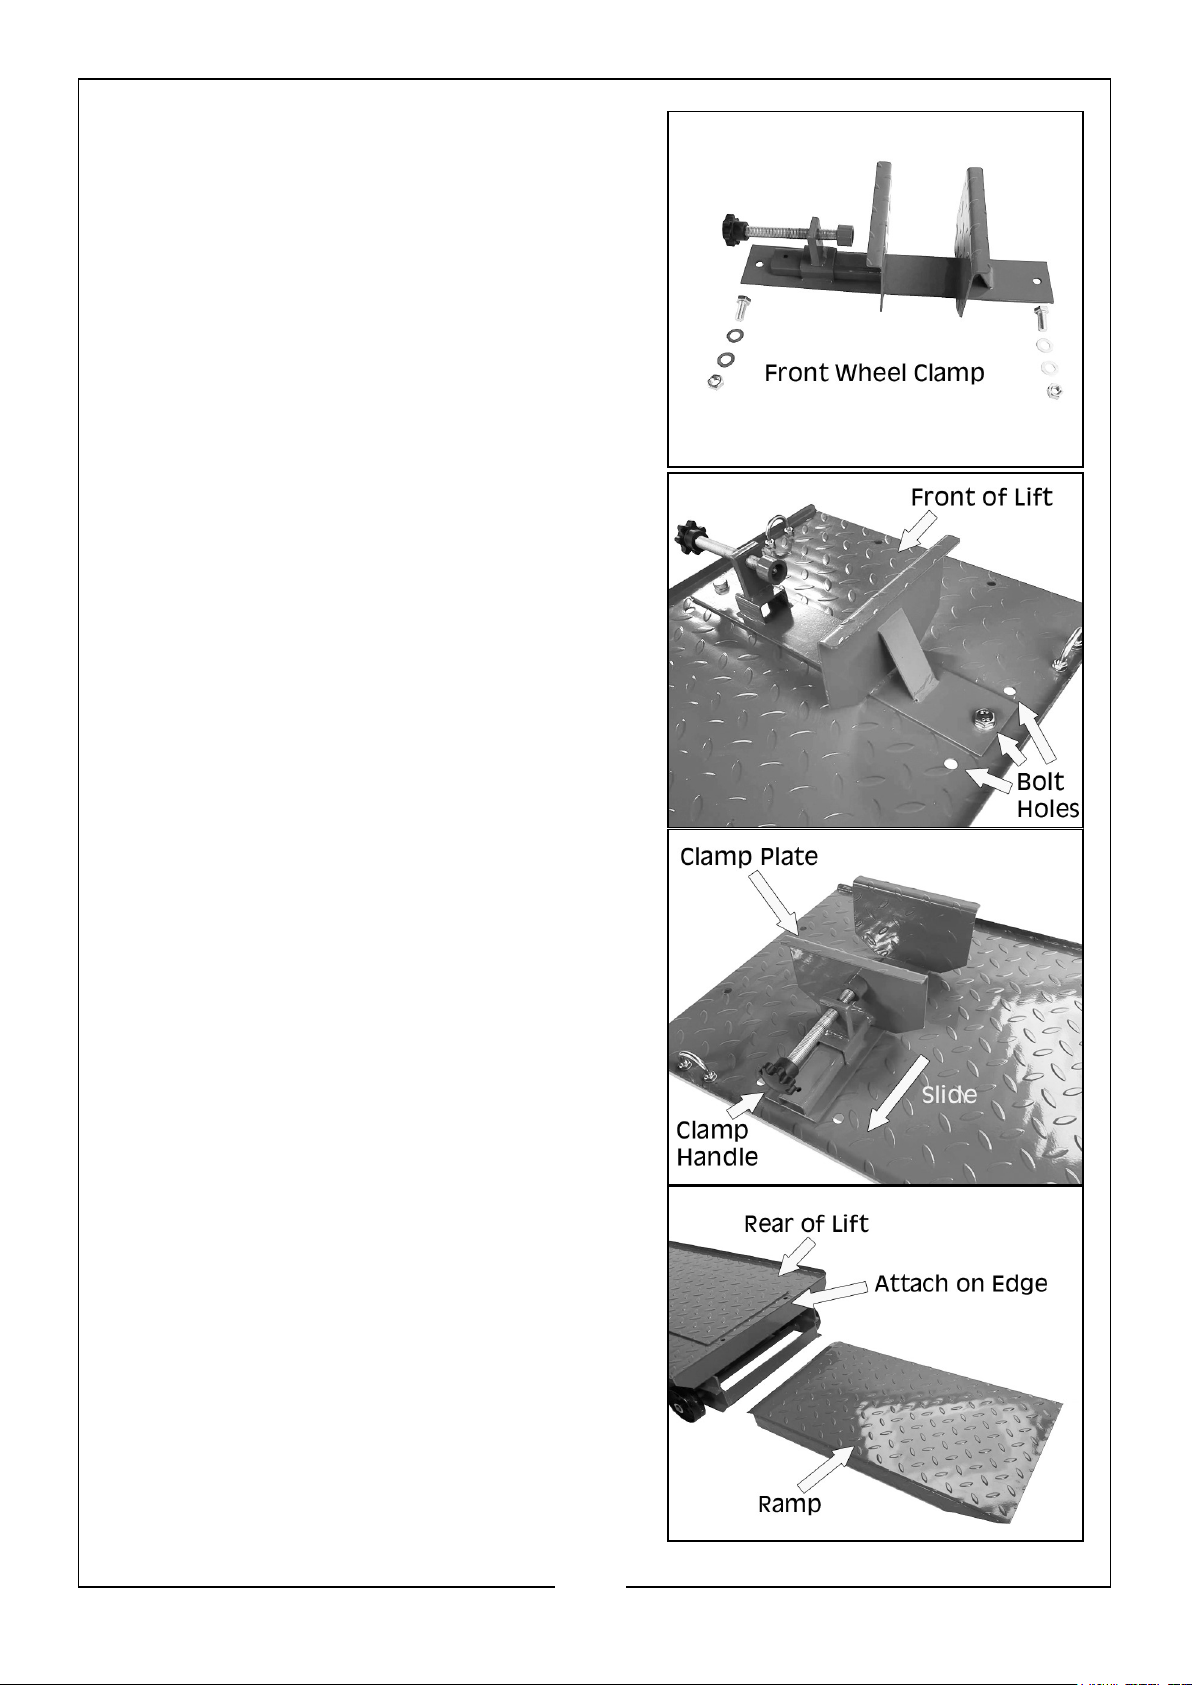
2. Attach the front wheel clamp to the front
end of the platform using the nuts, bolts
and washers provided, as shown. The are
3 different bolt hole positions to choose
from.
3. Slide the clamp plate into the clamp handle
side of the clamp.
4. Attach the ramp to the rear side of the
platform as shown.
5
Parts & Service: 020 8988 7400 / E-mail: [email protected] or [email protected]
Page 6
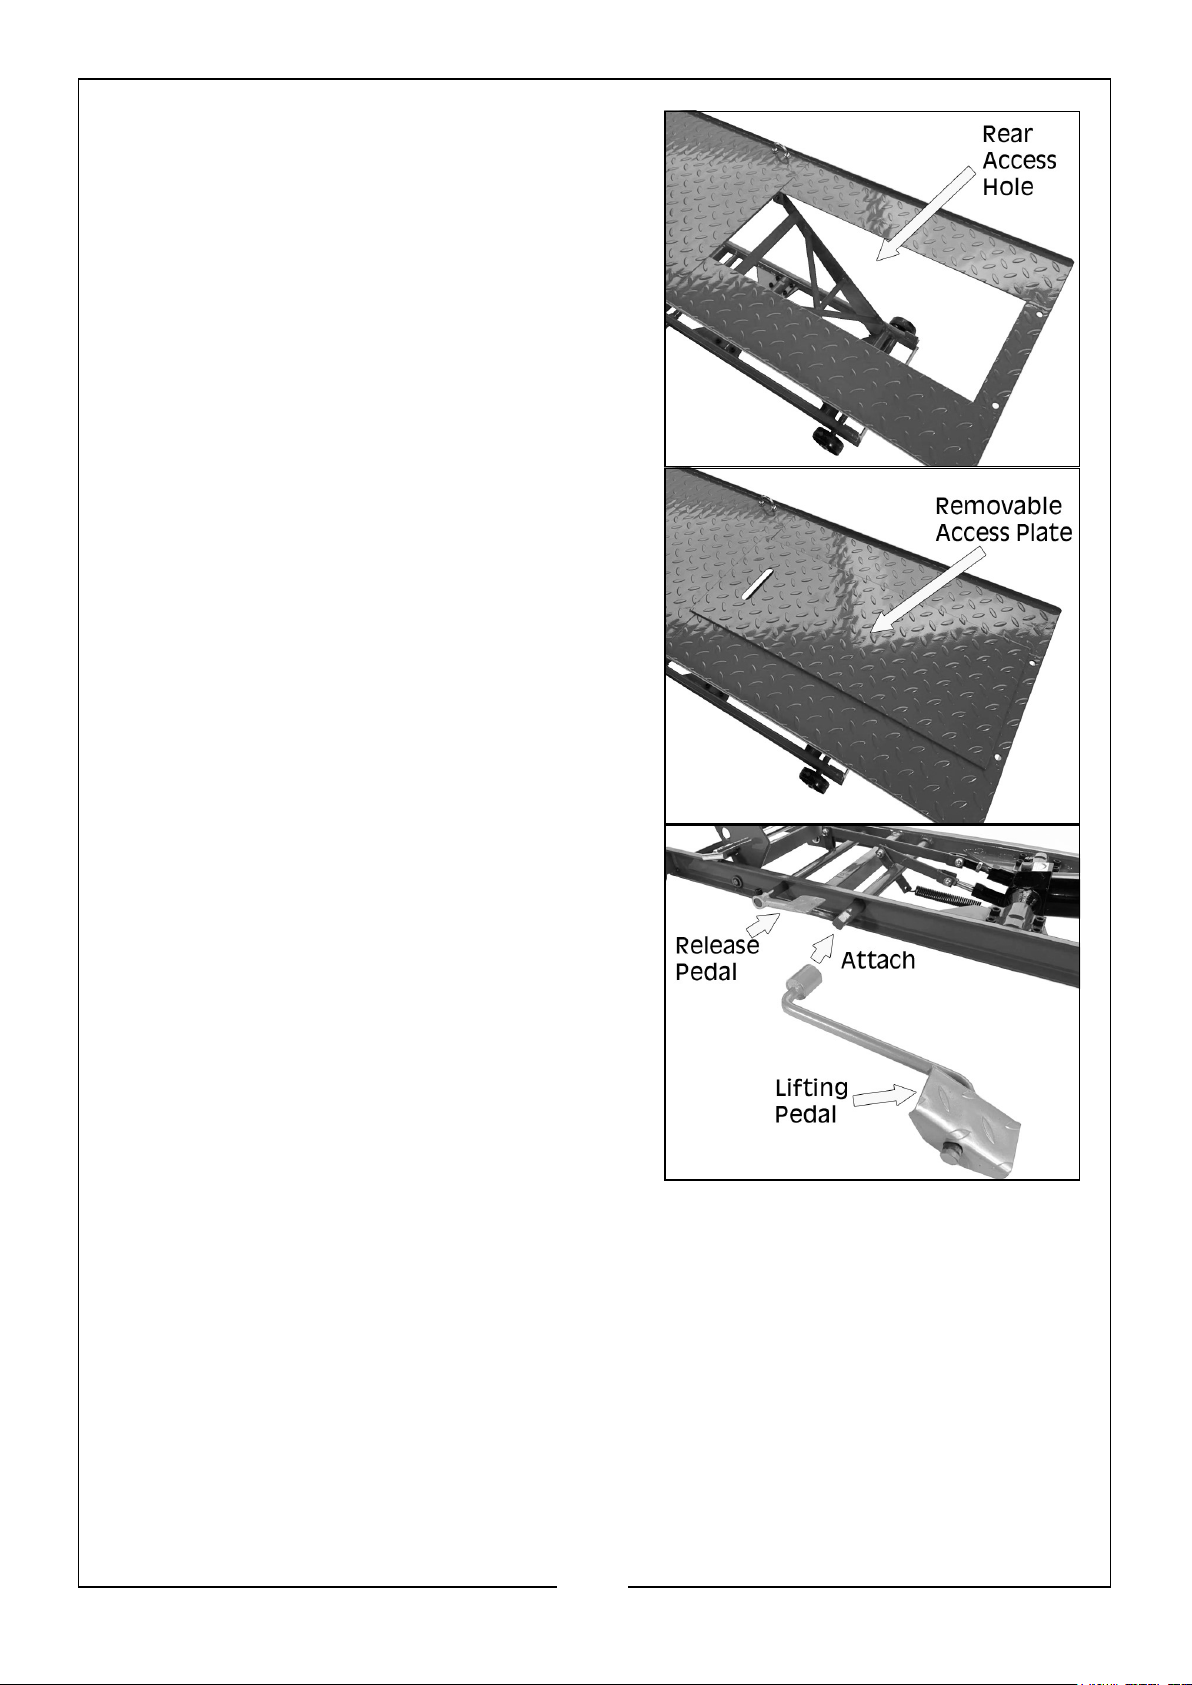
5. Attach the removable access plate over the
rear access hole at the rear end of the
ramp as shown.
6. Attach the lifting foot pedal to the lifting
spindle as shown.
6
Parts & Service: 020 8988 7400 / E-mail: [email protected] or [email protected]
Page 7
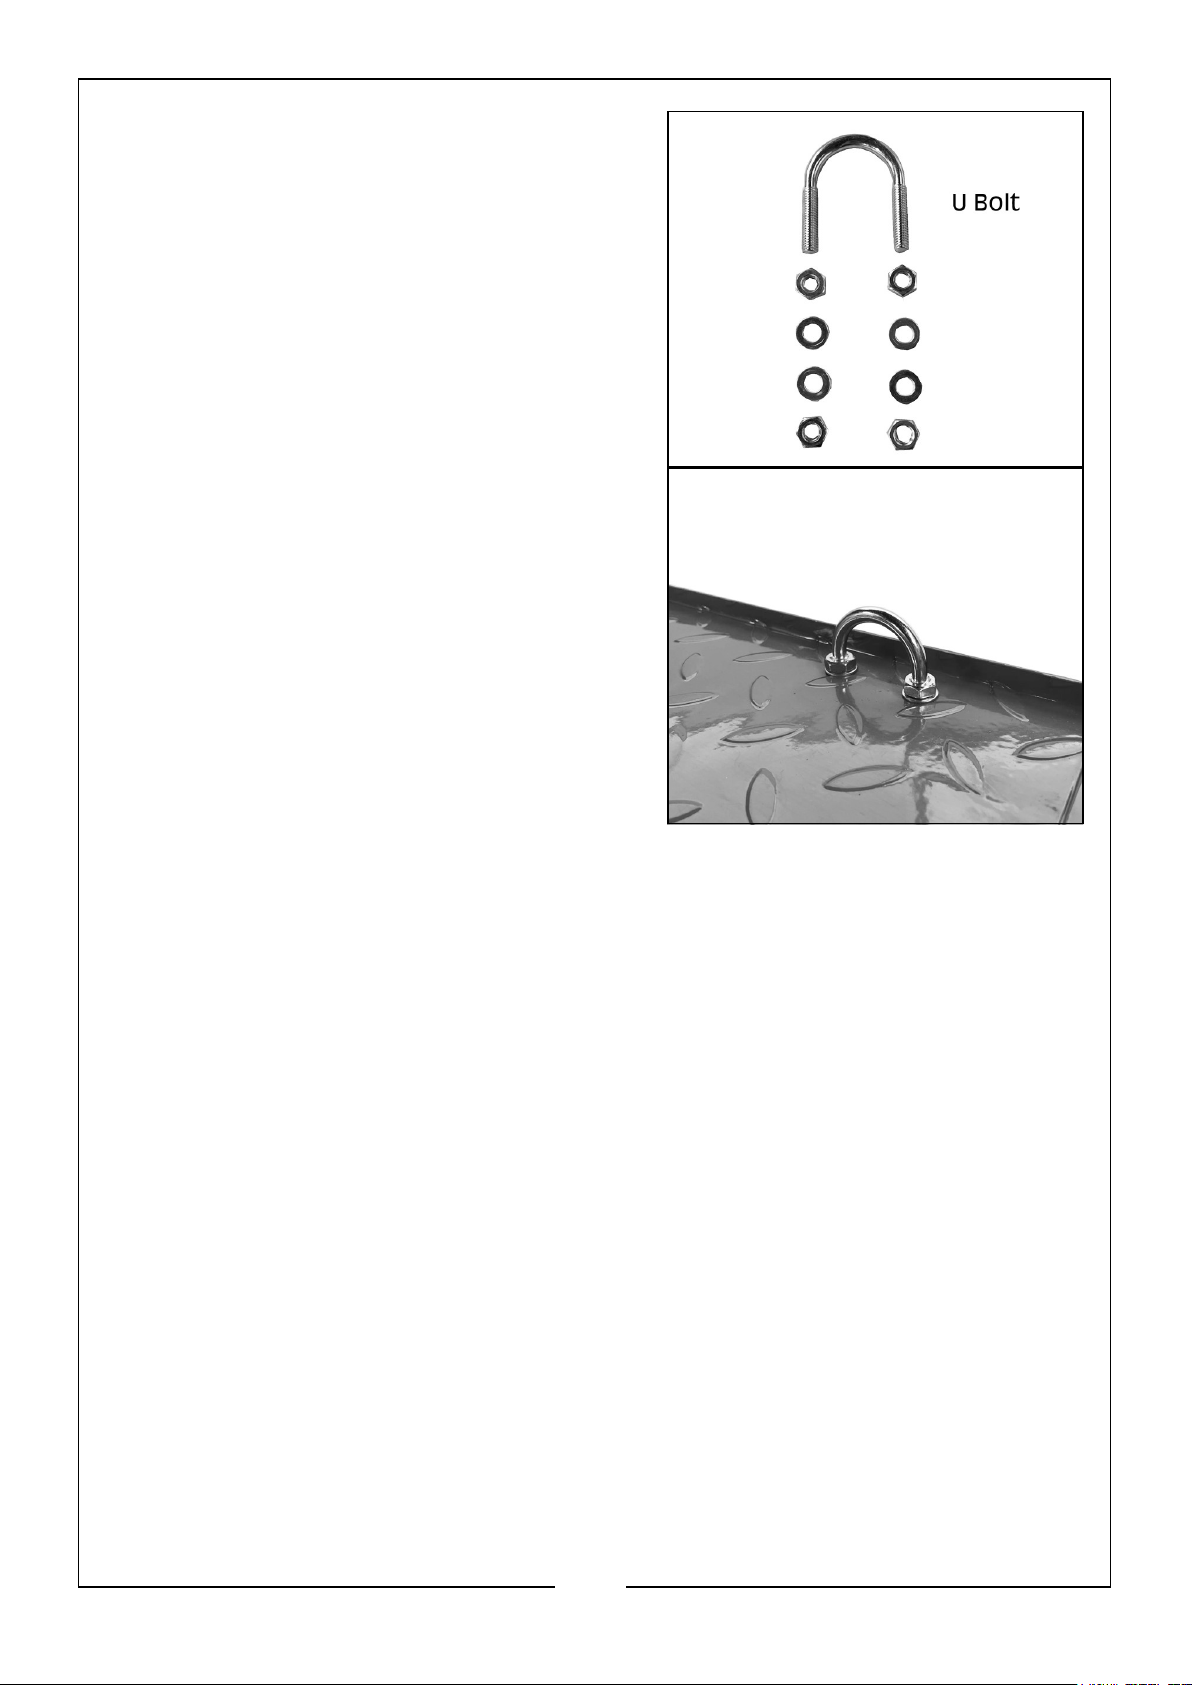
7. Attach the 4 U Bolts on to either side of the
platform as shown.
7
Parts & Service: 020 8988 7400 / E-mail: [email protected] or [email protected]
Page 8
BEFORE USE
Once unboxed and assembled, leave the lift for one hour to allow the oil to settle
before purging the system.
NOTE: Failure to allow sufficient time for the oil to settle could result in air
remaining in the oil. In this event, the pump will not purge completely
the first time and a second purge will be required.
PURGE AIR FROM THE HYDRAULIC SYSTEM
1. Lower the platform to its lowest position by depressing the release foot pedal.
2. Pump the lifting foot pedal several times to purge the air from the system.
3. Depress the release foot pedal.
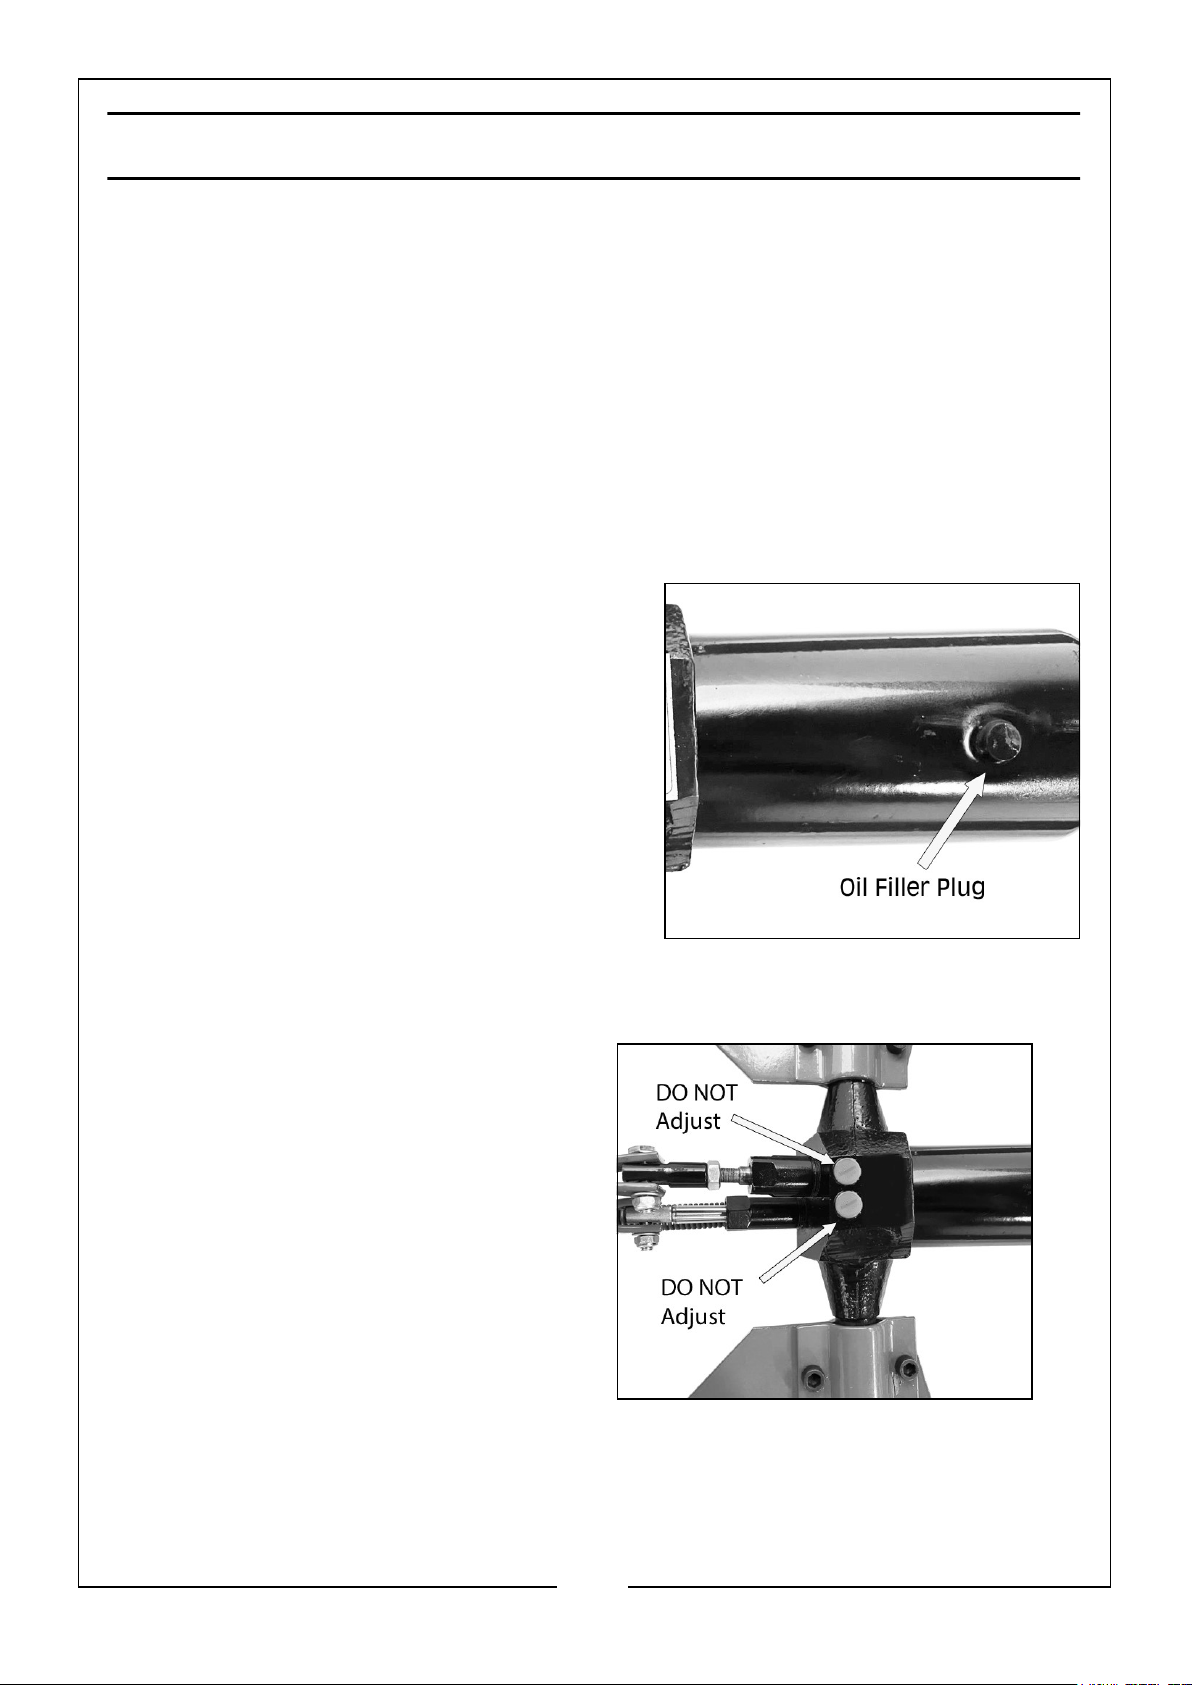
4. Carefully and slowly pinch the oil filler
plug, that is situated on the top of the
piston as shown, to release any trapped
air.
DESCENT SPEED CONTROL SETTING
NOTE: The descent speed and pressure
relief valves shown here are set
at the factory.
NOTE: DO NOT attempt to adjust the
valves under any circumstances.
• If you have any problems contact
your CLARKE dealer for help.
8
Parts & Service: 020 8988 7400 / E-mail: [email protected] or [email protected]
Page 9
OPERATION
Always carry out a visual check before use to ensure the lift is serviceable. Never take
things for granted.
For safety purposes, loading the lift is essentially a two man operation.
DO NOT exceed the maximum lifting
capacity of 360kg (800lbs)
UNDER NO CIRCUMSTANCES should you
ride a motorcycle onto the lift, and on no
account allow anyone to mount the motorcycle
whilst it is on the table.
1. With the lift maneuvered to a suitable
position which allows adequate working
space, screw down the stabilizers, as
shown, in order to take the weight off the
casters and to prevent any possible
movement of the table whilst working.
2. With the wheel clamp wide open, lower the table to its lowest position and with
one person either side of the motorcycle, position it on the table so that the front
wheel rests up against the stop plate.
3. Wind in the movable wheel clamp to secure the front wheel and tighten.
4. Secure the motorcycle with straps using the U bolts, two each side of the table.
WARNING: DO NOT USE THE MOTORCYCLE SIDE STAND ON THE LIFT, AS
THIS WILL SHIFT THE CENTRE OF GRAVITY AND MAKE THE LIFT
UNSTABLE.
5. Before raising the table, check to ensure the
motorcycle is perfectly stable.
6. Ensuring there is nothing to obstruct the
table, press the lifting pedal repeatedly, and
raise to an appropriate height to insert the
safety bar.
NOTE: Two positions are provided into which
the safety bar may be inserted, giving
two working heights.
9
Parts & Service: 020 8988 7400 / E-mail: [email protected] or [email protected]
Page 10
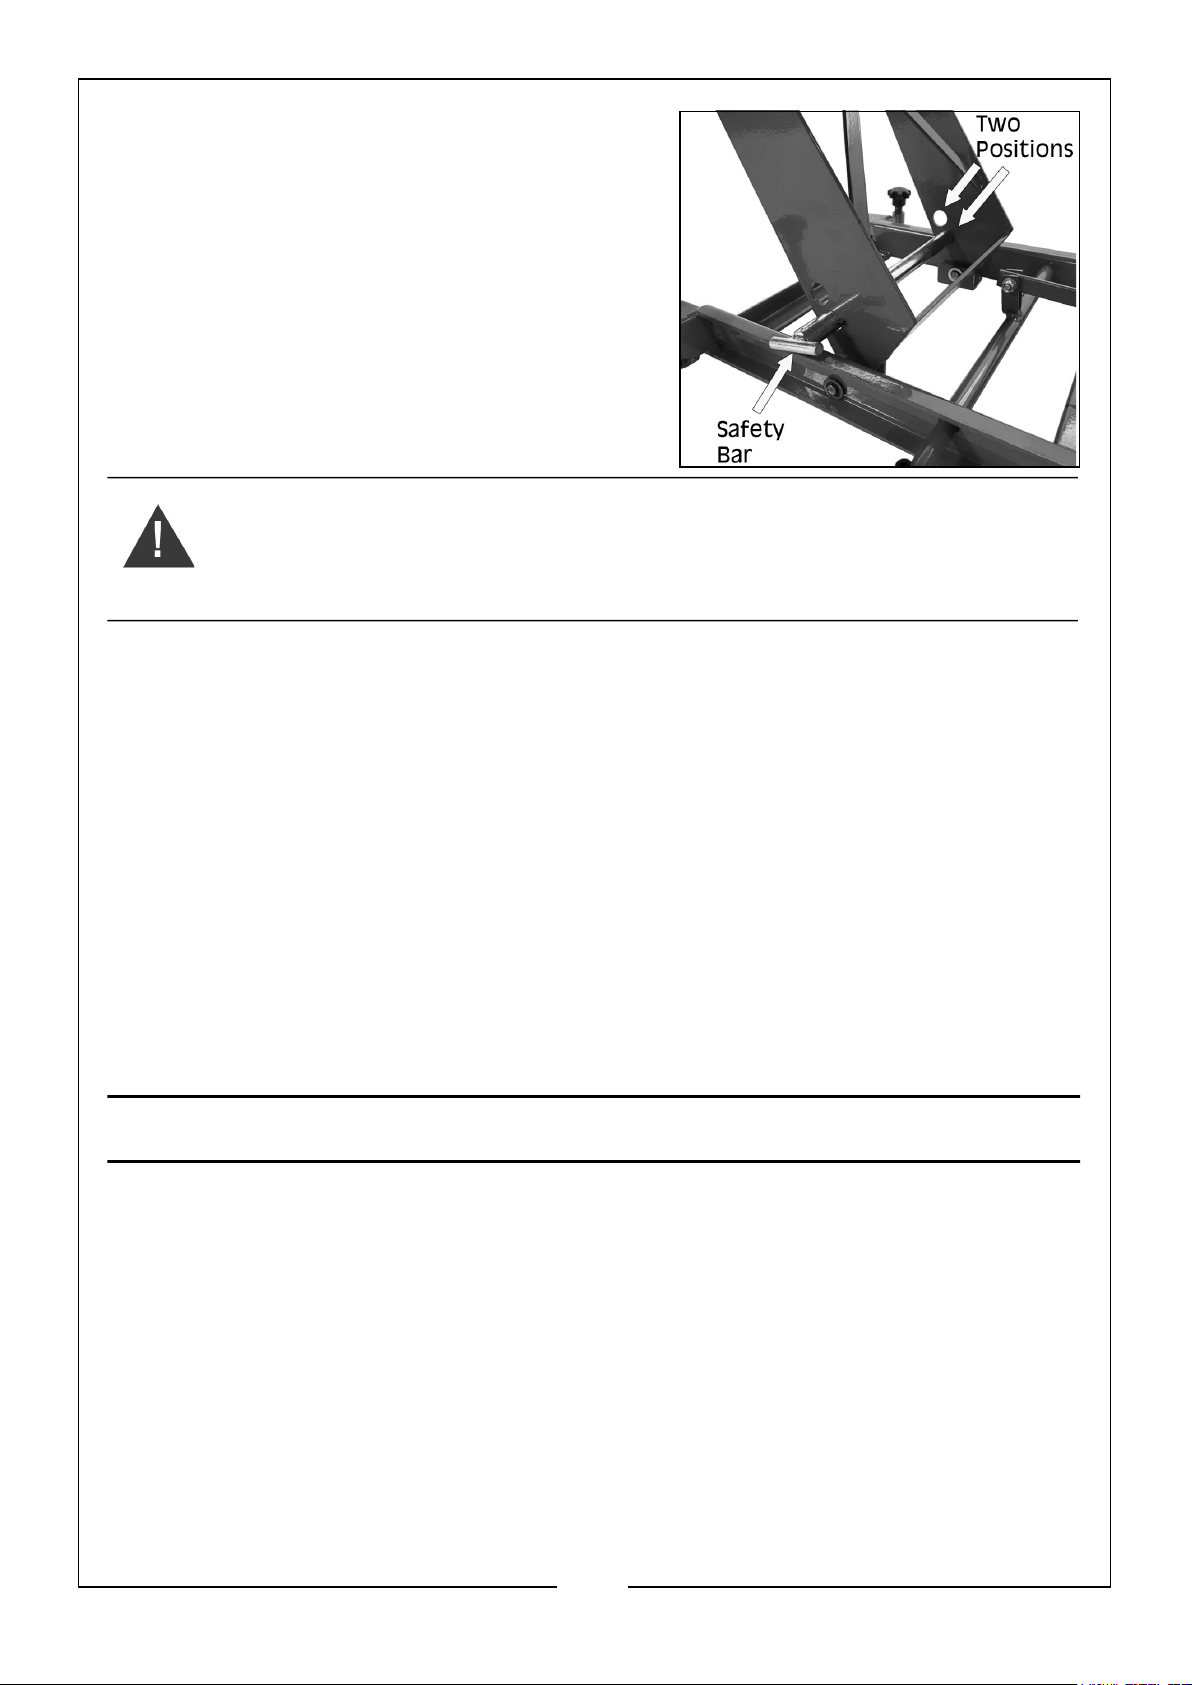
7. With the safety bar correctly inserted, lower
the table using the lowering foot lever to
ensure the full weight of the table is taken
by the safety bar.
8. If the rear wheel is to be removed, ensure
the motorcycle rests on its centre stand and
is well lashed down. Alternatively, a Paddock
Stand may be used to raise and secure the
trailing axle. The cover of the opening, at
the rear of the table, may be removed to
facilitate the removal of the rear wheel.
WARNING: ENSURE THE FOLLOWING BEFORE COMMENCING WORK
ON THE MOTORCYCLE:
• The safety bar is inserted and the table lowered so that the safety bar is taking
the FULL weight of the table
• The motorcycle is securely strapped to the lift.
• The stabilizers are screwed down to prevent the motorcycle lift from moving.
9. When you have finished working on the motorcycle, check under the lift to ensure
that there are no obstructions and that it is safe to lower the lift. Press the lifting
pedal once so the safety bar can be removed.
10. Depress the release foot pedal and let the lift down slowly to its lowest position.
NOTE: The lift will descend slowly if there is no motorcycle on the lift and may
need assistance to completely lower to floor level.
11. Open the wheel clamp, untie the straps and remove the motorcycle via the ramp.
MAINTENANCE & TROUBLESHOOTING
1. Keep the lift clean and wipe off any oil or grease. Lubricate all moving parts.
2. When not in use, the lift must be stored in its lowest position in a dry location to
minimise ram and piston corrosion.
3. Before each use, check all parts to ensure that all bolts and nuts are firmly
tightened. If any part of the lift is damaged or suspect, remove the lift from
service and take necessary action to repair it.
4. Periodically check the ram and piston for signs of corrosion. Clean exposed areas
with a clean oiled cloth.
5. When the lift efficiency drops, purge any air from the hydraulic system, see page
8.
10
Parts & Service: 020 8988 7400 / E-mail: [email protected] or [email protected]
Page 11
6. Check the hydraulic oil level. If not adequate, add more hydraulic oil if necessary.
DO NOT use brake fluid or any other improper fluid.
7. If the lift needs repairing and/or there are any parts that need to be replaced,
have the lift repaired by a CLARKE authorised and trained technician and only use
the replacement parts supplied by CLARKE International.
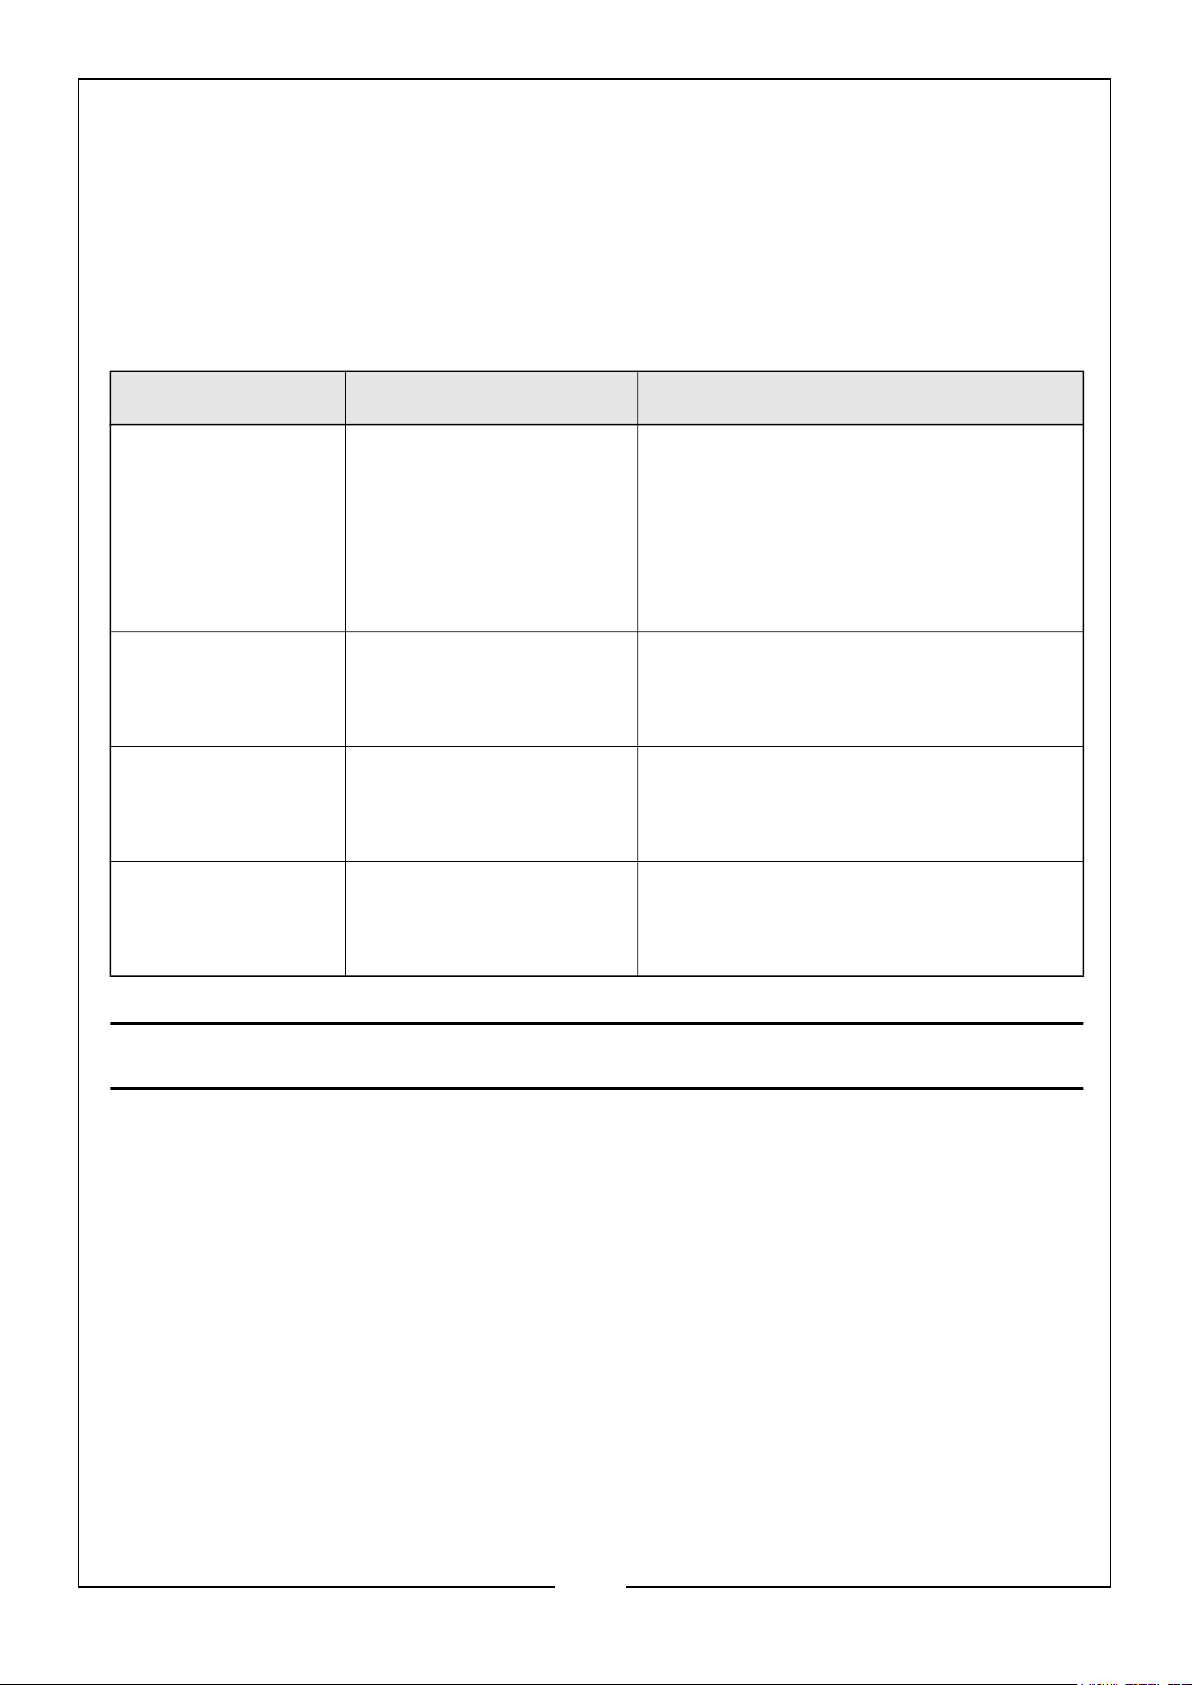
TROUBLESHOOTING
PROBLEM PROBABLE CAUSE SOLUTION
Can’t lift up the
platform
Can’t lower the
platform
The platform can’t
reach its highest
position
Oil leaking 1) Seals broken
1) The pump is leaking
2) Release valve not
completely closed
3) Air in hydraulic
system
1) Safety bar still in
place, see page 10
2) Lack of lubrication
1) Insufficient hydraulic
oil
2) Piston parts loose
1) Replace the oil seals, contact
CLARKE dealer
2) Check the release valve
3) Purge the air away, see page 7-8
1) Remove safety bar
2) Apply lubricating oil
1) Add hydraulic oil, via the oil filler
plug, see page 8
1) Replace the seal kit, contact
CLARKE dealer
2) Tighten the piston parts
GUARANTEE
This CLARKE product is guaranteed against faulty manufacture for a period of 12
months from the date of purchase. Please keep your receipt as proof of purchase.
This guarantee is invalid if the product is found to have been abused or tampered
with in any way, or not used for the purpose for which it was intended.
Faulty goods should be returned to their place of purchase, no product can be
returned to us without prior permission.This guarantee does not effect your statutory
rights.
11
Parts & Service: 020 8988 7400 / E-mail: [email protected] or [email protected]
Page 12
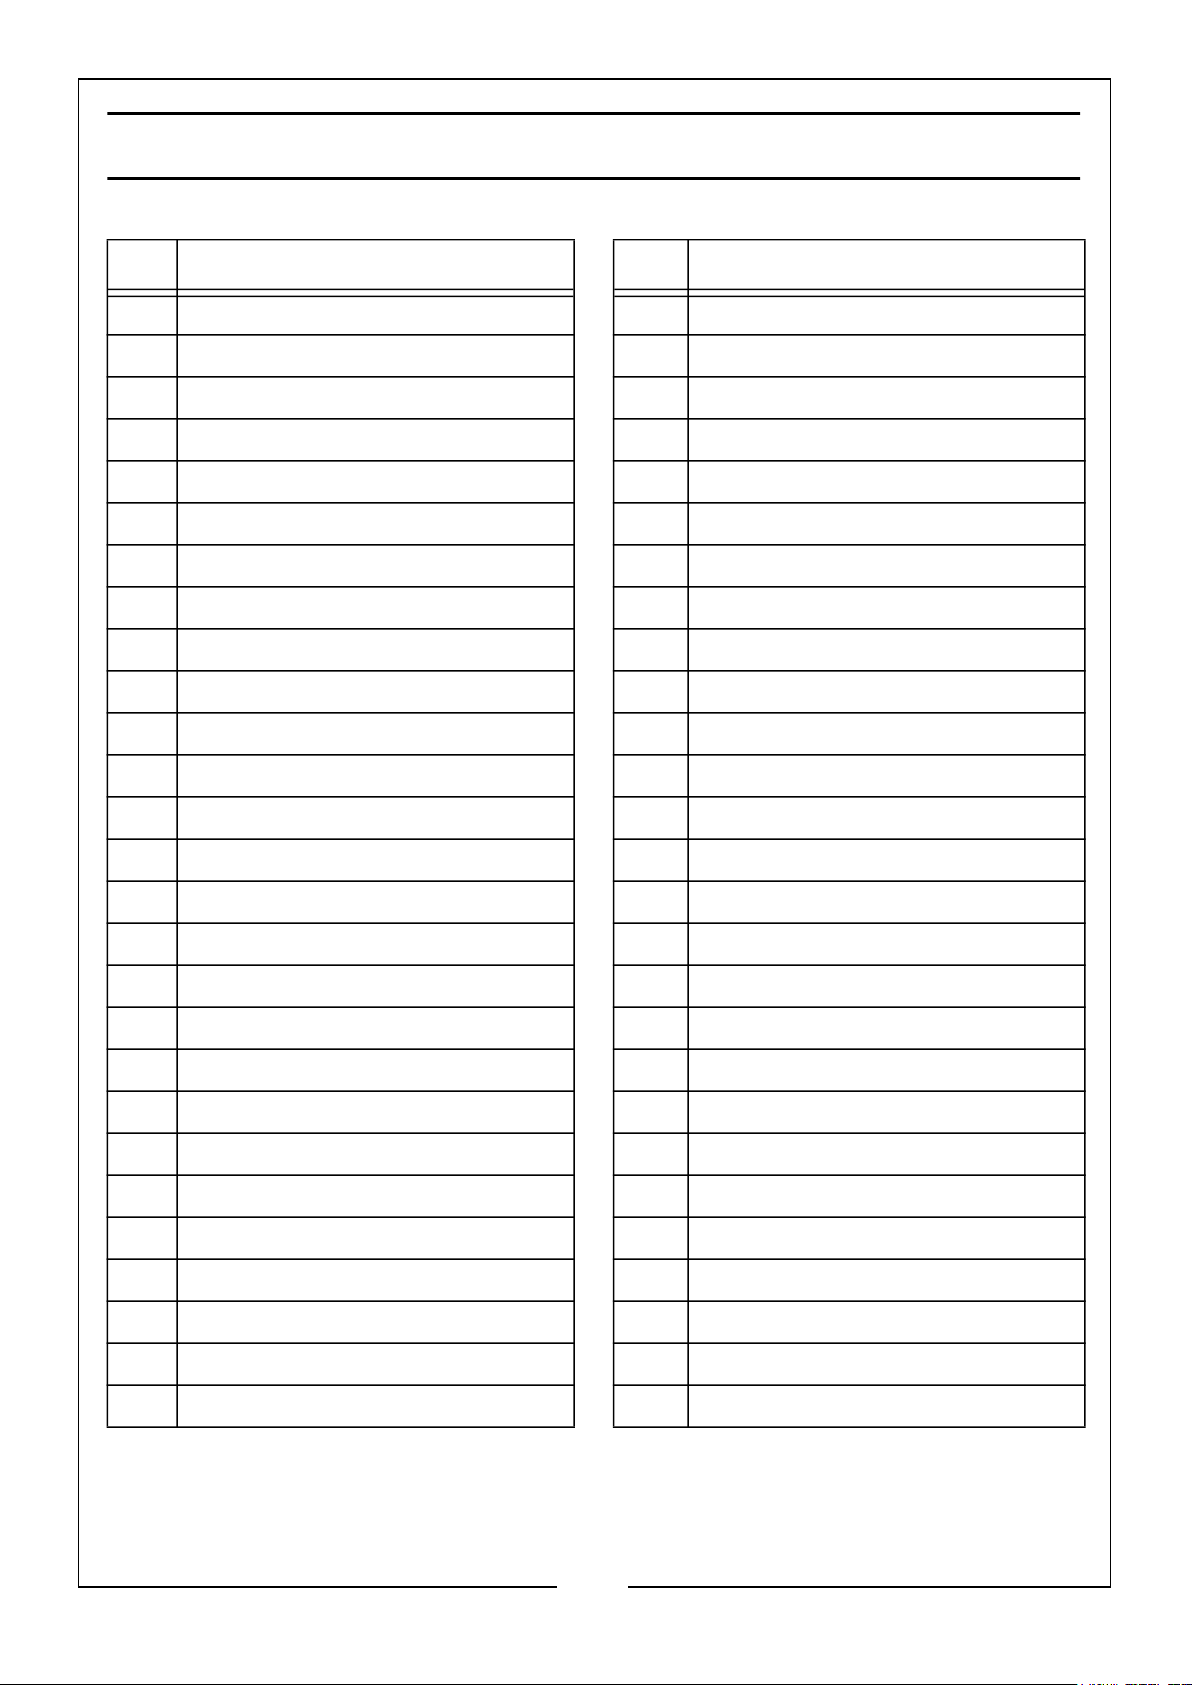
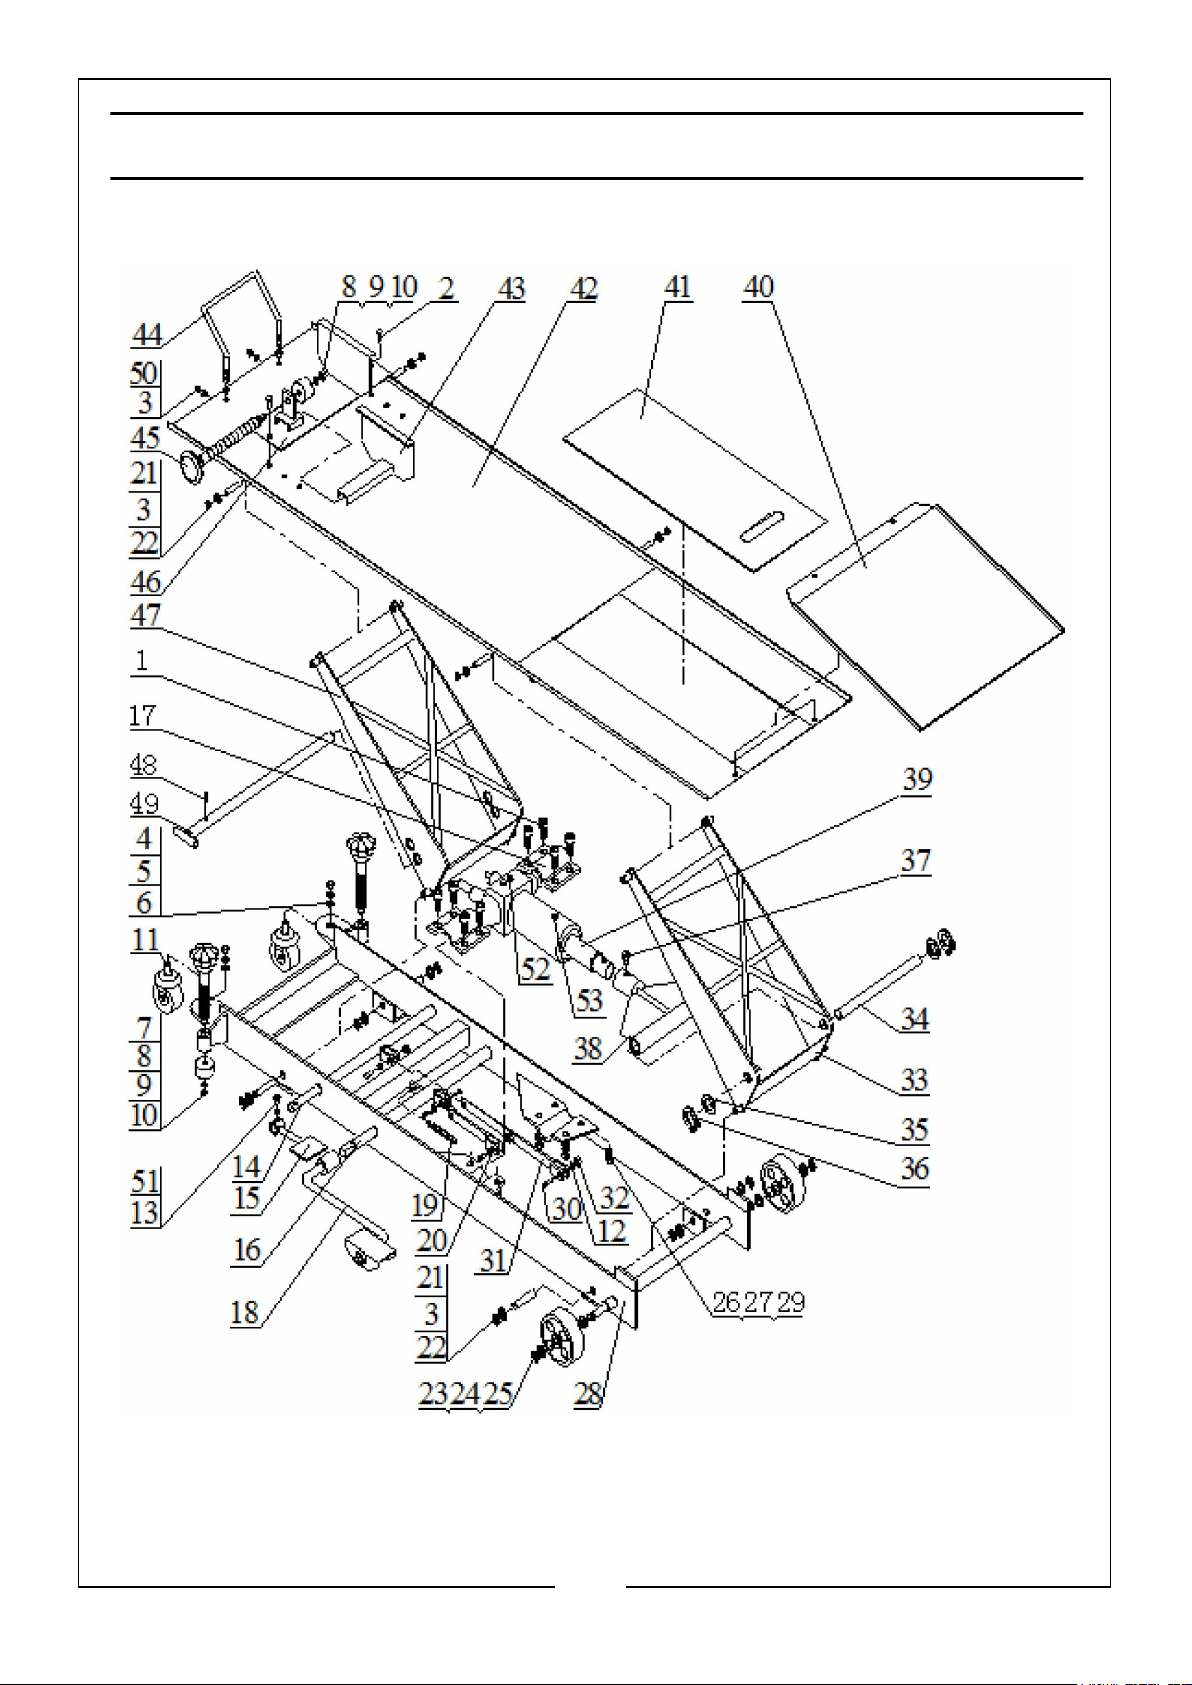
PARTS LIST
ITEM DESCRIPTION ITEM DESCRIPTION
1 Bolt M10x25 28 Bottom Frame
2 Bolt M12x30 29 Nut M10
3 Washer 12 30 Bolt M8x35
4 Washer 10 31 Oil Release Link
5 Spring Washer 10 32 Nut M8
6 Nut M10 33 Rear Arm Support
7 Support 34 Pin
8 Adjusting Screw 35 Washer 20
9 Washer 6 36 Ring 20
10 Nut M6 37 Bolt M10x10
11 Castor Wheel 38 Connector
12 Washer 8 39 Pump
13 Bolt M8x20 40 Ramp
14 Release Spindle 41 Movable Plate
15 Release Foot Pedal 42 Platform
16 Lifting Spindle 43 Clamp Plate
17 Fixed Cover 44 Stop Plate
18 Lifting Foot Pedal 45 Clamp Handle
19 Spring 46 Clamp Bottom
20 Link 47 Front Arm Support
21 Pin 48 Pin
22 Circlip 12 49 Safety Bar
23 Wheel 50 Nut M12
24 Washer 14 51 Washer 8
25 Circlip 14 52 Speed Control Valve
26 Washer 10 53 Oil Filler Plug
27 Spring Washer 10
12
Parts & Service: 020 8988 7400 / E-mail: [email protected] or [email protected]
Page 13
Page 14
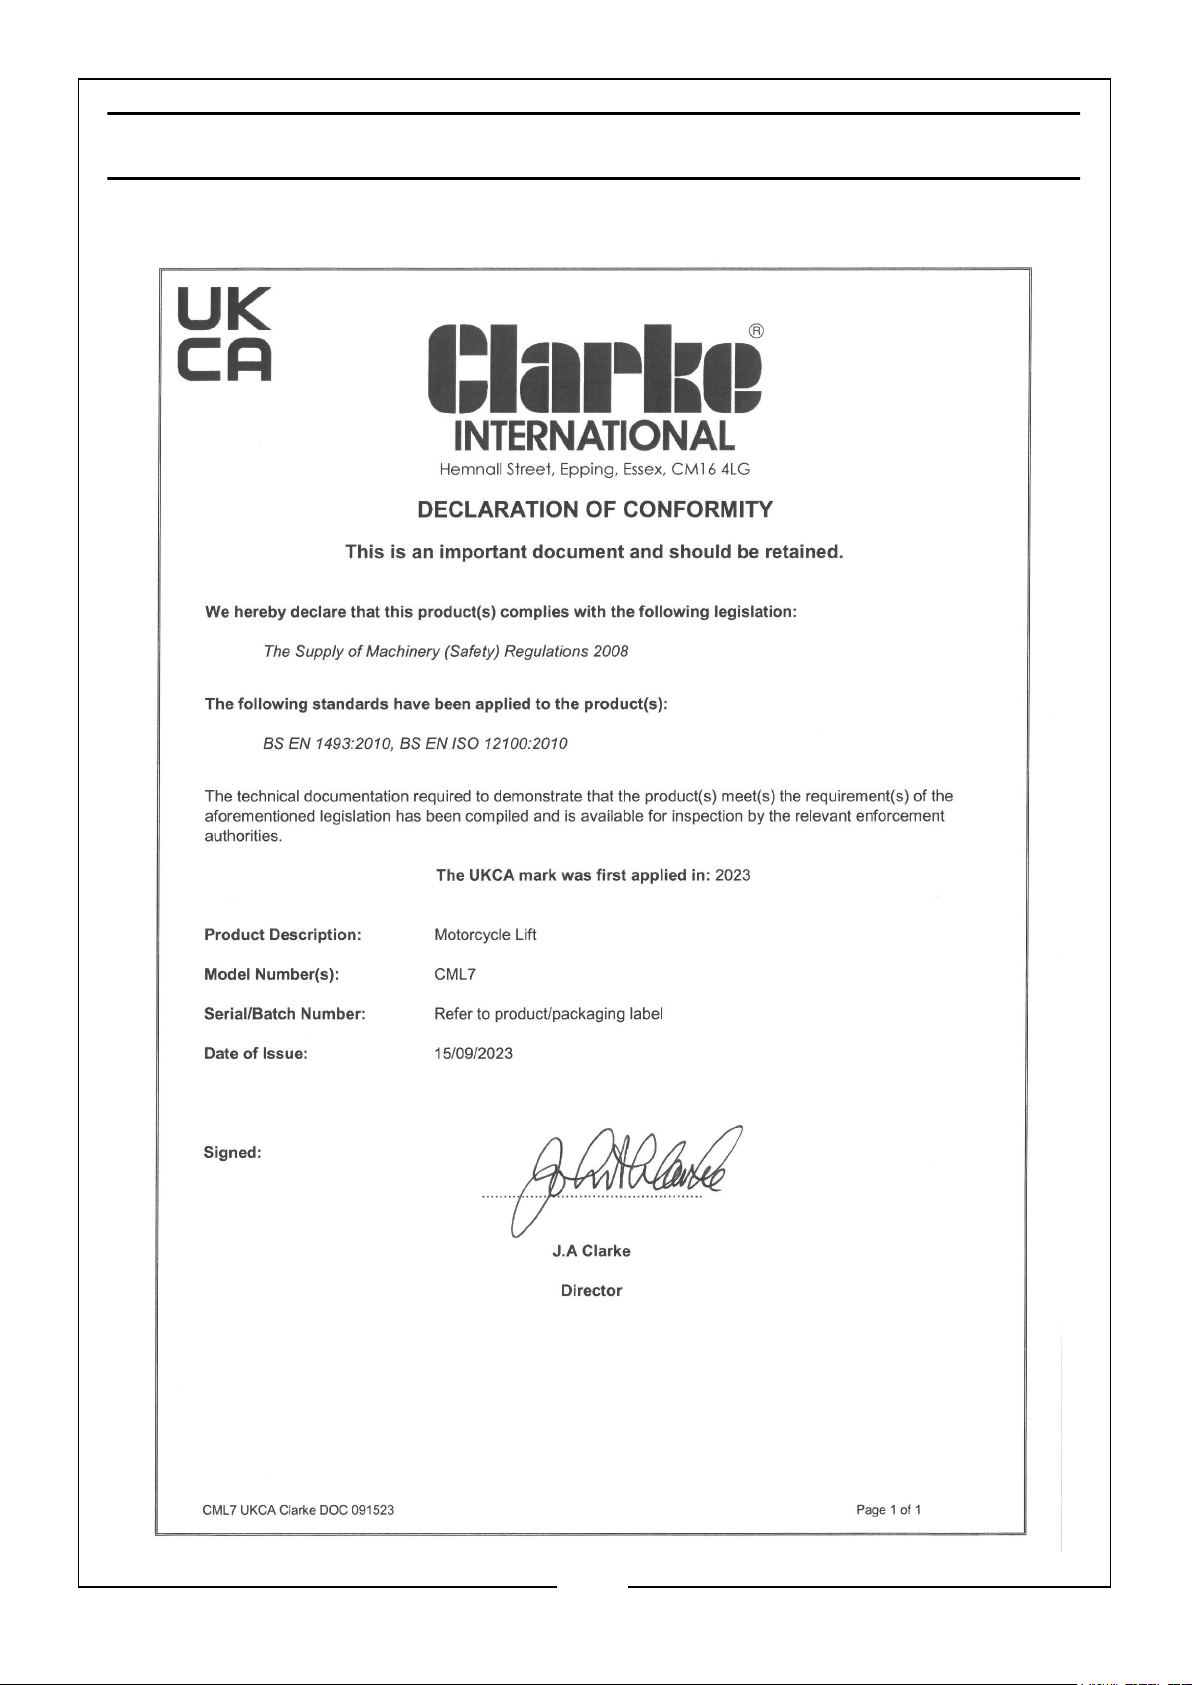
DECLARATION OF CONFORMITY - UKCA
14
Parts & Service: 020 8988 7400 / E-mail: [email protected] or [email protected]
Page 15
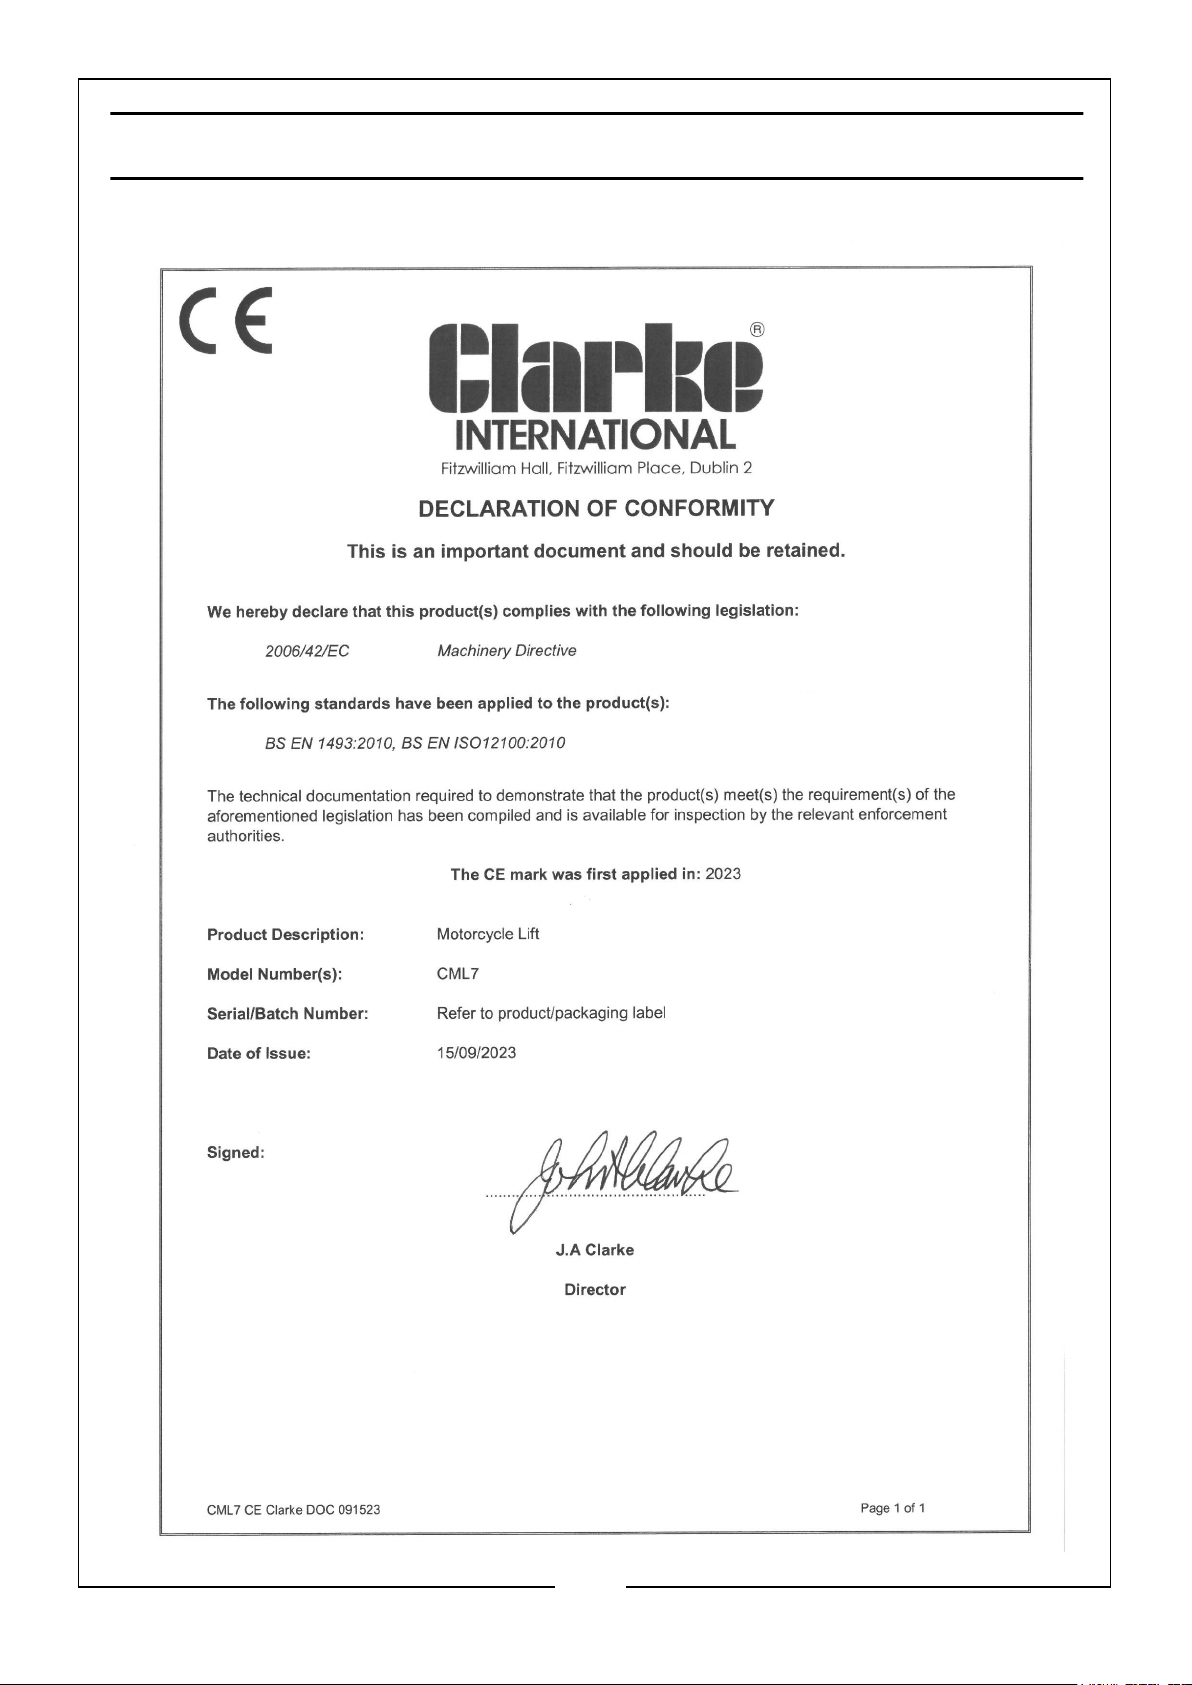
DECLARATION OF CONFORMITY - CE
15
Parts & Service: 020 8988 7400 / E-mail: [email protected] or [email protected]
Page 16
 Loading...