

Page 1
COIL SPRING COMPRESSOR KIT
MODEL NO: CHT965
PART NO: 1801965
USER INSTRUCTIONS
ORIGINAL INSTRUCTIONS GC 0925
Page 2
INTRODUCTION
Thank you for purchasing this CLARKE Coil Spring Compressor Set.
The CHT965 is suitable for most MacPherson strut coil springs. It features a yoke
extension bracket that also allows use on conical springs. It comes supplied with
three pairs of different sized interchangeable yokes for a wide range of vehicle
applications.
The plastic yoke protectors protect the spring coating from damage which could
invalidate the vehicle manufacturer’s guarantee. The safety yokes are carefully
shaped to stop the spring bowing while under compression.
Before attempting to use this product, please read this manual thoroughly and follow
the instructions carefully. In doing so you can look forward to your purchase giving
you long and satisfactory service.
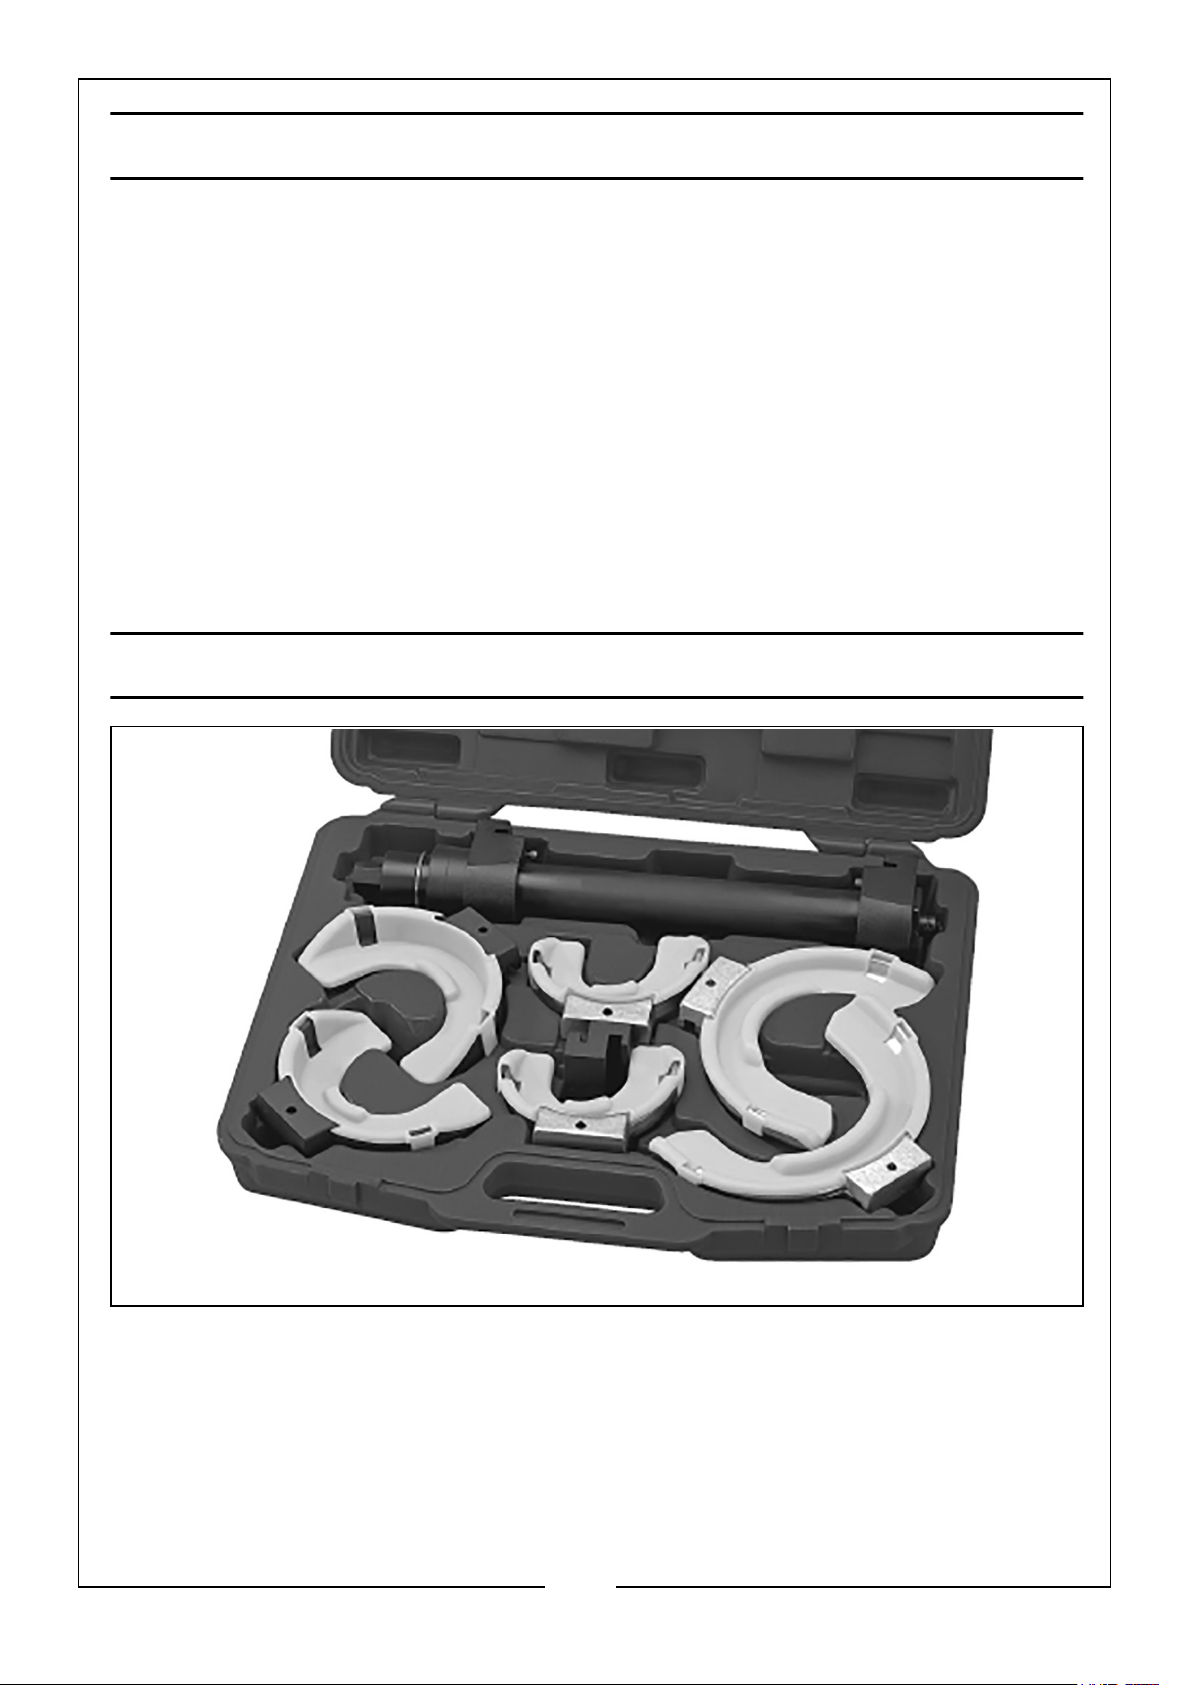
KIT CONTENTS
Contact your Clarke dealer if any items are missing or damaged.
• 1 x Blow moulded case • 3 pairs of compression cups/
yokes (small, medium & large)
• 1 x Compression drive body • 6 x Allen bolts
• 1 x Allen key • Extension bracket
2
Parts & Service: 020 8988 7400 / E-mail: [email protected] or [email protected]
Page 3

SAFETY INSTRUCTIONS
WARNING: WEAR APPROVED SAFETY EYE PROTECTION (STANDARD
SPECTACLES ARE NOT ADEQUATE).
WARNING: DO NOT COMPRESS THE SPRING TO AN EXTENT WHERE
THE COIL WINDINGS OR YOKES TOUCH.
WARNING: MEASURE THE OUTSIDE DIAMETER OF THE SPRING TO
BE COMPRESSED AND SELECT THE CORRECT SET OF YOKES TO FIT
THE SPRING.
• DO NOT operate the spring compressor if parts are damaged or missing as
this can cause failure or injury.
• DO NOT use air tools to operate the spring compressor.
• DO NOT allow persons unfamiliar with this product to operate the device.
• ALWAYS familiarise yourself with the applications, limitations and
potential hazards of the product.
• Maintain the spring compressor in good condition. Replace or repair any
damaged parts. Use genuine parts only. Unauthorised parts may be
dangerous and will invalidate the warranty.
• Keep the work area clean, uncluttered and ensure there is adequate
lighting.
• Keep hands and body clear of the spring when under compression.
• Maintain correct balance and footing. Ensure the floor is not slippery and
wear non-slip shoes.
• Remove ill fitting clothes. Remove ties, watches, rings, other loose
jewellery. Contain and/or tie back long hair.
• Wear appropriate protective clothing.
• DO NOT exceed the maximum capacity of this spring compressor. If in
doubt contact the vehicle manufacturer.
• DO NOT leave a compressed spring unattended.
• ALWAYS ensure that the chosen yokes are the correct ones for the spring
size and type. Ensure the spring sits within the shape of the yokes and
cannot slide out during compression.
3
Parts & Service: 020 8988 7400 / E-mail: [email protected] or [email protected]
Page 4
INSTRUCTIONS FOR USE
WARNING: MEASURE THE OUTER DIAMETER OF THE SPRING TO BE
COMPRESSED AND SELECT THE CORRECT SET OF YOKES.
WARNING: ENSURE THAT THE COIL SPRING TO BE COMPRESSED IS
FREE FROM DIRT AND GREASE WHERE THE YOKES WILL BE IN
CONTACT WITH IT
1. If removing the coil spring directly from the vehicle, raise the vehicle and remove
wheels and any other items to allow access to the spring.
• Make sure that the vehicle is safely and correctly supported.
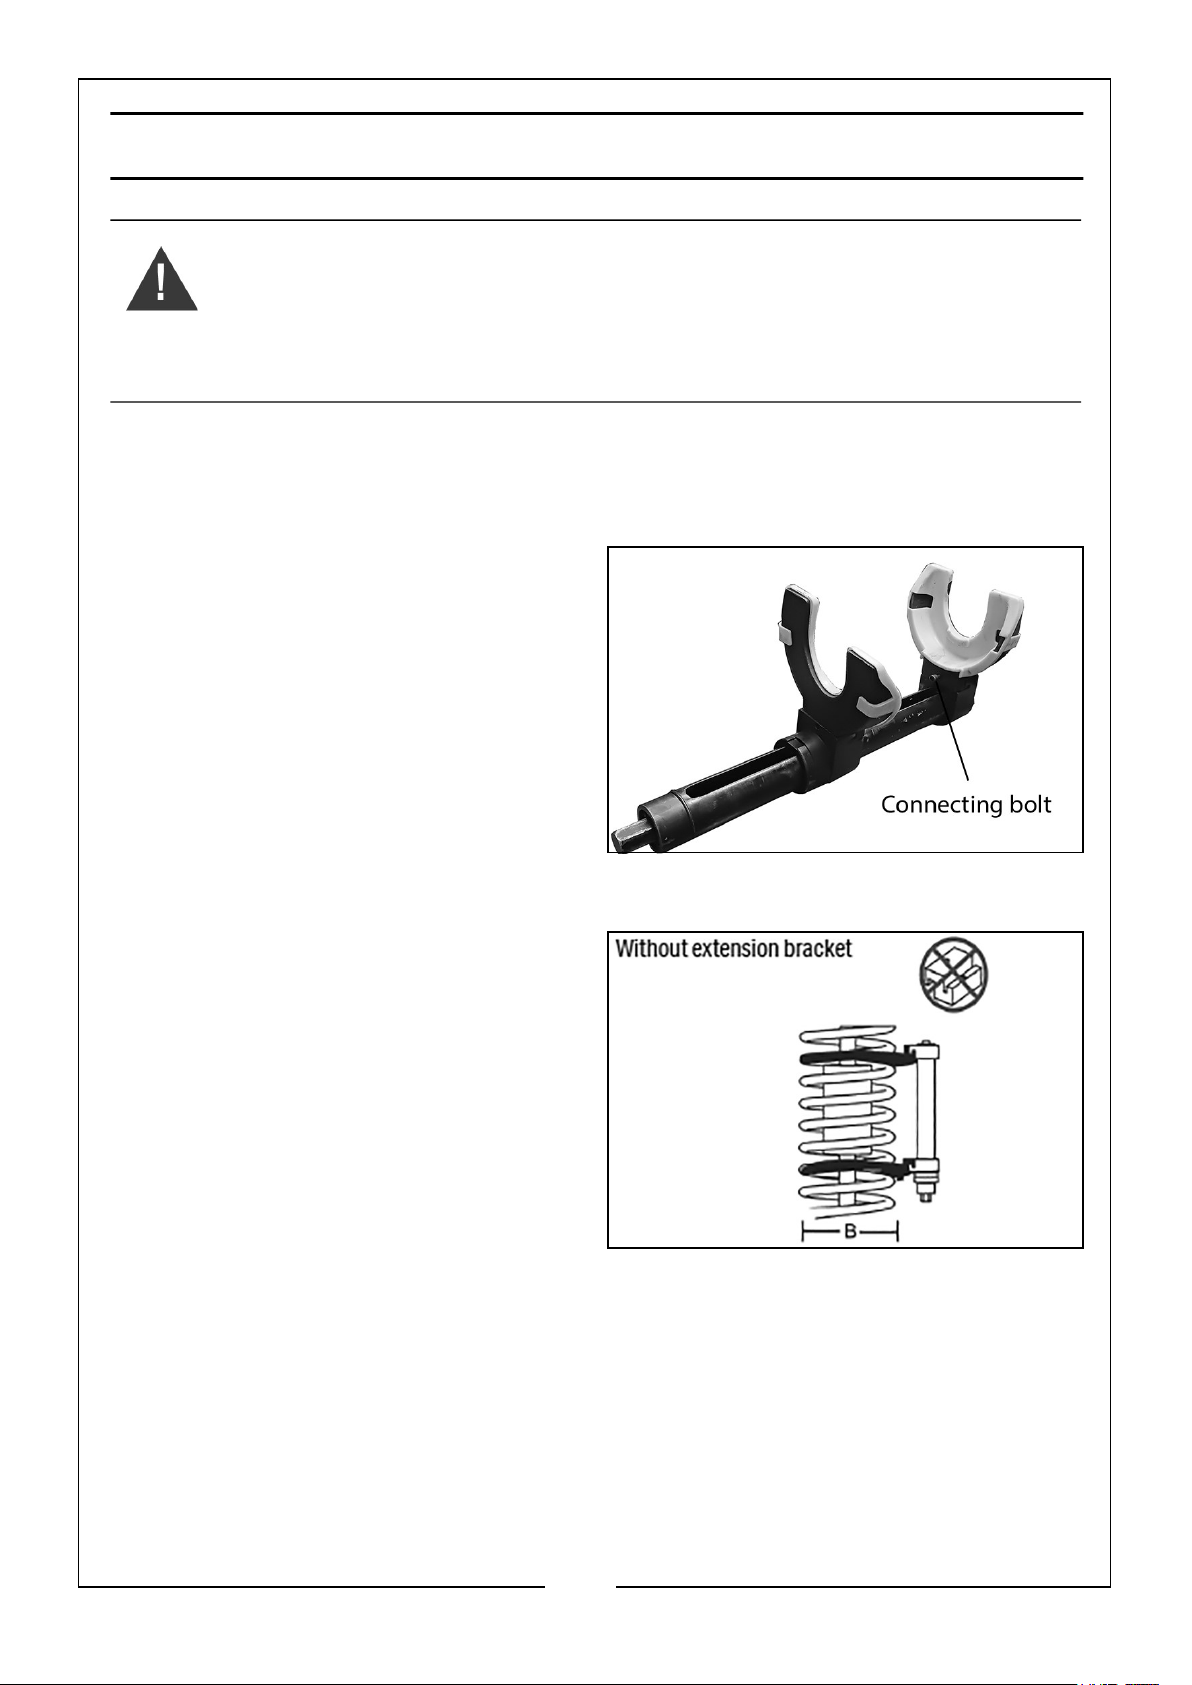
2. Measure the diameter of the ends of
the spring and select appropriately
sized yokes.
• A matching pair of yokes will suit a
parallel sided spring but for a
conical spring it may be necessary
to combine different sized yokes.
• Bolt your selected yokes to each
end of the compression device
using the connecting bolts
supplied. A key is provided for this.
3. Position one yoke under the lower
part of the spring winding.
4. Position the other yoke onto the top
spring coil.
• Install the yokes as close as
possible to the ends of the spring.
• Make sure that the spring coils sit
between the inner and outer rims
of the yokes.
4
Parts & Service: 020 8988 7400 / E-mail: [email protected] or [email protected]
Page 5
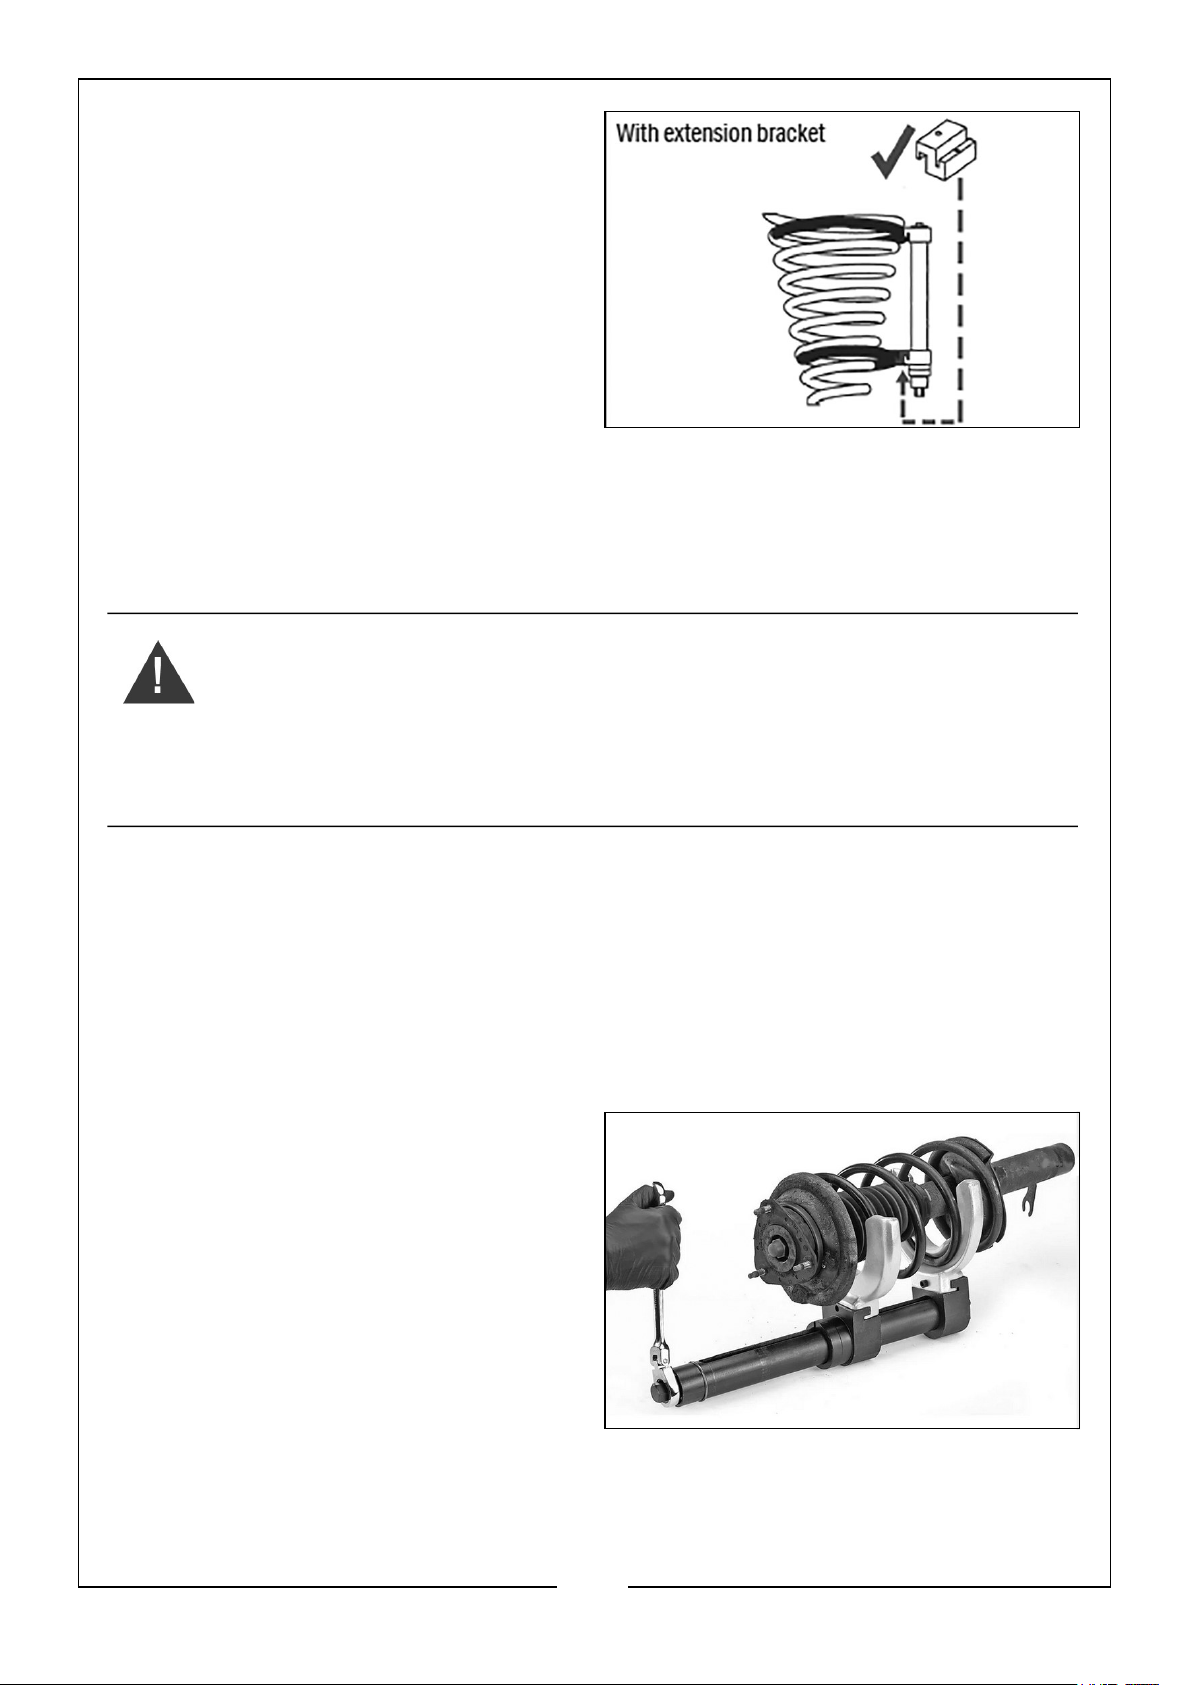
5. Attach the body of the spring
compressor to the yokes using the
extension bracket if required, to align
the axis of the spring with the
compressor.
• Make sure that the spring is
correctly seated within both yokes
and the yokes are correctly
aligned with the compressor body.
• If necessary use the extension
block to keep the spring and compressor body parallel.
6. Use a 21mm hex socket to turn the hexagonal drive nut until the yokes are firmly
in contact with the spring.
7. Now continue tightening to compress the spring.
WARNING: AIR TOOLS MUST NOT BE USED TO ADJUST THE SPRING
COMPRESSOR. USE OF AIR TOOLS WILL INVALIDATE THE
WARRANTY.
WARNING: DO NOT ALLOW THE SPRING WINDINGS TO TOUCH. DO
NOT ALLOW THE COMPRESSOR TO REACH THE LIMIT OF ITS
TRAVEL IN EITHER DIRECTION.
8. Remove the compressed spring and compressor assembly from the vehicle once
you have attained sufficient compression.
9. With the spring supported turn the hexagonal drive nut in the opposite direction
and remove the compressor and yokes from the spring.
10. To re-mount the spring, reverse the procedure.
TO COMPRESS A STRUT SPRING REMOVED FROM A VEHICLE
1. Secure the strut with a clamp, vice or
other adequate holding device.
2. Mount the selected yokes on the
compressor body, fit the retaining
bolts and tighten securely.
3. Rotate the hexagonal nut to drive the
jaws apart to the length of the spring
and to allow compression of as many
windings as possible.
4. Position the spring strut compressor
onto the spring, ensuring the spring seats correctly between the lips and the outer
rib and cannot slide out during compression.
5
Parts & Service: 020 8988 7400 / E-mail: [email protected] or [email protected]
Page 6
5. Ensure the yokes and body are correctly aligned.
6. Rotate the hexagonal nut and compress the spring until the spring is free to
rotate.
TO DECOMPRESS A STRUT REMOVED FROM A VEHICLE
1. To decompress the spring, reverse the compress procedure.
CARE & MAINTENANCE
1. Before each use check the compressor to ensure it is not damaged.
2. If any damage is suspected, DO NOT use the unit but contact your local Clarke
dealer who will be able to advise you regarding repair and spare parts.
3. Grease the compressor spindle as necessary to inhibit corrosion.
4. When not in use, clean and store in a safe, dry, childproof location.
TECHNICAL SPECIFICATION
Maximum Spring Load 1250 kg
Jaw Opening Range 80 - 115 mm -Small jaws
105 - 140 mm -Medium jaws
145 - 190 mm -Large jaws
Spring cup /yoke sizes 65-115mm - Small jaws
88-160mm - Medium jaws
126-212mm - Large jaws
Total weight 15.4 kg
Drive 21 mm Hex
Case size (H x W x D) 430 x 530 x 100 mm
GUARANTEE
This product is guaranteed against faulty manufacture for a period of 12 months from
the date of purchase. Please keep your receipt which will be required as proof of
purchase.
This guarantee is invalid if the product is found to have been abused or tampered
with in any way, or not used for the purpose for which it was intended.Faulty goods
should be returned to their place of purchase, no product can be returned to us
without prior permission. This guarantee does not effect your statutory rights.
6
Parts & Service: 020 8988 7400 / E-mail: [email protected] or [email protected]
Page 7
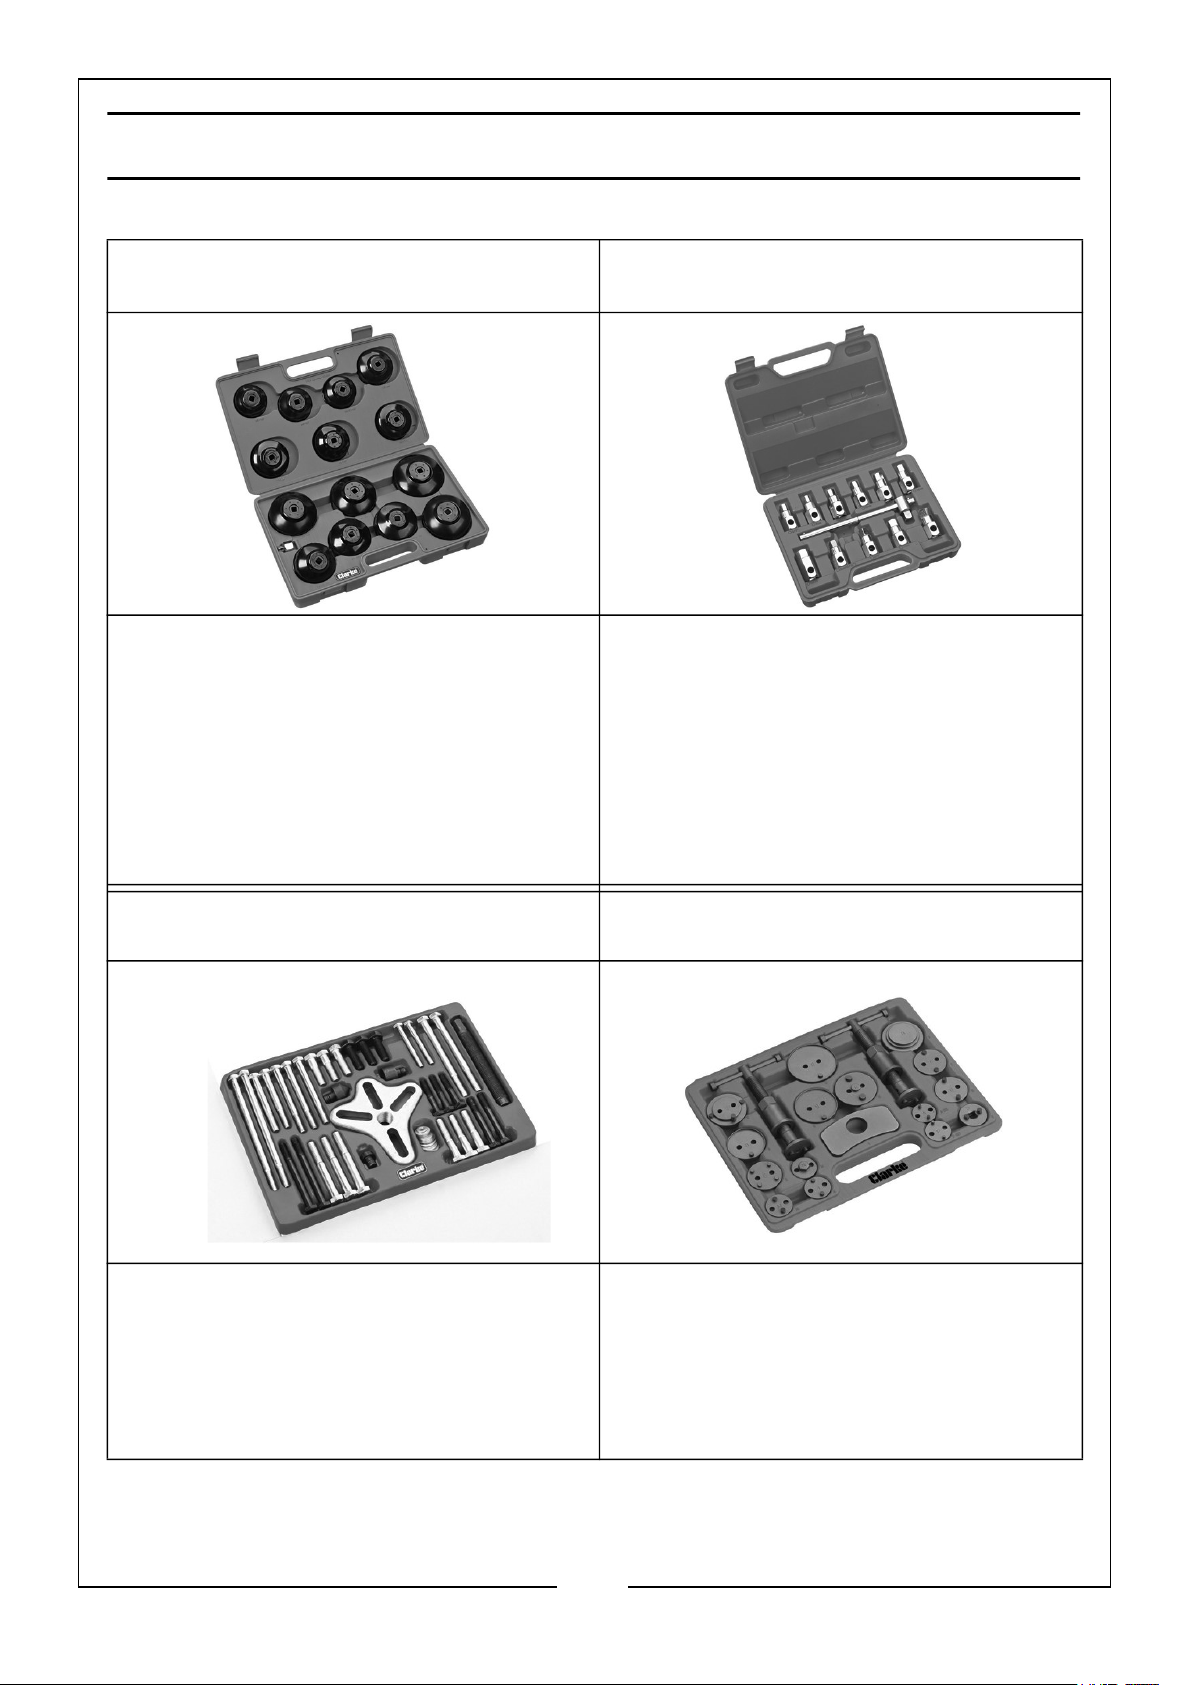
ALSO AVAILABLE FROM YOUR CLARKE DEALER
CHT695 OIL FILTER CAP WRENCH
SET
• Can withstand up to 85lb ft torque
• Oxide finish for rust protection
• Can be used with 3/8” & 1/2” square
drive wrenches
• Kit includes 14 wrenches, adapter and
tough carry case
CHT701 12 PIECE OIL DRAIN PLUG
KEY SET
• 3/8" square drive carbon steel tommy
bar
• 7 Hex key drives 3/8", 8, 9, 10, 12, 14
& 17mm
• 4 Square key drives 3/8", 8, 11 &
13mm
CHT698 46 PIECE HARMONIC
BALANCE PULLER
• Removes flywheels and pulleys
36 to 95mm diameter
• Solid yoke designed for 2 or 3
point fixing
• 5" pressure screw
CHT658 BRAKE CALIPER WIND
BACK TOOL SET
• Left & right hand threaded bolt
assemblies
• Rewind tools and reaction plate
• 15 adaptor plates to suit a range of
vehicles
7
Parts & Service: 020 8988 7400 / E-mail: [email protected] or [email protected]
Page 8
 Loading...