

Page 1
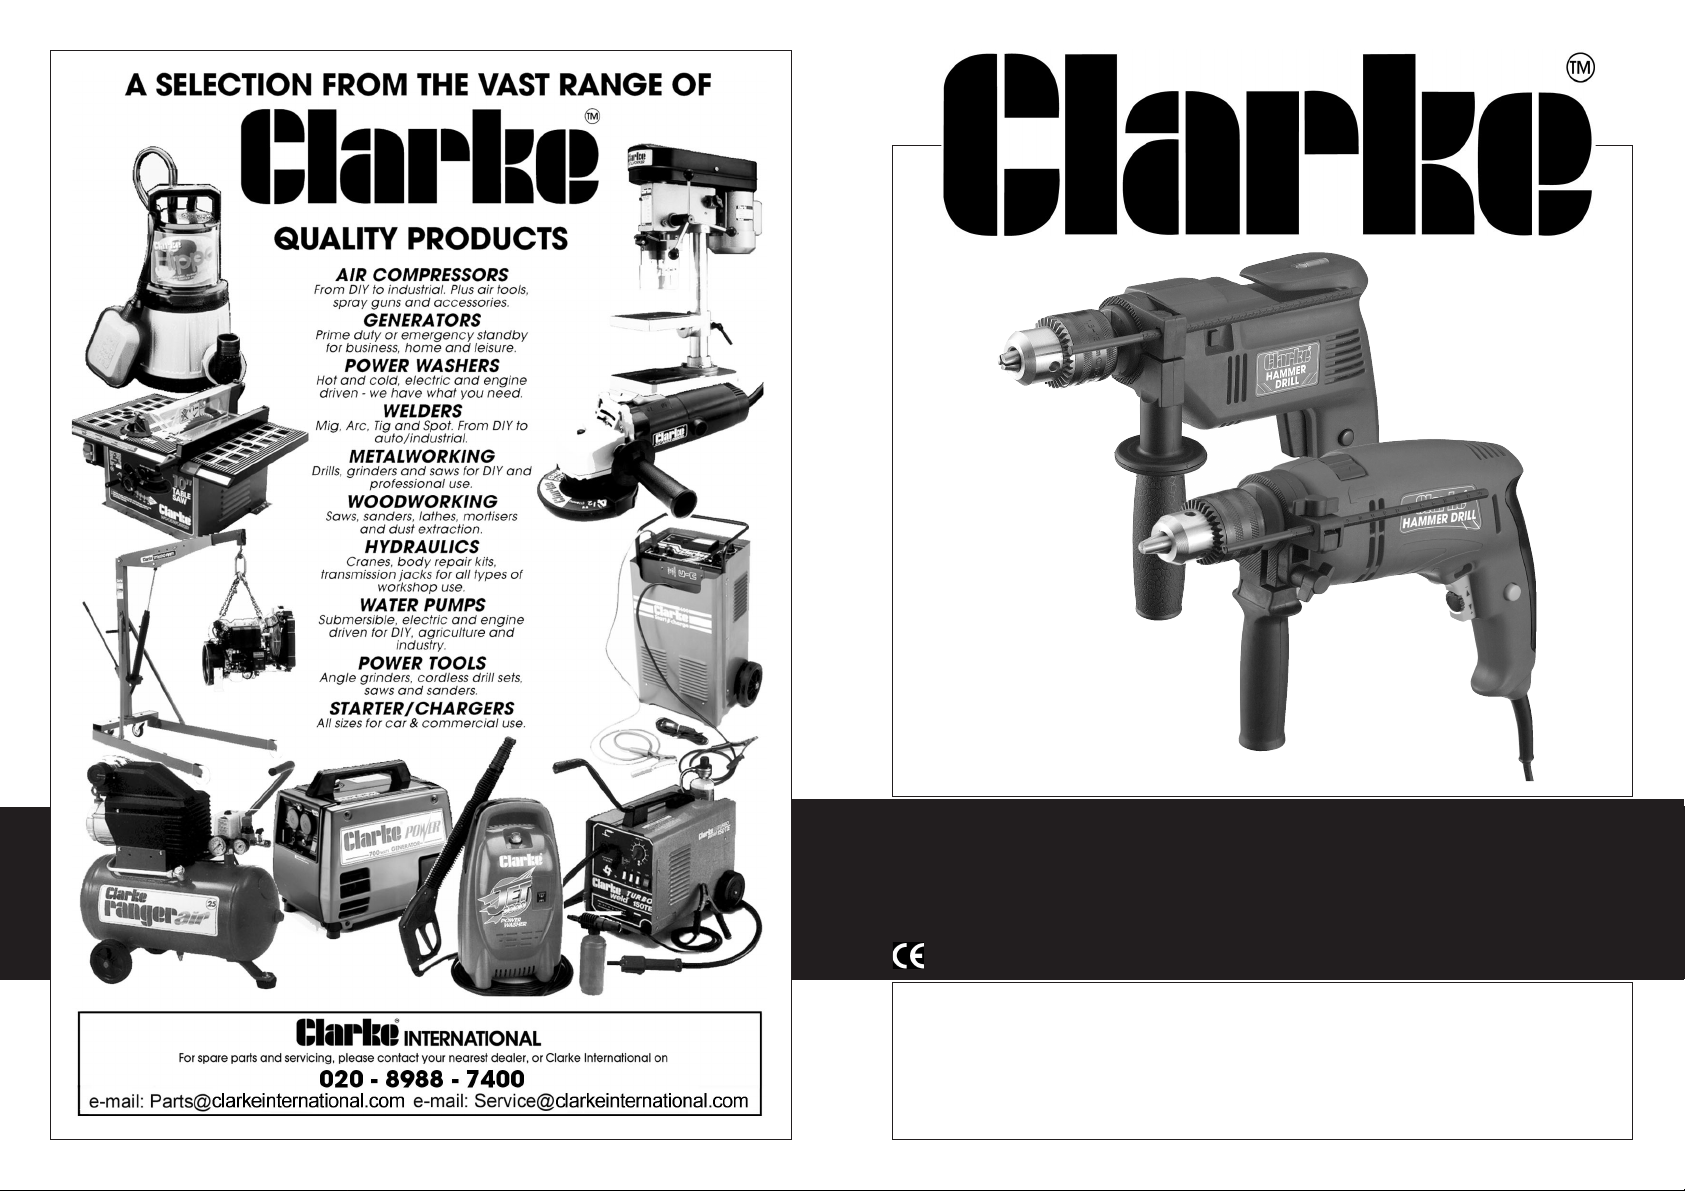
HAMMER DRILL
HAMMER DRILL
Model Nos.
CHD490 • CHD810
OPERATING & MAINTENANCE
INSTRUCTIONS
0202
Page 2
Thank you for purchasing this CLARKE 13mm Hammer Drill which is designed for
lighter duty, DIY use only.
Please read this booklet thoroughly. Your Clarke Hammer Drill will give excellent
service if it is used carefully and in accordance with the following advice and
recommendations. Never use excessive force and as with all tools, it should be
treated with care and respect.
GUARANTEE
This CLARKE product is guaranteed against faulty manufacture for a period of 12
months from the date of purchase. Please keep your receipt as proof of purchase.
This guarantee is invalid if the product is found to have been abused or tampered
with in any way, or not used for the purpose for which it was intended.
Faulty goods should be returned to their place of purchase, no product can be
returned to us without prior permission. This guarantee does not effect your
statutory rights.
TECHNICAL DATA
CHD490 CHD810
Motor 230V 50Hz 230V 50Hz
Power Input 500Watts 810Watts
Chuck Capacity 13mm 13mm
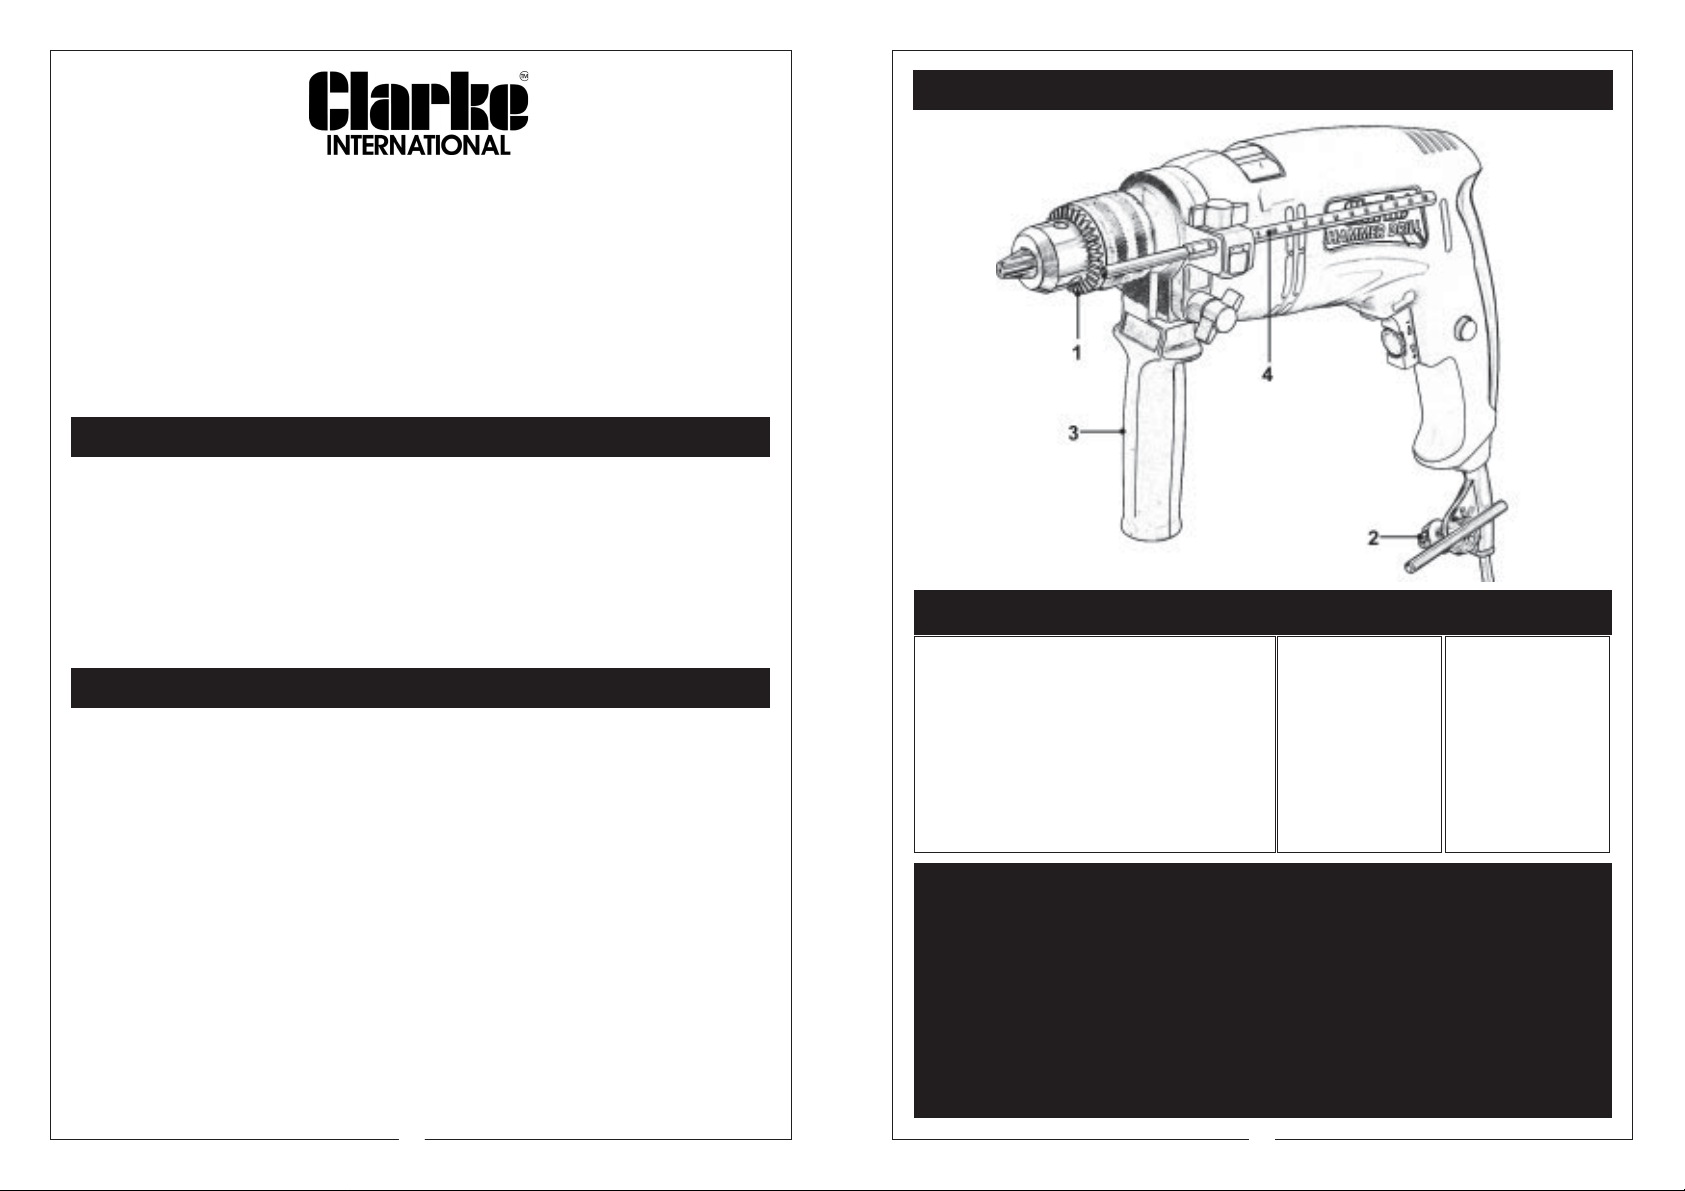
PARTS LIST AND DIAGRAM
No. Description Part No.
CHD490 CHD810
1 Chuck GRCHD49001 GRCHD81001
- Chuck securing screw GRCHD49002 GRCHD81002
2 Chuck Key GRCHD49003 GRCHD81003
3 Auxiliary Handle Complete GRCHD49004 GRCHD81004
4 Depth Gauge GRCHD49005 GRCHD81005
Speed Range 2,900RPM 10 - 2,900RPM
Sound Pressure Level 96.8dB(A) 94.5dB(A)
Sound Power Level 109.8dB(A) 107.5dB(A)
Vibration Level 24.1m/s
Weight 2.5kg 2.4kg
Part No. 6480100 6480110
Please note that the details and specifications contained herein, are correct at the time of going to
print. However , CLARKE International reserve the right to change specifications at any time without
prior notice. Always consult the machine’s data plate
2
2
5.2m/s
2
Spare Parts and Service
Please contact your nearest dealer,
or CLARKE International, on one of the following numbers.
PAR TS & SERVICE TEL: 020 8988 7400
PAR TS & SERVICE FAX: 020 8558 3622
or e-mail as follows:
PAR TS: [email protected]
SERVICE: [email protected]
7
Page 3
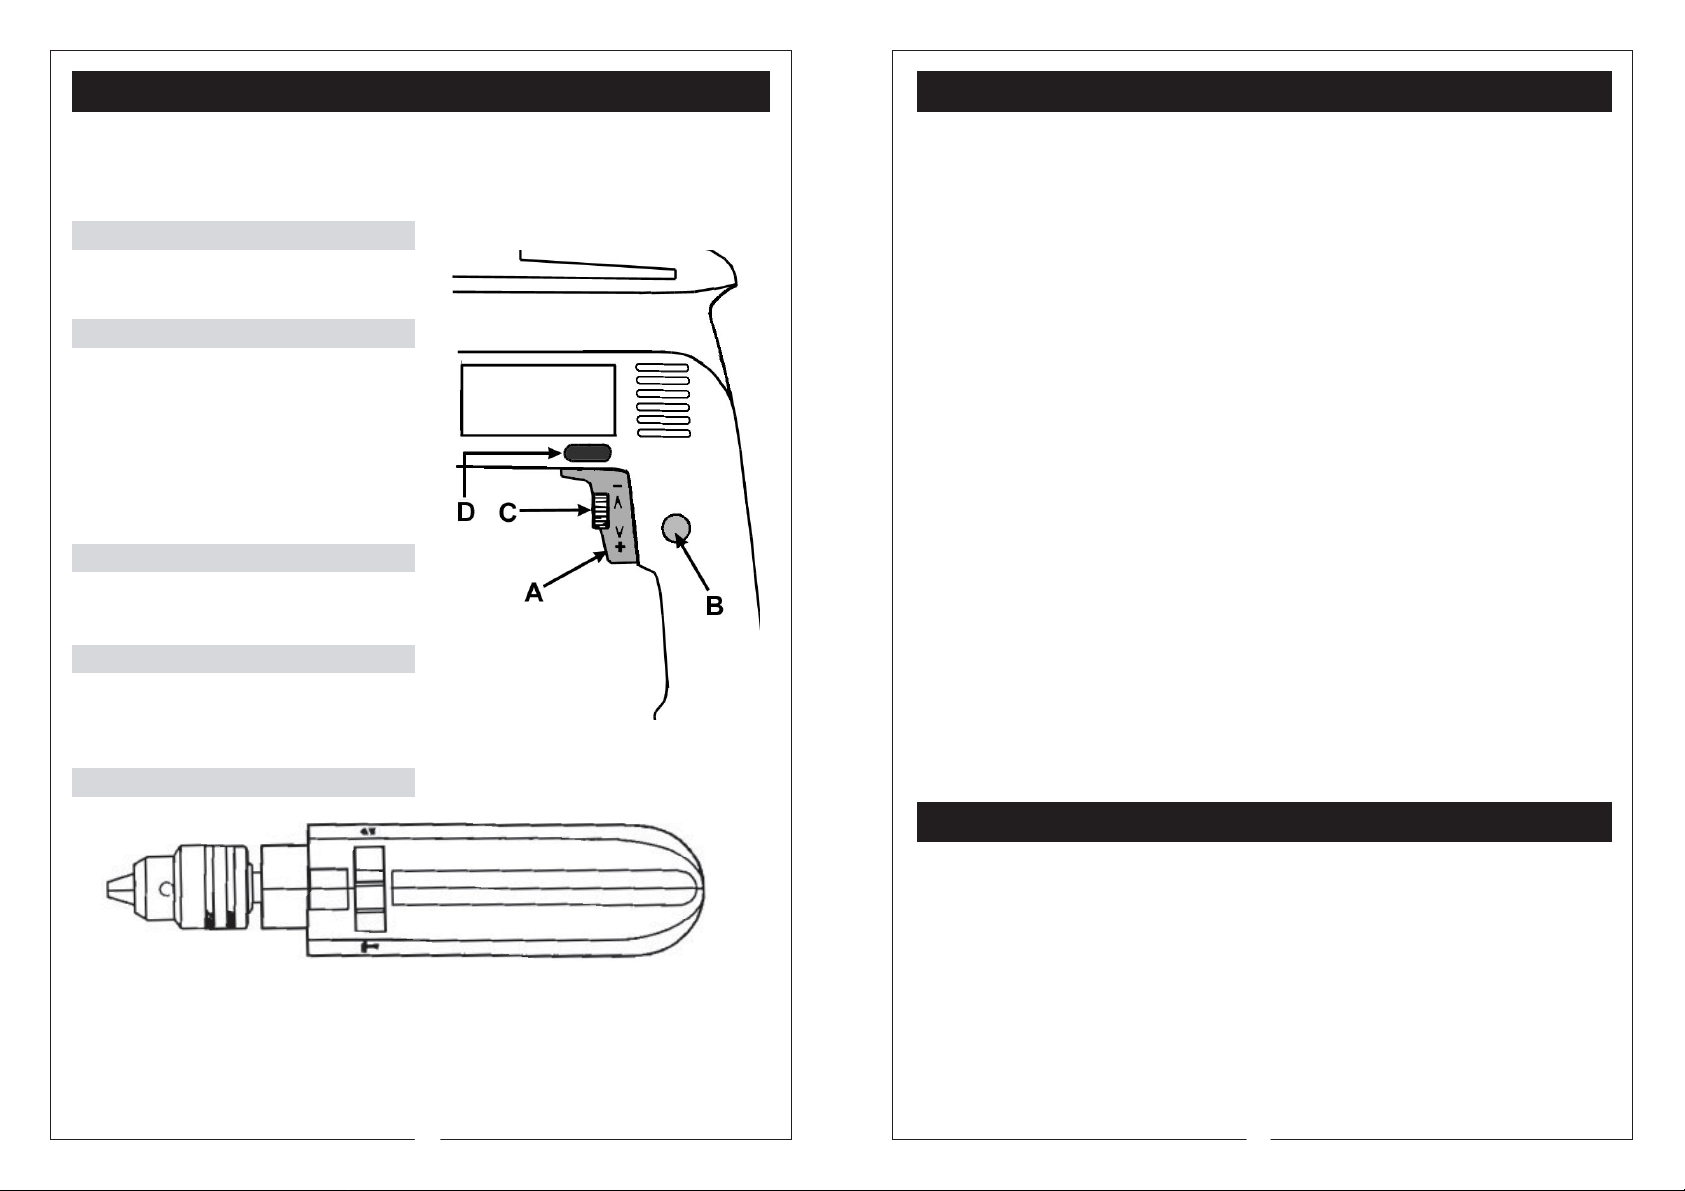
CONTROLS ~ CHD810
GENERAL SAFETY PRECAUTIONS
Before plugging into the mains supply, ALWA YS fit the appr opriate drill bit first, then
pull the trigger briefly and release, to ensure the drill is not locked in the ON
position. If you change a drill bit, ALWA YS disconnect from the mains beforehand.
To Switch ON:
Pull Trigger ‘A’
Continuous Operation:
Pull Trigger ‘A’ and lock by pressing
button ‘B’
NOTE: The speed is varied by applying
more or less pressure on switch A. The
maximum speed may be pre-selected
by turning the knurled knob C, within
switch A.
To switch OFF:
Pull Trigger ‘A’ briefly and then release.
Forward/Reverse Selection
Push the slide lever ‘D’ fully to left for normal rotation.
Push the slide lever ‘D’ fully to right for reverse rotation.
Hammer Selection
• Keep your Clarke drill and all other power tools out of reach of children.
• Keep the drill dry - do not use near water, steam or flammable liquids.
• When drilling into walls, ceilings and floors, check first for concealed services,
i.e. Water, Electric and Gas.
• Always wear safety goggles**. Take particular care when drilling overhead.
• We recommend the use of an appropriate dust mask**.
• Loose clothing and long hair can prove a danger if caught up in machinery.
Take suitable precautions.
• The level of noise may exceed 85 dB(A) when hammer drilling into concrete/
masonry etc., in which case we strongly recommend the use of ear defenders**.
• Always disconnect from the mains supply when changing bits and for all
adjustments and maintenance work.
• Always protect the mains cable, be aware of your surroundings. Do not allow
the cable to rest on hot surfaces, sharp edges, in oil or acids etc.
• When using an extension cable, ensure it is completely unwound from the drum.
• NEVER carry the drill by the cable.
• NEVER pull on the mains cable to disconnect from the mains supply.
• Always make sure you have a firm and secure stance when using the drill
particularly when on a ladder or scaffold.
• ALWAYS hold the drill firmly with BOTH hands when drilling. A drill could stall if
overloaded or used improperly. ALWAYS expect a stall and be prepared for it.
•
ALWA YS ensure the workpiece is perfectly secure before drilling. Use clamps or
a vice which is safer than your hands and frees both hands to operate the drill.
• Contact your CLARKE dealer for information regarding the various safety
products available.
Slide the switch, on top of the drill, to the ‘Hammer’ position ~ denoted by a
hammer symbol.
For normal drilling the switch should be in the ‘Drill’ position, denoted by a drill bit
symbol (particularly when drilling tiles, ceramics etc.).
DO NOT operate this switch until the drill has stopped.
6
GENERAL ADVICE ON DRILLING
• After drilling material to the full depth, do not simply pull out the drill but maintain
chuck rotation to ease withdrawal.
• Keep drill bits sharpened for optimum performance.
• Always drill directly in line with the bit. Do not use sideways movement as this
may damage the drill or cause the bit to break.
• Always use a cutting lubricant when drilling all metals except brass and cast
iron which should be drilled dry.
•
If the drill is not cutting the metal then sharpen the drill, ensuring the various cutting
angles are correct. Consult a suitable book of reference or a qualified technician.
** Available from your Clarke dealer
3
Page 4
ELECTRICAL CONNECTIONS
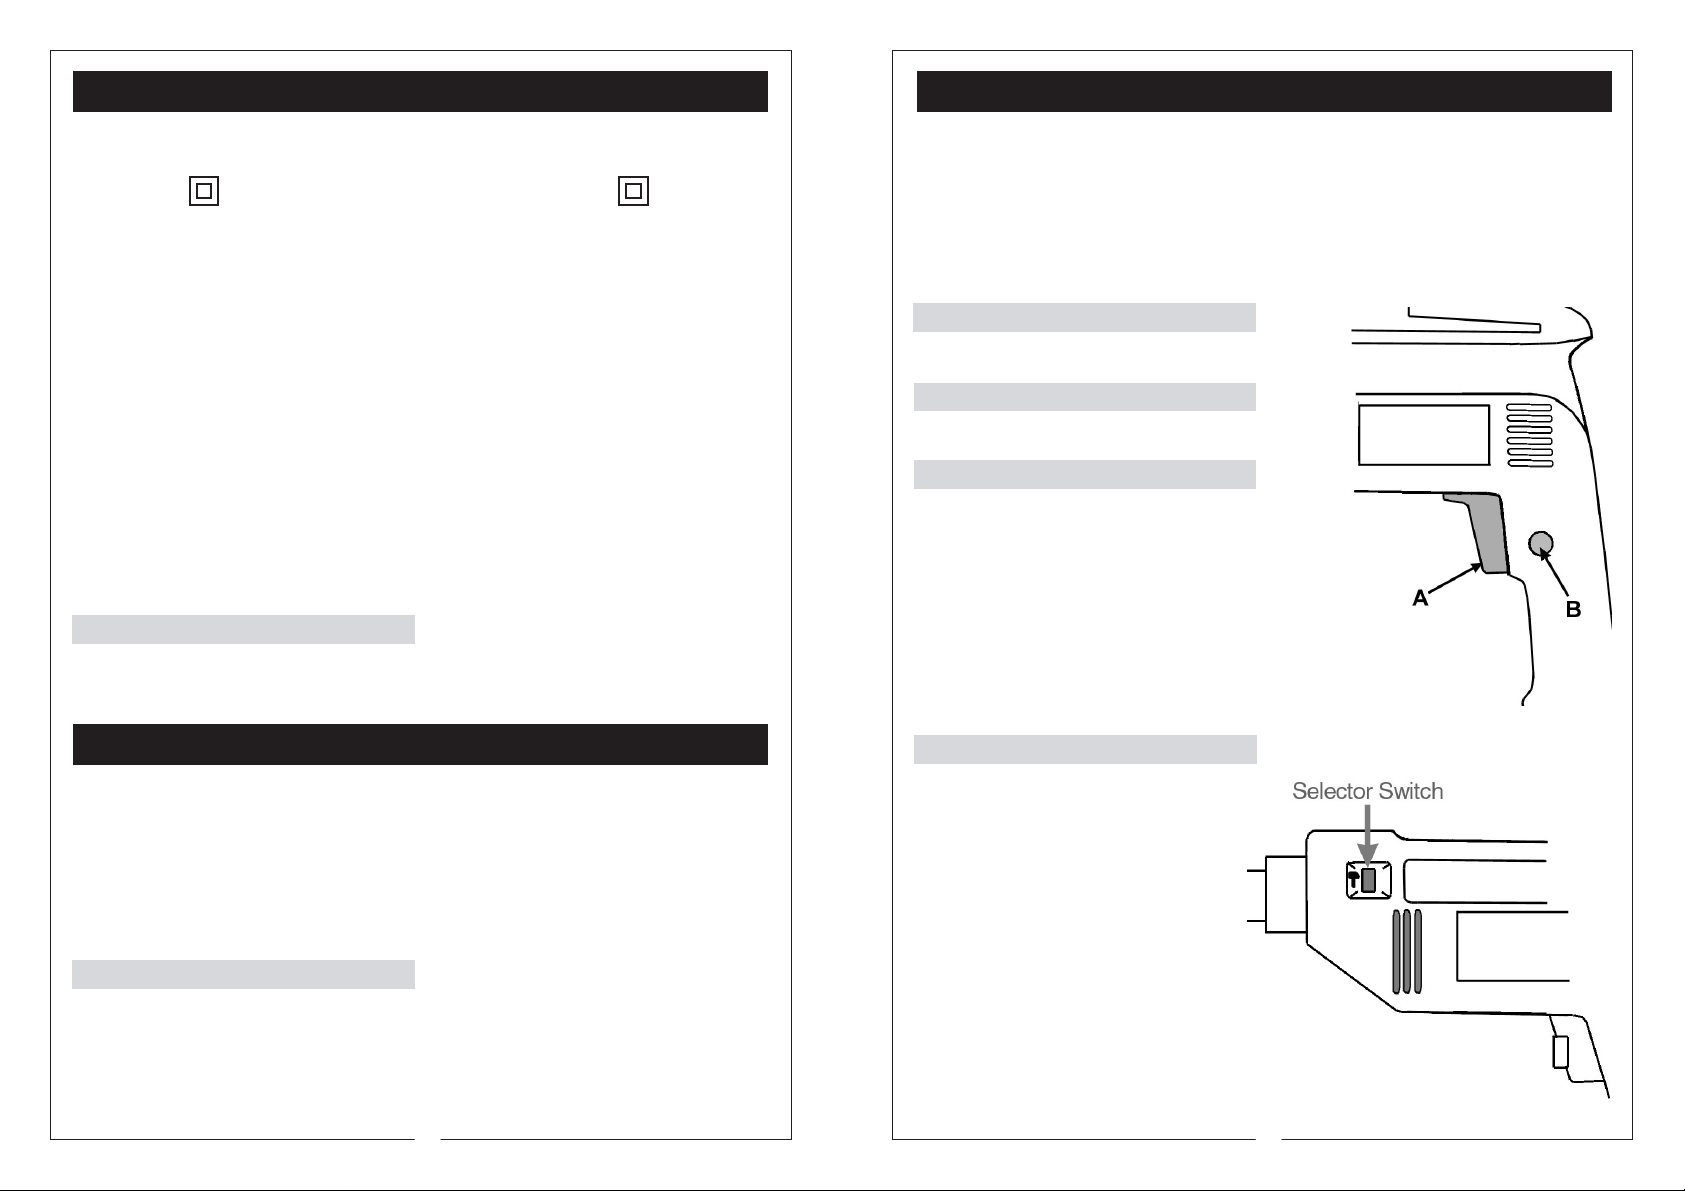
CONTROLS ~ CHD490
Connect the mains lead to a standard 230Volt (50Hz) electrical supply through a BS 1363
approved, 13 amp plug, or suitably fused isolator switch.
WARNING! THIS APPLIANCE IS DOUBLE INSULATED
IMPORTANT: The wires in the mains lead are coloured in accordance with the following
code:
Blue - Neutral
Brown - Live
As the colours of the flexible cord of this appliance may not correspond with the coloured
markings identifying terminals in your plug proceed as follows:
Connect BROWN cord to terminal marked with a letter ‘L’ or coloured RED
Connect BLUE cord to terminal marked with a letter ‘N’ or coloured BLACK
If this appliance is fitted with a plug which is moulded onto the electric cable (i.e. nonrewirable) please note:
1. The plug must be thrown away if it is cut from the electric cable. There is a danger of
electric shock if it is subsequently inserted into a socket outlet.
2. Never use the plug without the fuse cover fitted.
3. Should you wish to replace a detachable fuse carrier, ensure that the correct
replacement is used (as indicated by marking or colour code).
Fuse Rating
The fuse in the plug for this appliance must be rated at 5 amps.
BEFORE plugging your drill into the mains supply:
1. ALWAYS blip the trigger to ensure it is not locked in the ON position.
2. ALWAYS fit the appropriate drill bit and ensure it is tight.
IMPORTANT
When changing drill bits, ALWAYS disconnect from the mains supply beforehand.
To switch ON:
Pull trigger A
Continuous Operation:
Lock by pressing button B
To switch OFF:
Pull trigger ‘A’ briefly and then release
MAINTENANCE
• Always keep the drill clean - free from dirt, grease, oil or other contaminants.
• Do not use solvents to clean plastic parts.
• If sparking within the housing becomes excessive, clean the carbon brushes.
(Consult your Clarke dealer).
• Always ensure the ventilation holes are kept clear.
• Inspect the mains cable frequently and have it renewed if damage is apparent.
Chuck Replacement
Open up the jaws of the chuck and, holding the chuck securely to prevent it from
turning, undo the centre screw within, using a cross head screwdriver , noting that it has a
LEFT HAND thread, i.e. screw it CLOCKWISE. With the securing screw removed, unscrew
the chuck from the drive shaft, noting it has a standard right hand thread.
NOTE: If you have difficulty performing this operation, consult your Clarke dealer.
4
Hammer Selection
Push the slide switch fully to the right
to select the ‘Hammer’ facility. (A
hammer symbol is moulded into the
casing denoting that the switch
should be pushed from that side.)
For all normal drilling operations,
select the ‘Drill’ position (particularly
when drilling tiles, ceramics etc.).
DO NOT operate this switch until the
drill has stopped.
5
 Loading...