

Page 1
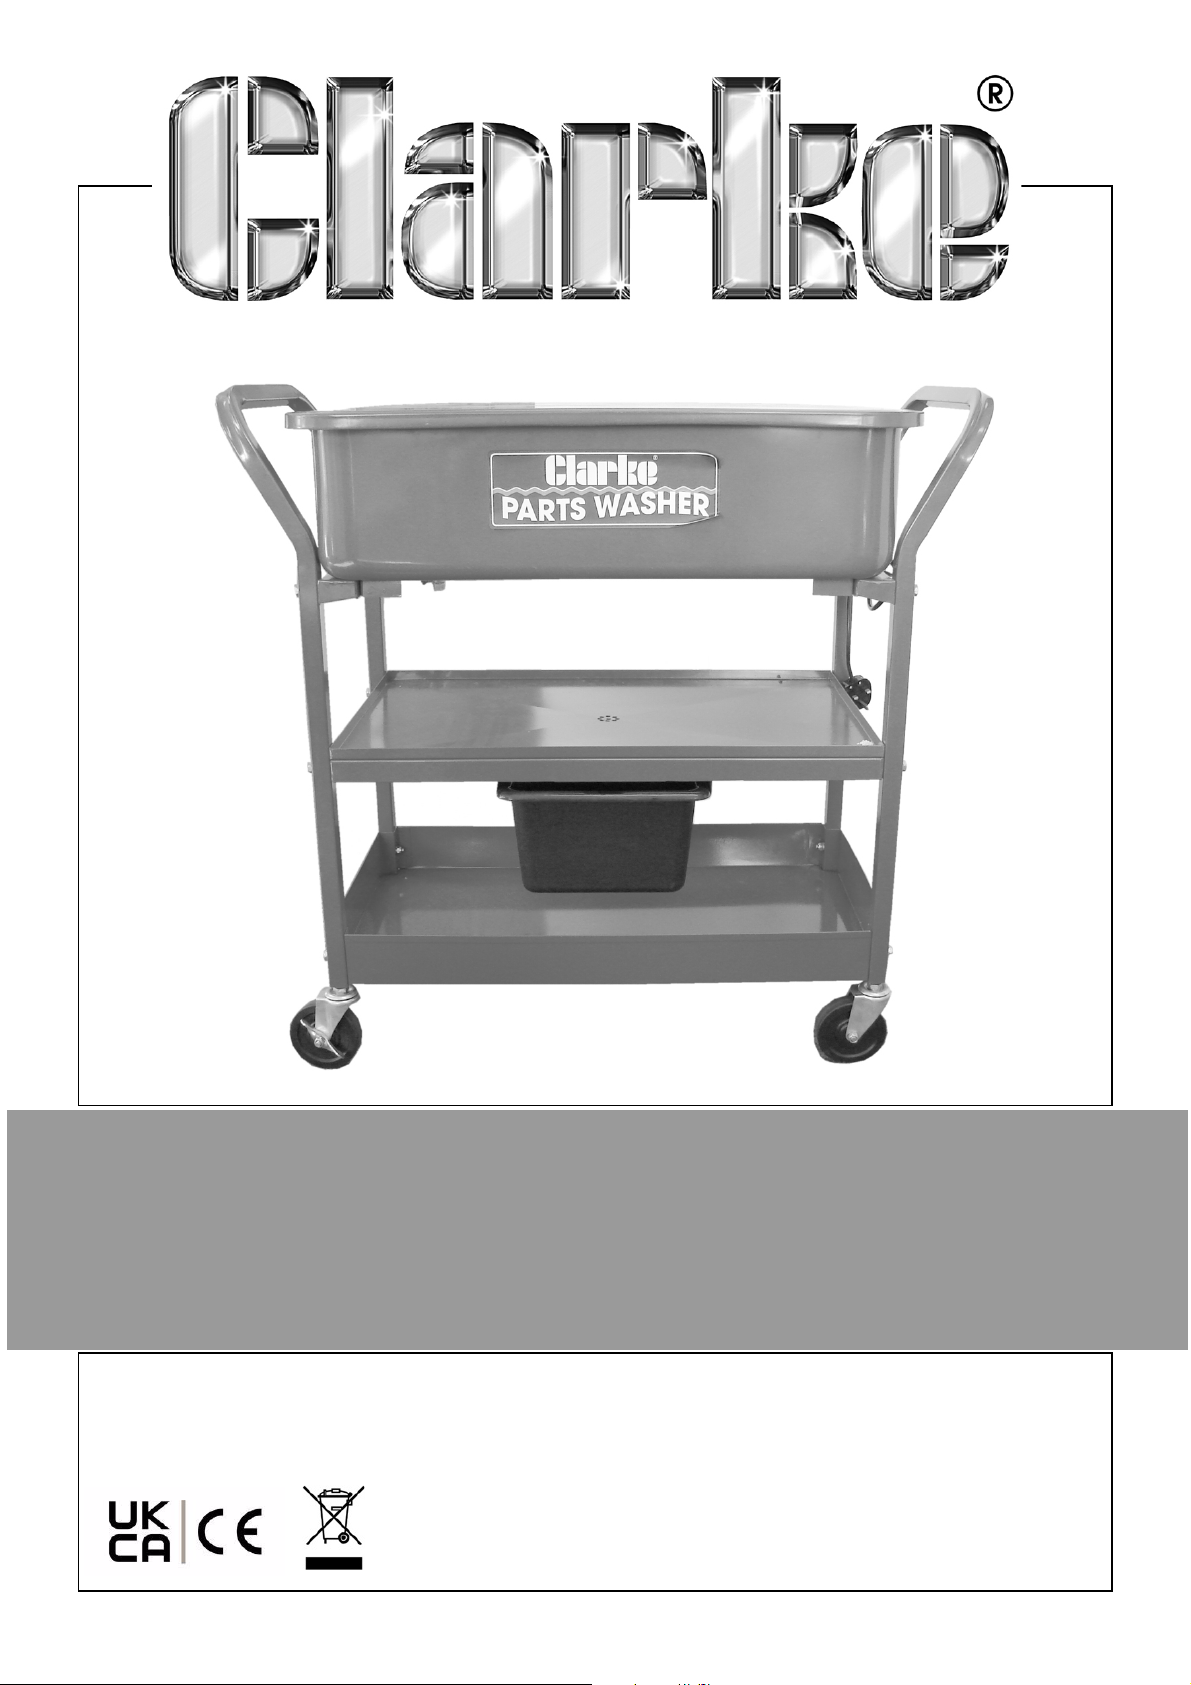
PARTS WASHER
MODEL NO: CWM20
PART NO: 7630925
ASSEMBLY & MAINTENANCE
INSTRUCTIONS
ORIGINAL INSTRUCTIONS DL0822 - Rev 5
Page 2
INTRODUCTION
Thank you for selecting this CLARKE Parts Washer. The CWM20 is ideal for
garage/workshop use when cleaning smaller automotive and machinery
components.
Before using the product, be sure to read these instructions thoroughly. In
doing so you will ensure the safety of yourself and of others around you, and
you can look forward to the product giving you long and satisfactory service.
GUARANTEE
This CLARKE product is guaranteed against faulty manufacture for a period of
12 months from the date of purchase. Please keep your receipt as proof of
purchase.
This guarantee is invalid if the product is found to have been abused or
tampered with in any way, or not used for its intended purpose.
Faulty goods should be returned to their place of purchase, no product can
be returned to us without prior permission.
This guarantee does not effect your statutory rights.
SPECIFICATIONS & FEATURES
Motor: 230V, 1ph, 50Hz
Maximum Pump Capacity 90 L/hour
Tank Capacity 60 L / 16 Gal
Weigh carrying capacity 50 Kg
Dimensions (L x W x H) 985 x 540 x 930 mm (Lid Closed)
985 x 540 x 1410 mm (Lid Open)
Weight: 33 kg
• Accepts all common degreasing fluids.
• Fusible link automatically closes lid in case of fire.
• Easy maintenance solvent pump.
• Built-in replacable filter
• Easy maintenance solvent pump
2
Parts & Service: 020 8988 7400 / E-mail: [email protected] or [email protected]
Page 3
SAFETY PRECAUTIONS
WARNING: AS WITH ALL EQUIPMENT, THERE ARE CERTAIN HAZARDS
INVOLVED WITH ITS OPERATION AND USE. EXERCISING RESPECT AND
CAUTION WILL CONSIDERABLY LESSEN THE RISK OF PERSONAL INJURY.
HOWEVER, IF NORMAL SAFETY PRECAUTIONS ARE OVERLOOKED OR
IGNORED, PERSONAL INJURY TO THE OPERATOR OR DAMAGE TO
PROPERTY MAY RESULT.
1. ALWAYS learn the machine’s applications, limitations and the specific
potential hazards peculiar to it. Read and become familiar with the entire
operating manual.
2. ALWAYS wear suitable protective clothing, gloves and goggles,
manufactured to the latest European Safety Standards. Everyday eye
glasses are not safety glasses.
3. ALWAYS clean off any accidental splashes of degreaser on the skin. Seek
medical attention immediately if necessary.
4. ALWAYS follow degreaser manufacturer’s instructions carefully.
5. ALWAYS check for damage before using the washer. Any damaged part,
should be checked to ensure that it will operate properly and perform its
intended function. Any damage should be properly repaired or the part
replaced. If in doubt, DO NOT use. Consult your local CLARKE dealer.
6. ALWAYS disconnect the washer from the power supply before carrying out
any maintenance.
7. ALWAYS keep the work area clean. Cluttered areas and benches invite
accidents. Mop up accidental spillages of degreaser immediately.
8. ALWAYS ensure that adequate lighting is available. A minimum intensity of
300 lux should be provided. Ensure that lighting is placed so that you will
not be working in your own shadow.
9. ALWAYS keep children away. All visitors should be kept a safe distance from
the work area, especially whilst operating the machine.
10. ALWAYS maintain in top condition. Keep the washer clean for the best and
safest performance.
11. ALWAYS ensure the switch is off before plugging in to mains. Avoid
accidental starting.
12. ALWAYS concentrate on the job in hand, no matter how trivial it may seem.
Be aware that accidents are caused by carelessness due to familiarity.
13. ALWAYS keep your proper footing and balance at all times don’t over
reach. For best footing, wear rubber soled footwear. keep floor clear.
3
Parts & Service: 020 8988 7400 / E-mail: [email protected] or [email protected]
Page 4
ELECTRICAL CONNECTIONS
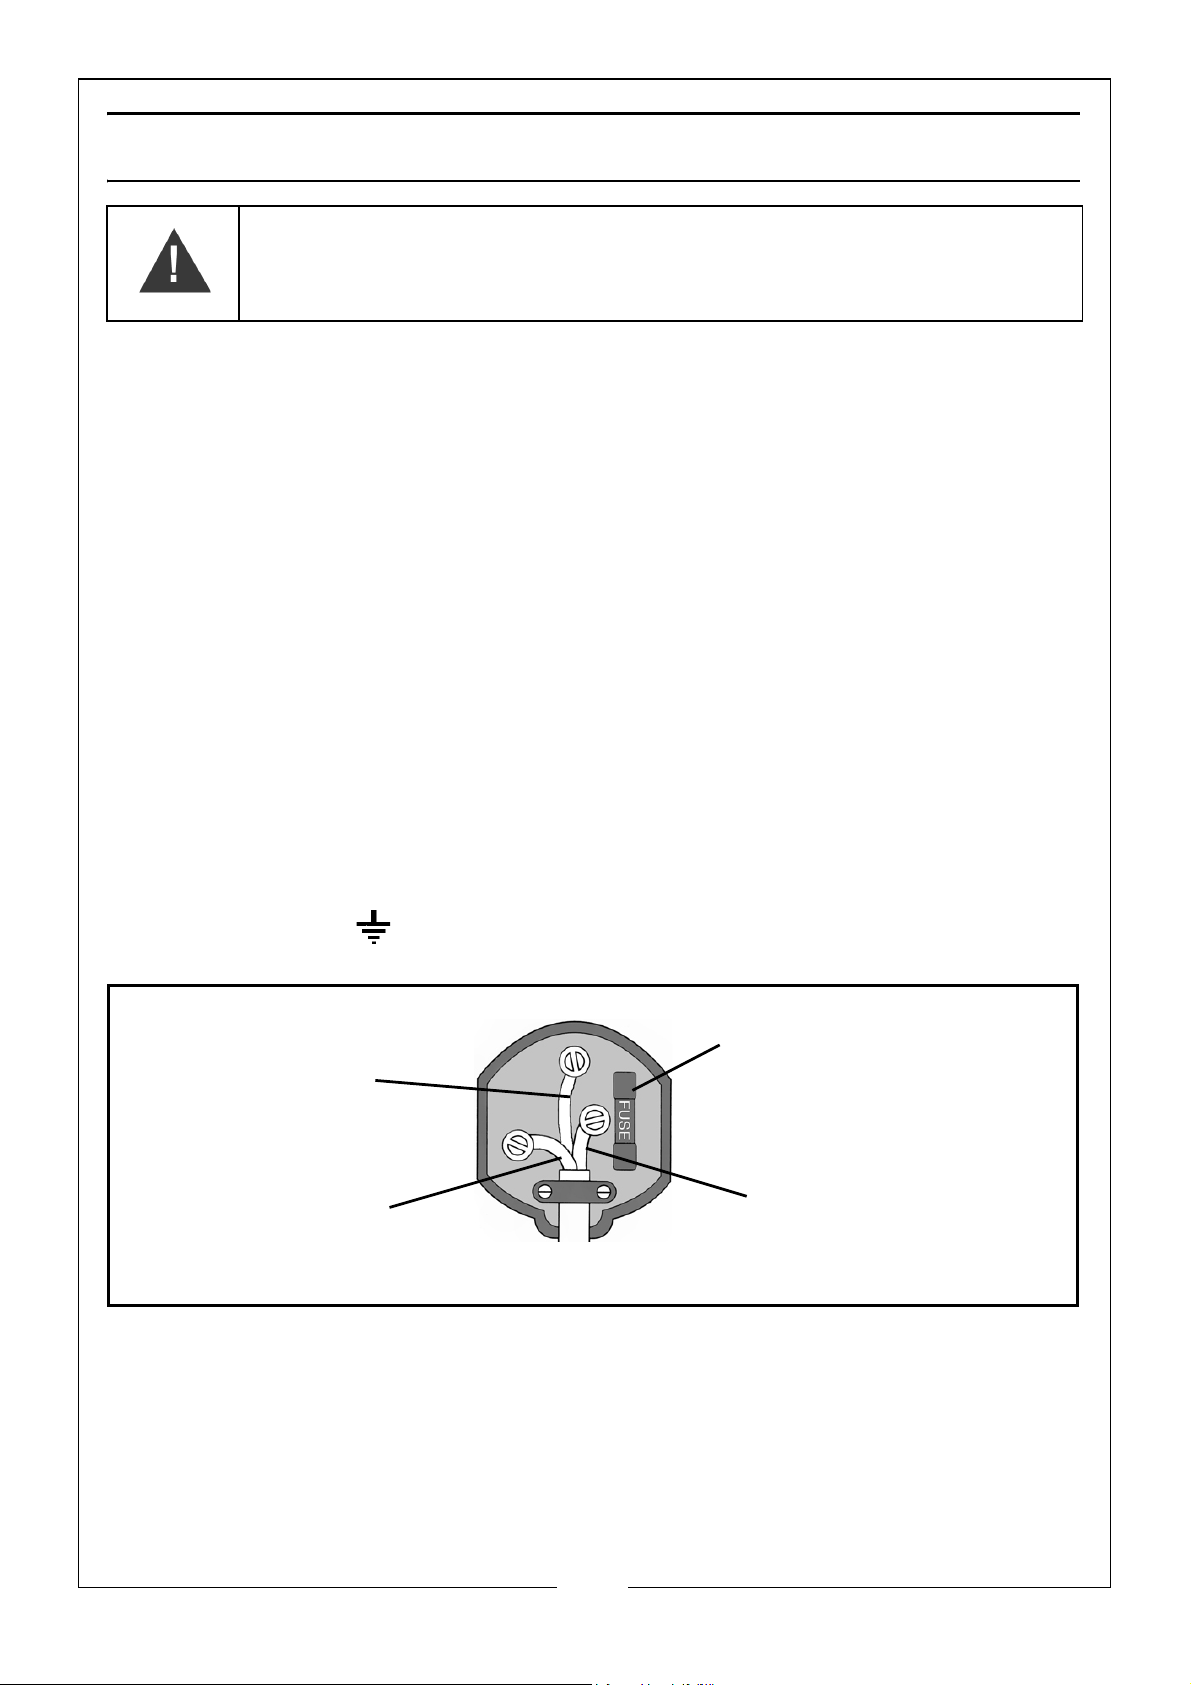
Plug must be BS1363/A approved.
Always fit a 3 Amp fuse.
Ensure that the outer sheath of the cable is firmly held by the clamp
Neutral
(Blue)
Live
(Brown)
Earth
(Green and Yellow)
WARNING! READ THESE ELECTRICAL SAFETY INSTRUCTIONS
THOROUGHLY BEFORE CONNECTING THE PRODUCT TO THE
MAINS SUPPLY.
Before switching the product on, make sure that the voltage of your electricity supply is
the same as that indicated on the rating plate. This product is designed to operate on
230VAC 50Hz. Connecting it to any other power source may cause damage.
This product may be fitted with a non-rewireable plug. If it is necessary to change the
fuse in the plug, the fuse cover must be refitted. If the fuse cover becomes lost or
damaged, the plug must not be used until a suitable replacement is obtained.
If the plug has to be changed because it is not suitable for your socket, or due to
damage, it should be cut off and a replacement fitted, following the wiring instructions
shown below. The old plug must be disposed of safely, as insertion into a mains socket
could cause an electrical hazard
If the colours of the wires in the power cable of this product do not correspond
with the markings on the terminals of your plug, proceed as follows.
.
•The Blue wire must be connected to the terminal marked N or
coloured Black.
•The Brown wire must be connected to the terminal marked L or
coloured Red.
•The Yellow and Green wire must be connected to the terminal
marked E or or coloured Green.
We strongly recommend that this machine is connected to the mains supply
via a Residual Current Device (RCD).
If in doubt, consult a qualified electrician. DO NOT attempt any repairs yourself
Parts & Service: 020 8988 7400 / E-mail: [email protected] or [email protected]
4
Page 5
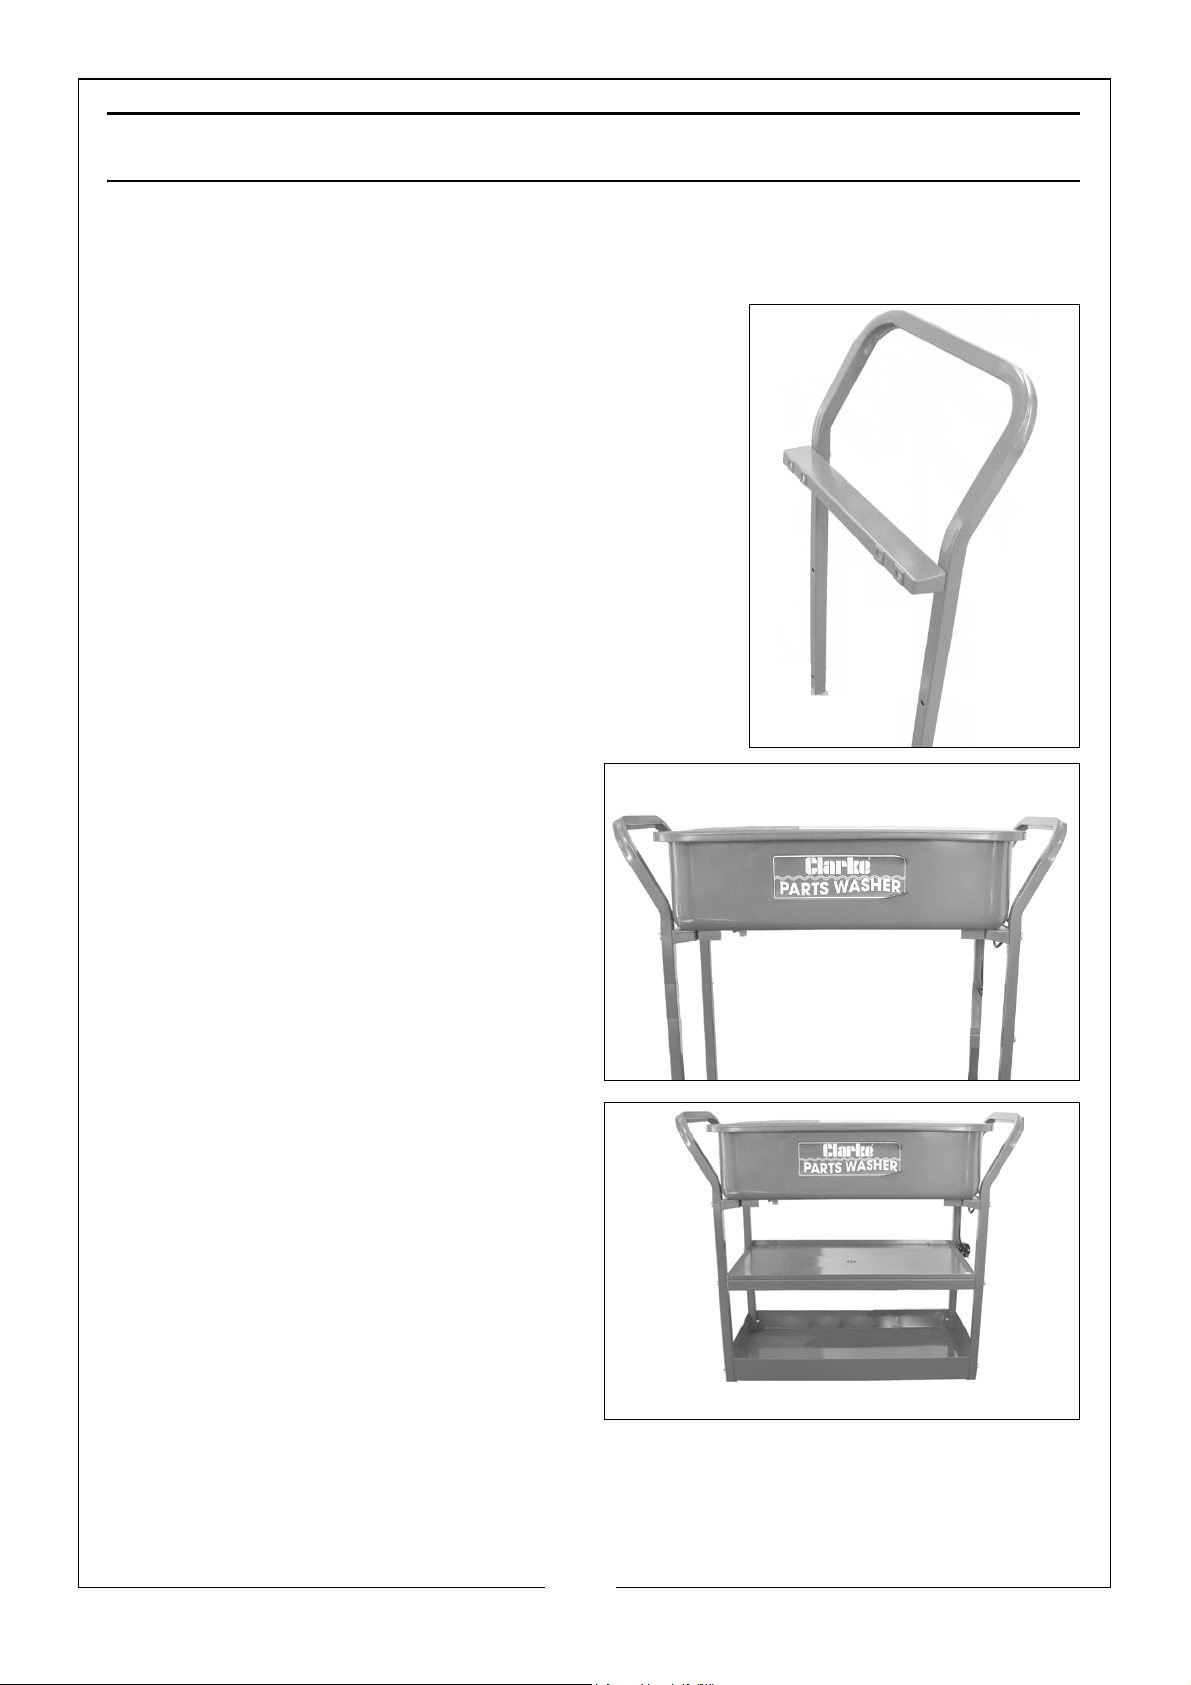
ASSEMBLY
1. Choose a firm, flat and level surface to site the parts washer on, in a well
ventilated area and away from any naked flames.
2. Loosely bolt the supporting brackets to the
side bars.
• Do not tighten at this stage.
3. Bolt the tank loosely to the
supporting brackets on each side
bar.
4. Loosely bolt the middle (draining)
and lower trays to the side bars.
5. Finally tighten all bolts evenly
across the whole assembly until
secure.
5
Parts & Service: 020 8988 7400 / E-mail: [email protected] or [email protected]
Page 6
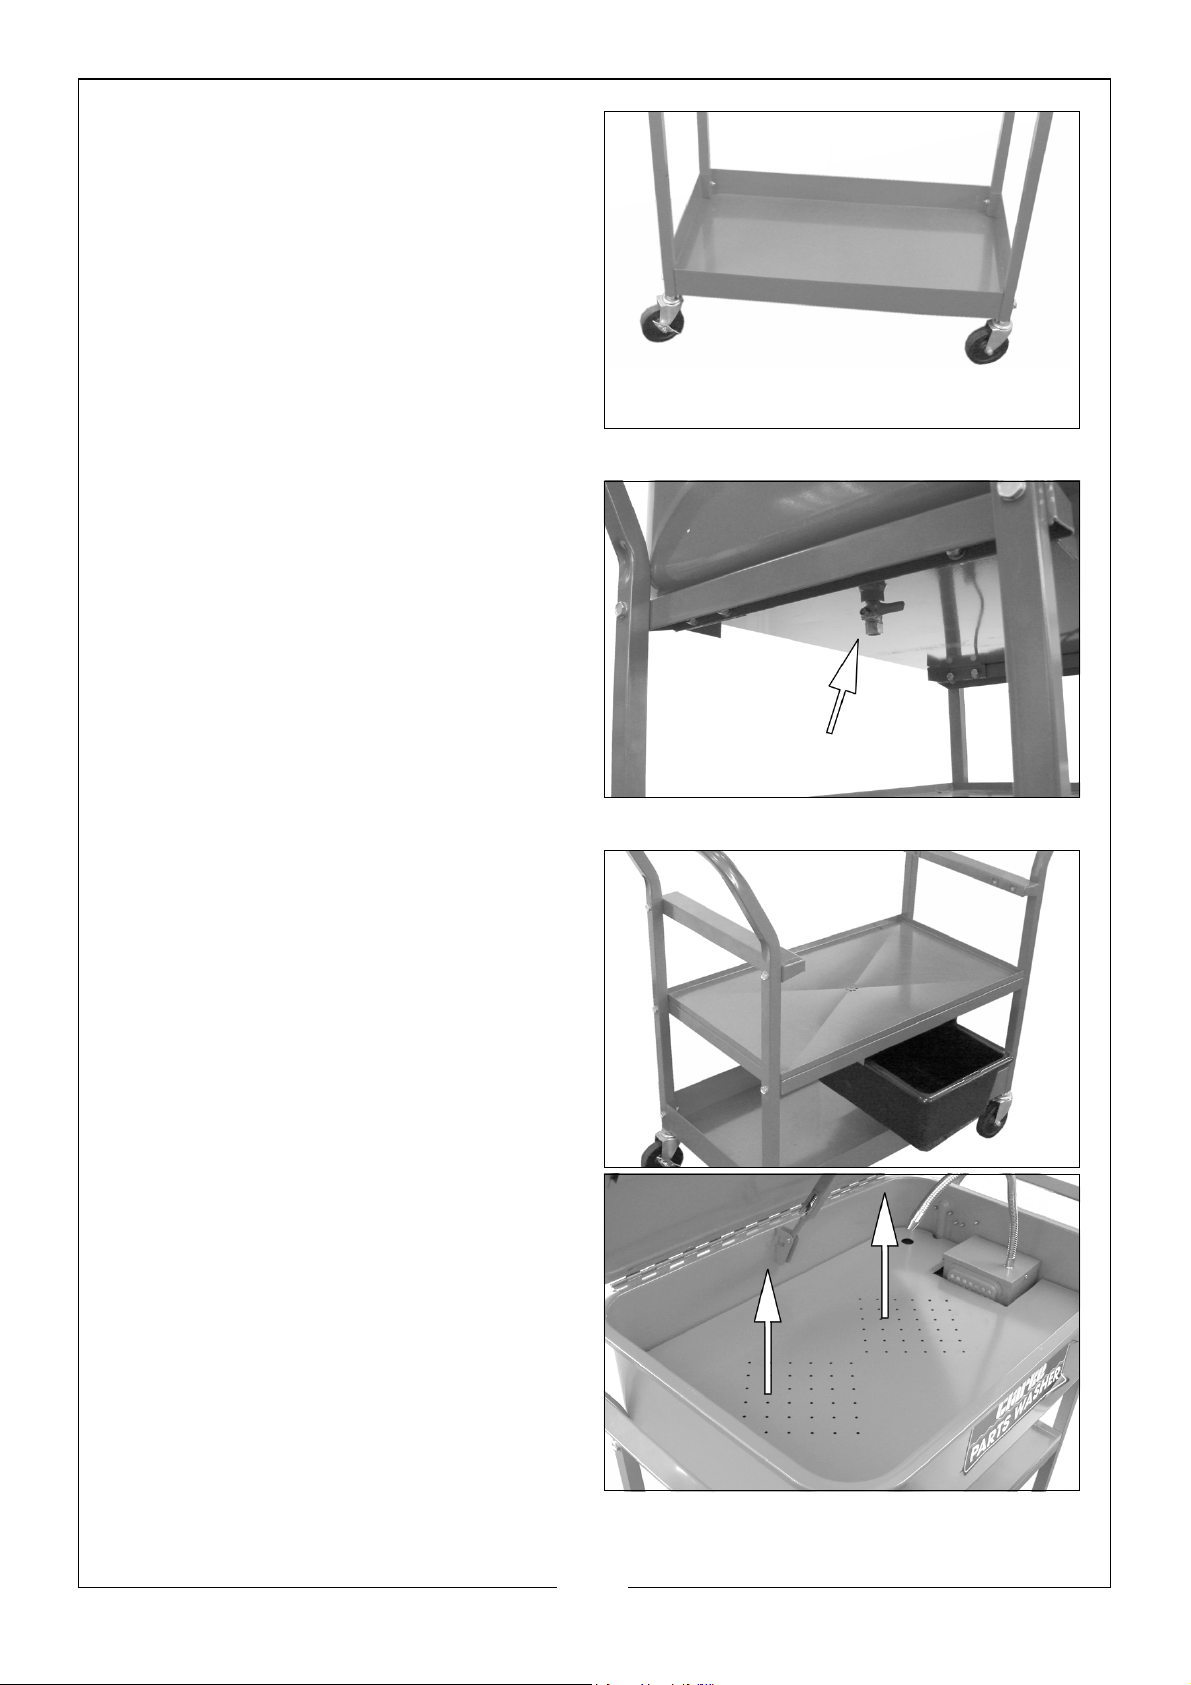
6. Fit the castors to the side bars.
7. Fit the drain valve as shown.
8. Slide the oil tank into position.
9. Rest the part tray into position.
6
Parts & Service: 020 8988 7400 / E-mail: [email protected] or [email protected]
Page 7
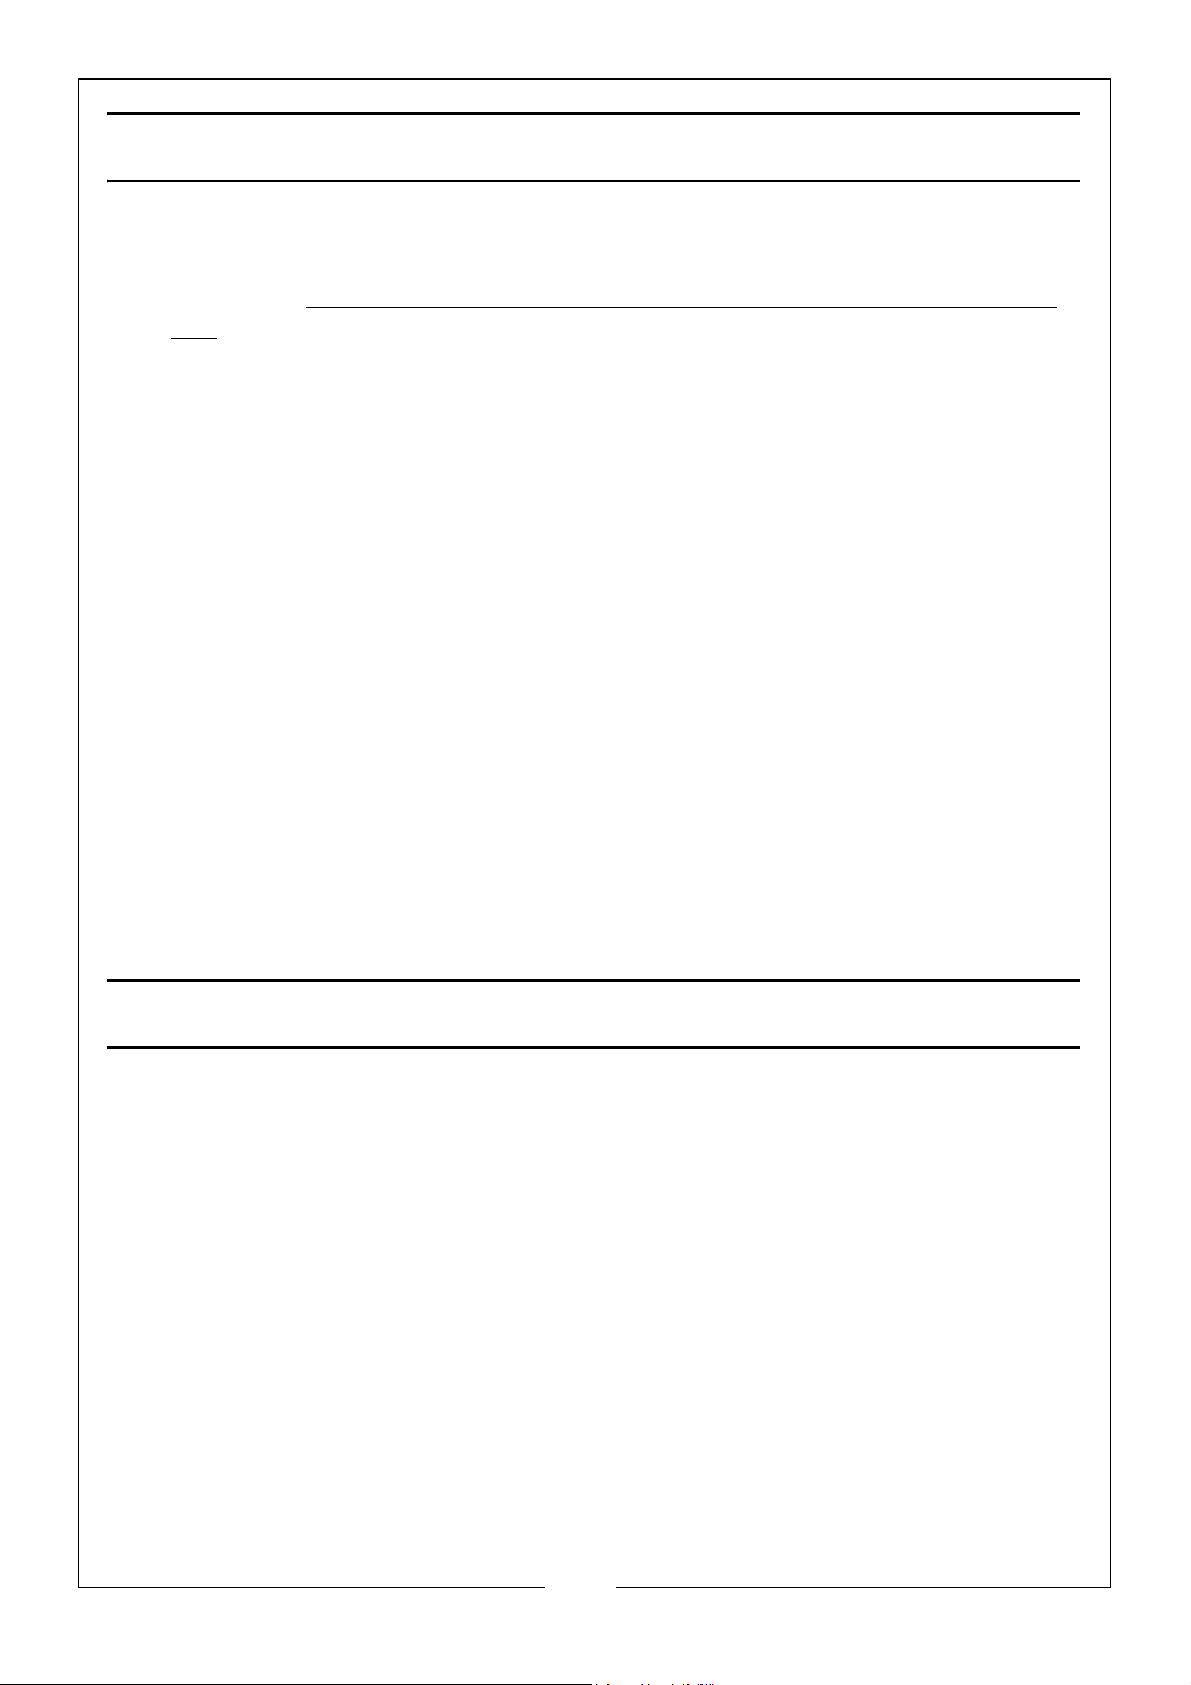
OPERATION
1. Open the tank lid and fill the tank with a nonflammable degreaser or
cleaning agent, such as Clarke’s degreaser, to just below the level of the
parts shelf. DO NOT fill with flammable solvents such as paraffin, thinners,
etc.
2. Insert the mains plug into a suitable mains outlet.
3. Using the On/Off button, switch the pump on. Hold the part to be cleaned
under the flexible nozzle and slowly rotate the part until the part is clean.
4. When clean, leave the part to drain on draining tray until dry.
5. Switch off the pump, close the lid and disconnect the power supply.
6. Remove gloves and goggles and store safely.
NOTE: To prevent an accident, any spillages should be mopped up
immediately.
IMPORTANT
1. The lid stay incorporates a safety device in the form of a thermally
activated safety link, which closes the lid in the event of fire. The link is nonresetting and must be replaced in the event of it operating.
2. Do not allow the level of liquid in the parts washer to fall below the pump
inlet, as damage to the pump can result.
ENVIRONMENTAL PROTECTION
Never throw away used oil with domestic refuse or flush it down a sink or drain.
Collect any oil in a leak proof container & take it to your waste disposal site.
Through purchase of this product, the customer is taking on the obligation to
deal with the WEEE in accordance with the WEEE regulations in relation to the
treatment, recycling, recovery & environmentally sound disposal of the WEEE.
In effect, this means that this product must not be disposed of with general
household waste but according to the laws governing Waste Electrical and
Electronic Equipment (WEEE) at a recognised disposal facility.
Do not dispose of this product or damaged components with general
household waste. All tools, accessories and packaging should be sorted,
taken to a recycling centre and disposed of appropriately.
7
Parts & Service: 020 8988 7400 / E-mail: [email protected] or [email protected]
Page 8
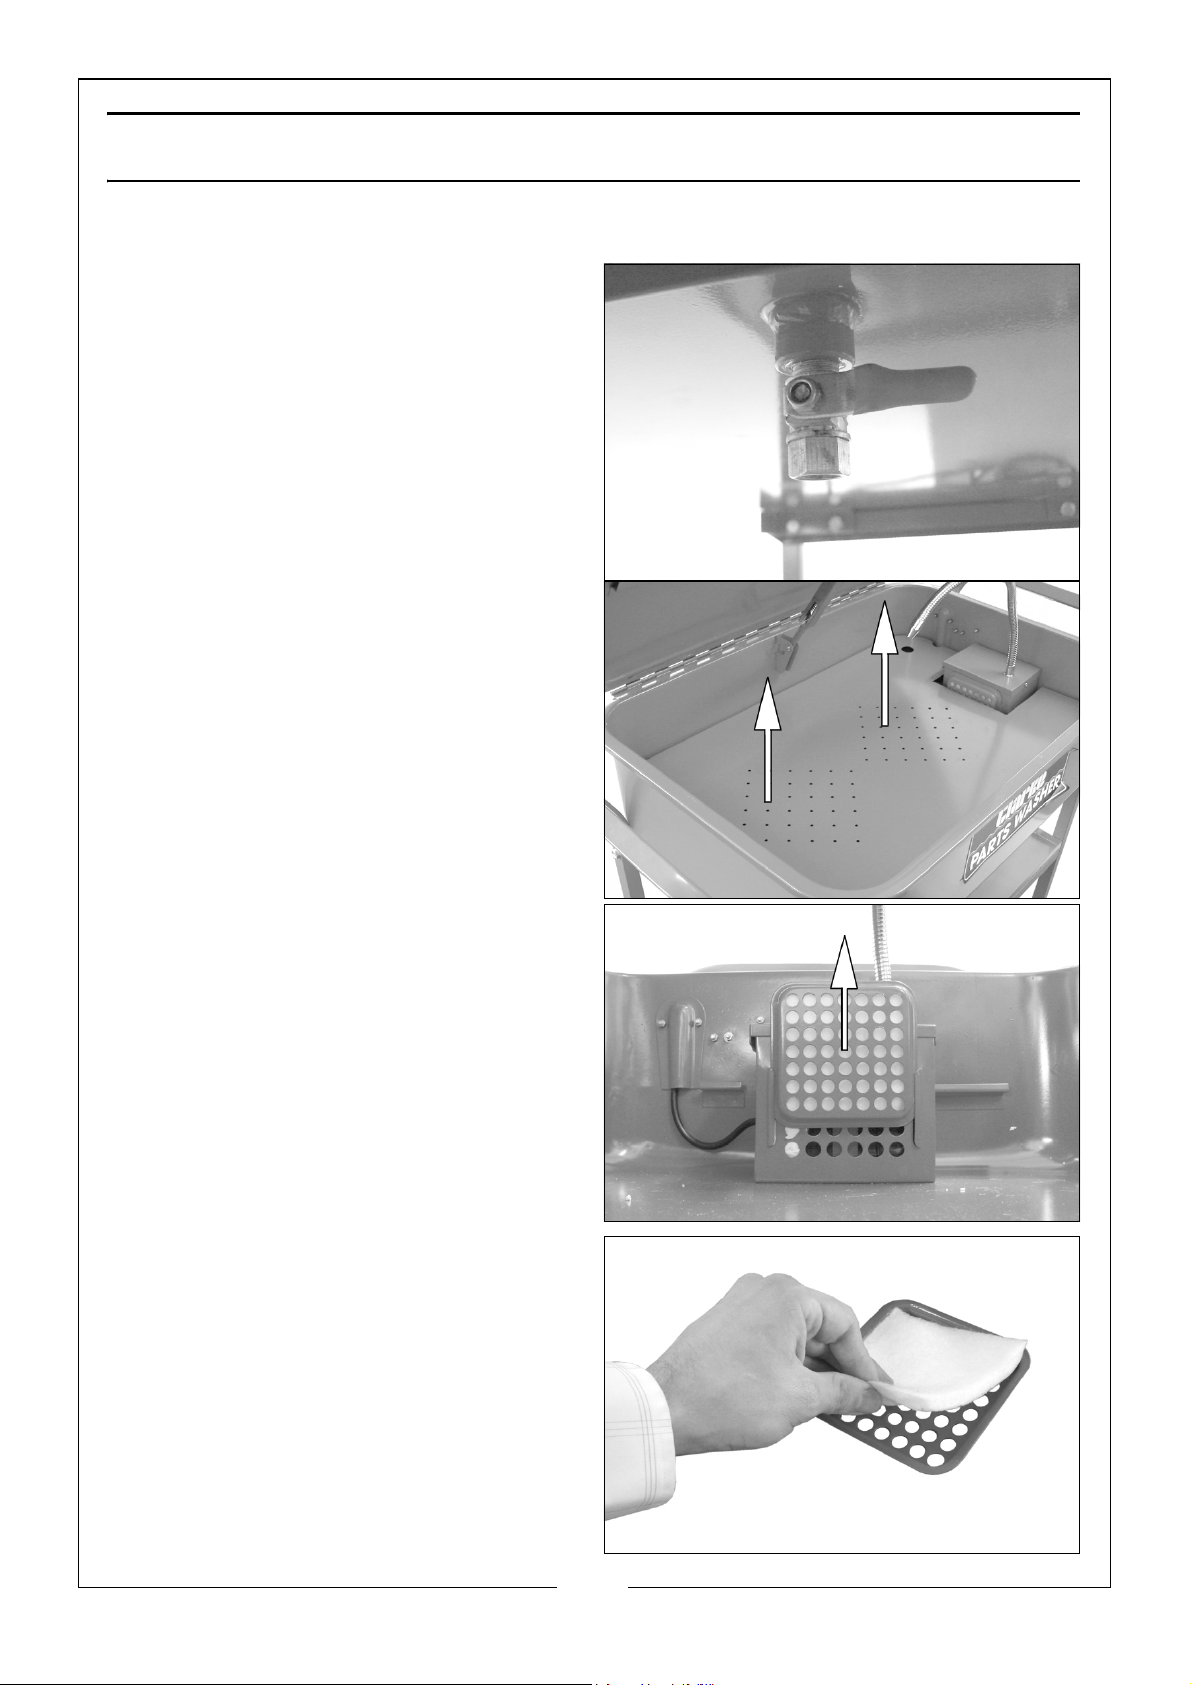
CLEANING AND MAINTENANCE
DRAINING THE TANK
1. Open the drain valve on the
underside of the tank.
• The liquid will drain onto the
draining tray below and into
the oil tank for disposal. Make
sure that the oil tank does not
over fill.
CHANGING THE FILTER
1. Lift out the parts shelf.
2. Slide the filter holder up from the
pump as shown.
3. Remove the filter from the holder
and replace.
4. Refit the filter holder.
Caution: Do not use the parts washer
without the filter in place.
8
Parts & Service: 020 8988 7400 / E-mail: [email protected] or [email protected]
Page 9
Page 10
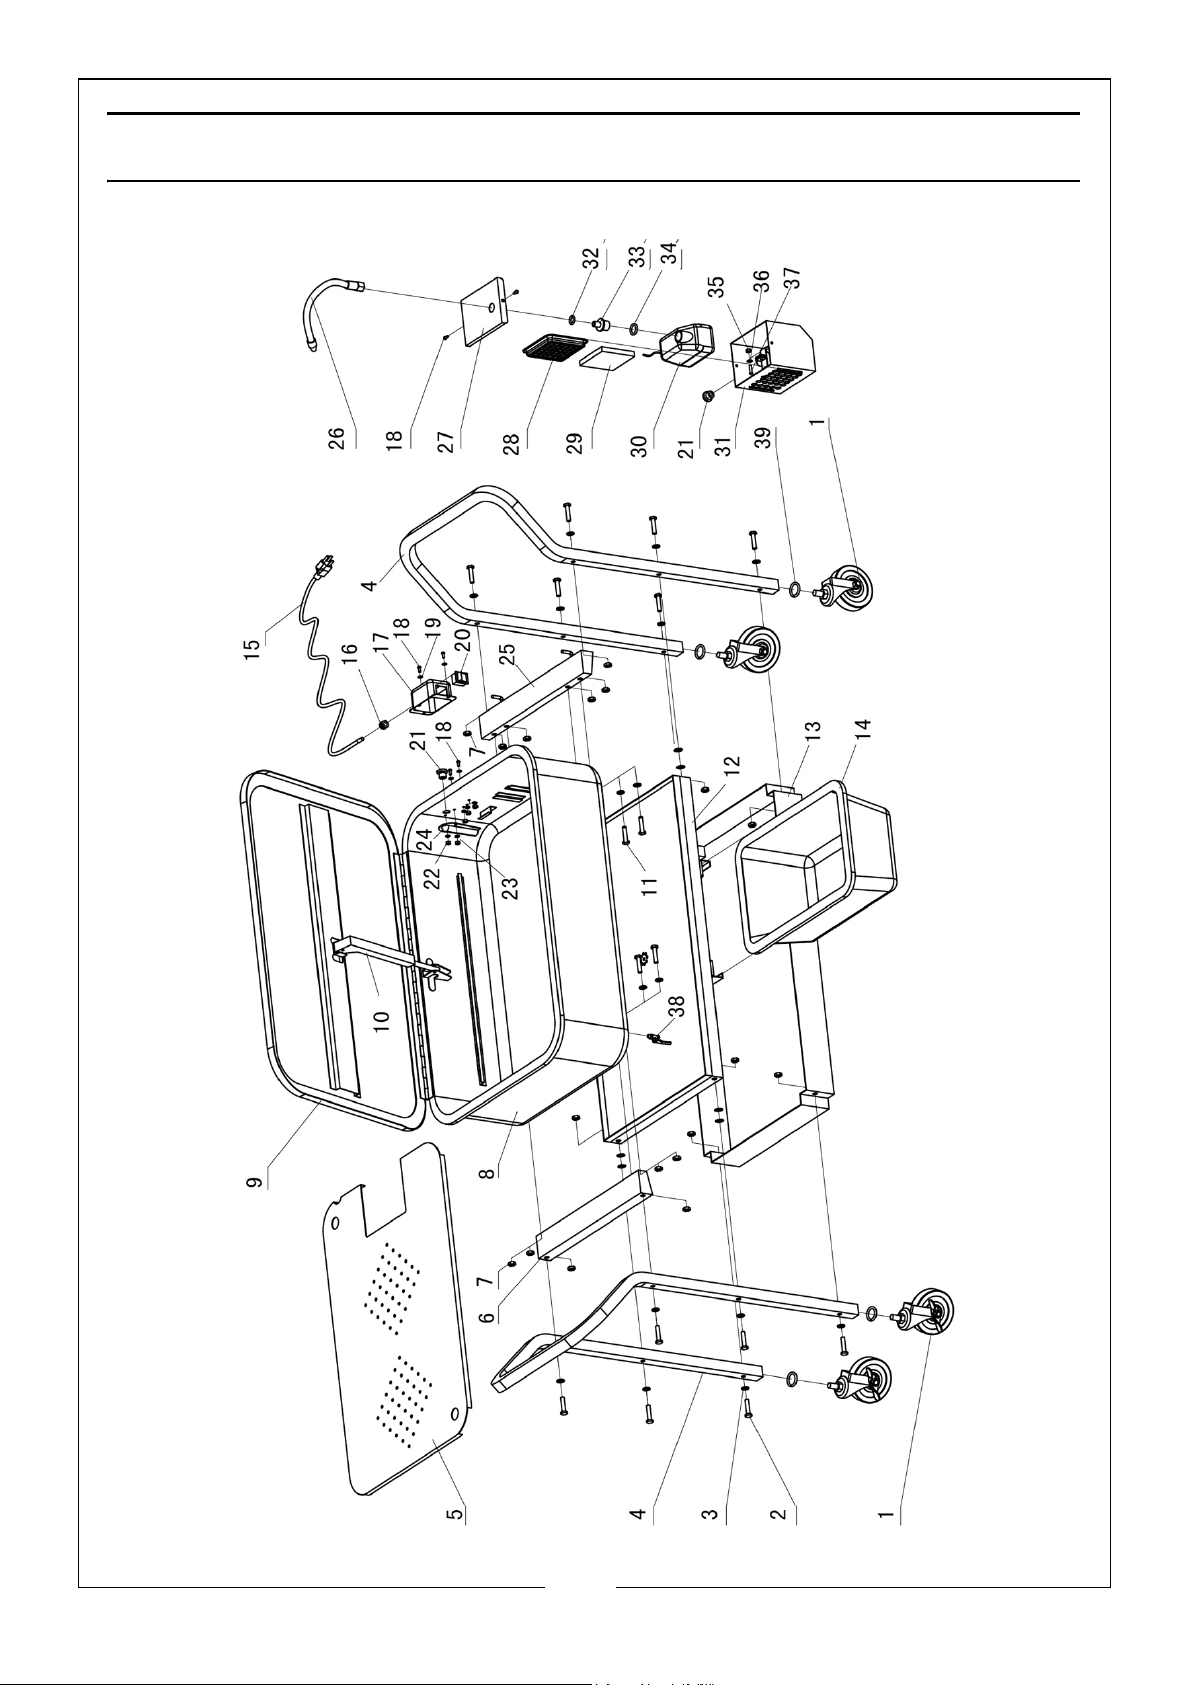
PARTS LIST
No Description No Description
1 Castor 21 Wire guard
2 Hex bolt M8 x 40 22 Nut M4
3 Flat washer M8 23 Spring washer
4 Side post 24 Flange (wire)
5 Parts shelf 25 Support bracket (righthand)
6 Support bracket (lefthand) 26 Flexible nozzle
7 Nut M8 27 Pump housing cover
8 Tank 28 Filter cover
9 Tank lid 29 Filter
10 Fusible link 30 Pump assembly
11 Bolt M8 x 15 31 Pump housing
12 Draining tray 32 Sealing ring
13 Lower Tray 33 Spigot
14 Oil tank 34 Sealing ring
15 Power cable 35 Nut M5
16 Cable gland 36 Flat washer
17 Switch box 37 Screw M5 x 20
18 Screw M4 x 10 38 Drain valve
19 Flat washer M4 39 Spring washer
20 On/Off switch
CONSUMABLES
This parts washer is suitable for use with Clarke water-based parts washer fluid;
Concentrated; P/No: 3051063 (5 Litre) P/No: 3051065 (25 Litre) - or
Ready to Use; P/No: 3051064 (5 Ltr) P/No: 3051066 (30 Ltr)
These products are non-flammable and bio-degradable. We do not
recommend the use of solvent-based parts washer fluids such as P/Nos:
3051115 and 3051120 with this parts washer.
10
Parts & Service: 020 8988 7400 / E-mail: [email protected] or [email protected]
Page 11
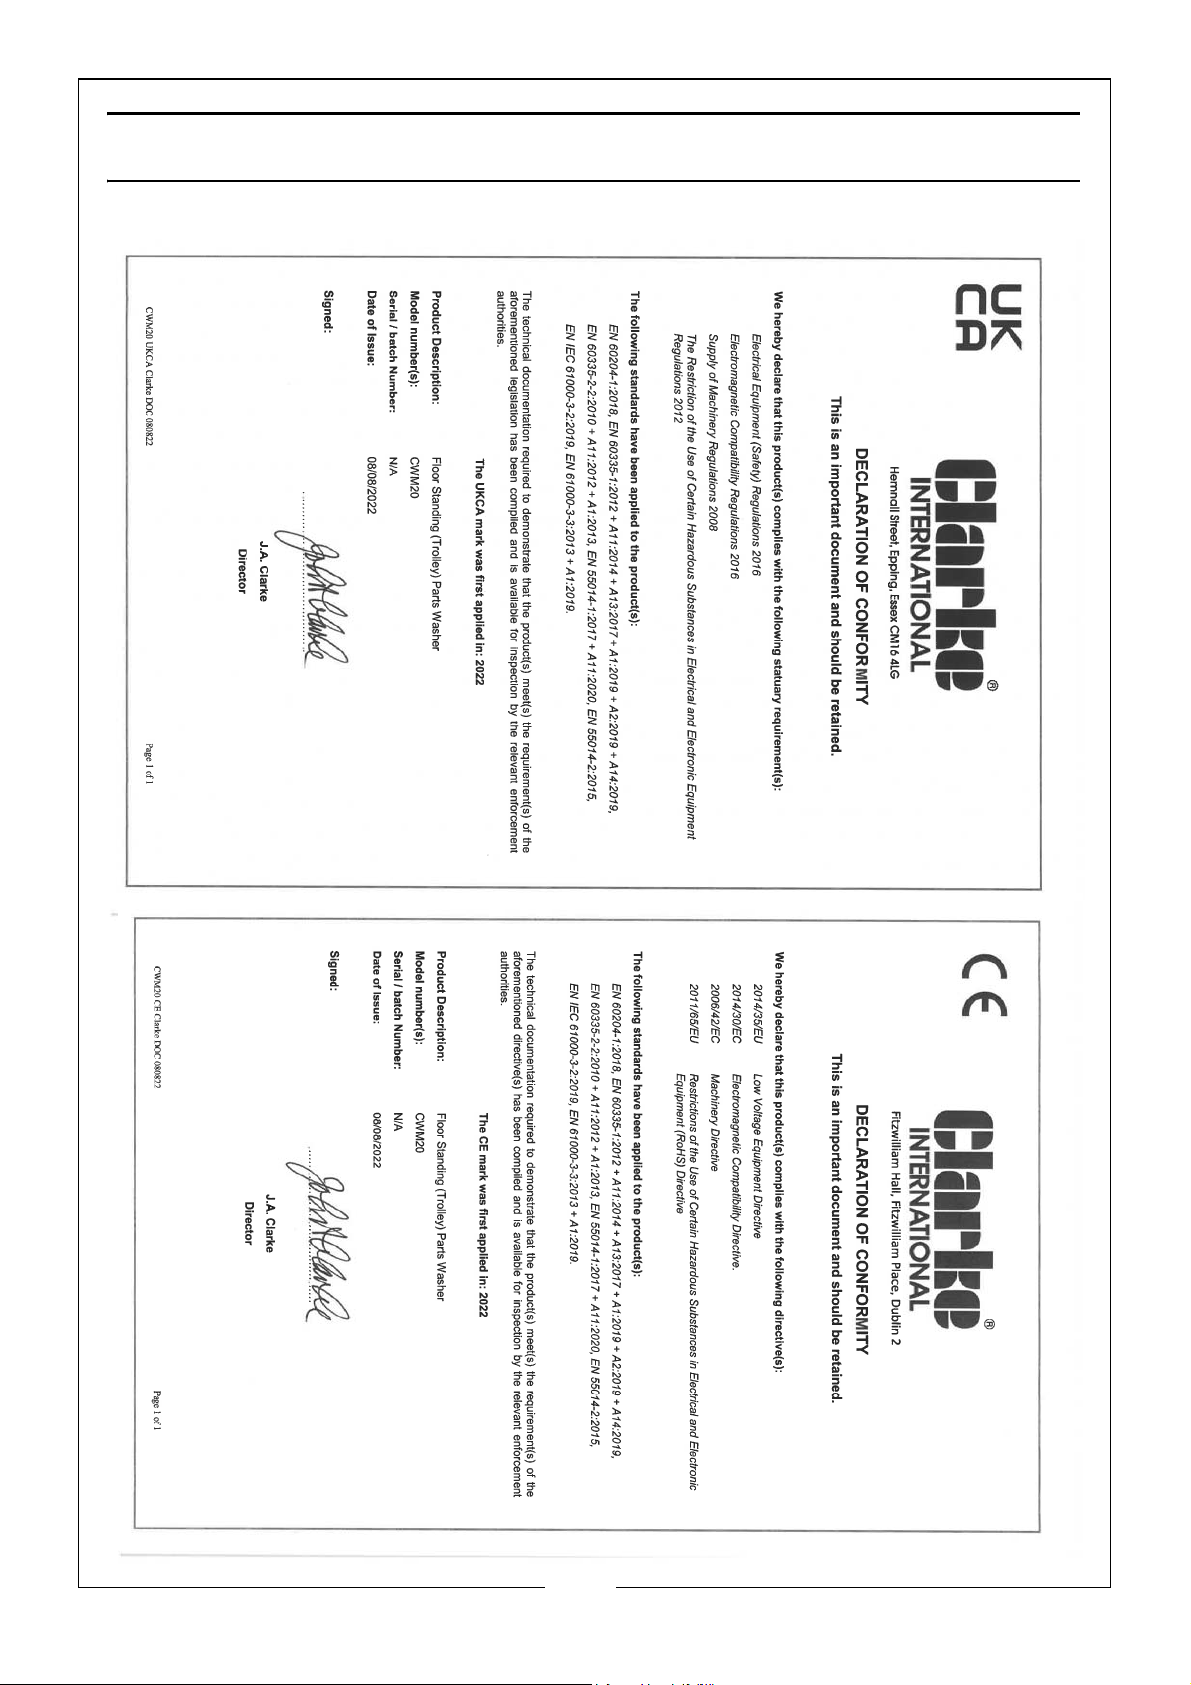
DECLARATION OF CONFORMITY
11
Parts & Service: 020 8988 7400 / E-mail: [email protected] or [email protected]
Page 12

 Loading...