

Page 1
OPERATION & MAINTENANCE
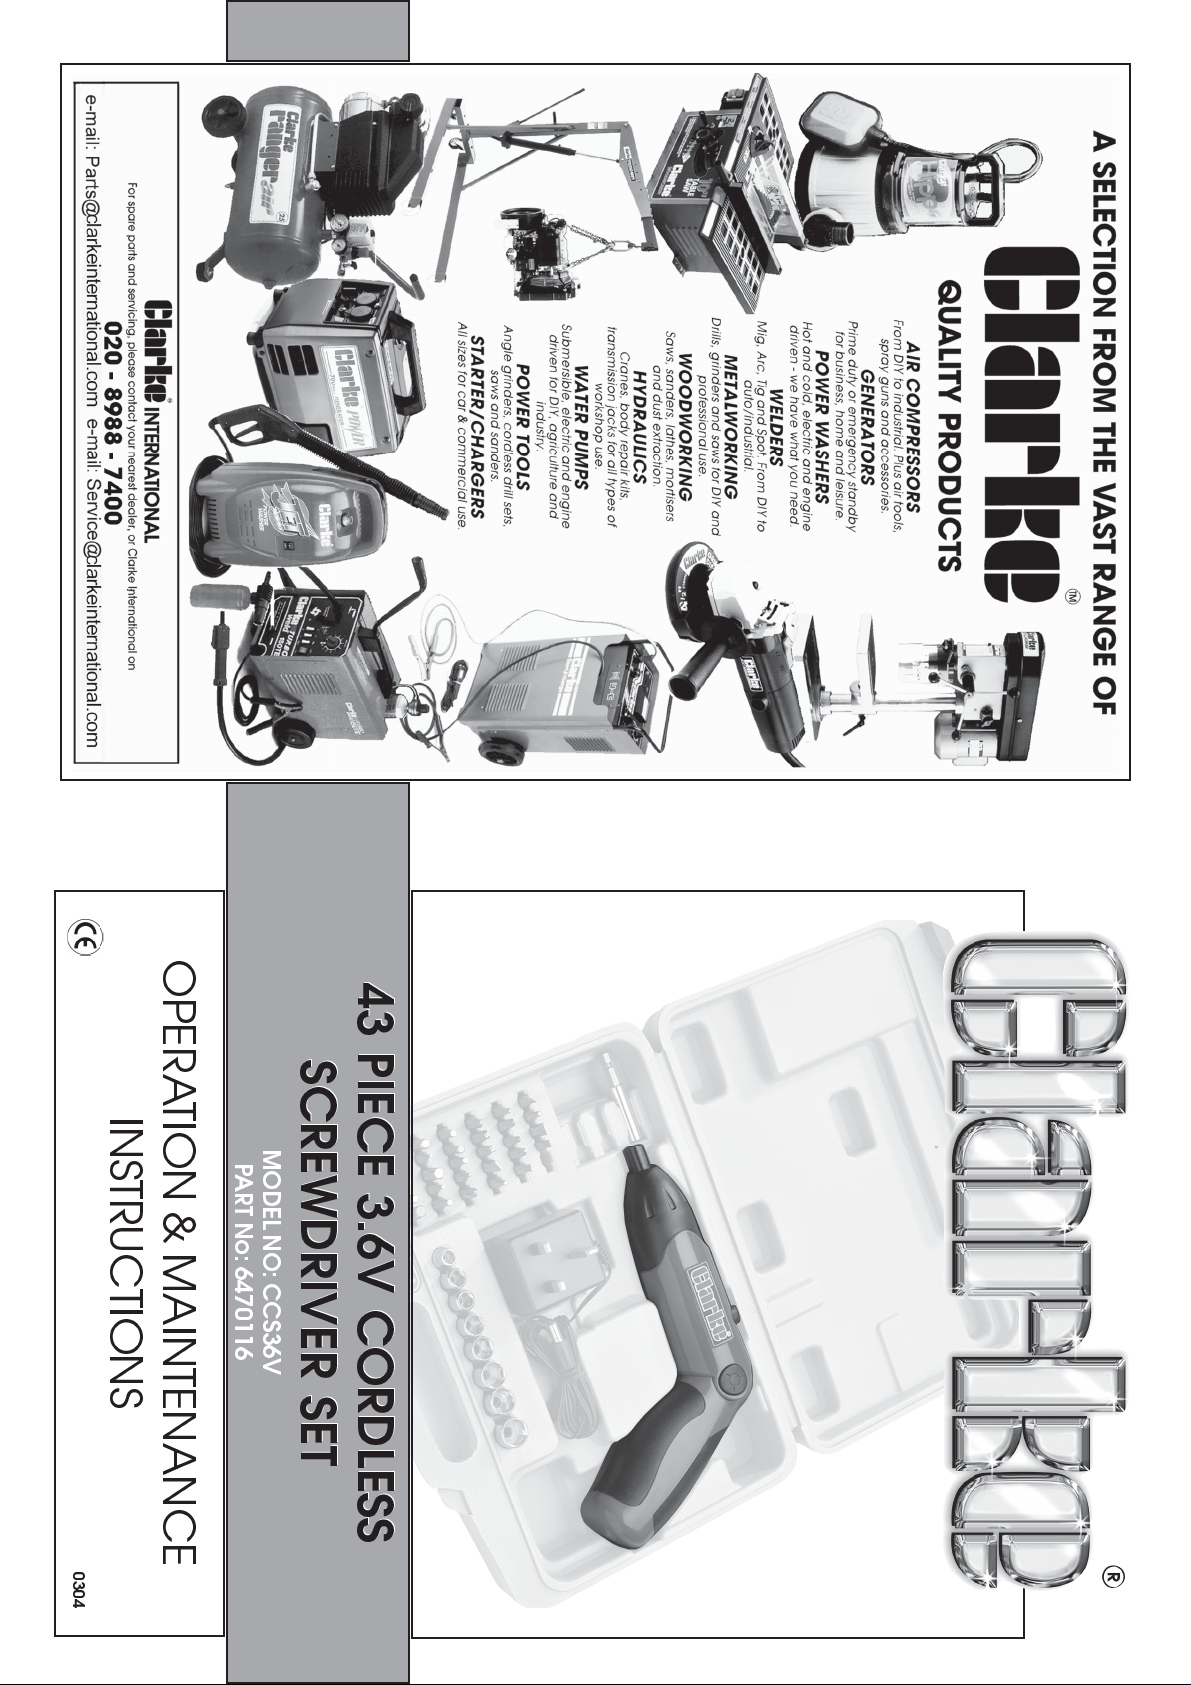
43 PIECE 3.6V CORDLESS
43 PIECE 3.6V CORDLESS
SCREWDRIVER SET
SCREWDRIVER SET
INSTRUCTIONS
MODEL NO: CCS36V
PART No: 6470116
0304
Page 2
-1- -6-
T
decreased tool performance and may invalidate your warranty.
he use of parts other than CLARKE replacement parts may result in safety hazards,
IMPORTANT:
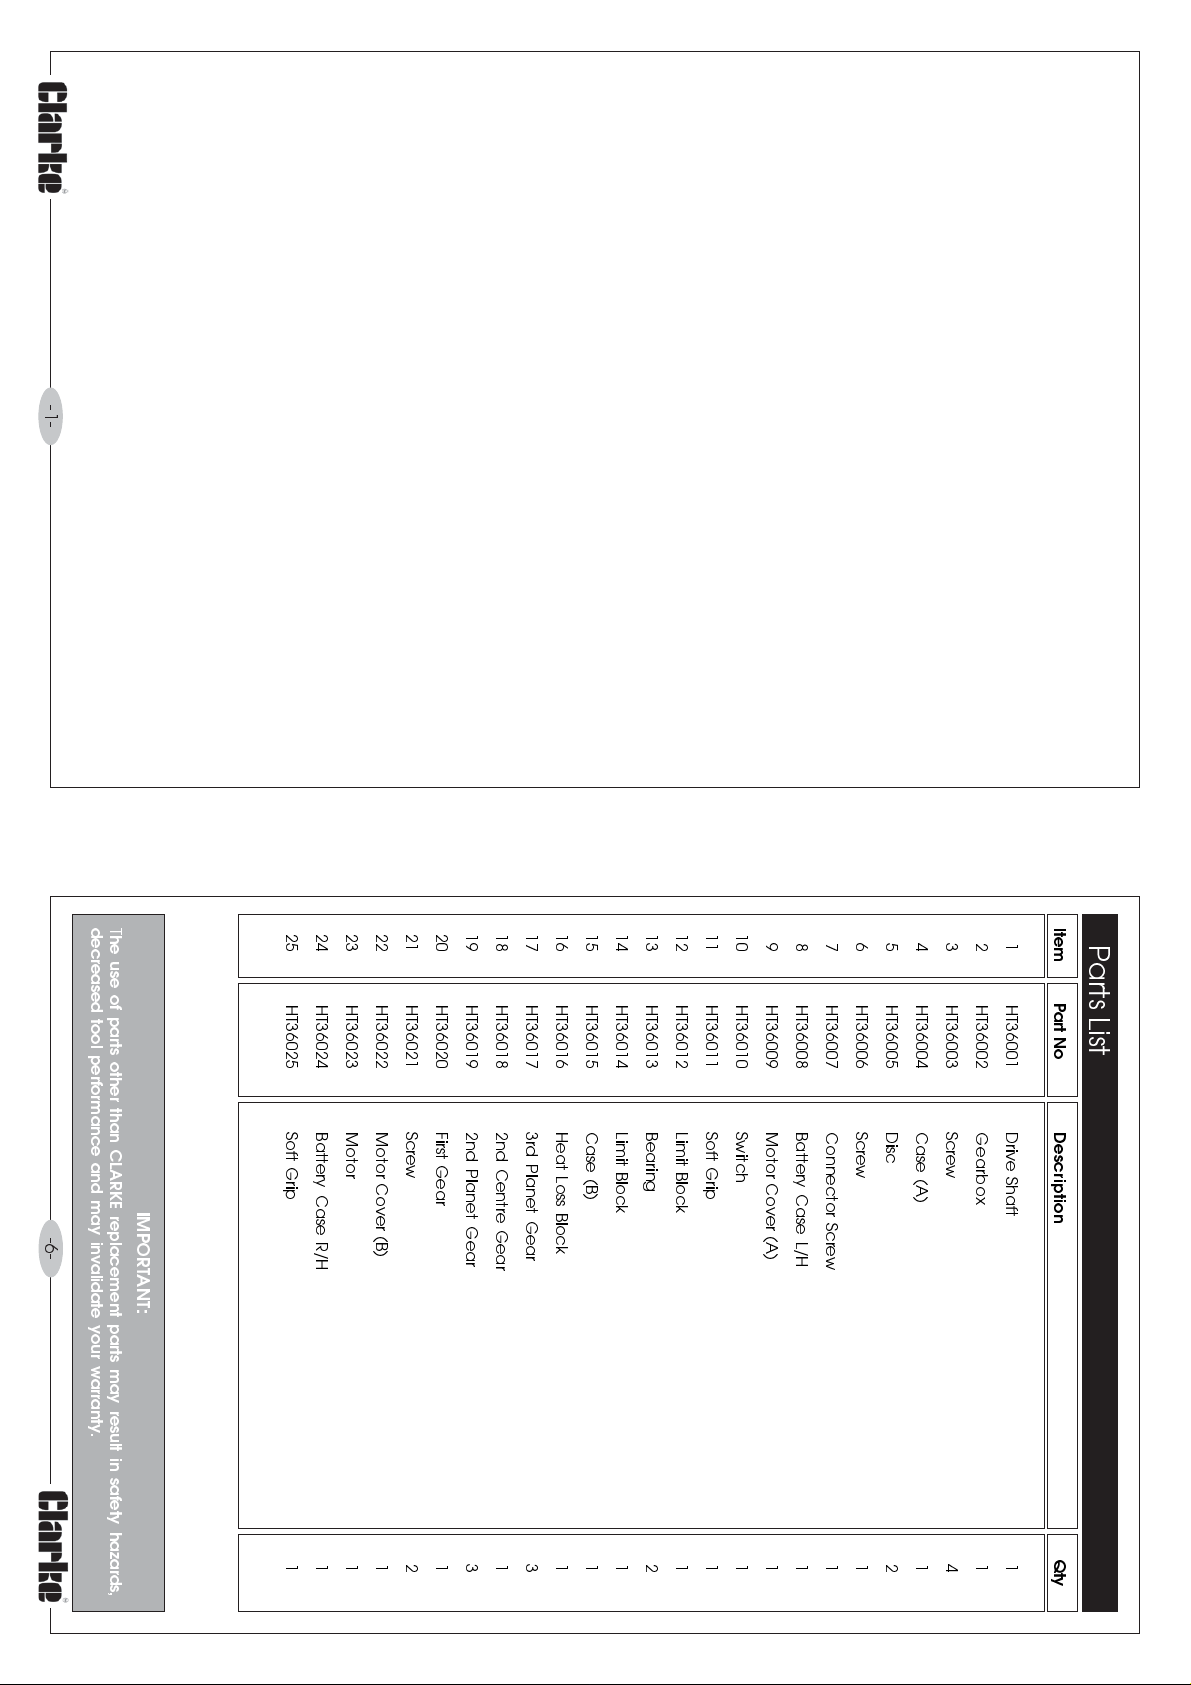
25 HT36025 Soft Grip 1
8 HT36008 Battery Case L/H 1
9 HT36009 Motor Cover (A) 1
5 HT36005 Disc 2
6 HT36006 Screw 1
7 HT36007 Connector Screw 1
2 HT36002 Gearbox 1
3 HT36003 Screw 4
4 HT36004 Case (A) 1
10 HT36010 Switch 1
11 HT36011 Soft Grip 1
12 HT36012 Limit Block 1
13 HT36013 Bearing 2
14 HT36014 Limit Block 1
15 HT36015 Case (B) 1
16 HT36016 Heat Loss Block 1
17 HT36017 3rd Planet Gear 3
18 HT36018 2nd Centre Gear 1
19 HT36019 2nd Planet Gear 3
20 HT36020 First Gear 1
21 HT36021 Screw 2
22 HT36022 Motor Cover (B) 1
23 HT36023 Motor 1
24 HT36024 Battery Case R/H 1
Item Part No Description Qty
1 HT36001 Drive Shaft 1
Parts List
Page 3
SERVICE: Service@clarkeinternational.com
PARTS: Parts@clarkeinternational.com
PARTS & SERVICE TEL: 020 8988 7400
or e-mail as follows:
-5- -2-
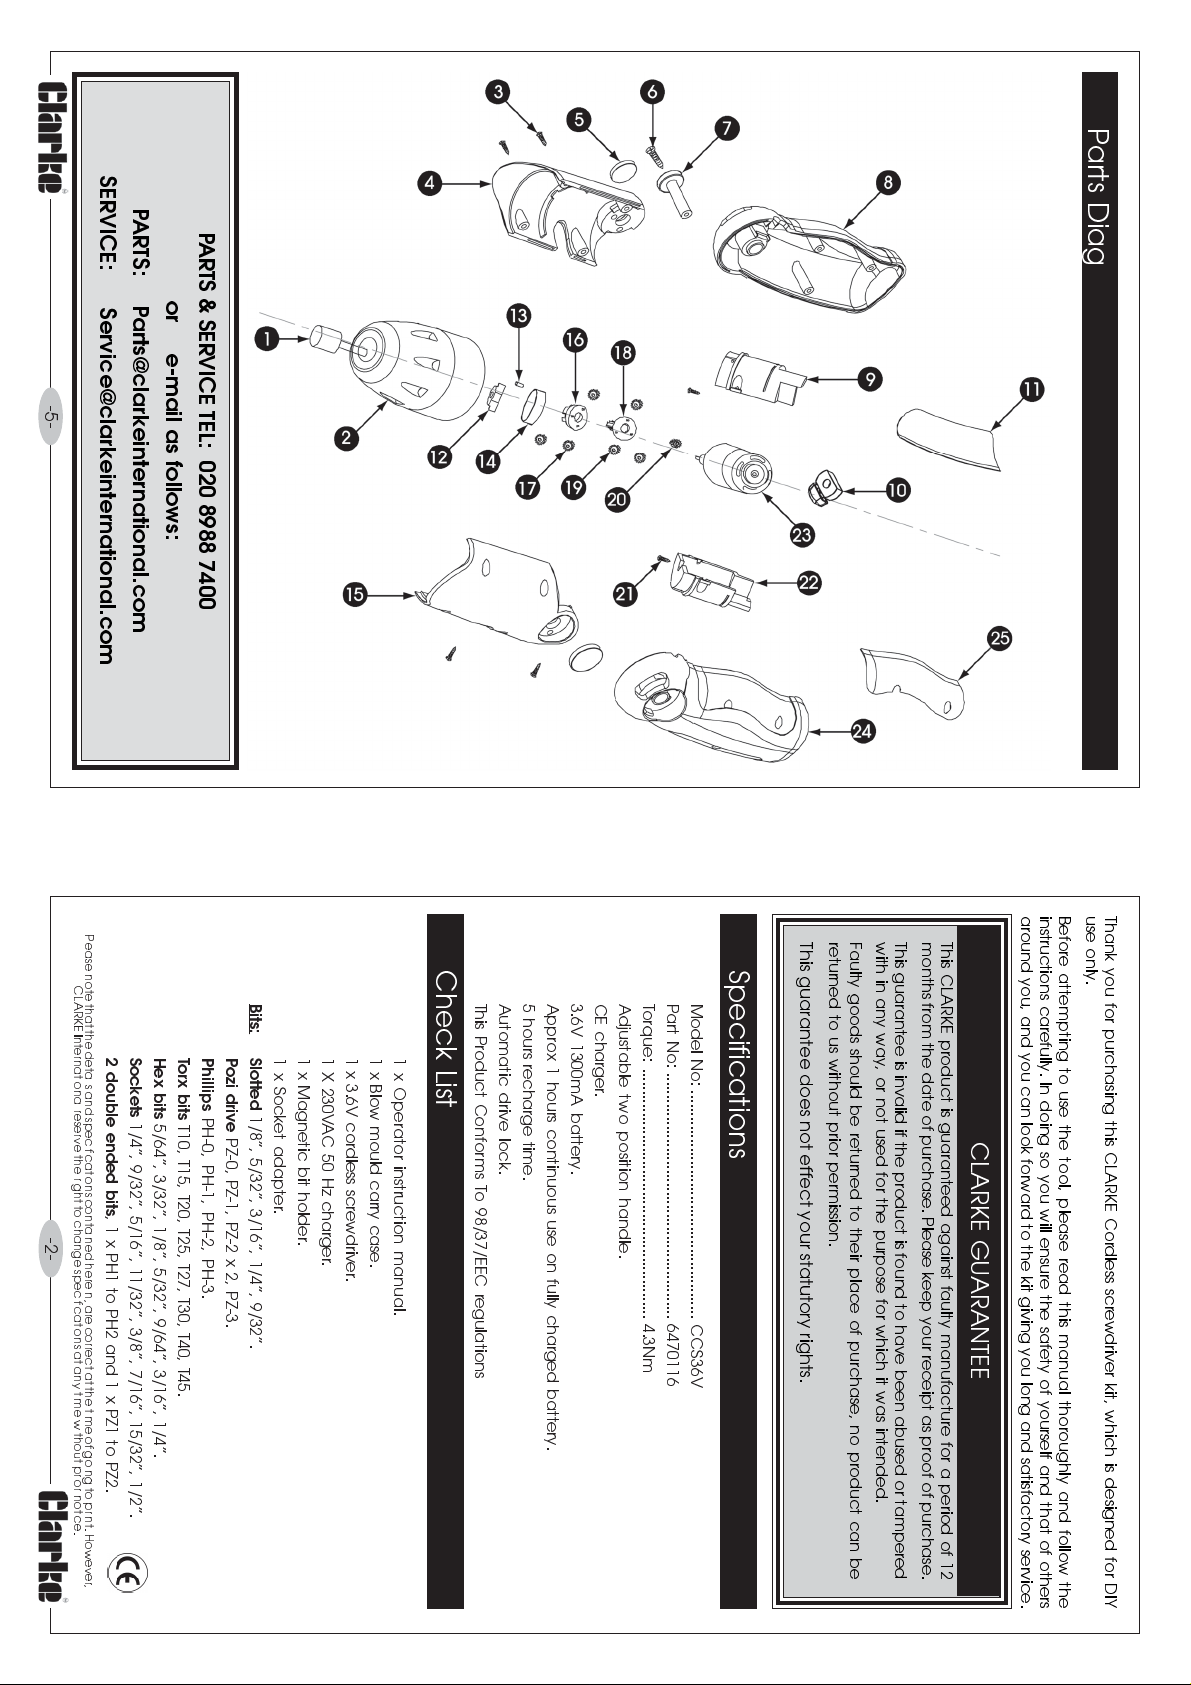
Parts Diag
Please note that the details and specifications contained herein, are correct at the time of going to print. However,
CLARKE International reserve the right to change specifications at any time without prior notice.
2 double ended bits
, 1 x PH1 to PH2 and 1 x PZ1 to PZ2.
Hex bits
Sockets
1/4, 9/32, 5/16, 11/32, 3/8, 7/16, 15/32, 1/2.
5/64, 3/32, 1/8, 5/32, 9/64, 3/16, 1/4.
Torx bits
T10, T15, T20, T25, T27, T30, T40, T45.
Pozi drive
Phillips
PH-0, PH-1, PH-2, PH-3.
PZ-0, PZ-1, PZ-2 x 2, PZ-3.
Bits: Slotted
1 x Socket adapter.
1/8, 5/32, 3/16, 1/4, 9/32.
Thank you for purchasing this CLARKE Cordless screwdriver kit, which is designed for DIY
use only.
Before attempting to use the tool, please read this manual thoroughly and follow the
instructions carefully. In doing so you will ensure the safety of yourself and that of others
around you, and you can look forward to the kit giving you long and satisfactory service.
This CLARKE product is guaranteed against faulty manufacture for a period of 12
months from the date of purchase. Please keep your receipt as proof of purchase.
This guarantee is invalid if the product is found to have been abused or tampered
with in any way, or not used for the purpose for which it was intended.
Faulty goods should be returned to their place of purchase, no product can be
returned to us without prior permission.
This guarantee does not effect your statutory rights.
Check List
Part No: ........................................................ 6470116
Torque: ......................................................... 4.3Nm
Adjustable two position handle.
CE charger.
3.6V 1300mA battery.
Approx 1 hours continuous use on fully charged battery.
5 hours recharge time.
Automatic drive lock.
This Product Conforms To 98/37/EEC regulations
1 x Operator instruction manual.
1 x Blow mould carry case.
1 x 3.6V cordless screwdriver.
1 X 230VAC 50 Hz charger .
1 x Magnetic bit holder.
Specifications
Model No: .................................................... CCS36V
CLARKE GUARANTEE
Page 4
soled footwear. Keep floor clear of oil, scrap wood, etc.
13.
ALWAYS
times - dont overreach. For best footing, wear rubber
9.
ALWAYS
how trivial it may seem. Be aware that accidents are
caused by carelessness due to familiarity.
tool by its electric cable, or yank the cable to
disconnect it from the power supply.
8.
AL WAYS
7.
tool.
ALWAYS
performance.
distance from the work area, especially whilst operating the
6.
AL WAYS
5.
ALWAYS
intensity of 300 lux should be provided. Ensure that lighting is
placed so that you will not be working in your own shadow.
4.
European Safety Standards. Everyday eyeglasses do not
have impact resistant lenses, they are not safety glasses.
ALWAYS
invite accidents.
3.
ALWAYS
other condition that may affect the tools operation. Any
damage should be properly repaired or the part replaced.
If in doubt,
moving parts, breakage of parts, mountings, and any
1.
2.
peculiar to it. Read and become familiar with the entire operating manual.
ALWAYS
checked to ensure that it will operate properly, and
perform its intended function. Check for alignment of
ignored, personal injury to the operator or damage to property, may result.
ALWAYS
personal injury. However, if normal safety precautions are overlooked or
and use. Exercising respect and caution will considerably lessen the risk of
As with all machinery, there are certain hazards involved with their operation
Safety Precautions
-3- -4-
keep your proper footing and balance at all
concentrate on the job in hand, no matter
handle with extreme care do not carry the
maintain tools in top condition. Keep them clean for the best and safest
keep children away. All visitors should be kept a safe
ensure that adequate lighting is available. A minimum
keep work area clean. Cluttered areas and benches
wear safety goggles, manufactured to the latest
DO NOT
use. Consult your local dealer.
check for damage. Before using the tool, any damaged part, should be
Learn the tools applications, limitations and the specific potential hazards
WARNING:
With the switch released the drive shaft is automatically locked, enabling the possibility
to use as a standard screwdriver for final tightening or releasing tight screws.
right hand side of the switch, and reverse push down on the left hand side.
Select and insert the required bit into the driver, forward driving, push down on the
IMPORTANT
Always
Operation
remove the charger from the main electric supply when not in use.
never leave the driver on charge for more than 24 hours.
DO NOT
attempt to use the driver whilst on charge.
Charger Input
Fig. 3
Charging indicator
Fig. 3.
Plug the AC charger into a standard domestic 13amp socket and switch ON, the charging
indicator should illuminate to signify charging in progress.
will be reduced to approx 5 hours
To do this, connect the charger lead into the charger input on the underside of the driver
Only ever use the charger supplied to charge the driver battery.
Before using for the first time, fully charge the battery (10 hours), subsequent charging time
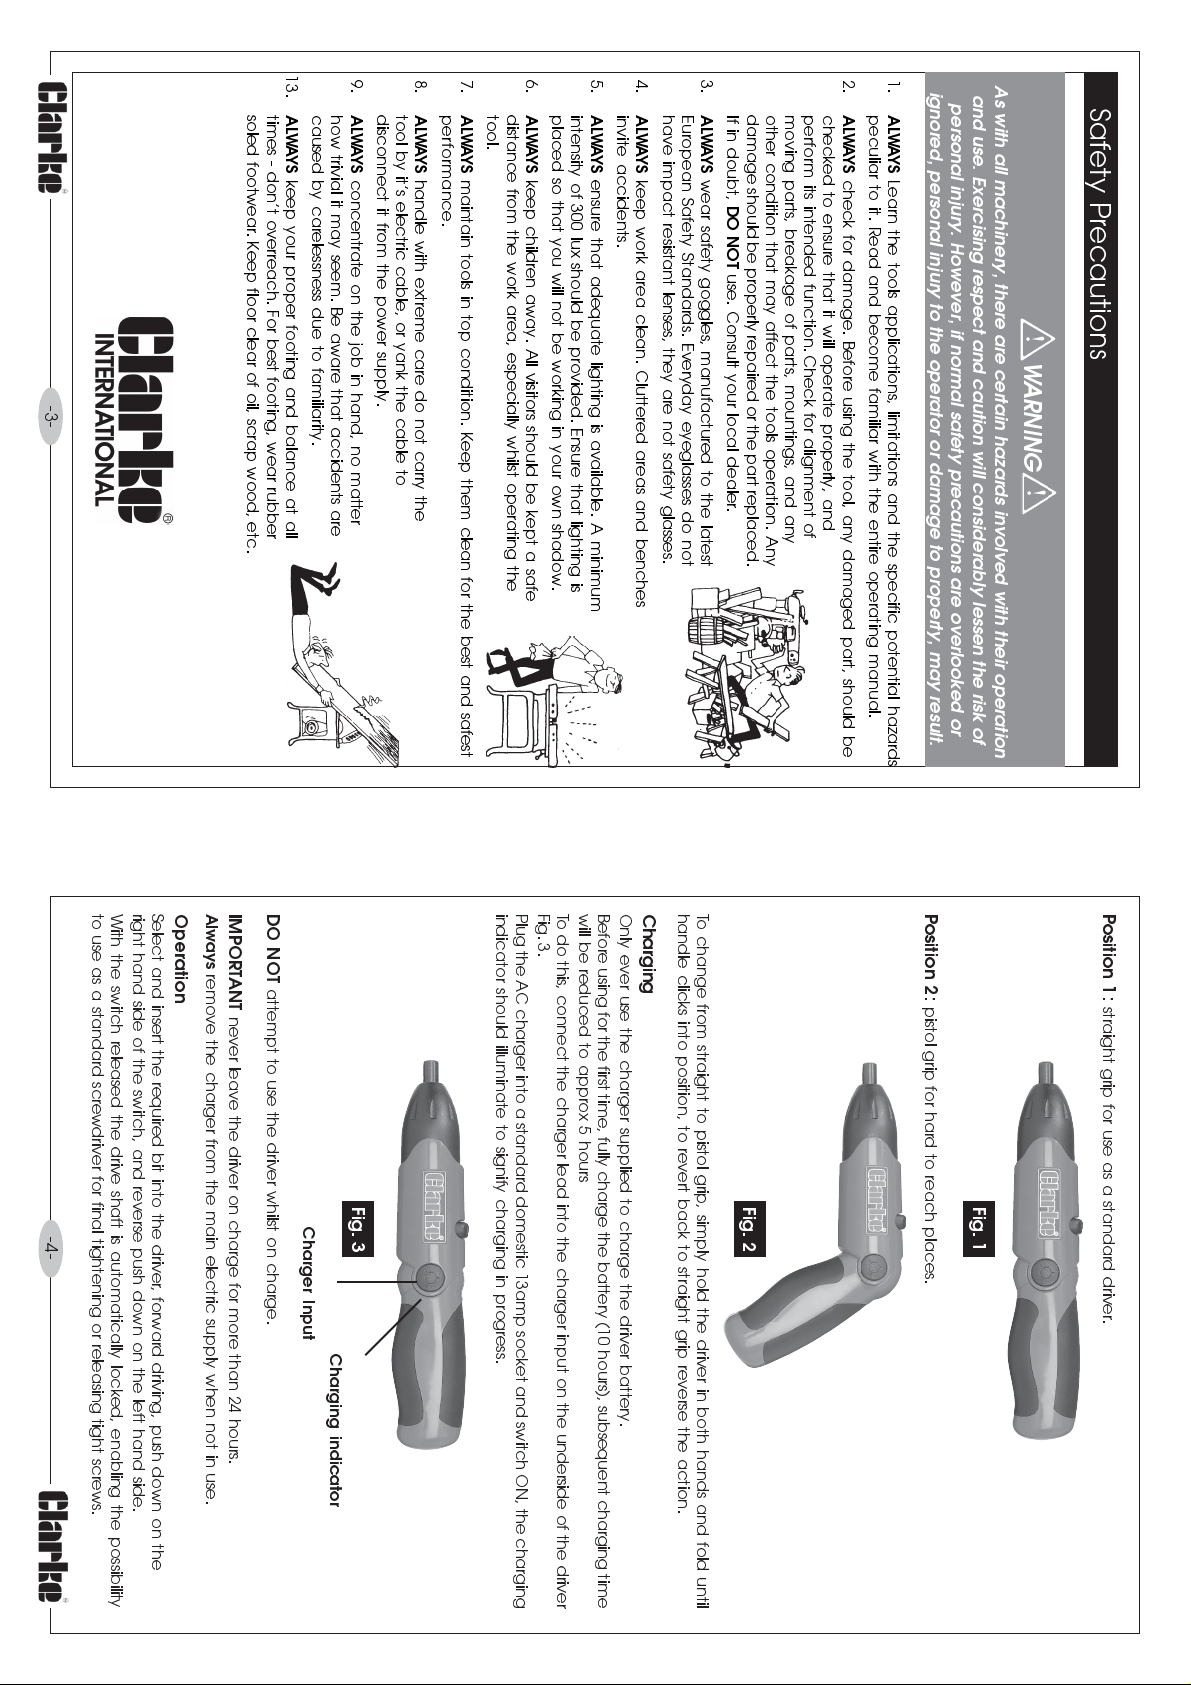
To change from straight to pistol grip, simply hold the driver in both hands and fold until
handle clicks into position, to revert back to straight grip reverse the action.
Charging
Position 2
:
pistol grip for hard to reach places.
Fig. 2
Fig. 1
Position 1
:
straight grip for use as a standard driver.
 Loading...