

Page 1
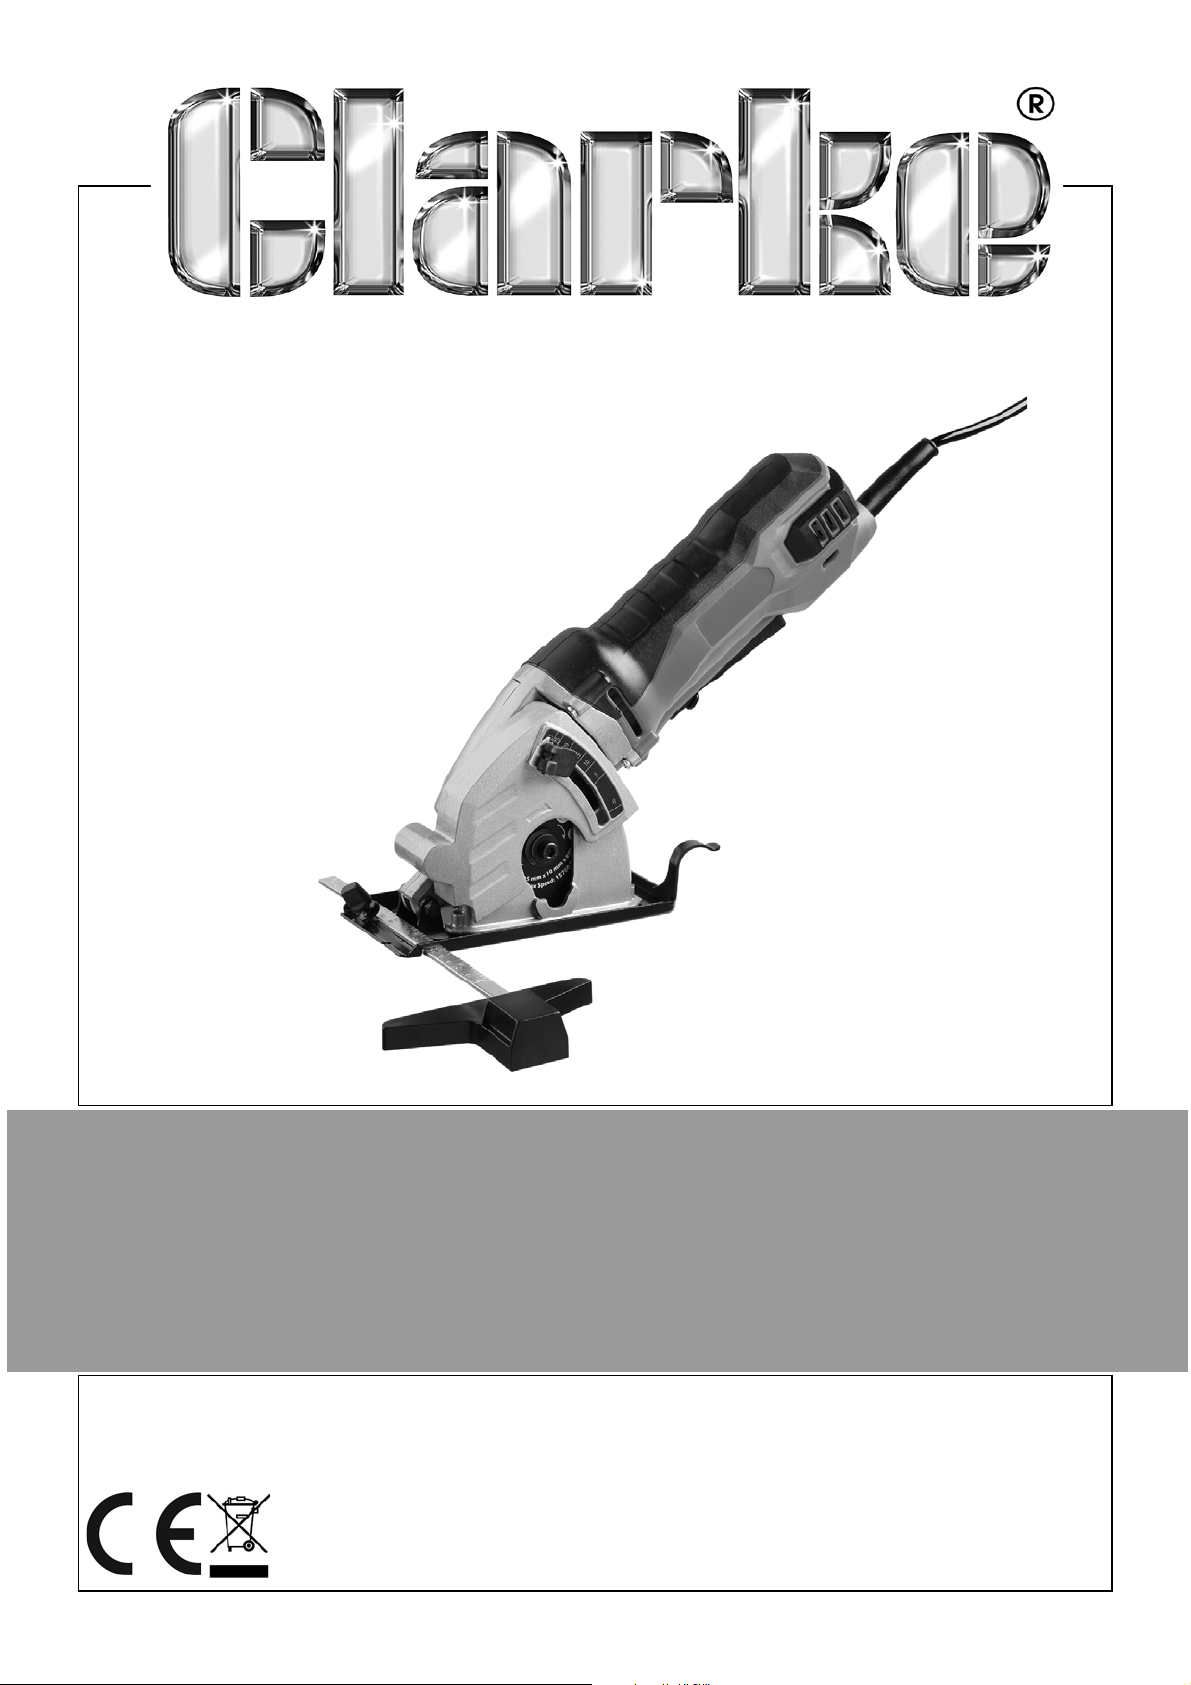
85 MM PLUNGE SAW
MODEL NO: CPS85
PART NO: 6460230
OPERATION & MAINTENANCE
INSTRUCTIONS
ORIGINAL INSTRUCTIONS
DL0422 - ISS 2
Page 2
INTRODUCTION
Thank you for purchasing this CLARKE 85 mm Plunge Saw.
Read this manual fully before you use this product and follow the instructions
carefully. In doing so you will ensure the safety of yourself and that of others
around you, and you can look forward to your purchase giving you long and
satisfactory service.
GUARANTEE
This product is guaranteed against faulty manufacture for a period of 12
months from the date of purchase. Please keep your receipt which will be
required as proof of purchase.
This guarantee is invalid if the product is found to have been abused or
tampered with in any way, or not used for the purpose for which it was
intended.
Faulty goods should be returned to their place of purchase, no product can
be returned to us without prior permission. This guarantee does not effect your
statutory rights.
CONTENTS
The following items should be supplied in the pack. If any parts are missing or
damaged, please contact the Clarke dealer where you purchased the tool.
• 1 x 550W Plunge Saw
• 1 x TCT saw blade 85 x 10 mm, 24T (wood cutting)
• 1 x HSS saw blade 85 x 10 mm, 80T
• 1 x Diamond saw blade 85 x 10 mm
• 1 x 5 mm hex key
• 1 x Parallel guide
• 1 x Dust pipe
• 1 x Carry Case
2
Parts & Service: 020 8988 7400 / E-mail: [email protected] or [email protected]
Page 3
ENVIRONMENTAL RECYCLING POLICY
Through purchase of this product, the customer is taking on the
obligation to deal with the WEEE in accordance with the WEEE
regulations in relation to the treatment, recycling & recovery and
environmentally sound disposal of the WEEE.
In effect, this means that this product must not be disposed of with general
household waste. It must be disposed of according to the laws governing
Waste Electrical and Electronic Equipment (WEEE) at a recognised disposal
facility.
SPECIFICATIONS
Model Number CPS85
Rated Voltage 230V~50Hz
Maximum Depth of Cut 27 mm
Blade Dimensions Diameter - 85 mm
Bore - 10 mm
Blade Thickness - 1 mm
Sound Pressure Level LpA 93 dB(A)
Sound Power Level LWA 104 dB(A)
Uncertainty Factor (K) 3 dB(A)
Weight 2.1 kg
Vibration (main handle)
Dimensions (L x W x H) 380 x 60 x 170 mm
Cutting Wood 2.4 m/s
Cutting Metal 4.7 m/s2
Uncertainty Factor 1.5
2
3
Parts & Service: 020 8988 7400 / E-mail: [email protected] or [email protected]
Page 4
GENERAL POWER TOOL SAFETY WARNINGS
Read all instructions carefully before you use this product. Pay attention to all
sections of this user guide that display warning symbols and notices.
WARNING: THIS SYMBOL IS USED THROUGHOUT THE USER GUIDE
WHEN THERE IS A RISK OF PERSONAL INJURY. MAKE SURE THAT THESE
WARNINGS ARE READ AND UNDERSTOOD AT ALL TIMES.
CAUTION: THIS SYMBOL IS USED THROUGHOUT THE USER GUIDE
WHEN THERE IS A RISK OF DAMAGING THE TOOL. MAKE SURE THAT
THESE CAUTIONS ARE READ AND UNDERSTOOD AT ALL TIMES.
WORK AREA
1. Keep the work area clean and well lit. Cluttered and dark areas invite
accidents.
2. Do not operate power tools in explosive atmospheres, such as in the
presence of flammable liquids, gases or dust. Power tools create sparks
which may ignite the dust or fumes.
3. Keep children and bystanders away while operating a power tool.
Distractions can cause you to lose control.
ELECTRICAL SAFETY
1. Power tool plugs must match the outlet. Never modify the plug in any way.
Do not use adaptor plugs with earthed (grounded) power tools. Unmodified
plugs and matching outlets will reduce the risk of electric shock.
2. Do not expose power tools to rain or wet conditions. Water entering a
power tool will increase the risk of electric shock.
3. Do not abuse the cable. Never use it for carrying, pulling or unplugging the
power tool. Keep the cable away from heat, oil, sharp edges or moving
parts. Damaged or entangled cables increase the risk of electric shock.
4. When operating a power tool outdoors, use an extension cable suitable for
outdoor use. Use of a cable suitable for outdoor use reduces the risk of
electric shock
5. If operating the power tool in a damp location is unavoidable, use a
residual current device (RCD) protected supply.
PERSONAL SAFETY
1. Stay alert, watch what you are doing and use common sense when operating a
power tool. Do not use a power tool while you are tired or under the
influence of drugs, alcohol or medication. A moment of inattention while
operating power tools may result in personal injury.
4
Parts & Service: 020 8988 7400 / E-mail: [email protected] or [email protected]
Page 5

2. Use safety equipment. Always wear eye protection. Safety equipment such
as dust mask, non-skid safety shoes, hard hat, or hearing protection used
for appropriate conditions will reduce personal injuries.
3. Avoid accidental starting. Make sure that the switch is in the off position
before plugging in. Carrying power tools with your finger on the switch or
plugging in power tools that have the switch on invites accidents.
4. Remove any wrench before turning the power tool on. A wrench left
attached to a rotating part may result in personal injury.
5. Do not overreach. Keep proper footing and balance at all times. This
enables better control of the power tool in unexpected situations.
6. Dress properly. Do not wear loose clothing or jewellery. Keep your hair,
clothing and gloves away from moving parts. Loose clothes, jewellery or
long hair can be caught in moving parts.
POWER TOOL USE AND CARE
1. Do not force the power tool. Use the correct accessories for your
application. The correct power tool will do the job better and safer at the
rate which it was designed for.
2. Do not use the power tool if the switch does not turn it on and off. Any
power tool that cannot be controlled with the switch is dangerous and
must be repaired.
3. Disconnect the plug from the power source before changing accessories,
or storing power tools. Such preventive safety measures reduce the risk of
starting the power tool accidentally.
4. Store idle tools out of the reach of children and do not allow persons
unfamiliar with the power tool or these instructions to operate it. Power tools
are dangerous in the hands of untrained users.
5. Maintain power tools. Check for misalignment or binding of moving parts,
breakage of parts and any other condition that may affect the power
tool’s operation. If damaged, have the power tool repaired before use.
Many accidents are caused by poorly maintained power tools.
6. Use the power tool and accessories in accordance with these instructions
and in the manner intended, taking into account the working conditions
and the work to be performed. Use of the power tool for operations
different from intended could result in a hazardous situation.
7. The performance of this tool may vary, depending upon variations in line
voltage. Extension cable usage may also affect performance.
SERVICE
1. Have your power tool serviced by qualified service personnel using only
identical replacement parts. This will ensure that the safety of the power
tool is maintained.
5
Parts & Service: 020 8988 7400 / E-mail: [email protected] or [email protected]
Page 6

SAW SAFETY WARNINGS
CUTTING PROCEDURES
a. Keep hands away from cutting area and the blade. If both hands are
holding the saw, they cannot be cut by the blade.
b. Do not reach underneath the workpiece. The guard cannot protect you
from the blade below the workpiece.
c. Adjust the cutting depth to the thickness of the workpiece. Less than a
full tooth of the blade teeth should be visible below the workpiece.
d. Never hold the piece being cut in your hands or across your leg. Secure
the workpiece to a stable platform. It is important to support the work
properly to minimise body exposure, blade binding, or loss of control.
e. Hold the power tool by insulated gripping surfaces, when performing an
operation where the cutting tool may contact hidden wiring or its own
cord. Contact with a “live” wire will also make exposed metal parts of
the power tool “live” and could give the operator an electric shock.
f. When ripping, always use a rip fence or straight edge guide. This
improves the accuracy of cut and reduces the chance of blade
binding.
g. Always use blades with the correct size and shape of arbor holes.
Blades that do not match the mounting hardware of the saw will run
eccentrically causing loss of control.
h. Never use damaged or incorrect blade washers or bolt. The blade
washers and bolt were specially designed for your saw, for optimum
performance and safety of operation.
KICKBACK CAUSES AND RELATED WARNINGS
• Kickback is a sudden reaction to a pinched, bound or misaligned saw
blade, causing an uncontrolled saw to lift up and out of the workpiece
toward the operator.
• When the blade is pinched or bound tightly by the kerf closing down,
the blade stalls and the motor reaction drives the unit rapidly back
toward the operator.
• If the blade becomes twisted or misaligned in the cut, the teeth at the
back edge of the blade can dig into the top surface of the wood
causing the blade to climb out of the kerf and jump back toward the
operator.
Kickback is the result of saw misuse and/or incorrect operating procedures or
conditions and can be avoided by taking proper precautions as given below.
a. Maintain a firm grip on the saw and position your arms to resist kickback
forces. Position your body to either side of the blade, but not in line with
6
Parts & Service: 020 8988 7400 / E-mail: [email protected] or [email protected]
Page 7

the blade. Kickback could cause the saw to jump backwards, but
kickback forces can be controlled by the operator if proper
precautions are taken.
b. When the blade is binding, or when interrupting a cut for any reason,
release the trigger and hold the saw motionless in the workpiece until
the blade comes to a complete stop. Never attempt to remove the saw
from the work or pull the saw backward while the blade is in motion or
kickback may occur. Investigate and take corrective actions to
eliminate the cause of the blade binding.
c. When restarting a saw in the workpiece, centre the saw blade in the kerf
so that the saw teeth are not engaged into the material. If a saw blade
binds, it may walk up, or kickback from the workpiece as the saw is
restarted.
d. Support large panels to minimise the risk of blade pinching and
kickback. Large panels tend to sag under their own weight. Supports
must be placed under the panel on both sides near the line of cut and
near the edge of the panel.
e. Do not use dull or damaged blades. Un-sharpened or improperly set
blades produce a narrow kerf causing excessive friction, blade binding
and kickback.
f. Blade depth and bevel adjusting locking levers must be tight and
secure before making the cut. If the blade adjustment shifts while
cutting, it may cause binding and kickback.
g. Use extra caution when sawing into existing walls or other blind areas.
The protruding blade may cut hidden objects that can cause kickback.
BLADE SAFETY WARNINGS
a. The maximum speed marked on the tool shall not exceed the
maximum speed marked on the blade.
b. Cracked saw blades must be scrapped (repairing is not permitted).
Composite (tipped) saw blades, where the tip dimension is reduced to
less than 1 mm, shall be taken out of service.
7
Parts & Service: 020 8988 7400 / E-mail: [email protected] or [email protected]
Page 8
SAFETY INSTRUCTIONS FOR PLUNGE TYPE SAWS
GUARD FUNCTION
a. Check the guard for proper closing before each use. Do not operate
the saw if the guard does not move freely and enclose the blade
instantly. Never clamp or tie the guard so that the blade is exposed. If
the saw is accidentally dropped, the guard may be bent. Check to
make sure that the guard moves freely and does not touch the blade
or any other part, in all angles and depths of cut.
b. Check the operation of the guard return spring. If the guard and the
spring are not operating properly, they must be serviced before use. The
guard may operate sluggishly due to damaged parts, gummy deposits,
or a build-up of debris.
c. Make sure that the base plate of the saw will not shift while performing a
“plunge cut”. The blade shifting sideways will cause binding and likely
kick back.
d. Always observe that the guard is covering the blade before placing the
saw down on bench or floor. An unprotected, coasting blade will cause
the saw to walk backwards, cutting whatever is in its path. Be aware of
the time it takes for the blade to stop after the switch is released.
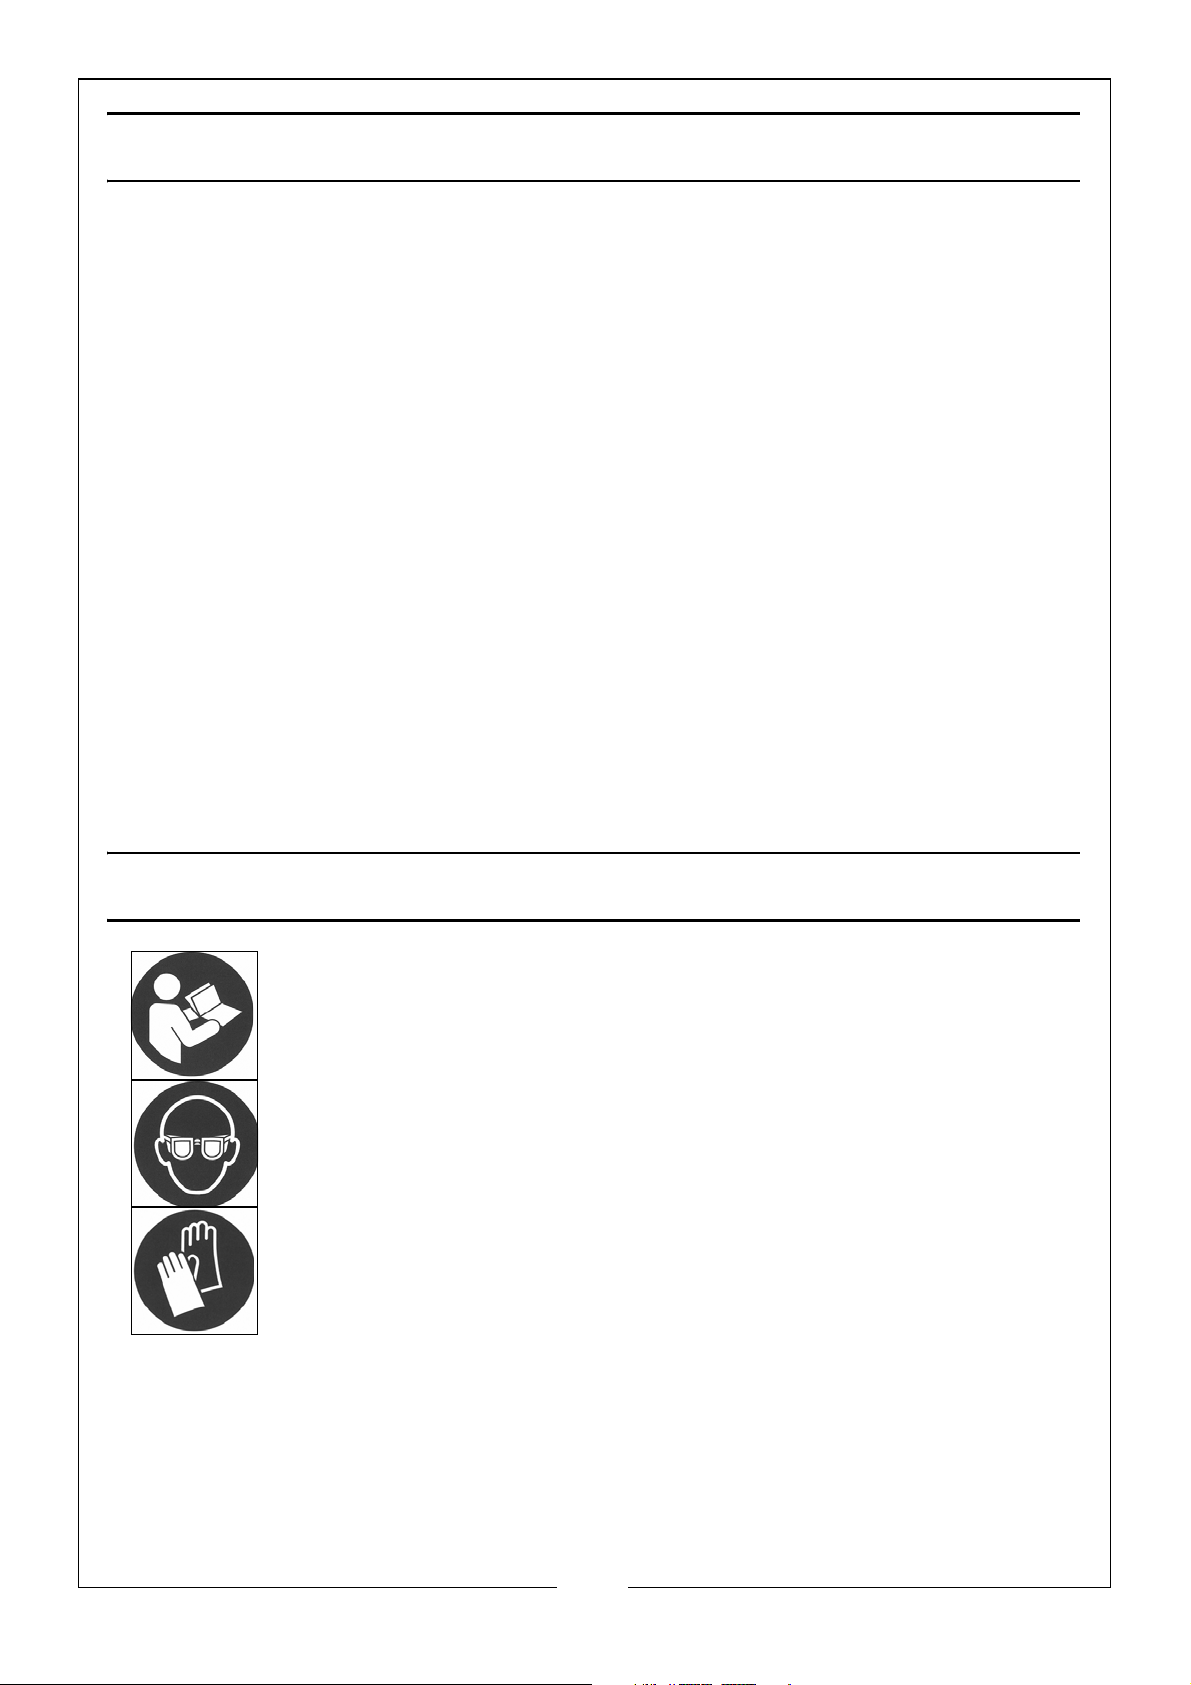
EXPLANATION OF SYMBOLS & PICTOGRAMS
Read Instruction Manual Before Use
Wear Eye Protection
Wear Gloves
8
Parts & Service: 020 8988 7400 / E-mail: [email protected] or [email protected]
Page 9
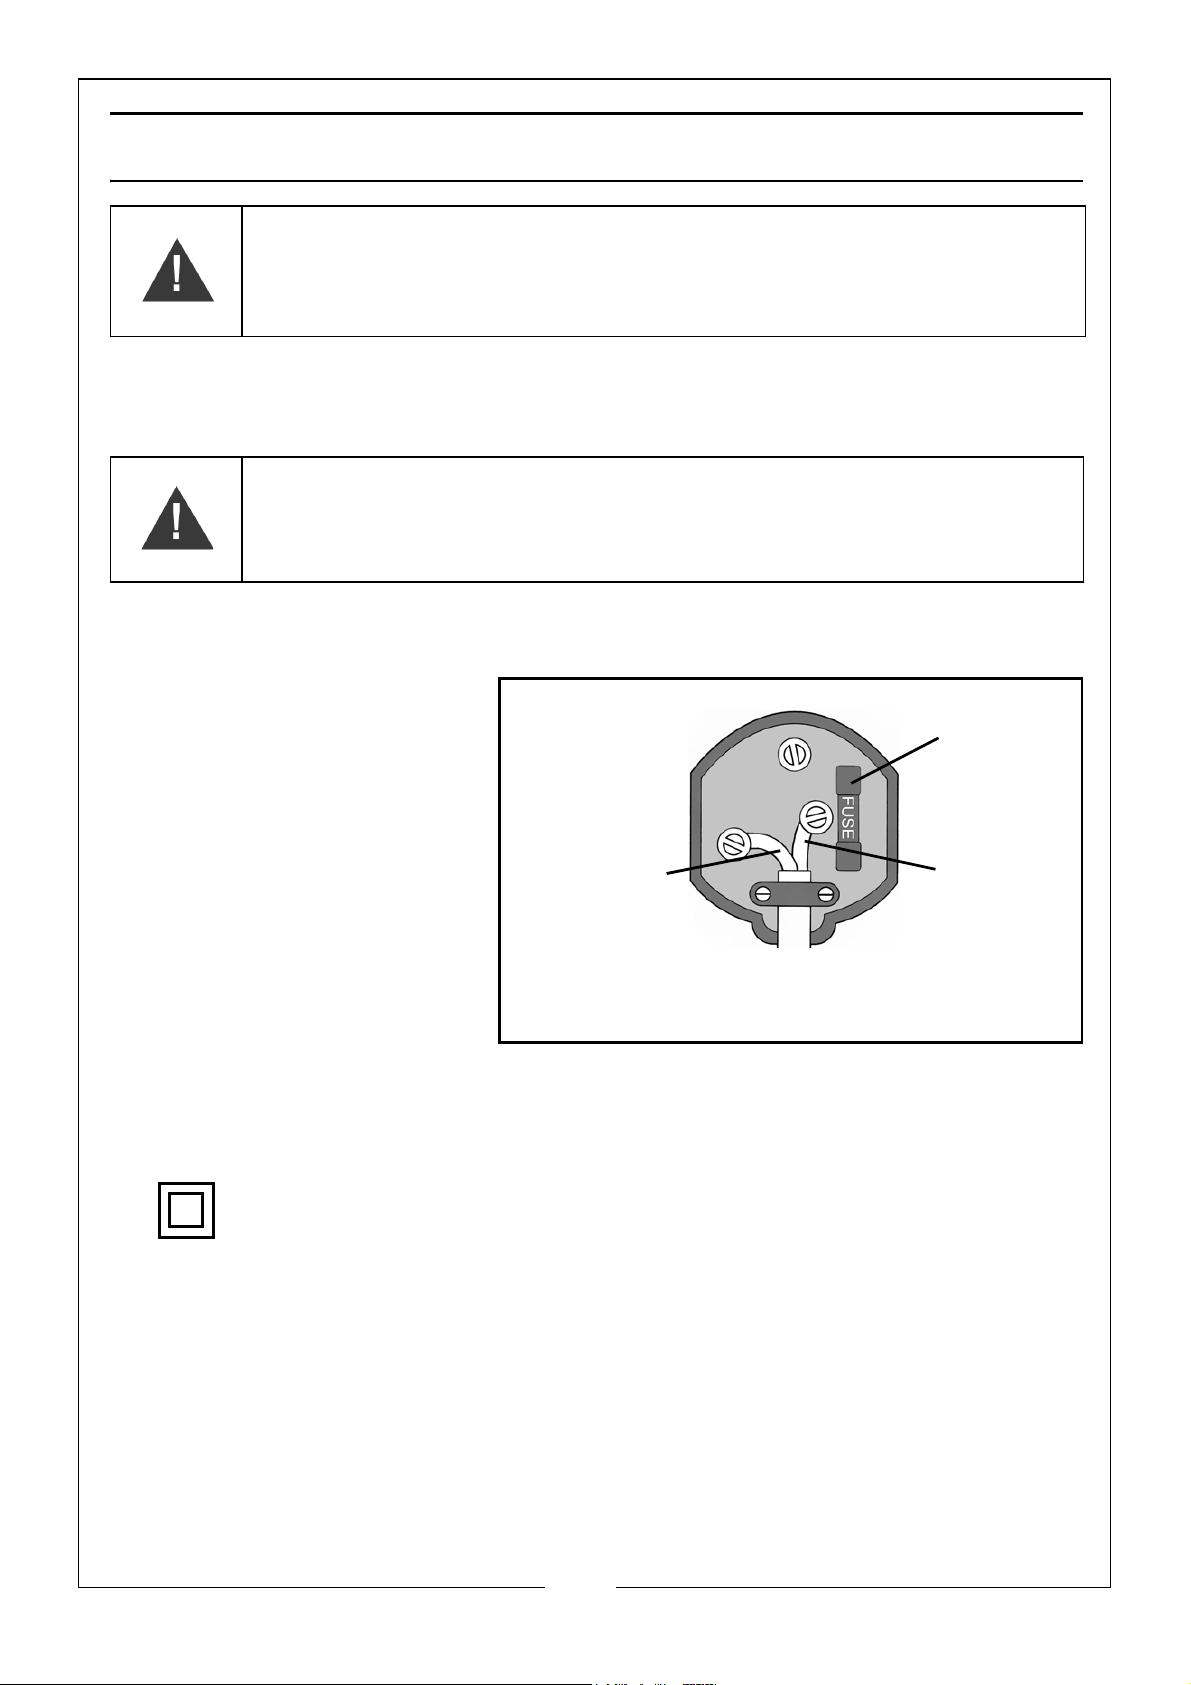
ELECTRICAL CONNECTIONS
Plug must be BS1363/A approved.
Always fit
make sure that the outer sheath of
Neutral
(Blue)
Live
(Brown)
a 5 Amp
the cable is firmly held by the clamp
fuse.
WARNING: READ THESE ELECTRICAL SAFETY INSTRUCTIONS FULLY
BEFORE CONNECTING THE PRODUCT TO THE MAINS SUPPLY.
This product is provided with a standard 13 amp, 230 volt (50Hz), BS 1363 plug,
for connection to a standard, domestic electrical supply. Should the plug
need changing, make sure that a plug of identical specification is used.
WARNING: THE WIRES IN THE CABLE ARE COLOURED AS FOLLOWS:
BLUE = NEUTRAL BROWN = LIVE
If the colours of the wires in the power cable do not correspond with the
markings on the terminals of your plug, proceed as follows.
• Connect the blue wire
to the terminal which
is marked N.
• Connect the brown
wire to the terminal
which is marked L.
We recommend that this plunge saw is connected to the mains supply via a
Residual Current Device (RCD)
If in doubt, consult a qualified electrician. DO NOT attempt any repairs yourself
This symbol indicates that this is a Class II product, and does not
require an earth connection.
CABLE EXTENSION
Always use an approved cable extension suitable for the power rating of this
tool (see specifications), the conductor size must be at least the same size as
that on the machine, or larger. When using a cable reel, always unwind the
cable completely.
Parts & Service: 020 8988 7400 / E-mail: [email protected] or [email protected]
9
Page 10
ADJUSTMENT
WARNING: ALWAYS DISCONNECT THE SAW FROM THE POWER SUPPLY
BEFORE MAKING ADJUSTMENTS.
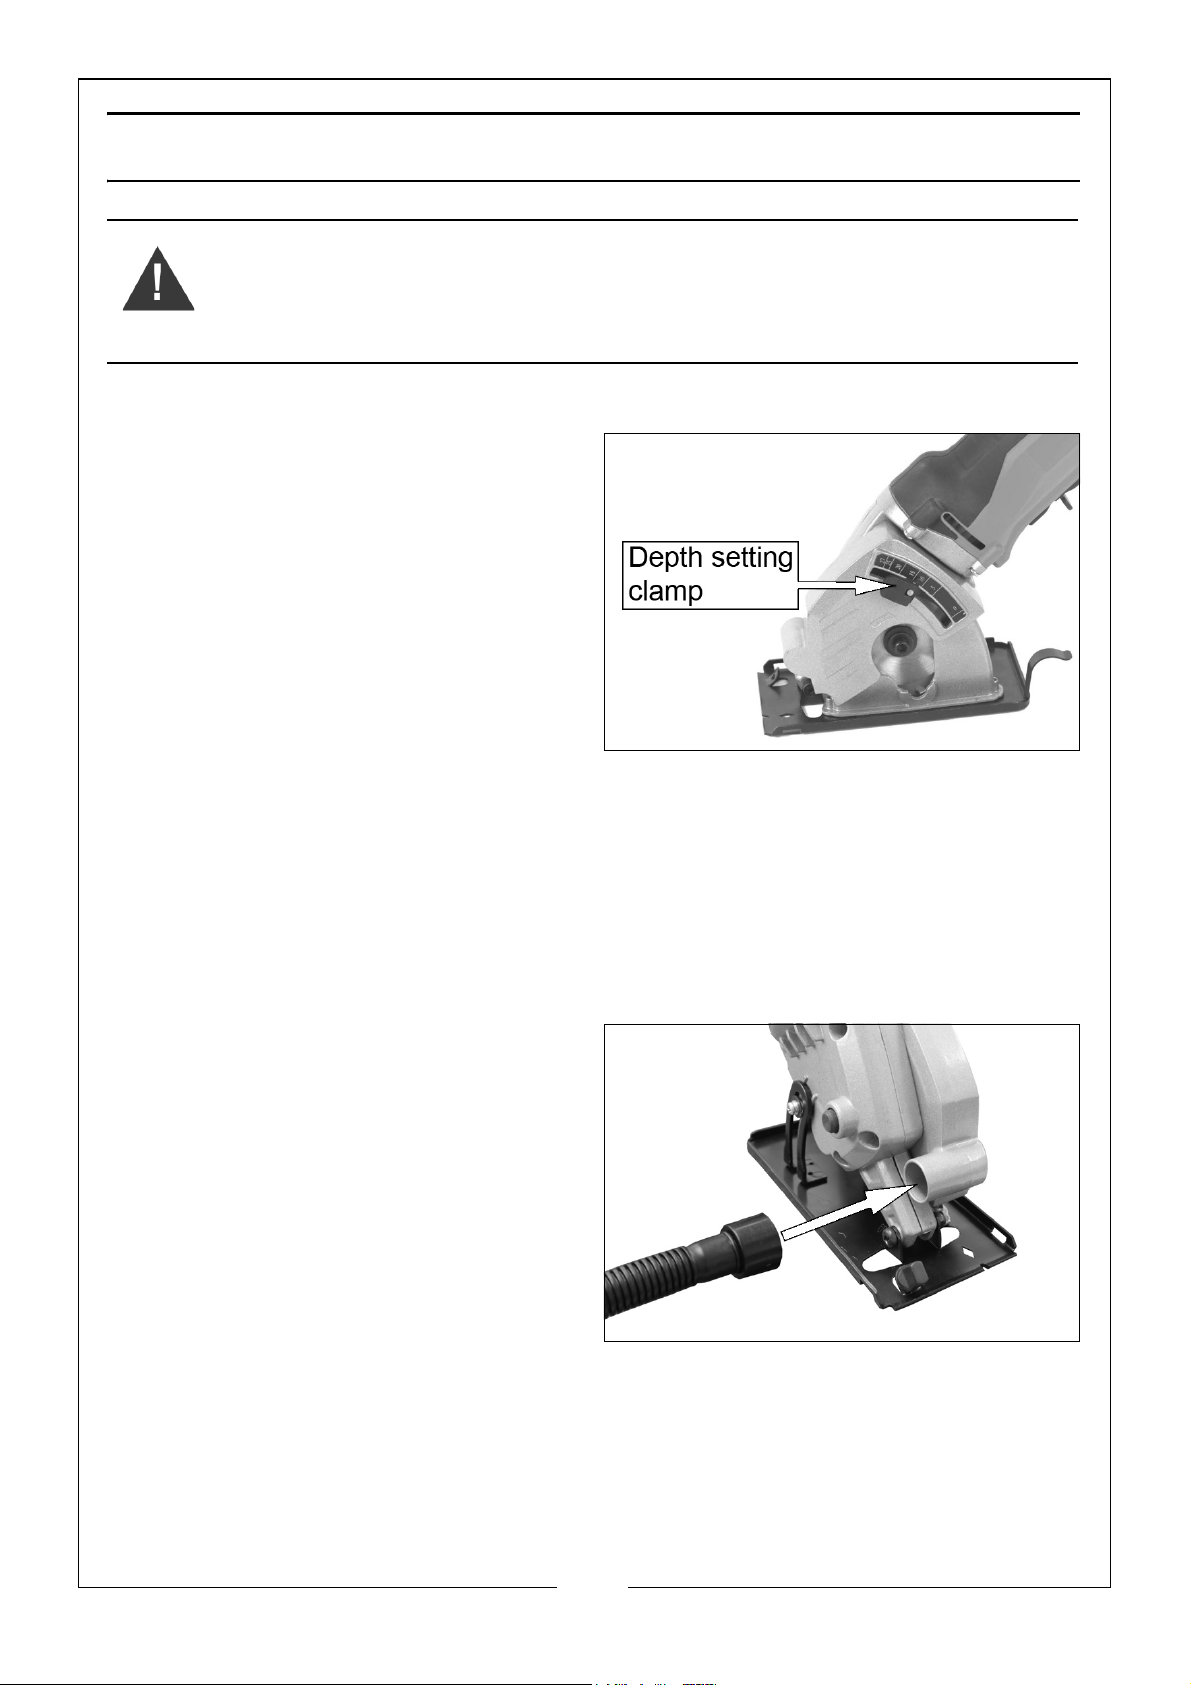
SETTING THE CUTTING DEPTH
1. Unlock the depth setting clamp.
2. Move the indicator to the desired
cutting depth on the scale.
3. Lock the depth setting clamp
again.
NOTE: We recommend that the
cutting depth is set
approximately 2 mm greater
than the material thickness.
This could help to achieve a
clean cut.
DUST EXTRACTION
The machine can generate a large amount of dust during cutting. When
equipped with the supplied dust extractor adapter, the chips and cutting
debris can be removed away from the working area.
1. Connect the small end of the dust
pipe to the dust extraction nozzle.
2. Connect the other end of the dust
pipe to your dust extractor.
• Switch on the dust extractor
while cutting.
NOTE: See your local Clarke dealer
for our latest range of dust
extractors.
10
Parts & Service: 020 8988 7400 / E-mail: [email protected] or [email protected]
Page 11
CHANGING THE SAW BLADE
WARNING: ALWAYS DISCONNECT THE SAW FROM THE POWER SUPPLY
BEFORE MAKING ADJUSTMENTS.
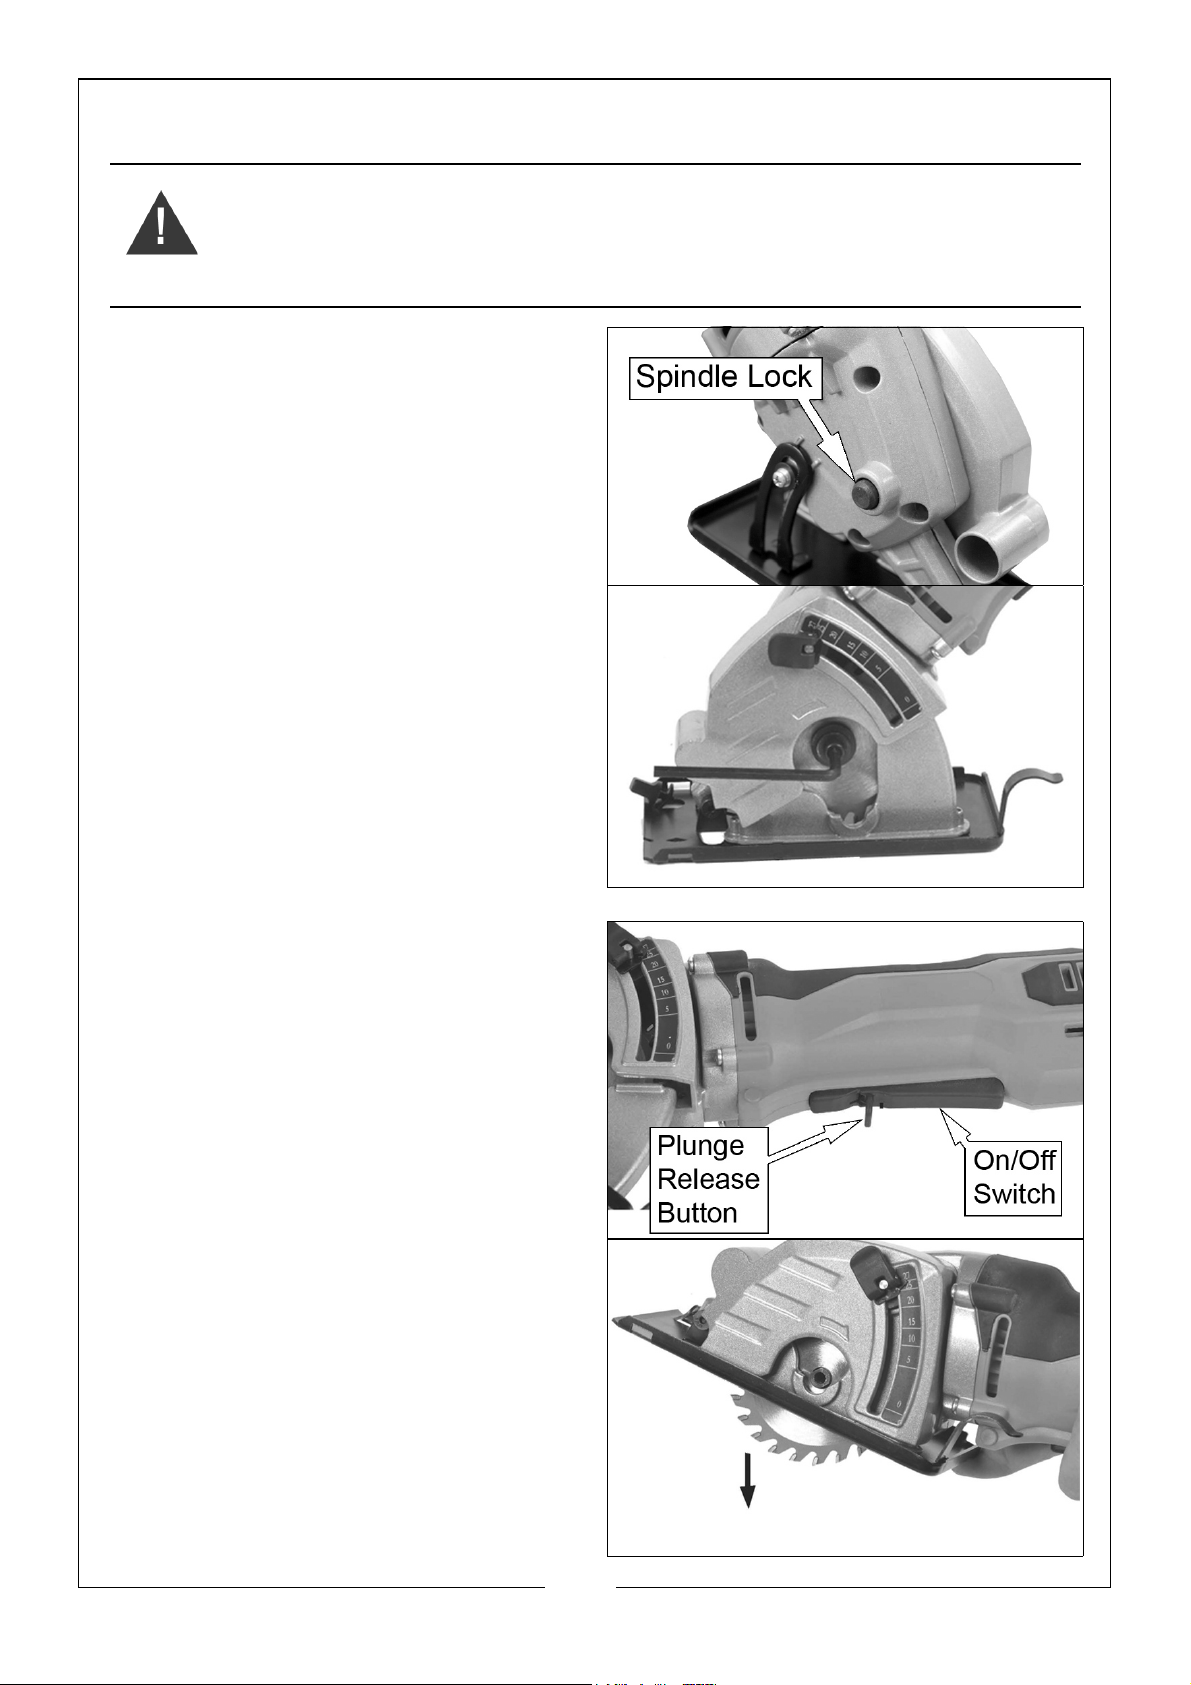
1. Press and hold the spindle lock
button.
2. Loosen the clamping screw using
a hex key.
NOTE: Turning the screw clockwise
will loosen it, anti-clockwise
will tighten it.
3. Remove the clamping screw,
washer and flange.
4. Set the cutting depth to
maximum.
5. Press the plunge release button
and lift up the base plate.
6. Lift the blade up off the spindle
and pull it from the saw.
7. Install the new saw blade in
reverse order.
• The arrow on the saw blade
must match the arrow showing
the direction of rotation on the
guard.
11
Parts & Service: 020 8988 7400 / E-mail: [email protected] or [email protected]
Page 12
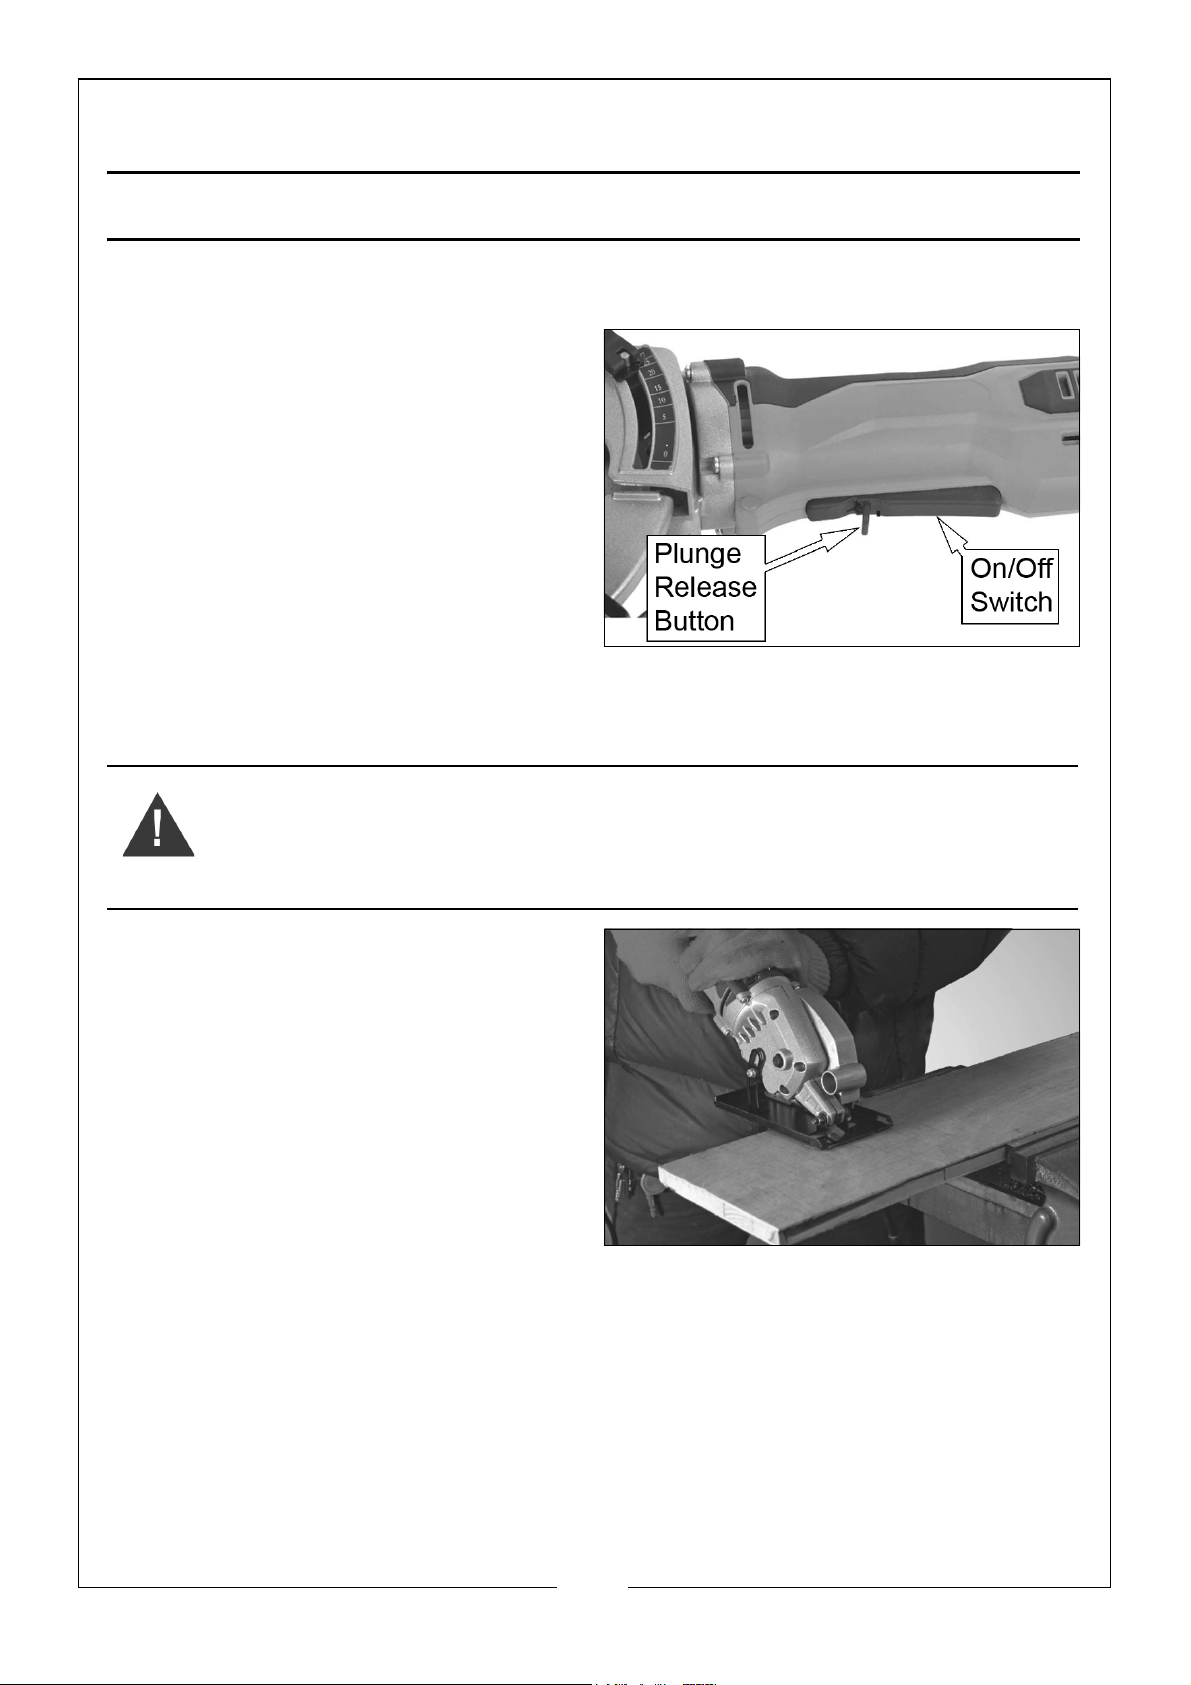
8. Press the spindle lock button and tighten the clamping screw firmly.
OPERATION
SWITCHING ON/OFF
The On/Off switch is equipped with a
Plunge Release Button which is
designed to prevent accidents.
TO SWITCH ON:
Push the Plunge Release Button
forward and then press the On/Off
switch.
TO SWITCH OFF:
Release the On/Off switch.
CUTTING WITH SAW
WARNING: ALWAYS CUT IN A FORWARD DIRECTION. NEVER DRAW THE
SAW BACKWARDS WHILE CUTTING.
1. Check and ensure the protective
cover can work properly.
2. Check and ensure the blade is
sharp and suitable for the material
to be cut.
3. Make any adjustments required to
the depth of cut.
4. Secure the workpiece firmly on a
flat surface.
5. Plug into main supply.
6. Place the base plate on workpiece. Align the indicator line on base plate
with the cutting line marked on workpiece.
7. Grasp the tool firmly. Switch on and wait for the blade to reach full speed.
8. Press the plunge release button and plunge the blade into workpiece
slowly. Then push the tool forwards along the cutting line.
9. Once the cut has been finished, lift the tool from the work surface before
switching off.
12
Parts & Service: 020 8988 7400 / E-mail: [email protected] or [email protected]
Page 13
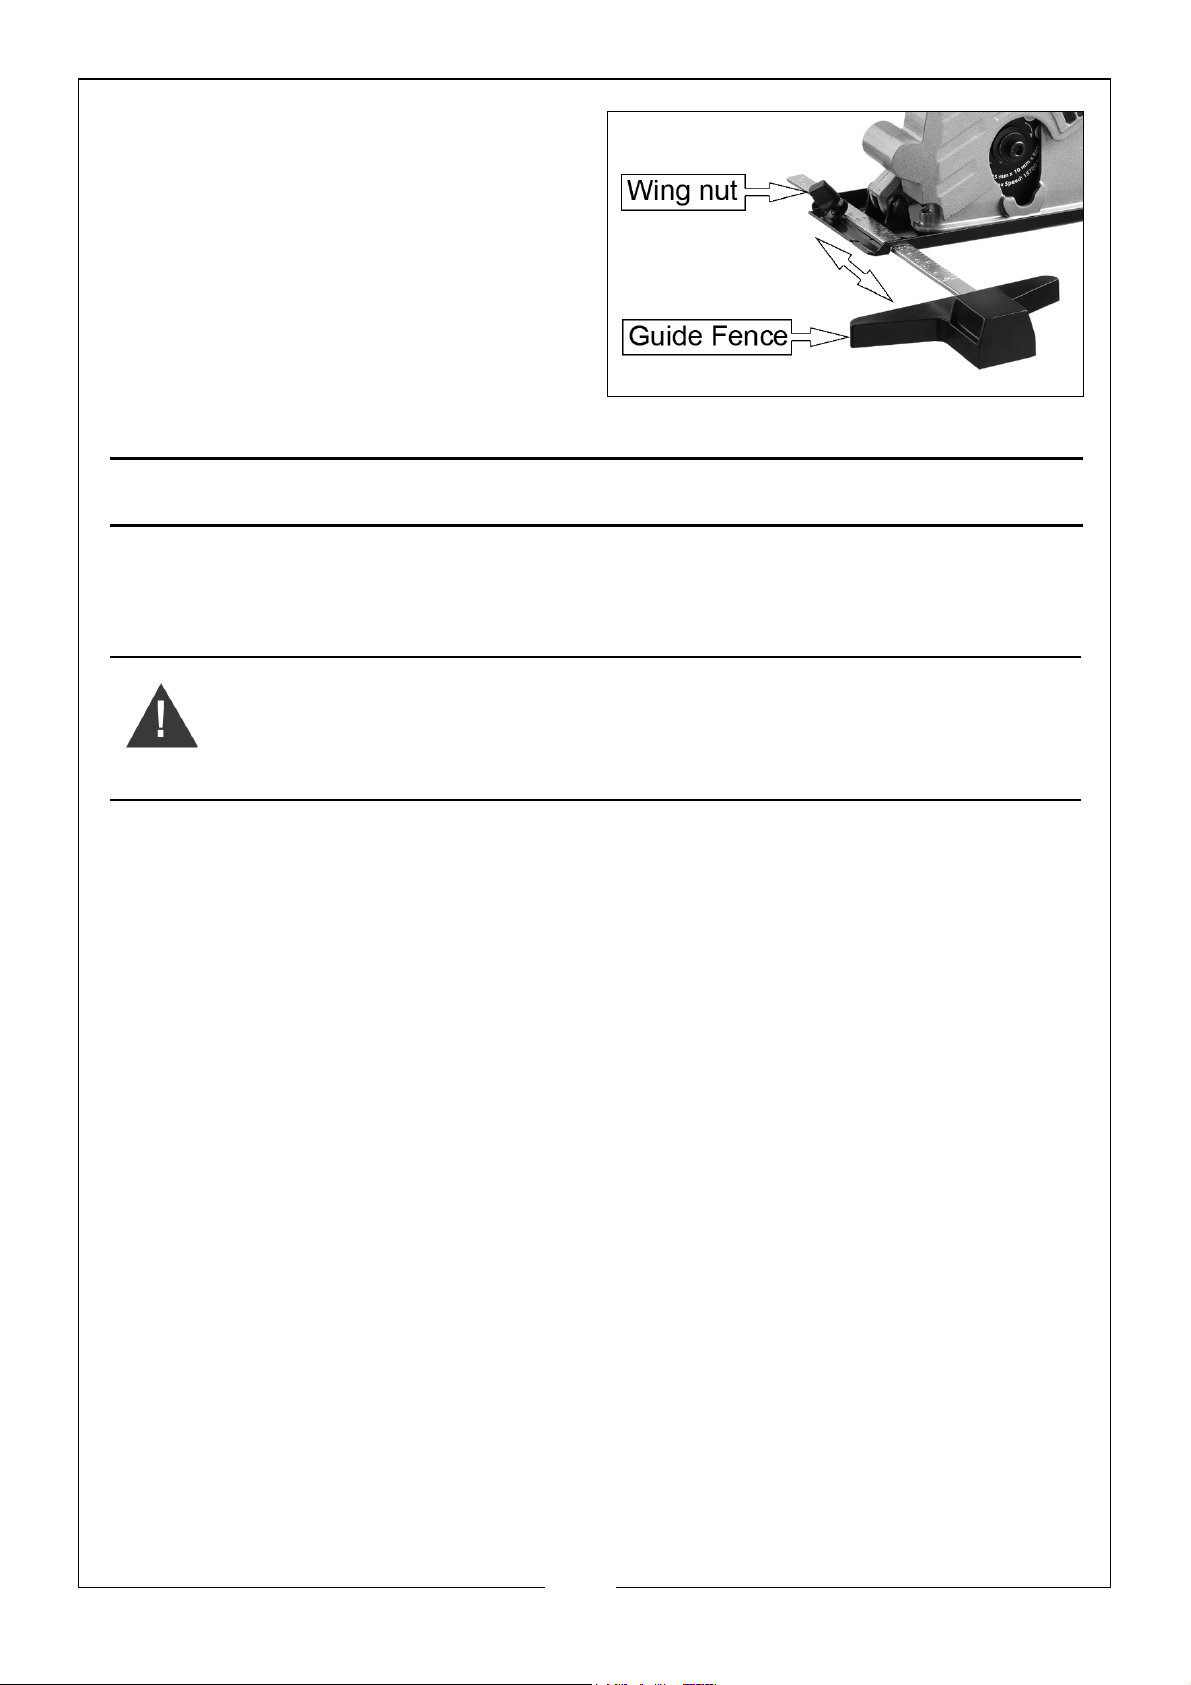
SETTING THE GUIDE FENCE
1. Release the wing nut on the base
plate
2. Insert the guide fence into the
slot.
3. Retighten the wing nut.
CUTTING SHEET METAL/CERAMICS
We recommend you learn to use the tool by cutting wood before attempting
to cut anything tougher. When cutting tougher material, such as metals, more
force is required to hold the tool.
WARNING: NEVER CUT MATERIALS THAT PRODUCE TOXIC DUST OR FUMES
SUCH AS PTFE AND ASBESTOS.
CUTTING SHEET METAL
1. Fit the HSS blade.
• Remove burrs and rust before cutting to avoid impeding the feed across
the material.
• Apply thick beeswax (furniture polish) to the base plate which can make
metal cutting easier.
• Every 2 minutes of metal cutting should be followed by a rest of at least 3
minutes.
CUTTING CERAMIC TILES
1. Fit the diamond blade
• Always connect the tool to a dust extractor as the dust can be
hazardous to the operator and prevent the guard operating properly.
13
Parts & Service: 020 8988 7400 / E-mail: [email protected] or [email protected]
Page 14
CLEANING AND MAINTENANCE
WARNING: DISCONNECT THE PLUNGE SAW FROM THE MAINS SUPPLY
BEFORE CLEANING.
WARNING: WEAR PROTECTIVE GLOVES WHEN HANDLING THE SAW
BLADE.
CLEANING
• Keep all safety devices, air vents and the motor housing free of dirt and
dust as far as possible. Wipe the equipment with a clean cloth or blow it
with compressed air at low pressure.
• We recommend that you clean the saw immediately each time you
have finished using it.
• Clean the equipment regularly with a moist cloth and some soft soap.
Do not use cleaning agents or solvents; these could attack the plastic
parts of the saw
MAINTENANCE
There are no parts inside the saw which require additional maintenance.
14
Parts & Service: 020 8988 7400 / E-mail: [email protected] or [email protected]
Page 15
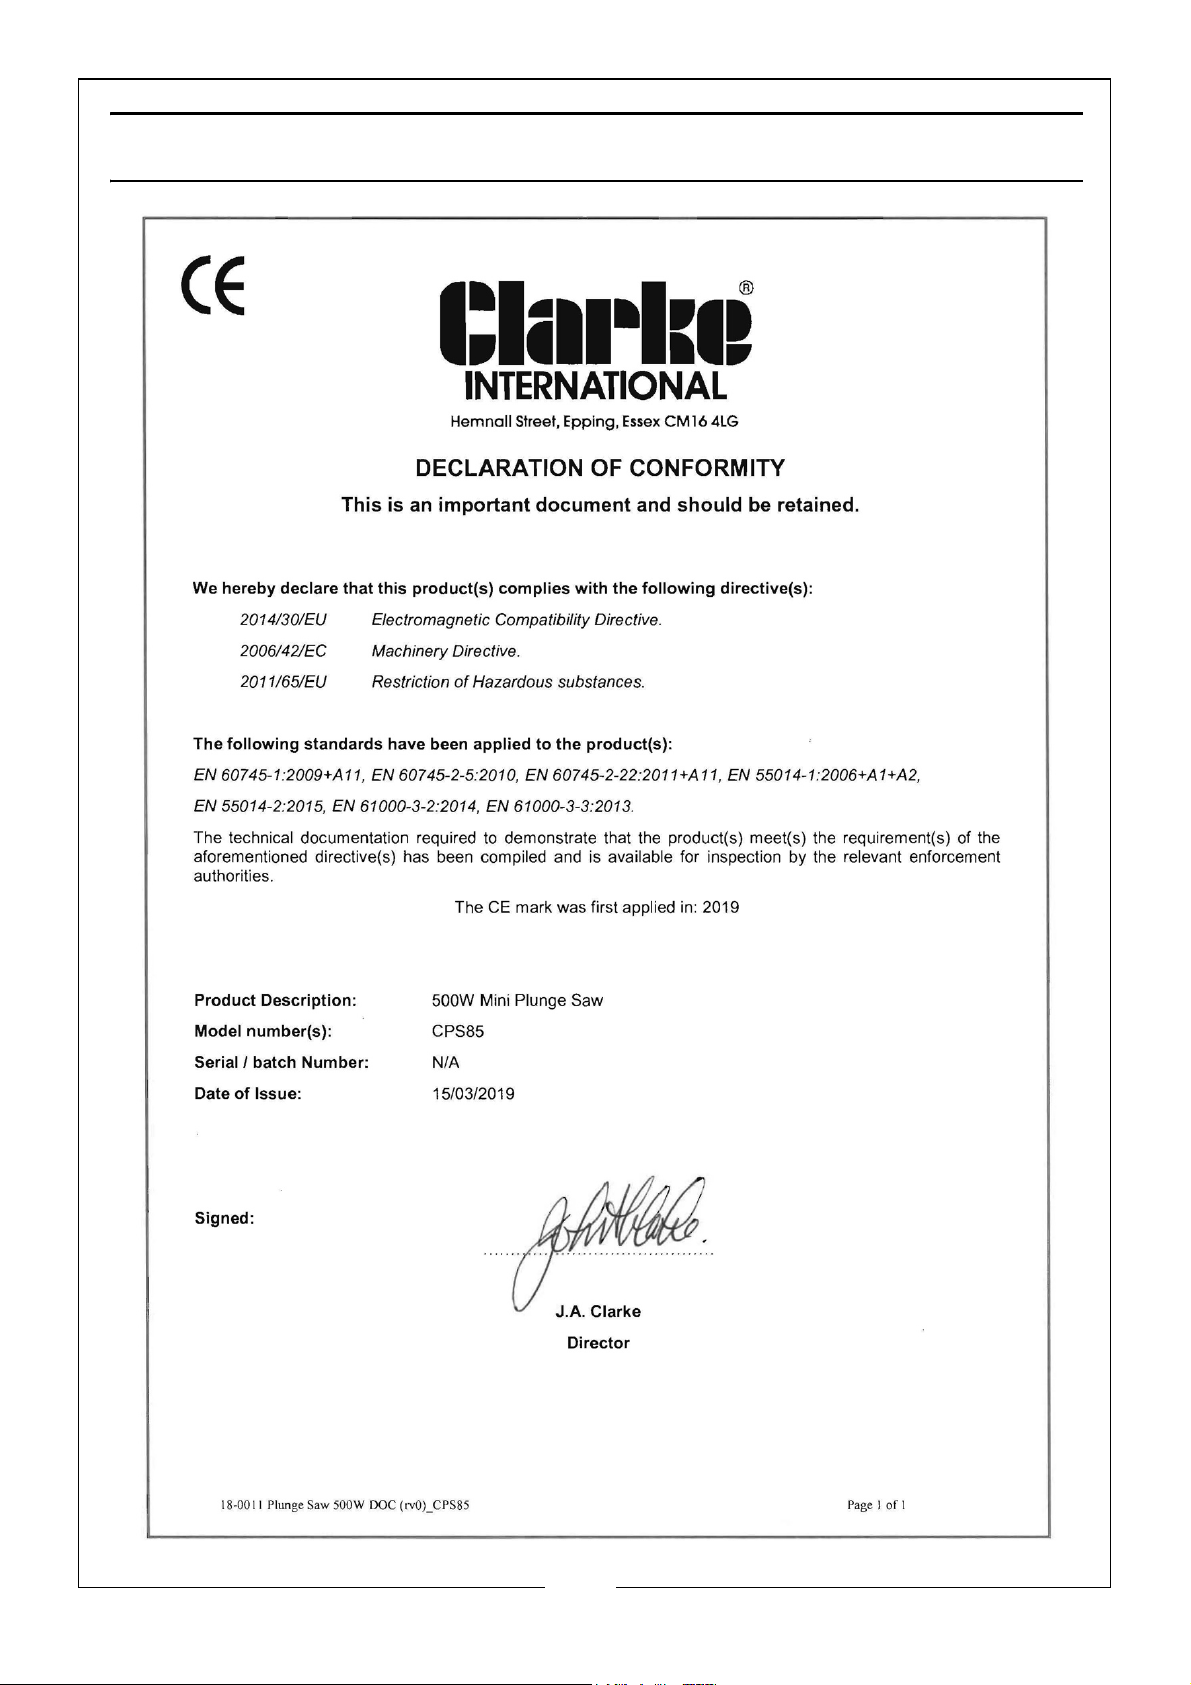
DECLARATION OF CONFORMITY
15
Parts & Service: 020 8988 7400 / E-mail: [email protected] or [email protected]
Page 16

 Loading...