

Page 1
CC1800P
Part Number: 4501590
Assembly Instructions
8
Contents
2
6
5
4
1
3
2
7
9
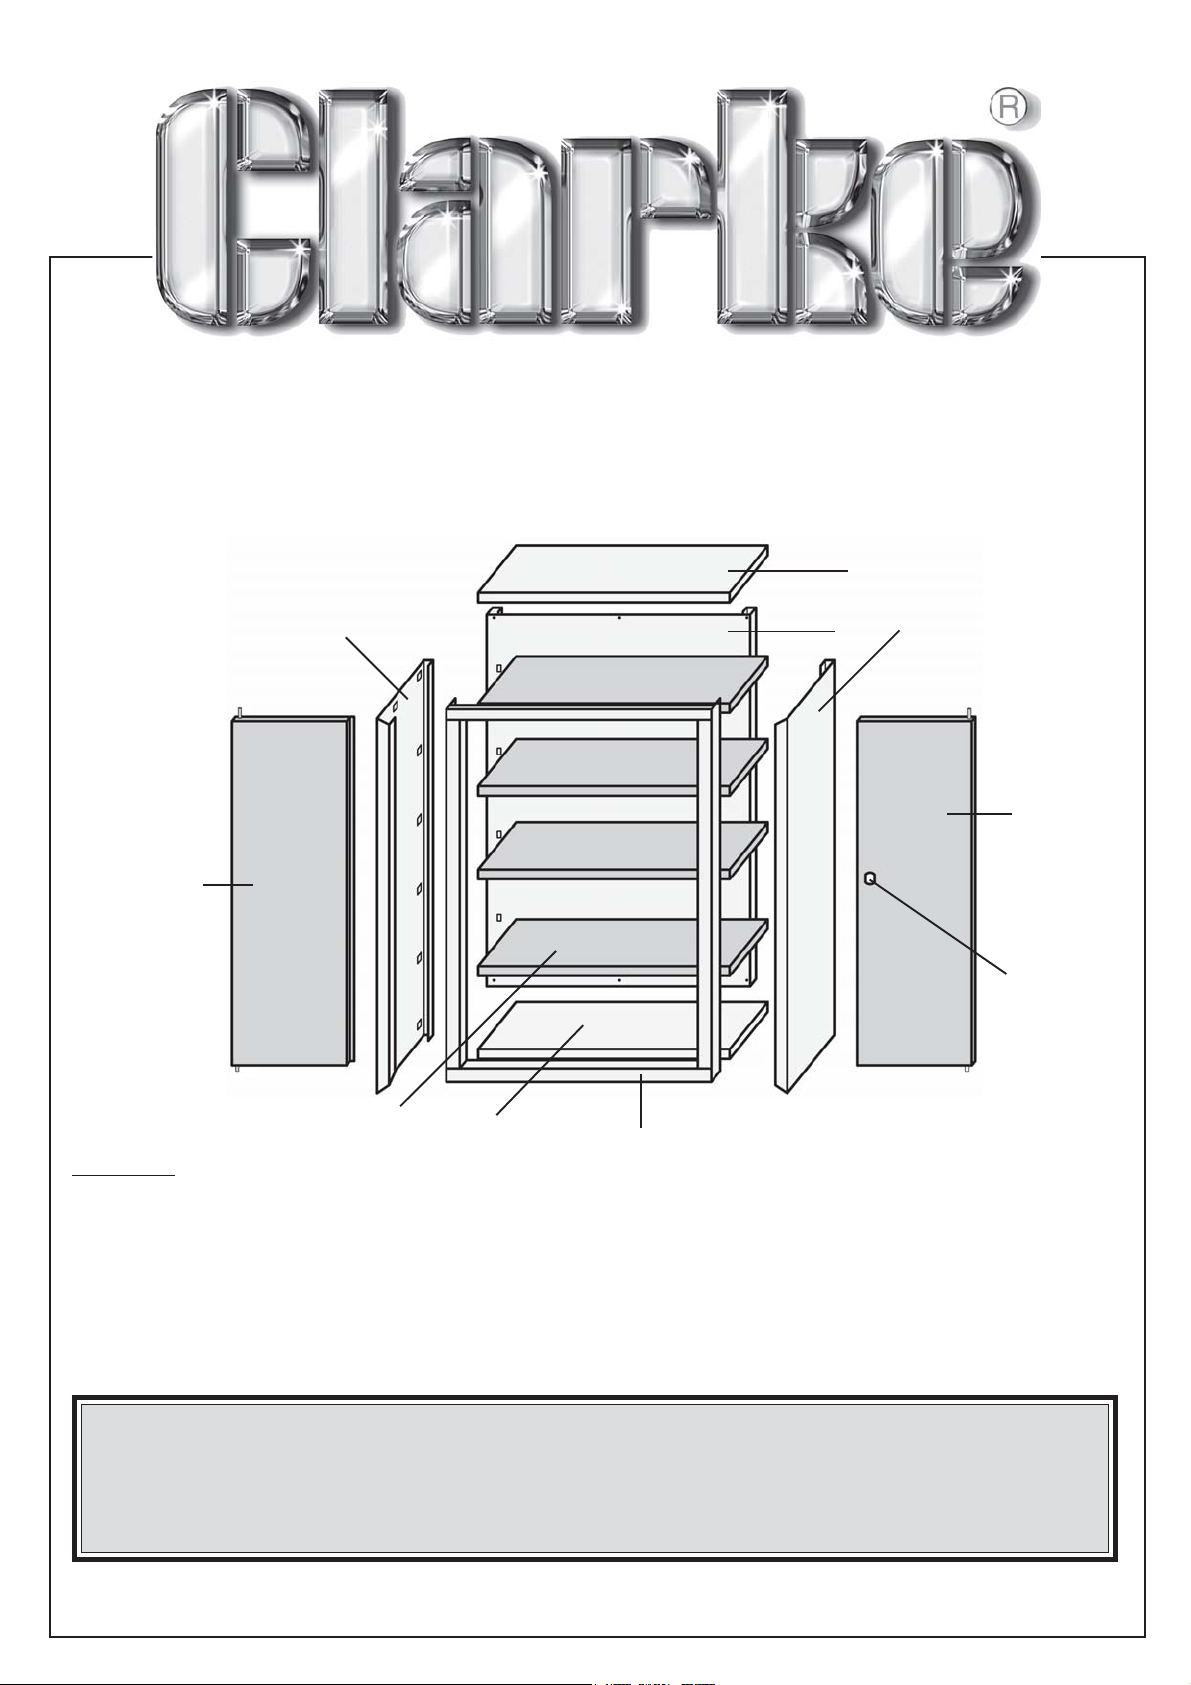
1. Frame x 1
2. Side Panel x 2
3. Back Panel x 1
4. Bottom Panel x 1
5. Shelf x 4
6. L/H Door x 1
PARTS: [email protected]
SERVICE: [email protected]
Please note that the details and specifications contained herein are correct at the time of going to print.
However CLARKE International reserve the right to change specifications at any time without prior notice.
7. R/H Door x 1
8. Top Panel x1
9. Lock x 1
Polythene bag containing nuts,
screws and washers etc.
PARTS & SERVICE TEL: 020 8988 7400
or e-mail as follows:
0205
Page 2
SAFETY PRECAUTIONS
ALWAYS seek assistance when lifting heavy items.
ALWAYS keep children and animals away from tools and work area.
ALWAYS keep work area clean and free from oil spills etc.
ASSEMBLY
Before attempting to assemble the cabinet, carefully unpack/unwrap and lay out all components,
check off against the list of contents on front page, notify your Clarke dealer ASAP of any shortages
and/or damage.
Tools required:
Cordless drill and drill bits (4mm and 5mm). Due to manufacturing tolerances, some holes may
not line up accurately and may require opening up in order to fit securing screws.
1 x Medium flat bladed screwdriver.
1 x 8mm ring or combination spanner.
Assemble as follows:
Note: items in brackets refer to the contents list on front page.
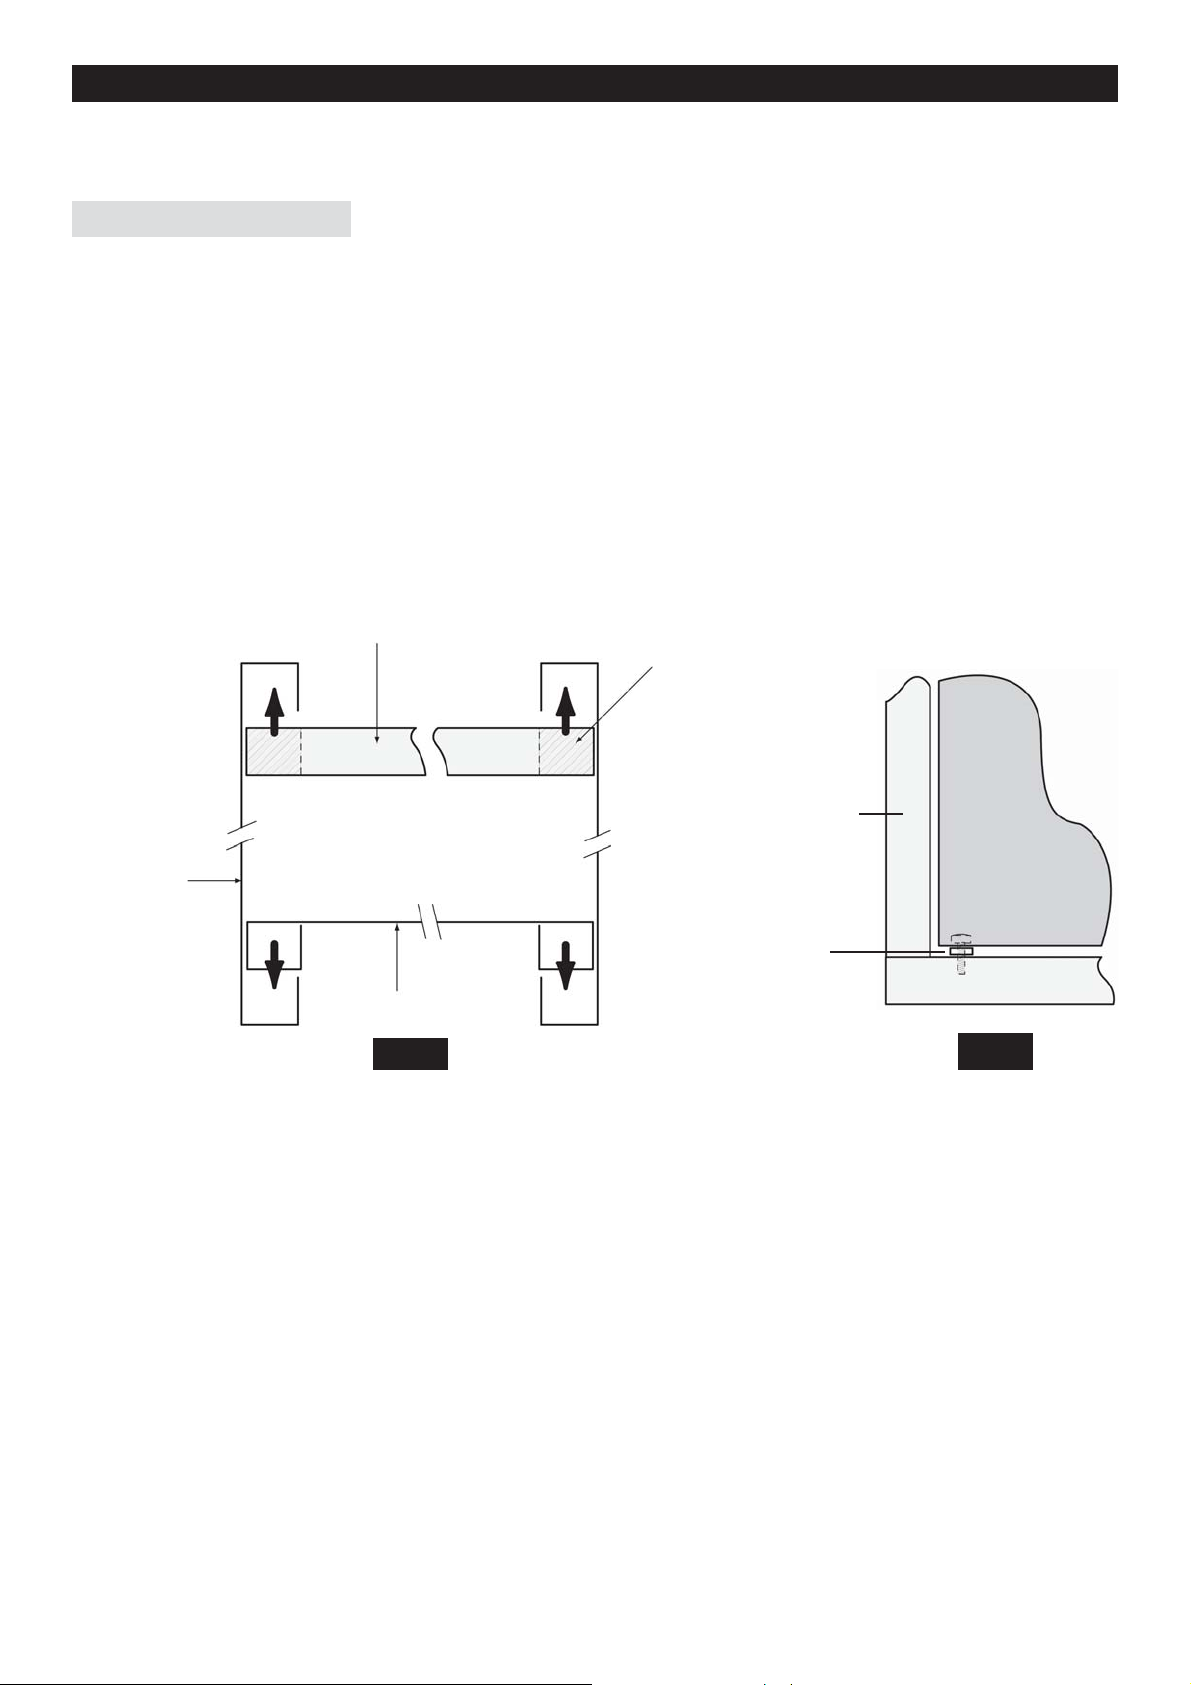
When assembling the back panel to the side panels, ensure the shelf hooks are all facing upwards.
1. Insert the frame (1) into the side panels (2) Fig. 1.
2. Insert the back panel (3) into the side panels Fig. 1.
Frame
Shaded Area
(Frame Uprights)
Frame
Viewed From Above
Side Panel
Spacer
Back Panel
Fig. 1 Fig. 2
2. Fit the bottom panel (4) ensuring it sits on all four hanging brackets in the side panels.
3. Fit the top panel (8) by tucking the front edge underneath the lip on the top of the frame, again
ensure the panel sits on all four hanging brackets. Secure in place with four screws, nuts and
lock washers, DO NOT tighten until all four screws are in place.
4. Carefully lay the assembly on its side, ensuring there is some form of protection on the floor to
prevent damage to the cabinet. Secure the bottom panel with screws, nuts and lock washers.
5. Stand the cabinet upright again, preferably where it is intended to be located.
6. Fit the shelves (5), starting with the lowest, again ensure they sit on all the hanging brackets in
the side and back panels.
7. Fit the L/H door (6) by locating the top hinge pin in the hole in the top L/H underside of the
frame, secure at the bottom using one of the large hinge screws and spacing washer. The
spacing washer to be fitted between the frame and the bottom of the door Fig. 2. Do NOT fully
tighten the screw.
8. Fit the right hand door in the same way.
9. Fit the door lock as follows, Ensure the key remains in the lock until lock is fully fitted.
• Remove the locking lever securing nut, locking lever and the lock retaining nut.
• Insert the lock into the hole in the door and secure with the retaining nut.
• Turn the key fully clockwise, fit the lever in the locked position and secure with securing nut.
Door
Your cabinet is now ready for use.
 Loading...