

Page 1
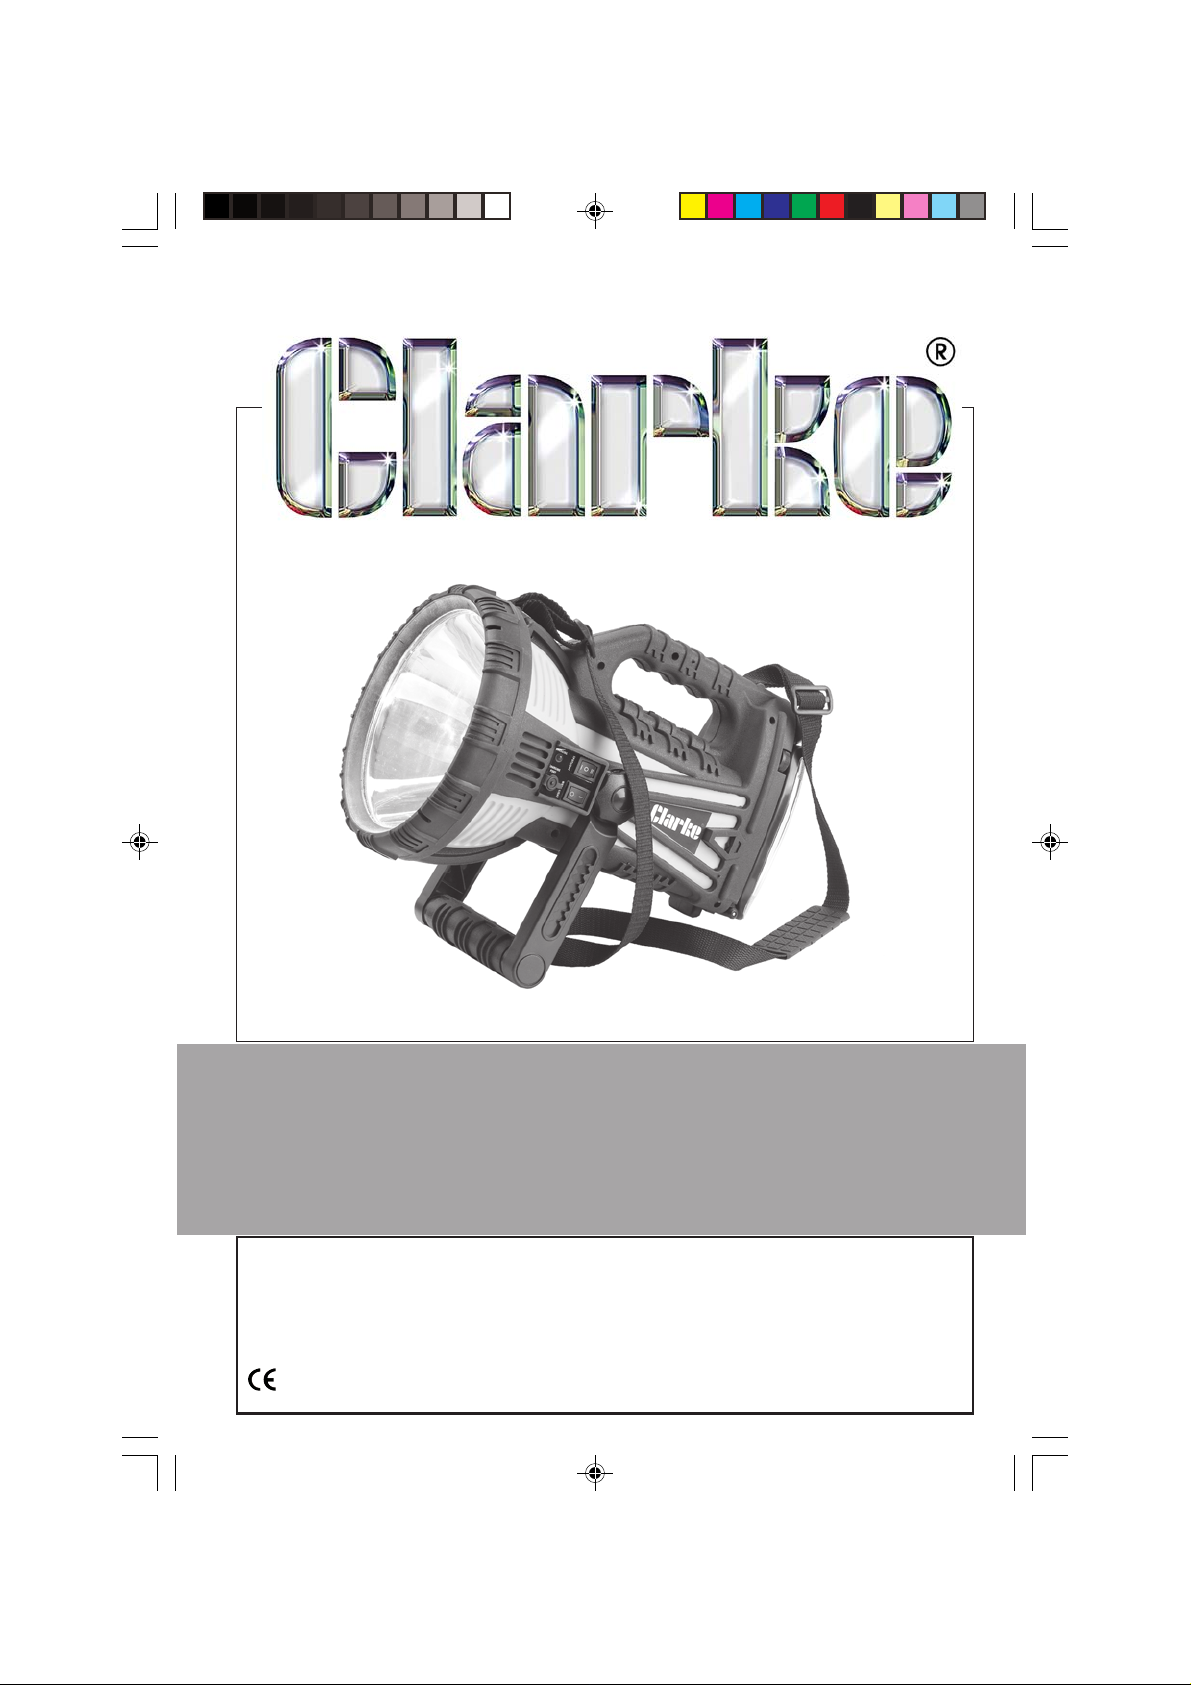
RECHARGEABLE SPOTLIGHT
MODEL: RWL10
Part No: 4002822
INSTRUCTION MANUAL
LS0609
Page 2
INTRODUCTION
Thank you for purchasing this CLARKE product
Before attempting to use the product, it is essential that you read this manual
thoroughly and carefully follow all instructions given. In doing so you will ensure the
safety of yourself and that of others around you, and you can also look forward to the
product giving you long and satisfactory service.
GUARANTEE
This CLARKE product is guaranteed against faulty manufacture for a period of 12
months from the date of purchase. Please keep your receipt as proof of purchase.
This guarantee is invalid if the product is found to have been abused or tampered with
in any way, or not used for the purpose for which it was intended.
Faulty goods should be returned to their place of purchase, no product can be
returned to us without prior permission.
This guarantee does not effect your statutory rights.
ENVIRONMENTAL PROTECTION
Do not dispose of this product with general household waste. It must be
disposed of according to the laws governing Waste Electrical and Electronic
equipment, at a recognised disposal facility.
2
Page 3
SAFETY INSTRUCTIONS
GENERAL SAFETY
Ensure the spotlight is correctly charged
before initial use.
When fully charged and on full beam,
the spotlight must not be used for more
than 15 minutes of continuous use. To do
so may damage the lamp.
DO NOT cover or block the lens during
use.
DO NOT turn the spotlight on when it is
being re-charged.
DO NOT shine directly into your, other
persons or animals eyes.
DO NOT stand the spotlight near any
surface or item that may be adversely
effected by the heat emitted from the
lens.
DO NOT allow children to use the
spotlight.
DO NOT handle or move the spotlight
whilst it is being charged.
DO NOT use the spotlight if you suspect
that the battery or the spotlight casing is
damaged.
Inspect the charger plug, cable and
connector for wear and damage to
ensure items are safe before connecting
to the mains power supply. If worn or
damaged DO NOT use.
Check that the voltage marked on the
charger plug is the same as the power
supply to be used
BATTERY SAFETY
BE AWARE, LEAD-ACID BATTERIES MAYBE
DANGEROUS IF NOT HANDLED WITH CARE
AND ACCORDING TO THESE
INSTRUCTIONS.
DO NOT disassemble the battery for any
reason.
DO NOT smoke or allow a spark or flame
in the vicinity of the battery.
WARNING! DO NOT allow metal tools to
touch both battery terminals
simultaneously. Arcing or short circuit will
result.
DO NOT allow battery wires to touch
each other or to make contact with any
other metallic part.
DO NOT cross-connect wires to the
battery as this will damage the unit.
Ensure positive (+) (RED) is to positive and
negative (-) BLACK is to negative.
DO NOT leave battery in a discharged
state, recharge battery immediately.
ELECTRICAL SAFETY
USE ONLY THE SUPPLIED CHARGER PLUG
FOR CONNECTING SPOTLIGHT TO THE
POWER SUPPLY.
ONLY USE THE SUPPLIED ADAPTER FOR
CONNECTING TO A VEHICLE 12V SOCKET.
WARNING! It is the user’s responsibility to
read, understand and comply with the
following electrical instructions:
You must also read and understand the
following instructions concerning
electrical safety.
DO NOT pull the charger plug from the
mains socket by the lead.
DO NOT use any other type of charger
with this product.
DO NOT get the charger wet, or use in
wet, damp conditions (for indoor use
only).
3
Page 4
CONTROL
3
4
6
5
15
7
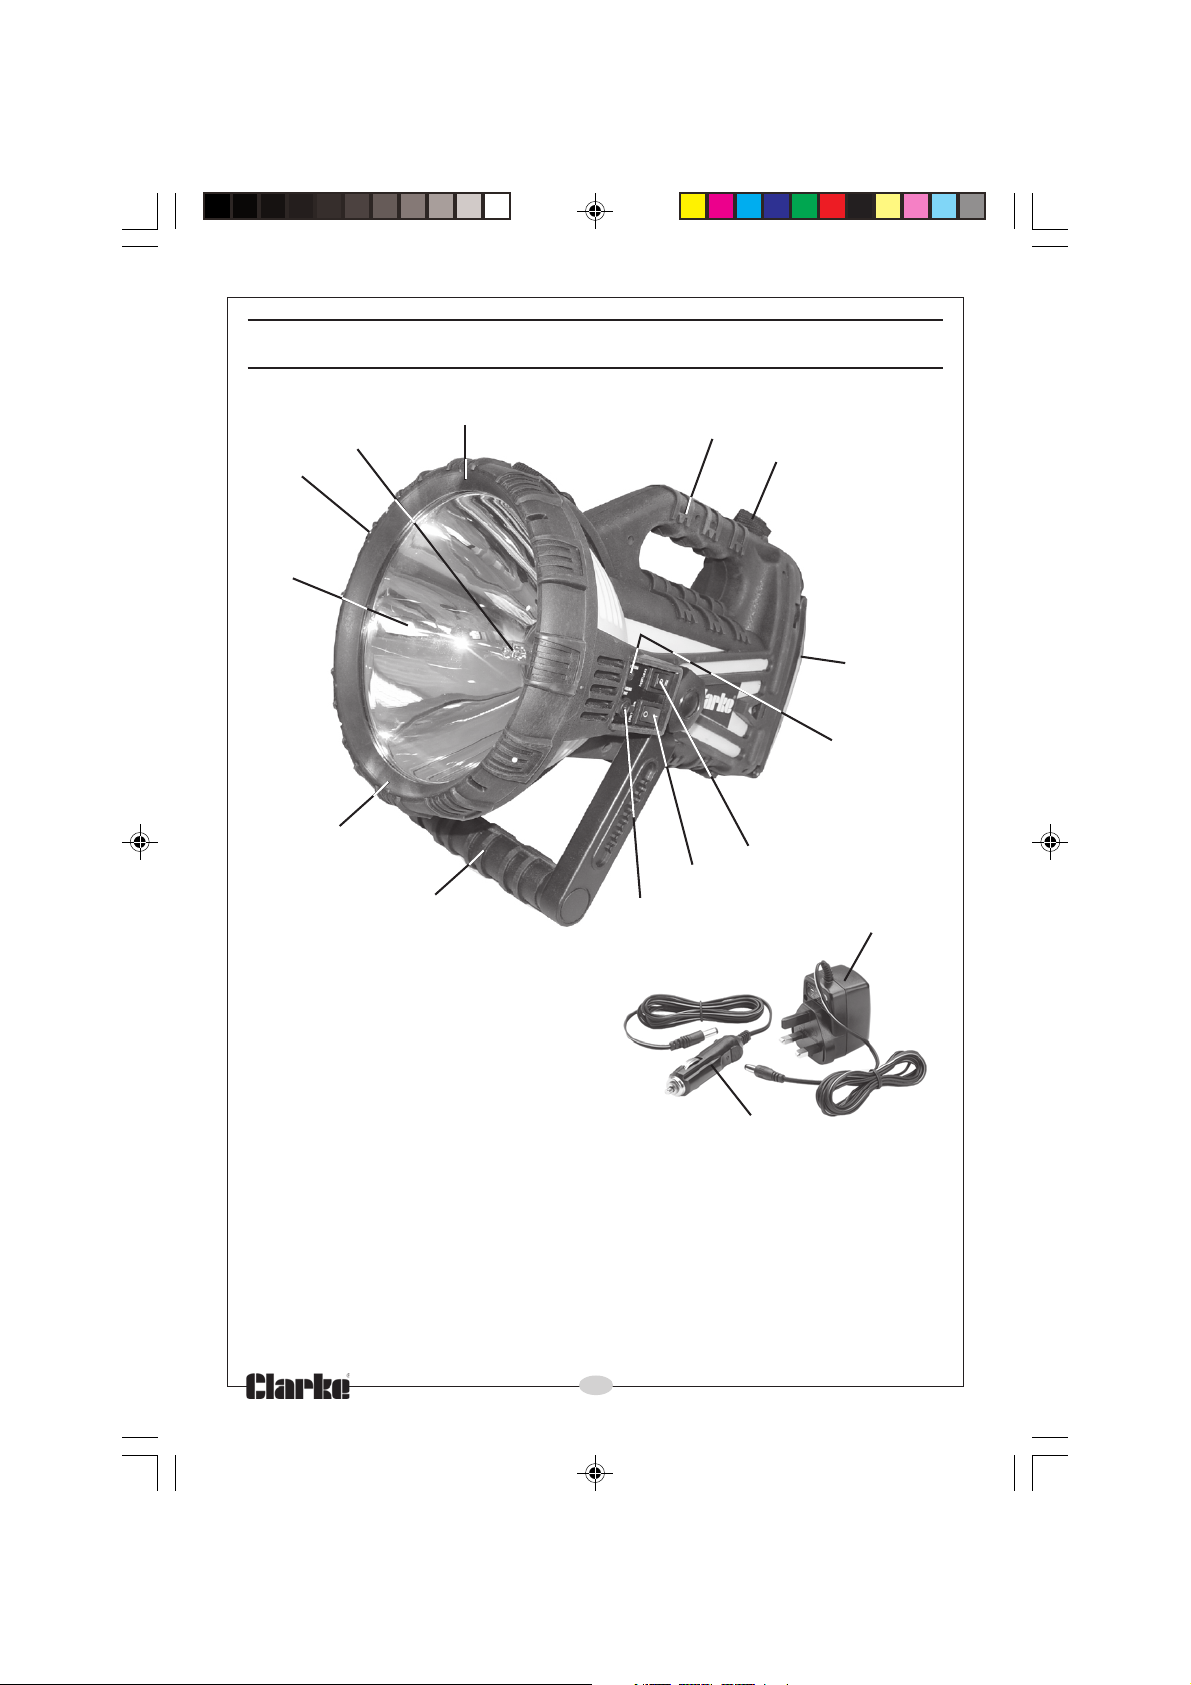
1. CARRYING STRAP
2. CARRYING HANDLE
3. BUMPER GUARD RING
4. 12 VOLT H4 100W HALOGEN BULB
5. HIGH POLISHED REFLECTOR
6. 12 VOLT DC OUTLET SOCKET
7. ADJUSTABLE LOCKING/FOLDING STAND
8. WORK LIGHT SWITCH
9. AC & DC CHARGING PORT
10. SPOTLIGHT SWITCH
11. CHARGING INDICATOR LED
12. TWIN-TUBE FLUORESCENT WORK LIGHT
13. AC CHARGER
14. DC CHARGER
15 HOOD
2
1
12
11
10
8
9
13
14
4
Page 5
OPERATION
CHARGING THE BATTERY
1 . Make sure the lamp is turn off before charging the battery.
2. Connect either the AC charger or DC charger to the AC & DC charging port and
charge for:
• 4-6 hours using the DC power cord and DC power supply. or
• 24-26 hours using the AC home charger. The product CANNOT be
operated when recharging using the AC home charger.
USING THE SPOTLIGHT
1. For full power light beam: Set the SPOTLIGHT SWITCH to the (I) position.
2. For half power light beam: Set the SPOTLIGHT SWITCH to the (II) position.
3. To turn it off: Set the SPOTLIGHT SWITCH to the (0) position.
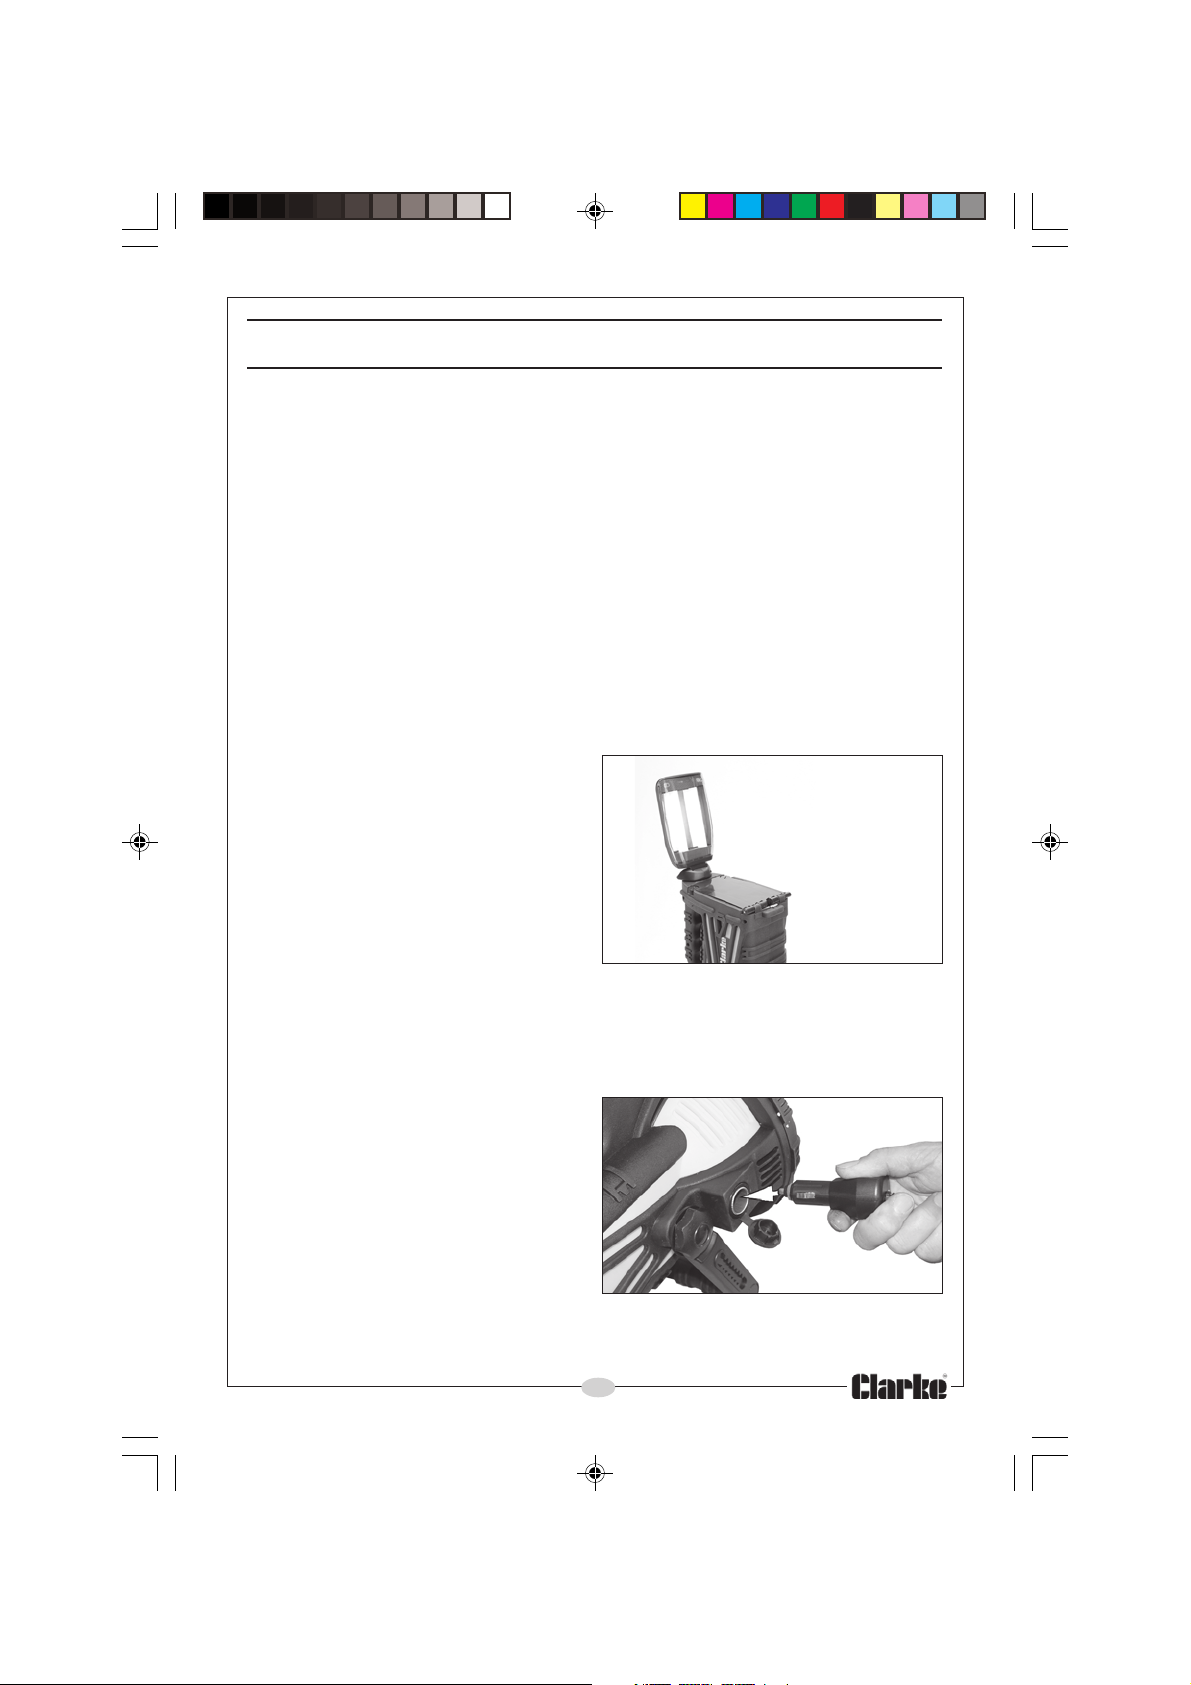
USING THE FLUORESCENT WORK LIGHT
1. Set the WORK LIGHT SWITCH to the
(I) position.
• The worklight will come on.
2. Set the WORK LIGHT SWITCH to the
(0) position.
• The worklight will switch off.
3. Lift the bottom part of the work light
and rotate to the desired position.
Fig.1
Note: The worklight only rotates 270
do not force it round any futher.
o
USE THE SPOTLIGHT AS A DC POWER SUPPLY
The DC power outlet has a built-in circuit breaker which is design to activate when the
current drawn exceeds 10 amps or the
power consumption is above 120W. Do
not connect any device that draws
more than this, to the DC power outlet.
1. Insert the DC accessory you want to
power into the DC power outlet.
2. Turn on the DC accessory and start
using the accessory.
• If the built-in circuit breaker
cutout activates, turn off the DC
accessory and disconnect it from the spotlight. Wait for about 3-5 minutes
before trying to use the DC power outlet again.
5
Fig.2
Page 6
MAINTENANCE
CHANGING THE BULB
WARNING: MAKE SURE THE LAMP IS SWITCHED OFF BEFORE CHANGING THE
BULB
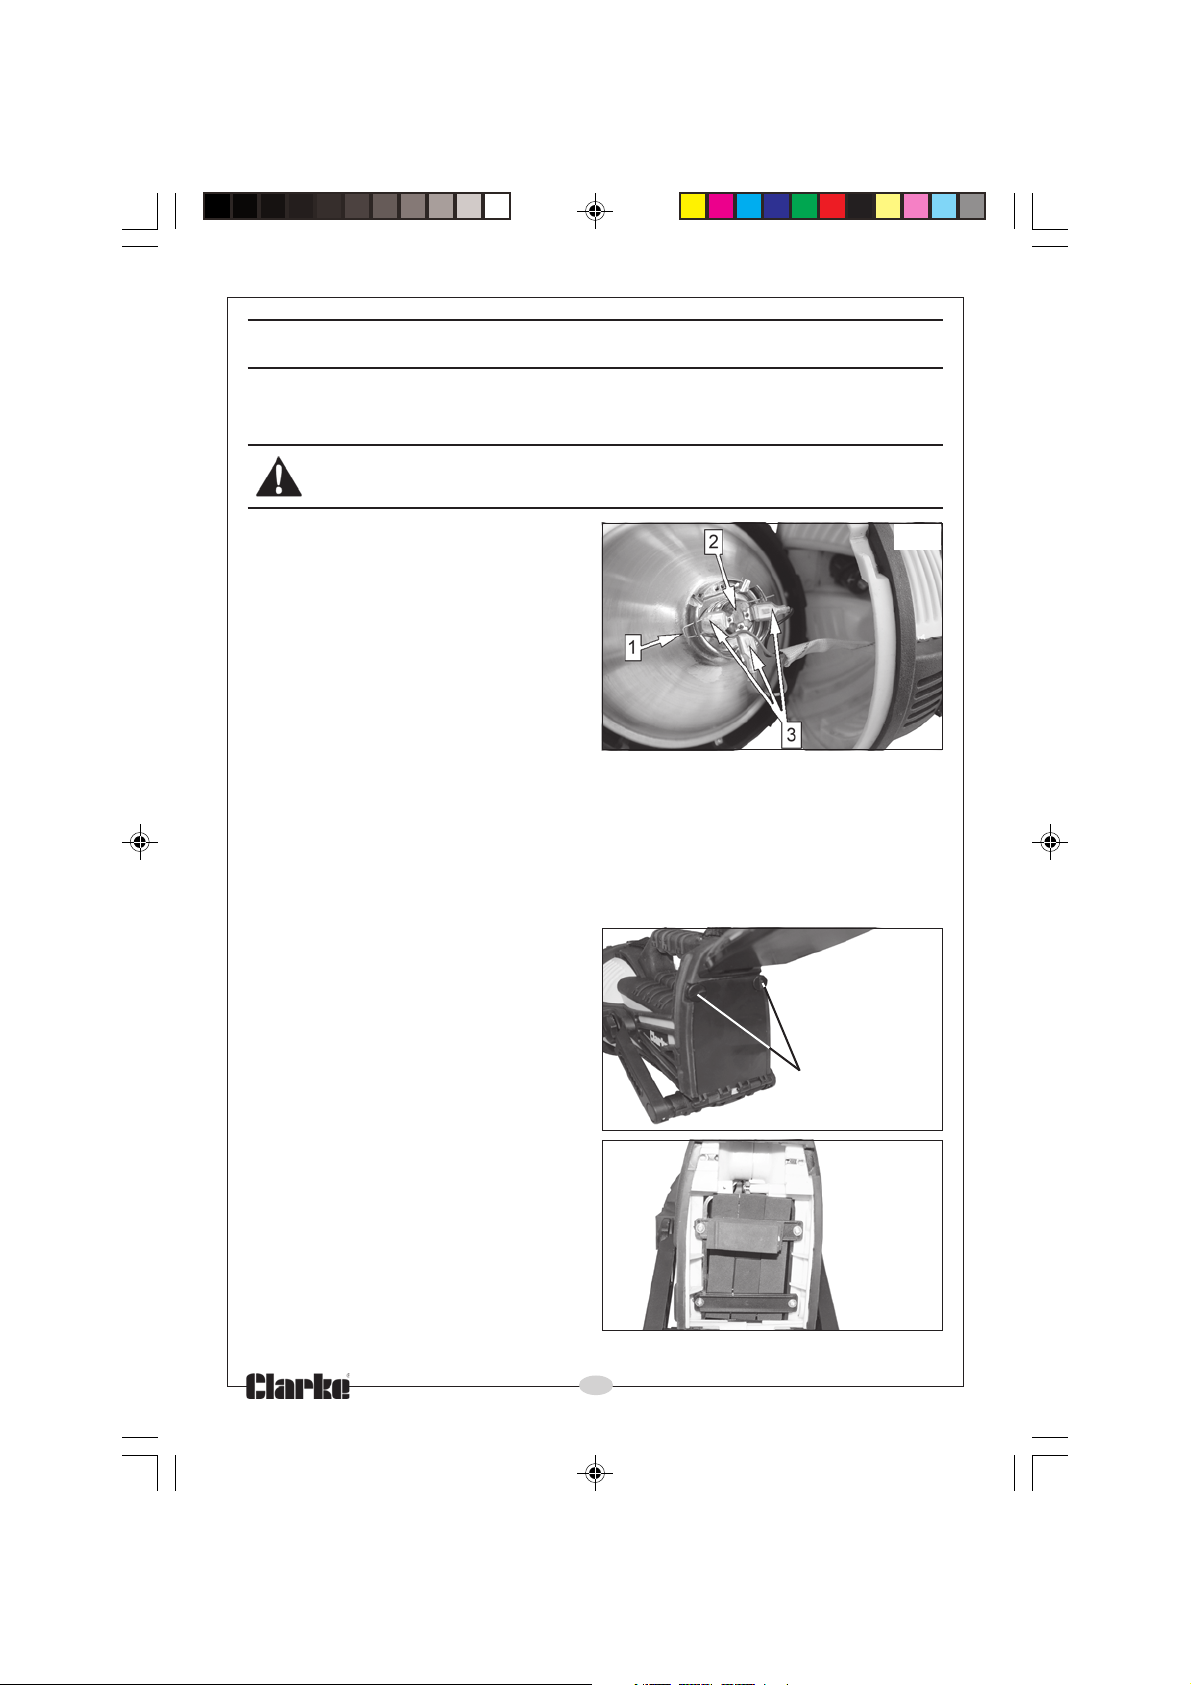
1. Remove the hood from the spotlight
by turning it slightly.
2. Carefully lift the hood and reflector
away from the torch.
• You should be able to see a
spring clip (1) and 3 wires (3).
3. Remove the 3 wires (3) making a
note of which wire connects to
which terminal
4. Remove the spring clip (1)
5. Pull the bulb (2) out of the reflector.
6 Hold the new bulb using a lint free cloth and install it by reversing the procedure
above.
NOTE: Do not touch the bulb with your hands, The oils on the skin will shorten the
life of the bulb.
REPLACING THE BATTERY
1. Lift the work light and unscrew the
two screws indicated in the picture
(fig. 4), Unscrew them anti-clockwise.
2. Remove battery braces with phillips
screwdriver.
3. Securely grip the exposed end of the
battery and carefully slide it a few
inches out of the housing (fig. 5).
4. Disconnect the battery terminal wires.
Remove the black negative wire first.
5. Carefully remove the battery.
6. Replace with a 12V 7AH Sealed Lead
Acid Battery available from your
Clarke dealer and install by reversing
the above procedure.
Unscrew
• Take care not to pinch or cross-
connect any wires.
Fig.3
Fig.4
Fig.5
6
Page 7
• When replacing rear rubber seal make sure that both screws are secure.
7. Dispose of old batteries in accordance with local regulations.
8. Charge the battery fully before use.
SPECIFICATIONS
Built-in battery: .......................................... 12 volt 7AH sealed lead acid.
Bulb (Spotlight): ........................................ H4 12V 100 Watt Halogen Bulb
Bulb (Fluorescent): ................................... 2 x 4 Watt
Charging time: AC charger ................... 24 - 26 hours
Charging time: 12V DC charger ............ 4 - 6 hours
OTHER PRODUCTS YOU MAY BE INTERESTED IN
• Includes twin socket adapter to
allow 12v products and light to be
operated together.
• Ideal for electricians or workmen
wanting a bright fluorescent work
light.
• Super bright 20w fluorescent lamp.
• Power pack can be used to run 12v
appliances.
• Recharge from 230v AC adaptor or
DC cigarette lighter plug, both
supplied.
• Lamp can be operated from
cigarette lighter socket, via cord
supplied.
Description Clarke Rechargeable Work Light
Model Number RWL12
Part Number 4003005
7
Page 8
 Loading...