

Page 1
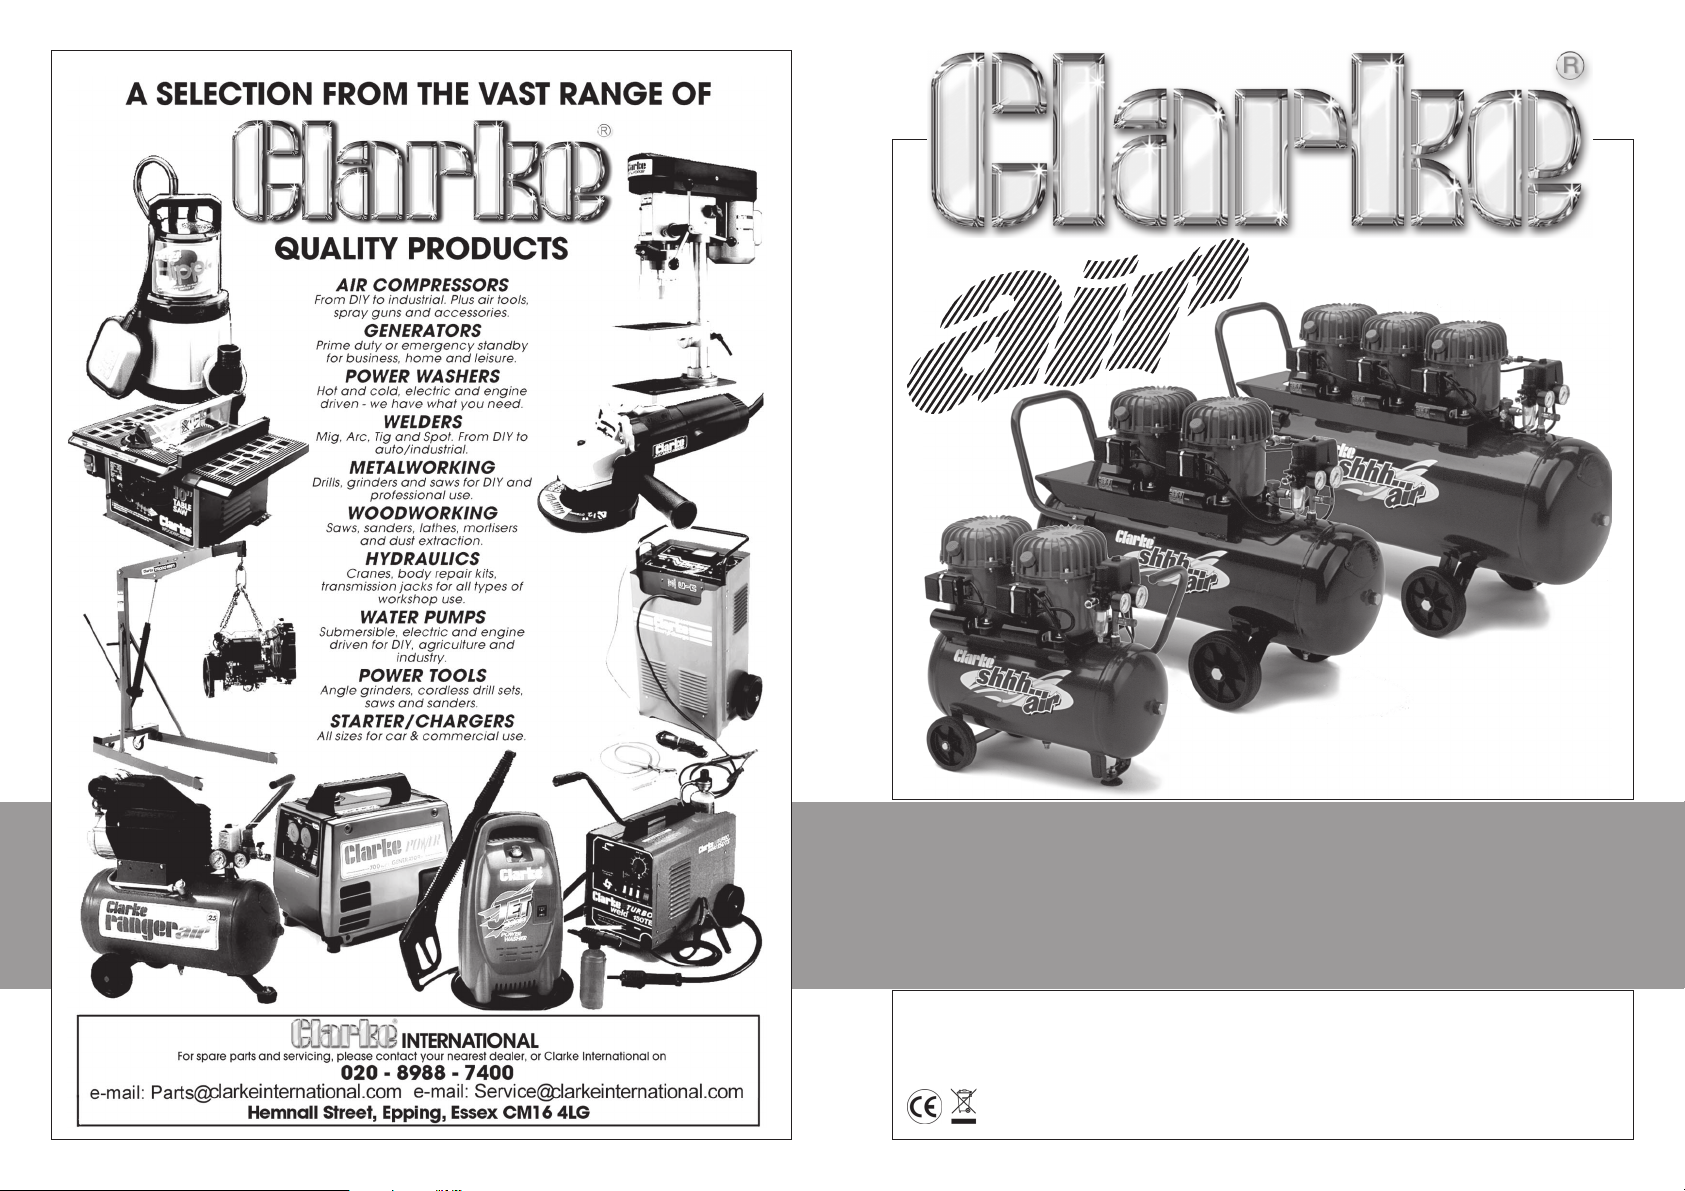
SHHH AIR COMPRESSOR
SHHH AIR COMPRESSOR
Model Nos.
SHHH5/24 - SHHH5/50 - SHHH7/100
OPERATING & MAINTENANCE
INSTRUCTIONS
0707
©
Page 2
When disposing of this product, do not dispose of with general waste. It must be disposed of according to the laws
governing Waste Electrical and Electronic equipment, at a recognised disposal facility.
PARTS & SERVICE
For Spare Parts and Service,please contact your nearest dealer,
or CLARKE International, on one of the following numbers.
PARTS & SERVICE TEL: 020 8988 7400
PARTS & SERVICE FAX: 020 8558 3622
or e-mail as follows:
PARTS: [email protected]
SERVICE: [email protected]
2
11
Page 3
SPECIFICATIONS
SHHH 5/24 SHHH 5/50 SHHH 7/100
Motor 230V 50Hz 1Ph 230V 50Hz 1Ph 230V 50Hz 1Ph
Max.Pressure 8 bar 8 bar 8 bar
Air Displacement 4.5cfm 4.5cfm 4.5cfm
Electric Motor 0.92HP 0.92HP 1.37HP
Air Receiver Capacity 25 Ltr 50Ltr 100Ltr
Fuse Rating 13amps 13amps 13amps
Duty Cycle S2 50%* S2 50%* S2 50%*
Part No. 2320805 2320810 2320850
Compressor Oil CLARKE Synthetic Oil
Compressor Oil Part No. 3050795
*S2 50% = 5 min ON followed by 5 min OFF
ACCESSORIES
Your Shhh Air Compressor can be used in conjunction with a range of optional
accessories for inflating tyres, air brushing, stapling, blowing and many other uses.
For details contact your local Clarke dealer.
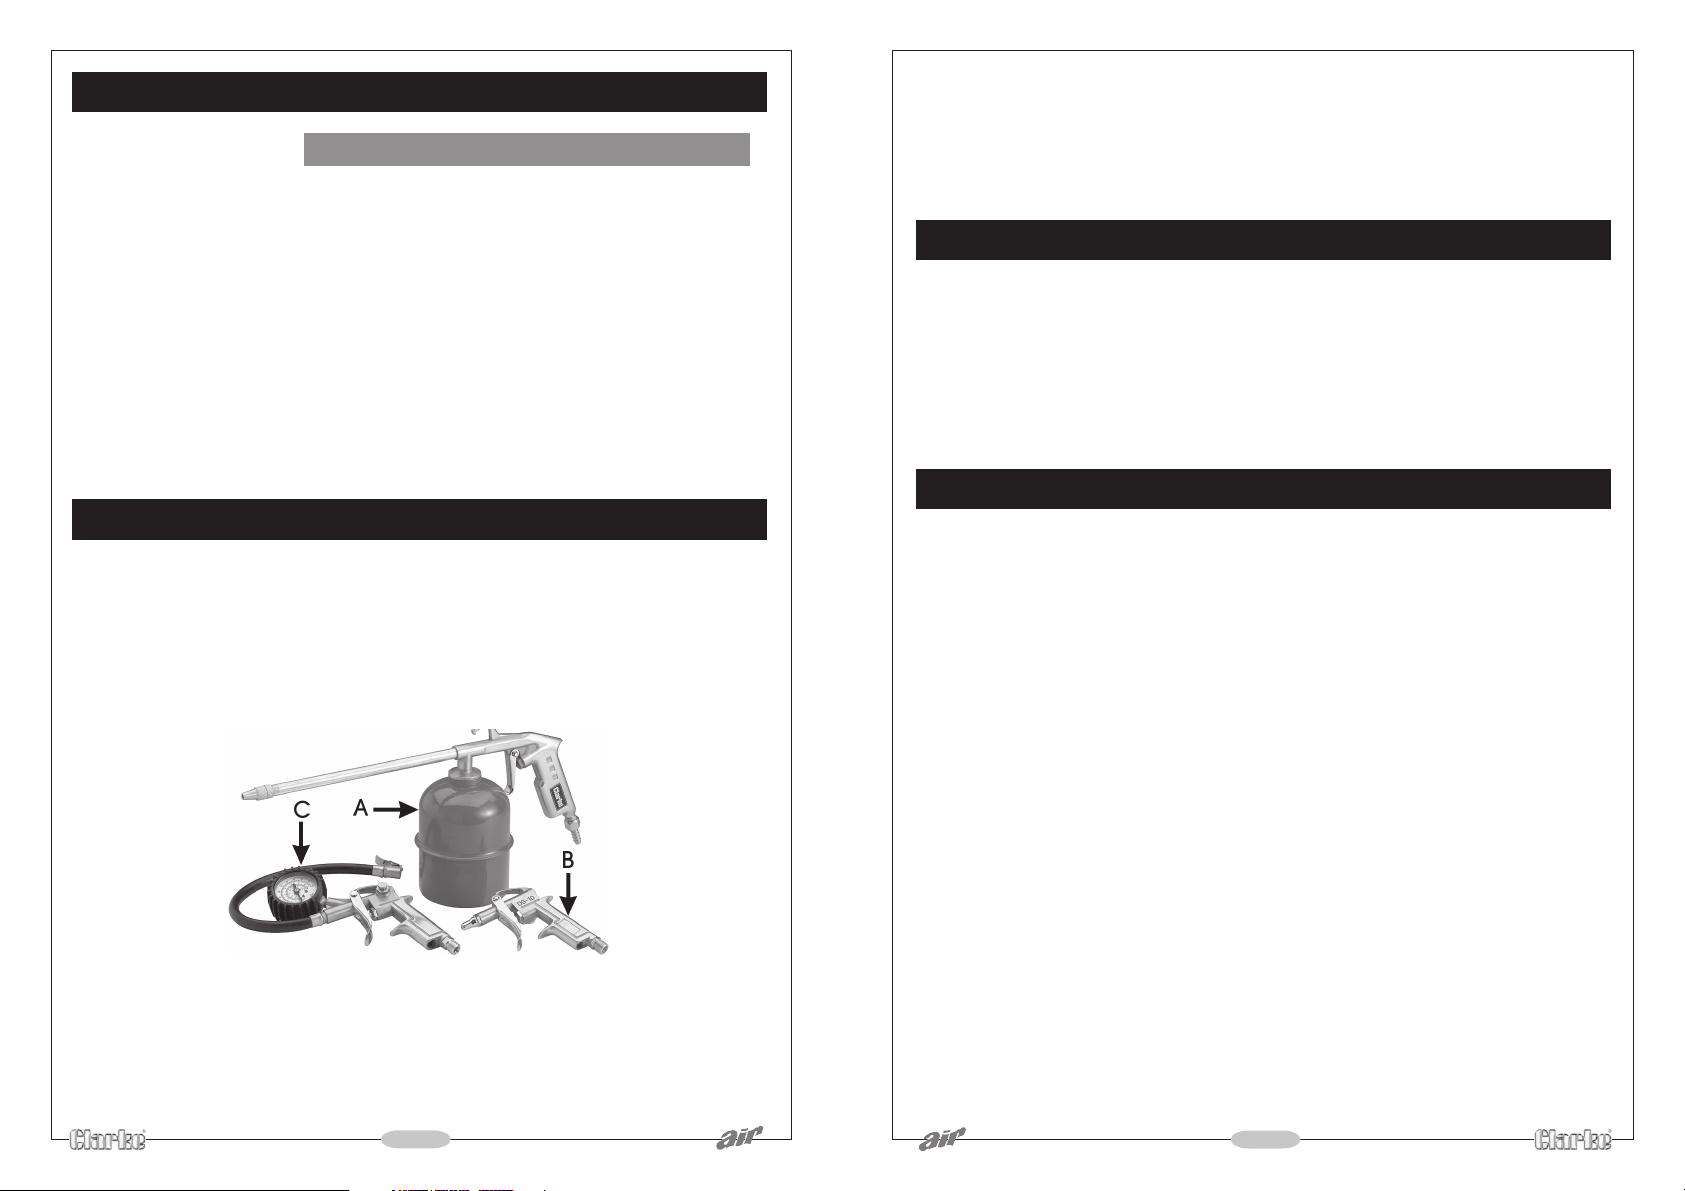
A complete kit - Model KIT 600, illustrated below, is available from your Clarke
dealer, ideal for many applications...... Please quote part number 3110150
Thank you for purchasing this CLARKE Shhh Air silent running air compressor
Before attempting to operate the machine, please read this leaflet thoroughly and
carefully follow the instructions given. In doing so you will ensure the safety of yourself
and that of others around you, and you can also look forward to the compressor
giving you long and satisfactory service.
GUARANTEE
This product is guaranteed against faulty manufacture for a period of 12 months
from the date of purchase. Please keep your receipt as proof of purchase. This
guarantee is invalid if the product is found to have been abused or tampered
with in any way, or not used for the purpose for which it was intended.
Faulty goods should be returned to their place of purchase, no product can be
returned without prior permission. This guarantee does not effect your statutory
rights.
CONTENTS Page
Safety Precautions .......................................................................... 4
Electrical Connections ................................................................... 5
Preparation for Use ......................................................................... 6
Operation ........................................................................................ 6
Shutting Down .................................................................................. 7
The accessories are also available separately:
A: Paraffin Gun B: Blow Gun C: Tyre inflator
Should you experience any difficulties obtaining accessories, please contact the
Clarke sales department (telephone 01992 565300) for details of your nearest
dealer.
10
Fault Finding ..................................................................................... 8
Maintenance .................................................................................. 9
Parts & Service ................................................................................ 9
Specifications ................................................................................ 10
Accessories ................................................................................... 10
Declaration of Conformity ........................................................... 11
Parts and Service Contacts ......................................................... 11
3
Page 4
SAFETY PRECAUTIONS
MAINTENANCE
WARNING
As with all machinery, there are certain hazards involved with their operation and use.
Exercising respect and caution will considerably lessen the risk of personal injury.
However, if normal safety precautions are overlooked, or ignored, personal injury to
the operator, or damage to property may result.
It is in your own interest to read and pay attention to the following rules:
1. COMPRESSED AIR IS DANGEROUS, NEVER direct a jet of air at people or animals, and
NEVER discharge compressed air against the skin.
2. DO NOT operate your compressor with any guards removed.
3. Electrical or mechanical repairs should only be carried out by a qualified engineer. If
problems occur, contact your Clarke dealer.
4. Before carrying out any maintenance, ensure the pressure is expelled from the air
receiver, and the machine is disconnected from the mains supply.
5. DO NOT leave pressure in the receiver overnight, or when transporting.
6. DO NOT adjust, or tamper with the safety valves. The maximum pressure is factory set,
and clearly marked on the machine.
7. DO NOT operate in wet or damp conditions. Keep the machine dry at all times.
Similarly, a clean atmosphere will ensure efficient operation. Do not use in dusty or
otherwise dirty locations.
8. Some of the metal parts can become quite hot during operation. Take care not to
touch these until the machine has cooled down.
9. Always adjust the pressure regulator to the recommended setting for the particular
spray gun or tool being used.
10. When spraying flammable materials e.g. cellulose paint, ensure that there is adequate
ventilation and keep clear of any possible source of ignition.
11. Protect yourself. Think carefully about any potential hazards which may be created by
using the air compressor and use the appropriate protection. e.g. Goggles will protect
your eyes from flying particles. Face masks will protect you against paint spray and/or
fumes.
12. Before spraying any material always consult paint manufacturers instructions for safety
and usage.
13. Do not exert any strain on electrical cables and ensure that air hoses are not angled or
wrapped around machinery etc.
14. When disconnecting air hoses or other equipment from your compressor ensure that
the air supply is turned off at the machine outlet and expel all pressurised air from within
the machine and other equipment attached to it.
15. Make sure that children and animals are kept well away from the compressor and any
equipment attached to it.
16. Always ensure that all individuals using the compressor have read and fully understand
these Operating Instructions.
17. Ensure that any equipment or tool used in conjunction with your compressor, has a
safety working pressure exceeding that of the machine.
4
DAILY
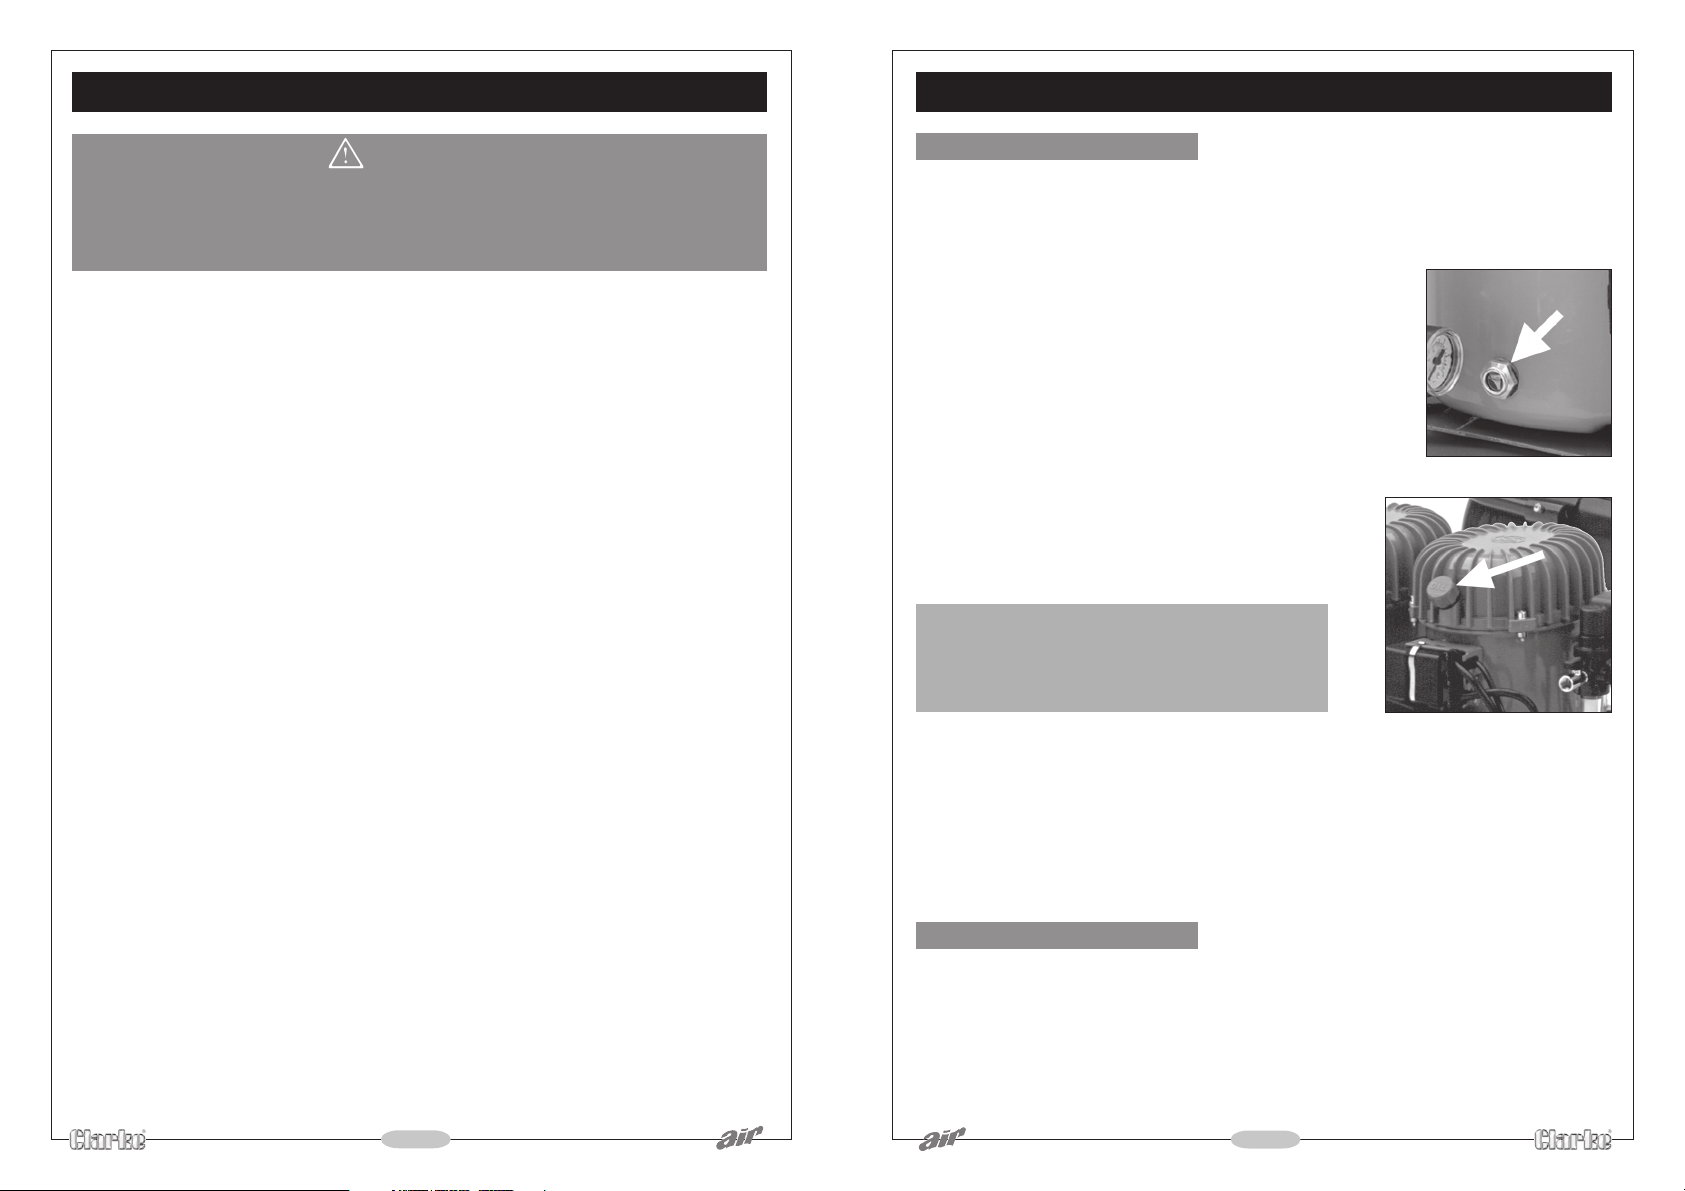
1. Check the oil level before you start and top up if necessary - use Clarke
Synthetic Air Compressor Oil ONLY, available from your Clarke dealer...
Part No. 3050795
Fig.5
The oil level is checked by viewing the oil
sight glass, shown arrowed in Fig. 5
To add oil, proceed as follows:
Remove the oil filler plug, shown
arrowed in Fig. 6, and top up until the
Fig.6
oil level is midway on the oil sight glass.
Take great care not to cross thread the
filler plug when replacing.
IMPORTANT:
DO NOT replace the oil filler plug with
anything other than the original, as the filler
plug doubles as an air breather
2. Drain any condensate that may have accumulated in the air outlet filter, by
pushing the valve (E Fig. 3), upwards.
3. When you have finished with the compressor, ALWAYS open the drain valve -
at the base of the tank, to expel all air, and to allow any
condensate to drain off.
DO NOT FORGET to close the valve again when the tank is empty.
PERIODICALLY
1. Renew Oil Filler Plug/Air Breather every 500 hours of operation.
2. If oil becomes contaminated it will be necessary to drain it by removing the
filler plug/air filter, inverting the compressor and allowing time for the oil to
drain, before filling with new SYNTHETIC OILto the middle of the oil sight glass.
9
Page 5
FAULT FINDING
ELECTRICAL CONNECTIONS
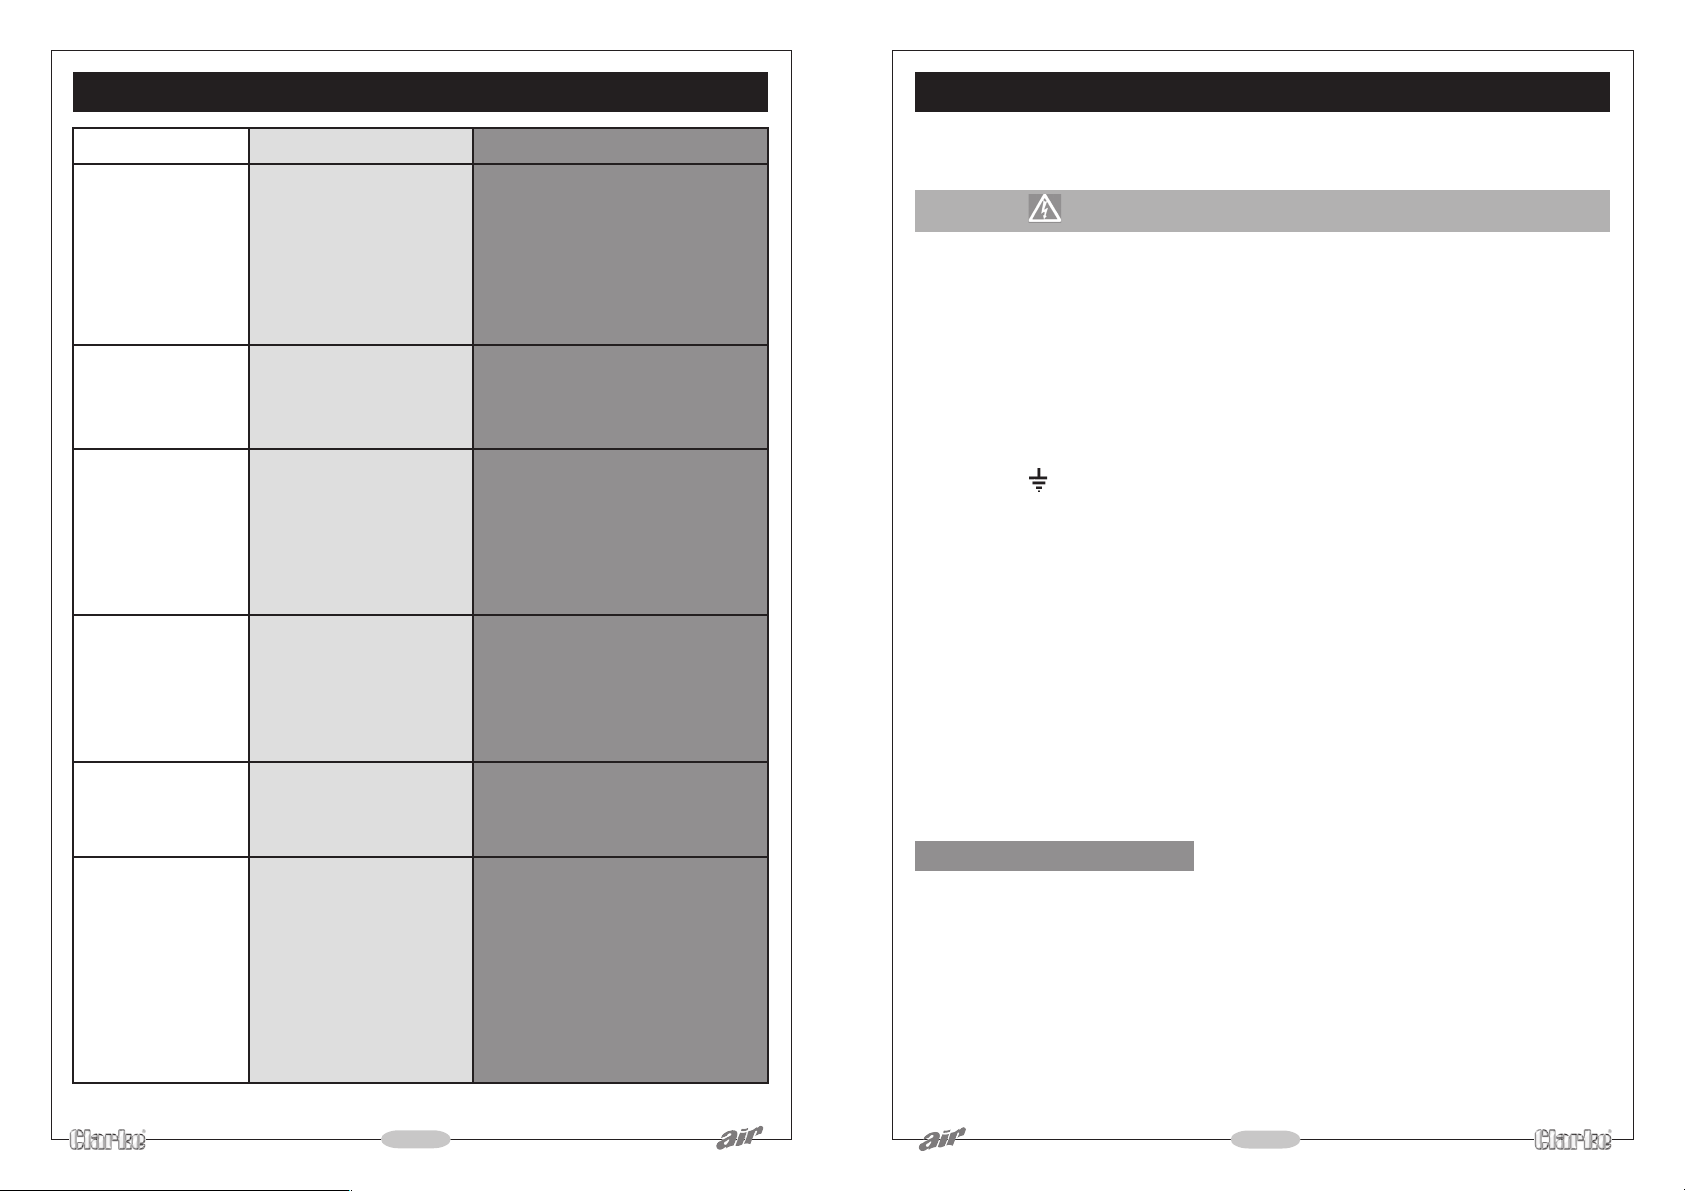
PROBLEM
The compressor
will not start, or
stops and will not
start again.
Compressor does
not start.
The compressor
does not reach
the set pressure
and overheats
easily.
Air leaking from
the pressure
switch valve
when the
compressor is not
running.
Air pressure from
the regulator will
not adjust.
Compressor
operating, but
no air from outlet
PROBABLE CAUSE
Bad connections.
Blown fuse
Overload cutout
switch has tripped.
Air receiver charged
(Does ot apply to
SHHH2)
(see also item 1)
Inlet Air Filter is blocked
NOTE: It is also possible
that you are using
more air than the
compressor is capable
of delivering.
Faulty non-return
valve.
the regulator body is
broken.
Inlet Air Filter Blocked
Pressure Regulator
closed
Drain valve open
Bleed Pipe (from
Pressure Switch to nonreturn valve) broken or
disconnected
REMEDY
Check the electrical
connections.
Clean and tighten as
necessary.
Open drain valve to expel air.
Compressor should start again
when pressure reduces to
approx 95 psi.
Renew Oil Filler/Air Filter plug
First drain the receiver
completely of air. Renew the
non-return valve.
Replace RegulatorThe diaphragm within
Renew Oil Filler/Air Filter Plug
Turn Regulator clockwise to set
required pressure
Close Drain Valve
Reconnect or replace Bleed
Pipe
Connect the mains lead to a standard, 230 Volt (50Hz) electrical supply through an
approved 13 amp BS 1363 plug, or a suitably fused isolator switch.
WARNING! THIS APPLIANCE MUST BE EARTHED
IMPORTANT: The wires in the mains lead are coloured in accordance with the following
code:
Green & Yellow - Earth
Blue - Neutral
Brown - Live
As the colours of the flexible lead of this appliance may not correspond with the
coloured markings identifying terminals in your plug proceed as follows:
❐ Connect GREEN & YELLOW cord to terminal marked with a letter “E” or Earth
symbol “ ” or coloured GREEN or GREEN & YELLOW.
❐ Connect BROWN cord to terminal marked with a letter “L” or coloured RED.
❐ Connect BLUE cord to terminal marked with a letter “N” or coloured BLACK.
If this appliance is fitted with a plug which is moulded onto the electric cable (i.e.
non-rewireable) please note:
1. The plug must be thrown away if it is cut from the electric cable. There is a
danger of electric shock if it is subsequently inserted into a socket outlet.
2. Never use the plug without the fuse cover fitted.
3. Should you wish to replace a detachable fuse carrier, ensure that the correct
replacement is used (as indicated by marking or colour code).
4. Replacement fuse covers can be obtained from your local dealer or most
electrical stockists.
FUSE RATING
The fuse in the plug must be replaced with one of the same rating (13 amps) and
this replacement must be approved to BS1362.
We recommend that this machine is connected to the mains supply via a Residual
Current Device (RCD)
If in any doubt, DO NOT attempt any connections or repairs yourself. Consult a
qualified electrician, your Clarke dealer,
or telephone CLARKE International Service Dep’t on:
or, e-mail : [email protected]
020 8556 4443
8
5
Page 6
OPERATION
1. Ensure the compressor is on level ground...do not allow
it to run, positioned on an incline.
2. Check that the mains voltage corresponds with that
shown on the data label on the side of the compressor.
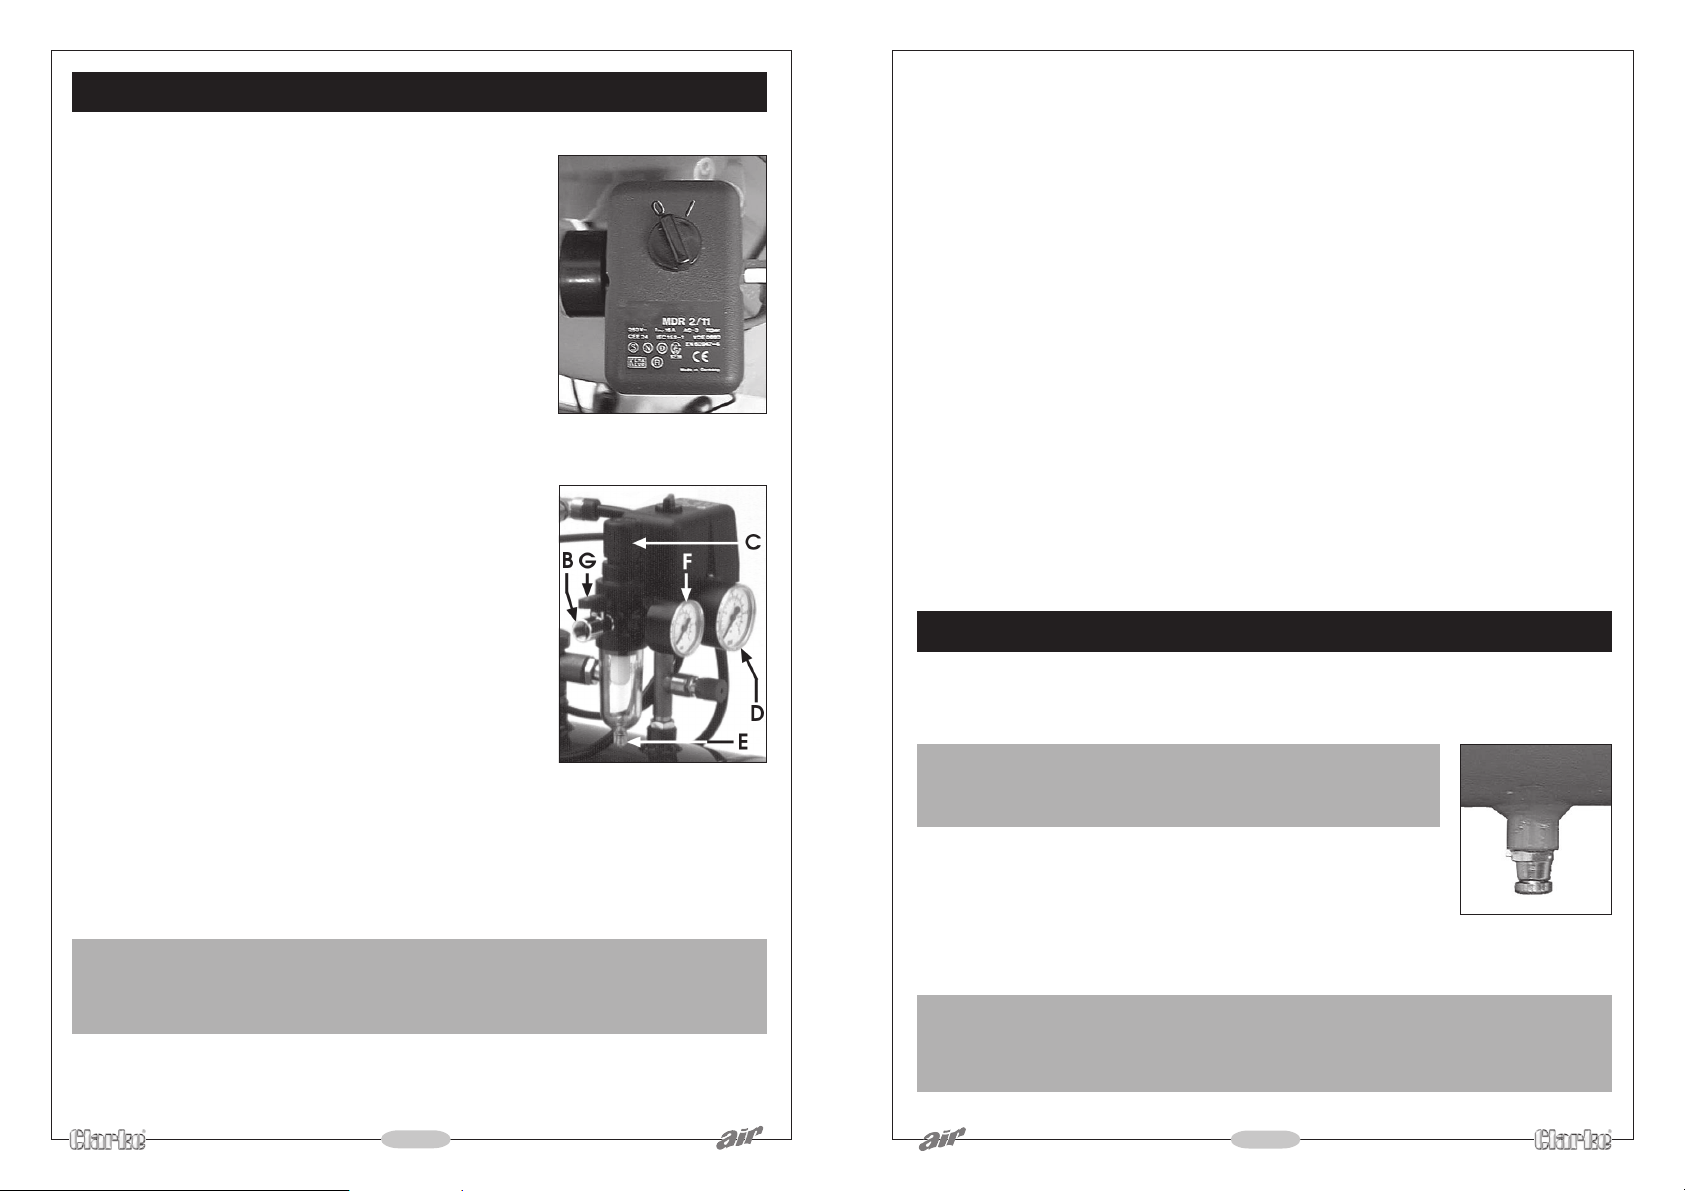
3. Ensure that the ON/OFF switch, mounted on the Pressure
Switch (shown in fig.1), is turned to the ‘0’ (OFF) position,
then plug in and switch on at the mains supply.
. To start the compressor, turn the ON/OFF switch to the
‘I’ (ON) position - the motor should start immediately.
NOTE: Should the motor fail to start immediately, it is possible
that the air receiver is already full of air. Check the tank
pressure gauge (F, fig. 2). If you release air, by opening the
air outlet tap, the motor will start automatically once the cutin pressure is reached.
Before connecting your airline to the compressor,allow
it to run for 10 - 15 seconds, with the air outlet tap,(G,
Fig. 2) completely open to permit a good distribution
of the lubricating oil.
2. Close the outlet tap then connect one end of suitable
air hose to the connector at the filter/regulator outlet,
(B, Fig. 3)and the other end to the equipment to be
used.
3. Set the outlet pressure by adjusting the Pressure
Regulator.
To do this, lift the Pressure Regulator Knob (C Fig. 2),
and turn it clockwise to increase pressure, anticlockwise
to decrease.
To lock the regulator knob and hence the outlet
pressure, push the Regulator knob down until it clicks
into place.
Fig.1
Fig.2
7. The Pressure Switch, located within the plastic cover beneath the ON/OFF switch, should
not require adjustment. This is an automatic device and has been preset at the factory
to stop the motor when pressure in the receiver reaches its maximum, and to start it
again when the pressure in the receiver falls to the minimum preset value. This operation
is completely automatic and does not affect the spraying process in any way. However,
should problems develop with the cut-in, cut out settings, please consult your Clarke
dealer, or the Clarke Service Dep’t.
NOTE:
a
. If the machine pumps continuously without cutting out then the compressor is too
small for the application/tool being used, and damage may result. Consult your
Clarke dealer.
b. The motor is protected by a Thermal Overload so that if the motor overheats for any
reason - the thermal overload will trip, stopping the motor. Allow a period for the
motor to cool down before restarting (15 - 20 minutes).
c. DO NOT exceed the Duty Cycle for the machine (see Specifications).
SHUTTING DOWN THE COMPRESSOR
1. To shut off the compressor, simply turn the ON/OFF switch (see Fig. 1), to the O’ (OFF)
position.
IMPORTANT:
ALWAYS switch the compressor ON or OFF at the Pressure
Switch...NEVER at the mains supply switch
NOTE: For most spray work do not exceed 50 psi (unless following paint manufacturer’s
instructions).
For other airline equipment such as, tyre gauges, staple guns, paraffin guns etc., it may be
necessary to set the operating pressure at a higher (or lower) level.
IMPORTANT:
Always refer to the accessory manufacturers recommendations for
4. With operating pressure set, reopen the air outlet tap.
optimum
operating pressures for their equipment.
6
2. Close the air outlet tap and trigger the equipment (spray
gun,air tool etc.) to release air from the air hose before
disconnecting the hose from the machine.
3. Before transporting your compressor or when leaving
overnight, expel all air from the receiver by opening the
drain valve Fig 6.
(Does not apply to the SHHH2)
Fig.4
IMPORTANT:
DO NOT FORGET to close the valve again when the tank is empty, particularly if the
compressor may not be used for sojme time.
7
 Loading...