

Page 1
XL45
Page 2
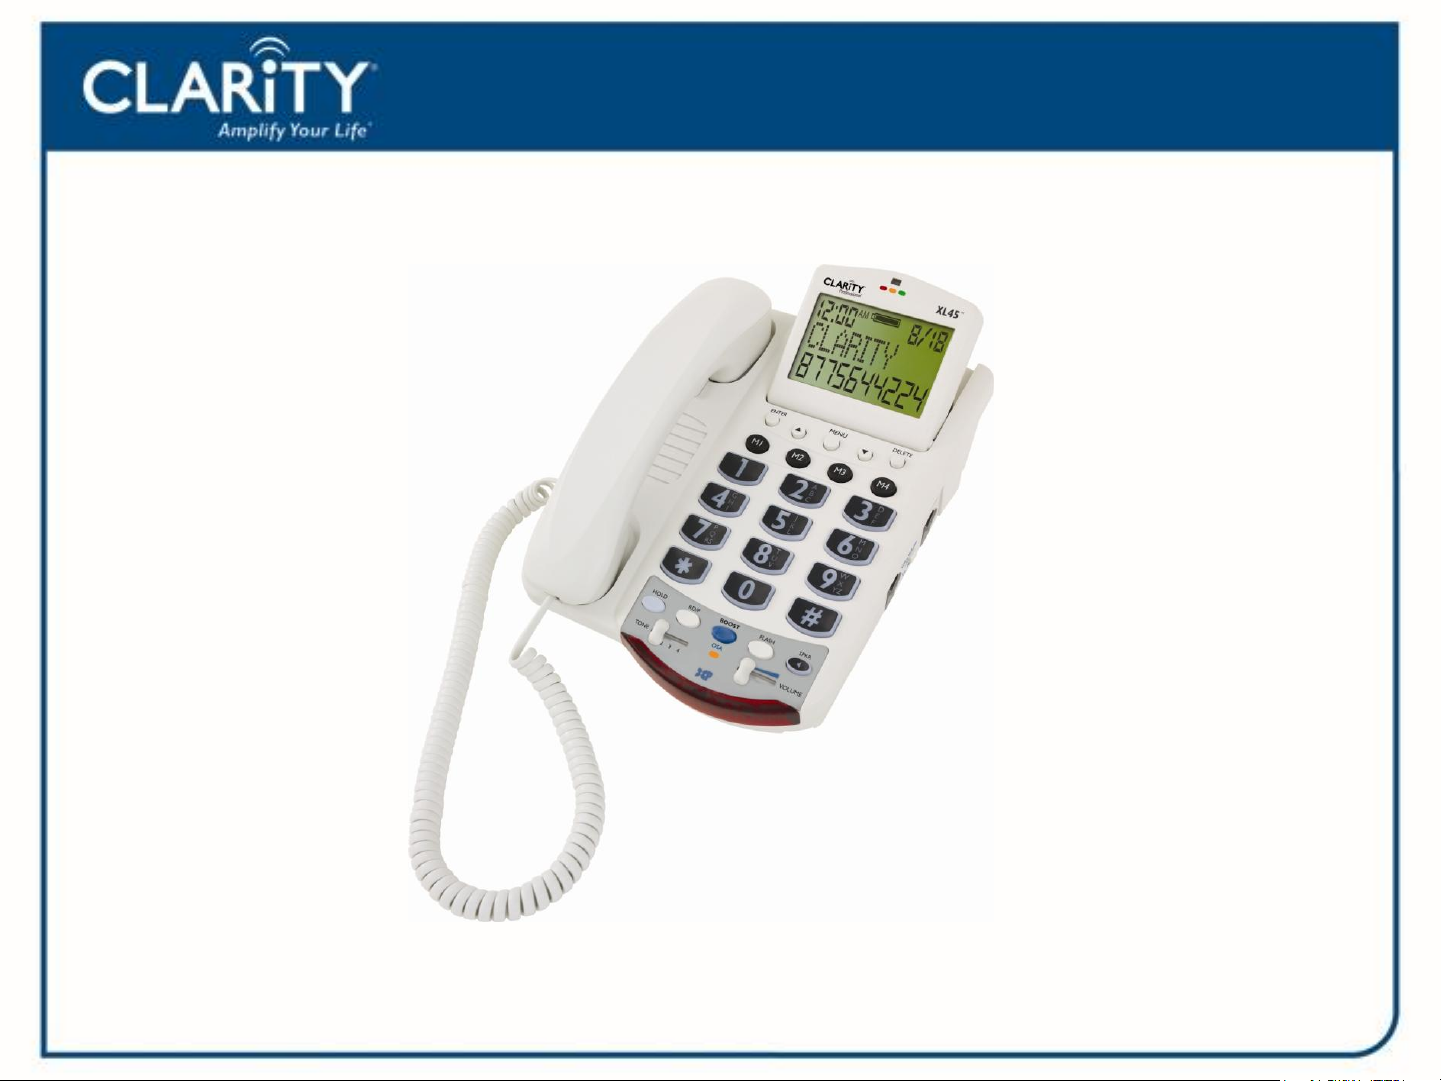
The Clarity Professional XL45 offers our
patented Digital Clarity Power that uses
digital technology to enhance the volume
and clarity of your phone conversations.
Up to 50 decibels of amplification, the
XL45 is ideal for those with severe hearing
XL45
loss or low vision.
Page 3

XL45 Features
Features
• Up to 50 decibels of amplification
• Digital Clarity Power™
• Four Tone Settings: Low Frequency, Flat Amplification, Clarity
Power and MBC Low
• ClarityLogic™
• Talking Keypad
• Speakerphone
• Outgoing Speech Amplification up to 15 decibels
• Large LCD Screen with Large Font
• CID/Call Waiting
• Four Memory Speed Dial Locations
• Headset and Neckloop Port
Page 4
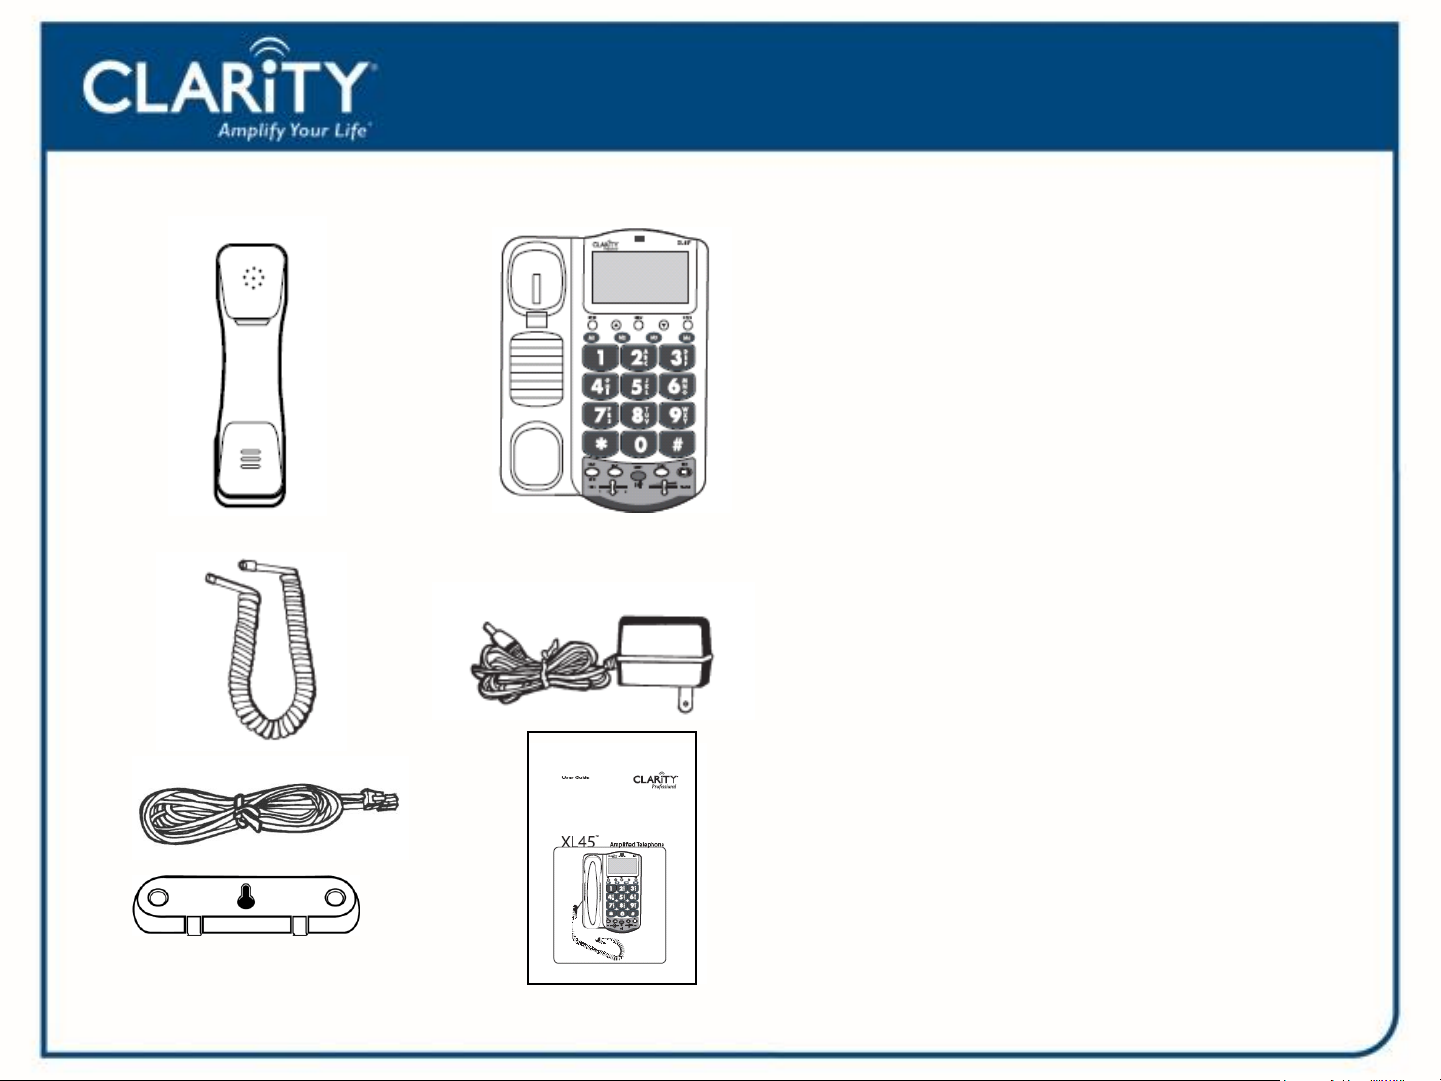
Parts Checklist
XL45
XL45 Handset
Base
Coiled Handset Cord
Telephone Cords
AC Adapter
Mounting Bracket
User Guide
Page 5
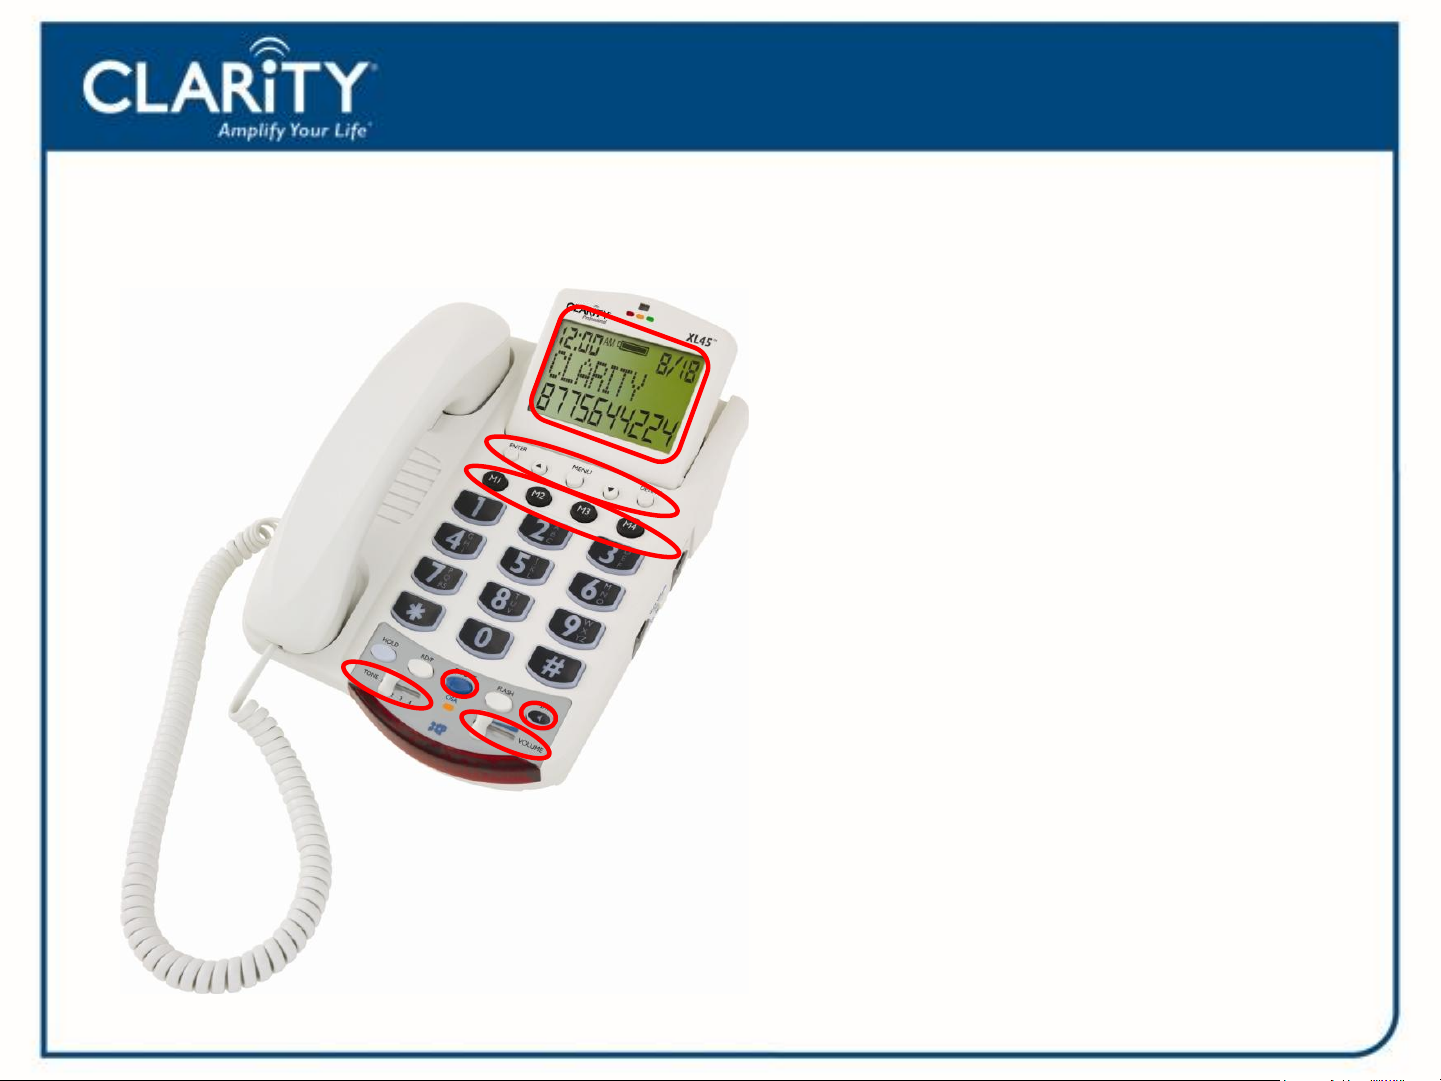
Product Layout
XL45
Large LCD Menu Screen
Menu Button
Memory Buttons
Volume Slider
Boost Button
Tone Selector
Speaker Button
Page 6
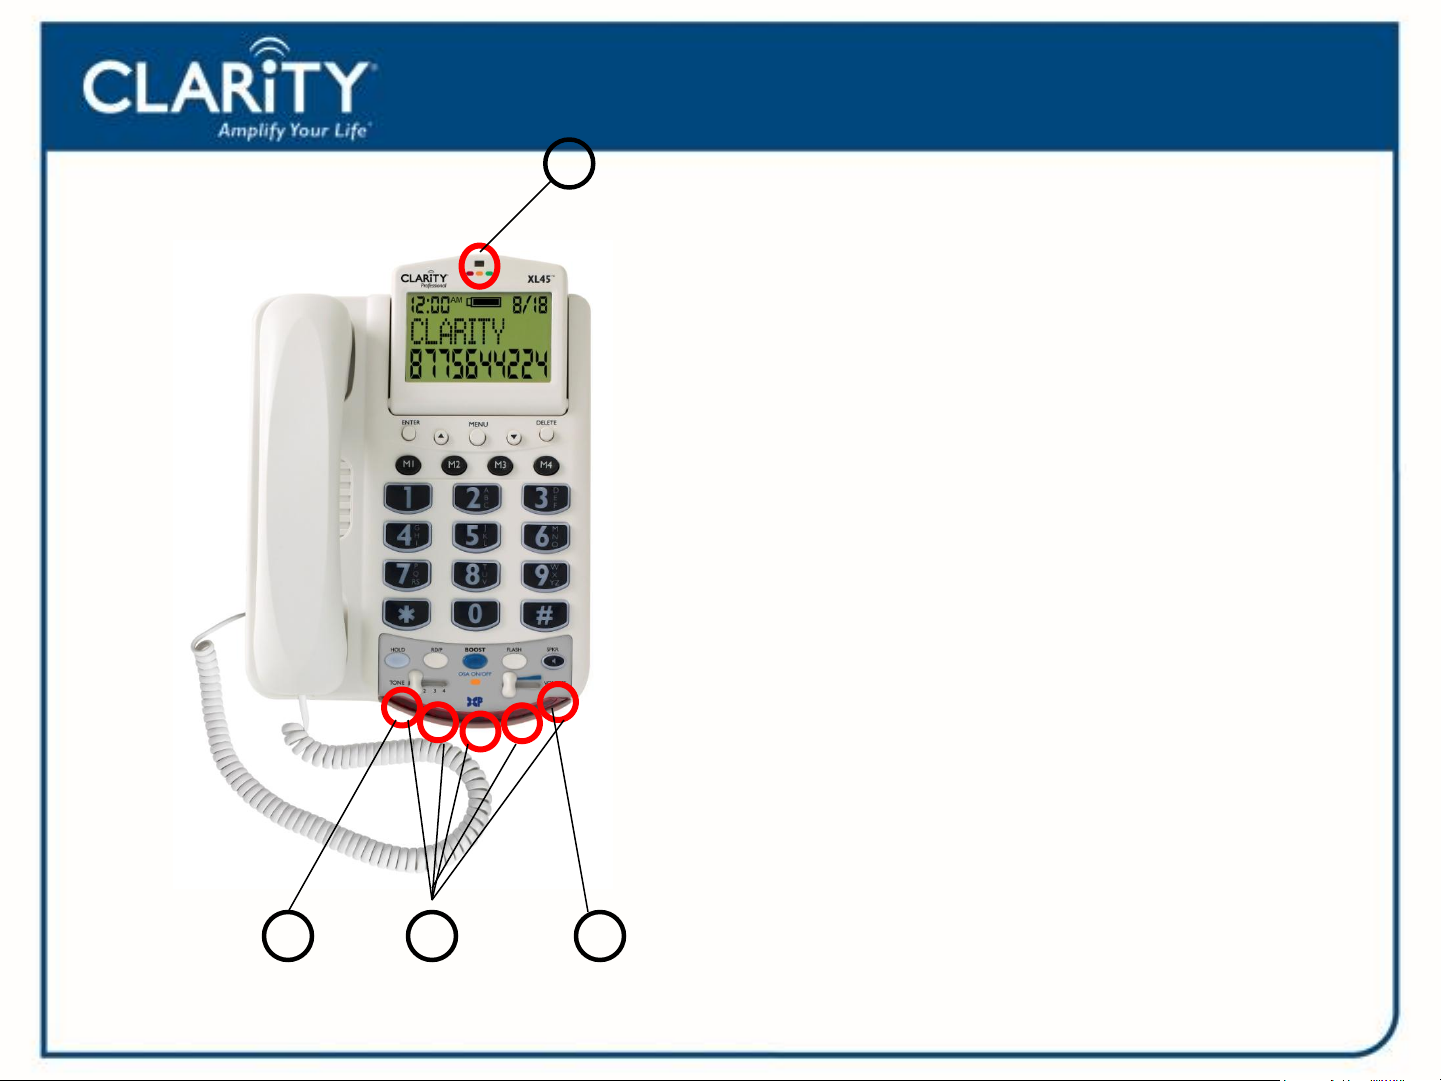
1.
Product Layout
XL45
1. Voice Mail/Missed Call Indicator
The light will illuminate Green for
a new Voice Mail and Orange when
the voice mail feature is active. The
light will display Red when the Ringer
is OFF (when there is not a voice mail
message).
2. Missed Call Indicator
This light will illuminate when there is a
missed call. (Active when Missed Call
2.
3.
4.
switch is ON)
3. Visual Ringers
The visual ringers will flash to alert of an
incoming call.
4. Low Battery Indicator
This light will illuminate to indicate the
back up battery is low.
Page 7
Product Layout
XL45
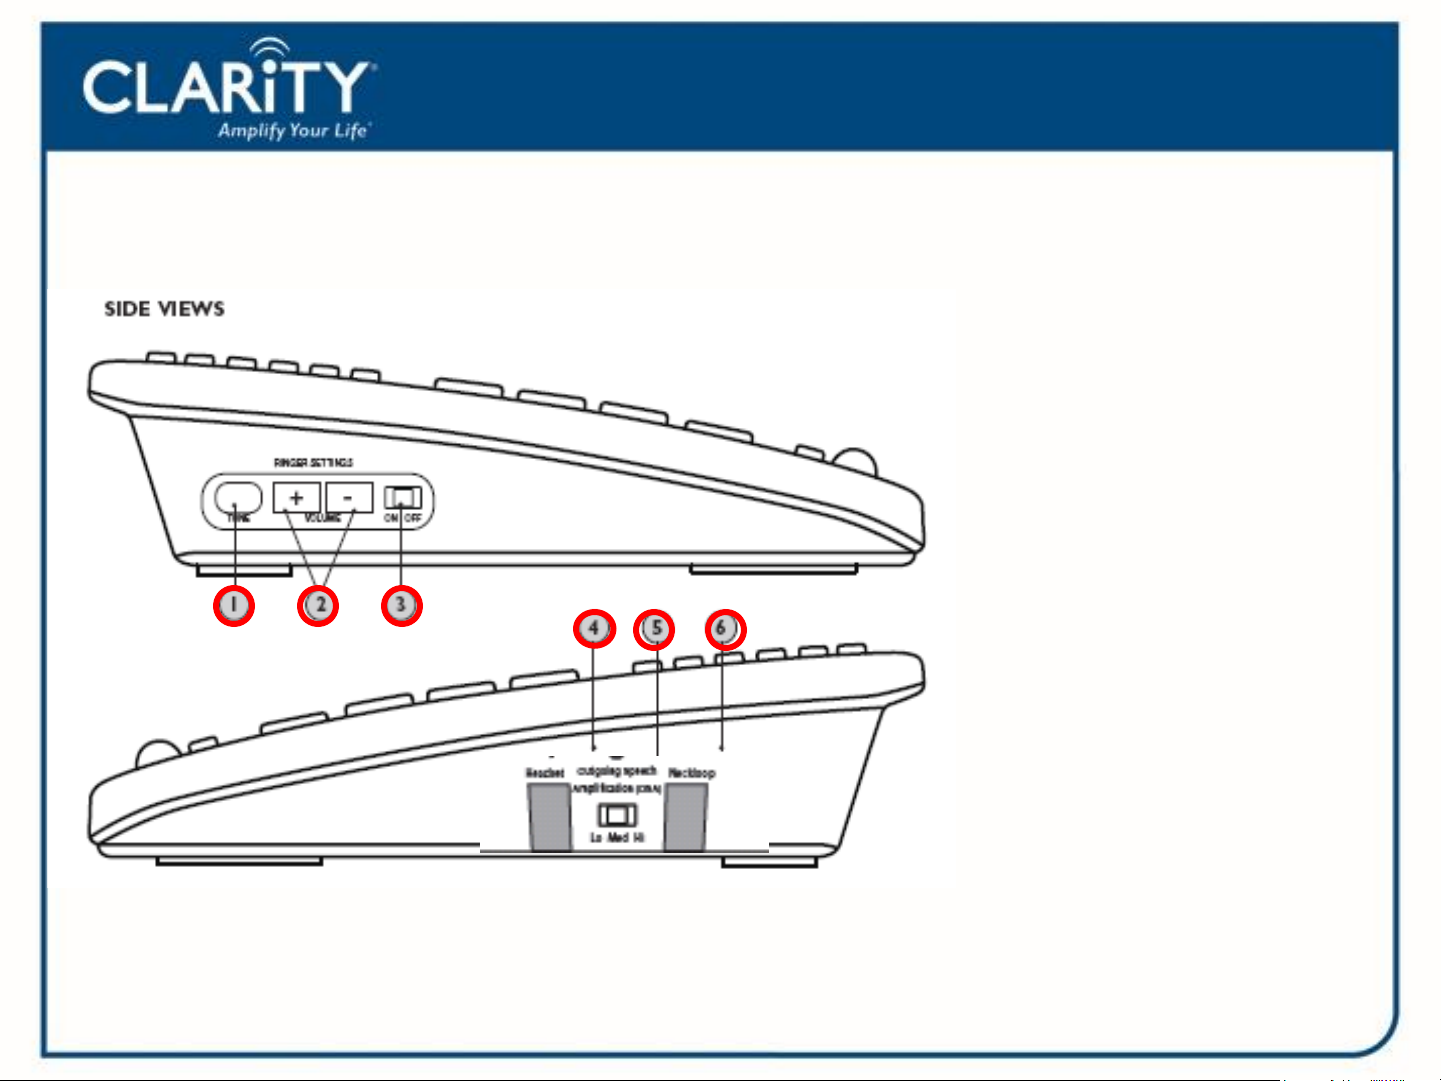
1. Ringer Tone
2. Ring Volume
3. Ringer On/Off
4. Headset Port
(2.5 mm)
5. Outgoing Speech
Amplification
(15 decibels)
6. Neckloop Port
(3.5 mm)
Page 8
Product Layout
XL45
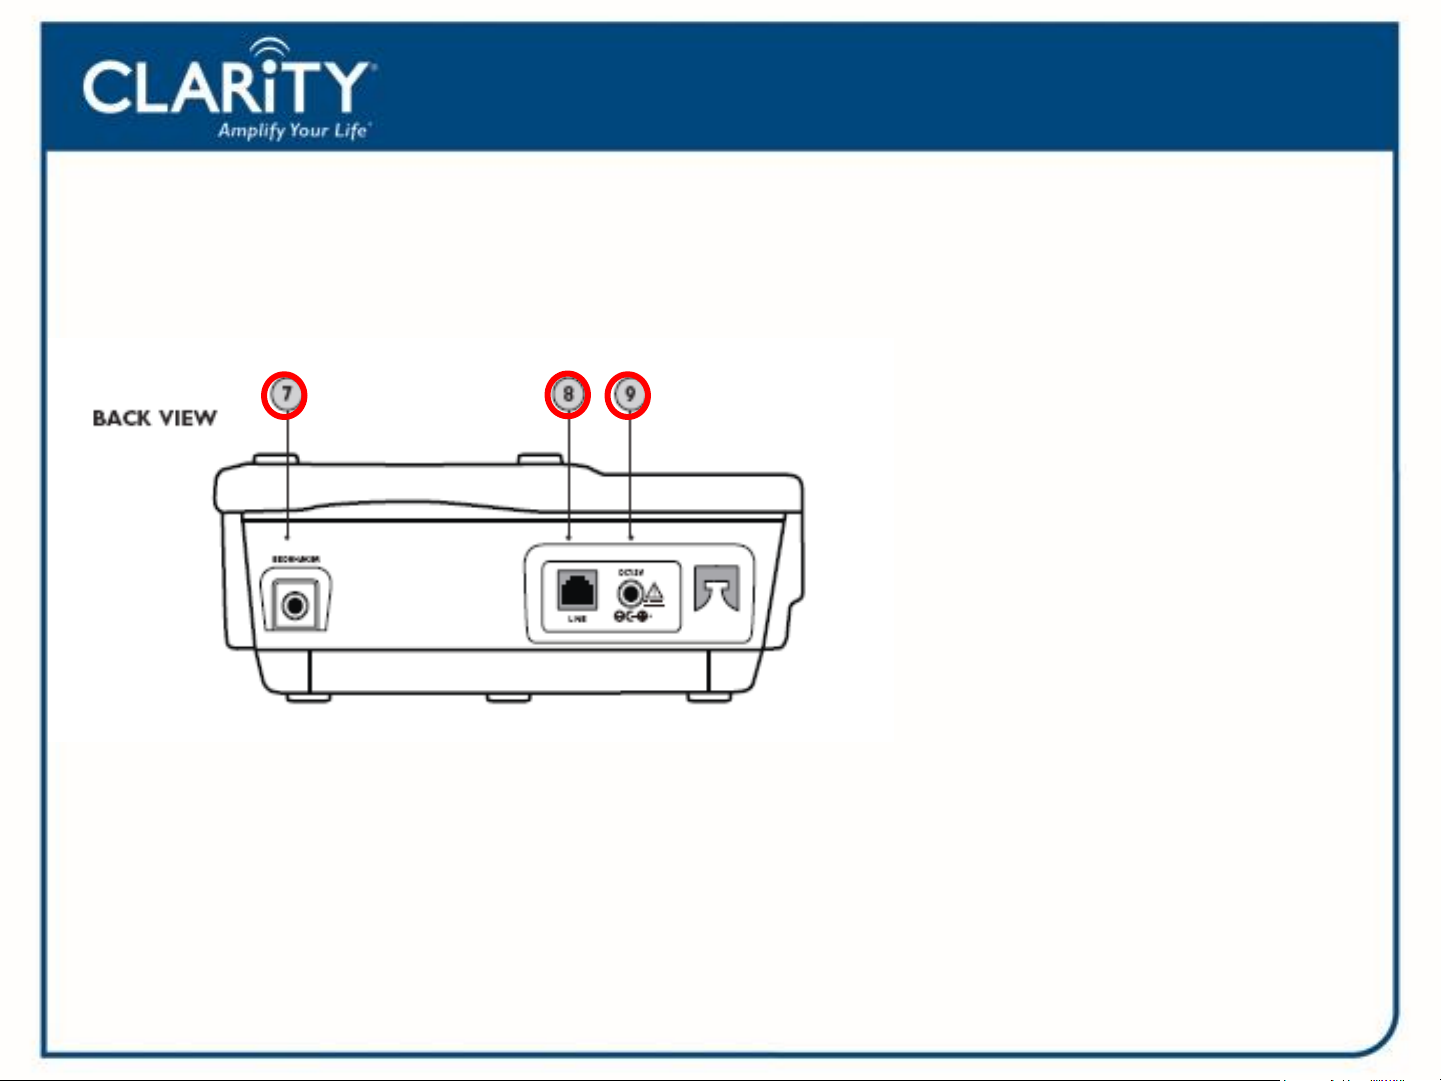
7. Bedshaker Port
8. Phone Line
9. AC Adapter
Page 9

Bottom View
Product Layout
XL45
1. Talk Keypad Switch
2. Boost Override Switch
3. Missed Call Switch
4. Voice Mail Switch
5. Tone/Pulse Switch
Page 10

Installation
XL45
1. Connect telephone line to “Line” jack of phone and to the
wall jack
2. Connect handset cord to telephone
3. Connect AC Adapter to telephone, and then to wall outlet
Page 11

DCP: Boost
XL45
The BOOST button controls the loudness of
the receiver. Once the BOOST button is
pressed, an extra level of amplification is
added over the entire range of the Volume
Control.
BOOST also activates the Tone Settings
On the bottom of the XL45, there is a Volume
Reset Override switch. When this is set to
“On” the Boost function is automatically
enabled every time the phone is picked up.
Page 12

DCP: Tone Settings
XL45
The XL45 offers four different tone settings to provide an experience that
may be customized to fit a specific users need. The illustration above
shows how the four settings relate to each other and the amount of
amplification they give to the different frequencies of sound.
The best way to choose between the settings is to listen to them all and
decide which one provides the best telephone conversation experience.
Page 13

DCP: Tone Settings
XL45
The first tone setting is one that emphasizes the low
frequency sounds.
This is for those who have a hard time hearing lower
pitched sounds.
This type of hearing need is common with those who
have noise-induced hearing loss.
Page 14

DCP: Tone Settings
XL45
The second tone is a flat amplification of all sounds.
For the user who wants full volume amplification for
every type of sound.
Suggested if the user wears a digital hearing aid while
using the phone.
Page 15

DCP: Tone Settings
XL45
The third tone setting is our set Clarity Power that begins to focus
more on the higher frequency sounds and add speech intelligibility.
It is a medium between tone setting two (2) and four (4).
Page 16

DCP: Tone Settings
XL45
The fourth tone setting provides full emphasis on speech
intelligibility using Clarity’s Multi-Band Compression.
This setting intelligently amplifies the human voice
and reduces noise and sharp sudden sounds during
the telephone conversation.
Page 17

Program Memory
XL45
Phone numbers can be stored into the phone’s memory to enable one button
dialing. The phone directory allows space for four (4) different phone numbers.
1. Pick the MENU button, then press the down arrow to the “View Mem
Dial” screen.
2. You will have the option to choose “1Yes” or “2 No”. Select “Yes” by
pressing the one (1) button.
3. MemDial 1 or the saved name and number will appear. (To go to the
next MemDial location press the down arrow)
4. Use the Delete Button to delete MemDial1 or name stored.
5. Next, type in the name of the number you wish to store and press Enter.
6. Now use the Delete button to delete the number to be edited. If there is
no number programmed, type the number you wish to store. Press the
Enter once again. The number has now been stored to MemDial 1.
Page 18

XL45 Caller ID
When there is a new incoming call the CID information will display on the
second ring. The first row will have the caller’s ID name. (If there is no
information, this will be blank.) The second row displays the telephone
number of the incoming call. If the number is longer than 11 digits, the
LCD will toggle the displayed number between the first 11 digits and the
remaining digits.
The time and date will automatically register after receiving your first call.
Page 19

XL45 Caller ID
View Caller ID
1. Press the Menu button. “View CID?” will display with the options
of “1 Yes” or “2 No”. Select “Yes” by pressing the (1) one button
and the most recent incoming call will be displayed. You can
also access the CID records by pressing the up or down arrow
keys.
2. Press the down arrow to view then next CID entry.
Page 20

XL45 Caller ID
Formatting CID and Call CID
1. Select your desired CID from your entry and press the Enter button.
2. “Pick Format” will appear on the screen first, then “Press UP/DN” will
appear. Use the arrow keys to choose the desired format for the CID
number and press the Enter button.
Note: A seven digit number will not display the area code. A 10 digit
number will display the area code without the one. The 11 digit will
display the number, Area code pulse one.
1. The next screens that will display are “Call Number?” and “Yes” or “2
No” with your chosen formatted number. Select “Yes” by pressing
the (1) one button to dial the number.
Page 21

XL45 Caller ID
Store Number from CID
1. Choose your correct dialing format.
2. Press the Enter Button.
3. Choose “2” No when asked if you want to dial the number, the
record with the correct dialing format will be displayed on the
screen.
4. Press and hold the memory key you wish to use for this record.
Page 22

Notification Accessory
XL45
The Bed Shaker is an optional
accessory that can be connected to
the phone and will begin to vibrate
when the phone rings.
Page 23

XL45 ClarityLogic™
ClarityLogic is the name of our simplified and easy to
use customer support service. While talking to a
Clarity representative, the telephone sends information
such as it model name and settings to Clarity. The
representative is immediately aware of the type and
current setting of the phone. This will allow for any
troubleshooting call to be quick and simple.
For your convenience, Clarity has pre-programmed the
customer support number into M1 of the phone. If you
do not wish to have this number stored in your phone
any new number can be programmed to that button.
Page 24

ClarityLogic
A simplified and easy to use customer
support service.
1. While talking to a Clarity representative,
the telephone sends information such
as its model name and settings to
Clarity.
2. The representative is immediately
aware of the type and current settings of
the phone. This will allow any
troubleshooting call to be quick and
simple, helping you find exactly what
you are looking for.
Just call 1 877 LOGIC24 (1 877 564-4224) to find out how
Clarity is there to make life easier.
Page 25

1. You call 1-877-LOGIC24 from your XL45
2. The call travels a standard telephone line to our server
ClarityLogic
System Process
3. The server then answers the call and evaluates the status of the phone
and then sends the voice and gathered data to a representative.
4. The representative answers the call and views the information on their
computer screen at which point they can make appropriate changes
or accurately advise you on a solution.
Best of all: to you, it is just a standard telephone call!
Page 26

Technical Specifications
XL45
Amplified dB Level
Up to 50/124dBSPL decibels
Tone control range
Full range: 300 to 3000Hz using one slide
control.
Dimensions
Size: 9 3/4” x 7” x 3 1/2” (24.765cm x 17.78cm x
8.89m)
Weight: 2.52 lbs. (1.14 kg)
Power Requirements
AC Adapter: 9VDC, 500 mA
Batteries: 4 AA alkaline batteries (not included)
 Loading...