

Page 1
Evolve Markerboard & Tackboard
Installation Instructions
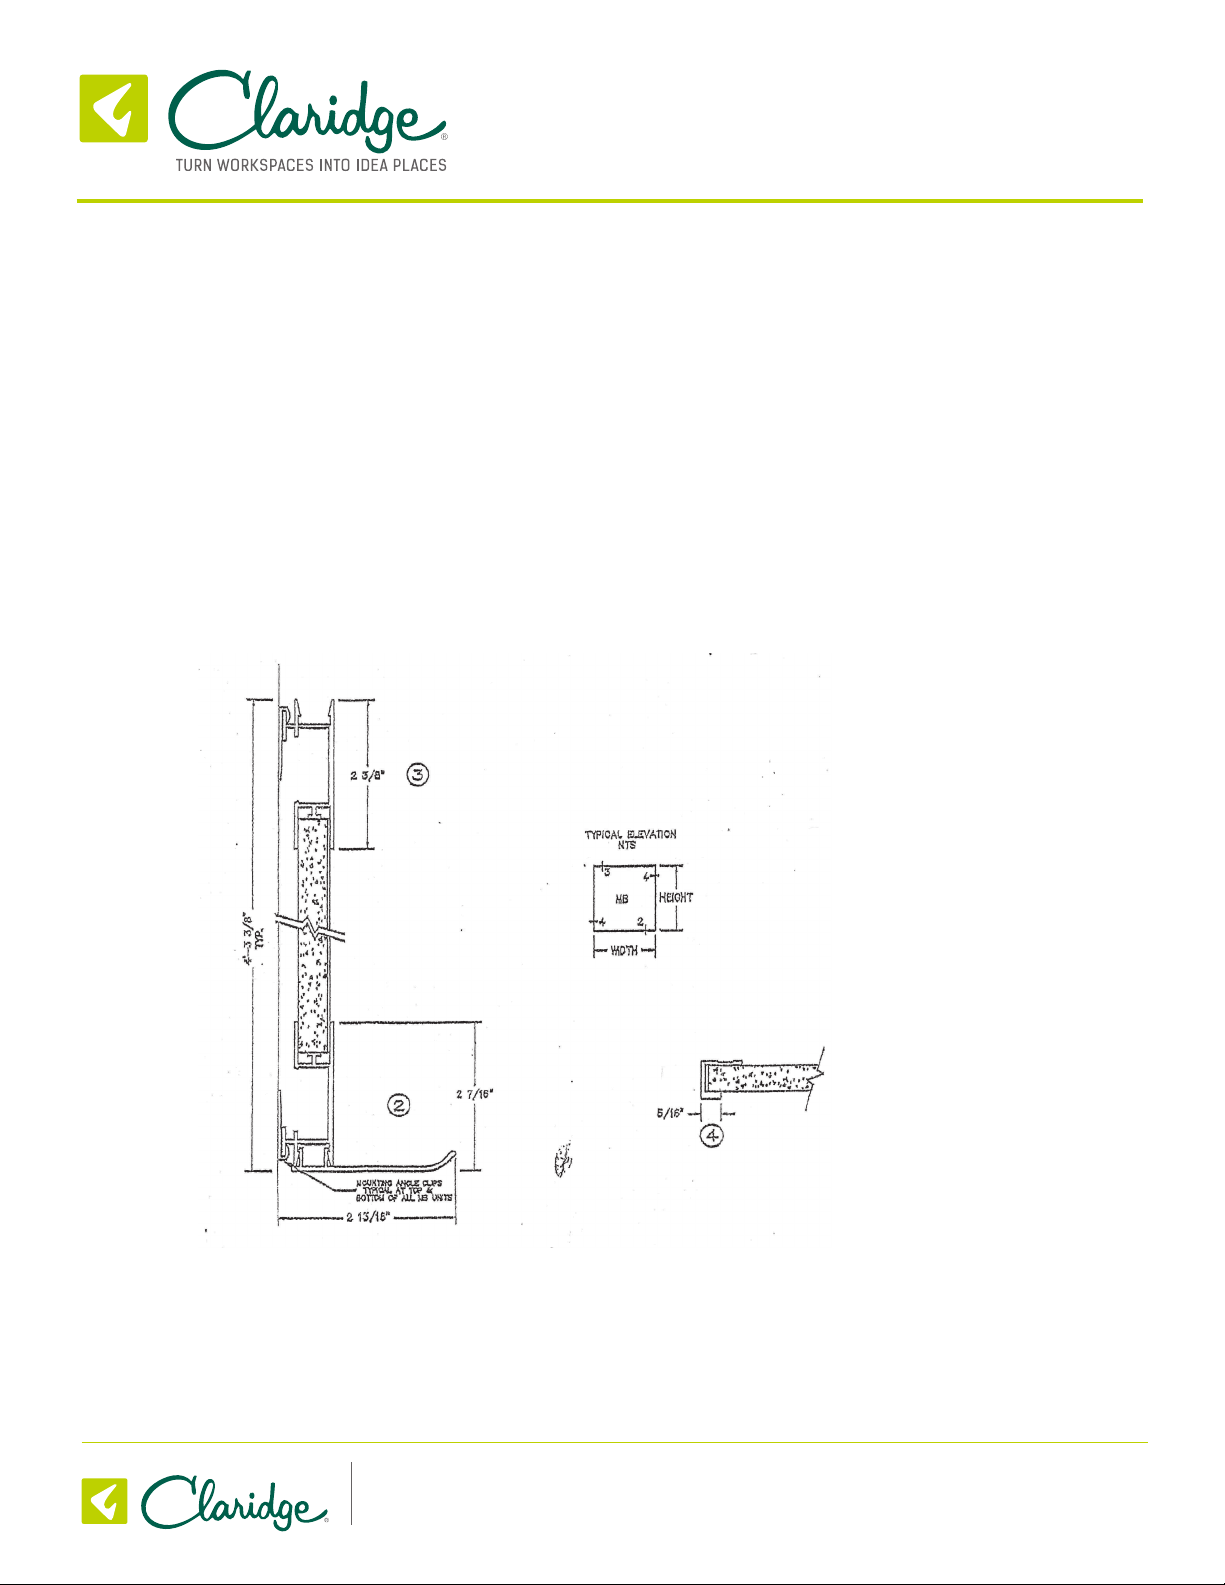
1. Determing desired position on wall and mark the height of the bottom of the
board. Drill holes for mounting clips 2” above the desired height of board,
allowing the clip to rest on the screw when securing to the wall.
2. Mount bottom hangers to wall with required type wall fastener. Wall fasteners
not furnished.
3. Using a straight edge, shim where necessary so that all anchor points of
hanger are in line with level. Anchor securely to wall.
4. Determine height for top of board, measure down 1 1/2” and drill holes for
clips.
5. Hold the clip in the highest position when tightening to the wall and do not
overtighten as the clip will need to be tapped down to hold firmly against the
board.
6. If adhesive is being used, apply glue to the back of the board. Position the
board on the wall and rest the bottom of the board’s built-in hanger on the
clips at bottom and press the board to the wall, tapping down on the clips at
top to engage the clips and the trim’s built-in hanger.
7. For boards with accessory tray, insert backing of tray into trim and rotate up
into position. A rubber mallet can be used to tap the tray into place. (Note: If
mallet is needed to “seat” the tray, be sure to use as close to back of tray as
possible.)
800.434.4610
claridgeproducts.com
The Writing Surface Experts
V030519
Page 2
Evolve - Tray & Hanging Board
Installation Instructions
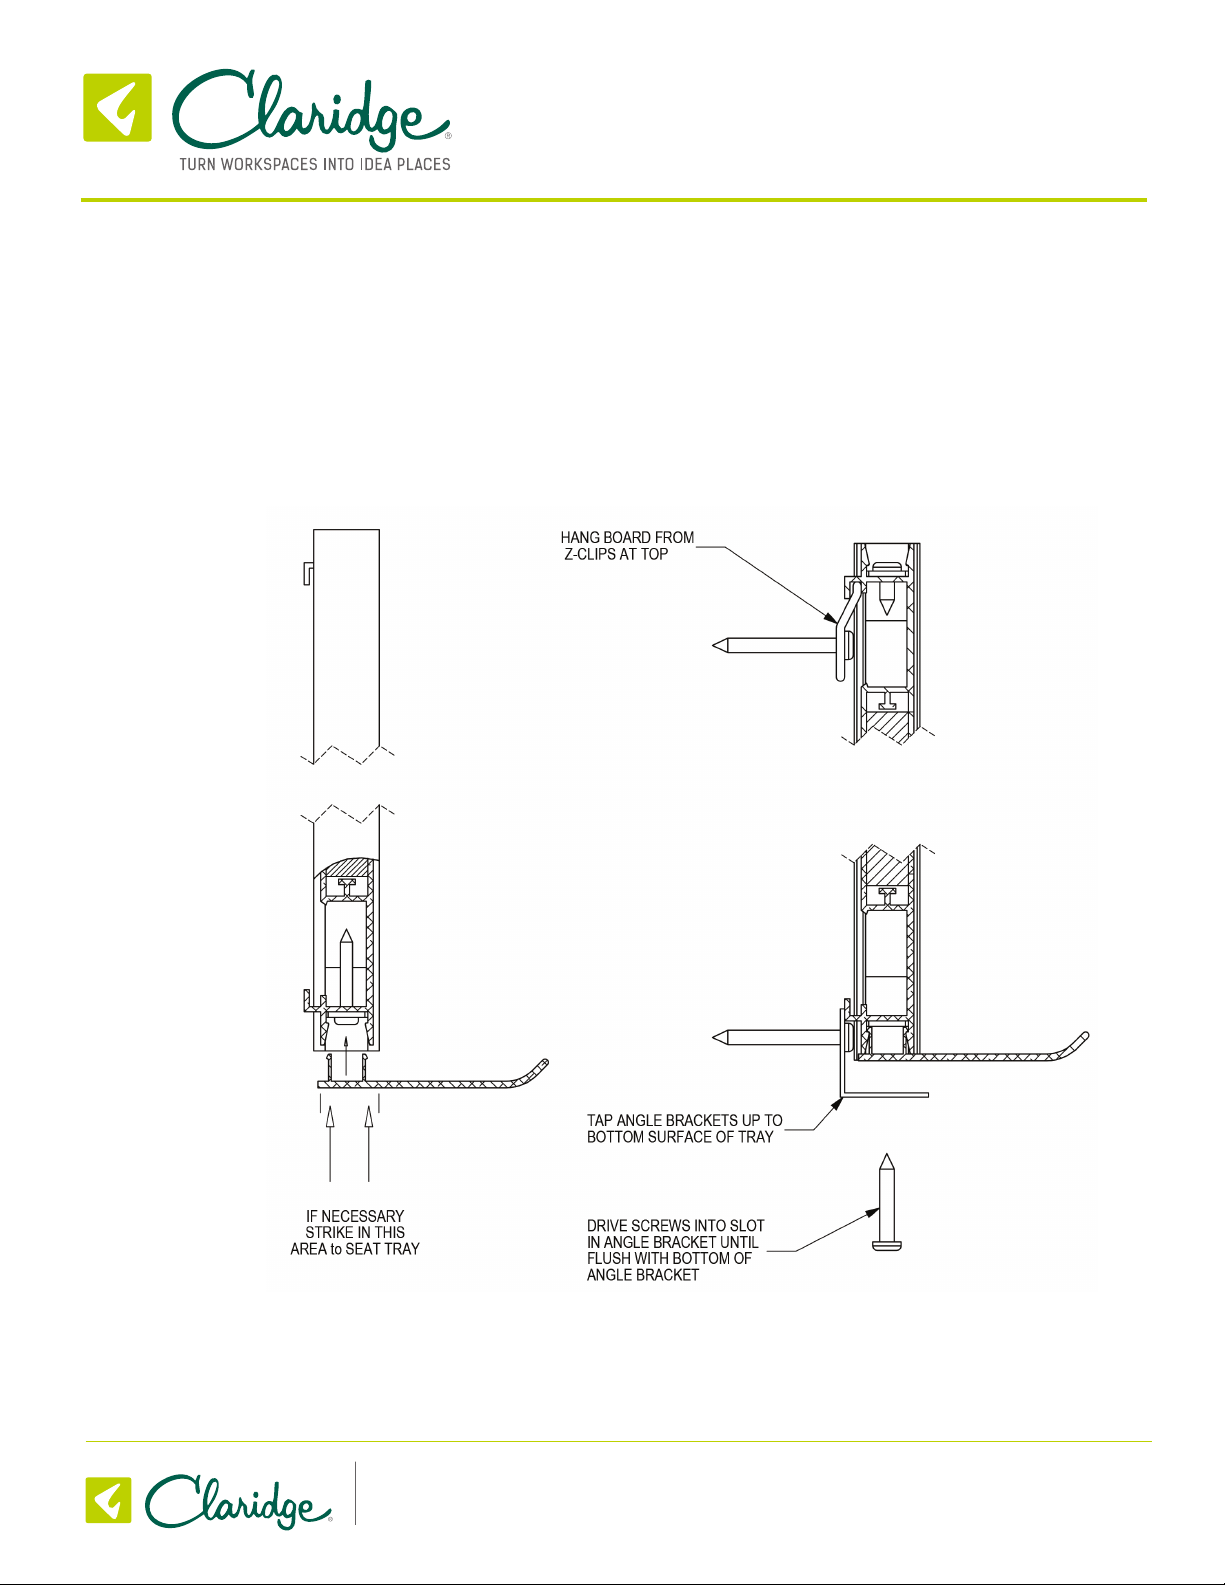
1. Assemble the marker tray to the board before mounting the marker
board on the wall.
2. To assemble the marker tray, fit the legs of the marker tray into the
channel along the lower edge of the board snapping the tray into
place. For safety and quality purposes the tray has a very snug fit.
Striking the bottom side of the tray with a rubber mallet can be done
if assembling the tray is difficult. Strike only in the area directly in line
with the board to prevent bending the tray.
3. Hang the board from the z-clips by the lip built into the back surface
of the top trim.
4. Tap the angle mounted to the wall at the bottom of the board up until
they touch the bottom surface of the marker tray.
5. Drive one #8 screw through the slot in the angle clip and into the
tray and lower trim until flush with the bottom of the clip, securing
the board to the clip. Repeat for all clips.
800.434.4610
claridgeproducts.com
The Writing Surface Experts
V030519
 Loading...