

Clare Controls ClareVision Plus Series Quick Start Manual

DOC ID - 1604 • Rev 05 1 / 9
ClareVision Plus IP Cameras
Quick Start Guide
Content
Introduction...1
Included...1
Installation Options...2
Creating and using a ClareVision Plus account...3
Warranty Information...9
Support...9
Last modified: 01/23/19
Introduction
Thank you for choosing Clare Controls. In today’s competitive market place, we
can appreciate that you have many choices for your home automation needs.
This document is intended as a quick-start guide, not a full product guide. For
more information, view the full ClareVision Plus Camera User Guide (DOC ID
1430 Rev 02).
Included
(contents vary per NVR)
• Camera
• Power supply
• Composite video output pigtail adapter (if applicable)
• Mounting screws (if applicable)
• Anchors (if applicable)
• Hex tool (if applicable)
• Drill template
• Weather housing (if applicable)
Note: Ensure all accessories are included. If not, contact your dealer.
DOC ID - 1604 • Rev 05 2 / 9
Installation Options
Select an installation option.
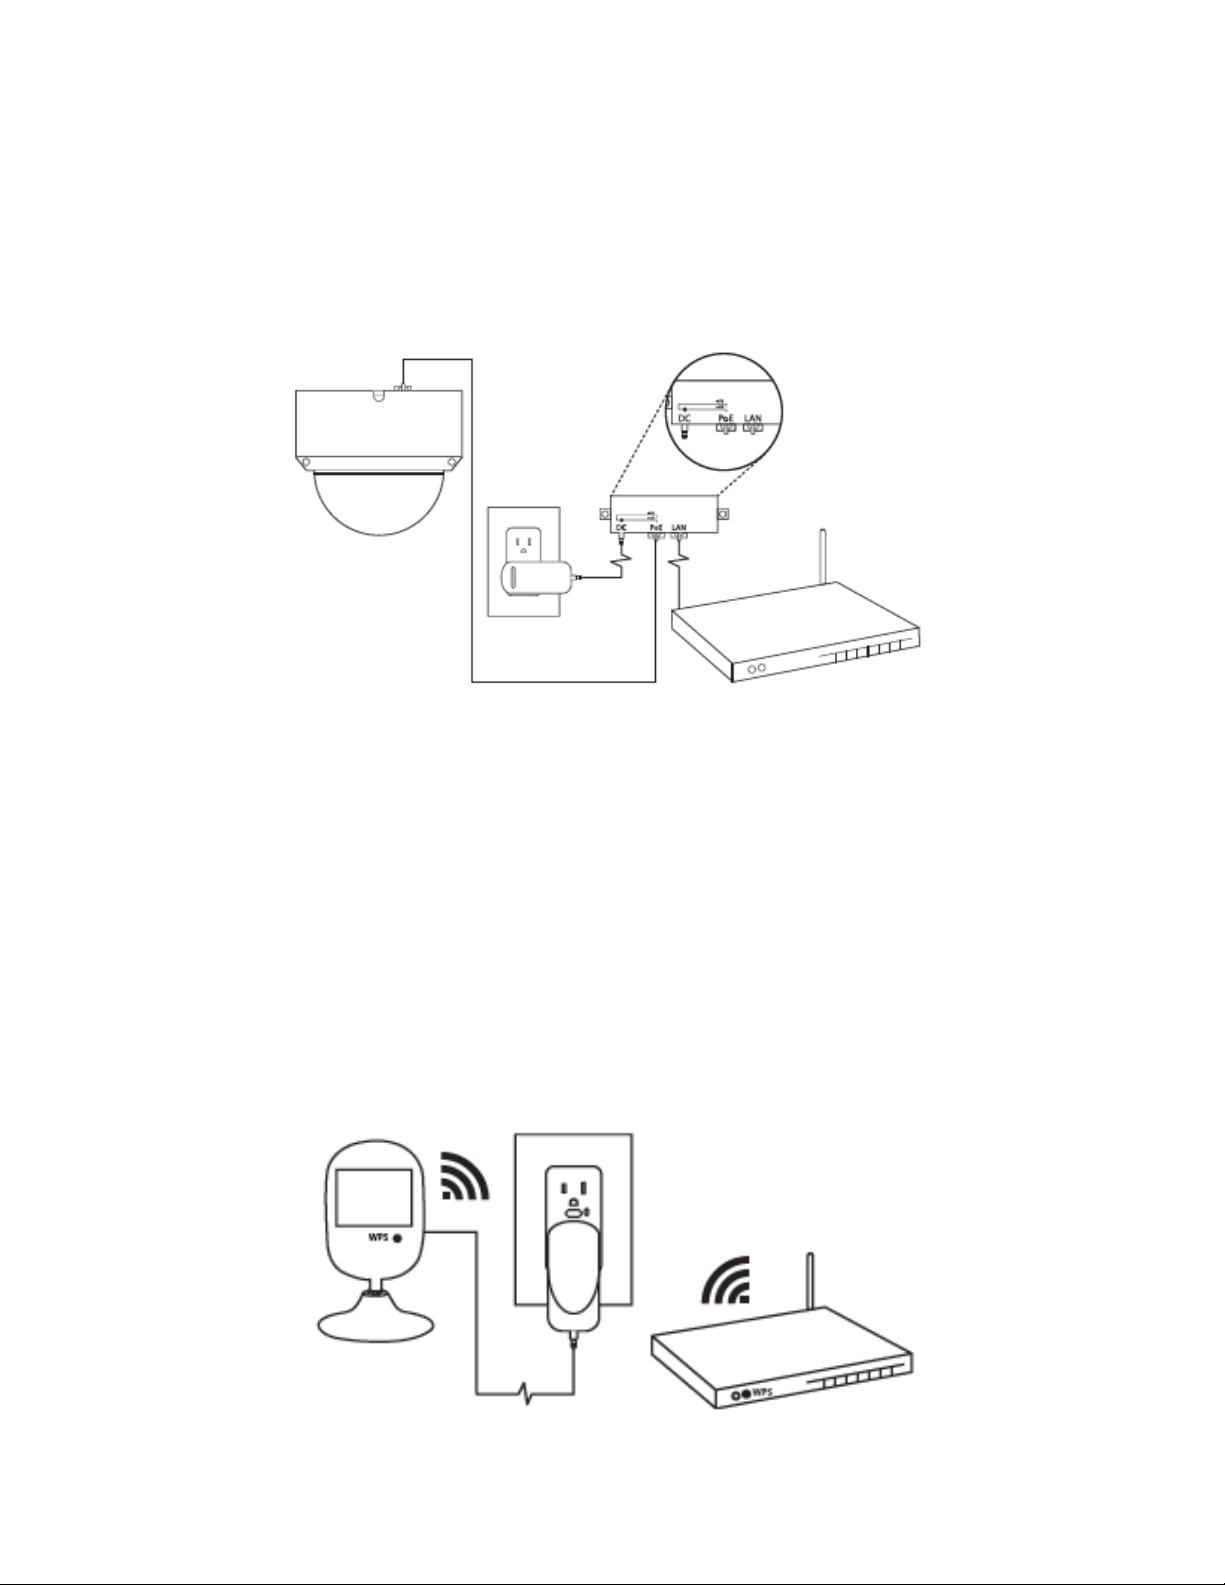
Installation Option 1: PoE (Power over Ethernet)
Option 1 requires access to the ClareVision Plus app, camera, and a PoE power
supply.
To setup your ClareVision Plus camera using PoE:
1. Connect the camera to the PoE port on the PoE injector.
2. Connect the injector to the router, and then plug in the injector’s power
supply.
3. Download and launch the ClareVision Plus app.
Installation Option 2: Wi-Fi
Option 2 requires access to Wi-Fi, the ClareVision Plus app, and the camera.
Note: When using the Wi-Fi option, ensure that your mobile device is connected
to the desired network for the camera.

DOC ID - 1604 • Rev 05 3 / 9
To setup your ClareVision Plus camera using Wi-Fi:
1. Connect the camera to the power supply.
2. Connect your mobile device to the Wi-Fi network desired for camera use
(2.4Ghz only).
3. Add the camera in the ClareVision Plus app, see “To add a ClareVision Plus
camera,” on page 4.
Creating and using a ClareVision Plus account
To access the live camera view and stream footage from anywhere in the world,
you must set up a ClareVision Plus account.
To setup the ClareVision Plus account using an iOS device:
1. Download and install the ClareVision Plus app.
ClareVision Plus for Android – Google Play
ClareVision Plus for iOS - iTunes
2. Launch the app, and then tap My Devices.
3. Tap Login.
4. Enter the homeowner’s credentials.
– or –
Tap Register. Follow the registration steps below.
Note: The ClareVision Plus account used must be that of the homeowner.
a. Tap Mobile or Email (preferred), and then read and select the
checkbox for the Terms of Service.
b. Select the country, and then tap Finish in the top-right.
Email
i. Enter the customer’s email address, and then tap Next.
ii. Retrieve the code from the email and enter it into the Security
Code field.
iii. Tap Next
Mobile
i. Enter the customer’s mobile number, and then tap in the
Mobile Phone Number field.
ii. Tap Get Security Code.
 Loading...