

Page 1
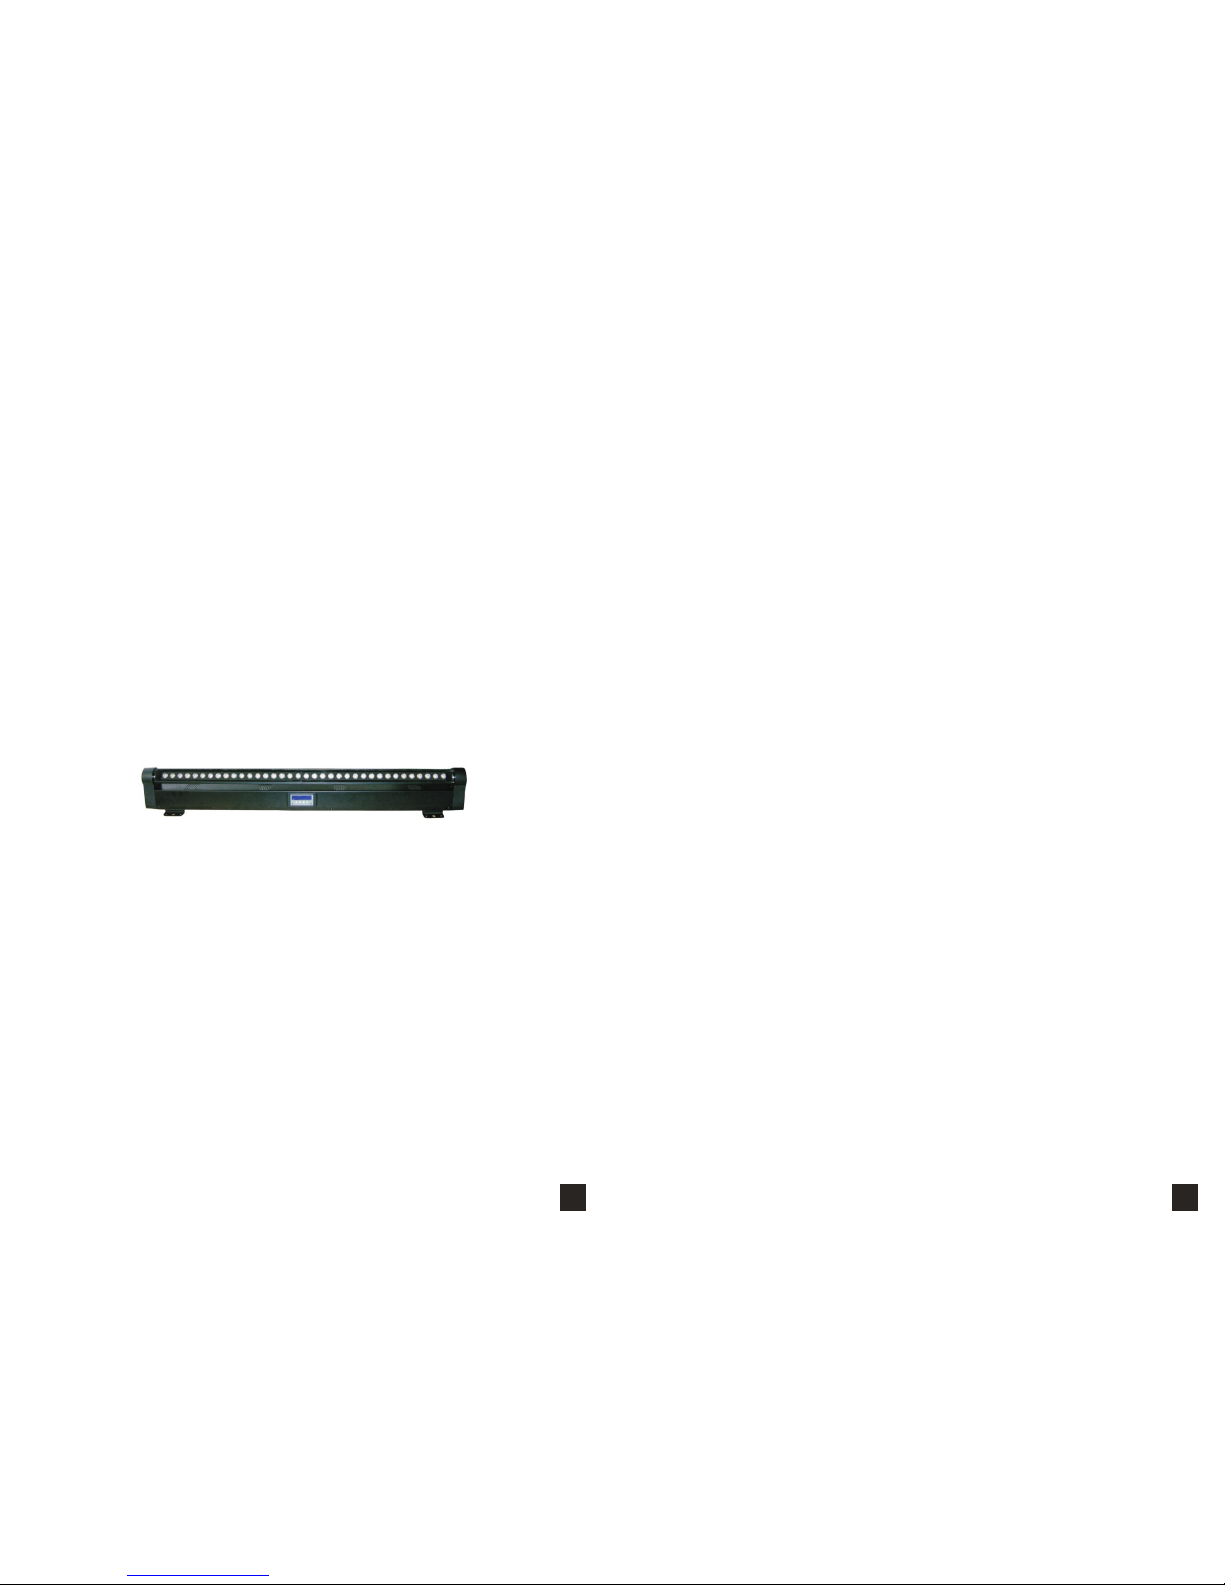
Table of Contents
Introduction .................................................. 3
Safety Instructions ...................................... 3
Features ........................................................ 4
Product View ................................................ 4
Mounting ....................................................... 5
Operation Instructions.................................. 5
▪ Menu Map ....................................................6
▪ DMX Mode ...................................................7
Mode 1: 6 DMX channels......................... 7
Mode 2: 39 DMX channels....................... 8
▪ Slave Mode ............................................... 9
General Maintenance ..................................10
Specifications ............................................. 10
MOVEPIXELBAR
USER MANUAL
21
Page 2
■ INTRODUCTION ■ FEATURES
■ Unpacking
■ Safety intructions
► Additional features
▪ Dimmer 0-100%
▪ Strobe 1-30 fps
▪ Power In/Out for daisy-chain
▪ Optical lens: 25° (installed)
▪ Quarter-turn fastener mounting points
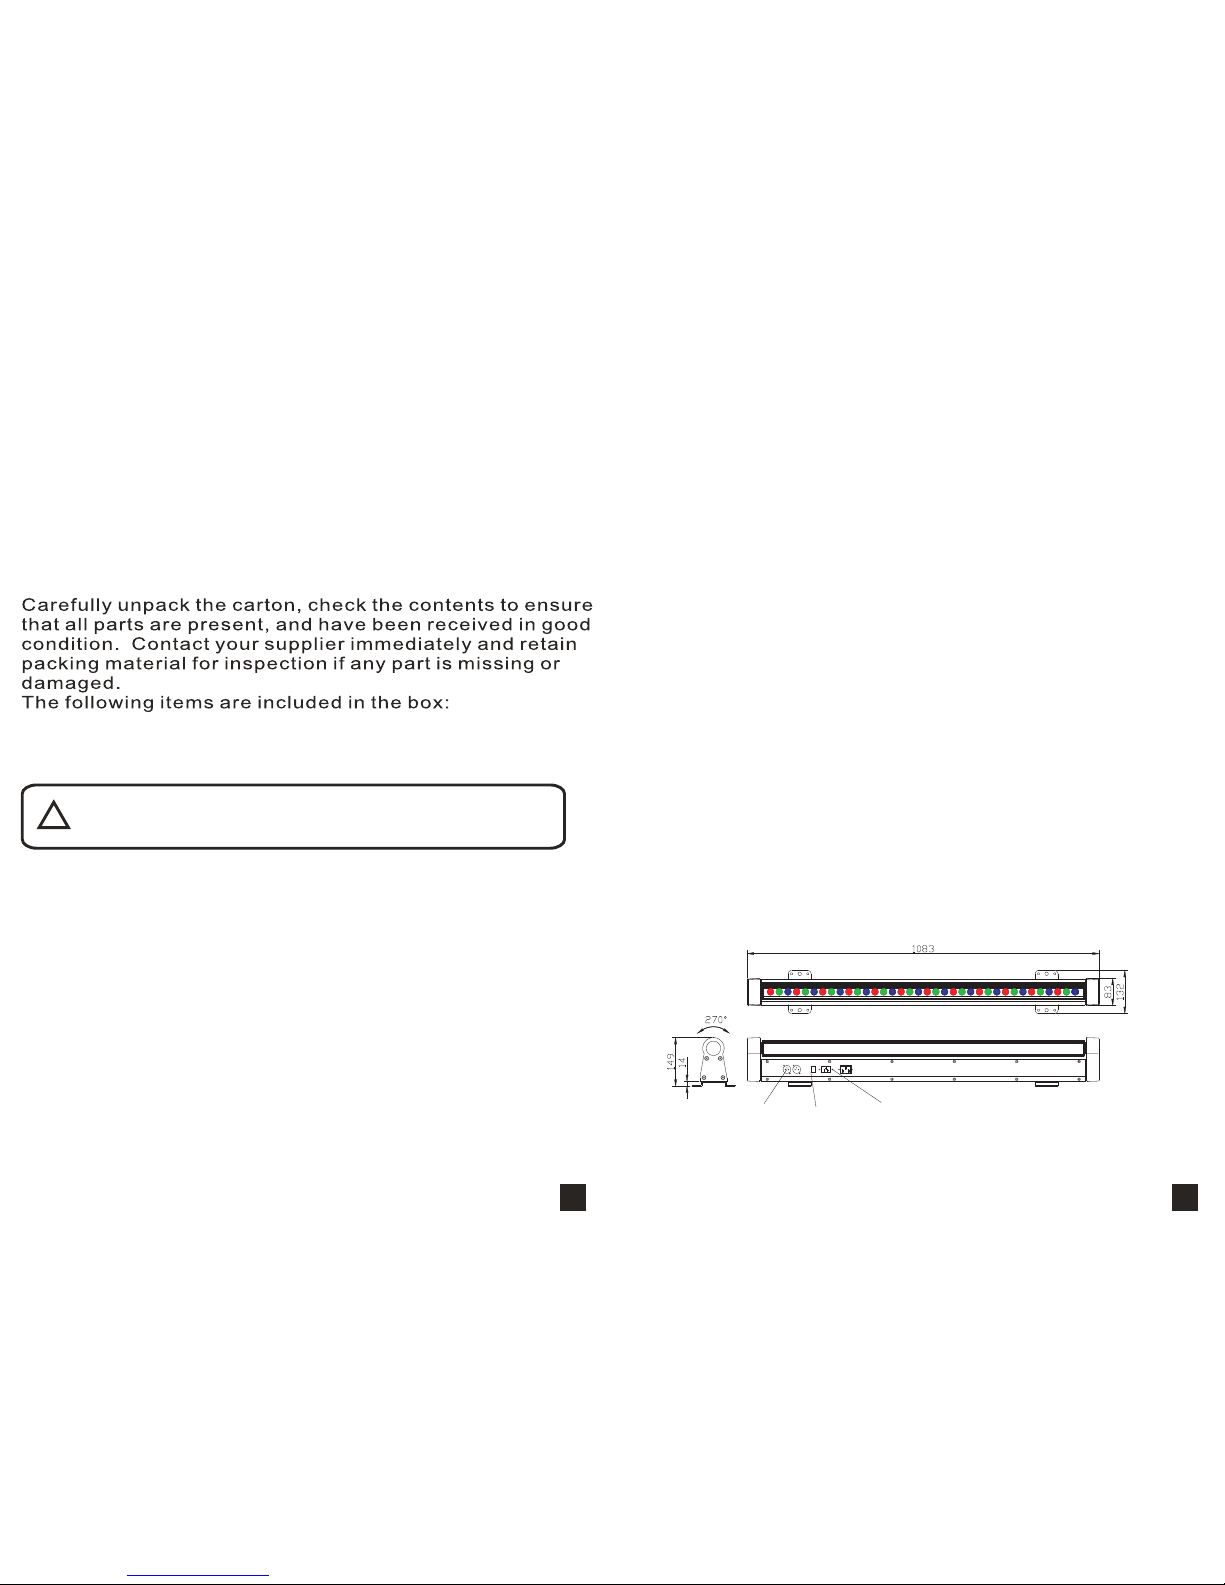
PRODUCT VIEW
Thank you for selecting the MovePixelBar108 . With motorized tilt
moment and 36pcs high power3W LEDs,this
gives you ultra bright, smooth and unlimited colors to project on a
wide area for enhancing your enviroment. Please read this user
manual carefully and thoroughly before operation.
mixing MovePixelBar108
● 1 x
● 1 x Power cord with plug
● 1 x User Manual
MovePixelBar108
!
Warning!!! To reduce the risk of fire, electric shock, or injury
to persons, follow these important safety instructions:
▪ This product is intended for indoor use only!
▪ Always turn off, unplug power and allow fixture to cool before servicing.
▪ Ensure that fixture is properly grounded.
▪ Please keep this User Guide for future consultation.
▪ Always make sure that you are connecting to the proper voltage and that the
line voltage you are connecting to is not higher than that stated on decal or rear
panel of the fixture.
▪ To prevent risk of fire or shock, do not expose fixture to rain or moisture.
▪ The unit must be installed in a location with adequate ventilation, at least 50cm
from adjacent surfaces. Be sure no ventilation slots are blocked.
▪ Always disconnect from power before servicing or replacing fuse.
▪ Make sure power cord is never crimped or damaged.
▪ Do not look into the beam from a distance of less than 40 cm (16 inches).
▪ Do not stare into the beam for extended periods at a short distance.
► Key features
▪ RGB color mixing
▪ 4 modes: Auto, Sound active, DMX, Program
▪ 2 DMX modes:6ch, 39ch
▪ 5 built-in programs
▪ Onboard programming functionality enables programming
without external DMX controller
▪ Thermal management system ensures long life of LEDs
▪ Electronic protection against short circuit
▪ 3-pin or 5-pin XLR connectors
▪ Blue LCD display of 16 x 2 digits
▪ Power failure memory
▪ Set Slave ID
▪ LED Refresh-rate 400Hz suitable for use in TV studio
Power in Power out
DMX out DMX in
Power switch
43
Page 3
■ SETUP
► MOUNTING
This fixture may be mounted in any safe position: floor stand up for lighting, wall
mount, truss mount, etc.
► FIXTURE LINKING
► AC POWER
► OPERATION INSTRUCTIONS
Clamp(not included)
Truss
Wall
Screw
Screw
!
!
IMPORTANT!!! Safety cables must always be used. The safety cable must
be capable of holding 10 times the weight of the fixture.
Warning! All fixtures must be connected to circuits with a suitable Earth
Ground.
To run your light shows of one or more fixtures using a DMX-512 controller
or to run synchronized shows on two or more fixtures in master/slave
operating mode, you need DMX cables to link the units from DMX IN to DMX
OUT.
The fixture is designed to work on 110V 60Hz or 230V 50Hz. Make sure you
are connecting to the proper voltage which is printed on specification label
on the unit.
4 working modes are at your choice: Auto, Sound, DMX,Slave. In Auto and
Sound mode, multiple units can be linkable via master/slave to run a
synchronal system.
1. Connect the fixture to main power and turn on power switch.
2. The fixture resets with noise (nomal). LCD display shows: Reset...
3. After system reset, LED display show: Welcome
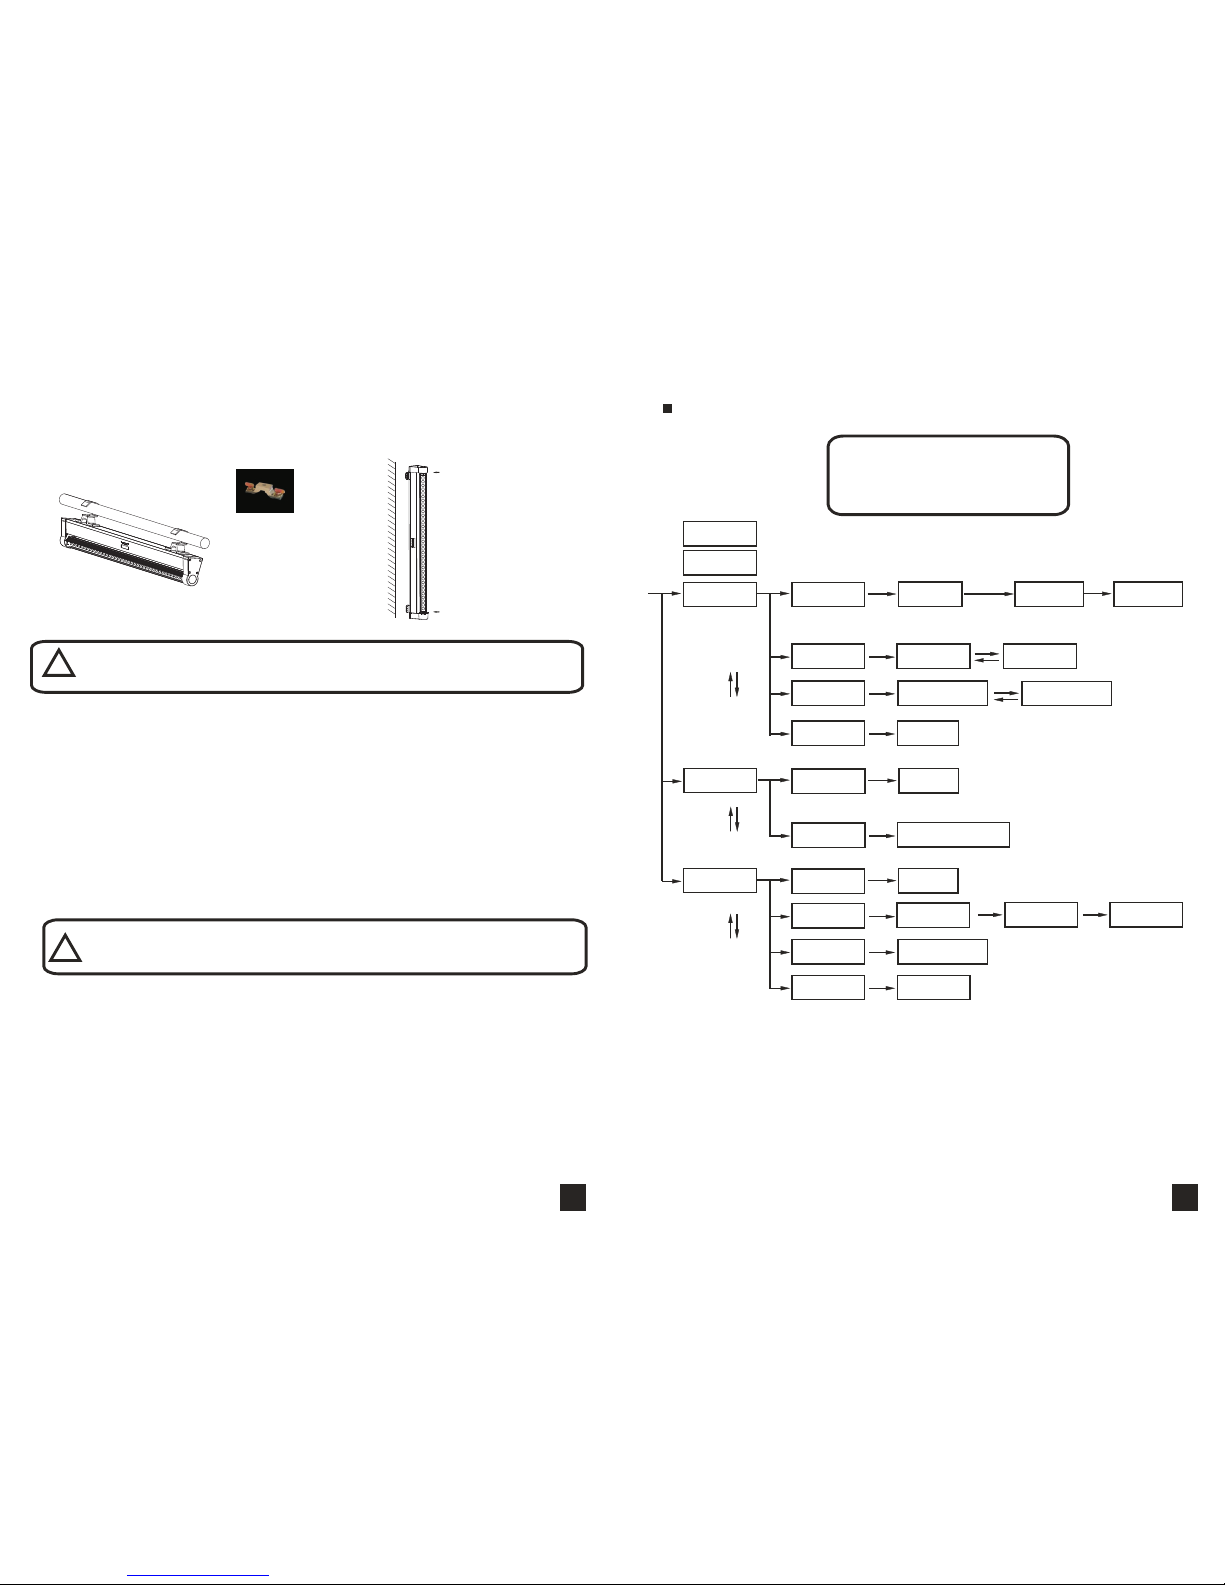
4. Press MENU button to enter System mode or Motor mode.
Menu MAP
When navigating the menu:
Use “UP” button to move up.
Use “DOWN” button to move down.
Use “ENTER” button to move right.
Use “MENU” button to move left.
Please wait... Reset moto...
Boot system...
System Mode
[xxx]
System Mode
[Autoc]
System Mode
[Sound]
System Mode
[DMX]
System Mode
[Slave]
Slave ID
[01~30]
Set wait time
[0~5]S
System setup
[xxx]
System setup
[Slave Number]
System setup
[Set software]
System setup
[Back light]
System setup
[Wait time]
Sensitivity
[01~99]
Sound program
[01~16]
Slave number
[00~30]
Dmx-addr Mode
[001~512] [x]
Set back light
[000~255]
Dmx-addr Mode
[xxx] [1~2]
Color Program
[xx]
Color Program
[01~05]
Color speed
[001~240]
Menu
Enter
Enter
Enter
Enter
Enter
Enter
Enter
Enter
Enter
Enter
Enter
Enter
Up
Up
Up
Down
Down
Down
65
Reset moto...
WELCOME TO
Moto Mode
Moto Mode
Moto Mode
[xxx]
[keep]
[AutoM]
Position
P1 P2 Speed
[000~255]
[000~255] [000~255] [1~5]
Enter
Enter
Up
Down
Page 4
■ DMX MODE
DMX MODE1
DMX MODE2
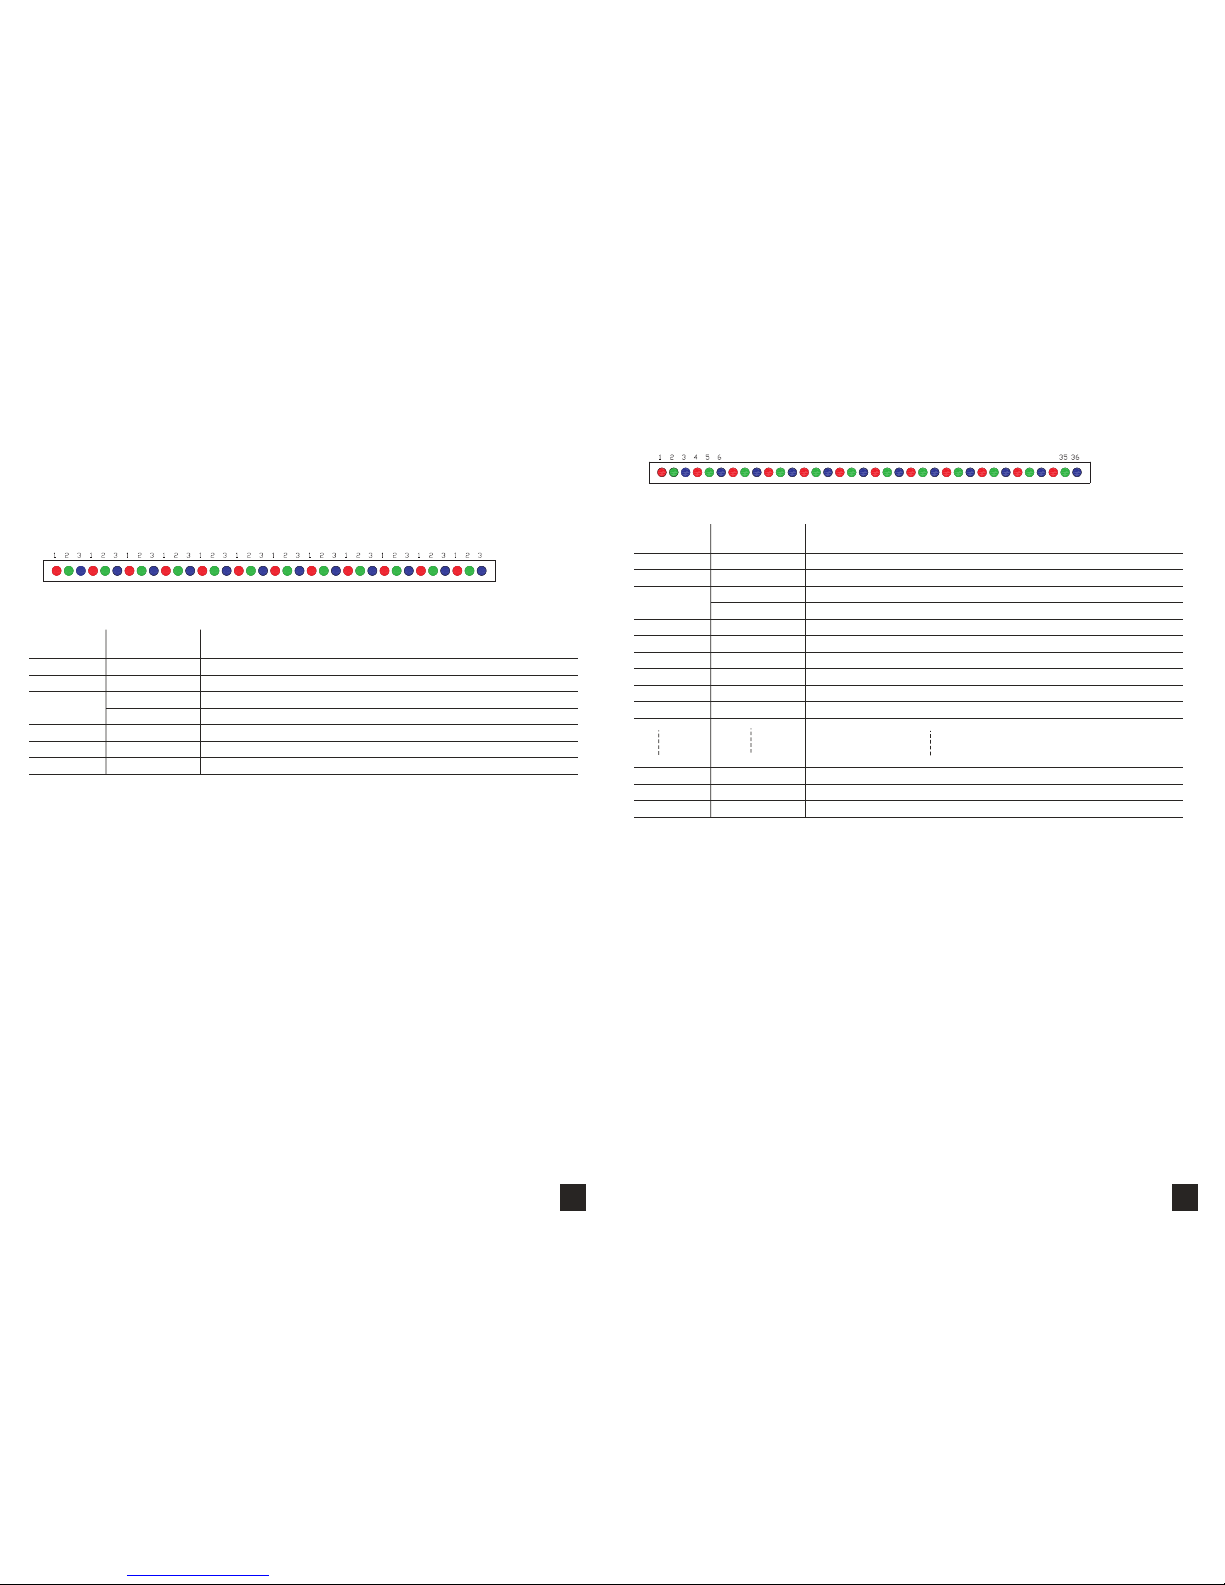
In DMX mode, you have 2 modes to select according to
programming requirement for your environment: 6ch, 39ch
Channel Level Function
Channel Level Function
Ch1 0-255 Rotate from 0-270°
Ch1 0-255 Rotate from 0-270°
87
Ch3 0-4 Strobe open
Ch3 0-4 Strobe open
5-255 Linear Strobe frequency adjustment from 1 to 20HZ
5-255 Linear Strobe frequency adjustment from 1 to 20HZ
Ch2 0-255 General-dimmer. Linear intensity adjustment 0-100%
Ch4 0-255 Red1 Linear adjustment 0-100%
Ch7 0-255 Red2 Linear adjustment 0-100%
Ch37 0-255 Red12 Linear adjustment 0-100%
Ch5 0-255 Green1 Linear adjustment 0-100%
Ch8 0-255 Green2 Linear adjustment 0-100%
Ch38 0-255 Green12 Linear adjustment 0-100%
Ch6 0-255 Blue1 Linear adjustment 0-100%
Ch8 0-255 Blue2 Linear adjustment 0-100%
Ch39 0-255 Blue12 Linear adjustment 0-100%
Page 5
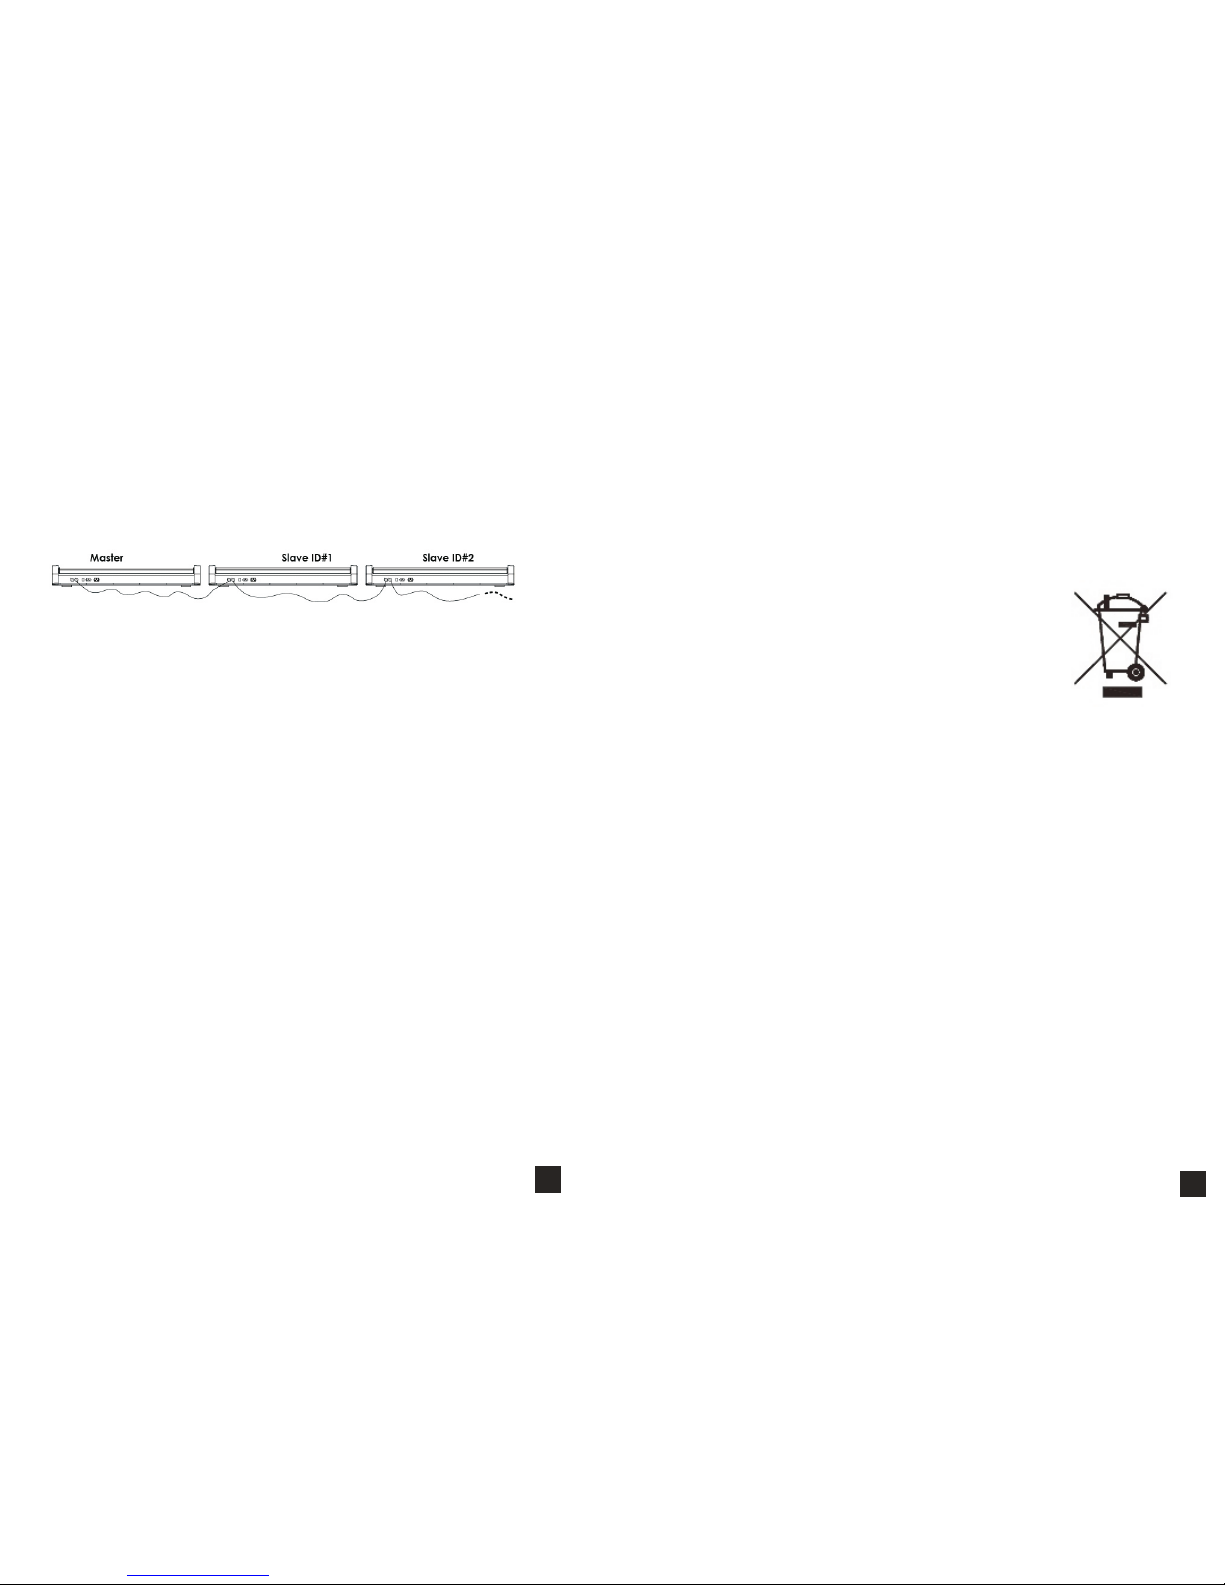
MASTER SLAVE MODE
In this mode, one can run the whole system in synchronized effect.
Maximum 31pcs can be linked in a daisy chain as Master/Slave
operating
1. One unit is to be set as Master and this Master unit needs to work
under PROGRAM or Auto or Sound mode. Also, you need to set
Slave Number for total number of Slave units. i.e., there are 5 Slave
units (not including Master unit) in the daisy chain, then Slave
Number is 5.
2. Other units are to be set in Slave mode and and Slave ID is to be
set for each Slave unit. The first Slave connected with the Master
unnit is Slave ID [1], the next Slave units are Slave ID [2], Slave ID [3],
and son on.
3. Operate the Master unit in PROGRAM, Auto and
Sound mode to run the whole system.
Note! After prolonged periods of operation, the fixture
may reach high temperatures and dim due to thermal
management. After a while of cool down, output will
recover.
9
To maintain optimum performance fixtures should be cleaned
frequently. Unplug fixture from power. Use a vacuum or air
compressor and a soft brush to remove dust collected on external
vents and internal components. Clean all glass gently when the
fixture is cold with a mild solution of glass cleaner or Isopropyl
Alcohol and a soft lint free cotton cloth or lens tissue.
To reduce the impact on human health and the
environment, old appliances must be collected
separately.
GENERAL MAINTENACE
IMPORTANT IN FORMATION
SPECIFICATIONS
WEIGHT & DIMENSIONS
Length ................................................................. 43.03 in (1,093 mm)
Width .....................................................................5.20 in (132 mm)
Height ..... ..................................... 6.10in (155 mm)
Weight ...................................................................18.26 lbs (8.3 kg)
POWER
AC Power ................................................... 110V or 230V 50/60Hz AC
(check spec label on product)
Power Consumption ......................................................120W Max.
LIGHT SOURCE
LED R,G,B ....................................................................36 x 3W
.........................
Optical lens ....................................................................... 25°
10
 Loading...