

CITROËN c4 picasso 2006, C4 Picasso 2008, Grand C4 Picasso 2008 Owner's Manual
4
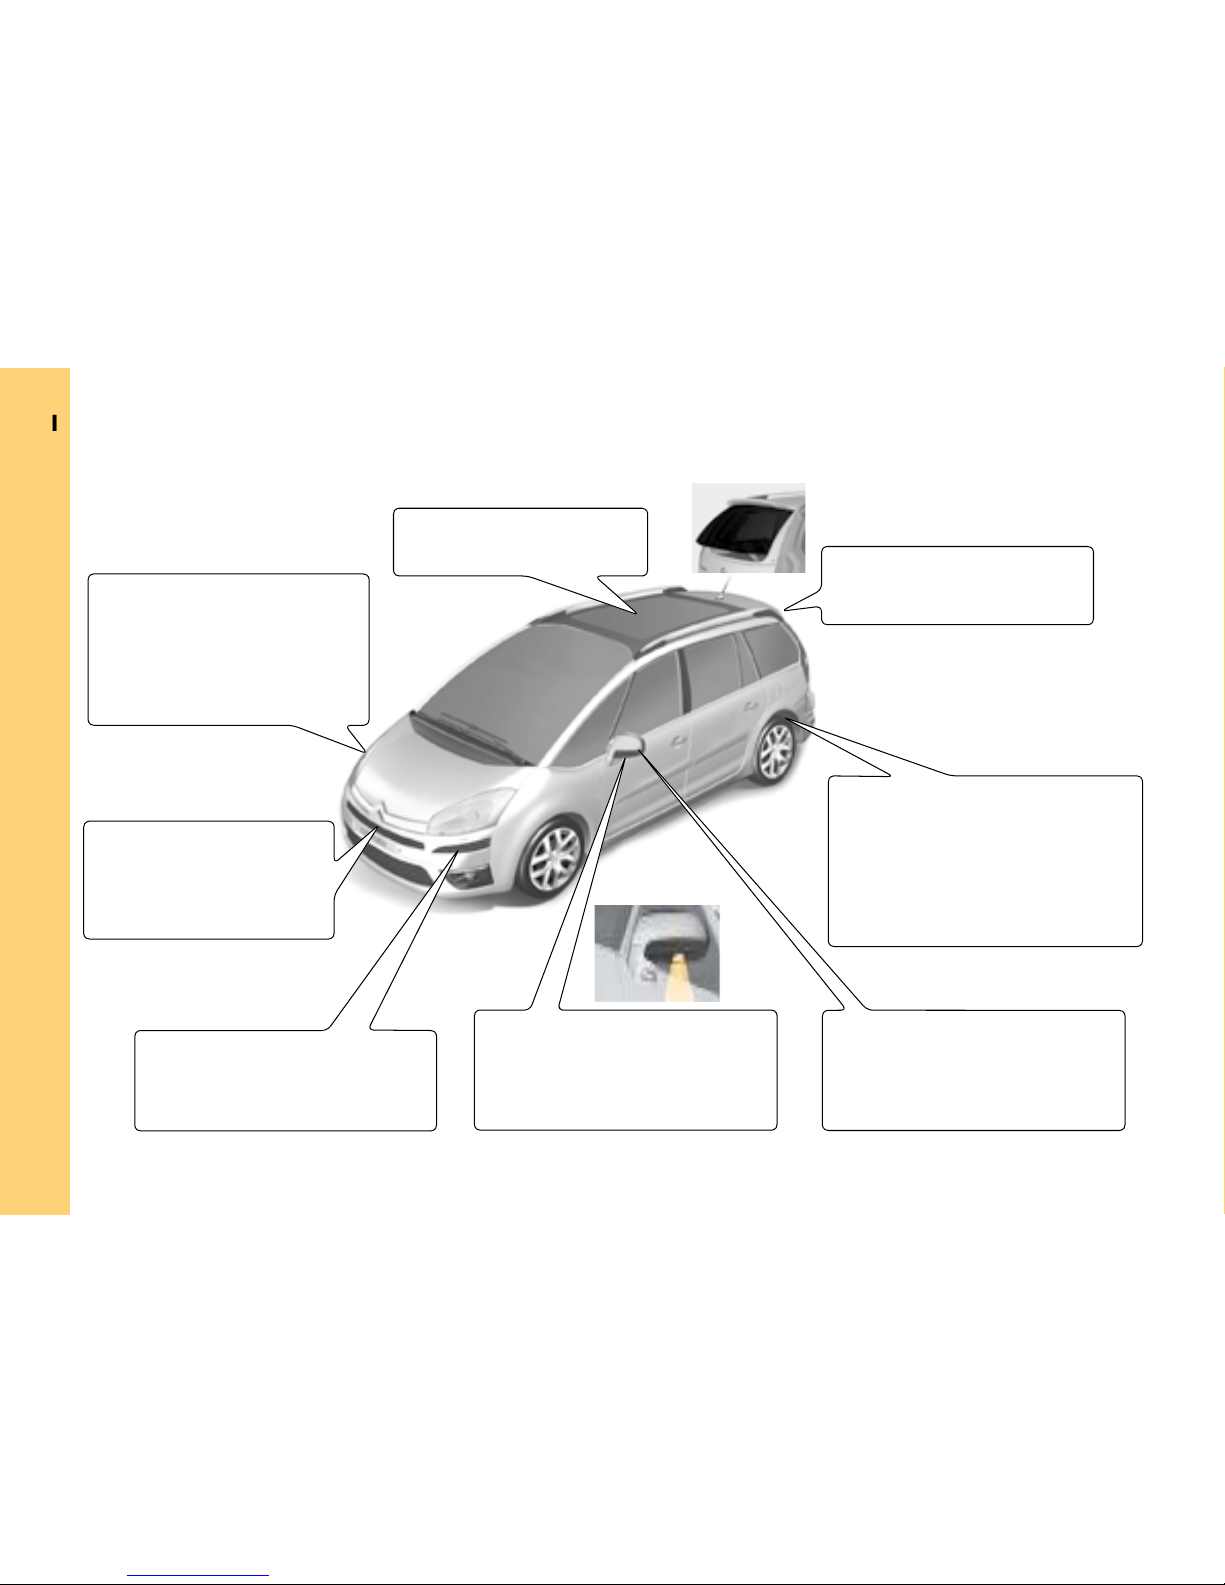
Xenon directional
Whether on dipped beams
tion allows your headlamps
to follow the direction of the
suspension
The rear pneumatic suspen-
These light up the zones fac-
With electric foldback.
Automatically tilts in reverse
A
B
C
D
B
A
A.
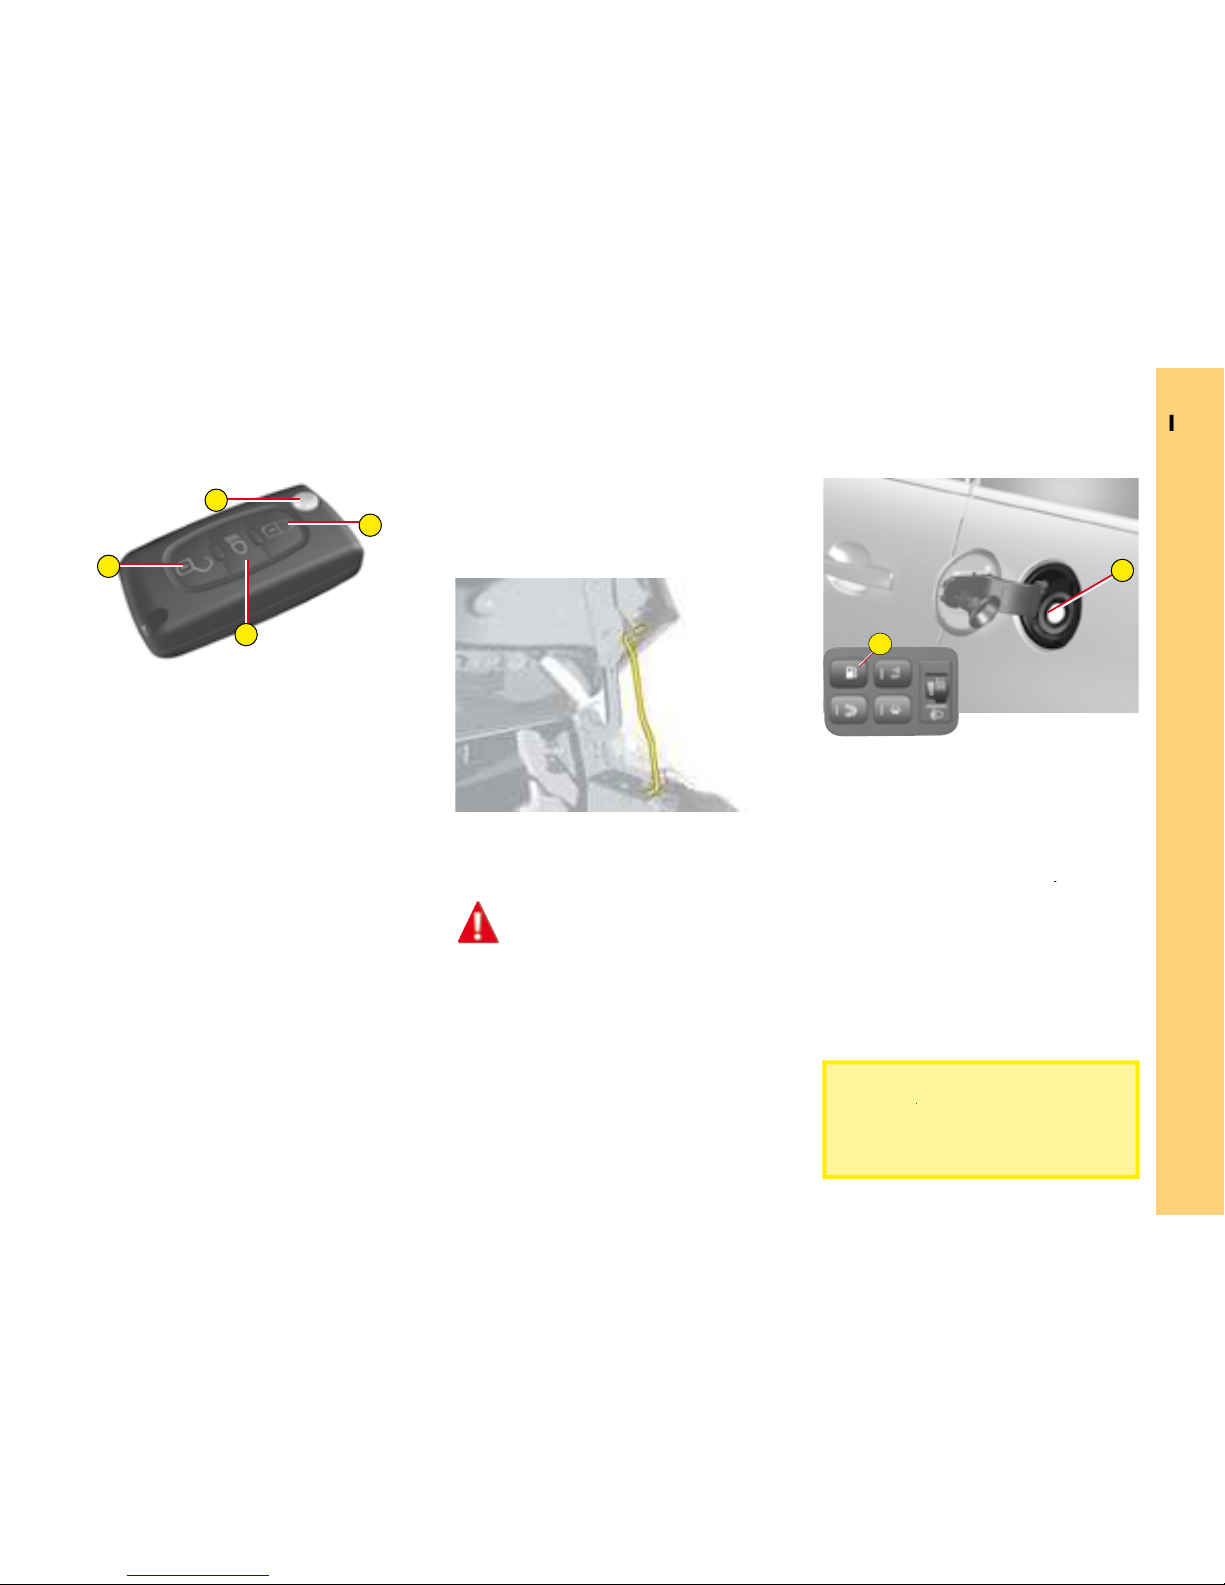
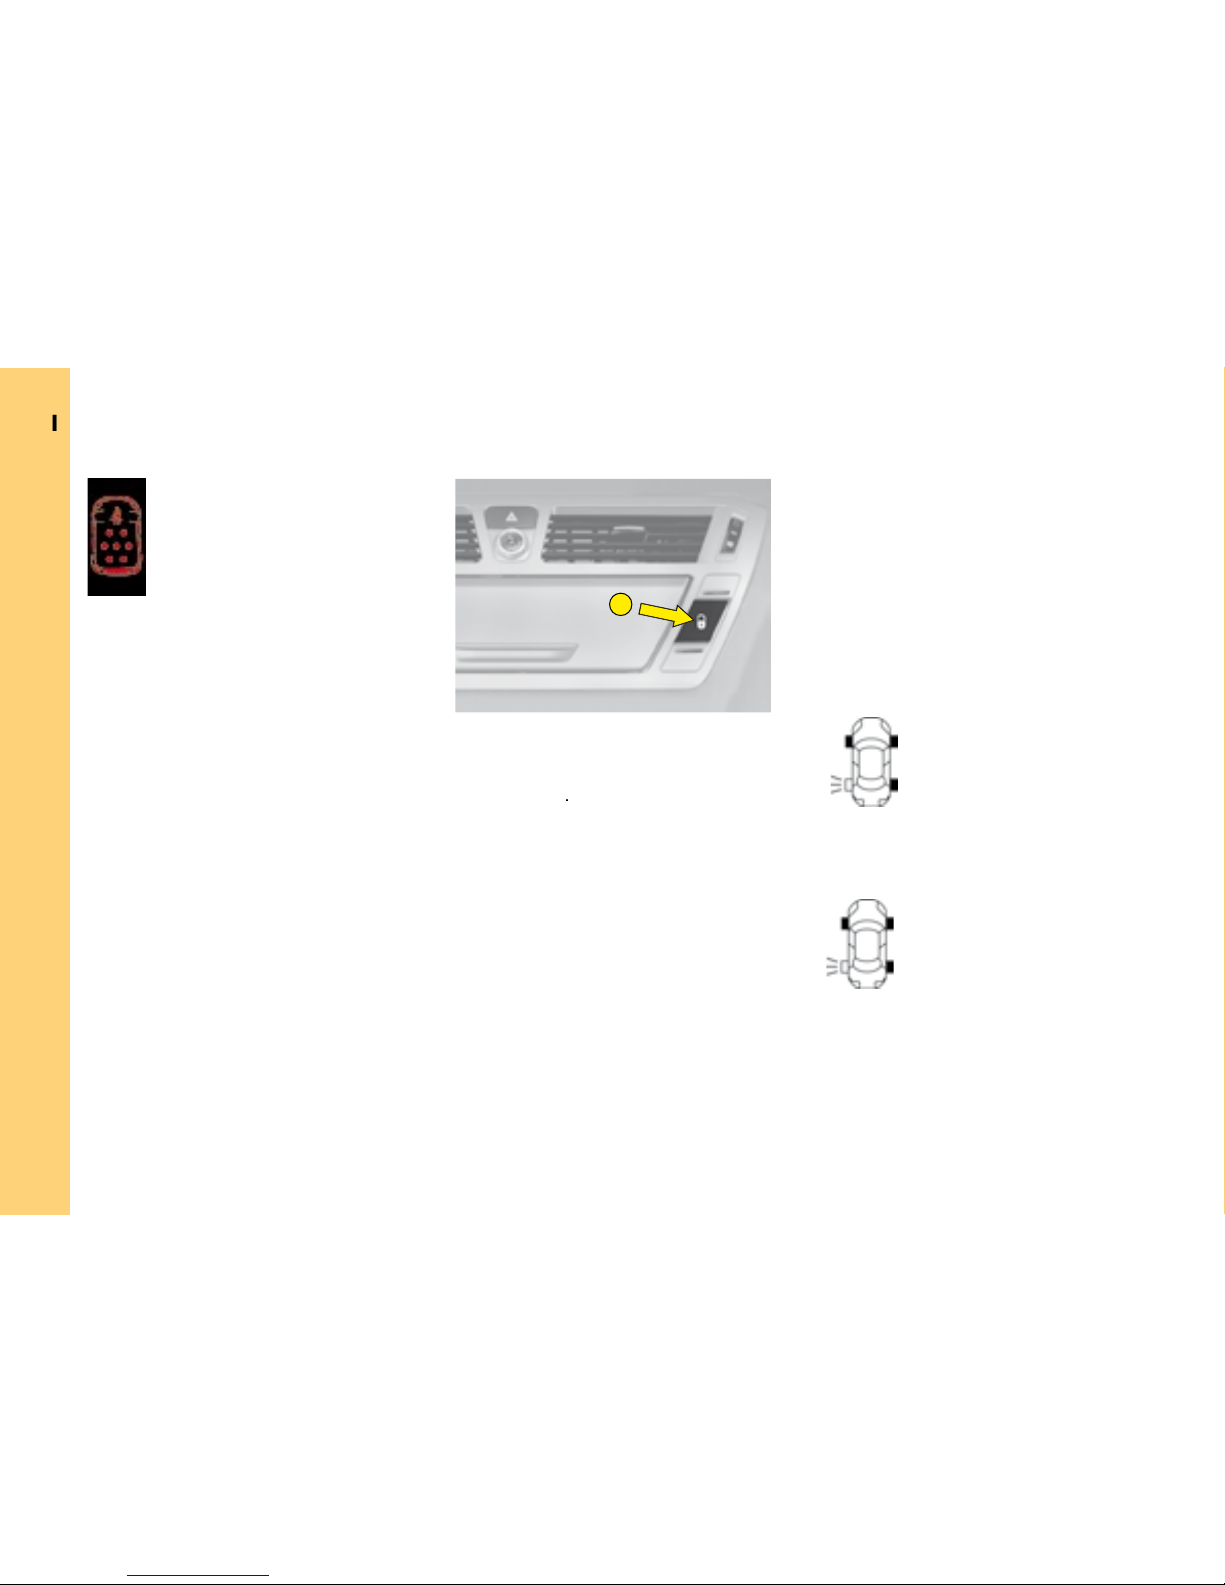
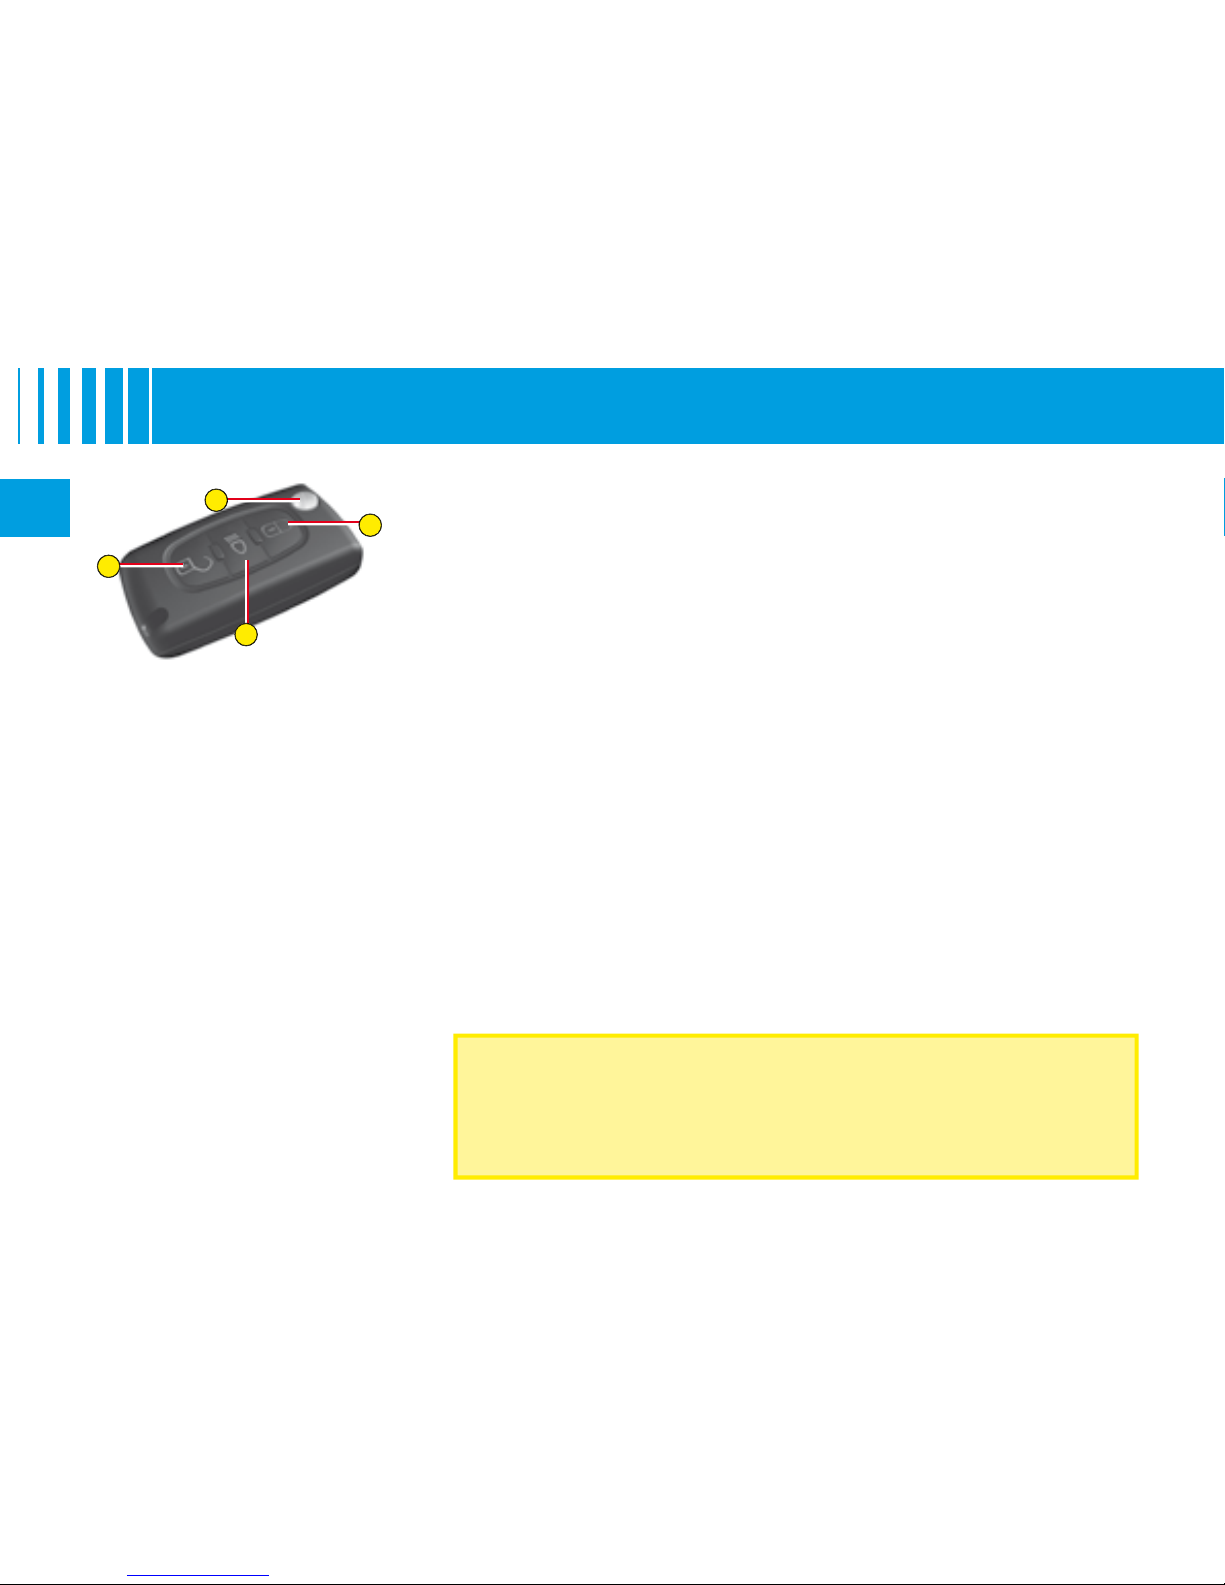
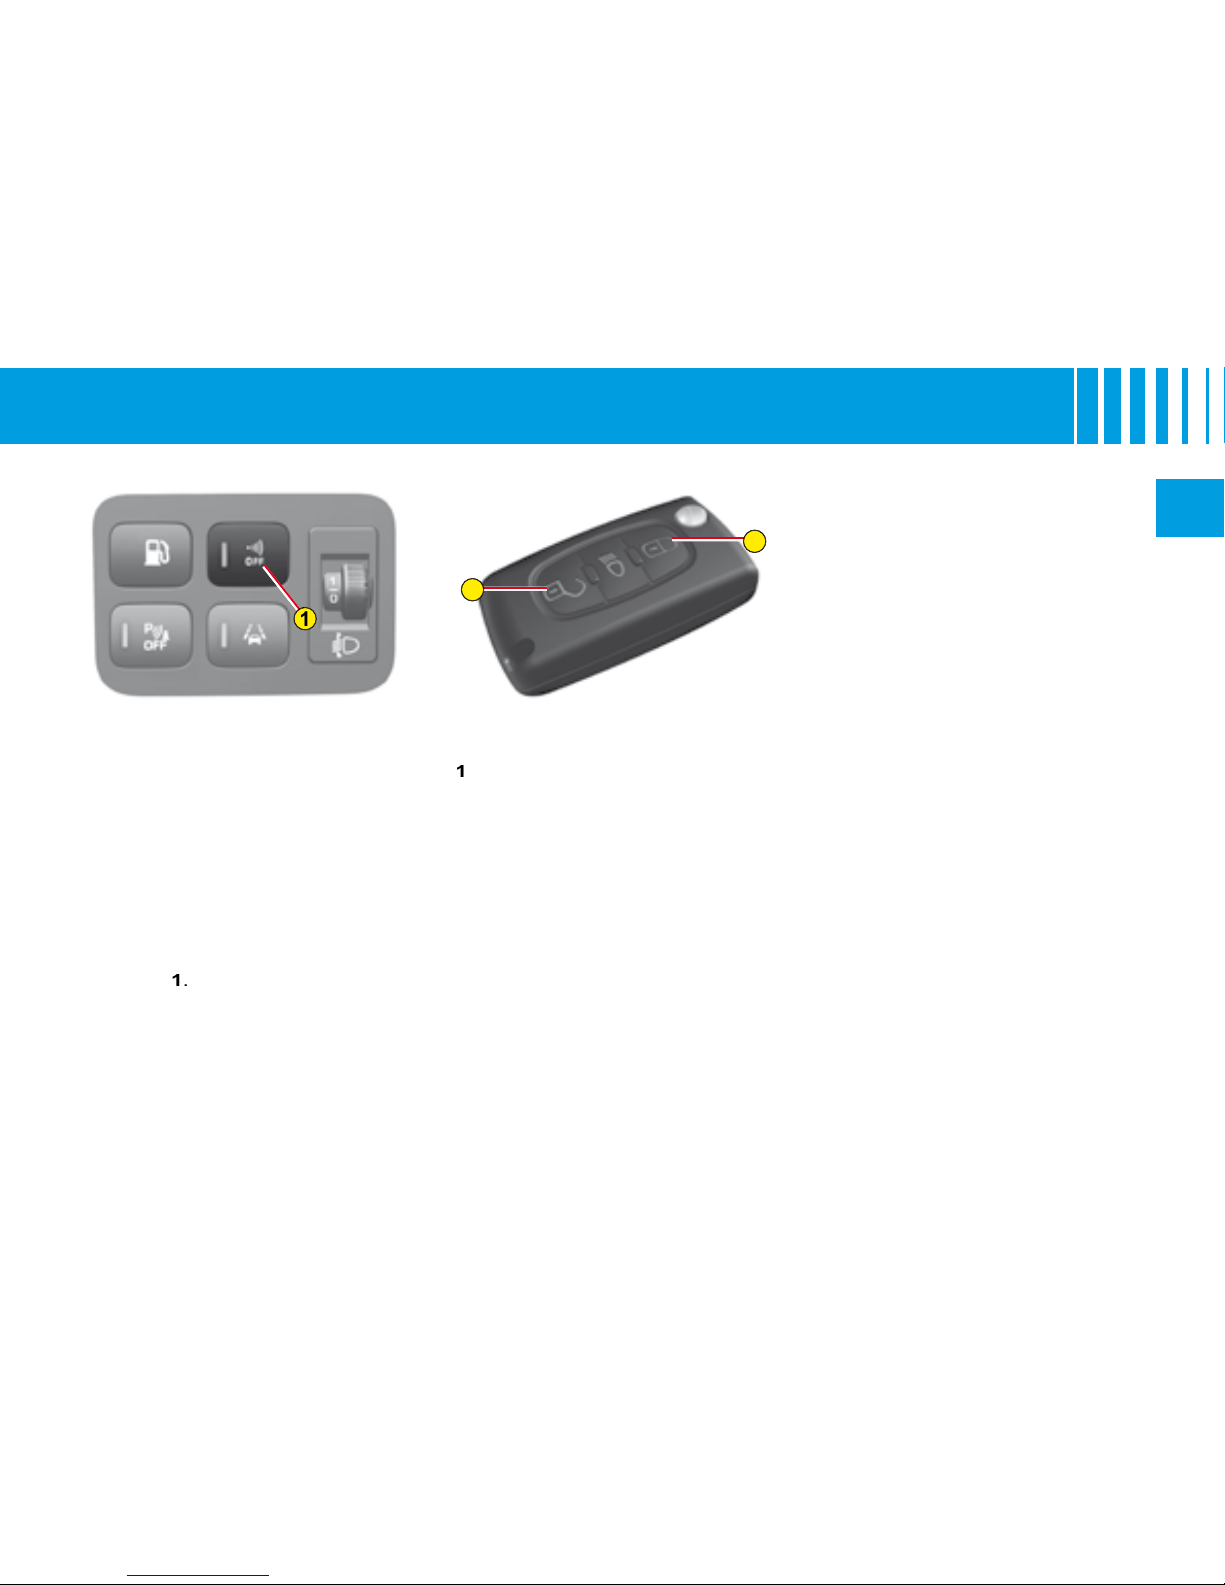
Central locking
Unlocking
Guide-me-home lighting
Key release/storage
located on
the control panel to the left of the
the metallic gate valve
After switching off the ignition,
A
is only active for a few
the ignition again to reactivate it.
To close :
To unlock, pull the control locat-
you.
you can choose from the following
tailgate,
with a second press.
2
4
1 2
3
3
This opening gives you enhanced
vehicle.
The handhold
is in line with the rear wiper.
You cannot open the tail-
the handholds
the tailgate to close itself (do
The Modubox is composed of a
which can be used independently
suspension
Allows the height of the
Access to
turn).
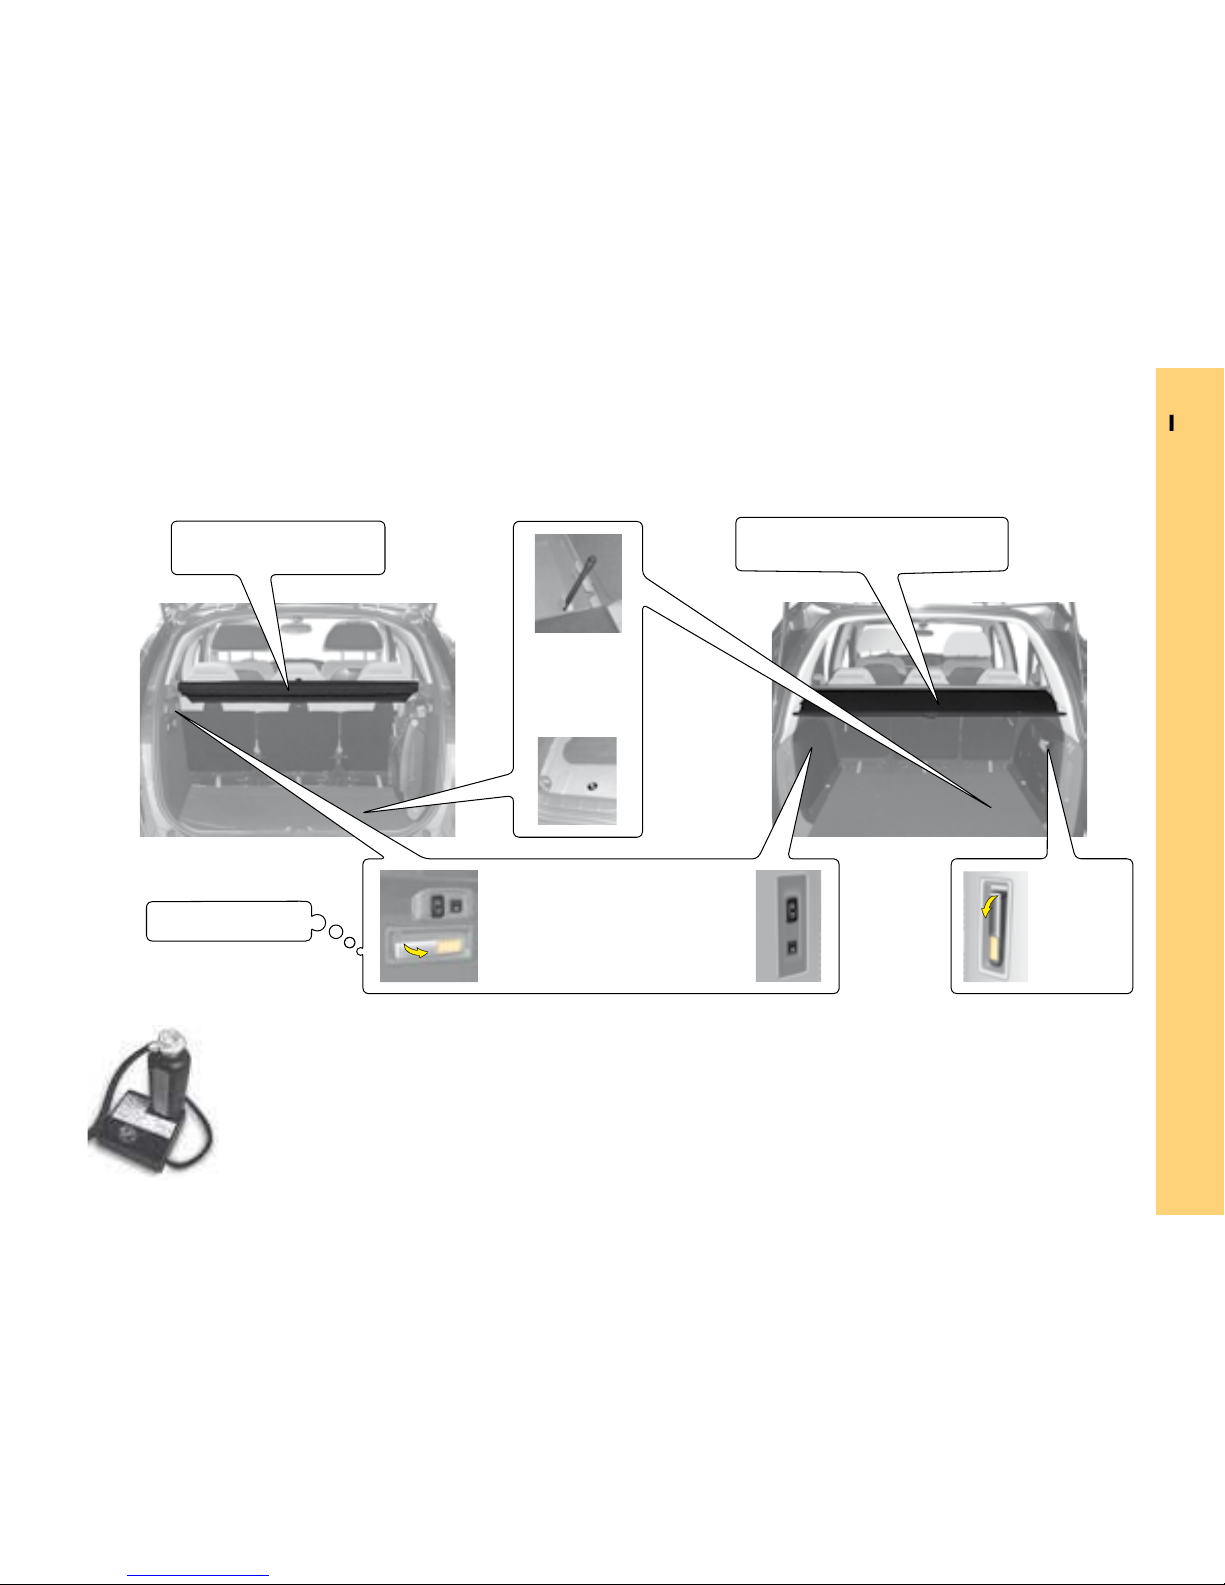
This puncture repair kit is a complete system for a temporary repair ; it is made up of a compres-
two sections

1
2
3
G
F
E
T h i r d - r o w s e a t s – G r a n d C 4 P i c a s s o
To return the seats to the
located on
the seat backrest.
To stow the seats
tical position then pull on the red
when you are folding them.
Access to third-row
seats
located at the top
the rigid plates fi rst (located
D
A
C
TO FOLD THE SEATS
to unlock the seat ; maintain the
folded.
to unlock the
TO RETURN THE SEATS TO
THE UPRIGHT POSITION
tion and lock them in position (Grand
wards until it locks in position.
A rigid plate is attached to each
To unlock / lock the rigid plate :
A
of the plate down-
wards, to unlock it.
A
up-
wards to lock it.
Take care to attach the third-row
third-row seat belt
B
A
C
D
S e c o n d - r o w s e a t s
THE “COMFORT” POSITION
The 3 second-row seats are inde-
the same width. They can all be ad-
justed to the “comfort” position.
To place the seat(s) in the
The backrest reclines and the seat
To return the seat to its original
front of the seat, and adjust the
the right, then insert the second
tongue
into the buckle on the
Automatic
freshener
wheel
1
2 3
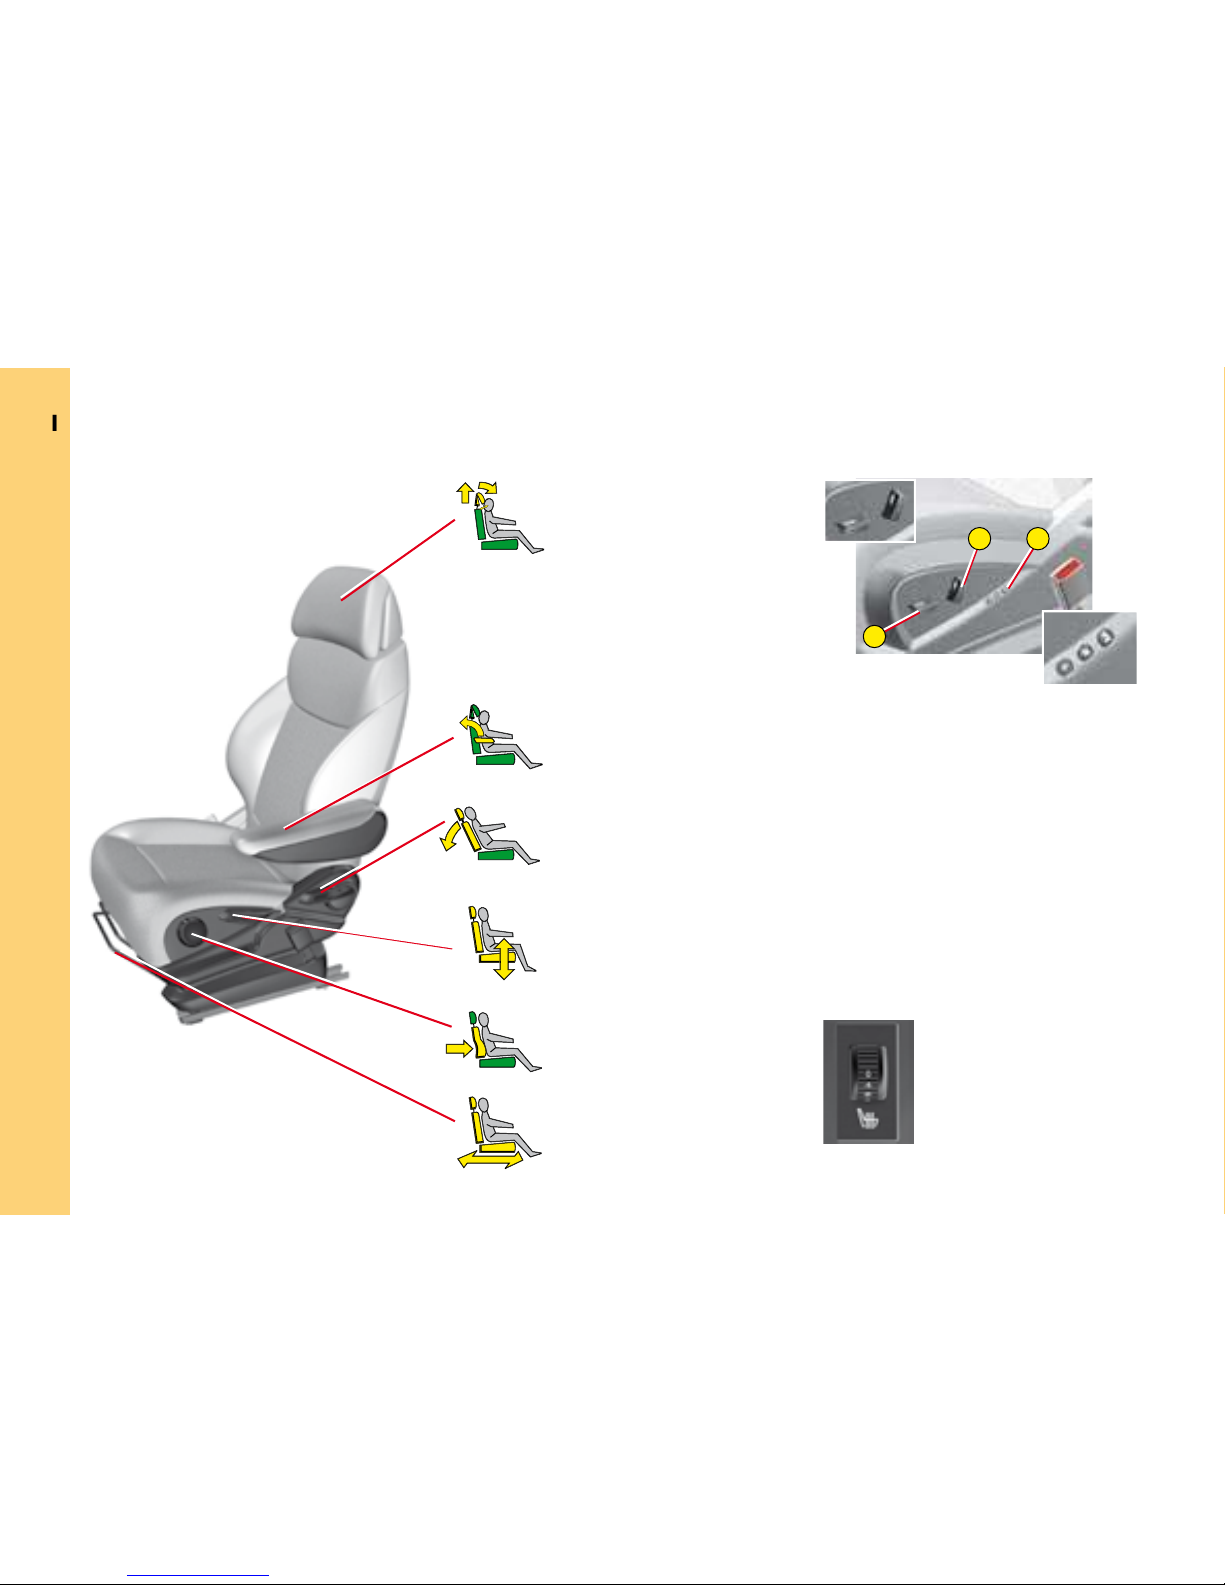
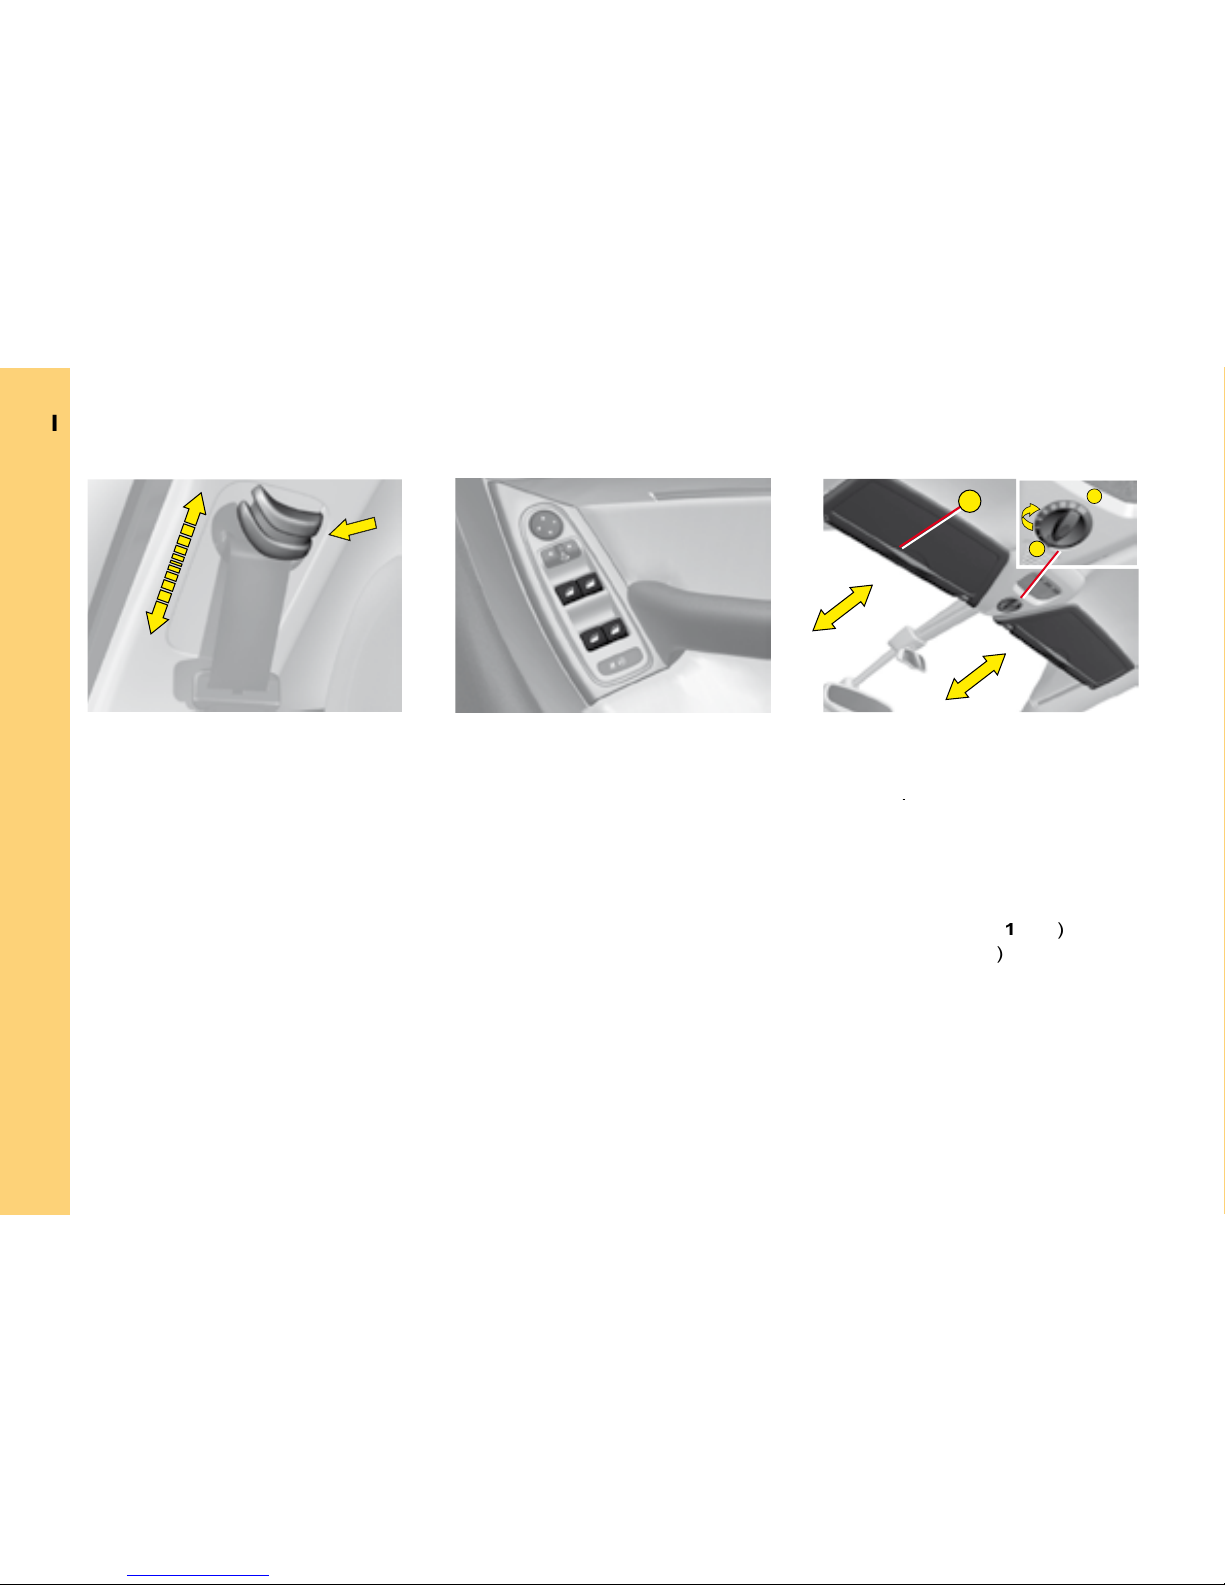
F r o n t s e a t s
Armrest
Adjustment of seat height
Adjustment of backrest angle
The seats can also be ad-
justed on a temporary basis :
A
1
2
1
2
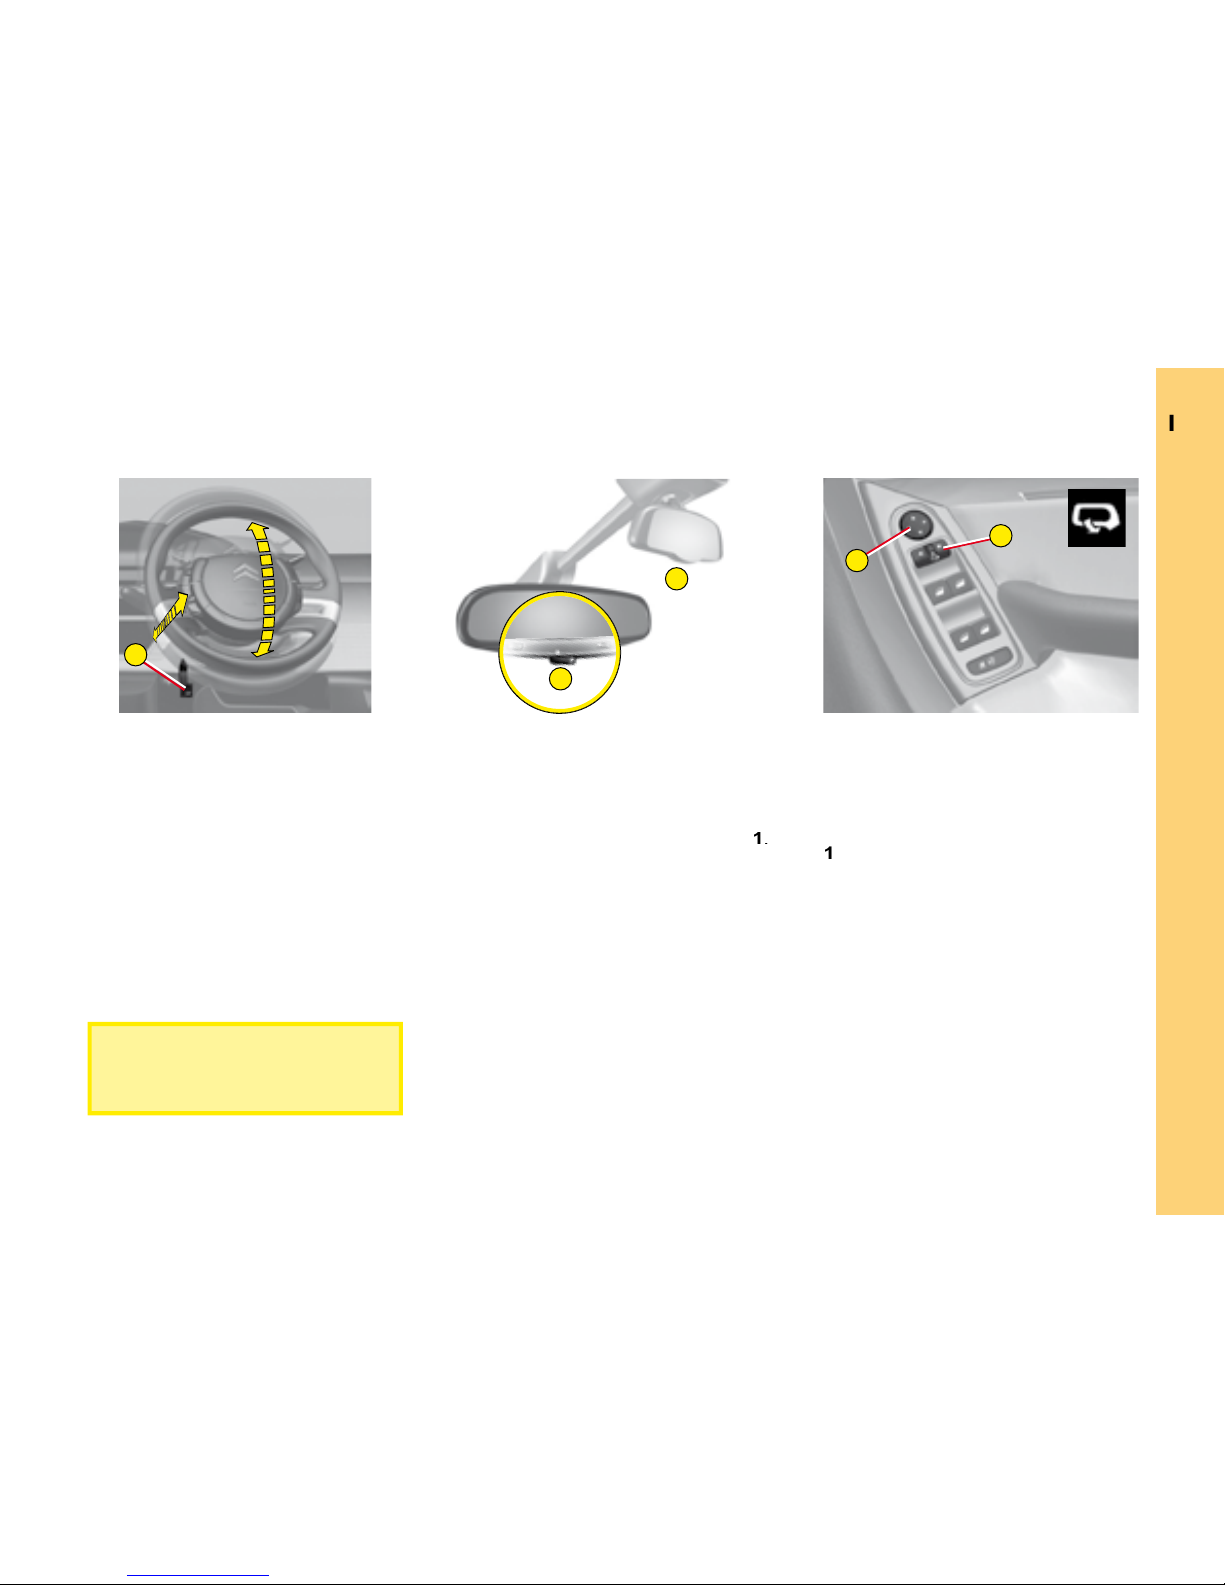
Adjusting the steering wheel
The steering wheel can be adjusted
A
towards you.
Adjust the position of the steer-
Automatic photochromic
This modifi es its role automatically
This allows you to monitor the rear
to eliminate dazzle.
This operates with the ignition
to the left or right, then adjust
the rear view mirror as required in
the 4 directions using control
When the vehicle is parked, the
justments must not be carried
A
9
0
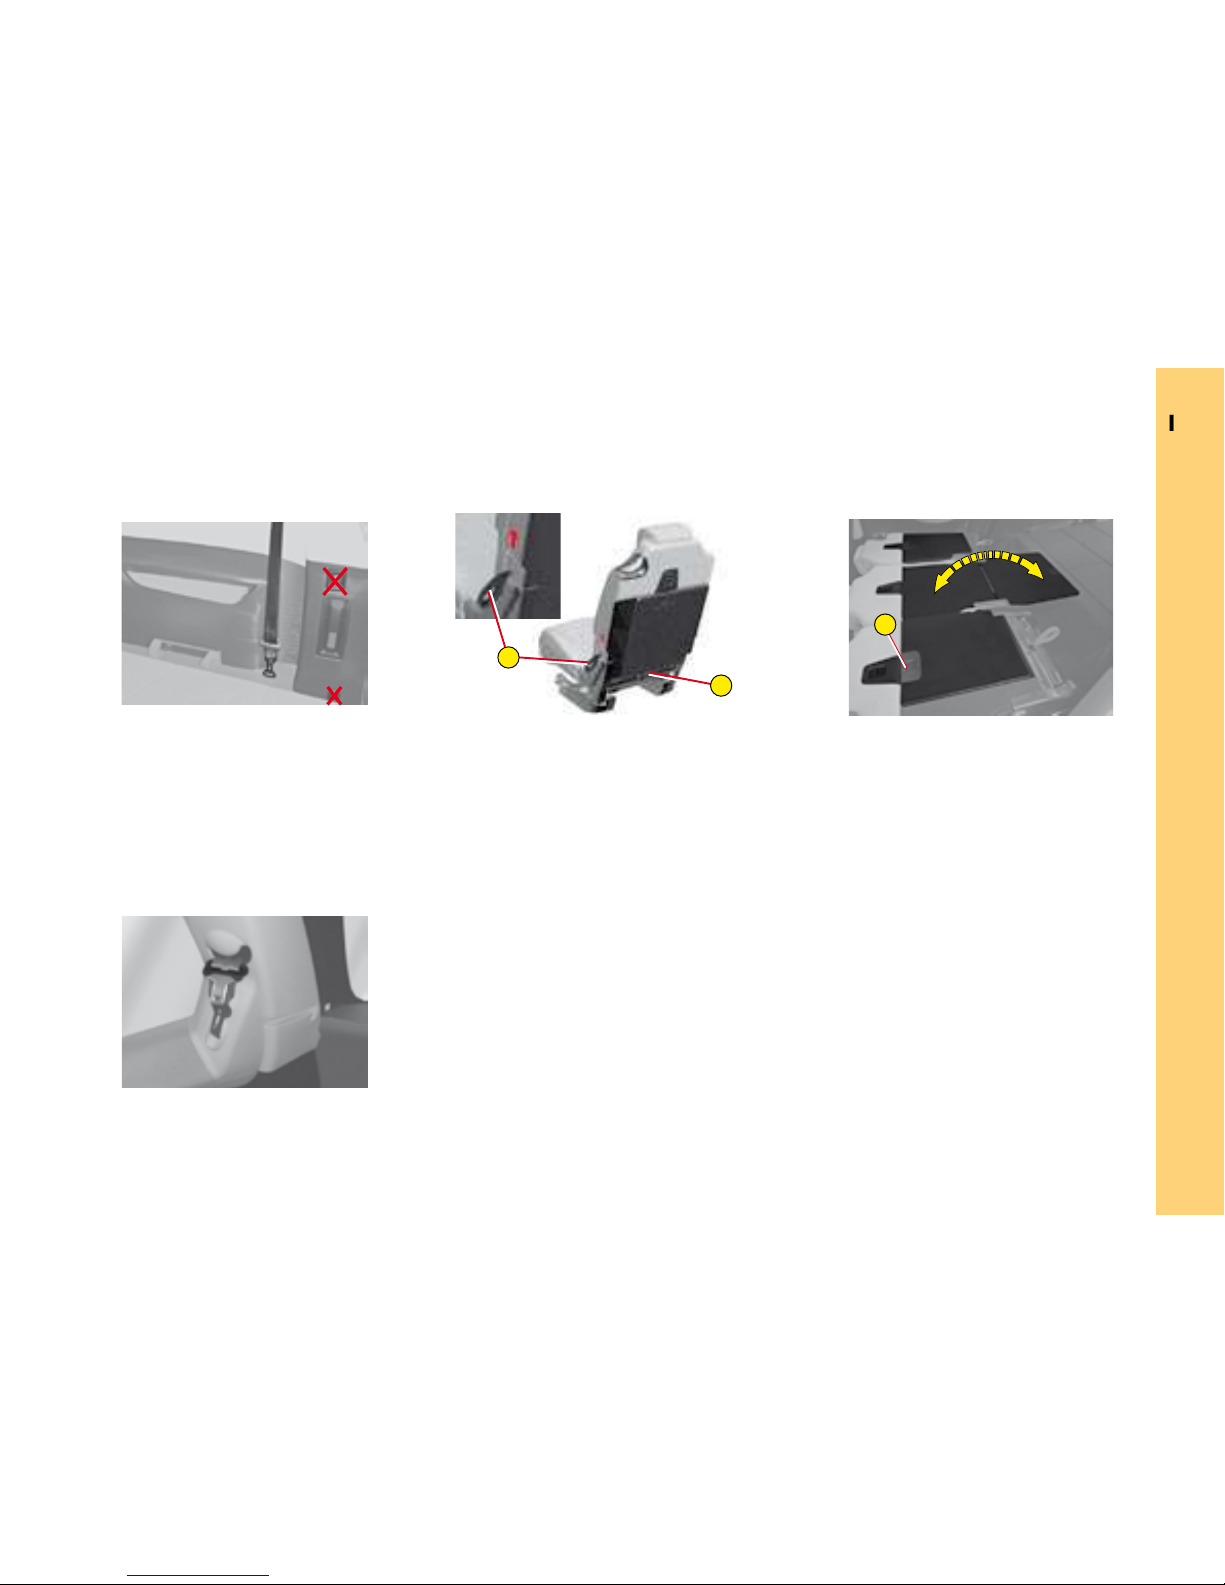
Adjusting the seat belt
To adjust the seat belt, pinch the
the controls located on the door
The blinds are extended on the
to
The blind has an anti-pinch de-
vice.

4
3
2
1
A
B
3
2
1
0
4
A
B
C
D
E
F
Automatic lighting
4
Windscreen wiper
4
Automatic wipe by pressing
To deactivate
then return to
Timed wash and wipe.
Warning lamps for direction
Audio system controls
+
–
system
Automatic mode
and
To start
system
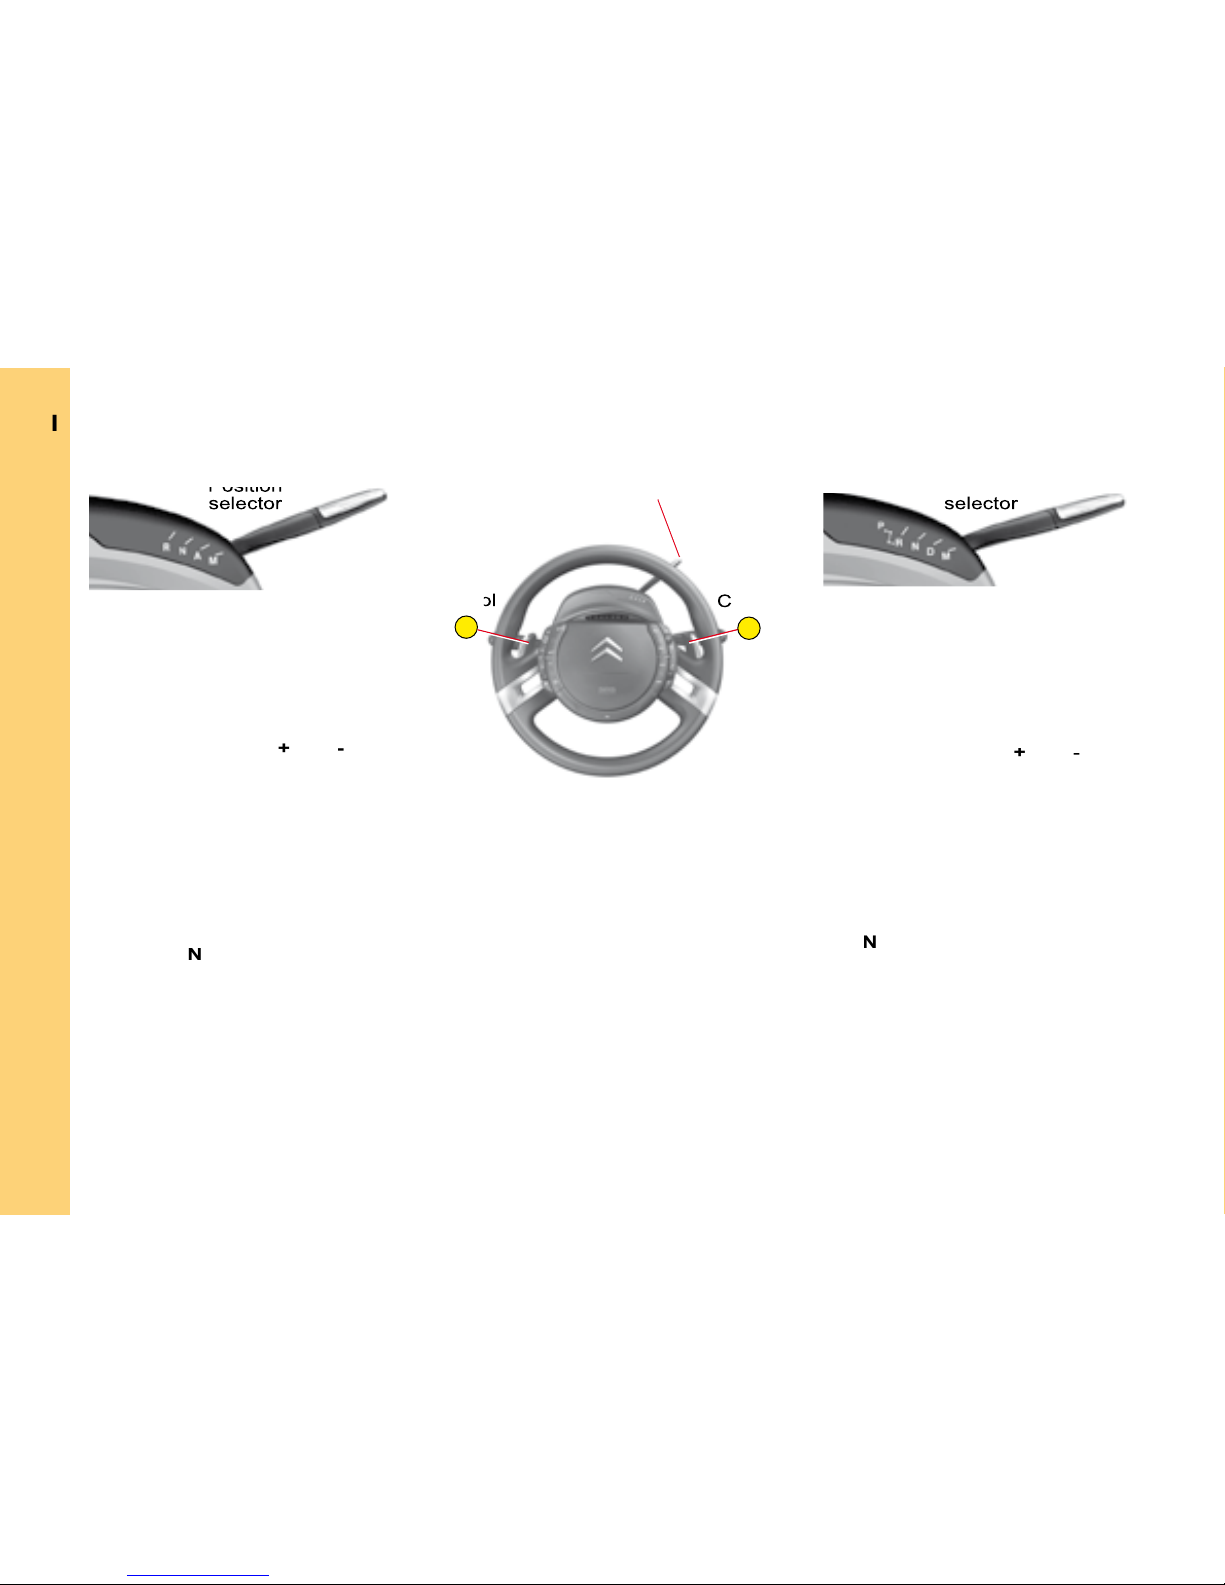
Automatic gearbox
Automatic mode
and
:
To start
Automatic gearbox
and turn the ignition key.
To exit position
the brake pedal before moving the
A
A
This device combines :
Automatic application when the
Permanent manual application /
A
that the electronic parking brake
warning lamp
(red) is perma-
the parking brake.
the vehicle with the ignition on,
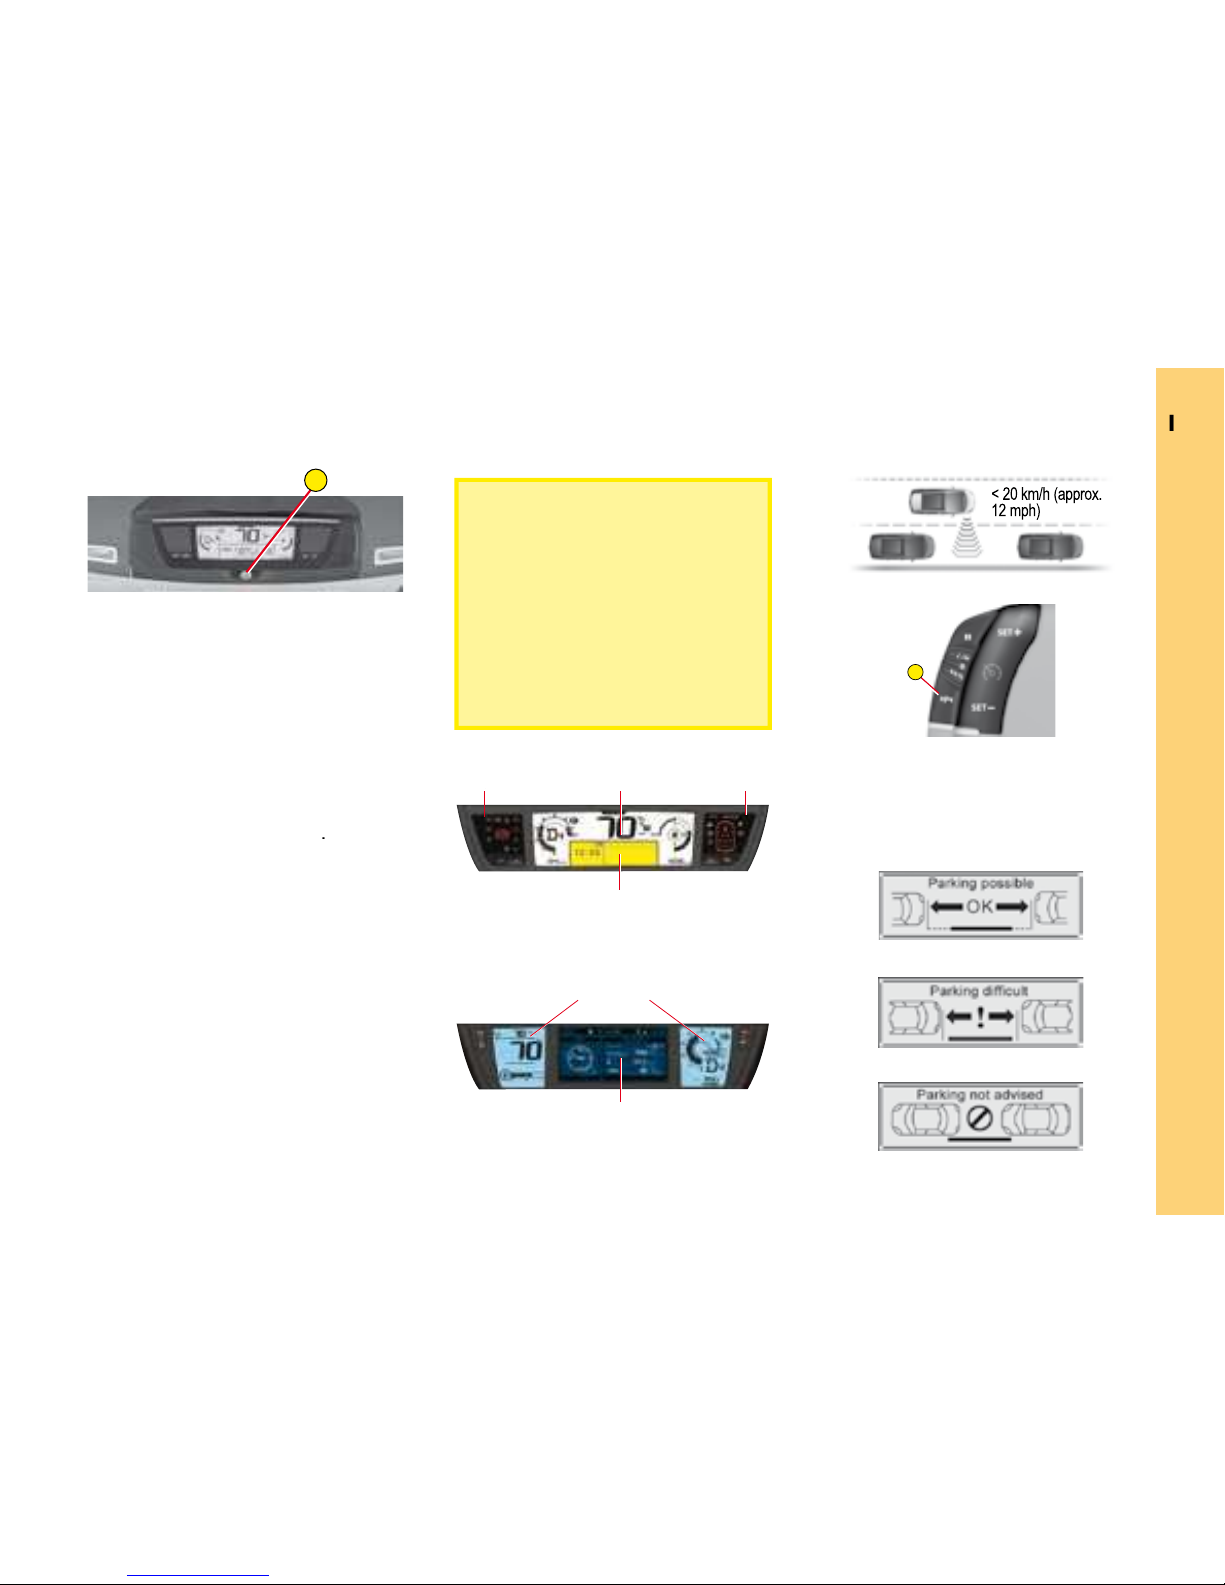
You can select the “parking space sen-
the function displays the following
Warning
Warning
To aid starting on a gradient, your
vehicle is equipped with a system
which keeps it immobilised for
time it takes to move your foot
from the brake pedal to the accel-
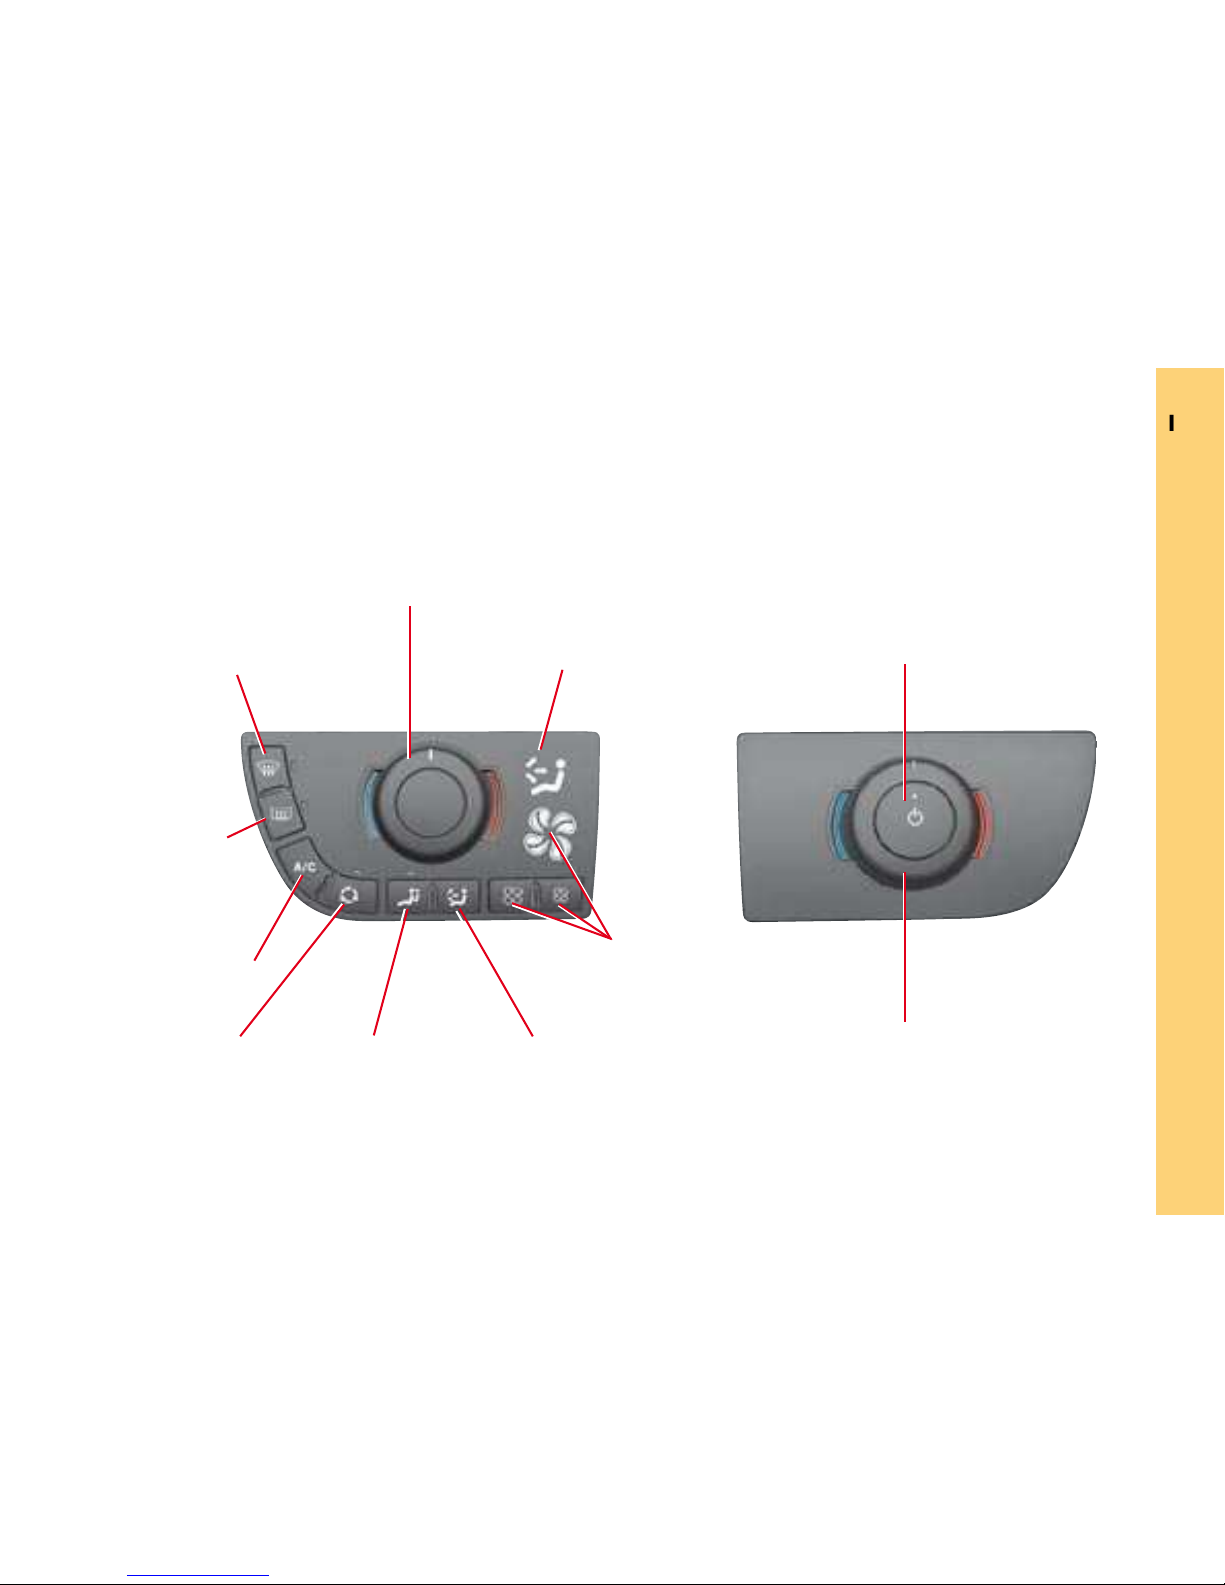
Air recirculation,
Automatic comfort
Air
Adjustment and display
the engine switched off)
Adjustment
Adjustment of air
Adjustment
DRIVER’S AND PASSENGER’S
CONTROL PANEL
REAR PASSENGERS’ CONTROL
PANEL
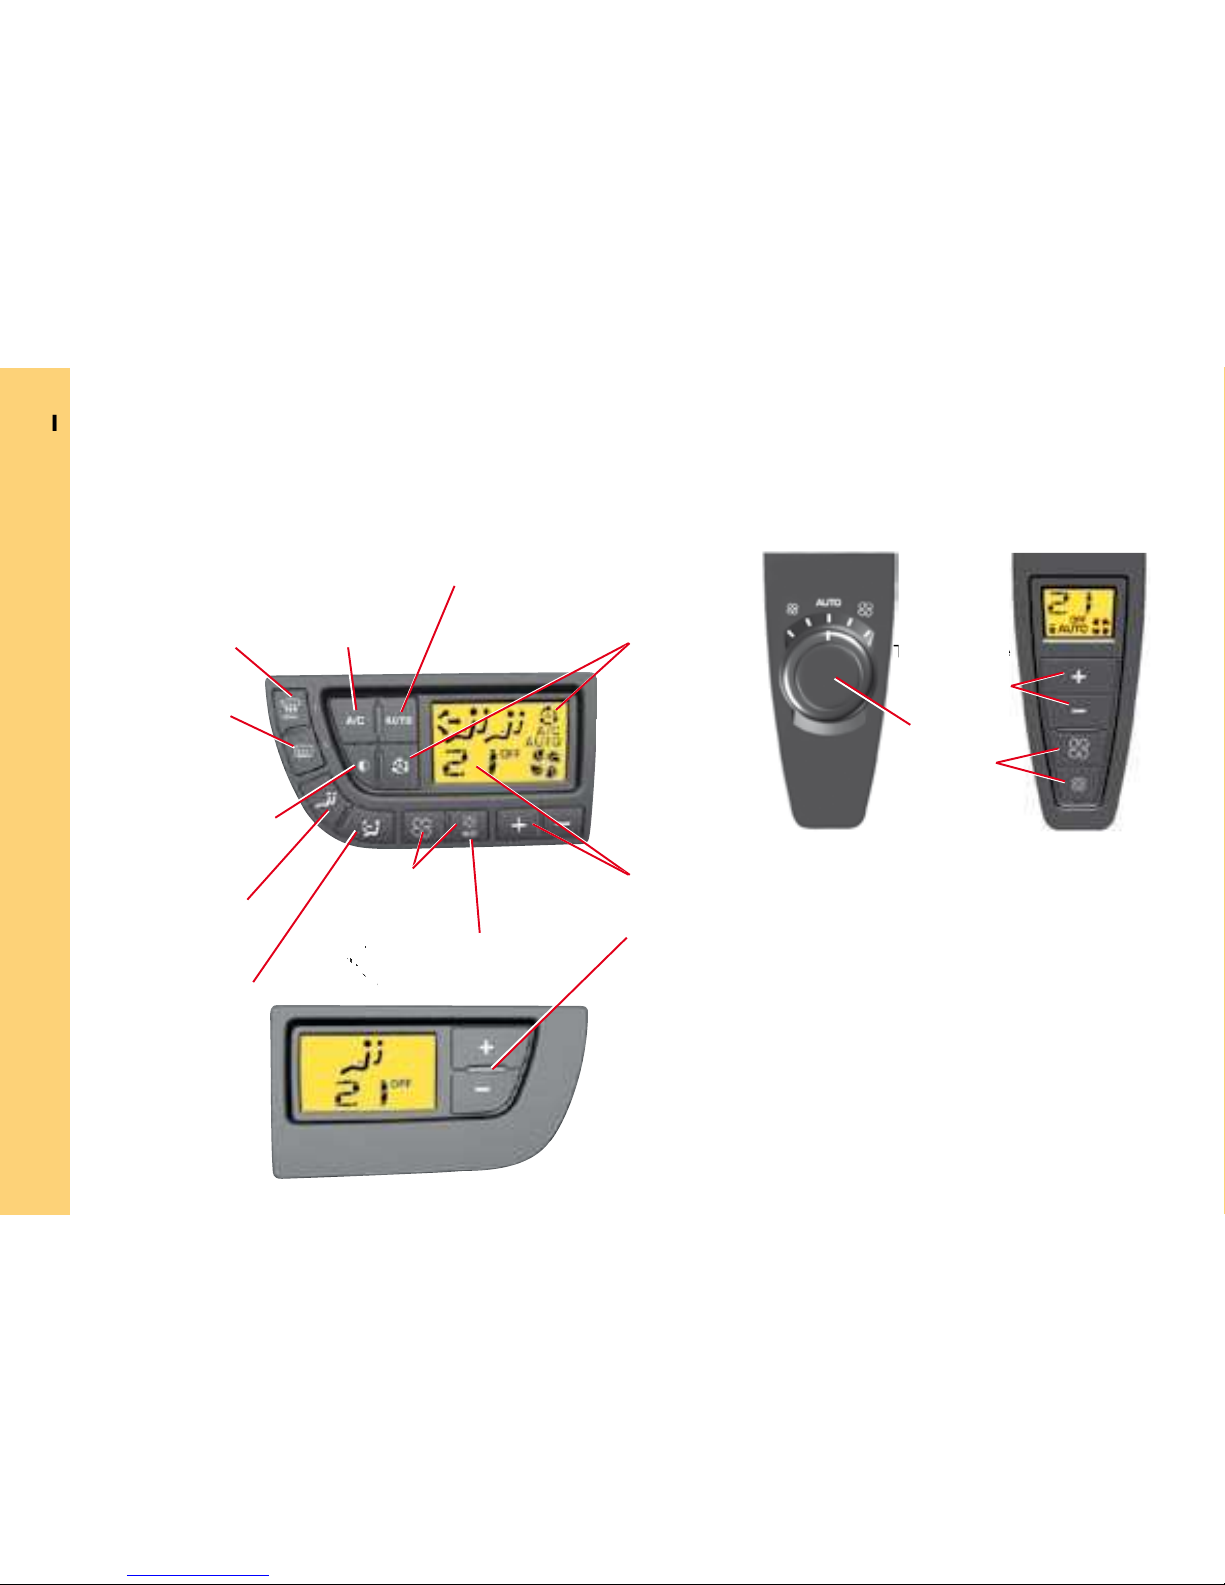
V E N T I L A T I O N
A u t o m a t i c a i r c o n d i t i o n i n g
With additional air
V E N T I L A T I O N
H e a t i n g a n d m a n u a l a i r c o n d i t i o n i n g
Adjustment of blown air
temperature
Adjustment
Adjustment of
temperature
Air recirculation
Air conditioning
view mirrors
Temperature
DRIVER’S CONTROL PANEL PASSENGER’S CONTROL PANEL
A
fastened / unfastened
warning lamp
This warning lamp informs you if
the driver’s or front passenger’s
the second- and third-row passen-
The lit up positions represent
those whose seat belts are not
fastened / unfastened.
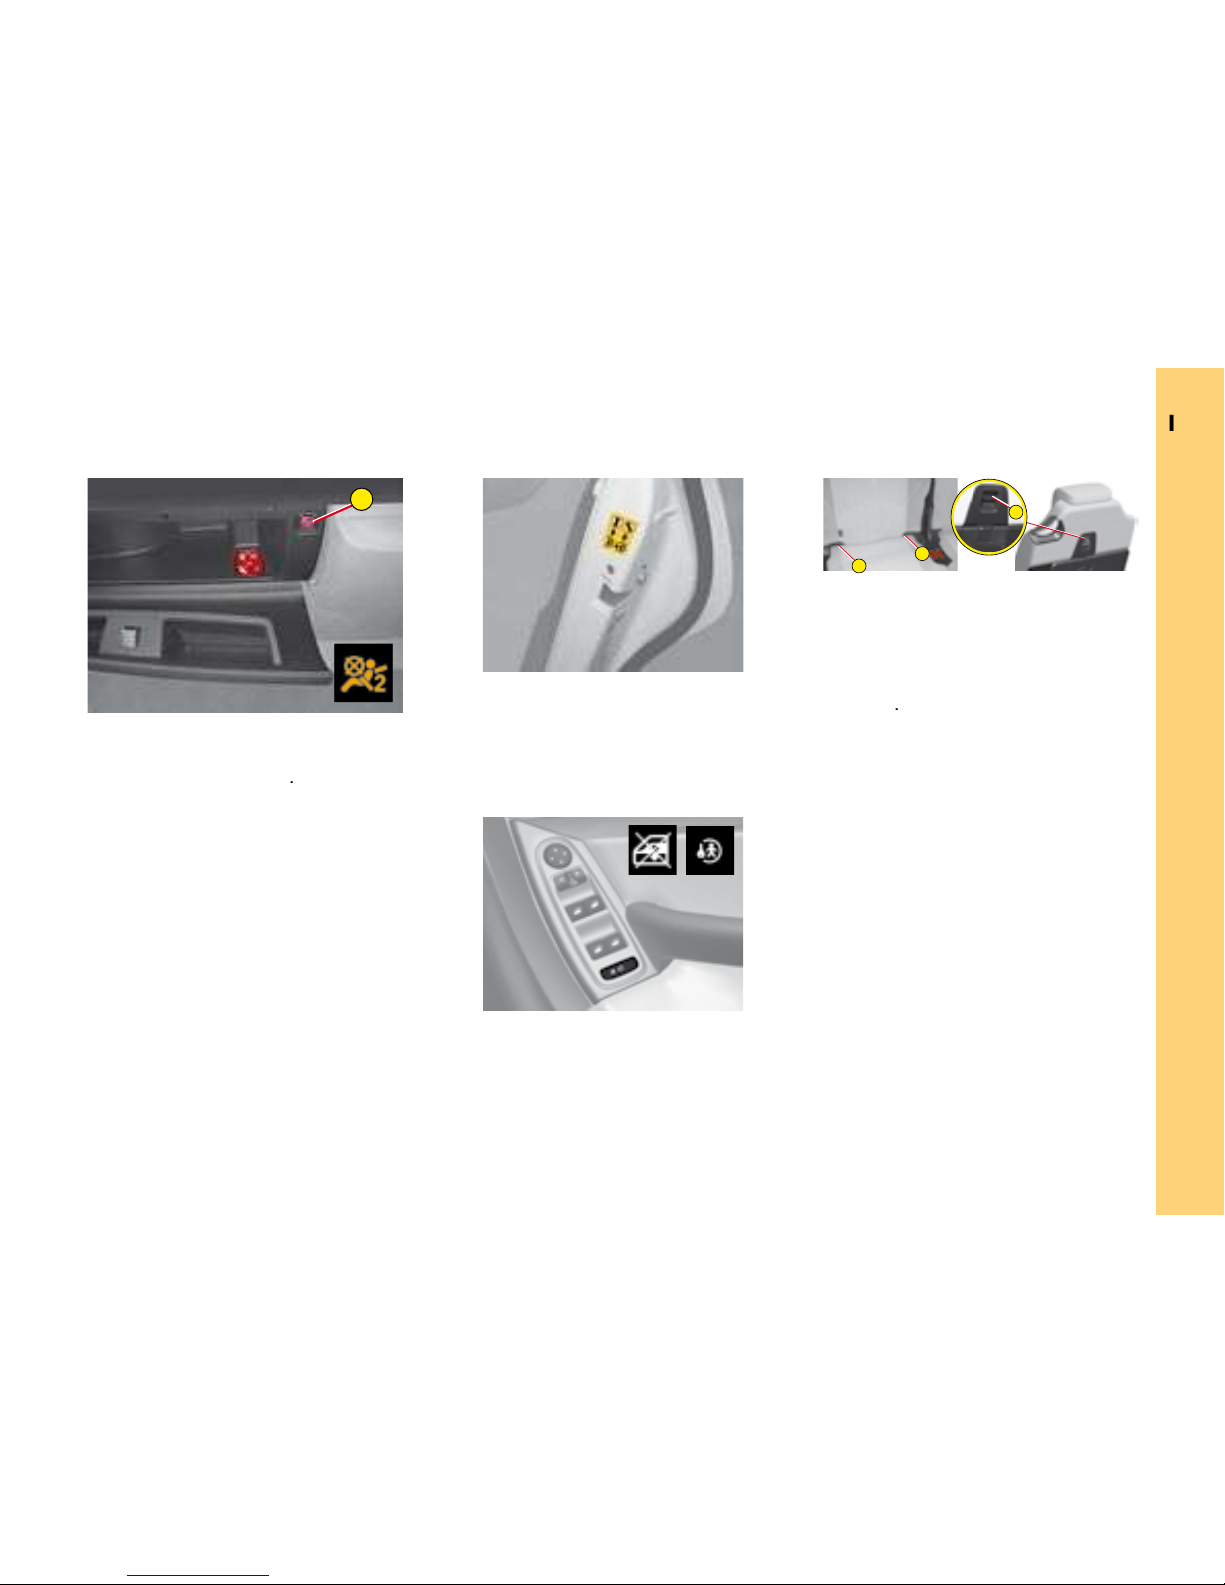
You can use electrical central
Anti-intrusion security
When starting the engine, the sys-
tem automatically locks the doors
Tyre defl ation
This function warns you if a tyre is
This system does not absolve
the driver of the need to regularly
The
warning
The
warning lamp
A
C
B
A
Insert key into
Select
Remove key.
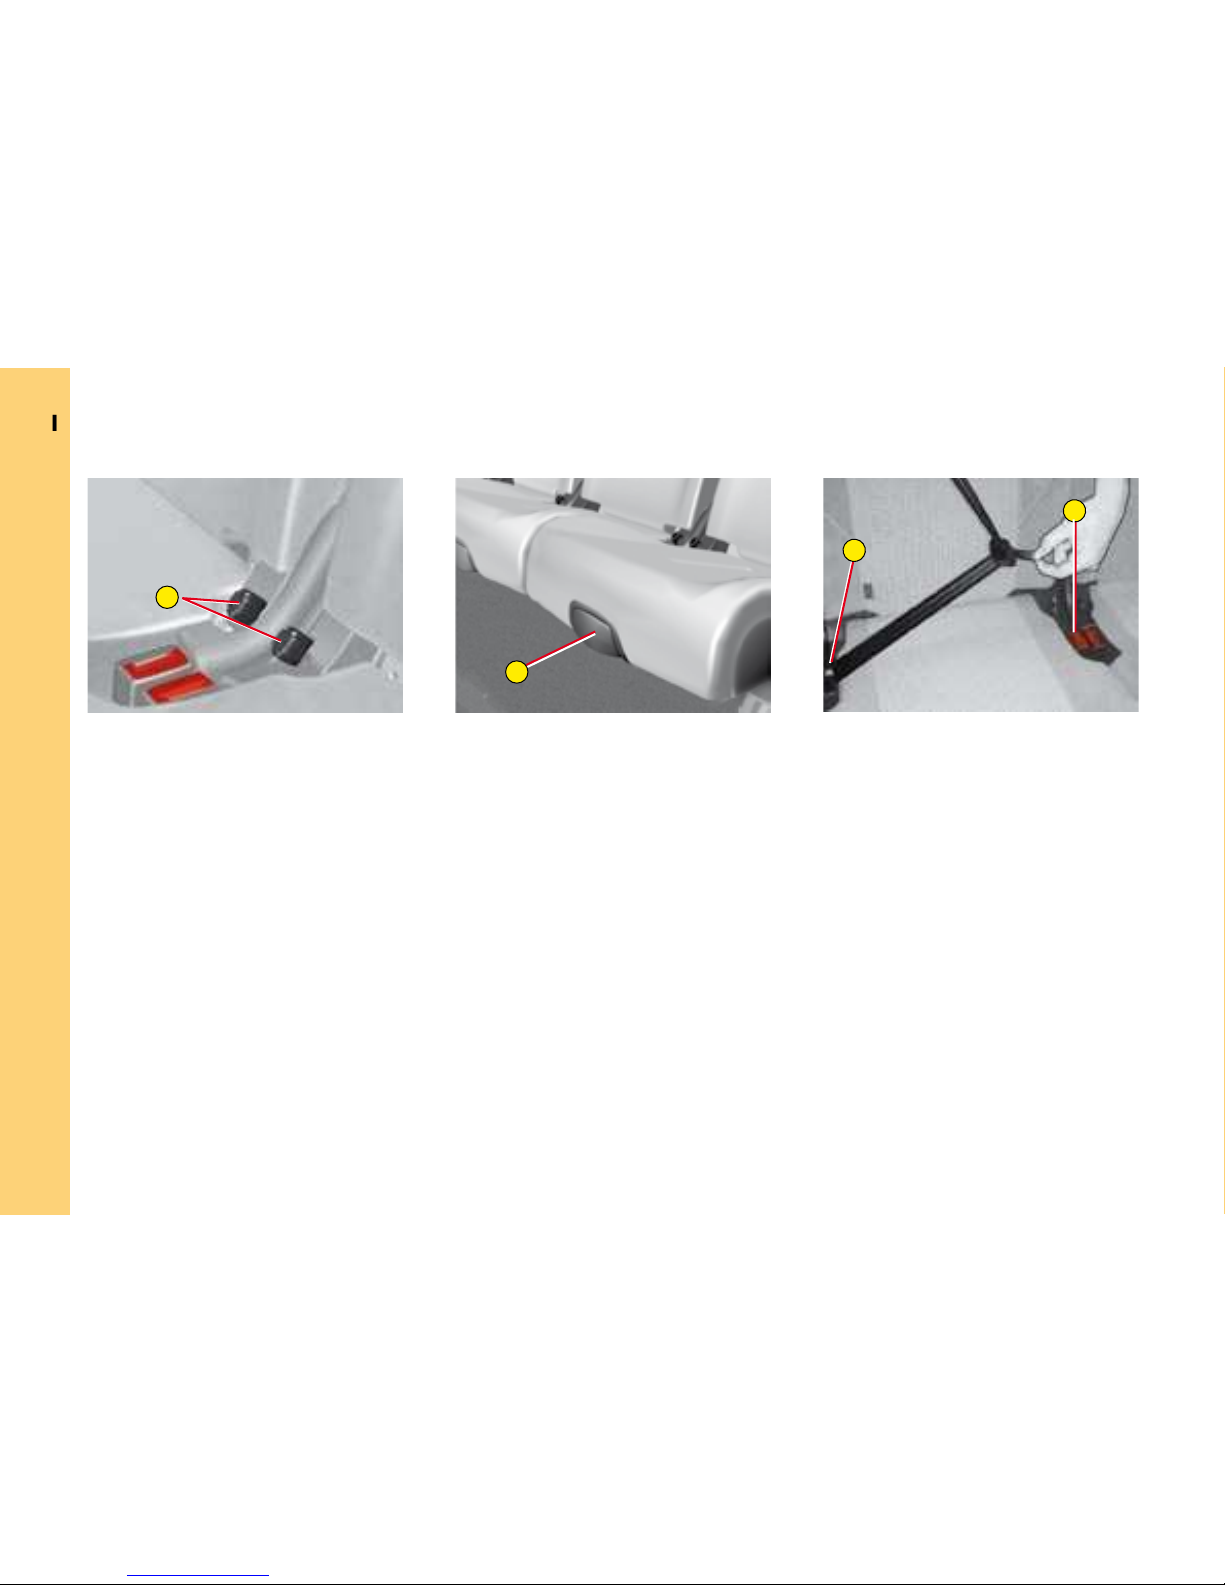
The rear doors are locked by op-
The 3 second-row rear seats
your vehicle are fi tted with regu-
with 3 rings for each seat position
This fi xing system is designed for
the rear of the vehicle.
II
un-
The unlocking is confi rmed by the
fl ashing of the direction indicators,
The unlocking activates:
the exterior rear view mirrors) for
vehicle because it is impossible to unlock the vehicle from the inside
When you are closing the windows and/or the panoramic glass roof
locks
your vehicle.
The locking is confi rmed by the
The locking activates:
A
the outside.
opens
This function is not available using
the key.

II
A press on button
operates the
A second press before the end of
the timing cancels the guide-me-
Vehicle location
To locate the vehicle on a carpark,
A
vehicle is revealed by :
few seconds,
for around 30 seconds,
The vehicle remains locked.
folds the key in and out of
tion of the remote control. If it malfunctions on a permanent basis, you
Warning : there is a risk of damage if the replacement battery is not in
This information is given by a message on the multifunction screen, accompa-
After a change of battery, it is necessary to re-initialise the remote control.
A
on your
take some ten seconds.
Make a careful note of the numbers for your keys and remote con-
trol on the ASSISTANCE card. Keep this in a safe place.
(photo shops, etc.).
II
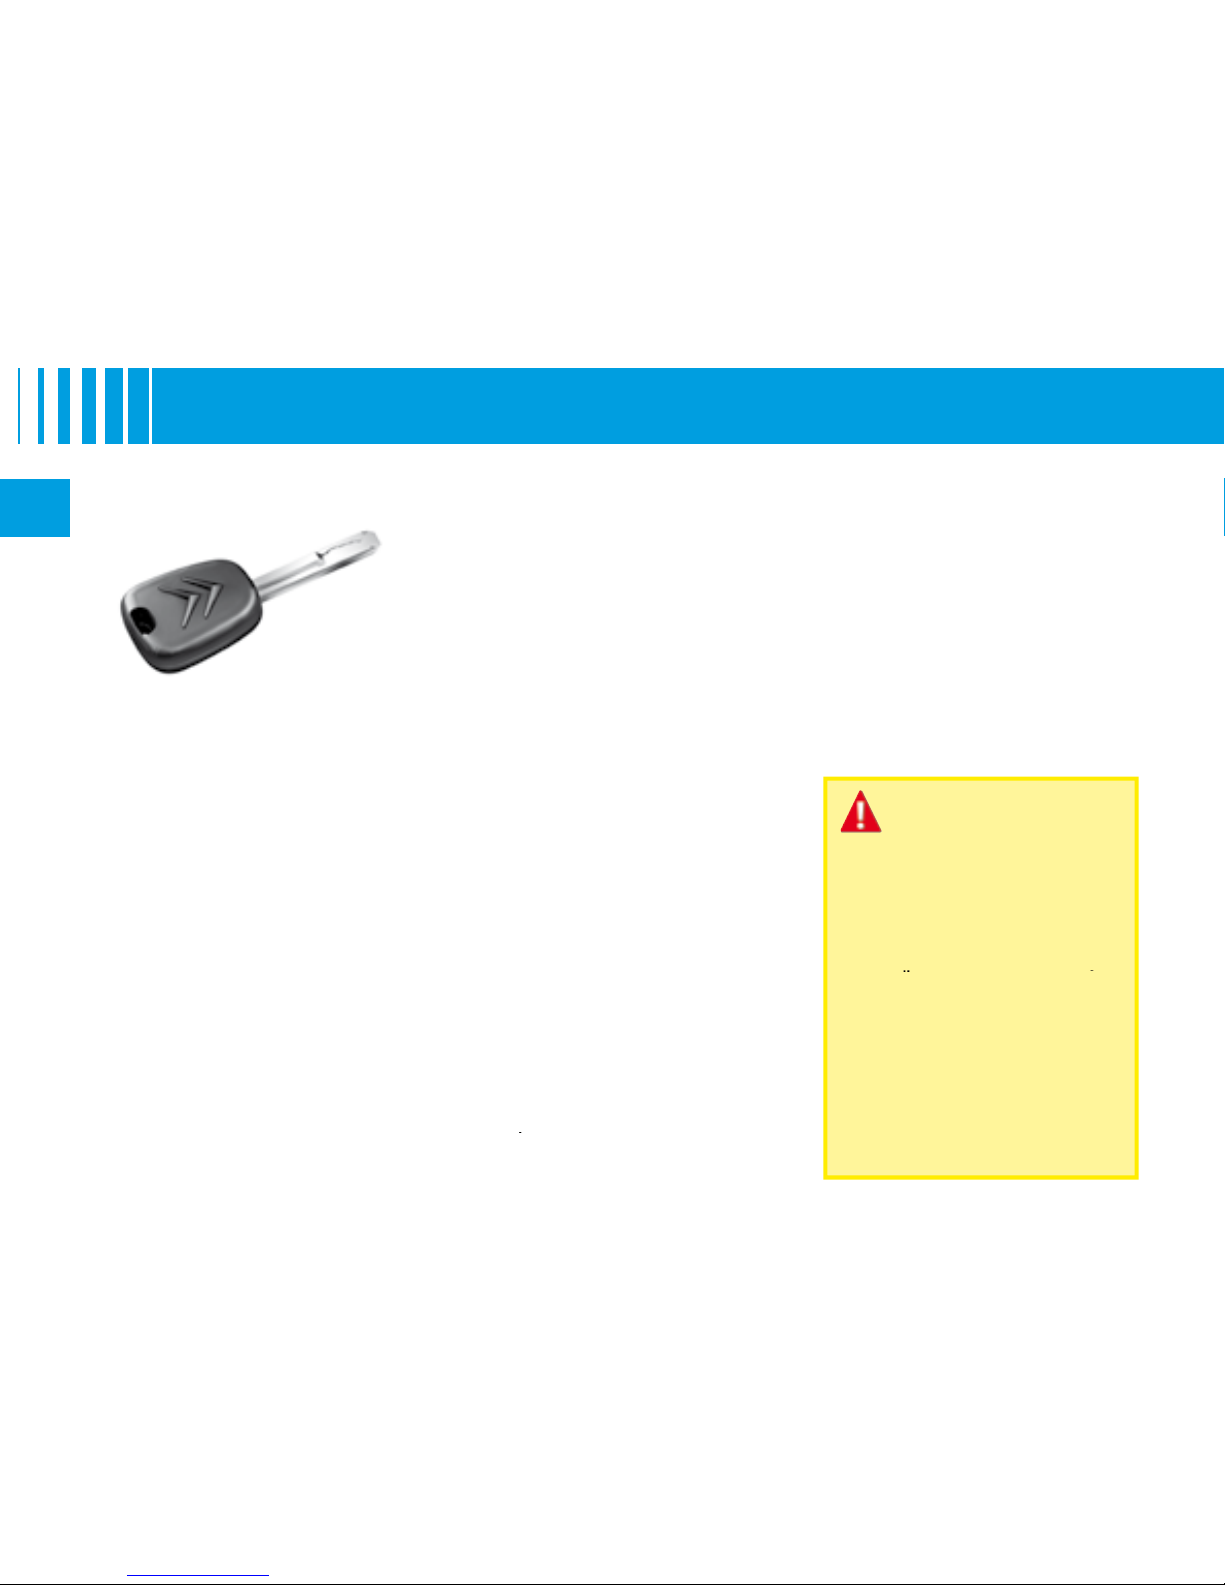
The key locks and unlocks all the
vehicle’s doors, as well as switch-
The key can also deacti-
vate the front passenger airbag
when someone is inside
the vehicle because it is impos-
the inside (without the remote
The number of the key is on the
you with new keys or remote
your vehicle undriveable.
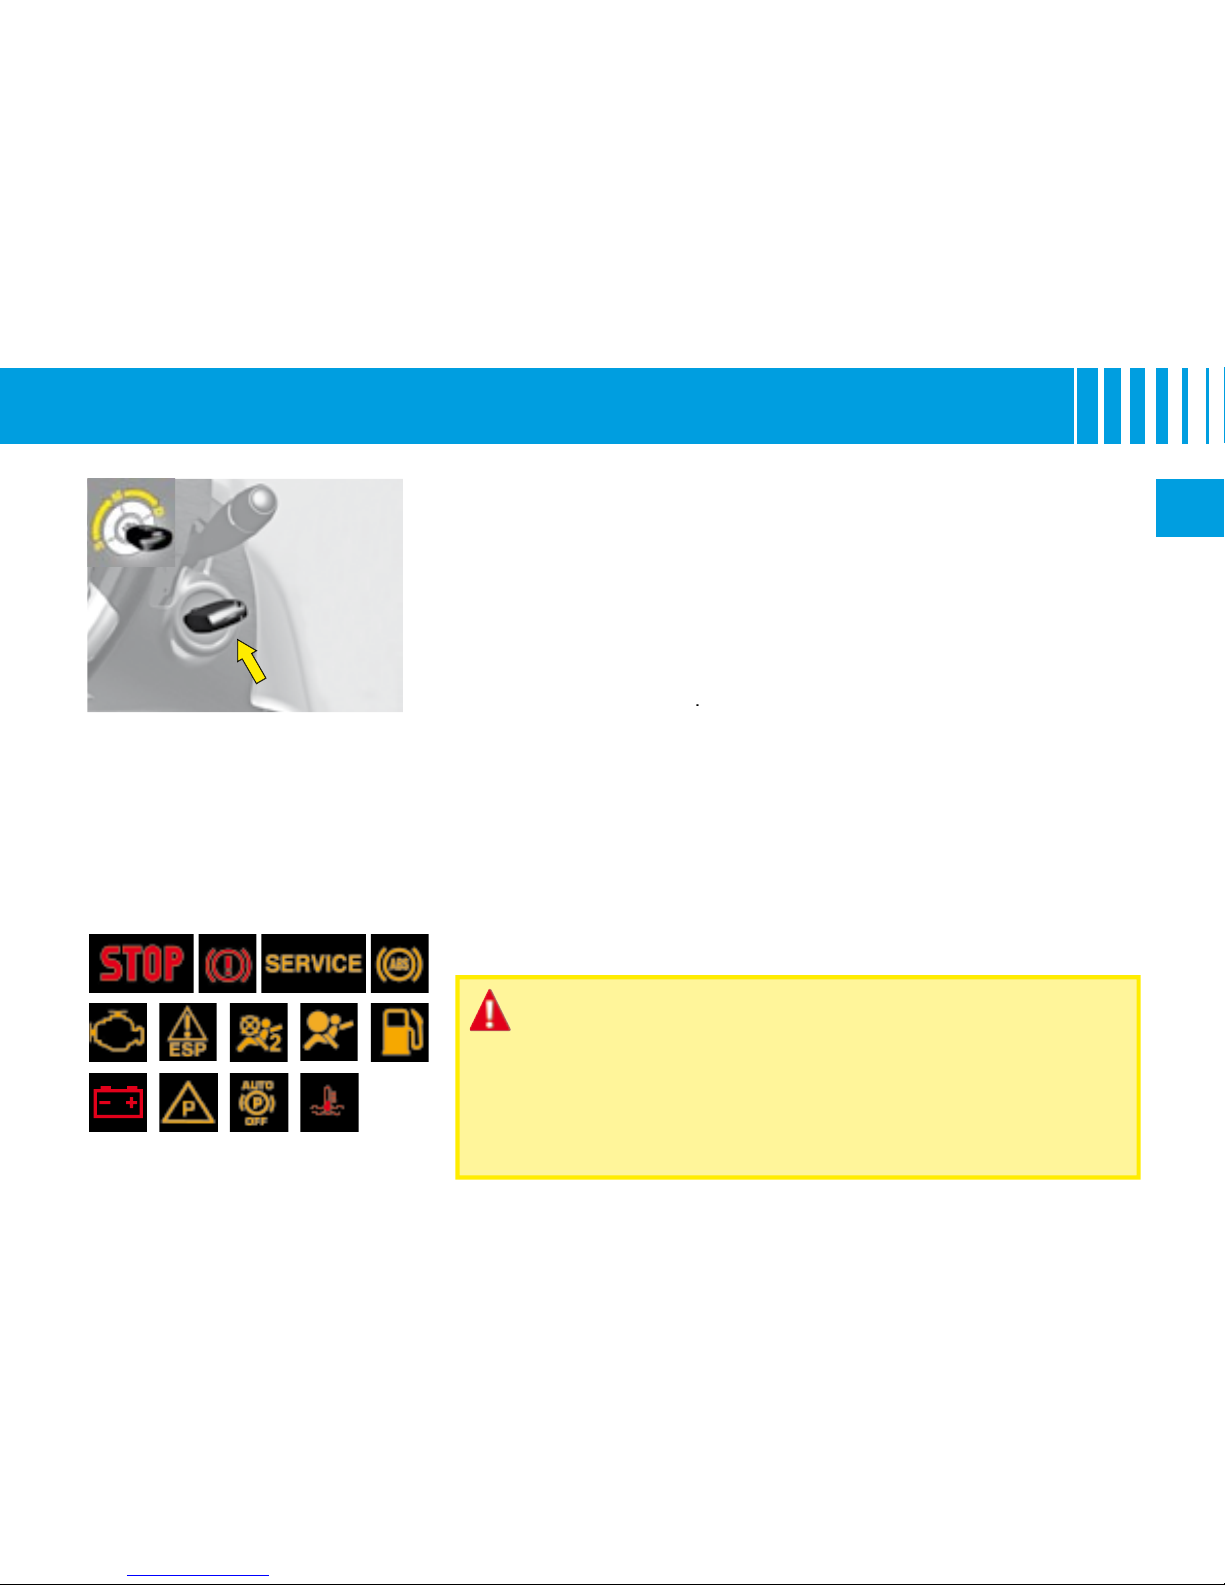
Turn the key briefl y in the door
with the key
Turn the key a second time in the
from the outside.
A long action with the key closes
the windows.
With the
vehicle stationary
the warning lamp on the interior
All the vehicle keys contain an
After you switch on the ignition, a
starting is impossible.
The ELECTRONIC IMMOBILISER
The system activates automatically
when the key is removed from the
II
Your vehicle may be equipped with
This provides :
The installation also has a siren,
which is visible from outside the
vehicle, indicating the three pos-
warning lamp off.
fl ashes rapidly if the alarm is dis-
If there is a malfunction,
the warning lamp remains perma-
The alarm is disarmed when you
on the remote control).
The siren triggers. Enter the ve-
A N T I - I N T R U S I O N A L A R M

II
A N T I - I N T R U S I O N A L A R M
The alarm is armed by pressing button
A
on the re-
With the alarm armed, the protections are active after
When the alarm is armed (on standby), any intrusion
will trigger the siren for 30 seconds, accompanied by
the direction indicators lighting up.
The alarm then goes back on standby, but the trigger-
fl ashing of the warning lamp on control
after you
The siren is also triggered if there is a cutting of the
the alarm will arm itself after approx. 45 seconds. You
will hear a rebound sound coming from the locks.
The siren is automatically deactivated (for ex-
vehicle is unlocked using the remote control
You can operate the alarm with perimeter protection
for at least one second.
The warning lamp on button
should come permanent-
Arm the alarm by locking your vehicle with the remote
when you use an automatic car wash, to prevent ran-
Automatic activation (depending on country)
The alarm is armed automatically, 2 minutes after the
the unlocking button
again on the remote control.
II
Release the key as soon the en-
the key while the engine is al-
After removing the key, turn
the steering wheel to lock the
Ignition switched on, the steer-
Starter position.
Test with the key in
the ignition position
To ensure engine starting, in cer-
tain situations the vehicle goes
When the engine is switched off,
you can still use some of the elec-
trical equipment (audio system, air
the headlamps (using the remote
trols).
After a variable period of time (de-
To reactivate them immediately,
you will need to start the engine
When the vehicle goes
To unlock the steering, gently
turning the key, without forcing it.
Depending on the version of
your vehicle, the following warn-
for a short time :
When stationary, having removed the key, turn the steering wheel
II

II
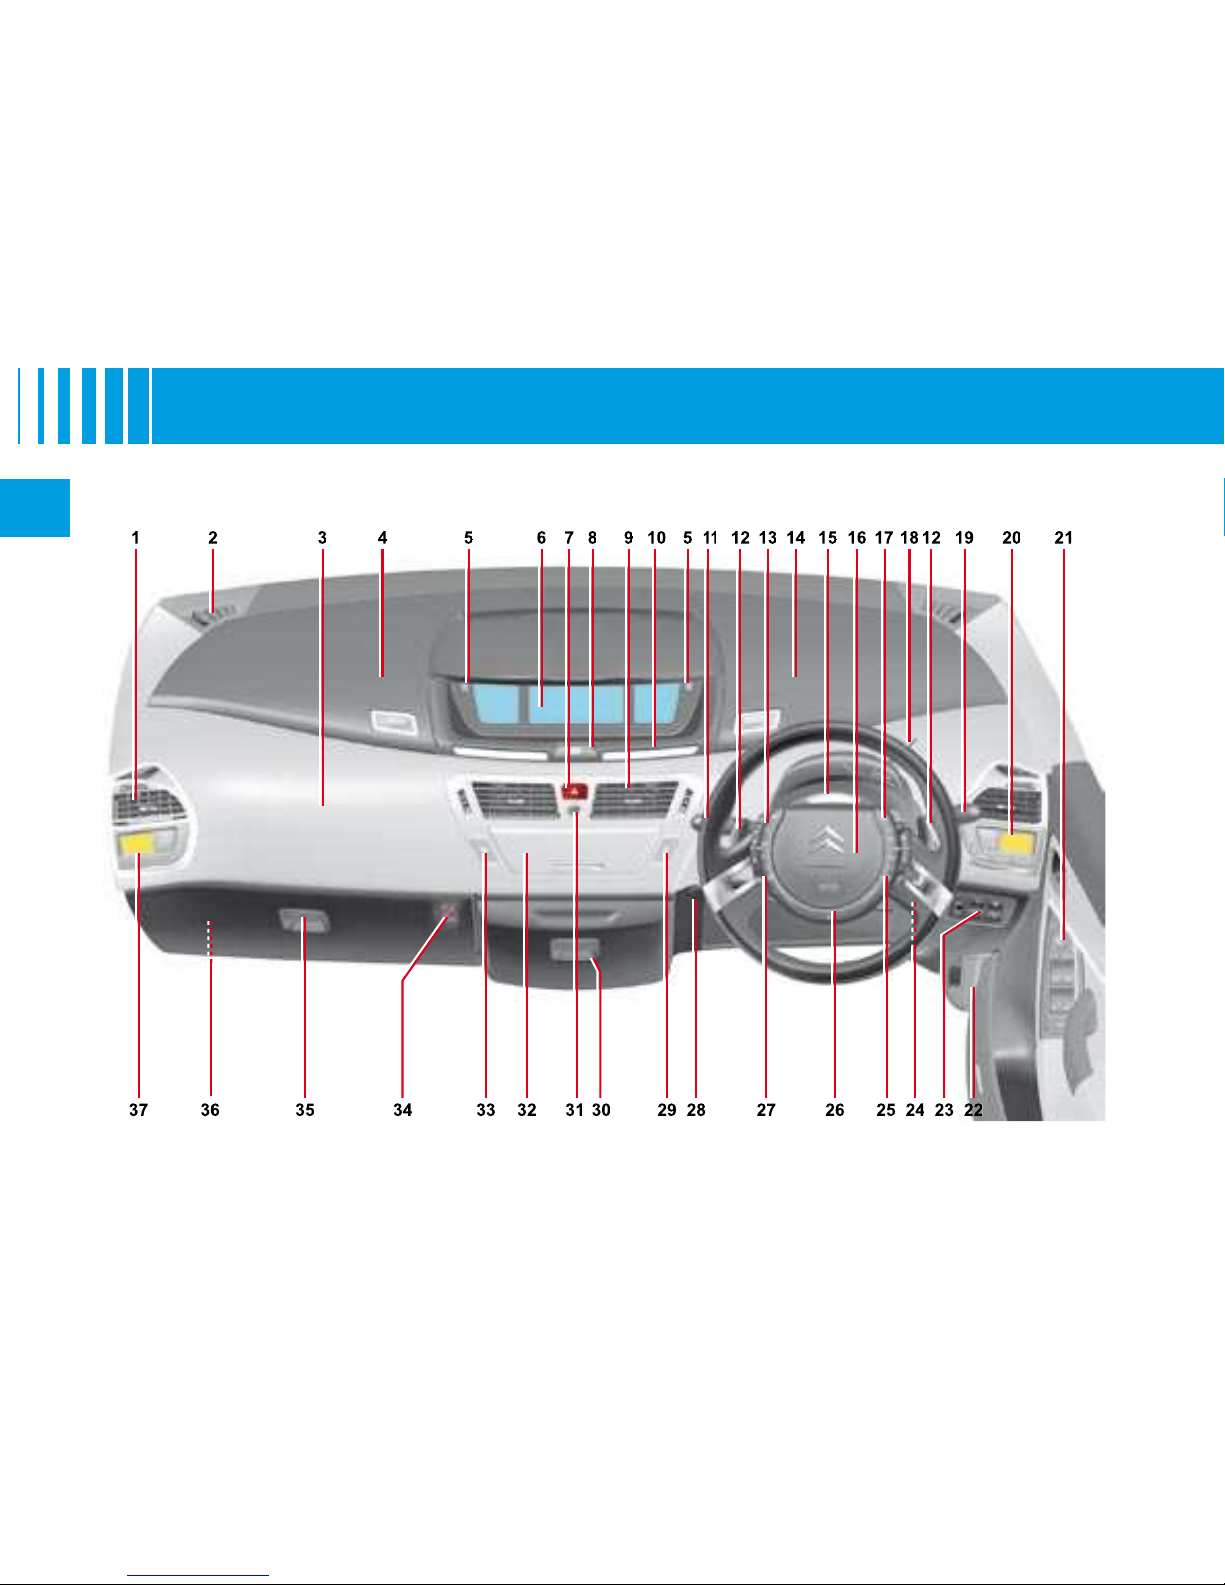
4
Controls :
•
Trip mileage recorder
•
Lighting rheostat
•
Personalisation
Automatic electronic
Warning lamps display
Controls :
•
Lighting
•
Direction indicators
•
Front and rear foglamps
Lever for automatic gearbox
Cruise control and speed
wheel)
Right hand upper storage
Direction indicator warning
Driver’s airbag
Radio-CD controls on
Selector for automatic gear-
Controls :
Windscreen wipe
•
Screen wash
•
Rear screen wipe
Trip computer
Driver’s air conditioning
Controls :
•
Rear view mirrors
•
Windows
Child safety
Bonnet release
Controls :
Fuel fl ap
•
Parking assistance
Lane departure warning
•
Alarm deactivation
Headlamps adjustment
Steering lock - ignition
Controls for multifunction
Horn
Optional function controls
Ambiance lighting control
Central locking button
Refrigerated storage
Scented air freshener
Radio-CD
ESP deactivation button
Key switch :
Lower glovebox :
•
Air freshener clips
•
Various storage
Fusebox access fl ap
Passenger’s air
II
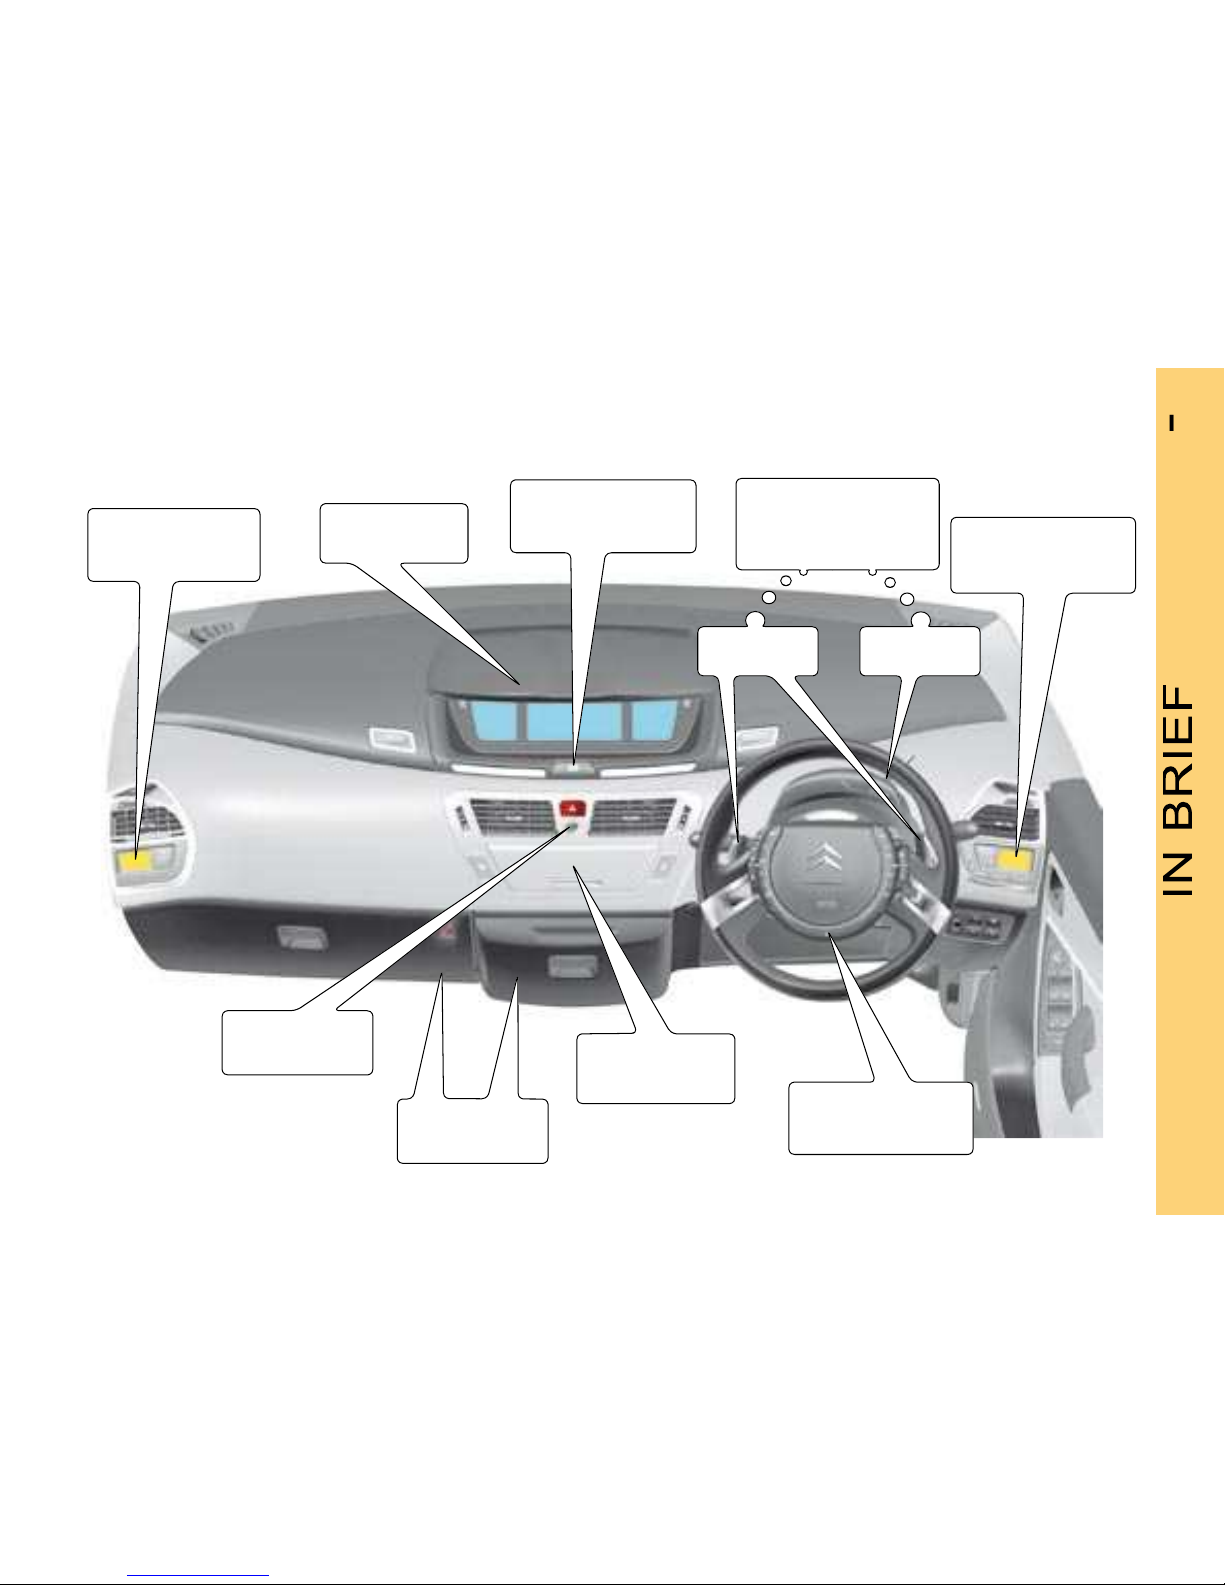
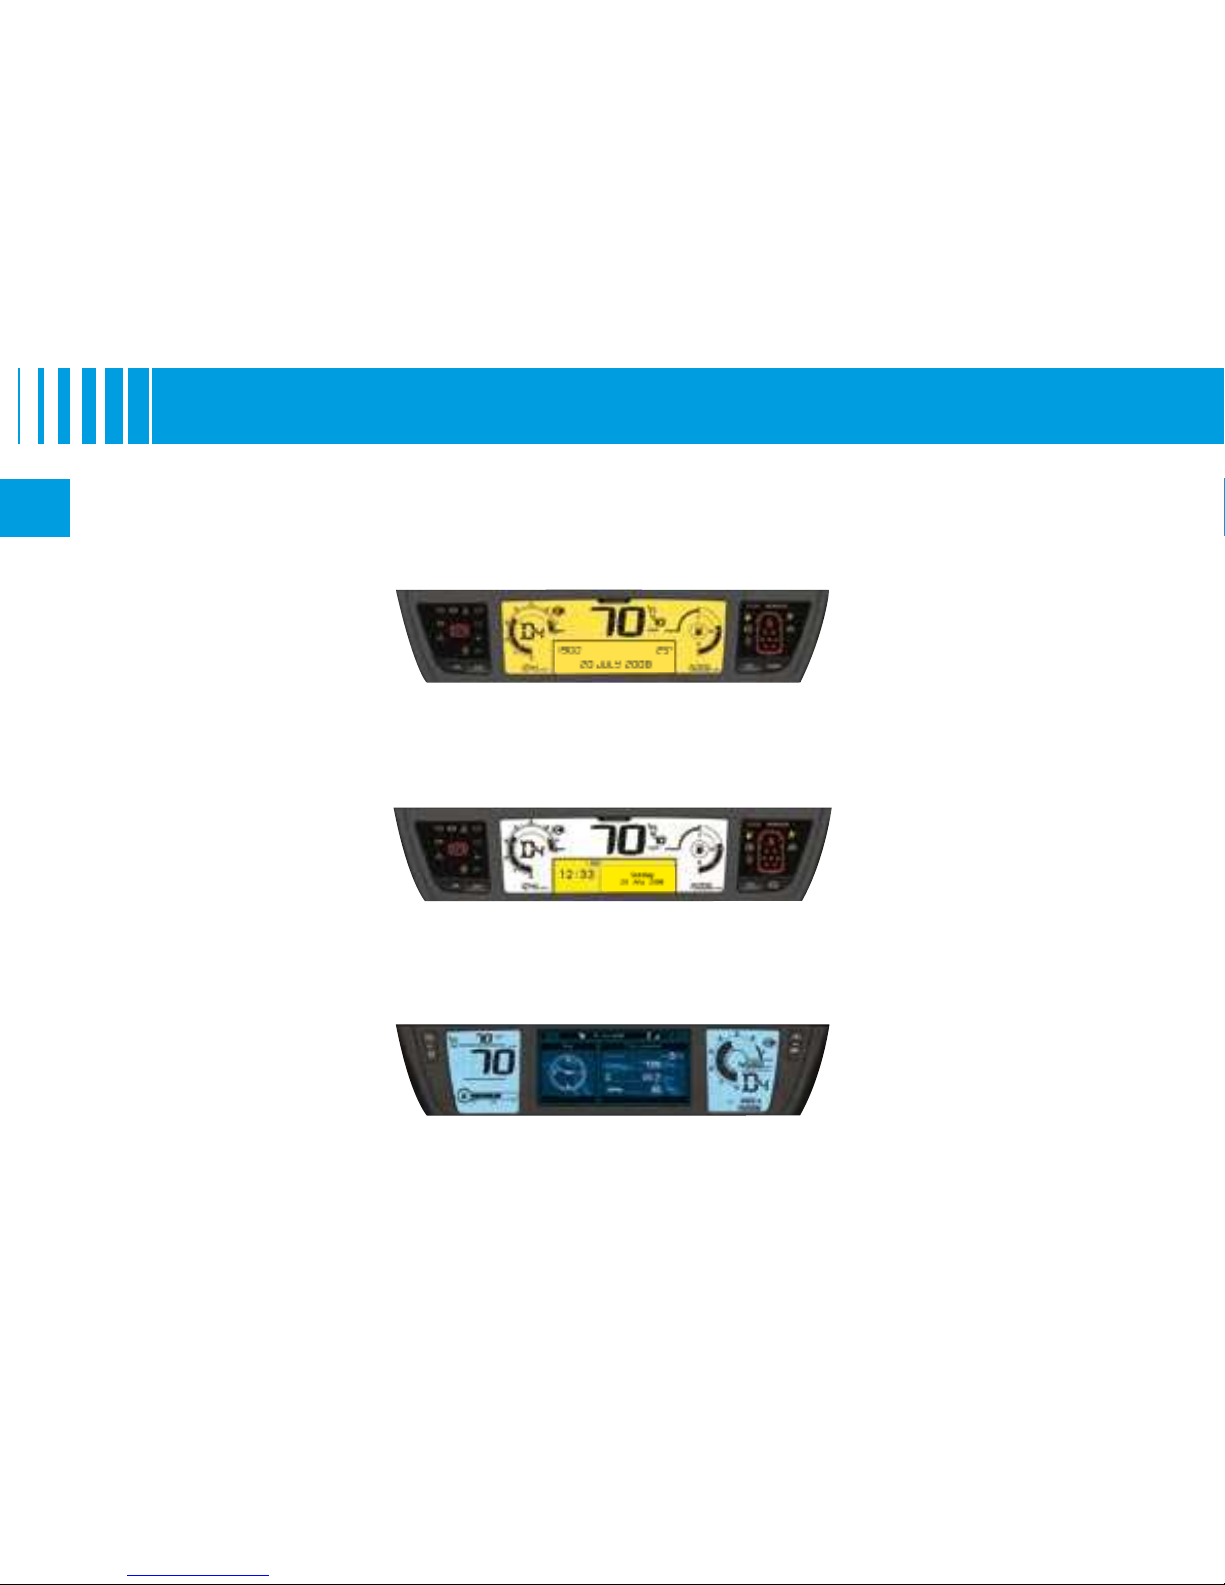
The instrument panel groups all the driving and comfort information
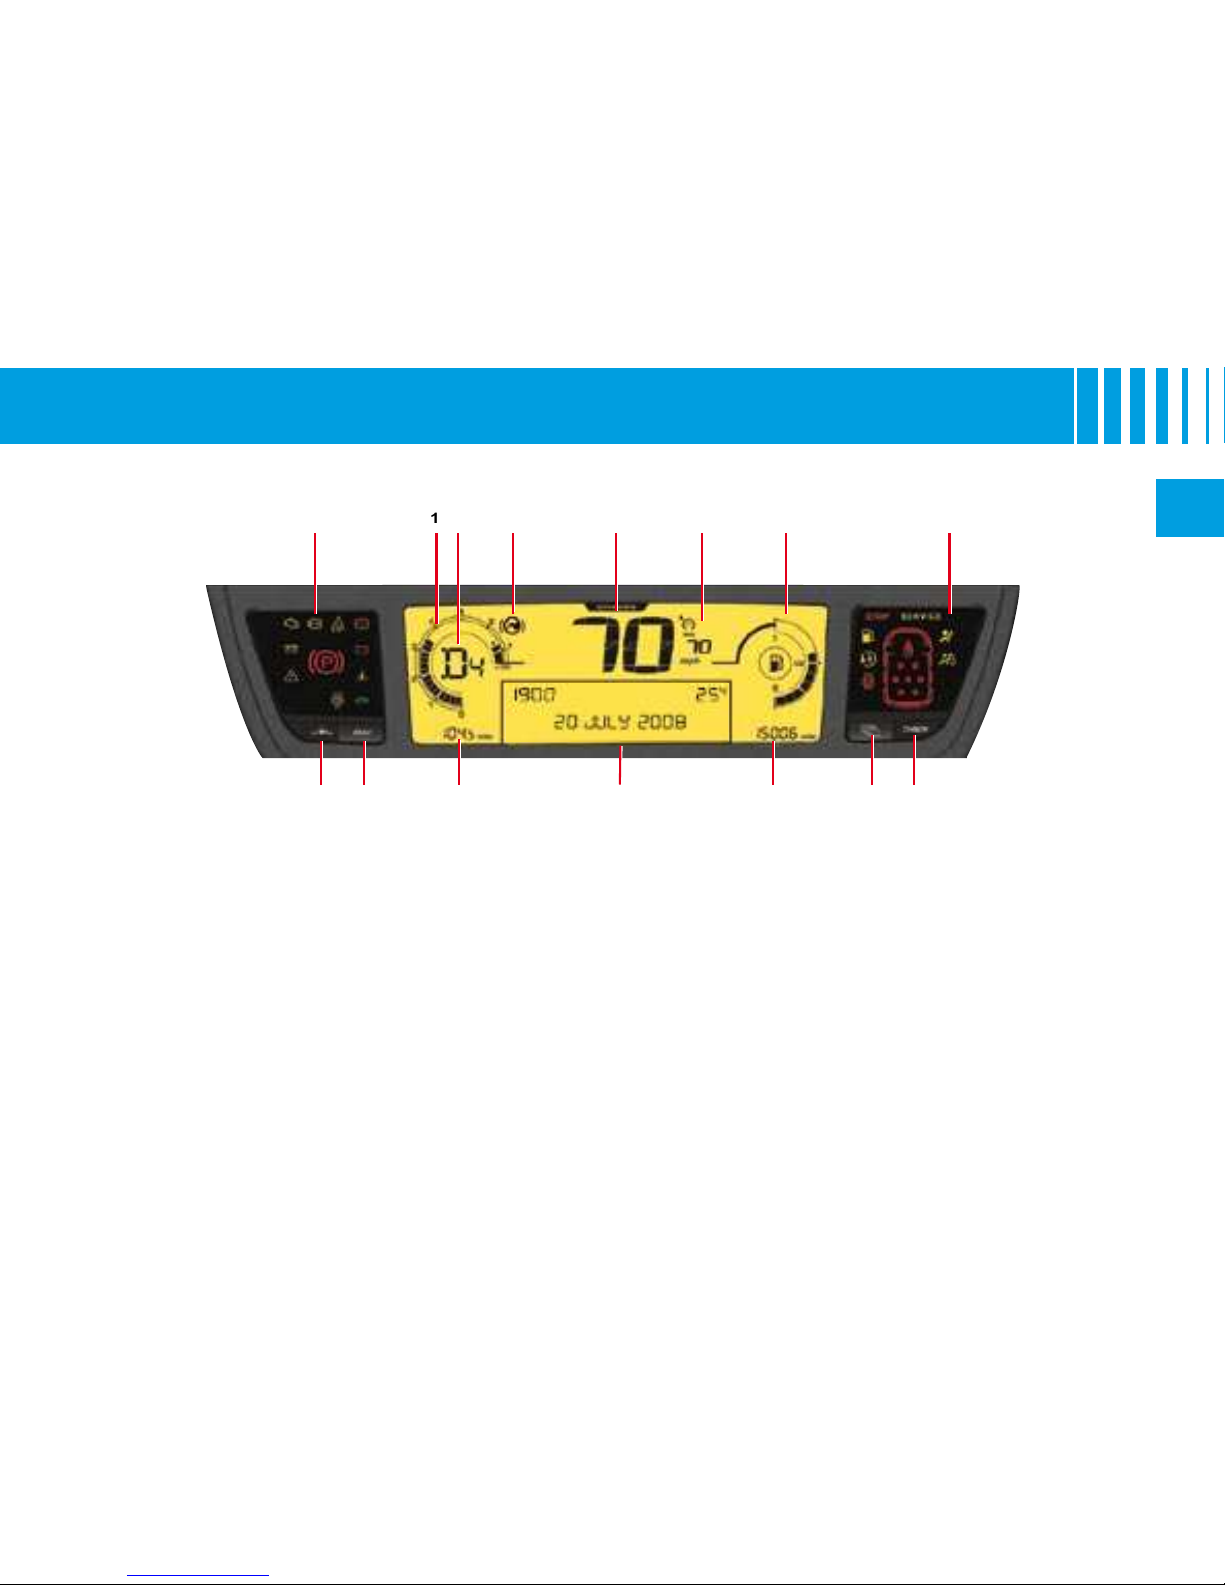
A
II
Rev counter
Gearbox information
“Foot on brake” warning lamp
4.
Speed indicator
Cruise control or speed
Fuel gauge
Trip mileage recorder
Multifunction screen A
Maintenance indicator, when
total mileage recorder
Lighting rheostat (available
Trip mileage recorder reset
Lighting rheostat (available
Check (list of alerts)
Warning lamps
Warning lamps
M U L T I F U N C T I O N S C R E E N A

II
The instrument panel groups all the driving and comfort information
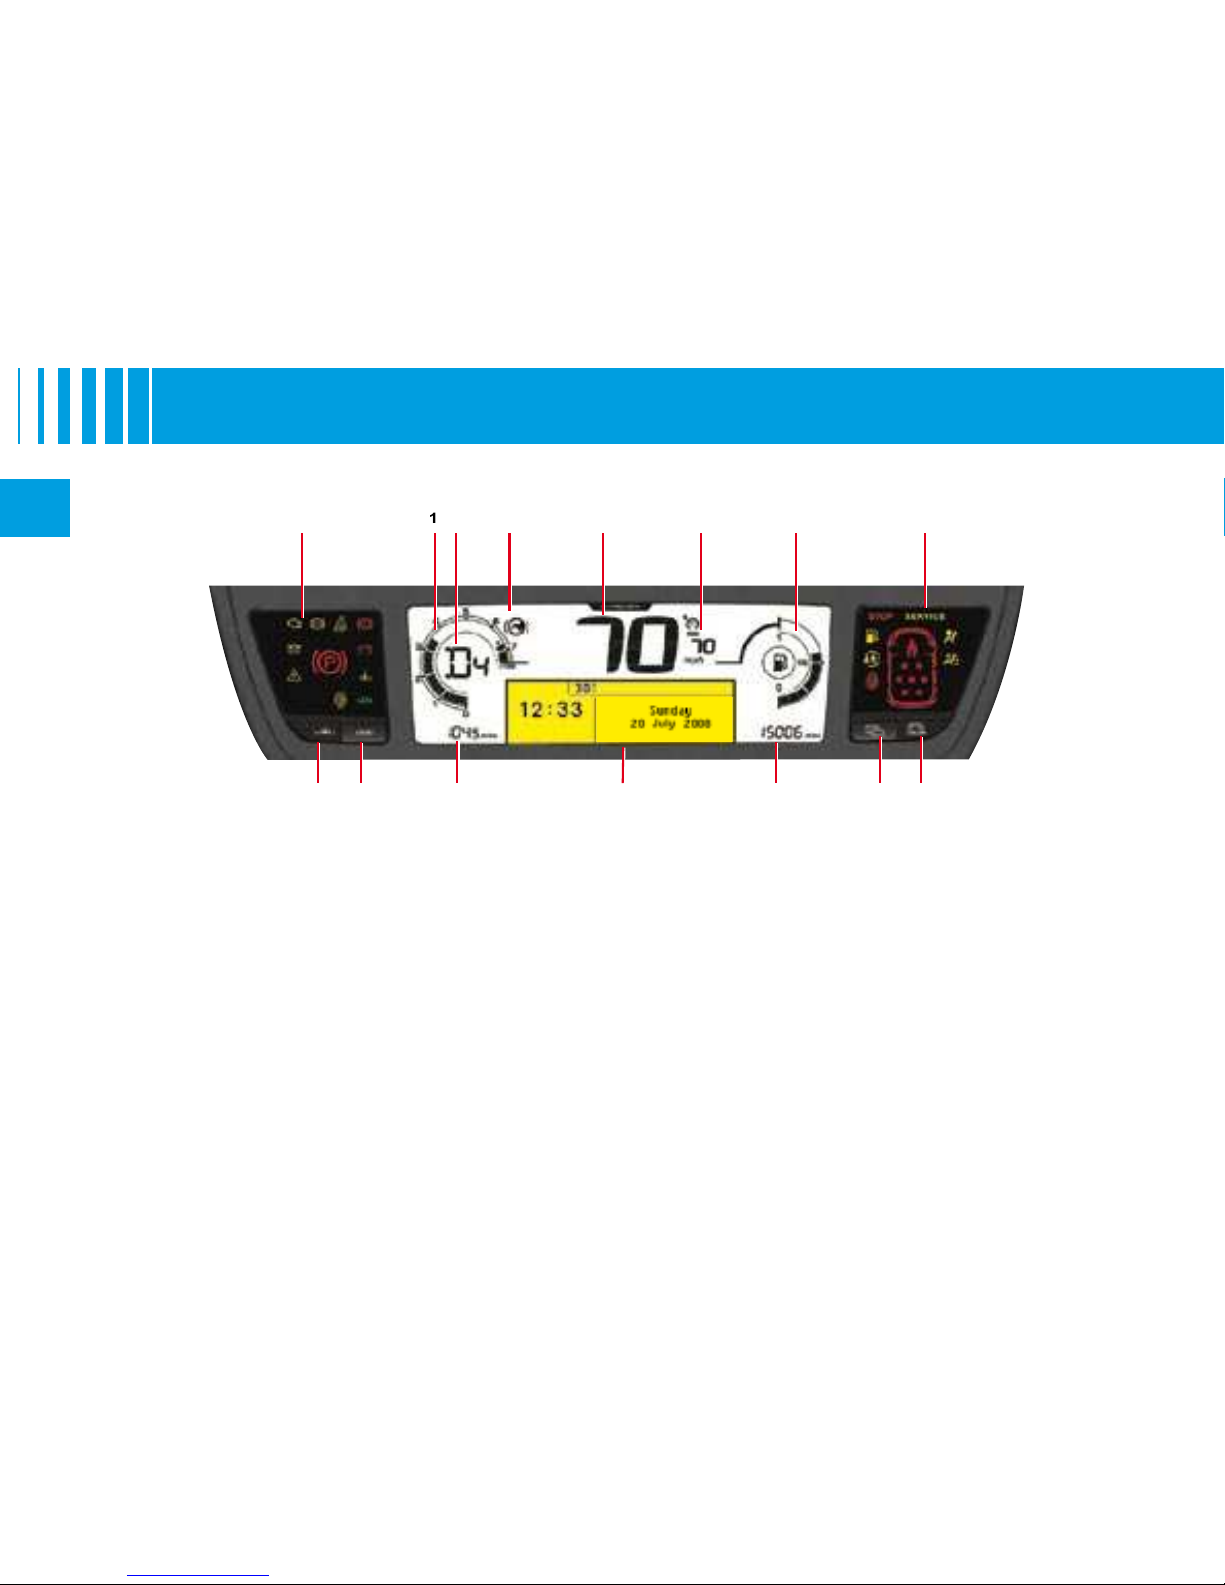
A
II
Rev counter
Gearbox information
“Foot on brake” warning lamp
4.
Speed indicator
Cruise control or speed
Fuel gauge
Trip mileage recorder
Multifunction screen C
Maintenance indicator, when
total mileage recorder
Lighting rheostat (available
Trip mileage recorder reset
Personalisation of the
COLOUR (choice of
This button offers you a whole
from white to blue.
Warning lamps
Warning lamps
M U L T I F U N C T I O N S C R E E N C
 Loading...