

Citiwell NG3TP1G Owner's Manual

Talking
Manual Part # 259962
Projector
Instructions
and
Owner’s Manual
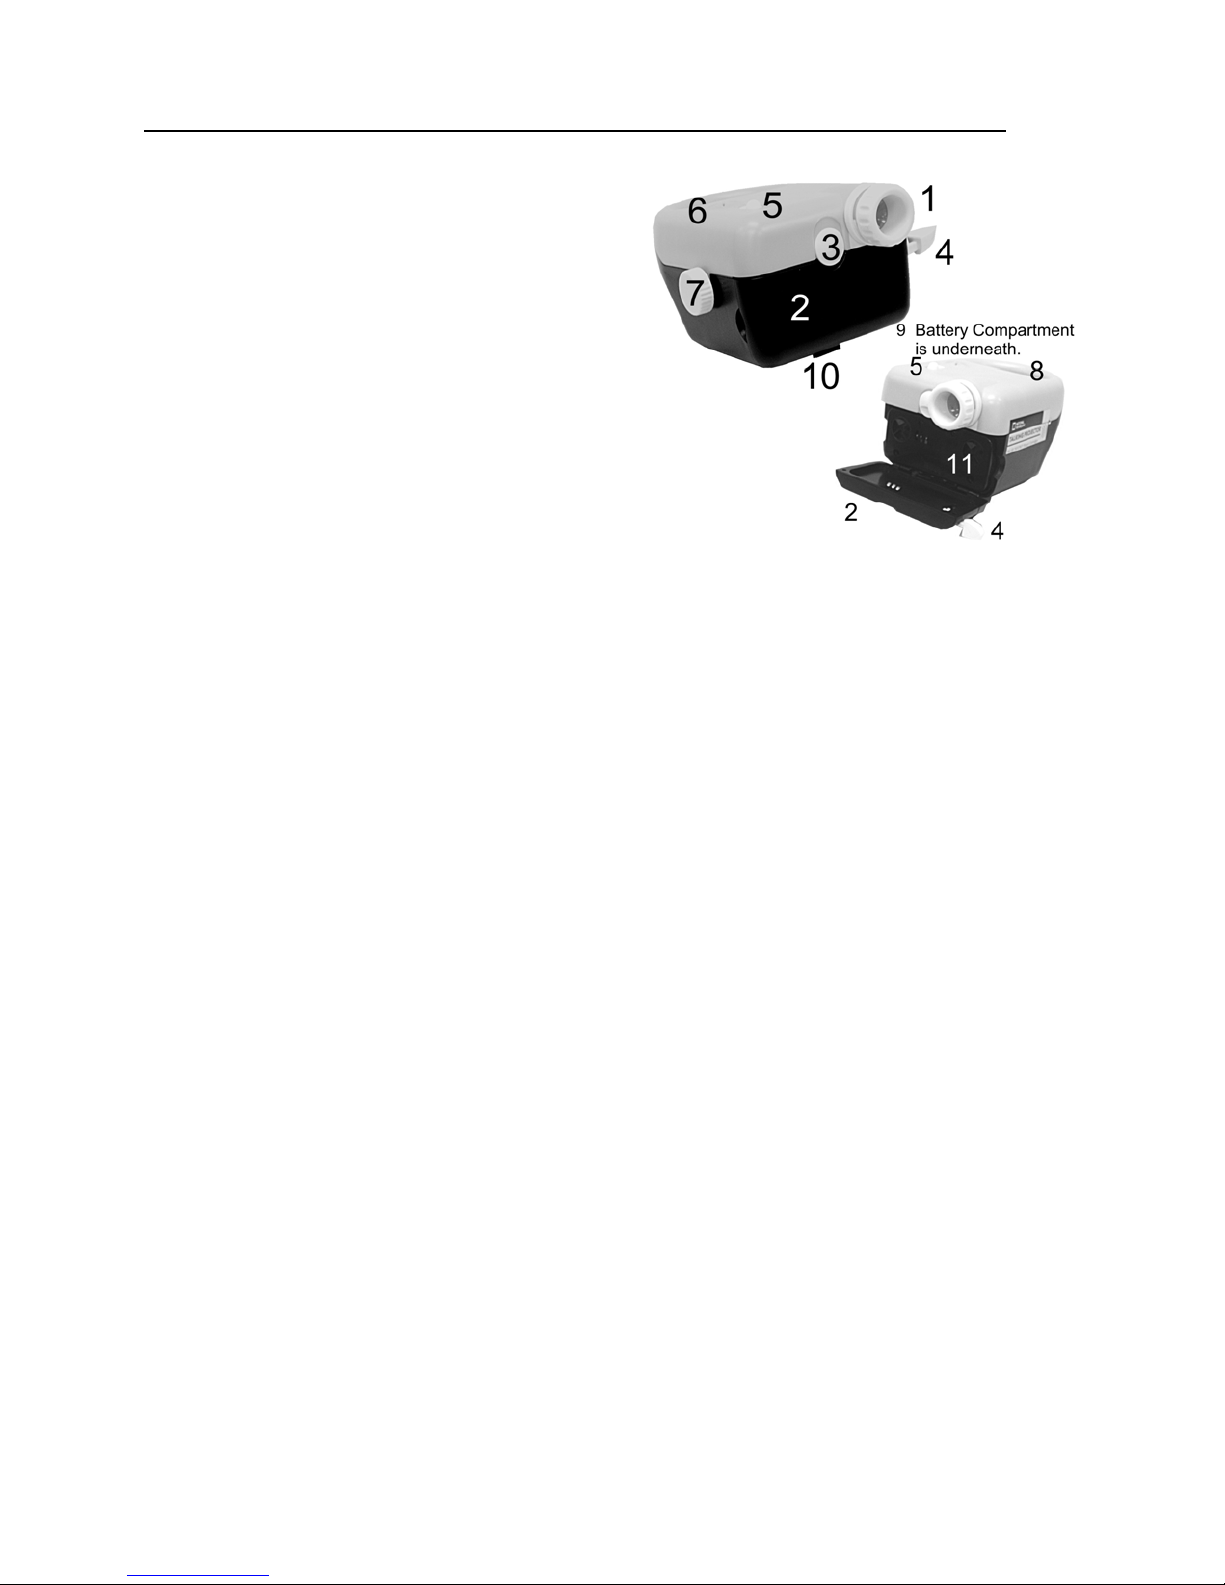
Here are the main parts of the National Geographic Talking Projector:
1. Focusing projection lens
2. Picture cartridge compartment
3. Cartridge compartment lock
4. Picture advance lever
5. ON/OFF switch for light
6. Speaker
7. Projector leveling and elevation knob
8. Handle
9. Battery compartment
10. Leveling and elevating foot
11. Talking picture cartridge (1 included)
The National Geographic Talking Projector will project the images from any National
Geographic (or compatible) 3D cartridge or 3D Talking Cartridge onto any light colored
wall or other light colored vertical surface. (Note: The images will not be projected in 3D.
To see the pictures in 3D you must view them with a National Geographic 3D Viewer or
Talking 3D Viewer.
As each image is viewed you will hear an interesting fact about the subject of the
picture. Of course, if you are viewing pictures from a regular 3D picture cartridge there
will not be any sound.
The National Geographic Talking Projector uses a new Dual LED light source that never
needs replacing and provides a light that is brighter than that produced by conventional
light bulbs, while placing less demand on the batteries.
Getting Started:
This projector is powered by 4 ‘C’ size batteries. Use good alkaline or heavy-duty
batteries. When the projector’s light becomes dim it is time to replace the batteries.
1) Use a small Phillips head (+) screwdriver to remove the small screw that holds
the battery compartment cover in place by turning it counter-clockwise. See
Figure 1. Insert 4 fresh ‘C’ size batteries as shown in Figure 2. Ensure that the
batteries are inserted facing in the right direction or the projector will not function.
2) Replace the battery compartment cover.
2
 Loading...