

Page 1

Cisco Global Site Selector Administration
Guide
Software Version 2.0
March 2007
Americas Headquarters
Cisco Systems, Inc.
170 West Tasman Drive
San Jose, CA 95134-1706
USA
http://www.cisco.com
Tel: 408 526-4000
800 553-NETS (6387)
Fax: 408 527-0883
Text Part Number: OL-10410-01
Page 2

THE SPECIFICATIONS AND INFORMATION REGARDING THE PRODUCTS IN THIS MANUAL ARE SUBJECT TO CHANGE WITHOUT NOTICE. ALL
C
k
S
I
E
N
P
a
A
STATEMENTS, INFORMATION, AND RECOMMENDATIONS IN THIS MANUAL ARE BELIEVED TO BE ACCURATE BUT ARE PRESENTED WITHOUT
WARRANTY OF ANY KIND, EXPRESS OR IMPLIED. USERS MUST TAKE FUL L RESPONSIBILITY FOR THEIR APPLICATION OF ANY PRODUCTS.
THE SOFTWA RE LICENSE AND LIMITED WARRANTY FOR THE ACCOMPANYING PRODUCT ARE SET FORTH IN THE INFORMATION PACKET THAT
SHIPPED WITH THE PRODUCT AND ARE INCORPORATED HEREIN BY THIS REFERENCE. IF YOU ARE UNABLE TO LOCATE THE SOFTWARE LICENSE
OR LIMITED WARRANTY, CONTACT YOUR CISCO REPRESENTATIVE FOR A COPY.
The Cisco im plementation of TCP header compression is an adaptati on of a program developed by the Uni versity of California, Berkeley (UCB) as part of UCB’s public
domain version of th e UNIX operating system. All rights reserved. Copyright © 1981, Regents of the Uni versity of California.
NOTWITHSTANDING ANY OTHER WARRANTY HEREIN, ALL DOCUMENT FILES AND SOFTWARE OF THESE SUPPLIERS ARE PROVIDED “AS IS” WITH
ALL FAULTS. CISCO AND THE ABOVE-NAMED SUPPLIERS DISCLAIM ALL WARRANTIES, EXPRESSED OR
LIMITATION, THOSE OF MERCHANTABIL ITY, FITNESS FOR A PARTICULAR PURPOSE AND NONINFRINGEMENT OR ARISING FROM A COURSE OF
DEALING, USAGE, OR TRADE PRACTICE.
IN NO EVENT SHALL CISCO OR ITS SUPPLIERS BE LIABLE FOR ANY INDIRECT, SPECIAL, CONSEQUENTIAL, OR INCIDENTAL DAMAGES, INCLUDING,
WITHOUT LIMITATION, LOST PROFITS OR LOSS OR DAMAGE TO DATA ARISING OUT OF TH E USE OR INABILITY TO USE THIS MANUAL, EVEN IF CISCO
OR ITS SUPPLIERS HAVE BEEN ADVISED OF THE POSSIBILITY OF SUCH DAMAGES.
CSP, the Cisco Square Bridge logo, Follow Me Browsing, and StackWise are trademarks of Cisco Systems, Inc.; Changing the Way We Work, Live, Play, and Learn, and iQuic
tudy are service marks of Cisco Systems, Inc.; and Access Registrar, Aironet, ASIST, BPX, Catalyst, CCDA, CCDP, CCIE, CCIP, CCNA, CCNP, Cisco, the Cisco Certified
nternetwork Expert logo, Cisco IOS, Cisco Press, Cisco Systems, Cisco Systems Capital, the Cisco Systems logo, Cisco Unity, Empowering the Internet Generation,
nterprise/Solver, EtherChannel, EtherFast, EtherSwitch, Fast Step, FormShare, GigaDrive, GigaStack, HomeLink, Internet Quotient, IOS, IP/TV, iQ Expertise, the iQ logo, iQ
et Readiness Scorecard, LightStream, Linksys, MeetingPlace, MGX, the Networkers logo, Networking Academy, Network Registrar, Packet, PIX, Post-Routing, Pre-Routing,
roConnect, RateMUX, ScriptShare, SlideCast, SMARTnet, StrataView Plus, SwitchProbe, TeleRouter, The Fastest Way to Increase Your Internet Quotient, TransPath, and VCO
re registered trademarks of Cisco Systems, Inc. and/or its affiliates in the United States and certain other countries.
ll other trademarks mentioned in this document or Website are the property of their respective owners. The use of the word partner does not imply a partnership relationship
Any Internet Protocol (IP) addresses used in this document are not intended to be actual addresses. Any examples, comm and display output, and figures included in the
document are shown for illustrative purposes onl y. Any use of actual IP addresses in illustrative content is unintentional and coincidental.
Cisco Global Site Selector Administ ration Guide
© 2007 Cisco System s, Inc. All ri ghts reserved.
IMPLIED, INCLUDING, WITH OUT
Page 3

CONTENTS
Preface xi
Audience xi
How to Use This Guide xii
Related Documentation xiii
Symbols and Conventions xv
Obtaining Documentation, Obtaining Support, and Security Guidelines xvii
CHAPTER
CHAPTER
1 Managing GSS Devices from the GUI 1-1
Logging Into the Primary GSSM Graphical User Interface 1-2
Logging Into the GSS and Accessing the CNR GUI 1-4
Activating and Modifying GSS Devices 1-6
Activating GSS Devices from the Primary GSSM 1-6
Modifying GSS Device Name and Location 1-9
Deleting GSS Devices 1-10
Logically Removing a GSS or Standby GSSM from the Network 1-11
Configuring the Primary GSSM GUI 1-13
Printing and Exporting GSSM Data 1-14
Viewing Third-Party Software Versions 1-15
2 Managing the GSS from the CLI 2-1
Logging in to the CLI and Enabling Privileged EXEC Mode 2-2
Understanding GSS Software Licenses 2-3
Acquiring and Installing CNR and DDoS License Files 2-4
OL-10410-01
Cisco Global Site Selector Administration Guide
iii
Page 4

Contents
Installing CNR 2-6
Accessing the CNR CLI 2-9
Invoking the Shell and Executing CNR Utilities 2-11
Using the startup-config and running-config Files 2-12
Changing the startup-config and running- config Files 2-12
Saving the startup-config and running-config Files 2-14
Loading the startup-config from an External File 2-15
Displaying the running-config File 2-15
Displaying the startup-config File 2-17
Managing GSS Files 2-18
Displaying the Contents of a File 2-18
Displaying Files in a Directory 2-20
Renaming GSS Files 2-21
Securely Copying Files 2-22
Deleting Files 2-23
Displaying Users 2-23
Specifying the GSS Inactivity Timeout 2-24
Configuring the Terminal Screen Line Length 2-24
Modifying the Attributes of the Security Certificate on the GSSM 2-25
Stopping the GSS Software 2-27
Shutting Down the GSS Software 2-27
Restarting the GSS Software 2-28
Performing a Cold Restart of a GSS Device 2-28
Disabling the GSS Software 2-28
Restoring GSS Factory-Default Settings 2-29
Replacing GSS Devices in Your GSS Network 2-30
Replacing the Primary GSSM in the Network 2-31
Cisco Global Site Selector Administration Guide
iv
Converting the Standby GSSM to a Primary GSSM 2-31
Replacing the Primary GSSM with an Available GSS 2-35
OL-10410-01
Page 5

Contents
Replacing the Standby GSSM in the Network 2-37
Replacing a GSS in the Network 2-39
Changing the GSSM Role in the GSS Network 2-40
Switching the Roles of the Primary and Standby GSSM Devices 2-41
Reversing the Roles of the Interim Primary and Standby GSSM Devices 2-43
Displaying GSS System Configuration Information 2-44
Displaying Software Version Information 2-45
Displaying License Information 2-46
Displaying Memory Information 2-47
Displaying Boot Configuration 2-48
Displaying GSS Processes 2-49
Displaying System Uptime 2-50
CHAPTER
Displaying Disk Information 2-50
Displaying UDI Data 2-50
Displaying System Status 2-51
Displaying GSS Services 2-52
3 Creating and Managing User Accounts 3-1
Creating and Managing GSS CLI User Accounts 3-1
Creating a GSS User Account 3-2
Modifying a GSS User Account 3-3
Deleting a GSS User Account 3-3
Creating and Managing Primary GSSM GUI User Accounts 3-4
Privilege Levels for Using the Primary GSSM GUI 3-5
Creating a GUI User Account 3-9
Modifying a GUI User Account 3-12
Removing a GUI User Account 3-12
Changing the User Account GUI Password 3-13
Creating and Modifying User Views for the Primary GSSM GUI 3-15
OL-10410-01
Custom User View Overview 3-15
Cisco Global Site Selector Administration Guide
v
Page 6

Contents
Creating a GUI User View 3-16
Modifying a GUI User View 3-24
Deleting a GUI User View 3-25
Modifying the Administrator Account Passwords 3-26
Resetting the Administrator CLI Account Password 3-26
Changing the Administrator CLI Password 3-27
Restoring or Changing the Administrator GUI Password 3-28
CHAPTER
4 Managing GSS User Accounts Through a TACACS+ Server 4-1
TACACS+ Overview 4-2
TACACS+ Configuration Quick Start 4-4
Configuring a TACACS+ Server for Use with the GSS 4-5
Configuring Authentication Settings on the TACACS+ Server 4-5
Configuring Authorization Settings on the TACACS+ Server 4-7
Configuring Primary GSSM GUI Privilege Level Authorization from the
TACACS+ Server 4-12
Enabling Custom User GUI Views When Authenticating a User from the
TACACS+ Server 4-16
Configuring Accounting Settings on the TACACS+ Server 4-17
Identifying the TACACS+ Server Host on the GSS 4-19
Disabling TACACS+ Server Keepalives on the GSS 4-22
Specifying the TACACS+ Server Timeout on the GSS 4-23
Specifying TACACS+ Authentication of the GSS 4-23
Specifying TACACS+ Authorization of the GSS 4-24
Specifying TACACS+ Accounting on the GSS 4-25
Showing TACACS+ Statistics on the GSS 4-26
Clearing TACACS+ Statistics on the GSS 4-28
Disabling TACACS+ on a GSS 4-28
Cisco Global Site Selector Administration Guide
vi
OL-10410-01
Page 7

Contents
CHAPTER
CHAPTER
5 Configuring Access Lists and Filtering GSS Traffic 5-1
Filtering GSS Traffic Using Access Lists 5-1
Access List Overview 5-2
Creating an Access List 5-4
Associating an Access List with a GSS Interface 5-7
Disassociating an Access List from a GSS Interface 5-8
Adding Rules to an Access List 5-8
Removing Rules from an Access List 5-9
Segmenting GSS Traffic by Ethernet Interface 5-9
Displaying Access Lists 5-10
Deploying GSS Devices Behind Firewalls 5-12
GSS Firewall Deployment Overview 5-12
Configuring GSS Devices Behind a Firewall 5-16
6 Configuring SNMP 6-1
CHAPTER
Overview 6-1
Configuring SNMP on the GSS 6-2
Configuring SNMP Servers 6-4
Configuring SNMP Server Notifications 6-5
Configuring SNMP Server Trap Limits 6-6
Specifying Recipients for SNMP Notification Operations 6-7
Viewing SNMP Status 6-8
Viewing MIB Files on the GSS 6-9
7 Backing Up, Restoring, and Downgrading the GSSM Database 7-1
Backing Up the Primary GSSM 7-2
Backup Overview 7-2
Performing a Full Primary GSSM Backup 7-3
OL-10410-01
Cisco Global Site Selector Administration Guide
vii
Page 8

Contents
Restoring a Primary GSSM Backup 7-4
Restore Overview 7-4
Restoring Your Primary GSSM from a Previous Backup 7-5
Downgrading Your GSS Devices 7-8
CHAPTER
CHAPTER
8 Monitoring GSS Operation 8-1
Monitoring GSS and GSSM Status 8-2
Monitoring the GSS Device Online Status from the CLI 8-2
Monitoring the GSS Device System Status from the CLI 8-4
Monitoring the GSS Device Status from the Primary GSSM GUI 8-4
Monitoring GSSM Database Status 8-5
Monitoring the Database Status 8-5
Validating Database Records 8-6
Creating a Database Validation Report 8-6
Viewing the GSS Operating Configuration for Technical Support 8-8
9 Viewing Log Files 9-1
Understanding GSS Logging Levels 9-1
Configuring System Logging for a GSS 9-4
Specifying a Log File on the GSS Disk 9-5
Specifying a Host for a Log File Destination 9-6
Specifying a Syslog Facility 9-8
Viewing Device Logs from the CLI 9-9
Viewing the gss.log File from the CLI 9-10
Viewing System Message Logging 9-11
Viewing Subsystem Log Files from the CLI 9-11
Rotating Existing Log Files from the CLI 9-12
Viewing System Logs from the Primary GSSM GUI 9-13
Viewing System Logs from the Primary GSSM GUI 9-14
Cisco Global Site Selector Administration Guide
viii
OL-10410-01
Page 9

Contents
Purging System Log Messages from the GUI 9-15
Common System Log Messages 9-16
Viewing GSS System Logs Using CiscoWorks RME Syslog Analyzer 9-18
APPENDIX
I
NDEX
A Upgrading the GSS Software A-1
Verifying the GSSM Role in the GSS Network A-2
Backing up and Archiving the Primary GSSM A-3
Obtaining the Software Upgrade A-3
Upgrading Your GSS Devices A-5
OL-10410-01
Cisco Global Site Selector Administration Guide
ix
Page 10

Contents
Cisco Global Site Selector Administration Guide
x
OL-10410-01
Page 11

Audience
Preface
This guide includes information on configuring the Cisco Global Site Selector
(GSS). It describes the procedures necessary to properly manage and maintain
your Global Site Selector Manager (GSSM) and GSS devices, including login
security, GSS software upgrades, GSSM database administration, and log files.
This preface contains the following major sections:
• Audience
• How to Use This Guide
• Related Documentation
• Symbols and Conventions
• Obtaining Documentation, Obtaining Support, and Security Guidelines
To use this guide, you should be familiar with the Cisco Global Site Selector
hardware, which is discussed in the Global Site Selector Hardware Installation
Guide. In addition, you should be familiar with basic TCP/IP and networking
concepts, router configuration, Domain Name System (DNS), the Berkeley
Internet Name Domain (BIND) software or similar DNS products, and your
organization’s specific network configuration.
Cisco Global Site Selector CLI-Based Global Server Load-Balancing Configuration Guide
OL-10413-01
xi
Page 12

How to Use This Guide
This guide includes the following chapters:
Chapter/Title Description
Preface
Chapter 1, Managing
GSS Devices from the
GUI
Chapter 2, Managing the
GSS from the CLI
Chapter 3, Creating and
Managing User Accounts
Chapter 4, Managing
GSS User Accounts
Through a TACACS+
Server
Chapter 5, Configuring
Access Lists and
Filtering GSS Traffic
Describes how to configure and manage your GSSM
and GSS devices from the primary GSSM graphical
user interface, including activating and configuring
GSS devices.
Describes how to manage the GSS software from the
CLI, including configuring a replacement GSS
device for use in your GSS network and changing the
GSSM role in the network.
Describes how to create and manage GSS device
CLI login accounts and primary GSSM GUI login
accounts. This chapter also describes how to specify
user privileges and assign custom user views for
accessing the primary GSSM GUI.
Describes how to configure the GSS as a client of a
TACACS+ server for authentication, authorization,
and accounting.
Describes how to create access lists and access
groups to filter GSS traffic.
Chapter 6, Configuring
SNMP
Chapter 7, Backing Up,
Restoring, and
Downgrading the GSSM
Database
Chapter 8, Viewing Log
Files
Cisco Global Site Selector CLI-Based Global Server Load-Balancing Configuration Guide
xii
Describes how to configure Simple Network
Management Protocol (SNMP) on your GSS.
Describes the procedures to back up and restore the
primary GSSM database. This chapter also includes
a set of general guidelines for when and how to back
up your primary GSSM.
Includes information on auditing logged information
about your GSS devices.
OL-10413-01
Page 13

Preface
Chapter/Title Description
Chapter 9, Monitoring
GSS Operation
Appendix A, Upgrading
the GSS Software
Related Documentation
In addition to this document, the GSS documentation set includes the following:
Document Title Description
Global Site Selector
Hardware Installation
Guide
Regulatory Compliance
and Safety Information
for the Cisco Global Site
Selector
Describes the tools that you can use to monitor the
status of your GSS devices and of global load
balancing on your GSS network.
Describes how to manually upgrade your GSS
software.
Information on installing your GSS device and
getting it ready for operation. It describes how to
prepare your site for installation, how to install the
GSS device in an equipment rack, and how to
maintain and troubleshoot the GSS hardware.
Regulatory compliance and safety information for the
GSS.
Release Note for the
Cisco Global Site
Selector
Cisco Global Site Selector CLI-Based Global Server Load-Balancing Configuration Guide
OL-10413-01
Information on operating considerations, caveats, and
new CLI commands for the GSS software.
xiii
Page 14

Document Title Description
Preface
Cisco Global Site
Selector Getting Started
Guide
Cisco Global Site
Selector GUI-Based
Global Server
Load-Balancing
Configuration Guide
Cisco Global Site
Selector CLI-Based
Global Server
Load-Balancing
Configuration Guide
Cisco Global Site
Selector Command
Reference
Information on getting your GSS set up, configured,
and ready to perform global server load balancing.
Procedures on how to configure your primary GSSM
from the GUI to perform global server load
balancing, such as configuring source address lists,
domain lists, answers, answer groups, DNS sticky,
network proximity, and DNS rules. This document
also provides an overview of the GSS device and
global server load balancing as performed by the
GSS.
Procedures on how to configure your primary GSSM
from the CLI to perform global server load balancing,
such as configuring source address lists, domain lists,
answers, answer groups, DNS sticky, network
proximity, and DNS rules. This document also
provides an overview of the GSS device and global
server load balancing as performed by the GSS.
An alphabetical list of all GSS command-line
interface (CLI) commands including syntax, options,
and related commands. This document also describes
how to use the CLI interface.
Several of the Cisco CNS Network Registrar (CNR) documents are referenced in
this guide. The CNR version6.2 documentation set consists of the following
documents:
Document Title Description
Release Notes for the
Cisco CNS Network
Registrar, Release 6.2
Cisco CNS Network
Registrar Installation
Guide
Cisco Global Site Selector CLI-Based Global Server Load-Balancing Configuration Guide
xiv
Information on new software features, installation
updates, caveats, and documentation for the CNR
release.
Information on installing CNR on the supported
operating systems: Windows, Solaris, and Linux.
OL-10413-01
Page 15
Preface
Document Title Description
Cisco CNS Network
Registrar User’s Guide
Cisco CNS Network
Registrar CLI Reference
Guide
Symbols and Conventions
This guide uses the following symbols and conventions to emphasize certain
information.
Command descriptions use the following conventions:
boldface font Commands and keywords are in boldface.
italic font Variables for which you supply values are in italics.
[ ] Elements in square brackets are optional.
Information on configuring CNR by using the
Web-based user interface (Web UI) and the command
line interface (CLI).
Information about how to use the CNR command-line
program, nrcmd.
OL-10413-01
{x | y | z} Alternative keywords are grouped in braces and separated
by vertical bars.
[x | y | z] Optional alternative keywords are grouped in brackets and
separated by vertical bars.
string A nonquoted set of characters. Do not use quotation marks
around the string, or the string will include the quotation
marks.
Screen examples use the following conventions:
screen font Terminal sessions and information the system displays are
in
screen font.
boldface screen
Information you must enter is in boldface screen font.
font
Cisco Global Site Selector CLI-Based Global Server Load-Balancing Configuration Guide
xv
Page 16
Preface
italic screen
font
Variables for which you supply values are in italic screen
font.
This pointer highlights an important line of text in an
example.
^ The symbol ^ represents the key labeled Control. For
example, the key combination ^D in a screen display means
hold down the Control key while you press the D key.
< > Nonprinting characters, such as passwords, are in angle
brackets.
[ ] Default responses to system prompts are in square brackets.
!, # An exclamation point (!) or a pound sign (#) at the
beginning of a line of code indicates a comment line.
Graphical user interface elements use the following conventions:
boldface text Instructs the user to enter a keystroke or act on a GUI
element.
Courier text Indicates text that appears in a command line, including the
CLI prompt.
Courier bold
text
Indicates commands and text you enter in a command line.
italic text Directories and filenames are in italic font.
Caution A caution means that a specific action you take could cause a loss of data or
adversely impact use of the equipment.
Note A note provides important related information, reminders, and recommendations.
Cisco Global Site Selector CLI-Based Global Server Load-Balancing Configuration Guide
xvi
OL-10413-01
Page 17

Preface
Obtaining Documentation, Obtaining Support, and
Security Guidelines
For information on obtaining documentation, obtaining support, providing
documentation feedback, security guidelines, and also recommended aliases and
general Cisco
Documentation, which also lists all new and revised Cisco
documentation, at:
http://www.cisco.com/en/US/docs/general/whatsnew/whatsnew.html
documents, see the monthly What’s New in Cisco Product
technical
Cisco Global Site Selector CLI-Based Global Server Load-Balancing Configuration Guide
OL-10413-01
xvii
Page 18

Preface
Cisco Global Site Selector CLI-Based Global Server Load-Balancing Configuration Guide
xviii
OL-10413-01
Page 19

CHAPTER
1
Managing GSS Devices from the GUI
This chapter describes how to configure and manage your Global Site Selector
Manager (GSSM) and Global Site Selector (GSS) devices from the primary
GSSM graphical user interface. It includes the procedures for activating and
configuring GSS devices and for changing the primary and standby GSSM roles
in the GSS network.
This chapter contains the following major sections:
• Logging Into the Primary GSSM Graphical User Interface
• Logging Into the GSS and Accessing the CNR GUI
• Activating and Modifying GSS Devices
• Logically Removing a GSS or Standby GSSM from the Network
OL-10410-01
• Configuring the Primary GSSM GUI
• Printing and Exporting GSSM Data
• Viewing Third-Party Software Versions
Cisco Global Site Selector Administration Guide
1-1
Page 20

Chapter 1 Managing GSS Devices from the GUI
Logging Into the Primary GSSM Graphical User Interface
Logging Into the Primary GSSM Graphical User
Interface
After you configure and enable your primary GSSM, you may access the GUI.
The primary GSSM uses secure HTTP (HTTPS) to communicate with web
clients.
When you first log in to the primary GSSM GUI, use the system default
administrative account and password. After you access the primary GSSM GUI,
create and maintain additional user accounts and passwords using the user
administration features of the primary GSSM. See
Managing User Accounts, for more information about creating user accounts.
To log in to the primary GSSM GUI, perform the following steps:
1. Open your preferred Internet web browser application, such as Internet
Explorer or Netscape Navigator.
Chapter 3, Creating and
2. Enter the secure HTTP address of your GSSM in the address field. For
example, if your primary GSSM is named gssm1.example.com, enter the
following to display the primary GSSM login dialog box and to access the
GUI:
https://gssm1.example.com
Note If you cannot locate the primary GSSM DNS name, be aware that the GSS
network uses secure connections and that the address of the GSSM
includes https:// (HTTP over SSL) instead of the more common http://.
3. Click Ye s at the prompt to accept (trust) and install the signed certificate from
Cisco Systems.
To avoid approving the signed certificate every time you log in to the primary
GSSM, accept the certificate from Cisco Systems, Inc. For instructions on
trusting certificates from a particular owner or website, refer to the online
help included with your browser.
4. Install the signed certificate as follows:
–
If you are using Internet Explorer—In the Security Alert dialog box,
click View Certificate, choose the Install Certificate option, and follow
the prompts of the Certificate Manager Import Wizard. Proceed to Step 5.
Cisco Global Site Selector Administration Guide
1-2
OL-10410-01
Page 21
Chapter 1 Managing GSS Devices from the GUI
–
If you are using Netscape—In the New Site Certificate dialog box, click
Next and follow the prompts of the New Site Certificate Wizard. Proceed
to Step 5.
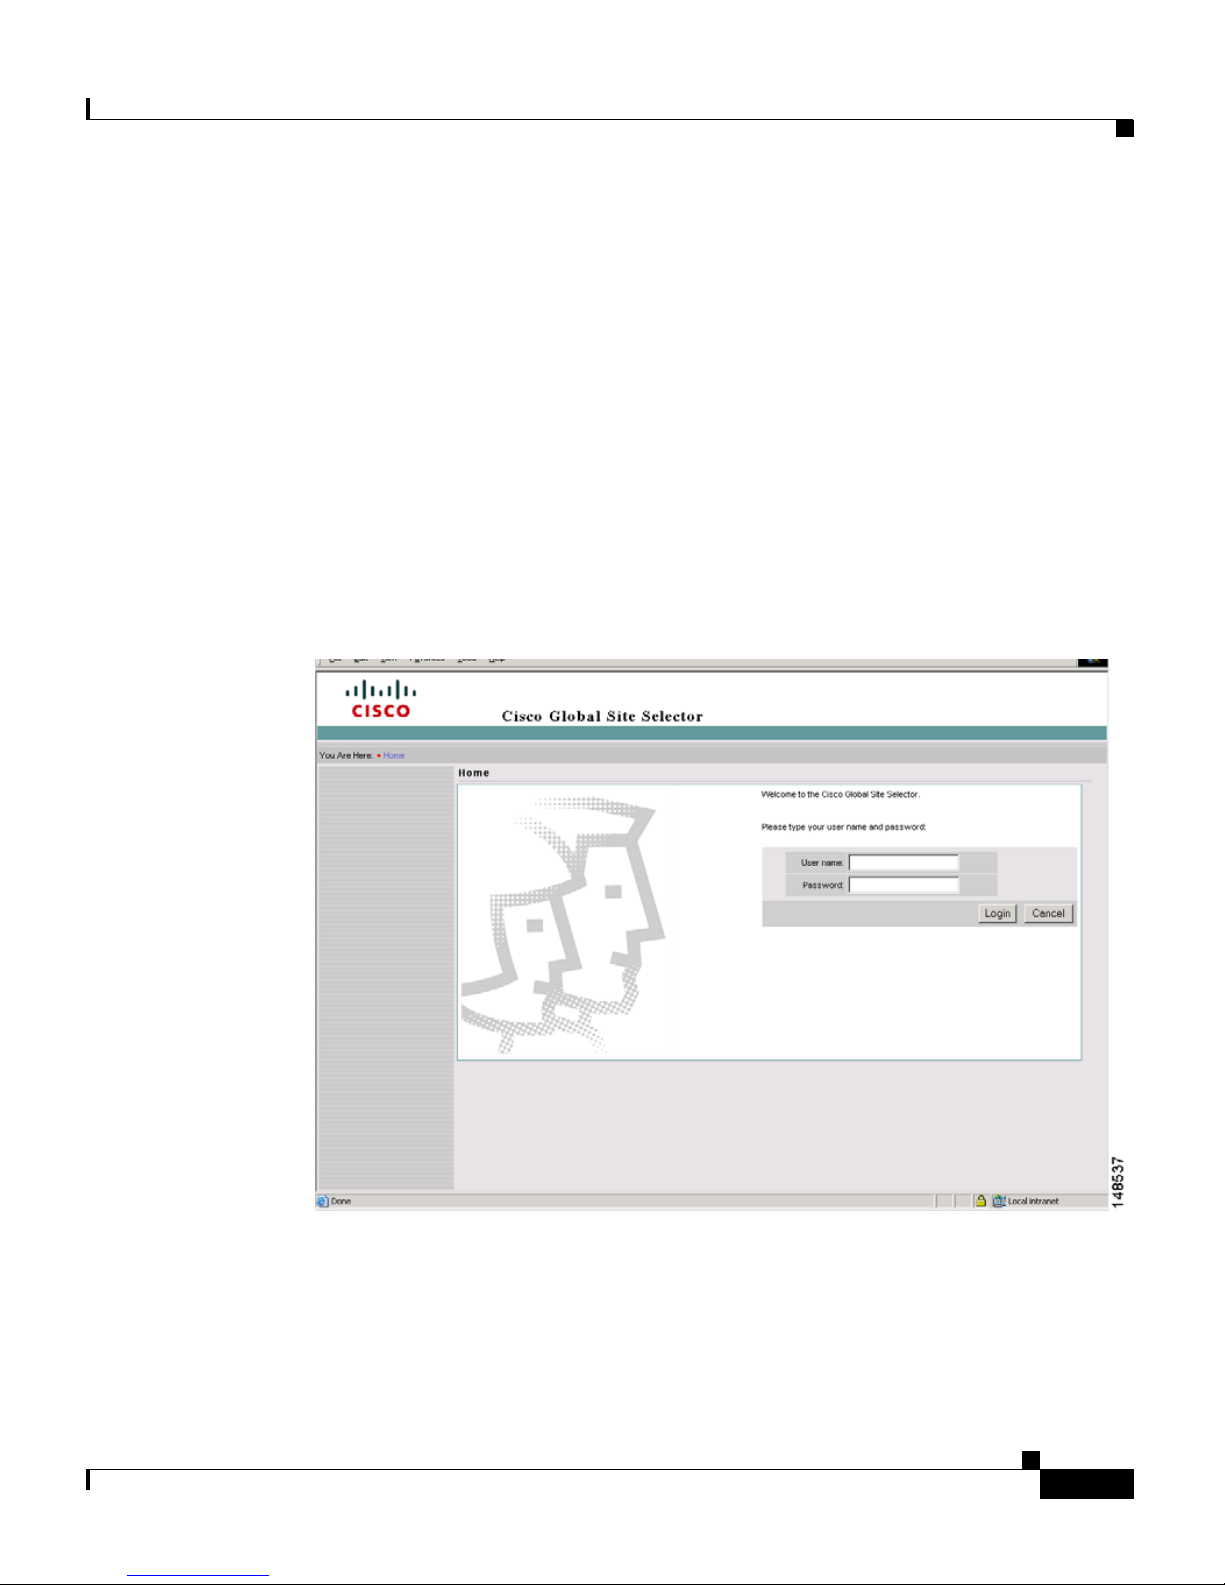
5. At the primary GSSM login window, enter your username and password in
the fields provided, and then click Login (see
time logging n to the GSSM, use the default account name (admin) and
password (default) to access the GUI.
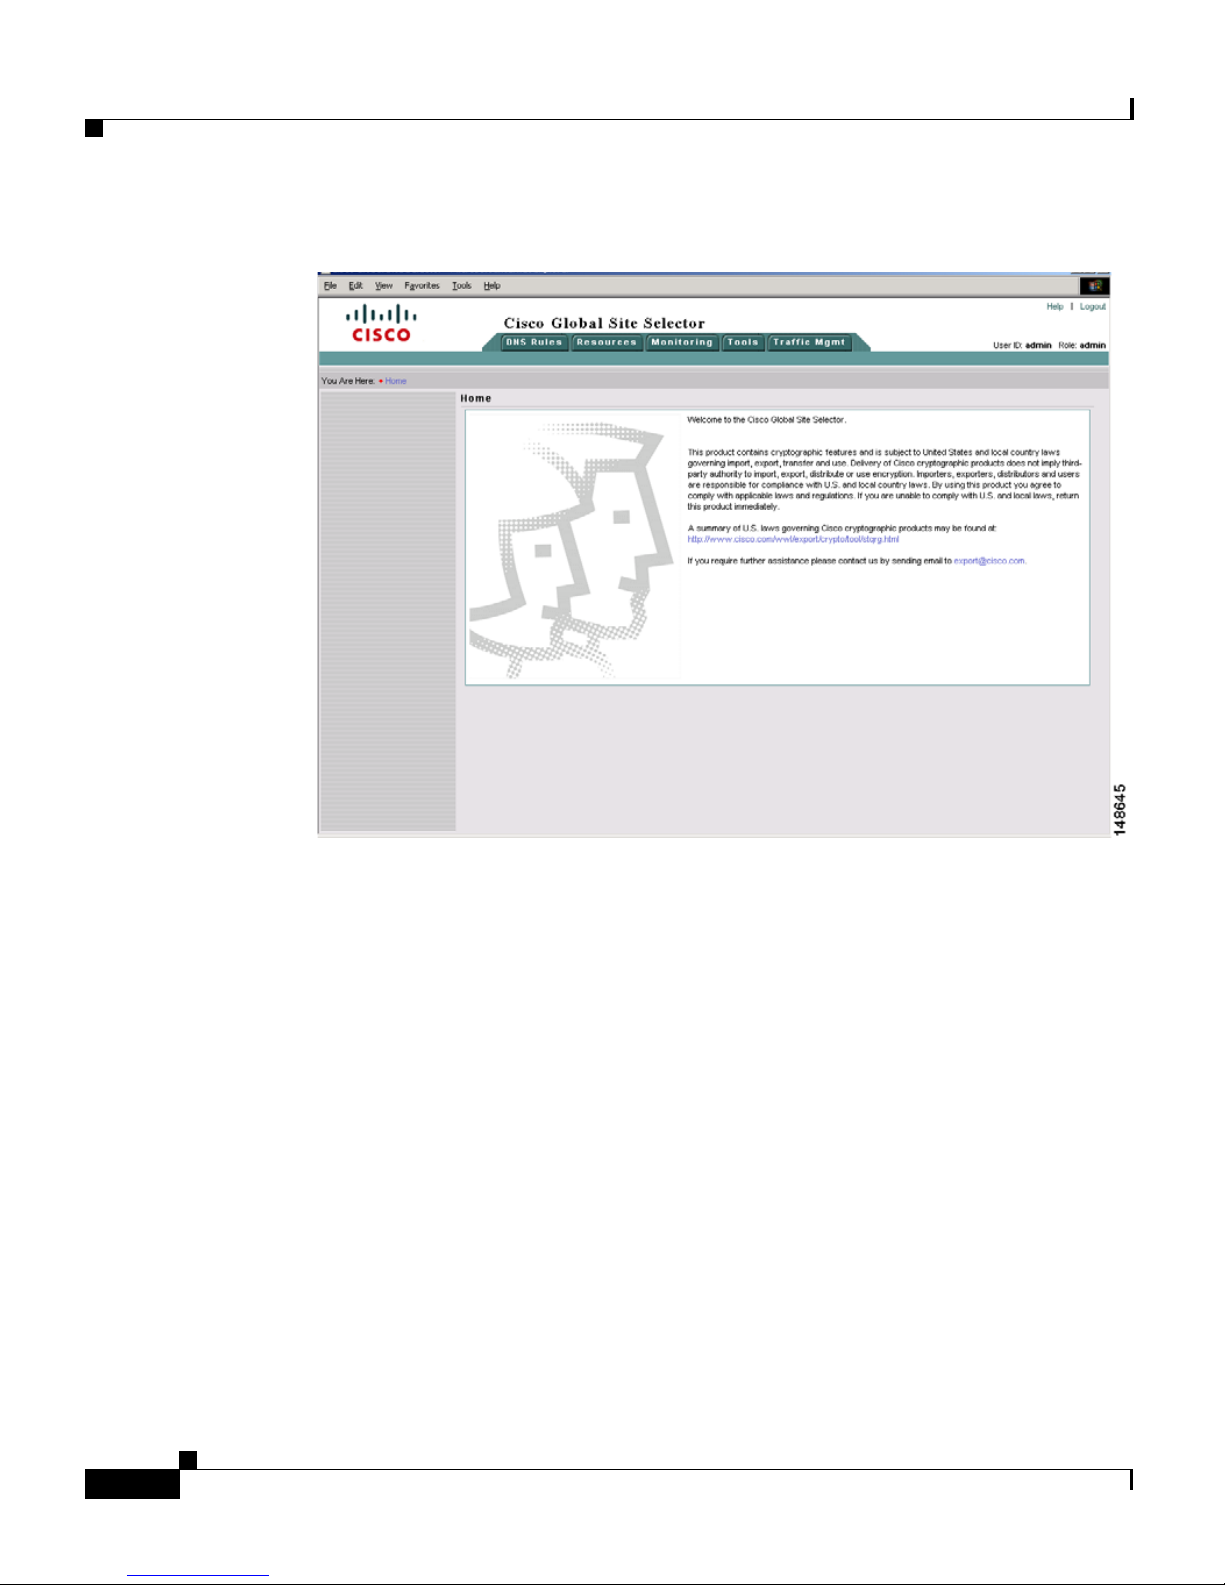
The Primary GSSM Welcome page (see Figure 1-2) appears. See the Cisco
Global Site Selector GUI-based Global Server Load-Balancing
Configuration Guide for information about navigating through the primary
GSSM GUI.
Figure 1-1 Primary GSSM GUI Login Window
Logging Into the Primary GSSM Graphical User Interface
Figure 1-1). If this is your first
OL-10410-01
Cisco Global Site Selector Administration Guide
1-3
Page 22
Logging Into the GSS and Accessing the CNR GUI
Figure 1-2 Primary GSSM Welcome Window
Chapter 1 Managing GSS Devices from the GUI
6. Log out of a primary GSSM GUI session by clicking Logout in the upper
right of the window.
The browser confirms that you want to log out of the primary GSSM GUI
session.
7. Click OK to confirm the logout (or Cancel).
When you click OK, the primary GSSM logs you out of the session and
redisplays the Primary GSSM GUI Login window (see
Figure 1-1).
Logging Into the GSS and Accessing the CNR GUI
You can extend the capabilities of GSS by using the Cisco Network Registrar
(CNR). CNR is purchased as a separate license add-on and involves upgrading the
existing GSS software license. For more information about obtaining, installing,
and activating a CNR license, see
Chapter 2, Managing the GSS from the CLI.
Cisco Global Site Selector Administration Guide
1-4
OL-10410-01
Page 23
Chapter 1 Managing GSS Devices from the GUI
After you install and activate CNR, you access the CNR GUI by performing the
following steps:
1. Open your preferred Internet web browser application, such as Internet
Explorer or Netscape Navigator.
2. Enter the secure HTTP address of your GSS in the address field as follows:
http:// gss-machine:8080
where gss-machine is a resolvable name, such as gss-example.cisco.com or
the IP address of that machine. For instance, each of the following can serve
as valid addresses:
http://gss-example.cisco.com:8080
or
http://16.1.1.114:8080
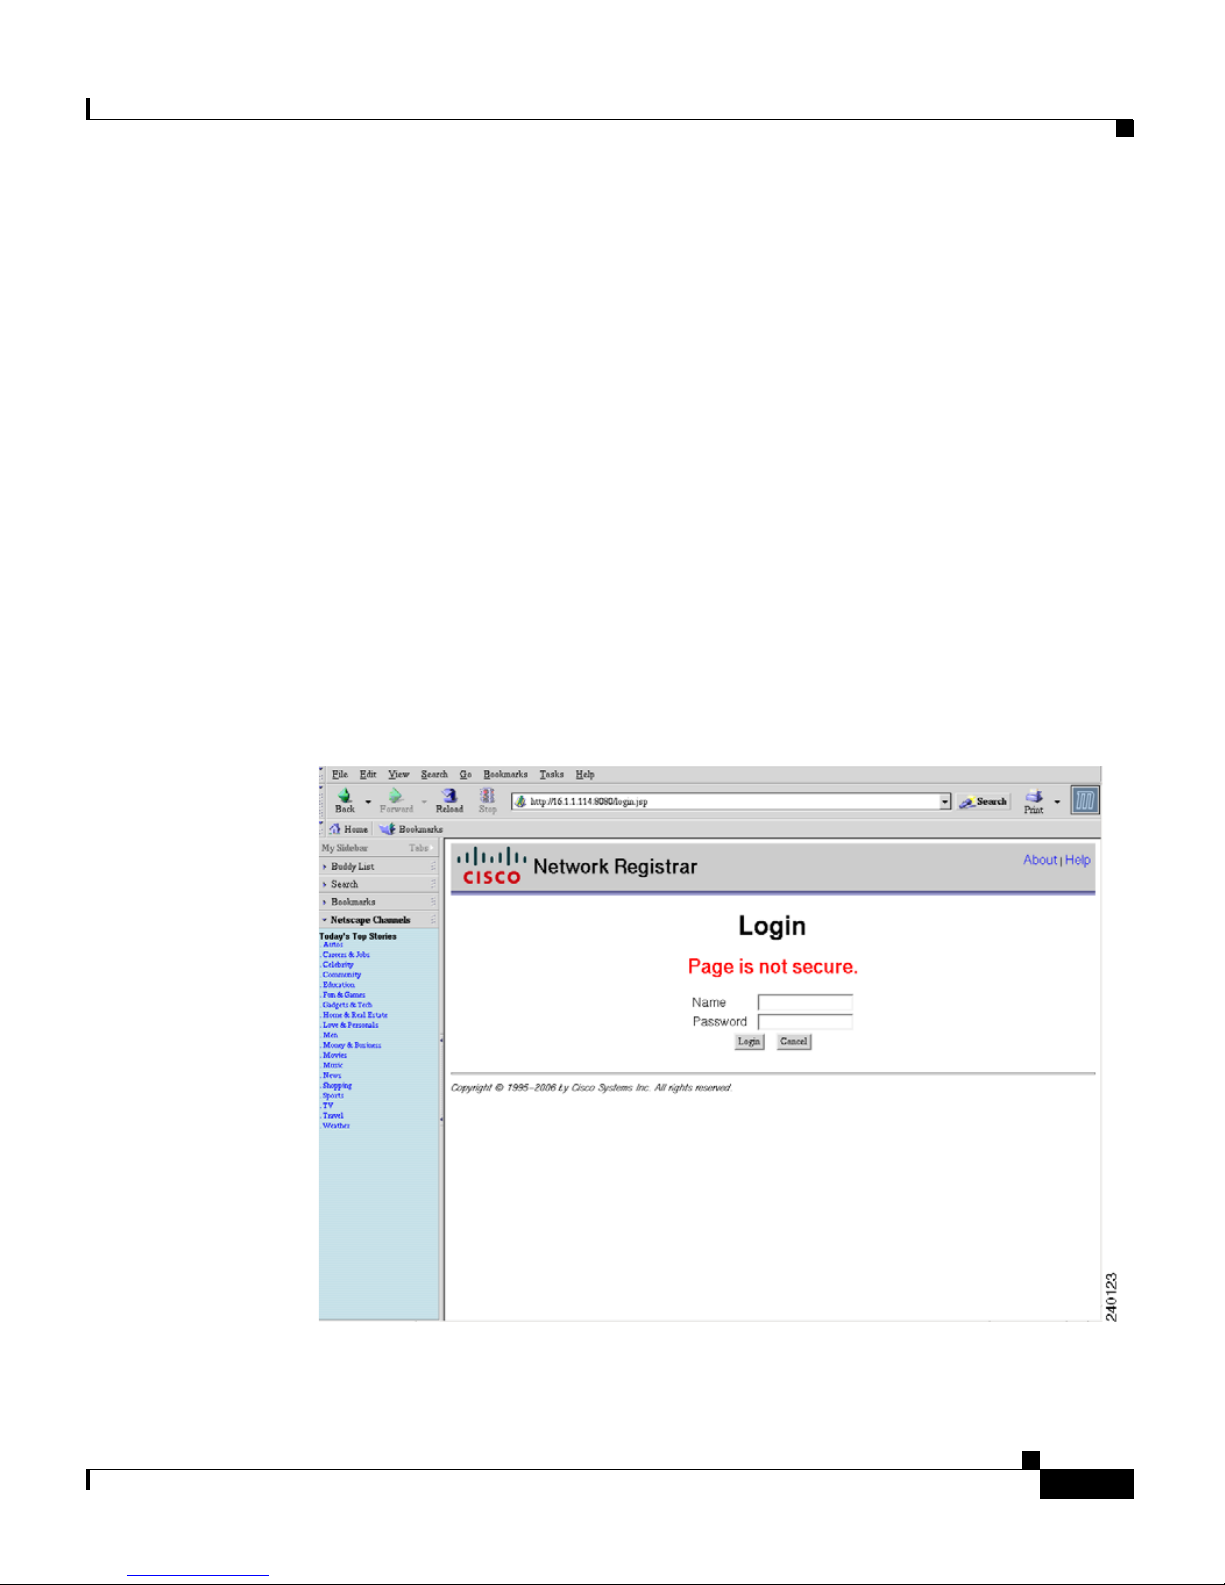
The Network Registrar login page (see Figure 1-3) appears.
Logging Into the GSS and Accessing the CNR GUI
Figure 1-3 Network Registrar Login Window
OL-10410-01
Cisco Global Site Selector Administration Guide
1-5
Page 24

Chapter 1 Managing GSS Devices from the GUI
Activating and Modifying GSS Devices
3. At the Network Registrar login window, enter your username and password
in the fields provided, and then click Login.
See the Cisco CNS Network Registrar User’s Guide for information on
configuring CNR using its Web-based user interface (Web UI).
Activating and Modifying GSS Devices
Activate your GSS devices from the primary GSSM GUI to add those devices to
your GSS network. You also use the primary GSSM GUI to remove a
non-functioning standby GSSM or GSS device from your network.
This section contains the following procedures:
• Activating GSS Devices from the Primary GSSM
• Modifying GSS Device Name and Location
• Deleting GSS Devices
Activating GSS Devices from the Primary GSSM
After you configure your GSS devices from the CLI to function as a standby
GSSM or as a GSS, activate those devices from the primary GSSM GUI so they
can receive and process user requests.
To activate a GSS or a standby GSSM from the primary GSSM GUI, perform the
following steps:
1. Click the Resources tab.
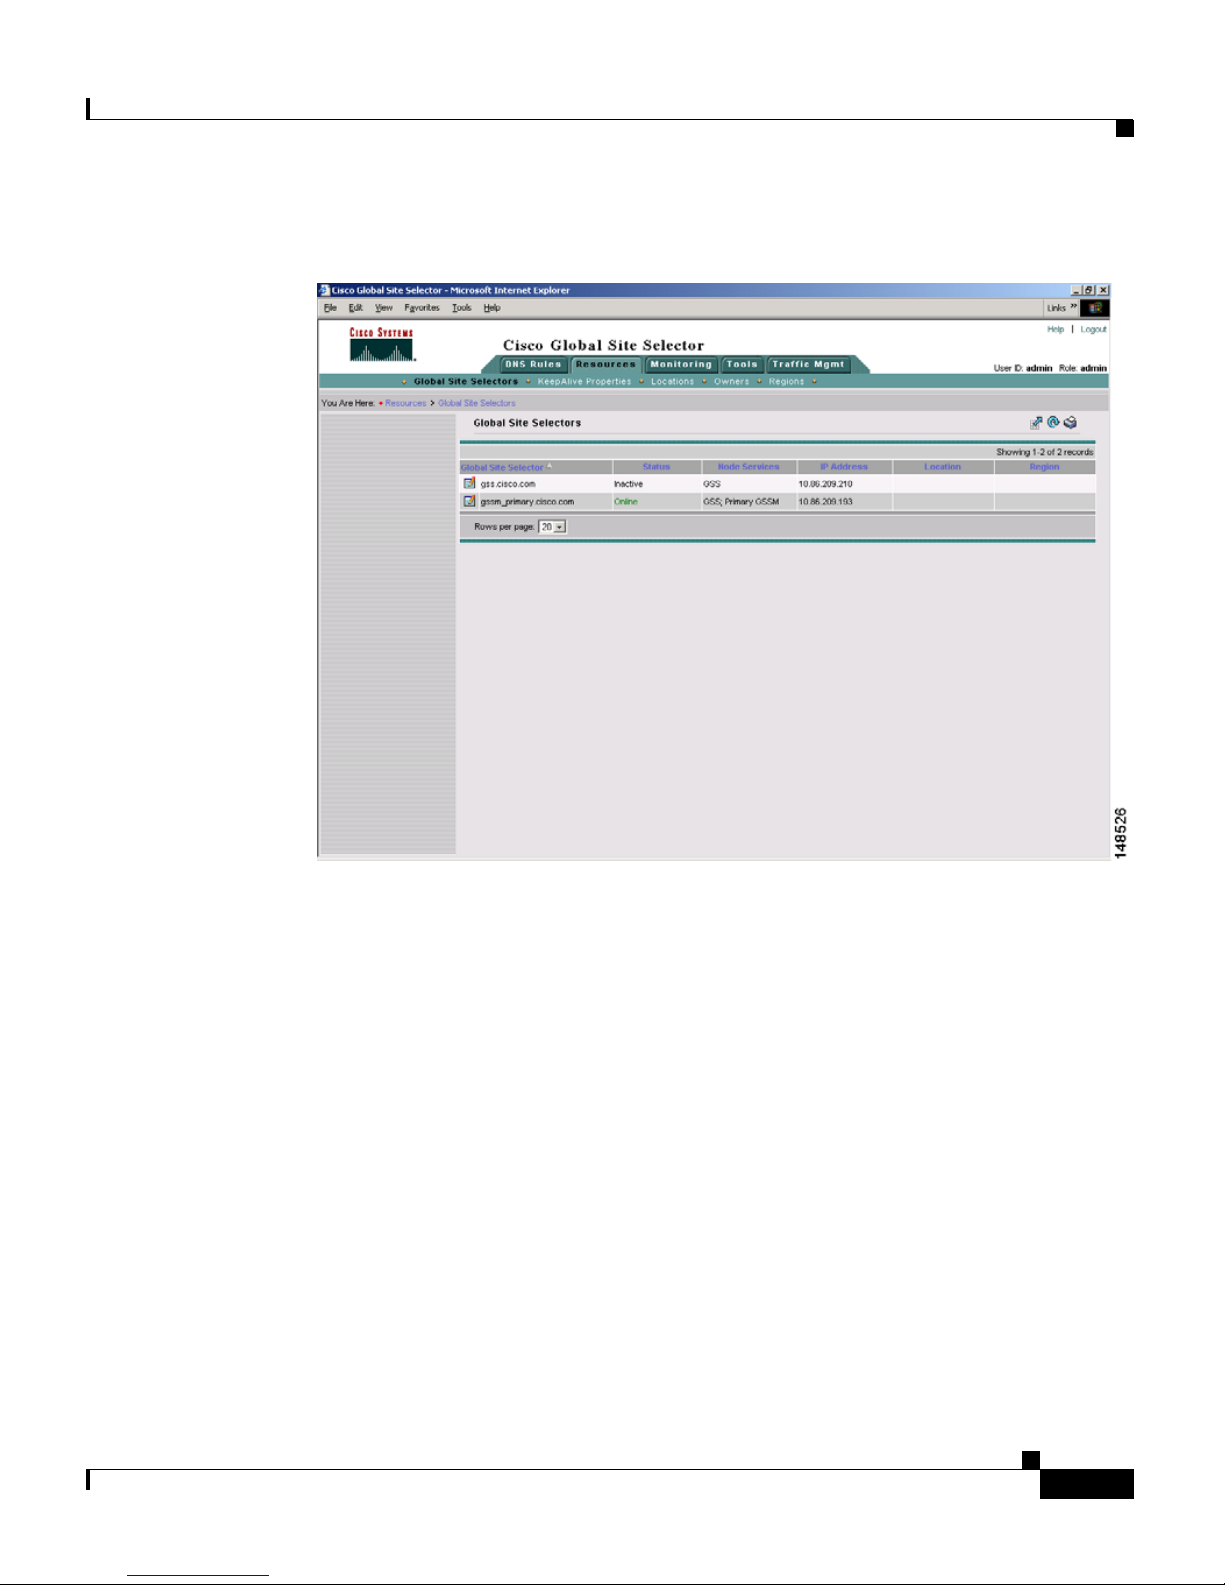
2. Click the Global Site Selectors navigation link. The Global Site Selectors list
page appears (see
“Online” status. The GSS devices requiring activation appear with an
“Inactive” status.
Figure 1-4). All active GSS devices appear with an
Cisco Global Site Selector Administration Guide
1-6
OL-10410-01
Page 25
Chapter 1 Managing GSS Devices from the GUI
Figure 1-4 Global Site Selectors List Page—Inactive Status
Activating and Modifying GSS Devices
OL-10410-01
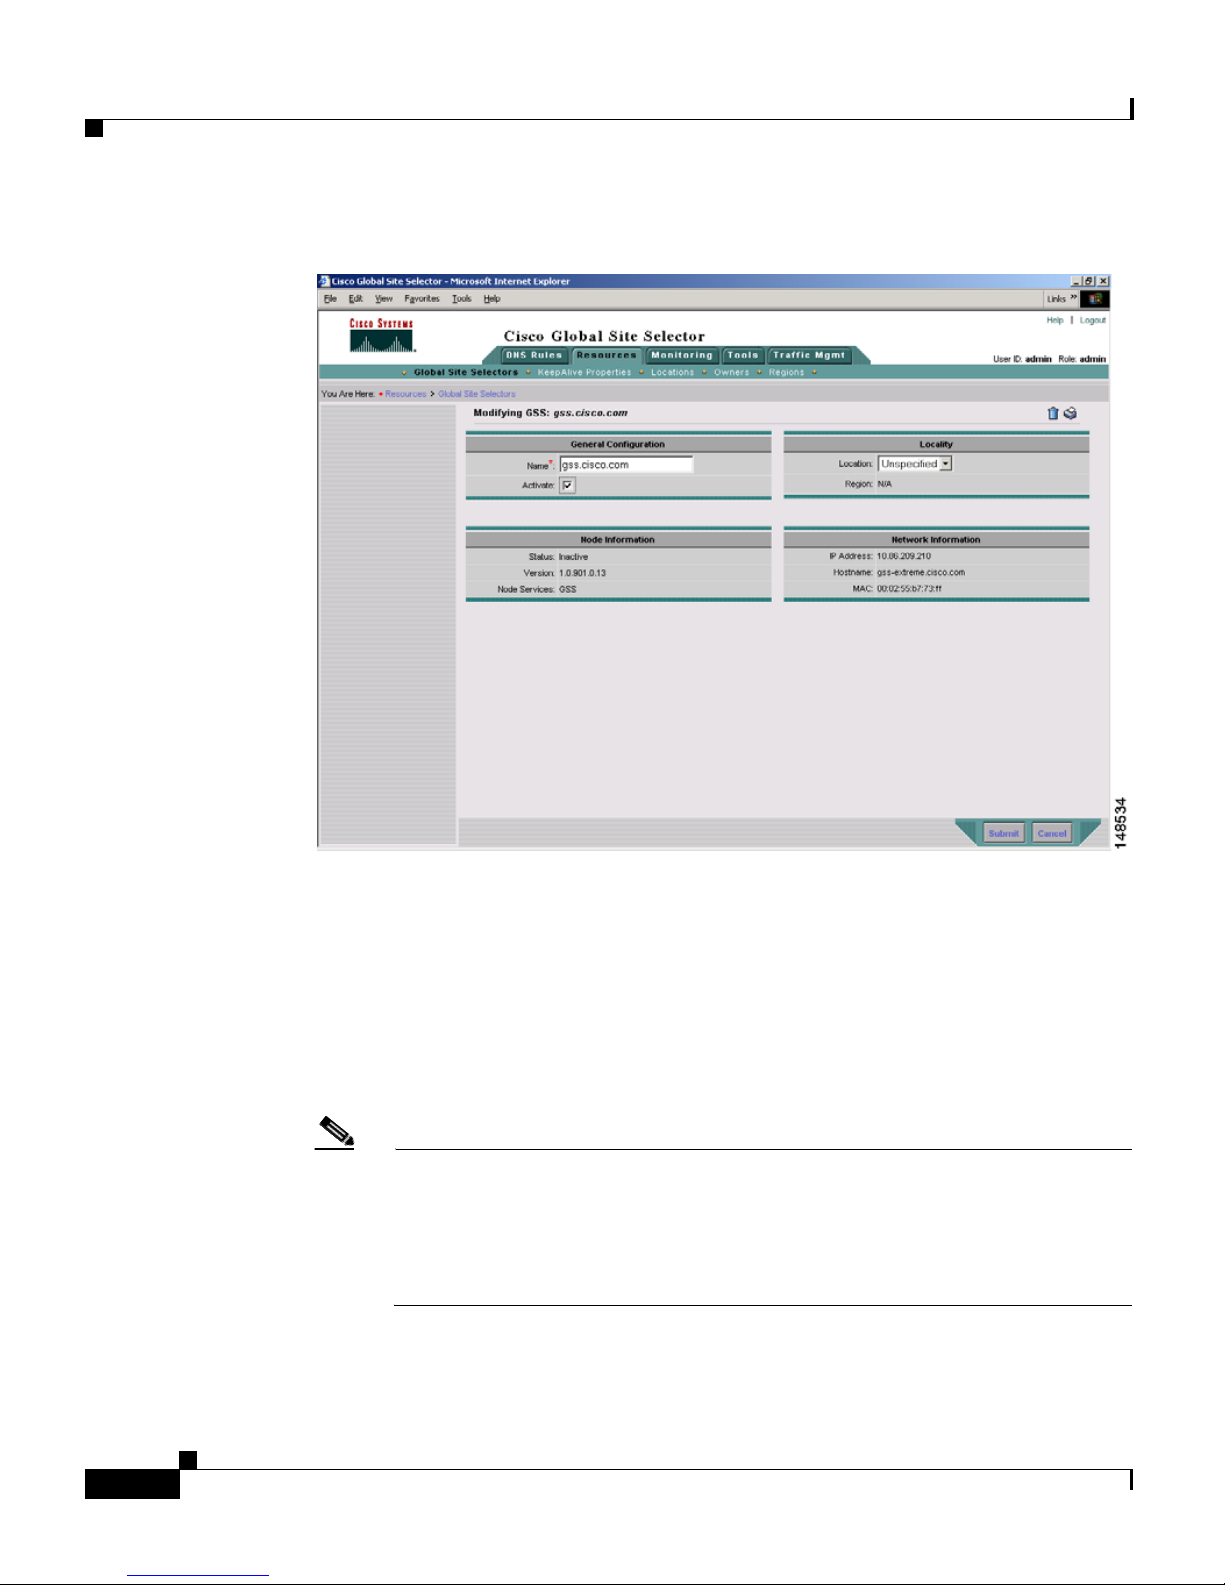
3. Click the Modify GSS icon for the first GSS device to activate. The
Modifying GSS details page appears (see
Cisco Global Site Selector Administration Guide
Figure 1-5).
1-7
Page 26
Activating and Modifying GSS Devices
Figure 1-5 Modifying GSS Details Page
Chapter 1 Managing GSS Devices from the GUI
1-8
4. Check the Activate check box. This check box does not appear in the
Modifying GSS details page once the GSS device has been activated.
5. Click the Submit button, which returns you to the Global Site Selectors list
page (see
Figure 1-6). The status of the active GSS device is “Online.”
If the device is functioning properly and network connectivity is good
between the device and the primary GSSM, the status of the device changes
to “Online” within approximately 30 seconds.
Note The device status remains “Inactive” if the device is not functioning
properly or if there are problems with network connectivity. If this occurs,
power cycle the GSS device, check your network connections, and then
repeat this procedure. If you still cannot activate the GSS device, contact
Cisco TAC.
Cisco Global Site Selector Administration Guide
OL-10410-01
Page 27

Chapter 1 Managing GSS Devices from the GUI
Figure 1-6 Global Site Selectors List Page—Active Status
Activating and Modifying GSS Devices
6. Repeat Steps 1 through 5 for each inactive GSS or standby GSSM.
Modifying GSS Device Name and Location
You can modify the name and location of any of your GSS devices using the
primary GSSM GUI. To modify other network information such as the hostname,
IP
address, or role, you must access the CLI on that GSS device (see the Cisco
Global Site Selector Getting Started Guide).
To modify the name and location of a GSS device from the primary GSSM GUI,
perform the following steps:
1. Click the Resources tab.
2. Click the Global Site Selectors navigation link. The Global Site Selectors list
page appears (see
“Online” status. The GSS devices requiring activation appear with an
“Inactive” status.
OL-10410-01
Figure 1-4). All active GSS devices appear with an
Cisco Global Site Selector Administration Guide
1-9
Page 28

Activating and Modifying GSS Devices
3. Click the Modify GSS icon for the first GSS to activate. The Modifying GSS
details page appears (see
4. In the Global Site Selector Name field, enter a new name for the device. You
use the device name to easily distinguish one GSS device from another in the
primary GSSM list pages, where many devices may appear together.
5. From the Location drop-down list, choose a new device location.
6. Click Submit to save your changes, and return to the Global Site Selector list
page.
Deleting GSS Devices
Deleting a GSS device such as a GSS or a standby GSSM allows you to remove
the nonfunctioning device from your network or reconfigure and then reactivate a
GSS device. With the exception of the primary GSSM, you can delete GSS
devices from your network through the primary GSSM GUI.
Chapter 1 Managing GSS Devices from the GUI
Figure 1-5).
To delete a GSS device from the primary GSSM GUI, perform the following
steps:
1. Click the Resources tab.
2. Click the Global Site Selectors navigation link. The Global Site Selectors list
page appears.
3. Click the Modify GSS icon located to the left of the GSS device you want to
delete. The Modifying GSS details page appears.
4. Click the Delete icon in the upper right corner of the page. The GSS software
prompts you to confirm your decision to delete the GSS device.
5. Click OK to confirm your decision and return to the Global Site Selectors list
page. The deleted device is removed from the list.
To reconfigure the GSS device, see the Cisco Global Site Selector Getting Started
Guide.
Cisco Global Site Selector Administration Guide
1-10
OL-10410-01
Page 29

Chapter 1 Managing GSS Devices from the GUI
Logically Removing a GSS or Standby GSSM from the Network
Logically Removing a GSS or Standby GSSM from
the Network
This section describes the steps to logically remove a GSS or standby GSSM
device from your network. You may need to logically remove a GSS from your
network when you perform the following tasks:
• Move a GSS device between GSS networks
• Physically remove or replace a GSS or standby GSSM
• Send the GSS or standby GSSM out for repair or replacement
Note Do not logically remove the primary GSSM from the GSS network. If you need
to take the primary GSSM offline for either maintenance or repair, temporarily
switch the roles of the primary and standby GSSMs as outlined in the
the GSSM Role in the GSS Network” section of Chapter 2, Managing the GSS
from the CLI.
“Changing
The first four steps in this procedure assume that the GSS or standby GSSM is
operational. If that is not the case, proceed directly to Step 5.
To logically remove a GSS or standby GSSM from the network, perform the
following steps:
1. Log in to the CLI and enable privileged EXEC mode.
gss1.example.com> enable
gss1.example.com#
2. Back up the startup configuration file on the GSS or standby GSSM device
by entering the following command:
gss1.example.com# copy startup-config disk configfile
3. Stop the GSS software running on the GSS by entering the following
command:
gss1.example.com# gss stop
4. Disable the GSSM or GSS by entering the following command:
gss1.example.com# gss disable
gss1.example.com# shutdown
OL-10410-01
Cisco Global Site Selector Administration Guide
1-11
Page 30

Logically Removing a GSS or Standby GSSM from the Network
The gss disable command removes the existing configuration and returns the
GSS device to an initial state, which includes deleting the GSSM database
from the GSS device and removing all configured DNS rules and keepalives.
If you intend to power down the GSS device, you should also enter the
shutdown command.
5. Logically remove a GSS or a standby GSSM from the network by accessing
the primary GSSM graphical user interface and clicking the Resources tab.
6. Click the Global Site Selectors navigation link. The Global Site Selectors list
page appears.
7. Click the Modify GSS icon located to the left of the GSS device that you want
to delete. The Modifying GSS details page appears.
8. Click the Delete icon in the upper right corner of the page. The GSS software
prompts you to confirm your decision to delete the GSS device.
Chapter 1 Managing GSS Devices from the GUI
9. Click OK to confirm your decision and return to the Global Site Selectors list
page. The deleted device is no longer on the list.
For details on physically removing or replacing a GSS from your network, refer
to the Cisco Global Site Selector Hardware Installation Guide.
To add the removed GSS or standby GSSM back into the GSS network, follow the
procedures outlined in the Cisco Global Site Selector Getting Started Guide. After
you configure the GSS or standby GSSM, you may reload the backup copy of the
GSS device startup configuration settings (see the
“Saving the startup-config and
running-config Files” section in Chapter 2, Managing the GSS from the CLI).
Cisco Global Site Selector Administration Guide
1-12
OL-10410-01
Page 31

Chapter 1 Managing GSS Devices from the GUI
Configuring the Primary GSSM GUI
The primary GSSM GUI provides you with a number of configuration options for
modifying the behavior and performance of the primary GSSM web-based GUI.
You can configure the GUI inactivity timeout interval, GSS device reporting
interval, and GUI screen refresh interval.
To modify GUI configuration settings from the primary GSSM GUI, perform the
following steps:
1. Click the Tool s tab.
2. Click the GUI Configuration navigation link. The GUI Configuration details
page appears (see
Figure 1-7 GUI Configuration Details Page
Figure 1-7).
Configuring the Primary GSSM GUI
3. Adjust one or more of the GUI configuration parameters as follows:
• To modify the length of time that can expire without GUI activity before the
primary GSSM automatically terminates the GUI session, do the following:
OL-10410-01
Cisco Global Site Selector Administration Guide
1-13
Page 32

Printing and Exporting GSSM Data
a. Check the GUI Session Inactivity Timeout Enable check box.
b. In the GUI Session Inactivity Timeout field, enter the length of time that
• To modify the length of time that can expire before GSS devices report their
status to the primary GSSM, enter a value in the GSS Reporting Interval field.
Valid entries are 30 to 4000 minutes. The default is 300 minutes.
• To modify the length of time between automatic screen refreshes on the
primary GSSM GUI, enter a value in the Monitoring Screen Refresh Interval
field. Valid entries are 0 to 86400 seconds. The default is 60 seconds. To
disable the automatic screen refresh function, enter a value of 0.
4. Click Submit to update the primary GSSM. The Transaction Complete icon
appears in the lower left corner of the configuration area to indicate the
successful updating of the GUI session settings.
Chapter 1 Managing GSS Devices from the GUI
can pass without user activity before the primary GSSM terminates the
session. Valid entries are 5 to 120 minutes. The default is 10 minutes.
Printing and Exporting GSSM Data
You can send any data that appears on the primary GSSM GUI to a local or
network printer configured on your workstation. You may also export that data to
a flat file for use with other office applications. When printing or exporting data,
the primary GSSM transmits all of the information appearing on the GUI page.
You cannot output individual pieces of data.
To print or export GSSM data from the primary GSSM GUI, perform the
following steps:
1. Navigate to the list page or details page that contains the data you want to
export or print.
2. Perform one of the following:
• To export the data, click the Export button. The software prompts you to
either save the exported data as a comma-delimited file or to open it using
your designated CSV editor.
• To print the data, click the Print button. The Print dialog box on your
workstation appears. Choose a printer from the list of available printers.
Cisco Global Site Selector Administration Guide
1-14
OL-10410-01
Page 33

Chapter 1 Managing GSS Devices from the GUI
Viewing Third-Party Software Versions
Note To export the output of all primary GSSM GUI configured fields when
troubleshooting a GSS device with a Cisco technical support representative, enter
the show tech-support config CLI command. See
Chapter 9, Monitoring GSS
Operation for details.
Viewing Third-Party Software Versions
The GSS software incorporates a number of third-party software products. For
that reason, the primary GSSM GUI allows you to easily track information for all
of the third-party software that the GSS uses.
To view information on the third-party software currently running on your GSS
from the primary GSSM GUI, perform the following steps:
1. Click the Tool s tab.
2. Click the Third-Party Software navigation link. The GSSM
Third-Party
Software list page appears (see Figure 1-8) with the following
information:
• Product—Third-party software product. For example, RedHat Version 9.0
• Version—Version of the third-party software currently installed on the GSS
device
• URL—Web URL for the software product
OL-10410-01
Cisco Global Site Selector Administration Guide
1-15
Page 34

Viewing Third-Party Software Versions
Figure 1-8 GSSM Third-Party Software List Page
Chapter 1 Managing GSS Devices from the GUI
Cisco Global Site Selector Administration Guide
1-16
OL-10410-01
Page 35

CHAPTER
2
Managing the GSS from the CLI
This chapter describes how to manage the GSS software from the CLI. It contains
the following major sections:
• Logging in to the CLI and Enabling Privileged EXEC Mode
• Understanding GSS Software Licenses
• Using the startup-config and running-config Files
• Managing GSS Files
• Displaying Users
• Specifying the GSS Inactivity Timeout
• Configuring the Terminal Screen Line Length
OL-10410-01
• Modifying the Attributes of the Security Certificate on the GSSM
• Stopping the GSS Software
• Shutting Down the GSS Software
• Restarting the GSS Software
• Performing a Cold Restart of a GSS Device
• Disabling the GSS Software
• Restoring GSS Factory-Default Settings
• Replacing GSS Devices in Your GSS Network
• Changing the GSSM Role in the GSS Network
• Displaying GSS System Configuration Information
Cisco Global Site Selector Administration Guide
2-1
Page 36

Chapter 2 Managing the GSS from the CLI
Logging in to the CLI and Enabling Privileged EXEC Mode
Logging in to the CLI and Enabling Privileged EXEC
Mode
To log in to a GSS device and enable privileged EXEC mode at the CLI, perform
the following steps:
1. Press the power control button on the GSS. After the GSS boot process
completes, the software prompts you to log in to the device.
2. If you are remotely logging in to the GSS device (Global Site Selector or
Global Site Selector Manager) through Telnet or SSH, enter the hostname or
IP address of the GSS to access the CLI.
Otherwise, if you are using a direct serial connection between your terminal
and the GSS device, use a terminal emulation program to access the GSS CLI.
Note For details about making a direct connection to the GSS device using a
dedicated terminal and about establishing a remote connection using SSH
or Telnet, see the Cisco Global Site Selector Getting Started Guide.
3. Specify your GSS administrative username and password to log in to the GSS
device. The CLI prompt appears.
localhost.localdomain>
4. At the CLI prompt, enable privileged EXEC mode.
localhost.localdomain> enable
localhost.localdomain#
The prompt changes from the user-level EXEC right angle bracket (>) prompt
to the privileged-level EXEC pound sign (#).
Cisco Global Site Selector Administration Guide
2-2
OL-10410-01
Page 37

Chapter 2 Managing the GSS from the CLI
Understanding GSS Software Licenses
Understanding GSS Software Licenses
A license package is a predefined set of features bundled together and sold as an
upgrade to the GSS v1.3 software. You can view a GSS software license as a
collection of license packages. For the v2.0 release, GSS capabilities have been
extended through a product coupling with the Cisco Network Registrar (CNR). In
addition, GSS now includes support for Distributed Denial of Service (DDoS)
attack detection and mitigation.
The CNR and DDoS licenses are add-ons; you must separately purchase and
install these two licenses. For a detailed overview and description of the CNR and
DDoS features, see the Cisco Global Site Selector CLI-Based Global Server Load
Balancing Configuration Guide.
To install either the CNR or DDoS license, your GSS must be running software
version 2.0(2) or higher. All previous version features are available and
configurable immediately except for the specifically licensed features. If you
want to enable the DDoS license package on a particular GSS, you must purchase
a DDoS license from Cisco Systems in order to receive a Product Access Key
(PAK) number.
Ensure that each GSS in your GSS network possesses a unique license file to
avoid any potential problems. Do not install the same licence file (files with the
same PAK number) in more than one GSS in the network. If you use the same PAK
number, the GSS with the duplicate license file will be deregistered from the GSS
network. If a clash of duplicate PAK numbers occurs between the primary GSSM
and any other GSS in the network, the other GSS is de-registered even if you
installed a valid PAK number on it prior to installing a PAK number on the
primary GSSM.
To recover a deregistered GSS, perform the following steps:
1. Uninstall the duplicate license file by using the license uninstall command.
2. Stop and then disable the GSS as described in the “Stopping the GSS
Software” and “Disabling the GSS Software” sections.
3. Reregister the GSS as the primary GSSM. See Chapter 1, Managing GSS
Devices from the GUI, for more details.
OL-10410-01
Cisco Global Site Selector Administration Guide
2-3
Page 38

Chapter 2 Managing the GSS from the CLI
Understanding GSS Software Licenses
This section contains the following topics:
• Acquiring and Installing CNR and DDoS License Files
• Installing CNR
• Accessing the CNR CLI
• Invoking the Shell and Executing CNR Utilities
Acquiring and Installing CNR and DDoS License Files
The Software Infrastructure and Fulfillment Technology (SWIFT) application is
a web-based package provided by Cisco that:
• Allows you to retrieve or generate a license file for a particular PAK.
• Provides a way for Cisco to track licenses as well as a way for you to recover
lost licenses.
• Enables internal support organizations to obtain information about customer
licenses.
To obtain a license file, perform the following steps:
1. Connect to the Cisco SWIFT web site at the following URLs.
–
Use the following website if you are a registered user of Cisco
Connection Online:
https://tools.cisco.com/SWIFT/Licensing/PrivateRegistrationServlet
–
Use the following website if you are not a registered user of Cisco
Connection Online:
https://tools.cisco.com/SWIFT/Licensing/RegistrationServlet
You will be prompted for various details about your purchase as part of a
software registration process.
2. Enter the required data. After submitting this data, the web site authenticates
the information, generates a license file, and emails it to you.
Cisco Global Site Selector Administration Guide
2-4
OL-10410-01
Page 39

Chapter 2 Managing the GSS from the CLI
Note We recommend that you make a back-up copy of your license file after
you receive it by email in case the license file is lost or corrupted. Should
anything happen to your license file, SWIFT also enables you to
regenerate it.
3. Transfer the license file from your PC to the GSS using FTP.
For example, transfer a license file to the GSS as follows:
C:\>ftp 1.1.1.21
Connected to 1.1.1.21.
220 "Global Site Selector FTP"
User (1.1.1.21:(none)): admin
331 Please specify the password.
Password:*****
230 Login successful.
ftp> bin
200 Switching to Binary mode.
ftp> put cnr_new.lic
200 PORT command successful. Consider using PASV.
150 Ok to send data.
Understanding GSS Software Licenses
226 File receive OK.
ftp: 696 bytes sent in 0.00Seconds 696000.00Kbytes/sec.
ftp> quit
221 Goodbye.
4. Install the license once you have transfered your license file by using the
license command. A valid license file always includes the .lic extension.
Otherwise, it is considered invalid and is not installed.
For example, you can install a DDoS license as follows:
gssm1.example.com# license install ddos_new.lic
The license file is copied to the /licenses directory when the installation is
complete.
5. To uninstall a license file on the GSS, enter the license command with the
uninstall keyword as follows:
gssm1.example.com# license uninstall ddos_new.lic
OL-10410-01
Cisco Global Site Selector Administration Guide
2-5
Page 40

Understanding GSS Software Licenses
Installing CNR
To install CNR, you must first obtain the following:
• GSS license, SF-GSS-DNSLIC
• CNR software, CNR-6.3-BASE1K (CNR software 6.3 or higher)
• CNR license file/key, shipped with the CNR software
Note Your GSS network must be running software version 2.0(2) or higher.
To install CNR on the GSS, perform the following steps:
1. Specify the license for the CNR module on the GSS as show in the following
Chapter 2 Managing the GSS from the CLI
example:
gssm1.example.com# license install GSS20070920122230075.lic
To verify the proper installation of the GSS and CNR license, enter the show
license command as follows:
gssm1.example.com# show license installed
License modules are
CNR
2. Install the CNR software on the GSS.
a. Enable the GSS to serve as an FTP client.
gssm1.example.com# config t
gssm1.example.com (config)# ftp-client enable admin
gssm1.example.com (config)# exit
b. From the GSS CLI, download the CNR software from the FTP server.
The software is automatically placed in the default FTP directory.
gssm1.example.com# ftp 1.1.1.23
Connected to 1.1.1.23 (1.1.1.23).
220 3Com 3CDaemon FTP Server Version 2.0
Name (1.1.1.23): cisco
331 User name ok, need password
Password:
230 User logged in
Remote system type is UNIX.
Using binary mode to transfer files.
Cisco Global Site Selector Administration Guide
2-6
OL-10410-01
Page 41

Chapter 2 Managing the GSS from the CLI
ftp> hash
Hash mark printing on (1024 bytes/hash mark).
ftp> get cnr_6_2_3-linux.gtar.gz
local: cnr_6_2_3-linux.gtar.gz remote: cnr_6_2_3-linux.gtar.gz
227 Entering passive mode ...
125 Using existing data connection
##################.....
226 Closing data connection; File transfer successful.
31625689 bytes received in 0.0013 secs (2.4e+02 Kbytes/sec)
ftp> quit
221 Service closing control connection
gssm1.example.com#
c. Install the CNR software on the GSS by using the cnr install command
and specifying the CNR license key as shown in the following example:
gssm1.example.com# cnr install cnr_6_3-linux.gtar.gz
cnr-license xxxx-xxxx-xxxx-xxxx
Installing CNR from cli-install. This may take a few minutes.
Understanding GSS Software Licenses
If you provide an invalid or expired license key, an error message appears
and the installation halts. The installation will then remove the CNR
installation directory, which may result in the removal of any previous
versions or installations of CNR.
Note The CNR installation does not activate the CNR server agent. You must
explictly enable CNR to start processing requests. See Step 4.
3. Verify that the GSS software is running:
gssm1.example.com# gss status
Cisco GSS - 2.0(2) GSSM - primary [Thu Nov 8 14:27:33 EDT 2007]
Normal Operation [runmode = 5]
START SERVER
Oct25 Boomerang
? CNR DNS Server [ Server is not ready ]
? CNR Server Agent [ Server is not ready ]
Oct25 Config Agent (crdirector)
Oct25 Config Server (crm)
Oct25 DNS Server
Oct25 Database
Oct25 GUI Server (tomcat)
Oct25 Keepalive Engine
OL-10410-01
Cisco Global Site Selector Administration Guide
2-7
Page 42

Understanding GSS Software Licenses
Oct25 Node Manager
Oct25 Proximity
Oct25 Sticky
Oct25 Web Server (apache)
Oct25 drp
If necessary, enable the GSS software. For example, to configure the selected
device to act as the primary GSSM for your GSS network, enter the following
command:
gssm1.example.com# gss enable gssm-primary
See the Cisco Global Site Selector Getting Started Guide for details.
4. Enable the CNR server agent by using the cnr enable command in global
configuration mode as shown in the following example:
gssm1.example.com# config
gssm1.example.com (config)# cnr enable
# Starting Network Registrar Local Server Agent
Chapter 2 Managing the GSS from the CLI
If you did not properly install CNR on the GSS, the cnr enable command
displays a message informing you to first install the CNR license.
gssm1.example.com (config)# cnr enable
CNR enable failed. Please install CNR first
5. Verify that the CNR license installed properly:
gssm1.example.com# show license gss-all
Own (Primary GSS) info:
Pak number is:
DDOS Not Installed, Not Active
CNS Installed, Active
6. Verify that the CNR software is running on the primary GSSM:
gssm1.example.com# gss status
Cisco GSS - 2.0(2) GSSM - primary [Thu Nov 8 14:31:28 EDT 2007]
Normal Operation [runmode = 5]
START SERVER
14:28 Boomerang
14:30 CNR DNS Server
14:30 CNR Server Agent
14:28 Config Agent (crdirector)
14:28 Config Server (crm)
Cisco Global Site Selector Administration Guide
2-8
OL-10410-01
Page 43

Chapter 2 Managing the GSS from the CLI
14:28 DNS Server
14:28 Database
14:28 GUI Server (tomcat)
14:28 Keepalive Engine
14:27 Node Manager
14:28 Proximity
14:28 Sticky
14:28 Web Server (apache)
14:28 drp
Accessing the CNR CLI
The CNR command-line interface (the nrcmd program) allows you to control your
local cluster servers’ operations by setting all configurable options, as well as
starting and stopping the servers.
Understanding GSS Software Licenses
To access the nrcmd program, perform the following steps:
1. Enter the cnr command in the GSS privileged EXEC mode.
gssm1.example.com# cnr
You must install and enable CNR on the GSS before you can enter the CNR
nrcmd program. Otherwise, an error message appears.
2. Enter the username and password when the prompts appear.
username: <user_name>
password: ******
100 OK
session:
cluster = localhost
current-vpn = global
default-format = user
groups = superuser
roles = superuser
scope-edit-mode = staged
user-name = admin
visibility = 5
zone-edit-mode = synchronous
nrcmd>
See the Cisco CNS Network Registrar CLI Reference Guide, 6.3 for
instructions on using nrcmd.
3. Exit the CNR nrcmd program.
OL-10410-01
Cisco Global Site Selector Administration Guide
2-9
Page 44

Understanding GSS Software Licenses
nrcmd> exit
gssm1.example.com#
Chapter 2 Managing the GSS from the CLI
Cisco Global Site Selector Administration Guide
2-10
OL-10410-01
Page 45

Chapter 2 Managing the GSS from the CLI
Understanding GSS Software Licenses
Invoking the Shell and Executing CNR Utilities
The GSS provides a restricted CNR shell that supports built-in Linux commands,
such as cd and echo. It also supports numerous CNR utilities including:
• cnr_tactool—Packages CNR data for TAC support engineers for
troubleshooting purpose.
• cnr_exim—Exports or imports CNR data repositories.
• cnr_keygen—Generates keys for Secret Key Transaction Authentication for
DNS (TSIG) configuration or key import.
To invoke the CNR shell and execute the CNR utilities, perform the following
steps:
1. Enter the cnr shell command in the GSS privileged EXEC mode.
gssm1.example.com# cnr shell
2. Press the Tab key in the CNR shell to display the supported utilities.
cnr shell> cnr <Tab>
cnr_exim cnr_tactool.orig cnrdb_load cnrdb_verify
cnr_exim.orig cnrdb_archive cnrdb_printlog cnrservagt
cnr_keygen cnrdb_checkpoint cnrdb_recover cnrsnmp
cnr_keygen.orig cnrdb_deadlock cnrdb_stat cnr_tactool
cnrdb_dump cnrdb_upgrade cnr shell > cnr shell
3. Enter the utility name to execute any of these CNR utilities. For example:
cnr shell> cnr_tactool
user:
password:
See the Cisco CNS Network Registrar User’s Guide for more information
about cnr_tactool and the other available CNR utilities.
OL-10410-01
Cisco Global Site Selector Administration Guide
2-11
Page 46

Chapter 2 Managing the GSS from the CLI
Using the startup-config and running-config Files
Using the startup-config and running-config Files
When you make device configuration changes, the GSS places those changes in a
virtual running configuration file (called running-config). Before you log out or
reboot the GSS, you must copy the contents of the running-config file to the
startup-configuration file (called startup-config) to save configuration changes.
The GSS uses the startup-config file on subsequent reboots.
This section contains the following procedures:
• Changing the startup-config and running- config Files
• Saving the startup-config and running-config Files
• Loading the startup-config from an External File
• Displaying the running-config File
• Displaying the startup-config File
Changing the startup-config and running- config Files
The network configuration for a GSS device includes the following:
• Interface—Ethernet interface in use
• IP address—Network address and subnet mask assigned to the interface
• GSS communications—Interface (Ethernet 0 or Ethernet 1) designated for
handling GSS-related communications on the device
• GSS TCP keepalives—Interface (Ethernet 0 or Ethernet 1) designated for
outgoing keepalives of type TCP and HTTP HEAD
• Hostname—Hostname assigned to the GSS
• IP default gateway—Network gateway used by the device
• IP name server—Network DNS server being used by the device
• IP routes—All static IP routes
• SSH enable—SSH state of the GSS device (enabled or disabled)
• Telnet enable—Telnet state of the GSS device (enabled or disabled)
• FTP enable—FTP state of the GSS device (enabled or disabled)
• FTP client enable—FTP client state of the GSS device (enabled or disabled)
Cisco Global Site Selector Administration Guide
2-12
OL-10410-01
Page 47

Chapter 2 Managing the GSS from the CLI
• SNMP enable—SNMP state of the GSS device (enabled or disabled)
Each GSS device tracks the following configurations:
• Startup configuration—Default network configuration. The GSS loads the
startup configuration settings each time you boot the device.
• Running configuration—Network configuration currently in use by the GSS
device.
Typically, the running-config and the startup-config files are identical. Once you
modify a configuration parameter, you must reconcile the two configuration files
in one of the following ways:
• Save the running-config file as the new startup-config file by using the copy
running-config startup-config command. The GSS retains any changes to
the network configuration of the device and uses those changes when the GSS
is next rebooted.
Using the startup-config and running-config Files
• Maintain the startup-config file. In this case, the GSS device uses the
running-config file until you reboot the device. The GSS then discards the
running-config file and restores the startup-config file.
To change the startup-config file for a GSS device, perform the following steps:
1. Log in to the CLI, enable privileged EXEC mode, and access global
configuration mode on the device.
gssm1.example.com> enable
gssm1.example.com#
gssm1.example.com# config
gssm1.example.com(config)#
2. Make any desired changes to the GSS configuration. For example, to change
the device hostname, use the hostname command in global configuration
mode as follows:
gssm1.example.com(config)# hostname new.example.com
new.example.com(config)#
3. Copy the current running-config file as the new startup-config file for the
GSS by entering the following command:
new.example.com(config)# copy running-config startup-config
OL-10410-01
Cisco Global Site Selector Administration Guide
2-13
Page 48

Chapter 2 Managing the GSS from the CLI
Using the startup-config and running-config Files
Saving the startup-config and running-config Files
To save the running-config file to the startup-config file on the GSS, or to copy
the current startup configuration to a file for use on other devices or for backup
purposes, use one of the following commands:
• copy startup-config disk filename—Copies the GSS device startup
configuration to a named file on the GSS.
• copy running-config disk filename—Copies the GSS device current running
configuration to a named file on the GSS.
• copy running-config startup-config—Copies the GSS device current
running configuration as the new startup configuration.
To copy the GSS device running-config or startup-config files, perform the
following steps:
1. Log in to the CLI of the primary GSSM, standby GSSM, or a GSS device and
enable privileged EXEC mode.
gss1.example.com> enable
gss1.example.com#
2. Copy the current startup configuration to a file for use on other devices or for
backup purposes by entering the following command:
gss1.example.com# copy startup-config disk newstartupconfig
The filename argument specifies the name of the file containing the startup
configuration settings.
Note The primary GSSM backup does not include user files that reside in the
/home directory. If you want to have a secure copy of the GSS
startup-config file, use either the secure copy (scp) or ftp commands to
copy the startup-config file to another device. Storing the startup-config
file in a safe location can save time and reconfiguration issues in a
recovery situation.
3. Copy the GSS device current running configuration to a named file located
on the GSS by entering the following command:
gss1.example.com# copy running-config newrunningconfig
Cisco Global Site Selector Administration Guide
2-14
OL-10410-01
Page 49

Chapter 2 Managing the GSS from the CLI
Using the startup-config and running-config Files
The filename argument specifies the name of the file containing the running
configuration settings.
4. Save the running-config file as the new startup-config file by entering the
following command:
gss1.example.com# copy running-config startup-config
The GSS retains any changes to the network configuration of the device and
uses those changes when the GSS is next rebooted.
Loading the startup-config from an External File
In addition to copying your running-config file as a new startup-config file, you
can also upload or download GSS device configuration information from an
external file using the copy command. Before you attempt to load the startup
configuration from a file, make sure that the file has been moved to a local
directory on the GSS device.
To load the GSS device startup configuration from an external file, perform the
following steps:
1. Log in to the CLI and enable privileged EXEC mode.
gssm1.example.com> enable
gssm1.example.com#
2. Load the GSS device startup configuration settings from a named file located
on the GSS by entering the following command:
gssm1.example.com# copy disk startup-config newstartupconfig
The filename argument specifies the name of the file containing the startup
configuration settings.
Displaying the running-config File
You can review the contents of the GSS running-config file to verify the current
configuration parameters in use by the GSS device. To display the contents of the
GSS running-config file, use the show running-config command. You can use
this command with the show startup-config command to compare the
configuration memory to the startup-config file used during the bootup process.
OL-10410-01
Cisco Global Site Selector Administration Guide
2-15
Page 50

Using the startup-config and running-config Files
Configuration entries within each mode in the running-config file appear in
chronological order, based on the order in which you configure the GSS. The GSS
does not display default configurations in the running-config file.
To display the current running-config file for the GSS, enter the following
command:
gssm1.example.com# show running-config
interface ethernet 0
ip address 192.168.1.25 255.255.255.0
gss-communications
gss-tcp-keepalives
hostname gssm1.example.com
ip default-gateway 10.86.208.1
ip name-server 172.16.124.122
ssh enable
no ssh keys
no ssh protocol version 1
telnet enable
ftp enable
ftp-client enable all
ntp enable
snmp enable
snmp community-string
<set>
ntp-server 16.1.1.11
cnr enable
drp
enable
authentication key sample key
path-rttprobe
burst_size 5
init_ttl 2
destination-port 1020
max-failure-ttl 5
max-ttl 40
tcp-rttprobe
sourceport static 10
Chapter 2 Managing the GSS from the CLI
terminal length 23
exec-timeout 150
logging disk enable
logging disk priority Notifications(5)
no logging host enable
logging host priority Warnings(4)
Cisco Global Site Selector Administration Guide
2-16
OL-10410-01
Page 51

Chapter 2 Managing the GSS from the CLI
tacacs-server timeout 5
tacacs-server keepalive-enable
Displaying the startup-config File
You can review the contents of the GSS startup-config file to display the
configuration used during initial bootup. The GSS stores the contents of the
startup-config file in a safe partition of the hard disk to prevent loss of data due to
power failures.
To display the contents of the GSS startup-config file, enter the following
command:
gssm1.example.com# show startup-config
GSS configuration [Saved: Thu Jul 10 16:20:25 UTC 2003]
interface ethernet 0
ip address 192.168.1.25 255.255.255.0
gss-communications
gss-tcp-keepalives
Using the startup-config and running-config Files
hostname gssm1.example.com
ip default-gateway 10.86.208.1
ip name-server 172.16.124.122
ssh enable
no ssh keys
no ssh protocol version 1
telnet enable
ftp enable
ftp-client enable all
ntp enable
snmp enable
snmp community-string
<set>
ntp-server 16.1.1.11
cnr enable
OL-10410-01
Cisco Global Site Selector Administration Guide
2-17
Page 52

Managing GSS Files
Chapter 2 Managing the GSS from the CLI
drp
enable
authentication key sample key
path-rttprobe
burst_size 5
init_ttl 2
destination-port 1020
max-failure-ttl 5
max-ttl 40
tcp-rttprobe
sourceport static 10
terminal length 23
exec-timeout 150
logging disk enable
logging disk priority Notifications(5)
no logging host enable
logging host priority Warnings(4)
tacacs-server timeout 5
tacacs-server keepalive-enable
Managing GSS Files
This section describes how to manage the files included in a directory or
subdirectory on a GSS device. This section contains the following topics:
• Displaying the Contents of a File
• Displaying Files in a Directory
• Renaming GSS Files
• Securely Copying Files
• Deleting Files
Displaying the Contents of a File
You can view the contents of a GSS file and monitor functions such as transaction
logging or system logging using the system.log file. Use the tail and type CLI
commands to view the contents of a file in a GSS directory as follows:
Cisco Global Site Selector Administration Guide
2-18
OL-10410-01
Page 53

Chapter 2 Managing the GSS from the CLI
• Display the last 10 lines of a file within any GSS file director by using the tail
filename command. This command displays the end of a file within any GSS
file directory.
• Display the entire contents of a file within any GSS file directory by using the
type filename command.
The filename argument identifies the name of the file in the GSS file directory. To
view the files available in the current directory or subdirectory, use the dir, lls, ls,
or pwd commands. See the
For example, to display the last 10 lines in the system.log, enter:
gssm1.example.com# tail system.log
Showing file system.log
Sep 15 07:11:40 host-css2 rc: Stopping keytable succeeded
Sep 15 07:11:42 host-css2 inet: inetd shutdown succeeded
Sep 15 07:11:45 host-css2 crond: crond shutdown succeeded
Sep 15 07:11:46 host-css2 dd: 1+0 records in
Sep 15 07:11:46 host-css2 dd: 1+0 records out
Sep 15 07:11:46 host-css2 random: Saving random seed succeeded
Sep 15 07:11:48 host-css2 kernel: Kernel logging (proc) stopped.
Sep 15 07:11:48 host-css2 kernel: Kernel log daemon terminating.
Sep 15 07:11:50 host-css2 syslog: klogd shutdown succeeded
Sep 15 07:11:51 host-css2 exiting on signal 15
End of file system.log
Managing GSS Files
“Displaying Files in a Directory” section for details.
OL-10410-01
For example, to display the contents of the audit.log file, enter:
gssm1.example.com# type /audit.log
atcr1.cisco.com>type audit.log
# Start logging at Tue July 1 23:59:30 GMT 2003
#=== WHEN WHAT_TABLE WHAT_ID HOW
===
# Start logging at Wed July 2 00:01:25 GMT 2003
#=== WHEN WHAT_TABLE WHAT_ID HOW
===
# Start logging at Thu July 3 14:42:40 GMT 2003
#=== WHEN WHAT_TABLE WHAT_ID HOW
===
...
Cisco Global Site Selector Administration Guide
2-19
Page 54

Managing GSS Files
Displaying Files in a Directory
The GSS software directories contain the GSS files, including boot files, backup
files, and log files. Use the dir, lls, ls, or pwd commands to view the files available
in the current directory or subdirectory on the GSS as follows:
• dir [directory]—Displays a detailed list of files contained within the working
directory on the GSS, including names, sizes, and time created. You may
optionally specify the name of the directory to list. The equivalent command
is lls.
• lls [directory]—Displays a detailed list of files contained within the working
directory on the GSS, including names, sizes, and time created. You may
optionally specify the name of the directory to list. The equivalent command
is dir.
• ls [directory]—Displays a detailed list of filenames and subdirectories within
the working directory on the GSS, including filenames and subdirectories.
You may optionally specify the name of the directory to list.
Chapter 2 Managing the GSS from the CLI
• pwd - Displays the current working directory of the GSS.
To view a detailed list of files contained within the working directory, enter:
gssm1.example.com# dir (or lls)
total 97684
-rw-r--r-- 1 root root 39 Mar 8 21:04 JVM_EXIT_CODE
-rw-r--r-- 1 root root 9 Mar 14 21:23 RUNMODE
-rw-r--r-- 1 root root 33427 Mar 14 21:23 gss.log
drwxr-xr-x 2 root root 4096 Mar 7 16:22 admin
drwxr-xr-x 3 root root 4096 Mar 7 18:05 apache
-rw-r--r-- 1 root root 117 Mar 7 18:05 audit.log
srwxr-xr-x 1 root root 0 Mar 7 15:40 cli_config
srwxr-xr-x 1 root root 0 Mar 7 15:40 cli_exec
drwxr-xr-x 14 root root 4096 Mar 7 18:05 core-files
-rw-r--r-- 1 root root 61 Mar 14 21:23 datafeed.cfg
srwxrwxrwx 1 root root 0 Mar 7 15:40
dataserver-socket
-rw-r--r-- 1 root root 18 Mar 7 15:39 nicinfo.cfg
-rw-r--r-- 1 root root 5072 Mar 7 18:05 node.state
drwxrwxrwx 2 root root 4096 Mar 8 21:04 pid
-rw-rw-rw- 1 root root 9127 Mar 14 21:23 props.cfg
-rw-r--r-- 1 root root 63 Mar 14 21:23
runmode-comment
-rw-r--r-- 1 root root 553 Mar 8 21:02 running.cfg
drwxr-xr-x 4 root root 4096 Mar 8 18:34 squid
Cisco Global Site Selector Administration Guide
2-20
OL-10410-01
Page 55

Chapter 2 Managing the GSS from the CLI
-rw-r--r-- 1 root root 49 Mar 7 18:05
sysMessages.log
drwxr-xr-x 2 root root 4096 Mar 7 15:40 sysmsg
drwxrwxrwx 2 root root 4096 Mar 8 21:02 sysout
-rw-r--r-- 1 root root 41652 Mar 14 21:23 system.log
To list the filenames and subdirectories of the current working directory, enter:
gssm1.example.com# ls
gss-1.0.2.0.2-k9.upg id_rsa.pub megara.back.1_0.full rpms
gss-1.0.904.0.1-k9.upg gss_sample.full megara.back.1_1.full
To display the present working directory of the GSS, enter:
gssm1.example.com# pwd
/admin
Renaming GSS Files
Managing GSS Files
The GSS software allows you to rename files located in the current directory or
subdirectory, such as backup files and log files. To rename a GSS file, use the
rename command. The syntax for this command is as follows:
rename source_filename new_filename
The arguments are:
• source_filename—Alphanumeric name of the file that you want to rename.
• new_filename—Alphanumeric name to assign to the file.
Quotation marks are not required around filenames. The following special
characters are not allowed in the renamed filenames: apostrophe (‘), semicolon
(;), asterisk (*), and space ( ).
To view the files available in the current directory or subdirectory, use the dir, lls,
ls, or pwd commands. See the
“Displaying Files in a Directory” section for
details.
For example, to rename the current GSS startup-config file as newstartupconfig,
enter:
gssm1.example.com# rename startup-config newstartupconfig
OL-10410-01
Cisco Global Site Selector Administration Guide
2-21
Page 56

Managing GSS Files
Securely Copying Files
The GSS supports the secure copying of files from the GSS device where you are
logged in, or from another device to the GSS device where you are currently
logged in.
Note The GSS supports one-way communication only in SCP. You can copy GSS files
from the GSS where you are logged in to an external device. You can also copy
files from an external device to the GSS. However, from an external device, you
cannot execute the scp command and get files from the GSS. You can only use scp
from the GSS.
Use the scp command to securely copy files from the following:
• A GSS device that you are logged in to:
Chapter 2 Managing the GSS from the CLI
scp {source_path [source_filename] user@target_host:target_path}
• Another device to the GSS device that you are currently logged in to:
scp {user@source_host:/source_path[source_filename] target_path}
The argument are as follows:
• source_path—Relative directory path and filename on the source device of
the file being transferred.
• source_filename—Name of the file to be copied.
• user@target_host—Login account name and hostname for the device to
which you are copying files.
• target_path—Relative directory path on the target device to which the file is
being copied.
• user@source_host— Login account name and hostname for the device from
which you are copying files.
After you log in to the CLI of the GSS that you intend to copy files to or from,
enter the scp command as previously described. You may be prompted to log in
to the remote device before you can navigate to the target directory.
To securely copy files from a GSS device that you are logged in to, enter:
gssm1.example.com# scp /tmp/system.log
myusername@192.168.2.3:/dump/home
Cisco Global Site Selector Administration Guide
2-22
OL-10410-01
Page 57

Chapter 2 Managing the GSS from the CLI
To securely copy files from another device to a GSS device that you are currently
logged in to, enter:
gssm1.example.com# scp <file-name of the GSS>
username@remote-host:target-path
Deleting Files
The GSS allows you to remove a specific file (startup-config, logs, or archive file)
stored on hard disk. You may want to remove older files or files that you no longer
use from the GSS. To delete files from your GSS, use the del command.
The syntax for this command is as follows:
del filename
Displaying Users
The filename argument identifies the name of the file in the GSS file directory.
For example, to delete the oldtechrept.tgz file, enter:
gssm1.example.com# del oldtechrept.tgz
Displaying Users
You can display the username and permission status for a specific user or for all
users of the GSS device as follows:
• Use the show user username command to display user information for a
particular user. The username argument identifies the name of the GSS user
that you want to display information for.
• Use the show users command to display information for all GSS users.
To display information for a particular user, enter:
gssm1.example.com#show user paulr-admin
Username permission
-------- ---------paulr-admin admin
To display information for all users, enter:
gssm1.example.com# show users
Username permission
-------- ----------
OL-10410-01
Cisco Global Site Selector Administration Guide
2-23
Page 58

Chapter 2 Managing the GSS from the CLI
Specifying the GSS Inactivity Timeout
lstar admin
admin admin
paulr-admin admin
For details about creating GSS users, refer to Chapter 3, Creating and Managing
User Accounts.
Specifying the GSS Inactivity Timeout
You can modify the length of time that can expire before a GSS automatically logs
off an inactive user by using the exec-timeout command. This command specifies
the length of time that a user in privileged EXEC mode can be idle before the GSS
terminates the session. Users logged on to GSS devices in the global configuration
mode are not affected by the exec-timeout command setting. The default
inactivity timeout value is 150 minutes.
The syntax for the exec-timeout command is as follows:
exec-timeout minutes
The minutes argument specifies the length of time that a user in privileged EXEC
mode can be idle before the GSS terminates the session. Valid entries are 1 to
44,640 minutes. The default is 150 minutes.
For example, to specify a GSS timeout period of 10 minutes, enter:
gssm1.example.com(config)# exec-timeout 10
To restore the default timeout value of 150 minutes, use the no form of this
command.
Configuring the Terminal Screen Line Length
You can specify the number of screen lines to display on your terminal by using
the terminal length command. The maximum number of displayed screen lines
is 512. The default is 23 screen lines. When the terminal length command is set
to a value of 0, the GSS sends all of its data to the screen at once without pausing
to buffer the data. To restore the default terminal length of 23 lines, use the no
form of this command.
The syntax for this command is as follows:
terminal-length number
Cisco Global Site Selector Administration Guide
2-24
OL-10410-01
Page 59

Chapter 2 Managing the GSS from the CLI
The number argument specifies the number of screen lines to display on your
terminal, from 0 and 512. The default is 23 lines.
For example, to set the number of screen lines to 35, enter:
gssm1.example.com(config)# terminal-length 35
To reset the number of screen lines to the default of 23, enter:
gssm1.example.com(config)# no terminal-length
To display the terminal length setting for your GSS device, use the show
terminal-length command.
For example:
gssm1.example.com# show terminal-length
terminal length 35
Modifying the Attributes of the Security Certificate on the GSSM
Modifying the Attributes of the Security Certificate
on the GSSM
You can customize the attributes of the security certificate issued by Cisco
Systems and installed on the primary GSSM (as described in the
the Primary GSSM Graphical User Interface” section in Chapter 1, , Managing
GSS Devices from the GUI). By using the certificate set-attributes CLI
command, you can modify the X.509 fields, extensions, and properties included
on the security certificate. The attribute changes that you make affect the fields on
the Details tab of the certificate. To return the attributes for the security certificate
to the default settings, use the no form of the certificate set-attributes command.
When you enter the certificate set-attributes command, the GSS software
displays a series of prompts related to the fields on the certificate. Proceed though
all of the prompts and make changes only to those fields that you want to modify.
When completed, the software prompts you to save your changes and generate a
a new certificate. The next time that you access the primary GSSM GUI, the
Security Alert dialog box reappears informing you that the certificate is invalid.
At that point, you can either reinstall the updated certificate or close the dialog
box and continue with the primary GSSM GUI operation.
“Logging Into
OL-10410-01
Cisco Global Site Selector Administration Guide
2-25
Page 60

Modifying the Attributes of the Security Certificate on the GSSM
To modify the attributes of a security certificate on the primary GSSM, perform
the following steps:
1. Log in to the CLI and enable privileged EXEC mode.
gssm1.example.com> enable
gssm1.example.com#
2. Enter the gss stop command to stop the GSS software. Modifications to the
certificate cannot occur while the GUI is active on the primary GSSM.
gssm1.example.com# gss stop
3. Access global configuration mode on the device.
gssm1.example.com# config
gssm1.example.com(config)#
4. Enter the certificate set-attributes command and modify information at the
prompts. All fields displayed for each software prompt have a maximum
character limit of 64, except for Country Code, which has a maximum
character limit of 2.
Chapter 2 Managing the GSS from the CLI
gssm1.example.com(config)# certificate set-attributes
Country code (2 chars) [US]:
State [California]: MA
City [San Jose]: Boston
Organization [Cisco Systems, Inc.]: New Organization
Organization Unit [ISBU]:
e-Mail Address [tac@cisco.com]: company@mycompany.com
US
MA
Boston
New Organization
ISBU
company@mycompany.com
5. Enter y to save these values (or n to use the existing certificate values).
Save these values? (y/n): y
6. Restart the GSS device.
gssm1.example.com(config)# exit
gssm1.example.com# gss start
Cisco Global Site Selector Administration Guide
2-26
OL-10410-01
Page 61

Chapter 2 Managing the GSS from the CLI
Stopping the GSS Software
You must stop the GSS software before you perform the following tasks:
• Upgrade GSS software
• Perform a warm reboot
• Restore GSS factory defaults
• Disable an active GSS device
• Perform GSS maintenance or troubleshooting
Use the gss stop command to stop the GSS software. For example, enter:
gssm1.example.com# gss stop
The following message appears when you stop the GSS software from the CLI.
Stopping the GSS Software
Server is Shutting Down
Use the gss start command to restart the GSS software on the selected device after
it has been stopped. For example, enter:
gssm1.example.com# gss start
Shutting Down the GSS Software
If you intend to power down a GSS device, we recommend that you use the
shutdown command to first shut down the GSS software. You should also shut
down the GSS software before you disable a GSS (see the
Software” section).
To shut down the GSS software, enter:
gssm1.example.com# shutdown
“Disabling the GSS
OL-10410-01
Cisco Global Site Selector Administration Guide
2-27
Page 62

Restarting the GSS Software
Restarting the GSS Software
You can perform a warm restart of the GSS software by using the gss restart
command. Before you perform a warm restart of the GSS software, save your
recent GSS configuration changes to memory. Use the copy running-config
startup-config CLI command to save your configuration changes. If you fail to
save your configuration changes, the GSS device reverts to its previous settings
upon a reboot.
To perform a warm restart of the GSS, enter:
gssm1.example.com# gss restart
As the GSS reboots, the output appears on the console terminal.
Chapter 2 Managing the GSS from the CLI
Performing a Cold Restart of a GSS Device
You can halt GSS operation and perform a cold restart of your GSS device by
using the reload command. The reload command reboots the GSS device and
performs a full power cycle of both the GSS hardware and software. Any open
connections with the GSS are dropped after you enter the reload command.
Before you perform a cold restart of the GSS, save your recent GSS configuration
changes to memory. Use the copy running-config startup-config CLI command
to save your configuration changes. If you fail to save your configuration changes,
the GSS device reverts to its previous settings upon restart.
To halt and perform a cold restart of the GSS, enter:
gssm1.example.com# reload
As the GSS boots, the output appears on the console terminal.
Disabling the GSS Software
Disabling a GSS device is necessary when you need to perform the following
tasks:
• Switch the role of a GSS within a network
• Change a GSS to a GSSM
Cisco Global Site Selector Administration Guide
2-28
OL-10410-01
Page 63

Chapter 2 Managing the GSS from the CLI
• Move a GSS or GSSM to a different network of GSS devices
Use the gss disable command to disable a selected GSSM or GSS. This command
removes the existing configuration and returns the GSS device to its initial state,
which includes deleting the GSSM database from the GSS device and removing
all configured DNS rules and keepalives. The gss disable command also removes
any certificate attributes specified using the certificate set-attributes command.
To disable a GSS device, enter:
gssm1.example.com# gss disable
gssm1.example.com# shutdown
To reenable the GSS device as a primary GSSM, standby GSSM, or a GSS, see
the Cisco Global Site Selector Getting Started Guide.
Restoring GSS Factory-Default Settings
Restoring GSS Factory-Default Settings
The restore-factory-defaults command erases your GSSM database and all of its
data and resets all network settings, returning your GSS hardware to the same
state it was in when it first arrived from the factory. If your GSS device is
improperly configured, use the restore-factory-defaults command to restore the
device to its initial state and allow you to properly configure the GSS device for
use on your network.
Before you enter the restore-factory-defaults command, ensure that you back up
any vital data in the database component of the primary GSSM, along with its
network and device configuration information. Use the gssm backup command
to perform a primary GSSM backup. See
Downgrading the GSSM Database for details.
Caution User files will also be deleted when you enter the restore-factory-defaults
command. If you have any important files in the /home directory that you want to
save, use either the secure copy (scp) or ftp commands to copy those files before
you enter the restore-factory-defaults command.
Chapter 7, , Backing Up, Restoring, and
Enter the gss stop command before you execute the restore-factory-defaults
command to stop the GSS software and avoid disrupting in-process activities (for
example, serving DNS requests or sending keepalives).
To restore GSS factory default settings, enter:
OL-10410-01
Cisco Global Site Selector Administration Guide
2-29
Page 64

Chapter 2 Managing the GSS from the CLI
Replacing GSS Devices in Your GSS Network
gssm1.example.com# gss stop
gssm1.example.com# restore-factory-defaults
Replacing GSS Devices in Your GSS Network
If you encounter problems with one of the GSS devices in your network,
determine which GSS device contains the problem (primary GSSM, standby
GSSM, or GSS) and configure a replacement GSS device for your network.
Figure 2-1 summarizes the decision-making process to follow when replacing a
malfunctioning GSS device.
Figure 2-1 Flow Chart for Replacing a Malfunctioning GSS Device
GSS device
fails
Convert to interim
primary GSSM.
Refer to “Converting
the Standby GSSM
to a Primary GSSM”
Replacement GSS
arrives. Refer to
“Replacing the Primary
GSSM With an
Available GSS”
Yes
Yes
Configure an available
“Replacing the Primary
Is there
a standby
GSSM?
No
Can you
wait for a
replacement?
No
GSS as the primary
GSSM. Refer to
GSSM With an
Available GSS”
Primary
GSSM
Which
GSS device
failed?
GSS
Wait for the
replacement GSS,
then refer to
“Replacing a GSS
in the Network”
Standby
GSSM
Can you
wait for a
replacement?
No
Configure GSS as
standby GSSM.
Refer to “Replacing
the Standby GSSM
in the Network”
Replacement GSS
Yes
arrives. Refer to
“Replacing the
Standby GSSM
in the Network”
126920
This section contains the following topics:
Cisco Global Site Selector Administration Guide
2-30
OL-10410-01
Page 65

Chapter 2 Managing the GSS from the CLI
Replacing GSS Devices in Your GSS Network
• Replacing the Primary GSSM in the Network
• Replacing the Standby GSSM in the Network
• Replacing a GSS in the Network
Replacing the Primary GSSM in the Network
To replace a malfunctioning primary GSSM in your GSS network to regain GUI
management, determine if there is a standby GSSM available in your network:
• If you have a standby GSSM that you can convert to the primary GSSM, see
the
“Converting the Standby GSSM to a Primary GSSM” section.
• If you do not have a standby GSSM but do have an available GSS that you can
convert to the primary GSSM, see the
Available GSS” section.
“Replacing the Primary GSSM with an
Converting the Standby GSSM to a Primary GSSM
Note Ensure that the designated primary GSSM is either offline or configured as a
standby GSSM before you attempt to enable the standby GSSM as the new interim
primary GSSM. Having two primary GSSM devices active at the same time may
result in the inadvertent loss of configuration changes for your GSS network.
To convert the standby GSSM to a primary GSSM, perform the following steps:
1. Log in to the CLI of the primary GSSM, enable privileged EXEC mode, and
perform a full backup of your primary GSSM to preserve your current
network and configuration settings (see the
GSSM Backup” section in Chapter 7, , Backing Up, Restoring, and
Downgrading the GSSM Database).
2. Log in to the CLI of the standby GSSM and enable privileged EXEC mode.
gssm2.example.com> enable
gssm2.example.com#
“Performing a Full Primary
OL-10410-01
Cisco Global Site Selector Administration Guide
2-31
Page 66

Replacing GSS Devices in Your GSS Network
3. Configure the current standby GSSM to function as the temporary primary
GSSM for your GSS network. Use the gssm standby-to-primary command
to reconfigure your standby GSSM as the primary GSSM in your GSS
network.
gssm2.example.com# gssm standby-to-primary
Note After entering the gssm primary-to-standby command, you should
ensure that at least 1 minute passes before you enter the gssm
standby-to-primary command in order to allow time for proper GSS
device synchronization.
Configuration changes do not take effect immediately. It may take up to 10
minutes before the other GSS devices in the network learn about the new
primary GSSM.
4. Validate the database records of the interim primary GSSM by entering the
following command.
Chapter 2 Managing the GSS from the CLI
gssm2.example.com# gssm database validate
5. Exit privileged EXEC mode. The standby GSSM begins to function in its new
role as the interim primary GSSM and is now fully functional. You may now
access the GUI.
6. When the replacement for the original primary GSSM is available, place the
current interim primary GSSM in standby mode by entering the following
command:
gssm2.example.com# gssm primary-to-standby
This command allows the current interim primary GSSM to resume its role in
the GSS network as the standby GSSM.
7. Exit from the CLI of the standby GSSM.
8. Log in to the CLI of the GSS replacement for the original primary GSSM and
enable privileged EXEC mode.
gssm1.example.com> enable
gssm1.example.com#
9. Configure basic network connectivity settings following the procedures
outlined in the Cisco Global Site Selector Getting Started Guide, Chapter 3,
Setting Up Your GSS. Specify the same hostname and IP address of the
original primary GSSM.
Cisco Global Site Selector Administration Guide
2-32
OL-10410-01
Page 67

Chapter 2 Managing the GSS from the CLI
10. Save your configuration changes to memory by entering the following
command:
gssm1.example.com# copy running-config startup-config
11. Configure the GSS device as the replacement primary GSSM in the GSS
network by entering the following command:
gssm1.example.com# gss enable gssm-primary
Note After entering the gssm primary-to-standby command, you should
ensure that at least 1 minute passes before you enter the gssm
standby-to-primary command in order to allow time for proper GSS
device synchronization.
Configuration changes do not take effect immediately. It may take up to 10
minutes before the other GSS devices in the network learn about the new
primary GSSM.
Replacing GSS Devices in Your GSS Network
12. Determine if you have a full backup of the interim primary GSSM database
that you can restore on the new primary GSSM as follows:
• If yes, restore the interim primary GSSM database. See the “Restoring a
Primary GSSM Backup” section in Chapter 7, , Backing Up, Restoring, and
Downgrading the GSSM Database. You can now use the replacement primary
GSSM in your GSS network.
• If no, determine if you have a backup of the original primary GSSM database
as follows:
–
If yes, restore the original primary GSSM database. See the “Restoring a
Primary GSSM Backup” section in Chapter 7, , Backing Up, Restoring,
and Downgrading the GSSM Database. Verify the existing global server
load-balancing configuration settings (DNS rules and keepalives) and
modify the settings as described in the Cisco Global Server
Load-Balancing Configuration Guide (GUI-based or CLI-based
version). You can now use the replacement primary GSSM in your GSS
network.
–
If no, proceed to Step 13.
13. If you do not have a backup of either the interim or original primary GSSM
database, do the following:
OL-10410-01
Cisco Global Site Selector Administration Guide
2-33
Page 68

Replacing GSS Devices in Your GSS Network
a. Reconfigure the global server load-balancing configuration settings on
the new primary GSSM as described in the Cisco Global Site Selector
Global Server Load-Balancing Configuration Guide (GUI-based or
CLI-based version).
b. Send DNS queries to the new primary GSSM and ensure that it replies
properly to the queries. If the new primary GSSM replies properly,
proceed to step 13c. If it fails to reply properly, verify the network
connectivity settings and resend DNS queries to the device.
c. At the CLI of the standby GSSM and of each GSS device in your
network, enter the gss disable command to remove the existing
configuration, including the deletion of the GSSM database from the
standby GSSM, and return the GSS device to an initial state. The deletion
process includes removing all previously configured DNS rules and
keepalives.
gssm2.example.com# gss disable
Chapter 2 Managing the GSS from the CLI
d. At the CLI of the standby GSSM, enter the gss enable gssm-standby
command to configure the GSS device as the standby GSSM in the GSS
network and direct it to the primary GSSM. See the
“Replacing the
Standby GSSM in the Network” section for details about the gss enable
gssm-standby command.
gssm2.example.com# gss enable gssm-standby gssm1.example.com
e. At the CLI of each GSS, enter the gss enable command to enable your
GSS device as a GSS and direct it to the primary GSSM. Specify either
the domain name or the network address of the primary GSSM. See the
“Replacing a GSS in the Network” section for details about the gss
enable command.
Note You may want to perform this step on one GSS device at a time to
minimize disruptions on your GSS network.
gss3.example.com# gss enable gss gssm1.example.com
f. Register the standby GSSM and each GSS device with the new primary
GSSM. See the
“Activating GSS Devices from the Primary GSSM”
section in Chapter 1, , Managing GSS Devices from the GUI.
You can now use the replacement primary GSSM in your GSS network.
Cisco Global Site Selector Administration Guide
2-34
OL-10410-01
Page 69

Chapter 2 Managing the GSS from the CLI
Replacing GSS Devices in Your GSS Network
Replacing the Primary GSSM with an Available GSS
To replace a malfunctioning primary GSSM with an available GSS, perform the
following steps:
1. Determine if you can wait for a replacement primary GSSM or if you require
an immediate primary GSSM configuration change in your network to
preserve the network configuration as follows:
• If yes, wait until the replacement GSS is available and configure it as the
primary GSSM. Proceed to Step 6.
• If no, configure an available GSS device as the primary GSSM. Proceed to
Step 2.
2. Log in to the CLI of the primary GSSM, enable privileged EXEC mode, and
perform a full backup of your primary GSSM to preserve your current
network and configuration settings (see the
GSSM Backup” section in Chapter 7, , Backing Up, Restoring, and
Downgrading the GSSM Database.
“Performing a Full Primary
3. Log in to the CLI of the GSS and enable privileged EXEC mode.
gss3.example.com> enable
gss3.example.com#
4. Stop the GSS software running on the GSS by entering the following
command:
gss3.example.com# gss stop
5. Remove the existing configuration and return the GSS device to an initial
state, including the removal of all previously configured DNS rules and
keepalives, by entering the following command:
gss3.example.com# gss disable
6. If this is a new GSS device, configure basic network connectivity settings
following the procedures outlined in the Cisco Global Site Selector Getting
Started Guide, Chapter 3, Setting Up Your GSS. Ensure that you specify the
same hostname and IP address of the original primary GSSM.
7. Save your configuration changes to memory by entering the following
command:
gssm1.example.com# copy running-config startup-config
OL-10410-01
Cisco Global Site Selector Administration Guide
2-35
Page 70

Replacing GSS Devices in Your GSS Network
8. Configure the GSS device as the primary GSSM in the GSS network by
entering the following command:
gssm1.example.com# gss enable gssm-primary
9. Determine if you have a full backup of the original primary GSSM database
that can be loaded on the replacement GSS as follows:
• If yes, restore the primary GSSM database as described in the “Restoring a
Primary GSSM Backup” section in Chapter 7, , Backing Up, Restoring, and
Downgrading the GSSM Database.
• If no, proceed to Step 10.
10. If you do not have a backup of the original primary GSSM database, do the
following:
a. Reconfigure the global server load-balancing configuration settings on
the new primary GSSM as described in the Cisco Global Site Selector
Global Server Load-Balancing Configuration Guide (GUI-based or
CLI-based version).
Chapter 2 Managing the GSS from the CLI
b. Send DNS queries to the new primary GSSM and ensure that it replies
properly to the queries. If the new primary GSSM replies properly,
proceed to Step 10c. If it fails to reply properly, verify the network
connectivity settings and resend DNS queries to the device.
c. At the CLI of the standby GSSM and of each GSS device in your
network, enter the gss disable command to remove the existing
configuration, including the deletion of the GSSM database from the
standby GSSM, and return the GSS device to an initial state. The deletion
process includes removing all previously configured DNS rules and
keepalives.
gssm2.example.com# gss disable
d. At the CLI of the standby GSSM, enter the gss enable gssm-standby
command to reenable the standby GSSM in the GSS network and direct
it to the primary GSSM. See the
“Replacing the Standby GSSM in the
Network” section for details about the gss enable gssm-standby
command.
gss1.example.com# gss enable gssm-standby gssm1.example.com
Cisco Global Site Selector Administration Guide
2-36
OL-10410-01
Page 71

Chapter 2 Managing the GSS from the CLI
e. At the CLI of each GSS, enter the gss enable command to enable your
GSS device as a GSS and direct it to the primary GSSM. Specify either
the domain name or the network address of the primary GSSM. See the
“Replacing a GSS in the Network” section for details about the gss
enable command.
Note You may want to perform this step on one GSS device at a time to
gss3.example.com# gss enable gss gssm1.example.com
f. Register the standby GSSM and each GSS device with the new primary
GSSM. See the
section in Chapter 1, Managing GSS Devices from the GUI.
You can now use the replacement primary GSSM in your GSS network.
Replacing GSS Devices in Your GSS Network
minimize disruptions on your GSS network.
“Activating GSS Devices from the Primary GSSM”
Replacing the Standby GSSM in the Network
To replace a malfunctioning standby GSSM in your GSS network, perform the
following steps:
1. Determine if you can wait for the replacement standby GSSM or if you
require an immediate configuration change in your GSS network as follows:
• If yes, wait until the replacement GSS is available and configure it as the
standby GSSM. Proceed to Step 5.
• If no, configure an available GSS device as the standby GSSM. Proceed to
Step 2.
2. Log in to the CLI of the GSS and enable privileged EXEC mode.
gss3.example.com> enable
gss3.example.com#
3. Stop the GSS software running on the GSS by entering the following
command:
gss3.example.com# gss stop
4. Disable the GSS to remove the existing configuration and return the GSS
device to an initial state by entering the following command:
OL-10410-01
Cisco Global Site Selector Administration Guide
2-37
Page 72

Replacing GSS Devices in Your GSS Network
gss3.example.com# gss disable
This command removes all previously configured DNS rules and keepalives.
5. If this is a new GSS device, configure basic network connectivity following
the procedures outlined in the Cisco Global Site Selector Getting Started
Guide, Chapter 3, Setting Up Your GSS.
6. Save your configuration changes to memory by entering the following
command:
gss3.example.com# copy running-config startup-config
7. If this is an existing GSS device, delete it from your GSS network through the
primary GSSM GUI. See the
Managing GSS Devices from the GUI.
8. If you want to use the same hostname and IP address of the failed standby
GSSM, determine if you have a backup of the startup-configuration file for
that device as follows:
Chapter 2 Managing the GSS from the CLI
“Deleting GSS Devices” section in Chapter 1, ,
• If yes, reload the backup copy of the GSS device startup configuration
settings (see the
“Saving the startup-config and running-config Files”
section).
• If no, reenter the platform configuration following the procedures outlined in
the Cisco Global Site Selector Getting Started Guide, Chapter
3, Setting Up
Your GSS.
9. Save your configuration changes to memory by entering the following
command:
gss3.example.com# copy running-config startup-config
10. Configure the GSS device as the standby GSSM in the GSS network and
direct it to the primary GSSM by entering the gss enable gssm-standby
command.
The syntax for this command is as follows:
gss enable gssm-standby primary_GSSM_hostname |
primary_GSSM_IP_address
The argument are as follows:
–
primary_GSSM_hostname—DNS hostname of the device currently
serving as the primary GSSM
Cisco Global Site Selector Administration Guide
2-38
OL-10410-01
Page 73

Chapter 2 Managing the GSS from the CLI
–
primary_GSSM_IP_address—DNS hostname of the device currently
serving as the primary GSSM
For example, to enable gss3.example.com as the standby GSSM and direct it
to the primary GSSM, gssm1.example.com, enter:
gss3.example.com# gss enable gssm-standby gssm1.example.com
11. Activate the standby GSSM from the primary GSSM GUI to add it to your
GSS network. See the
“Activating GSS Devices from the Primary GSSM”
section in Chapter 1, , Managing GSS Devices from the GUI.
You can now use the replacement standby GSSM in your GSS network.
Replacing a GSS in the Network
To replace a malfunctioning GSS in your GSS network, perform the following
steps:
Replacing GSS Devices in Your GSS Network
1. Configure basic network connectivity for the replacement GSS device
following the procedures outlined in the Cisco Global Site Selector Getting
Started Guide, Chapter 3, Setting Up Your GSS.
2. If you want to use the same hostname and IP address of the failed GSS,
determine if you have a backup of the startup-configuration file for that
device as follows:
• If yes, reload the backup copy of the GSS device startup configuration
settings (see the
“Saving the startup-config and running-config Files”
section).
• If no, reenter the platform configuration following the procedures outlined in
the Cisco Global Site Selector Getting Started Guide, Chapter
3, Setting Up
Your GSS.
3. If this is an existing GSS device, delete it from your GSS network through the
primary GSSM GUI. See the
“Deleting GSS Devices” section in Chapter 1, ,
Managing GSS Devices from the GUI.
4. Enable your GSS device as a GSS and direct it to the primary GSSM in your
GSS network by entering the gss enable command.
The syntax for this command is:
gss enable gss primary_GSSM_hostname | primary_GSSM_IP_address
OL-10410-01
Cisco Global Site Selector Administration Guide
2-39
Page 74

Changing the GSSM Role in the GSS Network
The arguments are as follows:
–
primary_GSSM_hostname—DNS hostname of the device currently
serving as the primary GSSM.
–
primary_GSSM_IP_address—DNS hostname of the device currently
serving as the primary GSSM.
For example, to enable gss3.example.com as a GSS and direct it to the
primary GSSM, gssm1.example.com, enter:
gss3.example.com# gss enable gss gssm1.example.com
5. Save your configuration changes to memory by entering the following
command:
gss3.example.com# copy running-config startup-config
6. Activate the GSS from the primary GSSM GUI to add it to your GSS network.
See the
“Activating GSS Devices from the Primary GSSM” section in
Chapter 1, , Managing GSS Devices from the GUI.
Chapter 2 Managing the GSS from the CLI
You can now use the replacement GSS in your GSS network.
Changing the GSSM Role in the GSS Network
The GSS software supports two GSSM devices in a single GSS network, with one
GSSM acting as the primary GSSM and the second GSSM acting as a standby
device. The standby GSSM can temporarily take over the role of the primary
GSSM if the primary GSSM is unavailable (for example, you need to move the
primary GSSM or you want to take it offline for repair or maintenance).
Using the CLI, you can manually switch the roles of your primary and standby
GSSM devices at any time.
Before switching GSSM roles, follow these guidelines:
• You must configure and enable both a primary and a standby GSSM in your
GSS network. Do not attempt to switch GSSM roles until you configure and
enable both a primary and a standby GSSM (see the Cisco Global Site
Selector Getting Started Guide).
Cisco Global Site Selector Administration Guide
2-40
OL-10410-01
Page 75

Chapter 2 Managing the GSS from the CLI
• Ensure that the designated primary GSSM is either offline or configured as a
standby GSSM before you attempt to enable the standby GSSM as the new
primary GSSM. Having two primary GSSM devices active at the same time
may result in the inadvertent loss of configuration changes for your GSS
network.
Although DNS request routing continues to function in such a situation, GUI
configuration changes made on one or both primary GSSM devices may be
lost or overwritten and are not communicated to the GSS devices. If this dual
primary GSSM configuration occurs, the two primary GSSM devices change
to standby mode. You must then reconfigure the original deployed primary
GSSM as the primary GSSM.
• The switching of roles between the designated primary GSSM and the
standby GSSM is intended to be a temporary GSS network configuration until
the original primary GSSM is back online. Use the interim primary GSSM to
monitor GSS network behavior and, if necessary, to make configuration
changes.
Changing the GSSM Role in the GSS Network
This section contains the following topics:
• Switching the Roles of the Primary and Standby GSSM Devices
• Reversing the Roles of the Interim Primary and Standby GSSM Devices
Switching the Roles of the Primary and Standby GSSM Devices
This procedure assumes that your primary GSSM is online and functional when
you are switching GSSM roles. If the primary GSSM is not functional, proceed to
Step 6.
To change the role of your primary and standby GSSM devices, perform the
following steps:
1. Log in to the CLI and enable privileged EXEC mode.
gssm1.example.com> enable
gssm1.example.com#
2. Perform a full backup of your primary GSSM to preserve your current
network and configuration settings (see the
GSSM Backup” section in Chapter 7, , Backing Up, Restoring, and
Downgrading the GSSM Database).
“Performing a Full Primary
OL-10410-01
Cisco Global Site Selector Administration Guide
2-41
Page 76

Changing the GSSM Role in the GSS Network
3. Configure the current primary GSSM as the standby GSSM. Use the gssm
primary-to-standby command to place the primary GSSM in standby mode.
gssm1.example.com# gssm primary-to-standby
4. (Optional) Power down the primary GSSM by entering the following
command:
gssm1.example.com# shutdown
5. Exit from the CLI of the primary GSSM.
6. Log in to the CLI of the standby GSSM and enable privileged EXEC mode.
gssm2.example.com> enable
7. Configure the current standby GSSM to function as the temporary primary
GSSM for your GSS network. Use the gssm standby-to-primary command
to reconfigure your standby GSSM as the primary GSSM in your GSS
network.
Chapter 2 Managing the GSS from the CLI
gssm2.example.com# gssm standby-to-primary
Note After entering the gssm primary-to-standby command, you should
ensure that at least 1 minute passes before you enter the gssm
standby-to-primary command in order to allow time for proper GSS
device synchronization.
Configuration changes do not take effect immediately. It may take up to 10
minutes before the other GSS devices in the network learn about the new
primary GSSM.
8. Validate the database records of the interim primary GSSM by entering the
following command:
gssm2.example.com# gssm database validate
9. Exit privileged EXEC mode. The standby GSSM begins to function in its new
role as the interim primary GSSM and is now fully functional. You may now
access the GUI.
Cisco Global Site Selector Administration Guide
2-42
OL-10410-01
Page 77

Chapter 2 Managing the GSS from the CLI
Changing the GSSM Role in the GSS Network
Reversing the Roles of the Interim Primary and Standby GSSM
Devices
When the original primary GSSM is available for use in the network, reverse the
roles of the two GSSM devices back to the original GSS network deployment.
Note If your original primary GSSM has been replaced by Cisco Systems, see the
“Replacing the Primary GSSM with an Available GSS” section for details about
replacing a primary GSSM with a new GSS device.
To reverse the roles of the interim primary and standby GSSM devices, perform
the following steps:
1. Log in to the CLI of the interim primary GSSM and enable privileged EXEC
mode.
gssm2.example.com> enable
gssm2.example.com#
2. If the GUI configuration has changed, perform a full backup of the interim
primary GSSM to preserve the current network and configuration settings
(see the
“Performing a Full Primary GSSM Backup” section in Chapter 7, ,
Backing Up, Restoring, and Downgrading the GSSM Database).
3. Place the current interim primary GSSM in standby mode to resume its role
in the GSS network as the standby GSSM by entering the following
command:
gssm2.example.com# gssm primary-to-standby
Ensure that a minimum of five minutes have passed since the last GUI
configuration change before you enter the gssm primary-to-standby
command to convert the interim primary GSSM back to its role as standby
GSSM.
4. Exit from the CLI of the standby GSSM.
5. Log in to the CLI of the primary GSSM from your original network
deployment. The CLI prompt appears.
6. Enable privileged EXEC mode on the primary GSSM.
gssm1.example.com> enable
OL-10410-01
Cisco Global Site Selector Administration Guide
2-43
Page 78

Displaying GSS System Configuration Information
7. Return the standby GSSM to its role as the original primary GSSM in the GSS
network by entering the following command:
gssm1.example.com# gssm standby-to-primary
Note After entering the gssm primary-to-standby command, you should
ensure that at least 1 minute passes before you enter the gssm
standby-to-primary command in order to allow time for proper GSS
device synchronization.
Configuration changes do not take effect immediately. It may take up to 10
minutes before the other GSS devices in the network learn about the new
primary GSSM.
You can now use the primary GSSM as in the original GSS network deployment.
Chapter 2 Managing the GSS from the CLI
Displaying GSS System Configuration Information
The GSS CLI provides a comprehensive set of show commands that display GSS
configuration information. The show commands are available in all CLI modes.
This section contains the following topics:
• Displaying Software Version Information
• Displaying License Information
• Displaying Memory Information
• Displaying Boot Configuration
• Displaying GSS Processes
• Displaying System Uptime
• Displaying Disk Information
• Displaying UDI Data
• Displaying System Status
• Displaying GSS Services
Cisco Global Site Selector Administration Guide
2-44
OL-10410-01
Page 79

Chapter 2 Managing the GSS from the CLI
Displaying GSS System Configuration Information
Displaying Software Version Information
You can display the software version information about the GSS software by using
the show version command. The syntax for the show version command is as
follows:
show version [verbose]
Specify the verbose optional keyword if you want to view detailed GSS software
version information.
To display general GSS software version information, enter:
gssm1.example.com# show version
Global Site Selector (GSS)
Model Number: GSS-4492-K9
Copyright (c) 1999-2007 by Cisco Systems, Inc.
Version 2.0 (1.0.0)
Uptime: 4 Hours 0 Minutes and 19 seconds
To display detailed GSS software version information, enter:
gssm1.example.com# show version verbose
Global Site Selector (GSS)
Model Number: GSS-4490-K9
Copyright (c) 1999-2003 by Cisco Systems, Inc.
Version 1.3(1)
Uptime: 23 Hours 57 Minutes and 53 seconds
Full Version: 1.3(1.0.0)
Compiled on Wed Feb 15 05:51:07 2006 by ralexand from gss-builder changeset 26190
Processor 0: Pentium III (Coppermine) GenuineIntel
Bridge: Intel Corporation 82371AB PIIX4 ACPI (rev 02)
Ethernet controller: Intel Corporation 82557 [Ethernet Pro 100] (rev
08)
Ethernet controller: Intel Corporation 82557 [Ethernet Pro 100] (rev
08)
IDE interface: Intel Corporation 82371AB PIIX4 IDE (rev 01)
ISA bridge: Intel Corporation 82371AB PIIX4 ISA (rev 02)
OL-10410-01
Cisco Global Site Selector Administration Guide
2-45
Page 80

Displaying GSS System Configuration Information
PCI bridge: Intel Corporation 440BX/ZX - 82443BX/ZX AGP bridge (rev
03)
SCSI storage controller: Symbios Logic Inc. (formerly NCR) 53c895 (rev
02)
USB Controller: Intel Corporation 82371AB PIIX4 USB (rev 01)
VGA compatible controller: Chips and Technologies F69000 HiQVideo (rev
64)
0000-001f : dma1 | 0020-003f : pic1
0040-005f : timer | 0060-006f : keyboard
0070-007f : rtc | 0080-008f : dma page reg
00a0-00bf : pic2 | 00c0-00df : dma2
00f0-00ff : fpu | 02f8-02ff : serial(auto)
03d4-03d5 : cga | 03f8-03ff : serial(auto)
6c00-6c7f : ncr53c8xx | 7000-701f : Intel Speedo3 Ethernet
7400-741f : Intel Speedo3 Ethernet | fc00-fc07 : ide0
fc08-fc0f : ide1 |
gssm1.example.com: scsi0 Channel: 00 Id: 00 Lun: 00
Vendor: IBM Model: IC35L018UCD210-0 Rev: S5BS
Type: Direct-Access ANSI SCSI revision: 03
Chapter 2 Managing the GSS from the CLI
Displaying License Information
You can display information about installed GSS licenses by using the show
license command and its options.
To obtain a listing of the currently-active license modules, enter:
gssm1.example.com# show license active
Enabled modules are
DDoS
To see which license files are installed, enter:
gssm1.example.com# show license installed
License modules are
DDoS
CNR
To obtain a complete listing of the license files, enter:
gssm1.example.com# show license file-name list
ddos_new.lic
Cisco Global Site Selector Administration Guide
2-46
OL-10410-01
Page 81

Chapter 2 Managing the GSS from the CLI
To obtain specific license file details, enter:
gssm1.example.com# show license file-name ddos_new.lic
FEATURE ddos cisco 1 permanent uncounted HOSTID=ANY \
NOTICE=”<LicFileID>ddos_new.lic</LicFileID><LicLineID>0</LicLineID> \
<PAK>1XIOS2C84AB</PAK>” SIGN=CFF95D462F42
To obtain a complete picture of the licenses installed in the GSS network from the
primary GSS, enter:
gssm1.example.com# show license gss-all
Own (Primary GSS) info :
Pak number is :
1XIOS2C81AB
DDoS Installed, Active
CNR Installed, Active
Other GSS info :
Address : 2.7.0.2
Pak number are :
1XIOS2C87AB
DDoS Installed, Active
CNR Installed, Active
Displaying GSS System Configuration Information
Address : 2.3.0.2
Pak number is:
1XIOS2C83AB
DDoS Installed, Active
CNR Installed, Active
Displaying Memory Information
You can display information about the GSS memory blocks and statistics by using
the show memory command.
gssm1.example.com# show memory
Table 2-1 describes the fields in the show memory output.
Ta b l e 2-1 Field Descriptions for show memory Command
Field Description
Memory:
total Total usable megabytes of RAM on the GSS.
OL-10410-01
Cisco Global Site Selector Administration Guide
2-47
Page 82

Displaying GSS System Configuration Information
Table 2-1 Field Descriptions for show memory Command
Field Description
free Available megabytes of RAM on the GSS.
Mem:
total Total usable megabytes of RAM on the GSS.
used Currently used RAM.
free Currently available RAM.
shared Memory shared between processes, always 0 (zero).
buffers Memory allocated as the internal kernel buffer space.
cached Memory allocated for the internal caching of file
Swap:
Chapter 2 Managing the GSS from the CLI
system data. This memory is reclaimed as needed.
total Total megabytes of swap space on the GSS.
used Currently used swap space.
free Currently available swap space.
Displaying Boot Configuration
You can display information about the GSS software, such as the current boot
image and boot device information, by using the show boot-config command.
gssm1.example.com# show boot-config
Table 2-2 describes the fields in the show boot-config output.
Ta b l e 2-2 Field Descriptions for show boot-config Command
Field Description
Boot Device Physical device used to boot the GSS software.
Timeout Length of time that the Linux boot manager, LILO
(Linux Loader) waits to receive an input before
automatically booting the GSS device.
Cisco Global Site Selector Administration Guide
2-48
OL-10410-01
Page 83

Chapter 2 Managing the GSS from the CLI
Table 2-2 Field Descriptions for show boot-config Command
Field Description
Label GSS software version that appears at the LILO
GSS Software Version Current GSS software version associated with the
Root Partition Device used for the Linux root partition (the core of
Linux Kernel Version of the Linux kernel used by the GSS
Default Boot Image Listed software version of the default boot image for
Displaying GSS System Configuration Information
prompt.
Label.
the Linux file system).
software image.
the GSS device.
Displaying GSS Processes
You can display a list of internal GSS device processes by using the show
processes command.
gssm1.example.com# show processes
Table 2-3 describes the fields in the show processes output.
Ta b l e 2-3 Field Descriptions for show processes Command
Field Description
Name Name of the GSS subsystem, per operating system
PID Process identifier.
MEM Percentage of memory used by the process.
CPUTIME Amount of CPU time used since the start of the
START Date or time when the process started.
process.
process.
OL-10410-01
Cisco Global Site Selector Administration Guide
2-49
Page 84

Displaying GSS System Configuration Information
Displaying System Uptime
You can display the length of time that the GSS has been running by using the
show uptime command.
gssm1.example.com# show uptime
Uptime: 12 Days 18 Hours 5 Minutes and 12 seconds
Displaying Disk Information
You can view general information about the GSS hard disk by using the show disk
command. The general hard disk information includes the available user space on
the disk, the size of the database, and the free space available on the disk.
gssm1.example.com# show disk
Chapter 2 Managing the GSS from the CLI
Table 2-4 describes the fields in the show disk output.
Ta b l e 2-4 Field Descriptions for show disk Command
Field Description
Size Total size of the disk, in megabytes.
Used Used space on the disk, in megabytes.
Free Available space on the disk, in megabytes.
User Space Disk space allocated to the GSS users.
Database Disk space allocated to the database configuration.
Safe Storage Disk space allocated for system data storage.
Displaying UDI Data
You can display GSS Unique Device Identifier (UDI) data by using the show
inventory command.
gssm1.example.com# show inventory
NAME: Chassis, DESCR: Global Site Selector 4492
PID: GSS-4491-K9 , VID: V01, SN: QTFNZD606000011
Cisco Global Site Selector Administration Guide
2-50
OL-10410-01
Page 85

Chapter 2 Managing the GSS from the CLI
The UDI provides a hardware product identification standard that is a consistent
feature across Cisco products, allowing customers to uniquely identify and track
Cisco products through their business and network operations. The UDI is
composed of three separate data elements which are physically attached to each
part:
• Orderable product identifier (PID)
• Version identifier (VID)
• Serial number (SN) of the hardware
The name of the device and a device description are also included in the output of
the show inventory command.
Displaying System Status
Displaying GSS System Configuration Information
You can display a report on the current operating status of your GSS device,
including the online status, current software version, and start date or time for the
various components by using the show system-status command.
Note The equivalent command to show GSS system status is gss status.
gssm1.example.com# show system-status
Cisco GSS - 1.3(1) GSS Manager - primary [Wed Feb 15 16 16:37:37 UTC
2006]
Normal Operation [runmode = 5]
START SERVER
Aug06 Boomerang
Aug06 Config Agent (crdirector)
Aug06 Config Server (crm)
Aug06 DNS Server
Aug06 Database
Aug06 GUI Server (tomcat)
Aug06 Keepalive Engine
Aug06 Node Manager
Aug06 Proximity
Aug06 Sticky
Aug06 Web Server (apache)
OL-10410-01
Cisco Global Site Selector Administration Guide
2-51
Page 86

Displaying GSS System Configuration Information
Displaying GSS Services
You can display the current state of the GSS services, such as FTP, NTP, SSH,
TACACS+, Telnet, and SNMP by using the show services command.
gssm1.example.com(config)# show services
START SERVICE
Jul23 Ftp
Jul23 Ntp
11:08 Snmp
14:47 Ssh
Jul23 Syslog
Jul23 Tacacs Stats
Jul23 Telnet
Chapter 2 Managing the GSS from the CLI
Cisco Global Site Selector Administration Guide
2-52
OL-10410-01
Page 87

CHAPTER
3
Creating and Managing User
Accounts
This chapter describes how to create and manage GSS device CLI user login
accounts and primary GSSM GUI user login accounts. It contains the following
major sections:
• Creating and Managing GSS CLI User Accounts
• Creating and Managing Primary GSSM GUI User Accounts
• Modifying the Administrator Account Passwords
Creating and Managing GSS CLI User Accounts
From the CLI of a GSS device, you can create user accounts that enable user
access to a GSS device, including the primary GSSM and standby GSSM. You
must individually manage user access to the CLI of each GSS device in the
network. Only users with the administrator privilege can create, modify, or
remove a GSS user account from the CLI.
Note The primary GSSM separately maintains the user accounts and passwords created
to log in to the CLI of the device from those accounts and passwords created to
log in to the GUI.
Cisco Global Site Selector Administration Guide
OL-10410-01
3-1
Page 88

Creating and Managing GSS CLI User Accounts
This section contains the following topics:
• Creating a GSS User Account
• Modifying a GSS User Account
• Deleting a GSS User Account
Creating a GSS User Account
When you create a user account from the GSS CLI, specify the new username,
password, and privilege level using the username command. You cannot create a
new account without designating a value for each of these configuration settings.
To create a user account that can log in and access the CLI of a GSS device,
perform the following steps:
1. Log in to the CLI and enable privileged EXEC mode.
Chapter 3 Creating and Managing User Accounts
gss1.example.com> enable
gss1.example.com#
2. Access global configuration mode on the GSS.
gss1.example.com# config
gss1.example.com(config)#
3. Create and configure your new login account by entering the username
command. The syntax for this command is as follows:
username name {delete | password password privilege {user | admin}}
The arguments and keywords are as follows:
• name—Specifies the username that you want to assign or change. Enter an
unquoted alphanumeric text string with no spaces and a maximum of 32
characters. Usernames may contain alpha characters (for example, A-Z or
a-z) and/or numerals. Numerals may be present at any position in the name.
• delete—Deletes the named user or administrative account.
• password password—Establishes the password. Specify the password that
you want to assign. Enter an unquoted text string with no spaces and a
maximum length of eight characters.
• privilege—Sets the user privilege level. To create an administrative account,
specify admin. To create a user account, select user.
Cisco Global Site Selector Administration Guide
3-2
OL-10410-01
Page 89

Chapter 3 Creating and Managing User Accounts
For example, enter:
gss1.example.com(config)# username user_1 password mypwd privilege
admin
User user_1 added.
4. Repeat Step 3 for each new user account that you want to create.
Modifying a GSS User Account
You can modify a GSS user account from the CLI by using the same procedure
that you followed to create the account (see the
section). Use the username command to enter the full username, password, and
privilege level, substituting the new values for the configuration settings that you
want to change.
Creating and Managing GSS CLI User Accounts
“Creating a GSS User Account”
For example, enter:
gss1.example.com(config)# username user_1 password newpwd privilege
user
User user_1 exists, change info? [y/n]: y
Deleting a GSS User Account
You can delete an existing user account for accessing the GSS from the CLI by
entering the username command. The GSS restricts you from deleting the
“admin” account.
For example, enter:
gss1.example.com#(config) username user_1 delete
User user_1 removed
OL-10410-01
Cisco Global Site Selector Administration Guide
3-3
Page 90

Chapter 3 Creating and Managing User Accounts
Creating and Managing Primary GSSM GUI User Accounts
Creating and Managing Primary GSSM GUI User
Accounts
By using the administrative capabilities of the primary GSSM GUI, you can create
and maintain user accounts to access the primary GSSM GUI. In addition to login
name and password information, you can assign user privileges, specify custom
GUI user views, and maintain contact information for each user. Only users with
administrator privilege can create, modify, or remove a primary GSSM GUI user
account.
Note The primary GSSM separately maintains the user accounts and passwords created
to log in to the GUI from those accounts and passwords created to log in to the
CLI.
This section contains the following topics:
• Privilege Levels for Using the Primary GSSM GUI
• Creating a GUI User Account
• Modifying a GUI User Account
• Removing a GUI User Account
• Changing the User Account GUI Password
• Creating and Modifying User Views for the Primary GSSM GUI
Cisco Global Site Selector Administration Guide
3-4
OL-10410-01
Page 91

Chapter 3 Creating and Managing User Accounts
Creating and Managing Primary GSSM GUI User Accounts
Privilege Levels for Using the Primary GSSM GUI
As the GSS administrator, you can control the GUI pages that a user accesses and
the associated functions that a user can perform from the primary GSSM GUI.
You control primary GSSM GUI access through the assignment of one of the three
user privilege levels, also called “roles.” Each of the following roles grants
specific access to the GUI based on the assigned role:
• Administrator—Full configuration privileges and complete access to the
primary GSSM GUI.
• Operator—Limited configuration privileges in the primary GSSM GUI, but
the operator can view list pages, view detail pages, and monitor global server
load-balancing statistics.
• Observer—No configuration privileges in the primary GSSM GUI, but the
observer can monitor global server load-balancing statistics.
Table 3-1 outlines the supported primary GSSM GUI functionality and
accessibility for the three user roles.
OL-10410-01
Cisco Global Site Selector Administration Guide
3-5
Page 92

Chapter 3 Creating and Managing User Accounts
Creating and Managing Primary GSSM GUI User Accounts
Ta b l e 3-1 User Privilege Roles for Using the Primary GSSM GUI
User Role Functionality Accessibility
Administrator Full functionality Full access to the primary GSSM
GUI pages.
Operator The operator has the following
functionality privileges:
• Suspend and activate
permissions for answers
only
• View list pages, detail
pages, and statistics
• Restricted from creating,
modifying, or deleting any
configuration items
appearing in the primary
GSSM GUI
The operator has the following
access privileges:
• DNS Rules Tab—
–
Access to all navigation
links.
–
Access to the Modify
icons to view the detail
pages. The Delete icon
and Submit icons are
unavailable.
–
Access to the Suspend
and Activate icons on
the Modifying Answer
and Modifying Answer
Group detail pages.
–
Access to the Filter
DNS Rules List and
Show All DNS Rules
icons on the DNS Rules
list page.
Cisco Global Site Selector Administration Guide
3-6
–
Restricted from the
DNS Rule Builder and
DNS Rules Wizard
icons and pages on the
DNS Rules list page.
OL-10410-01
Page 93

Chapter 3 Creating and Managing User Accounts
Creating and Managing Primary GSSM GUI User Accounts
Table 3-1 User Privilege Roles for Using the Primary GSSM GUI (continued)
User Role Functionality Accessibility
Operator (continued) • Resources tab—Access to
the Locations and Owners
navigation links to:
–
Activate or suspend all
answers associated with
a location
–
Activate or suspend all
answers associated with
answer groups held by
an owner.
Restricted from activating
and suspending all DNS
rules associated with an
owner.
• Monitoring tab—Access to
all navigation links and list
pages.
• Tools tab—Access to only
the Change Password
navigation link and detail
page.
• Traffic Mgmt tab—
Access to all navigation
links, list pages, and detail
pages.
OL-10410-01
Cisco Global Site Selector Administration Guide
3-7
Page 94

Chapter 3 Creating and Managing User Accounts
Creating and Managing Primary GSSM GUI User Accounts
Table 3-1 User Privilege Roles for Using the Primary GSSM GUI (continued)
User Role Functionality Accessibility
Observer The observer has read-only
privileges to monitor statistics.
Observers cannot do the
following:
• Create, modify, or delete any
configuration item.
• Perform any suspend or
activate functions
• View list pages or detail
pages (but observers can
view statistics)
The observer has the following
access privileges:
• DNS Rules Tab—
Restricted from access to the
DNS Rules tab.
• Resources tab—Restricted
from access to the Resources
tab.
• Monitoring tab—Access to
all navigation links and list
pages.
• Tools tab—Access to only
the Change Password
navigation link and detail
page.
• Traffic Mgmt tab—
Restricted from access to the
Traffic Mgmt tab.
3-8
To further control what an operator or observer can access in the primary GSSM
GUI, you can define and assign custom views to a user. A custom view limits the
data (configuration and statistics) visible on a primary GSSM GUI page using
configured answers, shared keepalives, locations, and owners. See the
and Modifying User Views for the Primary GSSM GUI” section for details.
Cisco Global Site Selector Administration Guide
“Creating
OL-10410-01
Page 95

Chapter 3 Creating and Managing User Accounts
Creating a GUI User Account
To create a GSSM GUI user account from the primary GSSM GUI, perform the
following steps:
1. Click the Tool s tab.
2. Click the User Administration navigation link. The Users list page appears
(see
Figure 3-1).
Figure 3-1 Users List Page
Creating and Managing Primary GSSM GUI User Accounts
3. Click the Create User icon. The Creating New User details page appears (see
Figure 3-2).
OL-10410-01
Cisco Global Site Selector Administration Guide
3-9
Page 96

Creating and Managing Primary GSSM GUI User Accounts
Figure 3-2 Creating New User Details Page
Chapter 3 Creating and Managing User Accounts
3-10
4. In the User Account area, enter the login name for the new account in the
Username field. Usernames can contain spaces.
5. In the Password field, enter the alphanumeric password for the new account.
6. In the Re-type Password field, reenter the password for the new account.
7. In the Role field, choose from the three user privilege levels to define what
the user has access to when using the primary GSSM GUI:
–
Administrator—Full configuration privileges and complete access to the
primary GSSM GUI.
–
Operator—Limited configuration privileges in the primary GSSM GUI,
but the operator can view list pages, view detail pages, and monitor
statistics.
–
Observer—No configuration privileges in the primary GSSM GUI, but
the observer can monitor statistics.
Cisco Global Site Selector Administration Guide
OL-10410-01
Page 97

Chapter 3 Creating and Managing User Accounts
You must assign a user to one of the three privilege levels. If you fail to assign
a privilege level, the GSS automatically assigns the observer role to a new
user.
Note Primary GSSM GUI privileges assigned to a user from the TACACS+
server override the user privilege level defined from the GSSM User
Administration details page.
See the “Privilege Levels for Using the Primary GSSM GUI” section for
information about the multiple levels of access that are available to a user
when using the primary GSSM GUI.
8. In the View drop-down list, choose View All or choose from one of the
previously created custom user views:
–
View All—Enables the user to see all configuration items and statistics
displayed in the primary GSSM GUI. This is the default selection when
you create a user.
Creating and Managing Primary GSSM GUI User Accounts
–
User View—For a user with an assigned operator or observer role, a user
view allows the administrator to limit the configuration data and statistics
available to the user when accessing the primary GSSM GUI.
Note Only an administrator can create a view. See the “Creating and
Modifying User Views for the Primary GSSM GUI” section for
details. An administrator may find it useful to set the view to a defined
User View to test the behavior of view while in the process of creating
it.
9. In the Personal Information area, enter the user’s first name in the First Name
field.
10. In the Last Name field, enter the last name of the user. The first and last names
appear next to the user’s login whenever that user logs in to the primary
GSSM.
11. (Optional) Fill in the rest of the user contact information:
–
Job Title—Position within the organization
–
Department—Business unit or group
–
Phone—Business telephone number
OL-10410-01
Cisco Global Site Selector Administration Guide
3-11
Page 98

Creating and Managing Primary GSSM GUI User Accounts
–
E-mail—E-mail address
–
Comments—Any important information or comments about the user
account
12. Click Submit to create your new user account and return to the User
Administration list page.
Modifying a GUI User Account
To modify an existing GSSM user account from the primary GSSM GUI, perform
the following steps:
1. Click the Tool s tab.
2. Click the User Administration navigation link. The Users list page appears
(see
Figure 3-1) listing existing user accounts.
Chapter 3 Creating and Managing User Accounts
3. Click the Modify User icon to the left of the user account that you want to
modify. The Modifying User details page appears (see
fields for modifying your GUI session settings.
4. Use the fields in the Modifying User details page to modify the details of the
user account.
5. Click Submit to save changes to the account and return to the Users list page.
Removing a GUI User Account
To remove an existing GSSM GUI user account from the primary GSSM GUI,
perform the following steps:
1. Click the Tool s tab.
2. Click the User Administration navigation link. The Users list page appears
(see
Figure 3-1) listing existing user accounts.
3. Click the Modify User icon to the left of the user account that you want to
remove. The Modifying User details page appears (see
displaying that user’s account information.
Figure 3-2) listing
Figure 3-2),
4. Click the Delete icon. The software prompts you to confirm your decision to
permanently remove the user. You cannot delete the “admin” account.
Cisco Global Site Selector Administration Guide
3-12
OL-10410-01
Page 99

Chapter 3 Creating and Managing User Accounts
Creating and Managing Primary GSSM GUI User Accounts
5. Click OK to remove the user account and return to the Users list page. The
user account is removed from the list page.
Changing the User Account GUI Password
You can change the password for the account that is used to log in to the primary
GSSM. Use the Change Password detail page of the primary GSSM GUI to
change the password. You must know the existing password for an account before
you can change it.
Note If you change the administration password that is used to log in to the primary
GSSM GUI and then either lose or forget the password, you can reset it back to
“default” by using the reset-gui-admin-password CLI command. See the
“Restoring or Changing the Administrator GUI Password” section for details.
To change your account password from the primary GSSM GUI, perform the
following steps:
1. Click the Tool s tab.
2. Click the Change Password navigation link. The Change Password details
page (see
Figure 3-3) appears displaying your account name in the Username
field.
OL-10410-01
Cisco Global Site Selector Administration Guide
3-13
Page 100

Creating and Managing Primary GSSM GUI User Accounts
Figure 3-3 GSSM Change Password Details Page
Chapter 3 Creating and Managing User Accounts
3-14
3. In the Old Password field, enter your existing GSSM login password.
4. In the New Password field, enter the string that you would like to use as the
new GSSM login password.
5. In the Re-type New Password field, enter the new password string a second
time. This action is used to verify that you have entered your password
correctly.
6. Click Submit to update your login password.
Cisco Global Site Selector Administration Guide
OL-10410-01
 Loading...