

Page 1

SQL Data Export for PS/PSS
Version 2.3.5
USER MANUAL
(M98232701-03-13B)
CIRCUTOR, SA
Page 2

SQL Data Export for PS/PSS
INDEX
1.- SQL DATA EXPORT SOFTWARE INSTALLATION ................................ 3
1.1.- ENABLE REMOTE CONNECTIONS OF THE SQL SERVER ........................... 14
1.2.- UNINSTALL SQL SERVER .................................................................... 16
2.- INTRODUCTION TO SQL DATA EXPORT ............................................ 17
2.1.- GRAPHIC INTERFACE ........................................................................... 17
3.- APPENDICES ......................................................................................... 24
3.1.- CHANGE THE LOCATION OF THE DATABASE ........................................... 24
3.2.- STRUCTURE OF THE DATABASE ............................................................ 27
2
Page 3
SQL Data Export for PS/PSS
1.- SQL Data Export software installation
The minimum necessary requirements for SQL Data Export to work
properly on your PC are:
Windows 2000 SP4. Windows 2003 Server SP1, Windows XP SP2,
Windows Vista or Windows 7.
PowerStudio/PowerStudio Scada version 3.0.1 or higher.
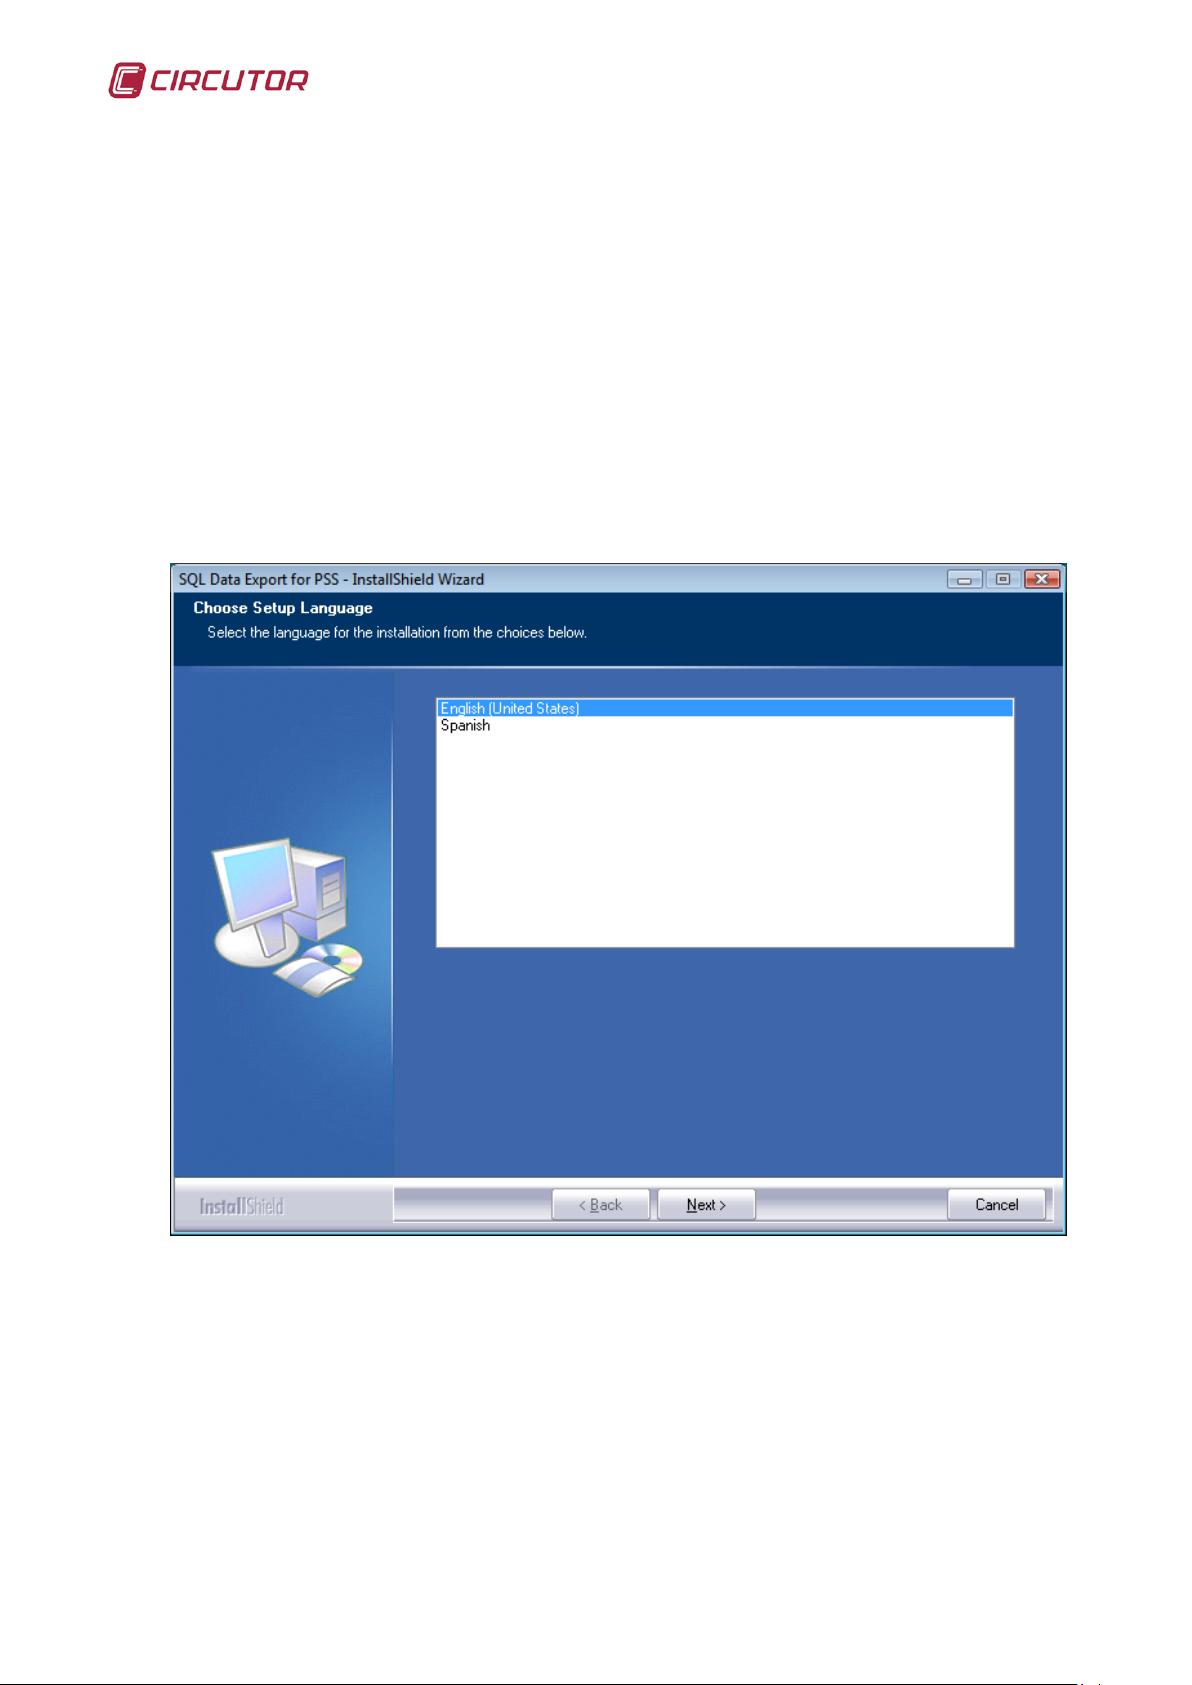
When the SQL Data Export installation starts a dialogue window will appear
to select the installation language.
After selection of the language when the “Next” button is pressed a
presentation screen appears.
Installation language
3
Page 4
SQL Data Export for PS/PSS
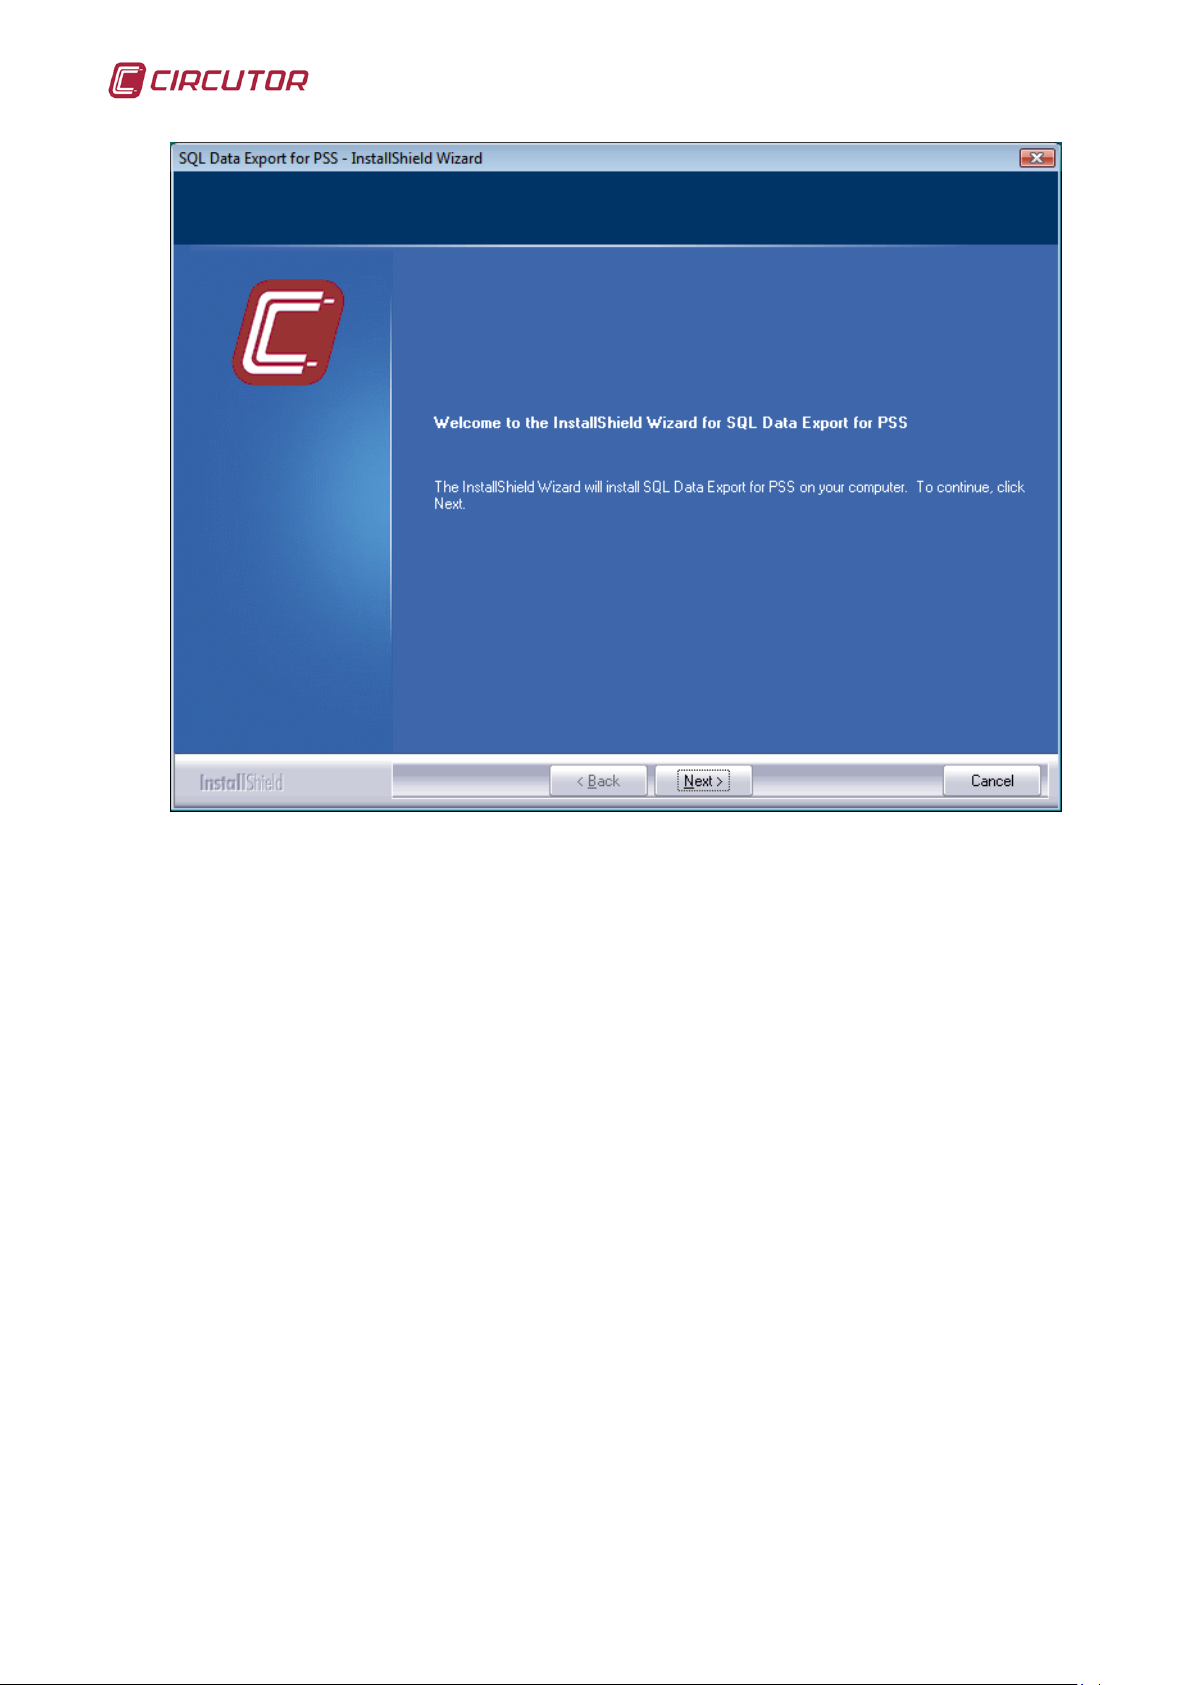
Welcome screen
After pressing the “Next” button the license screen is accessed where we
must accept its terms to continue.
4
Page 5
SQL Data Export for PS/PSS
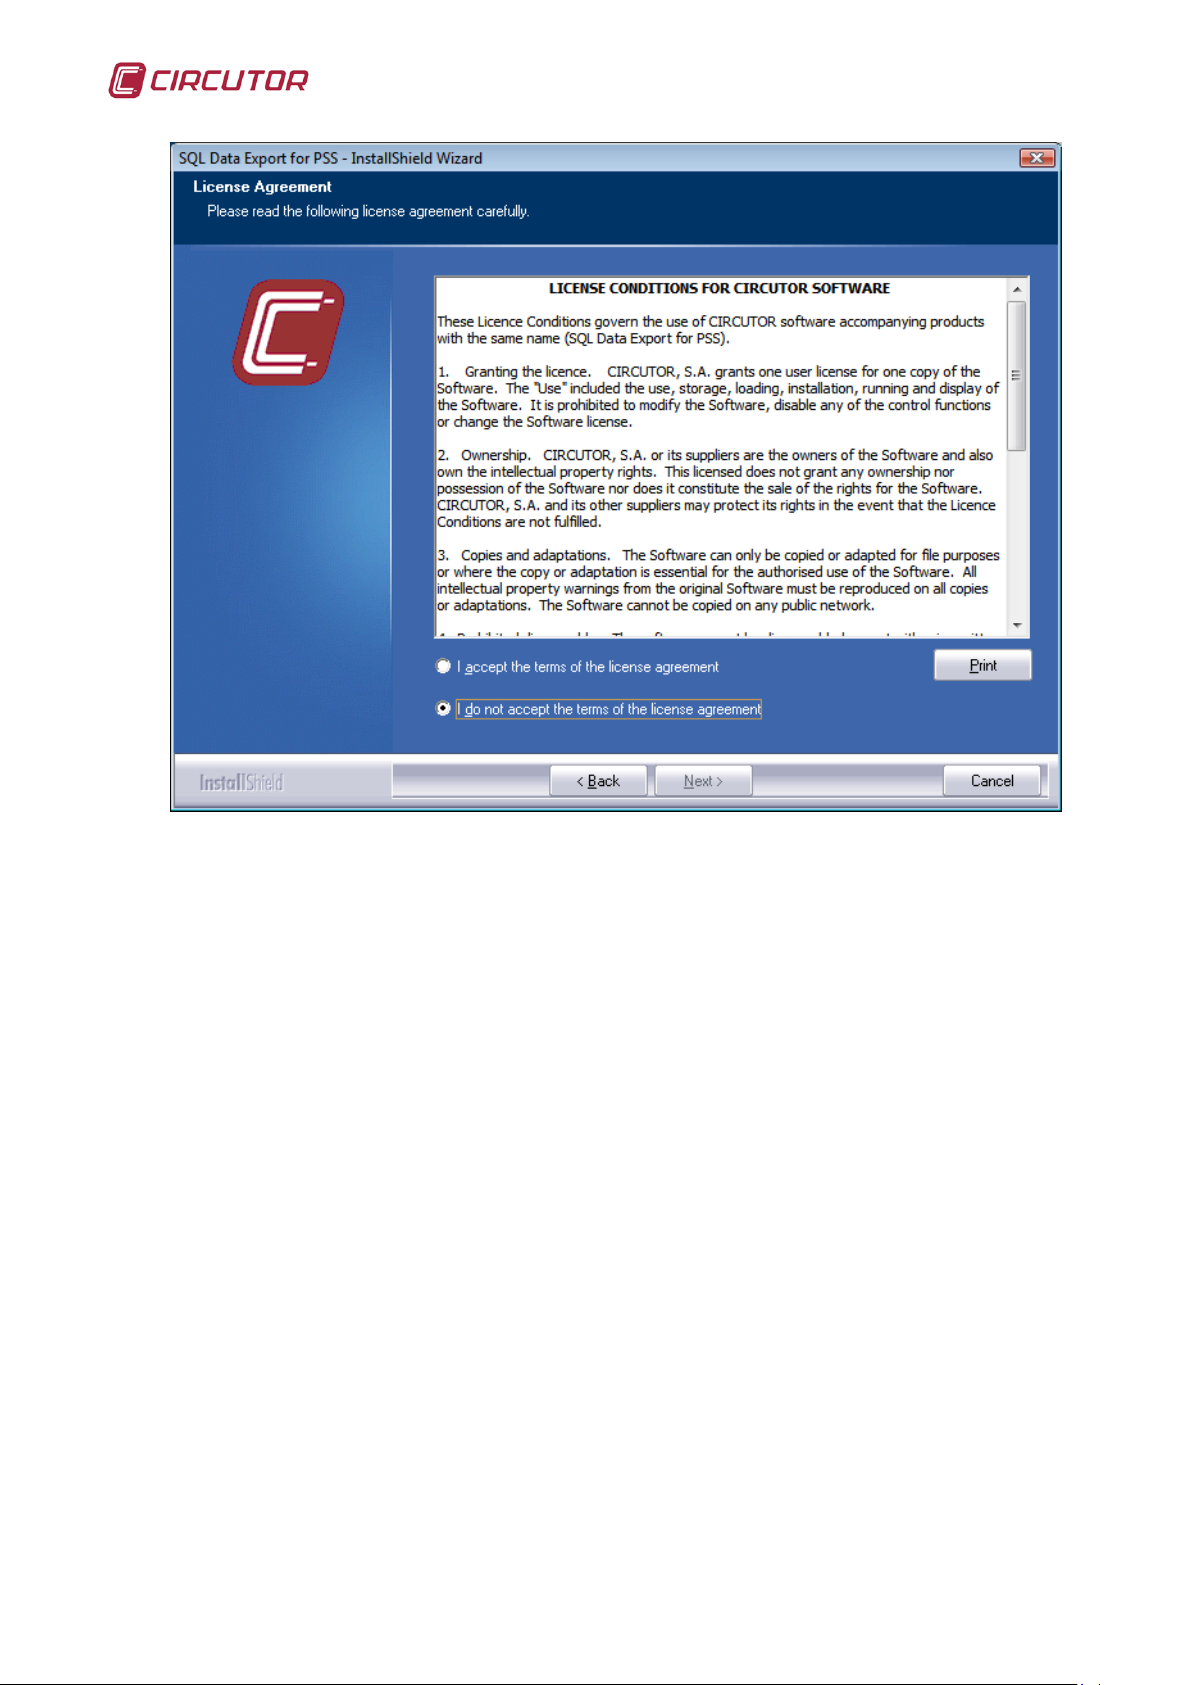
License terms
After completing the installation preparation process a dialogue will
appear where you will be asked for the application installation directory.
5
Page 6
SQL Data Export for PS/PSS
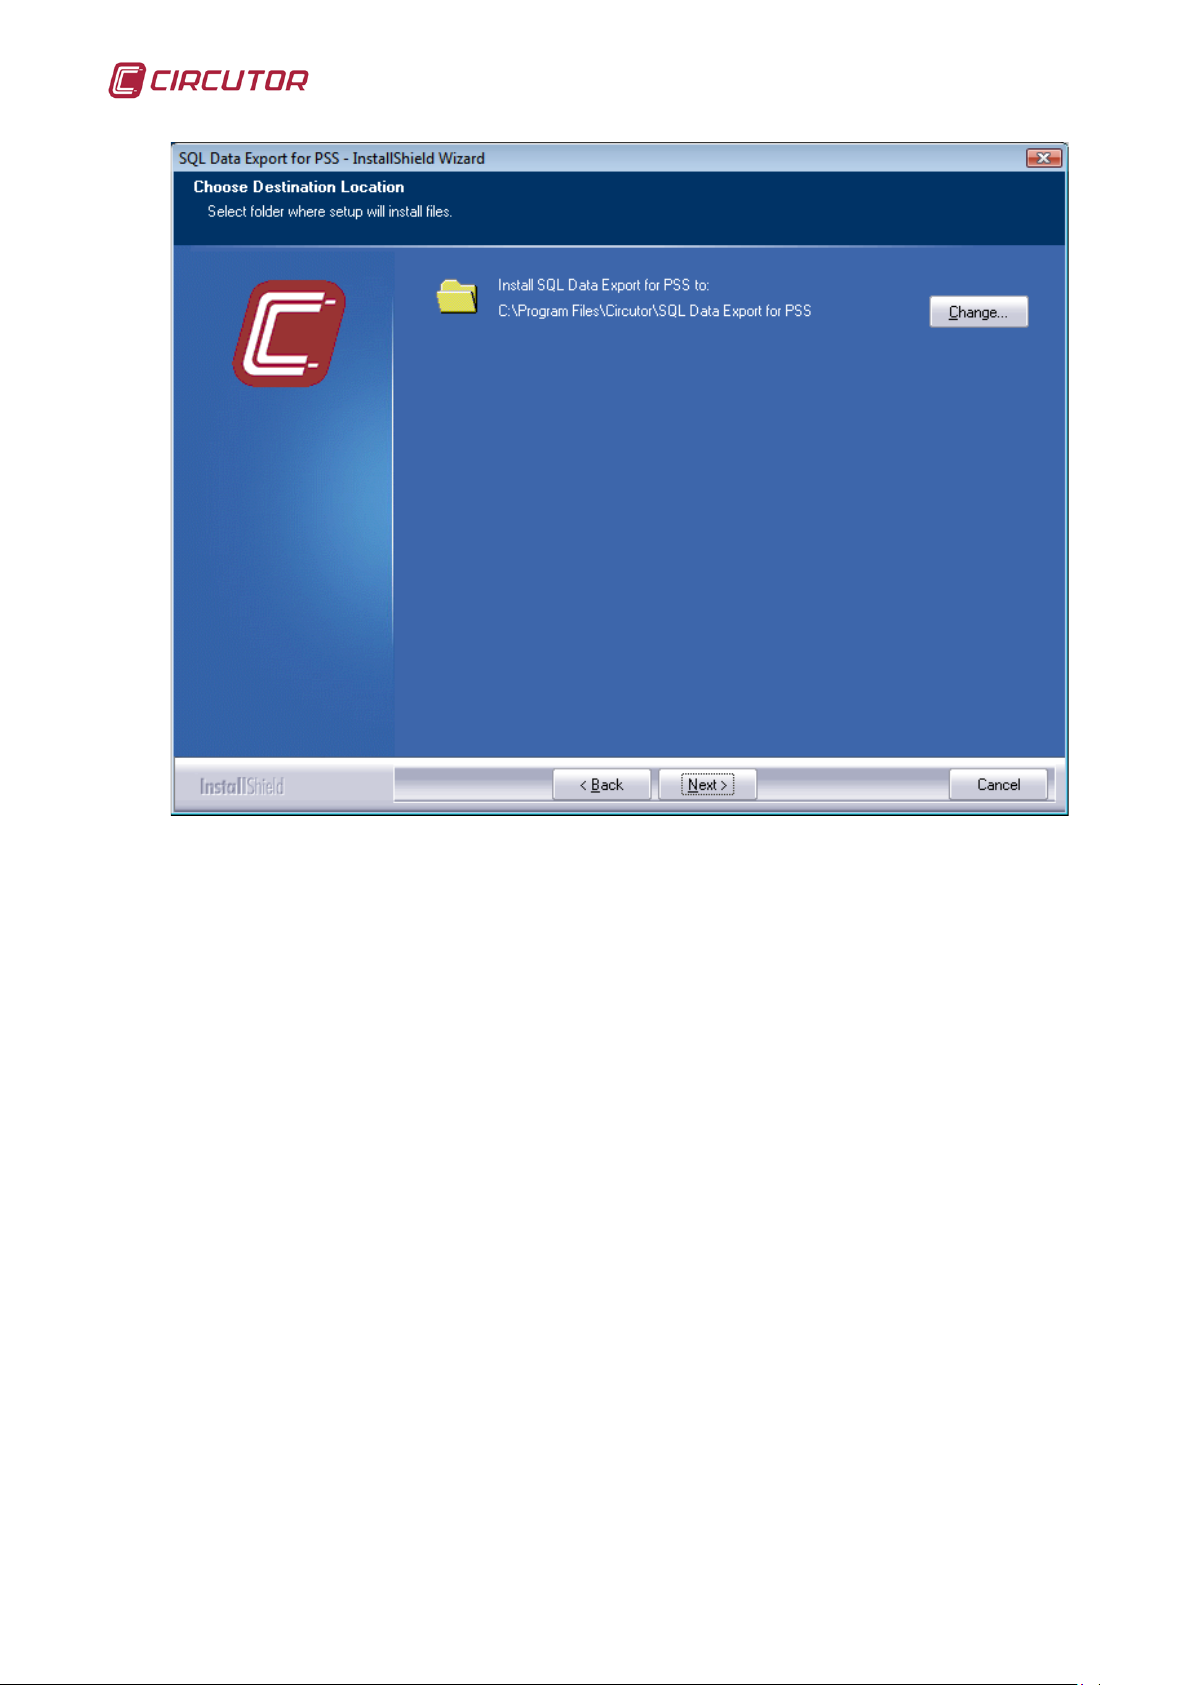
Selection dialogue for the installation folder
Here you may select the directory in which to install the application. As
you will see, the installation program proposes a destination directory for the
application, which you can change by pressing the “Next” button.
If you press this button, a dialogue box will appear where you may
choose the new application installation directory.
6
Page 7

SQL Data Export for PS/PSS
Selection dialogue for the new installation folder
Once the application destination directory has been entered you may
pass on to the next screen by pressing the “Next” button. Note that at any time
you may exit the installation by pressing the “Cancel” button on the screens that
provide it. If you choose this option a confirmation message as follows will
appear:
Confirmation message for quitting the installation
If you choose “No” the installation will continue from the point where it
was left off, otherwise you will quit the installation without saving anything.
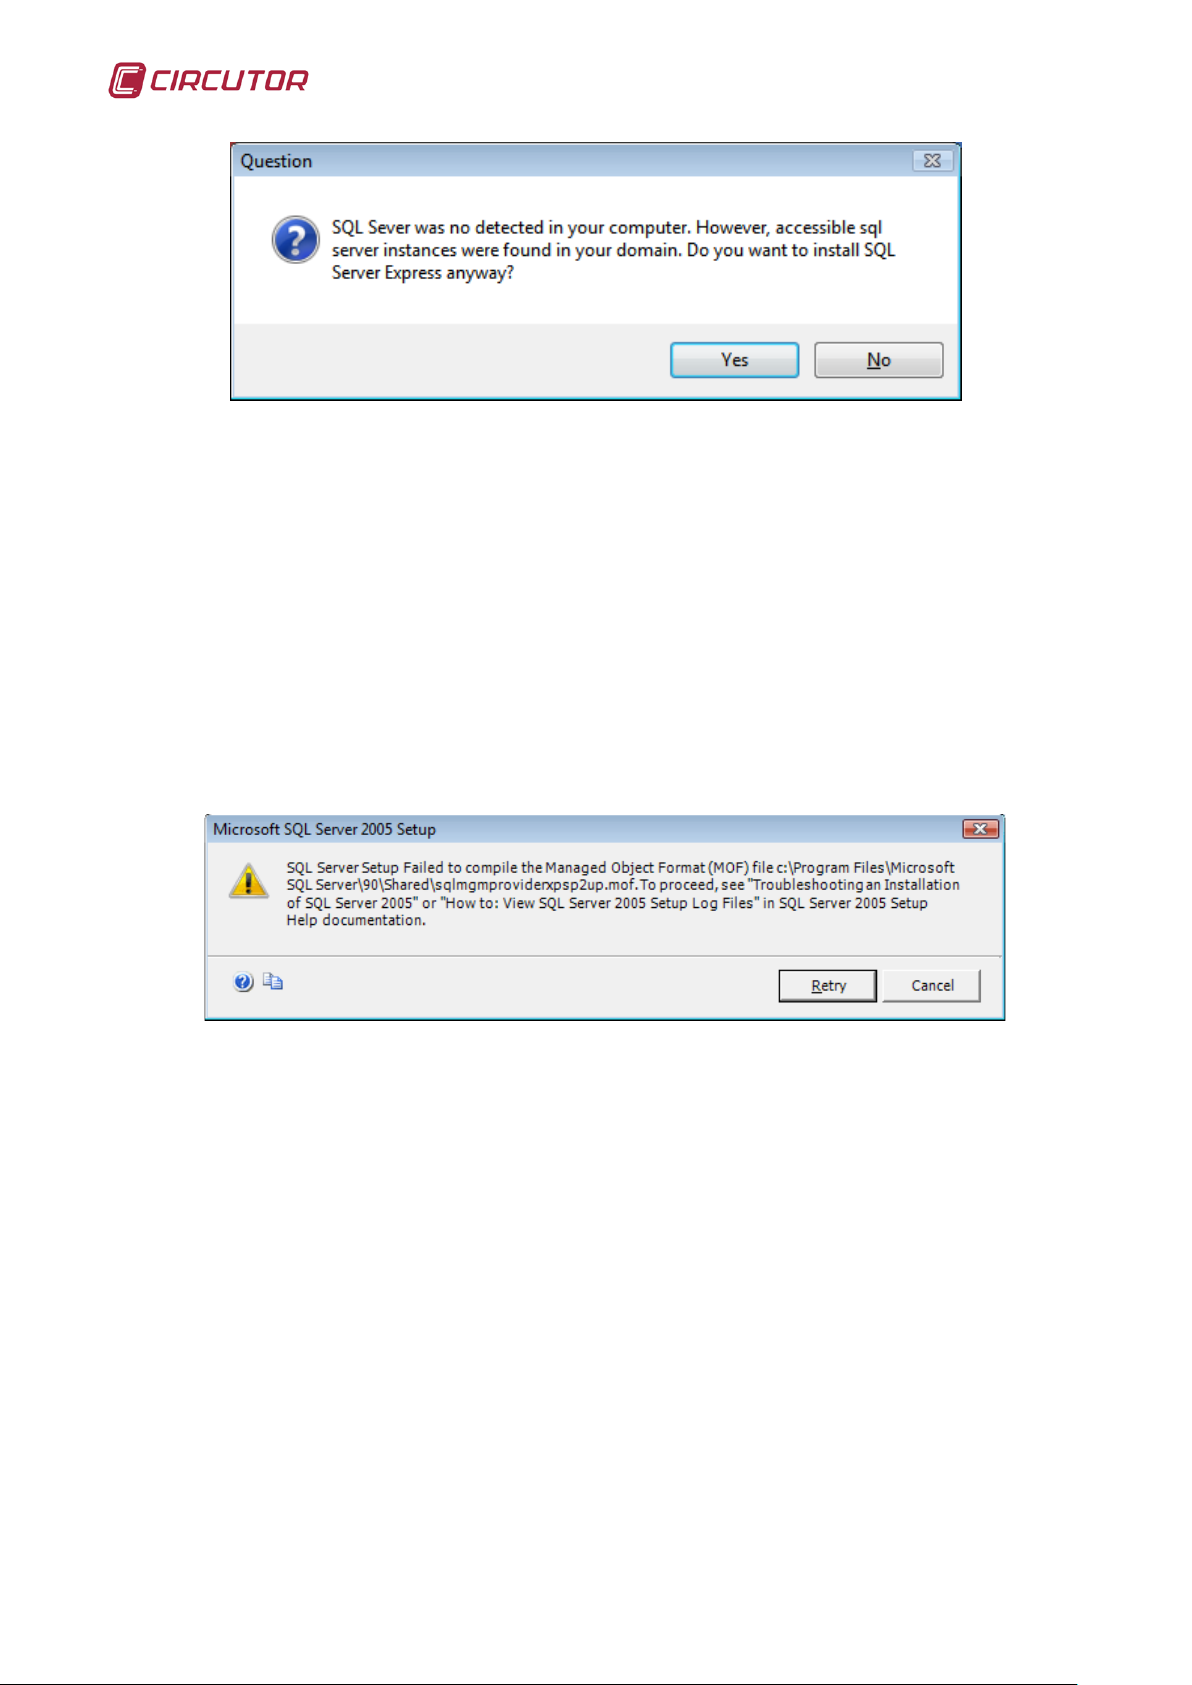
One of the main installation points is to establish the SQL Database
Server where you want to create the said database. We can use any server that
is already defined in our machine or on one of the machines of the local
network. In the event that you do not have a local server installed or you do not
wish to use any remote one on the local network, the application allows you to
install the free local server SQL Server Express 2005.
7
Page 8
SQL Data Export for PS/PSS
Please note that to be able to see and use servers installed on the other
machines in our network, we must have previously configured these to accept
remote connections. Point 1.1 explains in detail how to enable remote
connections in an SQL Server.
The format of the server names found will always be “machine\instanceserver”. If during the installation no SQL Server is detected, the wizard will allow
you to install the free SQL Server Express 2005 version.
If we are installing SQL Data Export on a Windows Vista or Windows XP
"operating system" it is possible that the SQL Server Express installation may
malfunction as these come with certain internal modules that are not properly
compiled. If this occurs we will see the following message:
To fix this problem, perform the following steps:
1. Open the command line as Administrator.
(StartProgramsAccessoriesSystem console, click the right
mouse button and the select option "Run as... Administrator").
2. Write “winmgmt /verifyrepositor” and press enter.
3. If it says that the repository is incoherent write “net stop winmgmt”
and press enter.
4. Next run: “winmgmt /salvagerepository”.
5. When it ends after 2 or 3 minutes, we will be able to install SQL
Server Express without any problem.
8
Page 9
SQL Data Export for PS/PSS
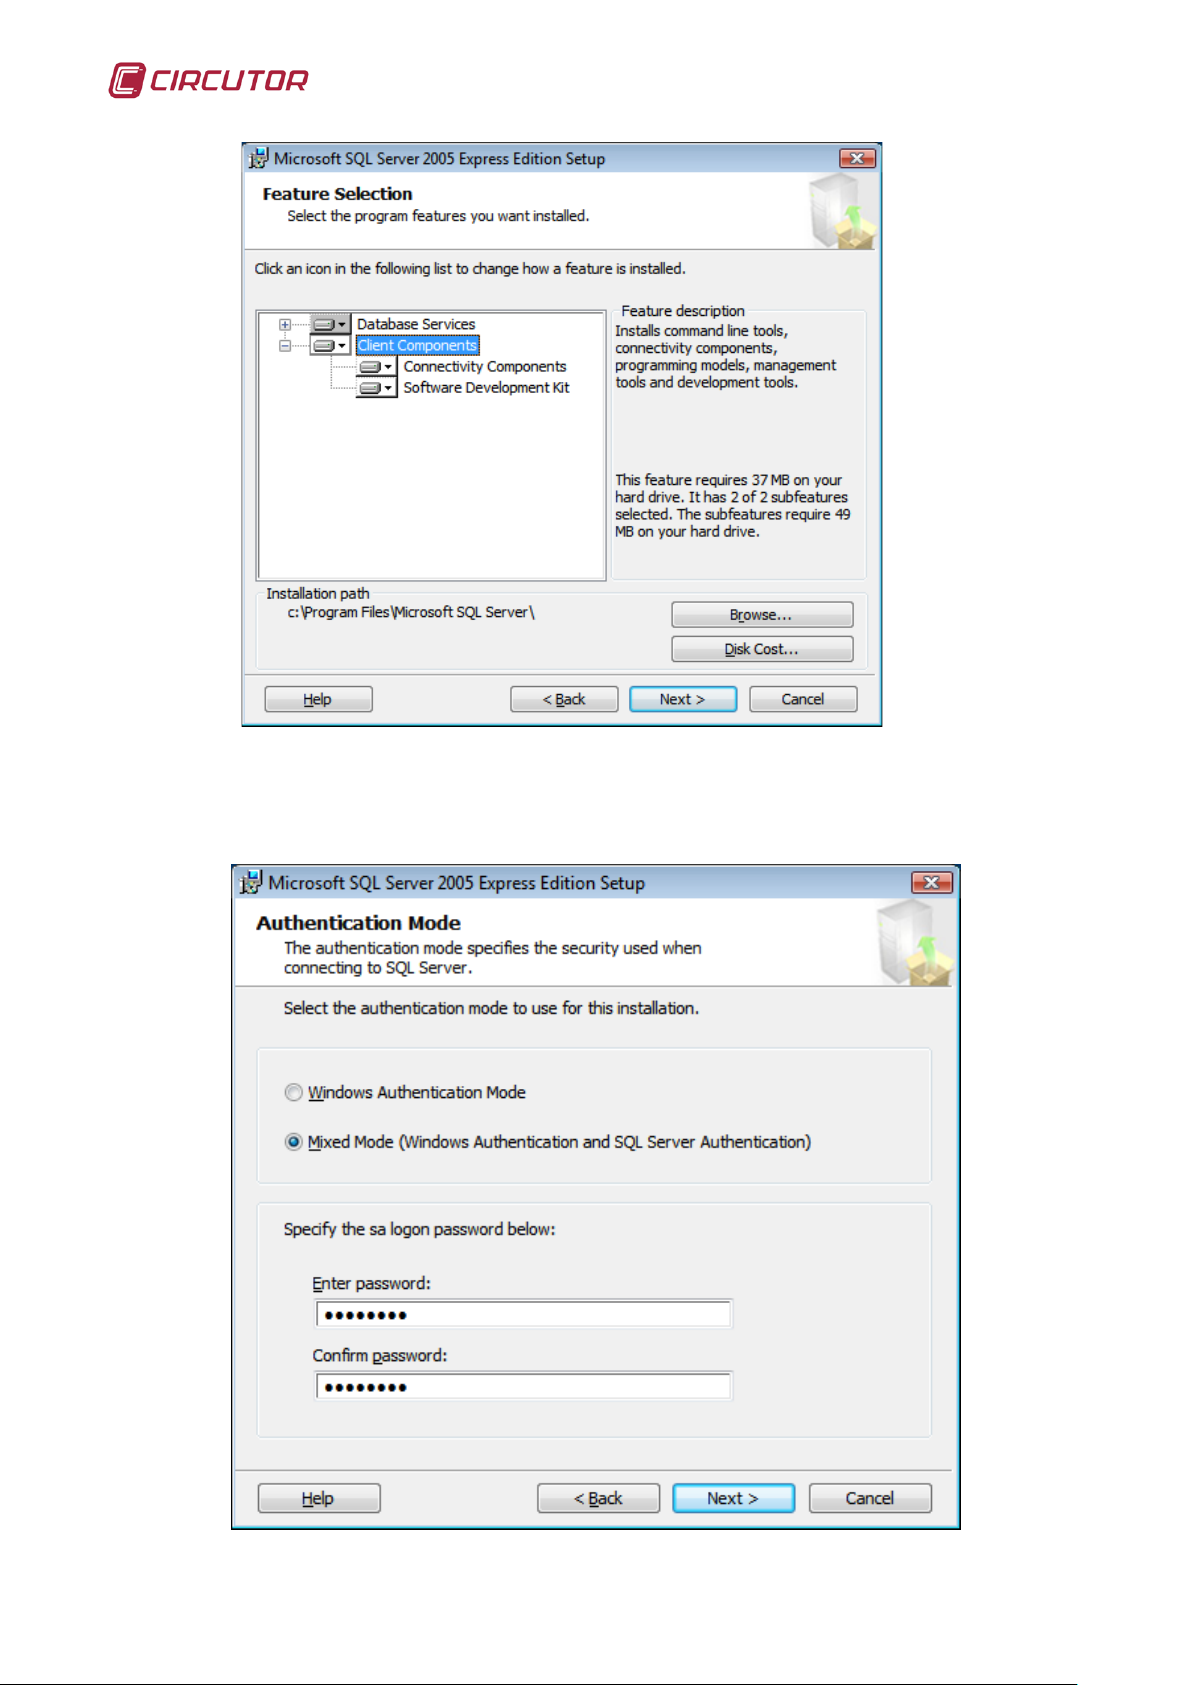
To configure SQL Server Express properly we must select the “Mixed
mode” option on the “Authentication mode” screen and set the password to
“SqlDE236”, to start the session for user sa:
9
Page 10

On the next “Configuration options” screen leave the "Enable user
instances” checkbox selected:
SQL Data Export for PS/PSS
It is most important to set these values properly for the application to
work correctly.
In the Windows Vista operating system it is recommended to select the
‘Add user to the SQL Server Administrator function’ option.
Once the installation process of the SQL Server has been completed, if
any copy of the SQL Data Export application database is found, we will be given
the option of adding it to the SQL Server.
10
Page 11

SQL Data Export for PS/PSS
Next, the selection screen for the SQL Server to be used will be
displayed, where we can obtain all the accessible servers with the Browse
button:
After all this process, file copying will finally start, which we will see from
the progress bar:
Selection of the SQL Server
11
Page 12

SQL Data Export for PS/PSS
Installation progress bar
As you can see the installation process can still be cancelled while the
files are being copied, although it is advised to wait until the installation has
been completed and if necessary proceed to uninstall it.
12
Page 13

SQL Data Export for PS/PSS
Finally, if everything has been completed correctly, the installation
process will finish, returning the operating system to its idle state, after which
you may run SQL Data Export from the start menu.
Note 1: It is possible that the installation program may require a reboot
for the changes to be effective. In this case, you will see a warning message
and it is recommended not to SQL Data Export before having rebooted.
Note 2: Depending on the configuration of your computer, it is possible
that the installation will need to access the Internet to update certain files, for
example to update the .NET Framework version. It is recommended that you
have an Internet connection enabled on your computer.
Note 3: If you have problems connecting to the server
(local)\SQLEXPRESS change the server name to ‘machine\SQLEXPRESS’
where machine is the name of your computer within the local area network. In
Windows 2000 operating systems it is possible that in the SQL server name
only (local) appears, in this case change the name to (local)\SQLEXPRESS.
After having rebooted your computer, SQL Data Export will be installed on
your computer and you can run it from the Start menu.
13
Page 14

SQL Data Export for PS/PSS
1.1.- Enable remote connections of the SQL Server
To connect to a database server installed on a machine other than the
one where we have installed the application, you will need to configure SQL
Server for it to accept the connection. Perform the following steps:
1. Enable remote connections in the SQL Server instance to which you
wish to connect from the remote machine.
- Click on “Start Programs Microsoft SQL Server 2005
Configuration tools SQL Server surface configuration”.
- In Surface configuration of SQL Server, select the surface
configuration option for services and connections.
- Expand the option “Database Engine Remote connections” and
select local and remote connections and the TCP/IP protocol and
channelling by name
- Click on service, click on Stop, wait until it stops and the click on Start
to restart the service.
-
14
Page 15

2. Activate the SQL Server browser service.
- Click on “Start Programs Microsoft SQL Server 2005
Configuration Tools SQL Server surface configuration”.
- In Surface configuration of SQL Server, select the surface
configuration option for services and connections.
- Expand the option SQL Server Browser and select automatic start
mode, apply the changes and click on Start.
SQL Data Export for PS/PSS
3. Configure the Windows firewall (this step is usually not necessary)
- Create an exception for SQL Server:
1. In Windows Firewall, click on the exceptions tab and then click on
Add program.
2. In the Add program window, click on Browse.
3. Locate the “…\MSSQL.X\MSSQL\Binn\sqlservr.exe” executable
program in the folder where MS SQL Server is installed, click
Open, then click OK.
4. Repeat steps 1 to 3 for each instance of SQL Server 2005 that
requires an exception.
- Create an exception for SQL Server Browser:
1. In Windows Firewall, click on the exceptions tab and then click on
Add program.
2. In the Add program window, click on Browse.
15
Page 16

SQL Data Export for PS/PSS
3. Locate the “…\90\Shared\sqlbrowser.exe” executable program in
the folder where MS SQL Server is installed, click Open, then click
OK.
1.2.- Uninstall SQL Server
If for any reason it is necessary to uninstall the local SQL Server Express
2005, follow these steps:
1. From the Windows control panel in Add and Remove Programs,
uninstall “Microsoft Sql Server 2005”. Select the option “Remove
components of the SQL Server 2005 instance” and “SQLEXPRESS:
Database engine”.
2. From the Windows control panel in Add and Remove Programs,
uninstall “Microsoft Sql Server Native Client”.
16
Page 17

SQL Data Export for PS/PSS
2.- Introduction to SQL Data Export
SQL Data Export is an automatic system for exporting the variables of
the devices stored in PSS and facilitates:
• The downloading of variables for the devices added to PSS
Select the device from which you would like to download the variables
and the variables that will be downloaded.
The programming of downloads every so often.
The application includes two parts similar to PSS:
Graphic interface: Allows the application to be configured by adding
PSS engines along with their devices and download schedules.
Service: Allows the variables for the configured devices to be
downloaded from the graphic interface to the database.
Important note: You must run the graphic interface as an administrator in the
operating systems that need it like Windows Vista, Windows 7 or higher to have
the required privileges for proper operation.
2.1.- Graphic interface
Once the presentation screen appears you can click with the left mouse
button or wait a few seconds. If the application detects that the hasp key with
the SQL Data Export code is not connected, the application will shut down.
Before closing, the hasp key will be checked up to three times to obtain the
option to connect the key. If the key is connected, the following screen will
appear and the program will be ready for use.
Main screen
From this screen the following actions can be performed:
17
Page 18

SQL Data Export for PS/PSS
Update: This button allows the statuses for each engine added to the list
to be refreshed. There are three statuses which are indicated by an icon:
• : active engine, the application is waiting for the date of the
next download.
• : engine not connected, the application was unable to connect
to the PSS engine because it is stopped or for some other reason.
• : downloading application, the application is downloading the
PSS engine data to the database.
Download: This button forces the immediate downloading of all the
active engines in the list.
Configure: This button allows you to add, edit and delete the PSS
engines in the application.
Exit: This button allows you to close the graphic interface without
stopping the service.
Open log: This button opens the “log_yyyyMM.txt” file which is located in
“C:\Documents and Settings\All Users\Program data\Circutor\SQL Data Export\”
or in a similar path depending on the operating system. A log of the actions and
incidents detected by the application are saved in this file.
Moreover, a descriptive message if the configuration has failed is
displayed in the “Message” field.
Further down, in the list of PSS engines added, you can see the following
columns:
IP:Port: address at which the PSS engine is located.
Next download: next time data will be downloaded from this engine.
Start date: Date when the data will start to be downloaded from the PSS
search engine.
Message: explanatory message on this engine, for example, that the
next download time has not been defined.
Once the components of the main screen have been explained, the first
step will be to configure the application by adding the IP address and the port
for the PSS engines so that the application can connect to these engines.
The following dialogue box will appear when you click "Configure":
18
Page 19

SQL Data Export for PS/PSS
From this dialogue box you can add, modify and delete PSS engines.
To edit an engine you must select it and click on the "Modify" button or
double click on the selected engine.
To delete an engine, you must select it and click on the "Delete" button or
press the "Delete" key on the keyboard.
The following dialogue box will appear when you click "Add" or press the
"Insert" key on the keyboard:
19
Page 20

SQL Data Export for PS/PSS
In this dialogue box, we can add the fields for the new engine such as the
IP address and port. If the PSS engine has authentication activated, the
username and password fields must be filled in for a valid user in this engine.
If you press the "Advanced" button, we can select from which devices the
data will be downloaded to the database and the frequency at which these data
will be downloaded.
Initially, in the list on the left, we will have all the devices for the PSS
engine. To program the download of all the variables of a device, it must be
selected and sent to the list of devices to download by double-clicking with the
mouse or by using the button. To not download the variables of a device,
simply move it over to the list on the left. More than one device can be selected
with the mouse, so it is sent together to a different list.
Assign a start date, i.e., when the data will start to be downloaded. This
date can not be edited later on and will be common for all devices that use this
search engine.
20
Page 21

SQL Data Export for PS/PSS
The variables downloaded for a specific device can be configured by
selecting a device from the "Download" list.
Variable Configuration
By default, the first time a device is selected to download, application will
also add all its variables to download.
Important Note: Click on OK to temporarily store the setup after the
variables that will be downloaded have been configured on the Variable setup
screen (the setup can be cancelled or modified later on). Return to the main
screen by clicking on OK on each screen. The setup will then be permanently
saved until a new setup is configured. The changes on this screen will not be
saved if you return to the variable configuration screen of this device directly
before returning to the main screen.
Note 1: The values already downloaded in the database will not be
deleted never even though the device is moved to the no-download list or the
device is deleted from the engine.
Note 2: Only the devices and variables of the PSS engine to which the
application is connected will be displayed in the lists.
21
Page 22

SQL Data Export for PS/PSS
If there are engines in the list we can update their status or force the
immediate download of a specific engine by selecting it and right clicking with
the mouse.
When the date of the next download arrives, the application will perform
the download and the download icon will be shown with its text until the
download has been completed, at which point the application will return to the
pending status, awaiting the next download and displaying the next date. This is
the case with each engine in the list.
Note: The downloads will only be performed if the user in not in the setup
screens. In the event that any setup screen is displayed, the application will not
perform any downloads until you return to the main screen or exit the graphic
interface.
22
Page 23

SQL Data Export for PS/PSS
Note 1: If the application has been unable to connect to the engine or the
download dates have not been configured, the application will not perform any
download from this engine.
Important note: You must go to the configuration dialogue box if new
devices have been added which are linked to other devices, e.g. a CVM96
linked to devices such as an R440, CIREOS or EDS, so that the variables for
the CVM96 can be added to the table for the R440, CIREOS or EDS and the
values of the CVM96 variables can be downloaded.
If the upper left-hand button of the application window is pressed, the
software will be minimised to the object dock.
This icon has 3 statuses:
• : all the engines are active, the application is awaiting the date
of the next download.
• : a engine is not communicating, the application has not been
able to connect to this engine but will download the active
engines.
• : application downloading, the application is downloading the
data from a engine to the database.
If you double click with the left button on the icon you will return to the
main screen for the graphic interface.
23
Page 24

SQL Data Export for PS/PSS
use master
3.- Appendices
3.1.- Change the location of the database
Do the following steps to change the location of the database:
1. Uninstall "SQL Data Export for PSS".
2. Sign in "SQL Server Management Studio".
3. Make a new query:
4. Run the following script:
go
sp_detach_db 'SQLDataExportSQL'
go
24
Page 25

5. Refresh
SQL Data Export for PS/PSS
25
Page 26

SQL Data Export for PS/PSS
use master
6. Move the files "SQLDataExportSQL.mdf" and
"SQLDataExportSQL_log.LDF" to destination.
7. Make a new query:
8. Run the following script with new path where you have located the
database, for example D:\.
go
sp_attach_db 'SQLDataExportSQL','D:\SQLDataExportSQL.mdf','D:\SQLDataExportSQL_log.LDF'
go
9. Refresh
10. Install "SQL Data Export for PSS".
26
Page 27

SQL Data Export for PS/PSS
3.2.- Structure of the database
The database is basically comprised of three types of tables:
• Devices table. A single table where we will store the information
on the devices
• Variables table. Single table where we will store the information
on the different variables contained in the devices
• Values table. There is a values table for each of the devices from
which data are downloaded. In addition, a device may have more
than one values table, precisely, it will have a values table for
each variable type (STD, WATT, SUC, CLW,…) the device has.
Devices table:
• Table name: <IP>:<PORT>_Devices (e.g. 127.0.0.1:80_Devices)
• Fields:
o id: Single device identifier. Main key field of the table
o name: Name of the device.
o description: Brief description of the device.
o class: Device type.
o download: Y/N type filed to indicate whether this device must
be downloaded or not. By using this field it will be possible for
the client to temporarily disable the downloading of values from
a device, without losing the data that has already been
downloaded.
o obsolete: Y/N type field, will only be Y (true) when the device
is removed from the PSS engine, thus the data already
downloaded will be retained for future use
Variables table:
• Table name: <IP>:<PORT>_Variables (e.g.
127.0.0.1:80_Variables)
• Fields:
o idDevice: Identifier of the device to which the variable belongs,
will correspond to the id field of the devices table. Main key
field of the table
o id: Identifier of the variable, for example VI1. Main key field of
the table
o description: Brief description of the variable.
o type: Variable type. Using this field one can differentiate which
variables go in each of the different devices values tables.
o units: Units in which the value of the variables are expressed.
o format: Format of the variable (integer, double, date, …).
Values table:
There is a values table for each of the variable types that a device
contains.
• Table name: <IP>:<PORT>_<idDevice>.<type> (e.g. 127.0.0.1:80_
F91FBB31-8587-4253-AC9E-93D354112B57.STD)
27
Page 28

SQL Data Export for PS/PSS
<IP>:<PORT>_Devices
PK
id
name
class
description
download
obsolete
<IP>:<PORT>_<idDevice>.<type>
PK
dateTime
dateTimeLocal
VI1
VI2
…
<IP>:<PORT>_Variables
PK, FK1
idDevice
PK
id description
type
units
format
For the table name the device id will be used (corresponding to the
id field of the device table) and the variables type that the file
contains (corresponding to the type field of the variables table).
By using the device id field instead of the name, treatment will be
facilitated when a user changes the device name, as the id field is
unique and does not change once created.
• Fields. The fields of the table will depend on the type of variables that
they contain. For example, for an STD type, the fields will be:
o dateTime: Date and time of the record in CUT. Main key field of
the table
o dateTimeLocal: Date and time at local time of the PC where the
application is installed.
o idVariable1: Identifier of the first variable stored, corresponding to
the id field in the variables table
o …
o idVariableN: A field will be created for each of the STD type
variables that the device contains
28
 Loading...