

Page 1

1
RS31
BHT-1600
Mobile Computer
(Android™ 6.0, Marshmallow)
Version 1.02
;YKX3GT[GR
Page 2

The software contains proprietary information of its owner; it is provided under a license
agreement containing restrictions on use and disclosure and is also protected by copyright
law. Reverse engineering of the software is prohibited.
Due to continued product development, this information may change without notice. The
information and intellectual property contained herein is confidential between the owner
and the client and remains the exclusive property of the owner. If having any problems in
the documentation, please report them to us in writing. The owner does not warrant that
this document is error-free.
No part of this publication may be reproduced, stored in a retrieval system, or transmitted
in any form or by any means, electronic, mechanical, photocopying, recording or otherwise
without the prior written permission of the owner.
For product consultancy and technical support, please contact the local sales
representative. Also, visit our website for more information.
All brand, logo, product and service, and trademark names are the property of their
registered owners.
Google, Google Play, Android and other marks are trademarks of Google Inc.
The editorial use of these names is for identification as well as to the benefit of the owners,
with no intention of infringement.
Page 3

IMPORTANT NOTICES
FOR USA
FCC ID : Q3N-MR00002
This equipment has been tested and found to comply with the limits for a Class B digital
device, pursuant to Part 15 of the FCC Rules. These limits are designed to provide
reasonable protection against harmful interference in a residential installation. This
equipment generates, uses and can radiate radio frequency energy and, if not installed and
used in accordance with the instructions, may cause harmful interference to radio
communication. However, there is no guarantee that interference will not occur in a
particular installation. If this equipment does cause harmful interference to radio or
television reception, which can be determined by turning the equipment off and on, the user
is encouraged to try to correct the interference by one or more of the following measures:
Reorient or relocate the receiving antenna.
Increase the separation between the equipment and re
ceiver.
Connect the equipment into an outlet on a circuit different from that to which
the receiver is connected.
Consult the dealer or an experienced radio/TV techni
This device complies with Part 15 of the FCC Rules. Operation is subject to the following
two conditions: (1) This device may not cause harmful interference, and (2) this device
must accept any interference received, including interference that may cause undesired
operation.
FCC Caution:
Any changes or modifications not expressly approved by the party responsible for
compliance could void the user's authority to operate this equipment.
This transmitter must not be co-located or operating
antenna or transmitter.
Find the certificate information from :
in conjunction with any other
cian for help.
Setup
Æ
About Phone Æ Certificate
Tested to Comply
with FCC Standards
FOR HOME OR OFFICE USE
Page 4

FOR HAC AND ACOUSTIC INFORMATION
This phone has been tested and rated for use with hearing aids for some of the wireless
technologies that it uses. However, there may be some newer wireless technologies used in
this phone that have not been tested yet for use with hearing aids. It is important to try the
different features of this phone thoroughly and in different locations, using your hearing aid
or cochlear implant, to determine if you hear any interfering noise. Consult your service
provider or the manufacturer of this phone for information on hearing aid compatibility. If
you have questions about return or exchange policies, consult your service
To determine the compatibility of a WD and a particular hearing aid, simply add the
numerical part of the hearing aid category (e.g. M2/T2=2) with the numerical part of the WD
emission rating (e.g., M3=3) to arrive at the system classification for this particular
combination of WD and hearing aid. A sum of 5 would indicate that the WD and hearing aid
would provide normal use, and a sum of 6 or greater would indicate that the WD and hearing
aid would provide excellent performance. A category sum of less than 4 would likely result in
a performance that is judged unacceptable by the hearing aid user.
WHAT IS HEARING AID COMPATIBILITY?
The Federal Communications Commission has implemented rules and a rating system
designed to enable people who wear hearing aids to more effectively use these wireless
telecommunications devices. The standard for compatibility of digital wireless phones with
hearing aids is set forth in American National Standard Institute (ANSI) standard C63.19.
There are two sets of ANSI standards with ratings from one to four (four being the best rating):
an “M” rating for reduced interference making it easier to hear conversations on the phone
when using the hearing aid microphone, and a “T” rating that enables the phone to be used
with hearing aids operating in the telecoil mode thus reducing unwanted background noise.
HOW WILL I KNOW WHICH WIRELESS PHONES ARE HEARING AID COMPATIBLE?
The Hearing Aid Compatibility rating is displayed on the wireless phone box.
A phone is considered Hearing Aid Compatible for acoustic coupling (microphone mode) if it
has an “M3” or “M4” rating. A digital wireless phone is considered Hearing Aid Compatible for
inductive coupling (telecoil mode) if it has a “T3” or “T4” rating.
The tested M-Rating and T-Rating for this device (FCC ID: Q3N-MR00002) are M4 and T4.
HOW WILL I KNOW IF MY HEARING AID WILL WORK WITH A PARTICULAR DIGITAL WIRELESS
PHONE?
You’ll want to try a number of wireless phones so that you can decide which works the best
with your hearing aids. You may also want to talk with your hearing aid professional about
the extent to which your hearing aids are immune to interference, if they have wireless
phone shielding, and whether your hearing aid has a HAC rating.
Warning statement:
A pleine puissance, l’écoute prolongée du baladeur p
eut endommager
l’oreille de l’utilisateur.
To prevent possible hearing damage, do not listen at high volume levels
for long periods.
Page 5

FOR CANADA
This digital apparatus does not exceed the Class B limits for radio noise emissions from digital
apparatus as set out in the interference-causing equipment standard entitled "Digital Apparatus,"
ICES-003 of Industry Canada.
Cet appareil numerique respecte les limites de bruits radioelectriques applicables aux appareils
numeriques de Classe B prescrites dans la norme sur le material brouilleur: "Appareils Numeriques,"
NMB-003 edictee par l'Industrie.
IC : 5121A-MR00002
This device complies with Industry Canada’s licence-
exempt RSSs. Operation is subject to the
following two conditions:
(1) This device may not cause interference; and
(2) This device must accept any interference, including interference that may cause undesired
operation of the device.
Le présent appareil est conforme aux CNR d’Industrie Canada applicables aux appareils radio exempts
de licence. L’exploitation est autorisée aux deux conditions suivantes :
(1) l’appareil ne doit pas produire de brouillage;
(2) l’utilisateur de l’appareil doit accepter tout brouillage radioélectrique subi, même si le brouillage est
susceptible d’en compromettre le fonctionnement.
The device meets the exemption from the routine evaluation limits in section 2.5 of RSS 102 and
compliance with RSS-102 RF exposure, users can obtain Canadian information on RF exposure and
compliance.
Le dispositif rencontre l'exemption des limites courantes d'évaluation dans la section 2.5 de RSS 102 et
la conformité à l'exposition de RSS-102 rf, utilisateurs peut obtenir l'information canadienne sur
l'exposition et la conformité de rf.
Find the certificate information from :
S
etupÆ About Phone Æ Certificate
Page 6

Caution :
(i) the device for operation in the band 5150-5250 MHz is only for indoor use to
reduce the potential for harmful interference to co-channel mobile satellite systems;
(ii) the maximum antenna gain permitted for devices in the bands 5250-5350 MHz
and 5470-5725 MHz shall be such that the equipment still complies with the e.i.r.p.
limit;
(iii) the maximum antenna gain permitted for devices in the band 5725-5850 MHz
shall be such that the equipment still complies with the e.i.r.p. limits specified for
point-to-point and non-point-to-point operation as appropriate; and
(iv) the worst-case tilt angle(s) necessary to remain compliant with the e.i.r.p. elevation
mask requirement set forth in Section 6.2.2(3) shall be clearly indicated.
(v) Users should also be advised that high-power radars are allocated as primary users
(i.e. priority users) of the bands 5250-5350 MHz and 5650-5850 MHz and that these
radars could cause interference and/or damage to LE-LAN devices.
Avertissement:
Le guide d’utilisation des dispositifs pour réseaux locaux doit inclure des instructions
précises sur les restrictions susmentionnées, notamment :
(i) les dispositifs fonctionnant dans la bande 5150-5250 MHz sont réservés
uniquement pour une utilisation à l’intérieur afin de réduire les risques de brouillage
préjudiciable aux systèmes de satellites mobiles utilisant les mêmes canaux;
le gain maximal d'antenne permis pour les dispositifs utilisant les bandes de 5250 à 5
(ii)
350 MHz et de 5470 à 5725 MHz doit être conforme à la limite de la p.i.r.e;
(iii) le gain maximal d'antenne permis (pour les dispositifs utilisant la bande de 5 725 à 5
850 MHz) doit être conforme à la limite de la p.i.r.e. spécifiée pour l'exploitation point à
point et l’exploitation non point à point, selon le cas;
(iv) les pires angles d’inclinaison nécessaires pour rester conforme à l’exigence de la
p.i.r.e. applicable au masque d’élévation, et énoncée à la section 6.2.2 3), doivent être
clairement indiqués.
(v) De plus, les utilisateurs devraient aussi être avisés que les utilisateurs de radars de
haute puissance sont désignés utilisateurs principaux (c.-à-d., qu’ils ont la priorité)
Page 7

pour les bandes 5250-5350 MHz et 5650-5850 MHz et que ces radars pourraient
causer du brouillage et/ou des dommages aux dispositifs LAN-EL.
Page 8

FOR PRODUCT WITH LASER
This laser component emits FDA / IEC Class 2 laser light at
the exit port. Do NOT STARE INTO BEAM DIRECTLY.
Do not aim the beam at the eyes.
Any adjustments or performance excluding those specified may
result in hazardous laser light exposure.
ENVIRONMENT
Operate the handy terminal at ambient temperatures from -20 °C to 50 °C
and with humidity range from 10% to 90%.
Store the device at ambient temperatures from -30 °C to 70 °C and with
humidity range from 5% to 95%.
Charge the device at ambient temperatures from 0°C to 35°C.
This device is built with a dust-proof and splash-proof structure that
conforms to protection class IP67.
SPECIFIC ABSORPTION RATE (SAR) INFORMATION
The product complies with the FCC / Canada portable RF exposure limit set forth for an
uncontrolled environment and are safe for intended operation as described in this manual.
The further RF exposure reduction can be achieved if the products can be kept as far as
possible from the user body or set the device to lower output power if such function is
available.
For body-worn operating conditions please use belt-clips, holsters, and/or accessories
no metallic component in the assembly and must provide at least 1cm separation between the device
and the user's body.
that have
A minimum separation distance of 0.5 cm must be maintained between the user’s body and the
device, including the antenna during body-worn operation to comply with the RF exposure
requirements in Europe.
To compliance with RF Exposure requirements in Europe, third-party belt-clips, holsters or similar
accessories used by this device should not contain any metallic components. The use of accessories
that do not satisfy these requirements may not comply with RF exposure requirements, and should be
avoided.
CE SAR Value (Standard limit is 2 W/Kg)
EU (10g): Max. 1.32 W/Kg
SAFETY PRECAUTIONS
RISK OF EXPLOSION IF BATTERY IS REPLACED BY AN INCORRECT TYPE.
DISPOSE OF USED BATTERIES ACCORDING TO THE INSTRUCTIONS.
For people’s safety
Page 9

Do not listen at high volume levels for long periods to prevent possible
hearing damage.
Do not operate this device while walking, cycling or car driving.
For the equipment
Do not use any batteries or charging devices which are not originally sold
Do not replace the battery with an incorrect type, to avoid the risk of heat
generation, fire, or explosion.
Do not disassemble, incinerate or short circuit the battery.
Do not touch the contact pins of the battery pack.
Do not expose the handy terminal or battery to any f
lammable sources.
Do not expose the handy terminal to extreme temperatures or soak it in
water.
Do not use any pointed or sharp objects against the screen surface.
Do not use the styluses which are not supplied, to prevent possible scratches
to the touch screen.
Water residue on the touch screen may cause abnormal behaviors or the fall
of its sensitivity levels.
On the surface of the terminal and the barcode reading window, the fog or
water drops caused by low temperatures may influence barcode reading.
Do not use bleaches or cleaners to clean the device. Use a clean, wet cloth
instead.
BATTERY
The main battery may not be charged to full for shipment. Charge the main
battery to full before using the handy terminal for the first time.
Main battery: The main battery powers the handy terminal to work. It takes
approximately 4 hours to charge an empty main battery to full. The charging LED
above the screen will light up in red while charging and will turn green when charging
is complete.
When the main battery is removed, RTC retention will
be maintained for at
least 30 minutes.
Backup battery: The backup battery is mounted on the main board. Its role is
to temporarily keep the handy terminal in suspension when the main battery is drained
out so data in DRAM will be retained. The backup battery takes approximately 3.5
hours to charge to full by the main battery or power adapter.
It is recommended to charge the battery at room temperature (18°C to 25°C)
for optimal performance.
Battery charging stops when ambient temperature drops below 0°C or
exceeds 40°C.
In order to prevent system from shutting down after the battery is drained
out, keep a fresh battery for replacement at all times, or connect the handy terminal to
an external power.
If there are drippings or dust on the device or battery pack, wipe them away
with a soft clean cloth before battery replacement.
Turn off the power before battery replacement.
If you want to put away the handy terminal for a period of time, remove the
battery pack from the handy terminal’s battery compartment. Store the handy
terminal and battery pack separately.
Recycle batteries in a proper way for the green-envi
ronment issue.
Page 10

SCANNER
Scan a 1D barcode
1) Open ReaderConfig and tap Scan Test on the menu bar.
2) Aim the scanning window at the barcode to read. Move the device,
having the barcode located in the center of the scanning area.
3) Press any of the two side triggers. The scanning light beams to read the
printed barcodes. The buzzer beeps after scanning. The scanning light goes off once
the data is decoded, or when the decode timeout period has passed.
Scan a 2D barcode
1) Open ReaderConfig and tap S
can Test on the menu bar.
2) Aim the scanning window at the barcode to read. Move the device,
having the barcode located in the center of the scanning area.
3) Press any of the two side triggers. The scanning light beams to read the
printed barcodes. The buzzer beeps after scanning. The scanning light goes off once
the data is decoded, or when the decode timeout period has passed.
Page 11

CONNECTION
Via Bluetooth or WLAN
Connection may fail when the handy terminal is around other wireless
machines or power cables as the radio frequencies of those may cause interferences.
If communication fails, move the devices much closer to each other, and try
to communicate again
After turning on, Bluetooth power is sustained even when the handy terminal
is suspended. However, if the power mode is switched to Airplane Mode, Bluetooth
power will be turned off regardless of the settings.
Not Charging could be the result of battery damage,
battery’s failure to touch
the connector or AC plug coming off.
Charging error could be due to high battery temperature.
CARE & MAINTENANCE
This handy terminal is intended for industrial use. The handy terminal is rated
IP67, however, damage may be done to the handy terminal if it is exposed to extreme
temperatures or soaked in water.
When the body of the handy terminal gets dirty, use a clean, wet cloth to
wipe off dust and debris. DO NOT use bleaches or cleaners.
Use a clean, non-abrasive, lint-free cloth to wipe dust off the LCD touch
screen. DO NOT use any pointed or sharp objects against the surface. Always keep the
LCD dry.
If you want to put away the handy terminal for a period of time, download the
collected data to a host computer, and then remove the battery pack from the handy
terminal’s battery compartment. Store the handy terminal and battery pack
separately.
If you encounter malfunction on the handy terminal,
write down the specific
scenario and consult your local sales representative.
Page 12

USA AND CANADA E-LABEL
Page 13

EUROPE - EU DECLARATION OF CONFORMITY
Page 14

Page 15

INTRODUCTION
The RS31/BHT-1600 handy terminal, powered by Android™ 6.0 Marshmallow, is
light-weight, easy to use, providing powerful and handy tools for the purpose of delivering
flexibility in customization.
Specifically designed to work as an industrial PDA, it provides rich options of data
collection, voice and data communication, long-lasting working hours, and so on. Its large
color transmissive display guarantees ease in reading in all lighting conditions. Integrated
with Bluetooth v4.1, v2.1+EDR and 802.11a/b/g/n technologies, the handy terminal also
includes a GSM/GPRS/EDGE/WCDMA/UMTS/HSDPA/HSUPA/HSPA+/LTE module to gain
greater speeds and optimal mobility. In particular, an integrated GPS receiver is made
available for use with third-party location-based applications.
This manual serves to guide you through how to install, configure, and operate the handy
terminal. The Care & Maintenance section is specifically crucial for those who are in charge
of taking care of the handy terminal.
We recommend you to keep one copy of the manual at hand for quick reference or
maintenance purposes. To avoid any improper disposal or operation, please read the
manual thoroughly before use.
Page 16

FEATURES
Built tough to survive drop test and sealed against moisture/dust to industrial
standard IP67.
Android™ 6.0 Marshmallow operating system with a powerful Cortex 1.3 GHz
Quad-Core processor
16GB eMMC flash memory to store OS and software programs
2GB LPDDR3 SDRAM to store and run programs, as well as store program
data
One expansion slot for microSDHC memory card up to 32GB (SDXC
supported)
Built-in 8.0 Megapixel rear camera with white LED fo
r flash and auto focus
and 2.0 Megapixel front camera (optional).
Left and right side triggers for ambidextrous scanning
Total wireless solution — connectivity includes Bluetooth v4.1 and v2.1+EDR,
802.11 a/b/g/n, GSM/GPRS/EDGE/WCDMA/UMTS/HSDPA/HSUPA/HSPA+/LTE, and
near field communication (NFC)
A 4.7” color transmissive display with 720x1280 pixels to deliver excellent
visibility in all lighting conditions
Configurable feedback indicators including speaker and vibrator
Built-in scan engine setting tool Reader Configuration which serves
out-of-the-box keyboard wedge functionality
Accessories and peripherals include USB Charging and Data Transfer Cable,
Direct Cable
INSIDE THE PACKAGE
The following items are included in the kit package. Save the box and packaging material
for future use in case you need to store or ship the handy terminal.
RS31/BHT-1600 Handy terminal
Rechargeable Li-ion battery pack
Hand Strap
Micro USB Charging and Data Transfer Cable
Direct Cable
AC Power Adaptor
Quick Guide
ACCESSORIES
Hardshell
Handbelt
Direct Cable
AC Power Adapter
Page 17

Chapter 1
QUICK START
This chapter helps you get ready for starting using the handy terminal.
IN T
HIS CHAPTER
1.12.1 Overview ............................................................. 16
1.2 Charging & Communication ......................................... 25
Page 18
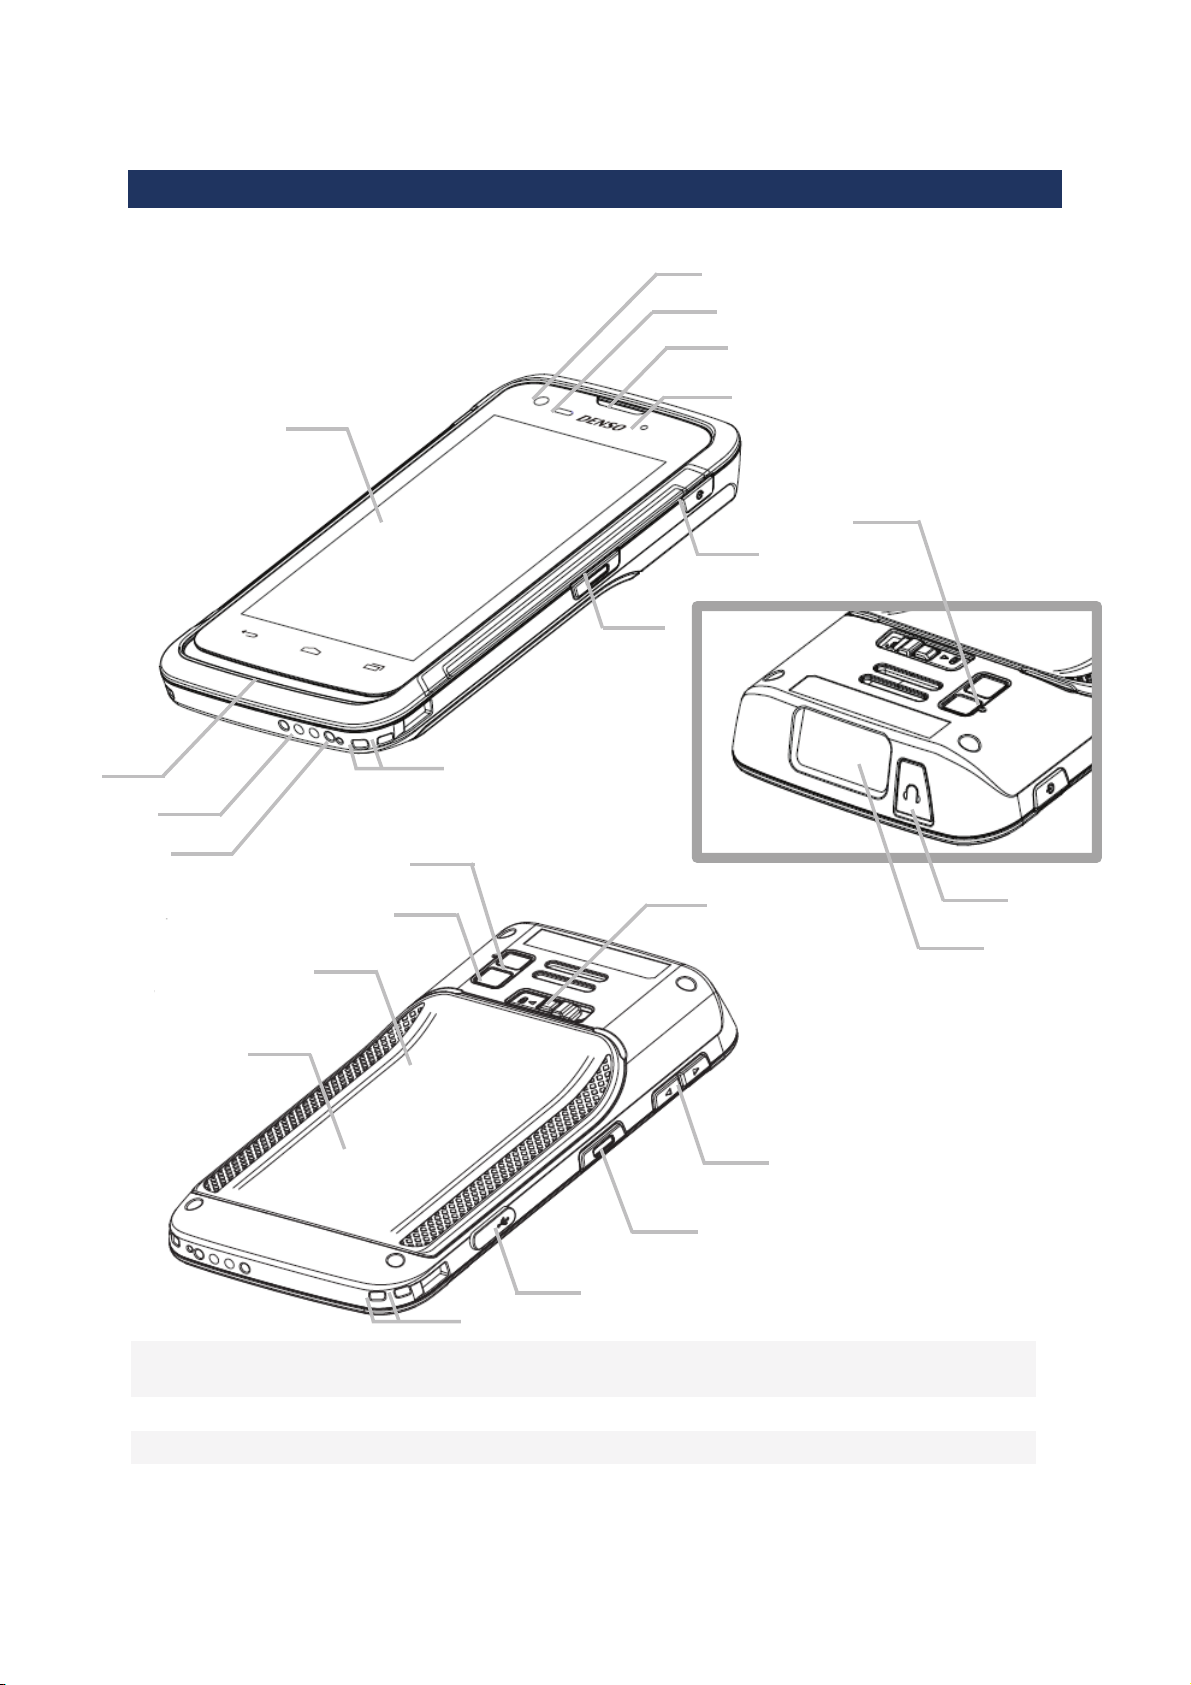
1.1. OVERVIEW
N
o.
Description N
o.
Description
1 Front Camera 2 Proximity+ALS Sensor Hole
3 Receiver 4 Status LED
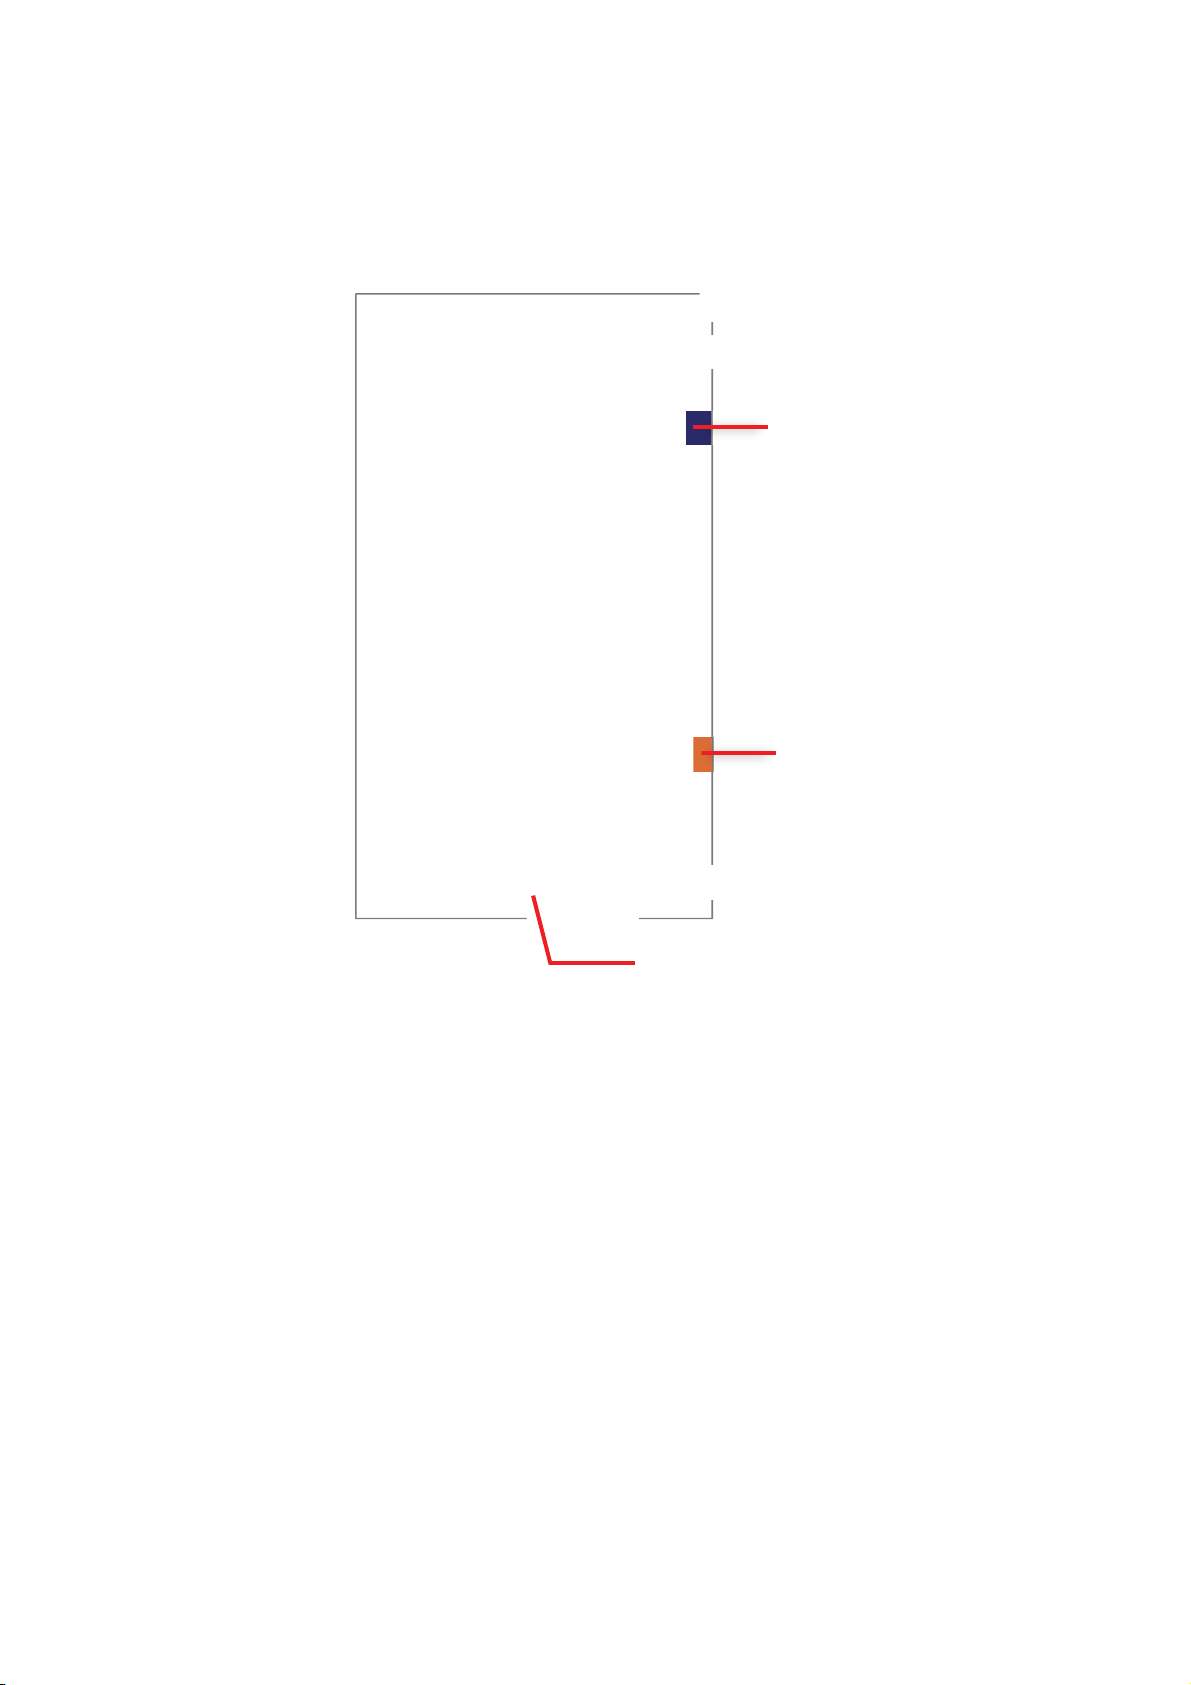
5 Power Button 6 Side Key
Page 19

7 Hand Strap Slot 8 Microphone
9 Charging Pins 10 Speaker
11 Touchscreen 12 Sub Microphone
13 Headset Jack 14 Scan Window
15 Battery Cover Latch and Lock 16 Volume Buttons
17 Micro USB Port 18 NFC Detection Area
19 Battery Cover 20 Rear Camera
21 Camera Flash
Page 20

1.1.1. INSTALLING BATTERY
For shipping and storage purposes, the handy terminal and the main battery are saved in
separate packages.
Note:
Any improper handling may reduce the battery life.
To install the main battery:
1) Press down the lock button and slide it right to the “Unlock” position.
2) Insert your fingernail into the groove between the case and the top of the cover, with
a little force, lift the battery cover up and away from the device.
3) Insert the main battery with the contact pins facing the lower end. Fix the top edge
of the battery first.
4) Press down the lower edge of the battery.
5) Fix the lower edge of the battery cover, and then push the upper end in. Please make
sure that the battery lock is in “Unlock” state before replacing the battery cover.
6) Slide the battery lock to the left to the “Lock” position.
Warning
1) Make sure the battery lock is at the “Lock” position before powering on the device.
2) For initial use, insert a charged battery, lock the battery cover in place, then press the
Power key to power on the handy terminal.
Page 21

REMOVE BATTERY
1) Press down the lock button and slide it right to the “Unlock” position.
2) Insert your fingernail into the groove between the case and the top of the cover, with
a little force, lift the battery cover up and away from the device.
3) Lift the battery up from its lower end.
4) Replace the battery cover and slide the battery lock to the left to the “Lock” position.
Page 22
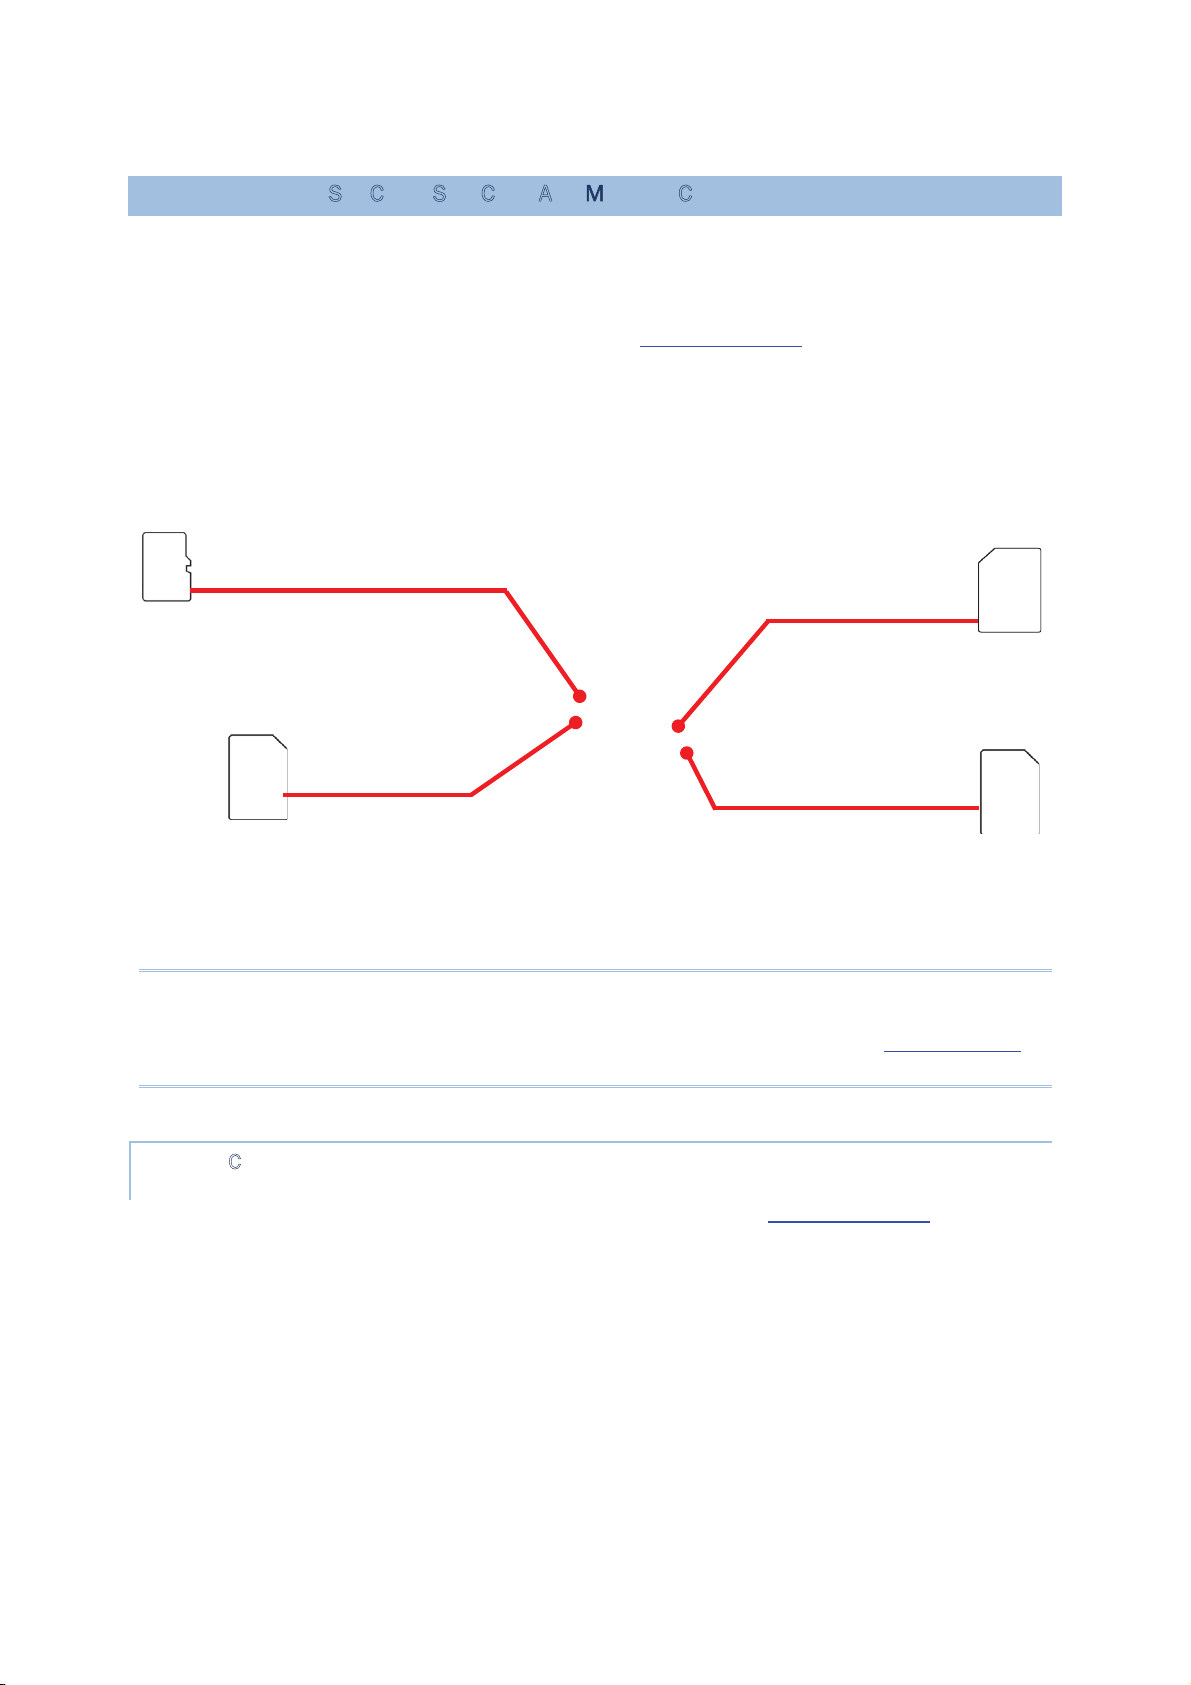
1.1.2. INSTALLING SIM CARD, SAM CARD AND MEMORY CARD
The RS31/BHT-1600 handy terminal is equipped with two SIM card slots, one SAM card
slot and one memory card slot.
To insert the cards:
1) Remove the battery cover as described in Remove Battery.
2) Insert the cards into their respective slots according to the directions indicated. Push
the cards to lock them in. Please note that when you insert the cards into their slots, the
metal contact sides of SD card and SIM1 card should be facing downwards, while those
of SIM2 card and SAM card should be facing upwards.
3) Replace the battery cover and push the battery lock back to the lock position.
Note:
Both SIM1 and SIM2 card slots support 2G/3G/4G cards. However, you can have 3G/4G
data transmission on either SIM but not on both at the same time. Refer
Phone Power for
details on managing dual SIM cards.
REMOVE CARDS
1) Remove the battery cover as described in steps 1-3 of Remove Battery.
2) Push the SIM cards, SAM card and SD card to eject them from their slots.
3) Replace the battery cover and push the battery lock back to the lock position.
SIM 1 Slot
Supports2G/3G/4G
Card
Micro SD Card Slot
Supports SD/SDHC/SDXC
SIM 2 Slot
Supports 2G/3G/4G
Card
SAM SD Card Slot
ˏ
SIM1
ˏ
SD
ˏ
SIM2
ˏ
SAM
Page 23

1.1.3. INSTALLING HARDSHELL
The hardshell is a protective cover that shields the handy terminal from impact due to
bumps, drops and scratches.
To fit the handy terminal in the hardshell:
1) Fix the upper end of the handy terminal in at a 45 degree angle.
2) Press the two lower corners of the handy terminal down to secure it inside the shell.
Page 24

1.1.4. POWER ON/OFF HANDY TERMINAL
POWER ON
To power on the handy terminal, press and hold the power button located on the upper
right side of the device. The handy terminal opens to show the
Home Screen.
Note:
For the handy terminal to power on, the battery cover must be secured in place.
POWER OFF
To power off the handy terminal, press and hold the power button for more than three
seconds. A menu will appear on-screen which allows you to power off the device. Make sure
all user data and tasks have been stored before tapping Power off.
Page 25

1.1.5. HOMESCREEN SELECTION
Upon the first time you launch the system, a Select Home app window will pop up to
request your immediate choice of home screen. By selecting “AppLock”, you will directly
enter AppLock application (please refer to AppLock User Guide for detailed instructions on
AppLock settings) to start configuring the interface provided to normal users of this device;
by selecting “Launcher”, you will enter the default Android™ 6.0 home screen.
Page 26

1.1.6. USING HARDWARE BUTTONS
On the bottom of the handy terminal are three hardware
buttons that deliver the following functions:
Button Function Description
Back button
Returns to the previous screen or closes
the active window or keyboard.
Home
button
Displays the Home screen.
Recent
apps button
Opens a list of recently used applications.
1.1.7. CONNECTING HEADSET
The headset jack is located on the top of the handy terminal. You can use the headset for
audio playback or communication via the phone application, audio instant messaging, etc.
1) Flip up the rubber cover.
2) Connect the headset to the headset jack.
3) Replace the rubber cover.
Page 27

1.2. CHARGING & COMMUNICATION
1.2.1. CHARGE HANDY TERMINAL
The main battery may not be charged to full for shipment. When you first receive the kit
package, you will need to charge the main battery to full before using the handy terminal.
You may use the Direct Cable with a power adapter to charge the handy terminal.
Your device can be charged as well when connected to a computer via USB cable; however,
charging from a USB port on a computer is slower than charging using a supplied Direct
Cable because the voltage and amperage the computer provides is lower than in the case of
using a normal charging method.
CHARGING T
IME
Main battery: The main battery powers the handy terminal to work. It takes approximately
4 hours to charge an empty main battery to full. The charging LED above the screen
(located on the right) will light up in red while charging and will turn green when charging
is complete.
When the main battery is removed, RTC retention will be maintainedġfor at least 30 minutes.
Backup battery: The backup battery is mounted on the main board. Its role is to
temporarily keep the handy terminal in suspension when the main battery is drained out so
data in DRAM will be retained. The backup battery takes approximately 3.5 hours to charge
to full by the main battery or power adapter.
CHARGING T
EMPERATURE
It is recommended to charge the battery at room temperature (18°C to 25°C) for optimal
performance.
Please note that battery charging stops when ambient temperature drops below 0°C or
exceeds 40°C.
OPERATION ON BATTERY POWER
When 802.11a/b/g/n, GSM/GPRS/EDGE/WCDMA/UMTS/HSDPA/HSUPA/HSPA+/LTE,
Bluetooth v4.1 & v2.1+EDR and GPS are all enabled on battery power, the main battery
level will drop down substantially. Prolonged use of the display and continued scanning of
barcodes will also affect battery level.
In order to prevent system from shutting down after the battery is drained out, we suggest
that you keep a fresh battery for replacement at all times, or connect the handy terminal to
an external power.
Page 28
USE DIRECT CABLE
The Direct Cable provides a convenient way to charge your handy terminal.
1) Fasten the Direct Cable to the lower end of the handy terminal.
2) Connect the other end of the cable to the adapter.
3) Fix the adapter plug onto the adapter, and plug in into an electrical outlet.
While the device battery is being charged, the LED on handy terminal will indicate charging
status.
Note:
The Direct Cable is for charging only. For data communication, use the micro USB cable to
connect the handy terminal to your PC or laptop.
LED Indicator Status Description
Charging Red, solid Charging the handy terminal
Red, blink Charging error
Green, solid Charging complete
No light Charging error (charging will stop)
Click!
LED
Status
Indi
cato
r
Page 29
1.2.2. WIRED DATA TRANSMISSION
Use the micro USB cable to connect the handy terminal to your PC for data transmission.
1) Connect your device to the computer with supplied USB cable.
2) Swipe down from the status bar to reveal Notifications Panel.
3) Tap “USB for Charging” to enter USB options. By default, the device will be in
charging mode, in which you are unable to access the files on this device from the PC
client. To transfer all types of files between your device and PC, choose “File transfers”.
To transfer videos and photos, you can select “Photo transfer (PTP), in which your
device will share only videos and photos in DCIM and Pictures folders.
1.2.3. USING WIRELESS NETWORKS
The handy terminal supports widely applied wireless technologies including Bluetooth v4.1
& v2.1+EDR, 802.11 a/b/g/n and NFC, and is able to send/receive data in real time in an
efficient way. Select GSM/GPRS/EDGE/WCDMA/UMTS/HSDPA/HSUPA/HSPA+/LTE modules
embedded for a total wireless solution for data and voice communication.
Page 30

Chapter 2
USING THE RS31/BHT-1600 HANDY TERMINAL
This chapter walks you through the fundamental usage and features of this device.
IN T
HIS CHAPTER
2.1 Battery ..................................................................... 29
2.2 Memory .................................................................... 39
2.3 Touch Screen ............................................................ 50
2.4 Notifications .............................................................. 55
2.5 Date and Time ........................................................... 57
2.6 Language & Keyboard Input ........................................ 58
2.7 Sound and Volume ..................................................... 66
2.8 Programmable Keys ................................................... 67
2.9 Data Capture ............................................................ 73
Page 31

2.1. BATTERY
Main Battery
The handy terminal is powered by a rechargeable 3.85V / 2960 mAh Li-ion battery
pack, and it takes approximately 4 hours to charge it to full from the power adaptor.
However, the charging time may vary by your working condition.
Spare Battery
A spare battery pack is provided as an accessory. We recommend keeping a fully
charged spare battery at hand in order to replace the main battery when it is nearly
drained out.
Backup Battery
S
ettled on the main board is a backup battery that keeps the handy terminal in
suspension when the main battery is depleted. The backup battery is a 60 mAh
rechargeable Li-ion battery, and can retain data in the DRAM for 30 minutes when it is
fully charged (as long as wireless modules on the handy terminal are inactive). The
backup battery can be charged by the main battery or the power adapter, and takes
approximately 3.5 hours to charge to full.
Warning:
(1) The battery cover must be secured in position. If not, the handy terminal cannot turn on
by pressing the power key.
(2) For a new battery, make sure it is fully charged before using.
(3) To avoid data loss, when replacing the main battery, make sure you replace it with a
well-charged spare battery pack. Always prepare a spare battery at hand, especially when
you are on the road.
(4) When the handy terminal has been on backup battery for 30 minutes, the system will
shut down. Be sure to replace the main battery as soon as possible in order to avoid data
loss.
Page 32

2.1.1. BATTERY STATUS INDICATORS
The main battery pack is the only power source for the handy terminal to work. Therefore,
when the main battery level goes low, you need to replace the battery pack with a charged
one or charge it as soon as possible. Most of all, you should backup important data on a
regular basis.
By checking the battery status icon on Status Bar, you can tell the battery level remaining
in the main battery.
To check the exact remaining percentage of power and battery life:
1) Use two fingers to swipe down from the top of the screen to open Quick Settings.
2) The percentage of remaining battery power is shown beside the battery icon; you
can tap on it to enter Battery Settings for more details and configurations.
Main battery is fully charged.
Main battery level is partially drained.
Main battery level is low.
Main battery level is very low and needs charging
immediately.
External power source is connected and main battery
is being charged.
Page 33

Note:
When the handy terminal is fully charged and battery level reaches 100%, the battery icon
will change from to to indicate charging is completed.
Warning:
(1) Once the battery level drops below 15%, the low battery notification will be displayed on
the screen.
(2) Data loss with RAM may occur when battery level is low. Always save data before the
battery runs out of power or keep a fresh battery for replacement.
(3) Constant usage of the handy terminal at low battery level can affect battery life. For
maximum performance, recharge the battery periodically to avoid battery drain out and
maintain good battery health.
Page 34

2.1.2. MONITOR BATTERY LEVEL
MAIN BATTERY LEVEL
The main battery is the only source that feeds the handy terminal to work. It also supplies
the backup battery on the main board in order to retain the data stored in DRAM. When
main battery level gets low, recharge it or replace it as soon as possible. Most critically, back
up the important data from time to time to protect your work.
To check main battery level:
Tap All Apps | Settings | Battery .
Battery level percentage is also shown to provide a clear grasp of the remaining battery
power. The screen also shows the rate of battery discharge since the last battery charging
session, how long the device has been running on battery power, and which applications are
consuming the most battery power.
To enable Android’s smart power saving feature, activate the Standby
Intelligent power saving function, which intelligently manages the background
tasks as this device is powered on.
To look at the timeline of each application that drained or has been draining
the battery power, tap on the chart; with this, you can diagnose any serious power
drains.
Page 35

BATTERY SAVER MODE
You can have the Battery Saver Mode automatically turned on when the main battery gets
low or have activated the whole time. This mode will limit the use of location services,
vibration and most background processing data. On Battery Settings screen, tap on
More and then select “Battery saver”.
Switch on the function and choose when to have this mode automatically activated. After
enabling this function, the title bar of your screen will turn orange.
Page 36

BATTERY OPTIMIZATION
Having Battery optimization on for the applications, you can make sure they stay
inactive until you start using your device. On Battery Settings screen, tap More and
then select “Battery optimization”.
On dropdown list, select “All apps”, all the applications will be optimized by this function by
default. You can individually turn off the optimization mode of a certain app if you would like
it always activated by tapping on the app name and select “Don’t optimize” and then
“DONE”
Page 37

LOW BATTERY ALERT
When the main battery level drops to 15%, the handy terminal prompts a warning
reminding you to charge the main battery. Connect the handy terminal to an external power
source, or replace the main battery pack as soon as possible.
To replace the main battery pack, see
Replace Main Battery.
Page 38

2.1.3. REPLACE MAIN BATTERY
When main battery level is low, follow the steps below to replace the main battery.
1) Press and hold the power button on the side of the handy terminal.
2) Tap “Power off” in the pop-up menu. The handy terminal will power off.
3) Open the battery cover and insert a charged main battery as in
Installing Battery.
4) Press the power button to power on the handy terminal.
Note:
Before replacing the main battery, make sure the backup battery is well-charged in order to
avoid unnecessary data loss. After removing the main battery, insert a well-charged battery
as soon as possible.
Page 39

BATTERY HOT SWAP
Backup battery supplies system power during battery hot swap.
When battery cover is removed, the system will enter suspend mode and not wake up until
battery cover is put back and the power button is pressed.
To perform a battery hot swapping:
1)Make sure the new battery is fully-charged.
2)Follow Step1~2 in
Installing Battery to remove the battery cover. Upon the removal
of the cover, the system will prepare to enter suspend mode with the red light lit, which
will last for 3 to 5 seconds.
3)Flip the device over to observe the Status LED on the front panel. As the red light
goes off, the device is in complete suspend mode and Main battery is ready to be
replaced. Remove the battery and replace it with the new one.
Note:
When main battery is removed, the system will stay in suspend mode for 30 minutes. To
avoid system being shut down without warning, please replace the main battery within the
30 minutes.
Page 40

2.1.4. POWER MANAGEMENT
For any portable device, power management is a critical issue especially when you are on
the road. Below are some tips to help you save battery power.
Warning:
Using backlight, wireless connectivity, and peripheral devices while on battery power will
substantially reduce battery power.
Bring an additional main battery pack with you on the road.
End wireless connections (such as Bluetooth transmission, wireless
connection, NFC and GPS) which are not in use.
Shorten the screen turn off time. See Screen Timeout Settings.
Reduce the screen brightness level, see Screen Brightness.
Shut down automatic data syncing of applications (such as Email, Calendar,
and Contacts).
Enable Battery saver mode and Battery optimization mode. See Battery
Saver Mode and Battery Optimization.
ENTER AIRPLANE MODE
You can enable Airplane mode to have all the wireless radios (including call functions, data
connections such as Bluetooth, Wi-Fi and 3G/4G) on your handy terminal turned off, which
will considerably reduce the power consumption of your battery.
1) To enter Airplane mode, use two fingers to swipe down from the top of the screen
to open Quick Settings.
2) Tap on the Airplane mode icon to enable/disable the mode.
Page 41

2.2. MEMORY
Flash Memory (ROM)
16GB flash memory for storing the OS (Android™ 6.0 Marshmallow and custom
application programs.
Random-access Memory (RAM)
2GB RAM for storing and running programs, as well as storing program data.
Expansion Slot
The handy terminal is equipped with one microSDHC card slot which accommodates
an SD card up to 32 GB (microSDXC is supported as well).
CAUTION O
F DATA LOSS
When the main battery is removed or drained, the backup battery on the main board takes
over to supply the handy terminal and keep it in suspension. A fully charged backup battery
will retain the data in the RAM for 30 minutes. When the backup battery is drained out as
well, the handy terminal will shut down, and only the contents of RTC will be retained. All
other unsaved data will be lost.
If you want to put away the handy terminal for a couple of days, you should be aware that
data loss occurs when the main battery and backup battery discharges completely.
Therefore, it is necessary to backup data and files before putting away the handy terminal.
Page 42

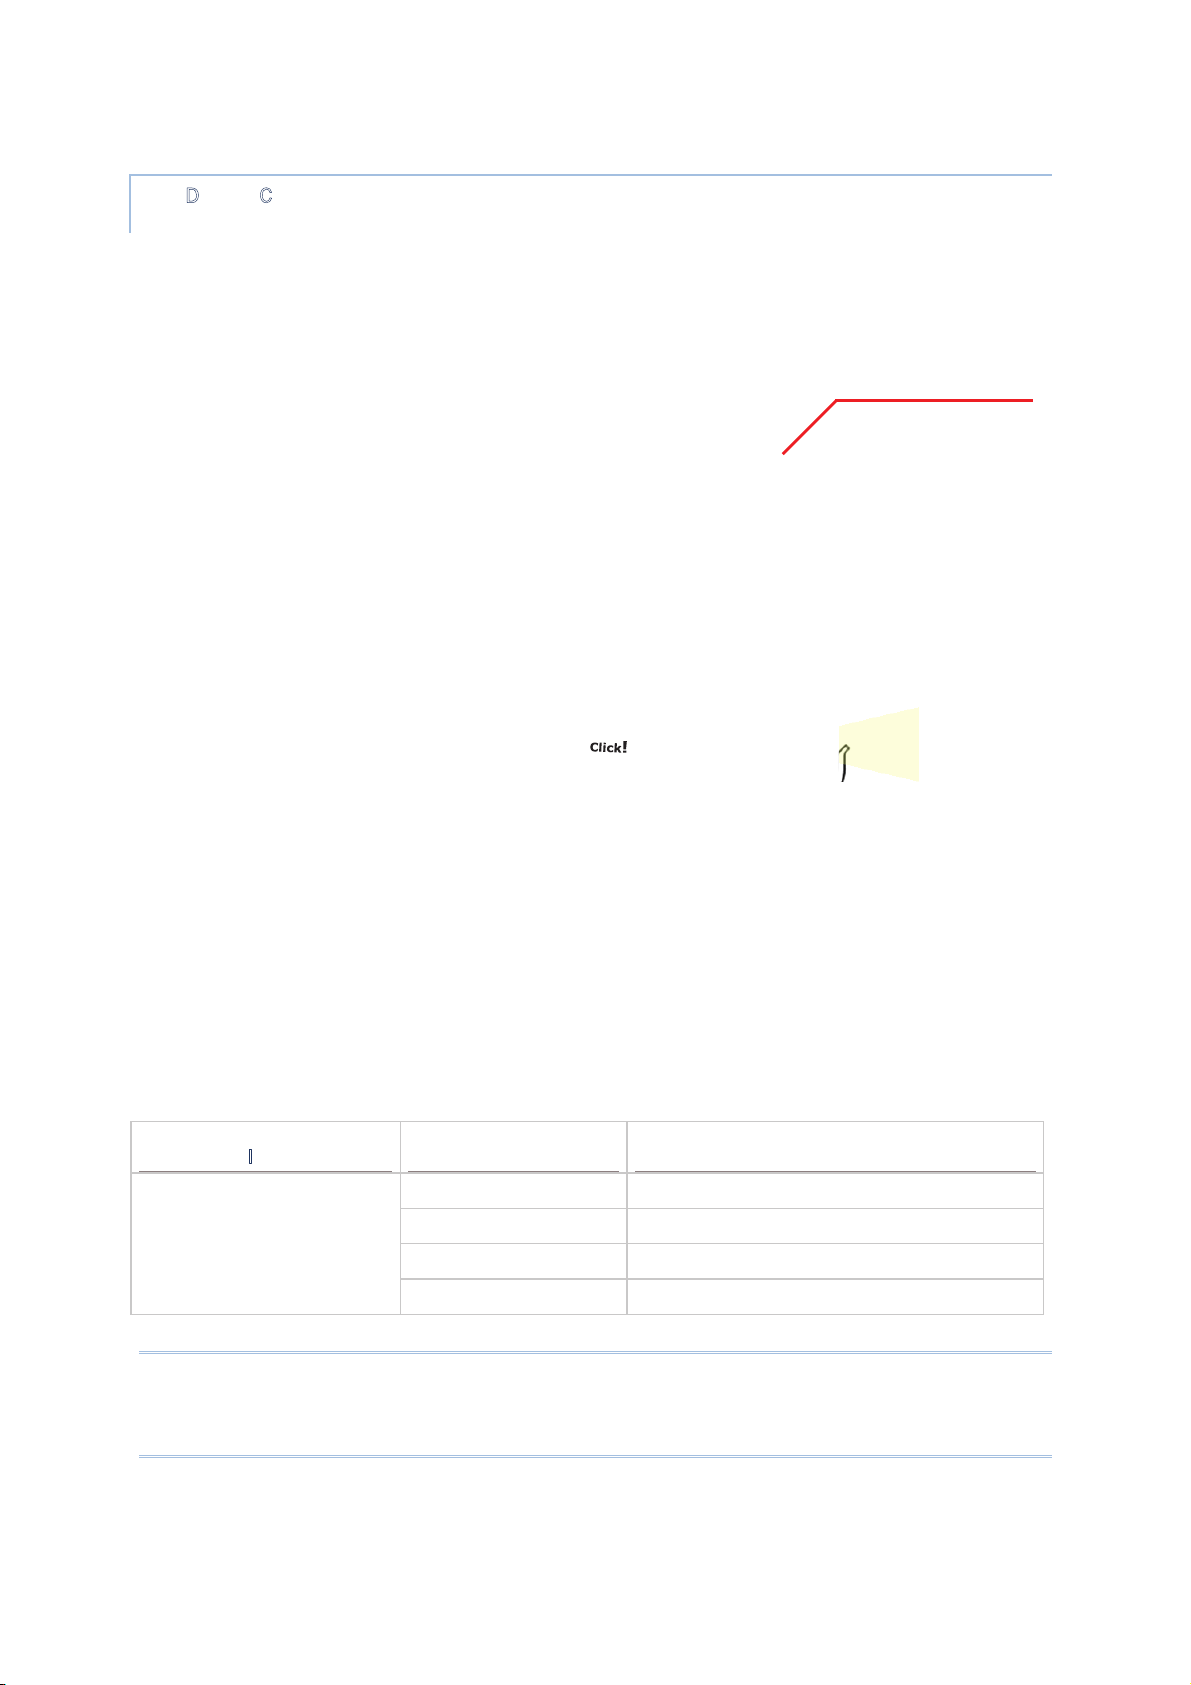
2.2.1. CHECK MEMORY USAGE
The memory manager can offer a glance of how the device is using its RAM.
Tap All Apps | Settings | Memory to enter memory manager screen.
On the main screen, it tells you not only the used and
free memory space of the RAM, but how your pattern of
usage has impacted the device’s overall performance. To
figure out how the system and apps have been taking up
the memory over a longer period, tap the dropdown list to
choose a different time span.
To look at how individual apps are consuming the
memory space, tap “Memory used by apps” to get a
breakdown of memory usage by apps.
Tap an application name
to check its memory
usage. This allows you to
make sense of how much
memory a newly-installed
application can potentially
consume your RAM.
Page 43

2.2.2. MANAGE STORAGE SPACE
To your Android device, the SD card can serve as an extension of your device’s internal
storage (which comes as 16 GB of flash memory to store the OS, applications and files)
other than a portable storage place.
Tap All Apps | Settings | Storage & USB to check usage of the internal
and external storage spaces.
CHOOSE DEFAULT STORAGE
By default, all the videos, photos and downloaded files are directly saved to the device’s
internal storage. If you have previously inserted and mounted an SD card as portable
storage, this external storage will appear selectable below the option Internal Storage,
and you can choose it as the Default write disk.
Page 44

SET UP SD CARD AS PORTABLE STORAGE
Using SD card as a portable device allows you to treat it as a USB disk, by swapping it
between your Android device and the computer to easily transfer files. This is quite handy
when there is a need to offload files that are taking up too much storage space.
The disk content is readable on PC client:
On Storage & USB screen, this disk can be managed separately.
To start:
1)Connect your handy terminal with PC with supplied USB cable, swipe down from the
status bar to reveal Notifications Panel, tap “USB for Charging” to enter USB options
and then choose “File transfers”.
2)Insert the SD card. A notification will pop up indicating that an SD card is detected
tap “SET UP”.
The SD card is considered a
separate storage, the capacity of
which is not included in total
device storage. You can tap
to eject a mounted SD card.
RS31/BHTͲ1600
Page 45

3)Tap “Use as portable storage” and then “NEXT”
4)Tap “ERASE & FORMAT” to format this card. The file format allows the card to be
readable on other devices such as PC or a digital camera.
5)At the window asking you whether to change the write disk from internal storage
(default) to the SD card, tap “OK” to do so or “Cancel ” to stay with the default setting.
6)When the setting is completed, tap “DONE”.
Page 46

Note:
Please make sure the USB cable is properly connected while transferring files over USB
connection.
CONVERT THE SD CARD TO INTERNAL STORAGE
1) You can always convert the SD Card from portable storage to internal storage. On
Storage & USB screen, tap the SD card. Before you start, make a backup of the files on
this disk if you would like to keep them.
2) On SD card content screen, tap More and then tap “Settings”.
3) By selecting “Format as internal”, the device will eventually format this SD card
into a specific file format only readable by this device.
4) On Format as internal storage screen, tap “ERASE & FORMAT” to format the card.
Page 47

5) You will then be asked to whether to move media files to this new SD card right away
or later, make your choice and then tap “Next”.
6) When the formatting is completed, tap “DONE”.
SET UP SD CARD AS INTERNAL STORAGE
Using SD card as internal storage allows you to extend your existing device storage and to
store huge applications. This SD card will be reformatted and encrypted with a file format
that is not readable by another device. Therefore, it is essential that you back up important
files on this SD card in advance of formatting.
The disk content is not seen from PC client.
Page 48

On Storage & USB screen, the capacity of this SD card is merged into the total device
storage. Please note that. In this setting, you will have no control of which files to be stored
on SD card.
Warning:
Do not physically remove the SD card from the device without ejecting this card in advance.
To eject this SD card:
1) Select this SD card.
2) On SD card content screen, tap
More and then tap “Eject”.
RS31/BHTͲ1600
Page 49

To start:
1) Insert the SD card. A notification will pop up indicating that an SD card is detected
tap “SET UP”.
2) Tap “Use as internal storage” and then “NEXT”.
3) Tap “ERASE & FORMAT” to format this card.
4) You will then be asked to whether to move media files to this new SD card, make
your choice and then tap “Next”.
5) When the setting is completed, tap “DONE”.
Page 50

CONVERT THE SD CARD TO PORTABLE STORAGE
1) You can always convert the SD Card from internal storage to portable storage. On
Storage & USB screen, tap the SD card. Before you start, make a backup of the files on
this disk if you would like to keep them.
2) On SD card content screen, tap More and then tap “Format as portable”.
3) Tap “Format” to have this SD card re-formatted into a file type inaccessible by other
devices.
4) On Move data now screen, tap “MOVE” to migrate data from the device’s storage
to SD card and have the SD card become the primary storage location.
5) When the formatting is completed, tap “DONE”.
Note:
It is recommended that you
select “Move now” at Step
4 to have the device
immediately start making
use of SD card space. If you
select “Move later”, the
device will continue to
consider device’s original
storage the primary location
to save files.
Page 51

Page 52

2.3. TOUCH SCREEN
The handy terminal comes with a 4.7” transmissive LCD with 1280 by 720 pixels resolution
(HD). The LED backlight of the screen, which helps ease reading under dim environments,
can be controlled manually and automatically.
Warning:
DO NOT use any pointed or sharp objects to move against the surface of the screen.
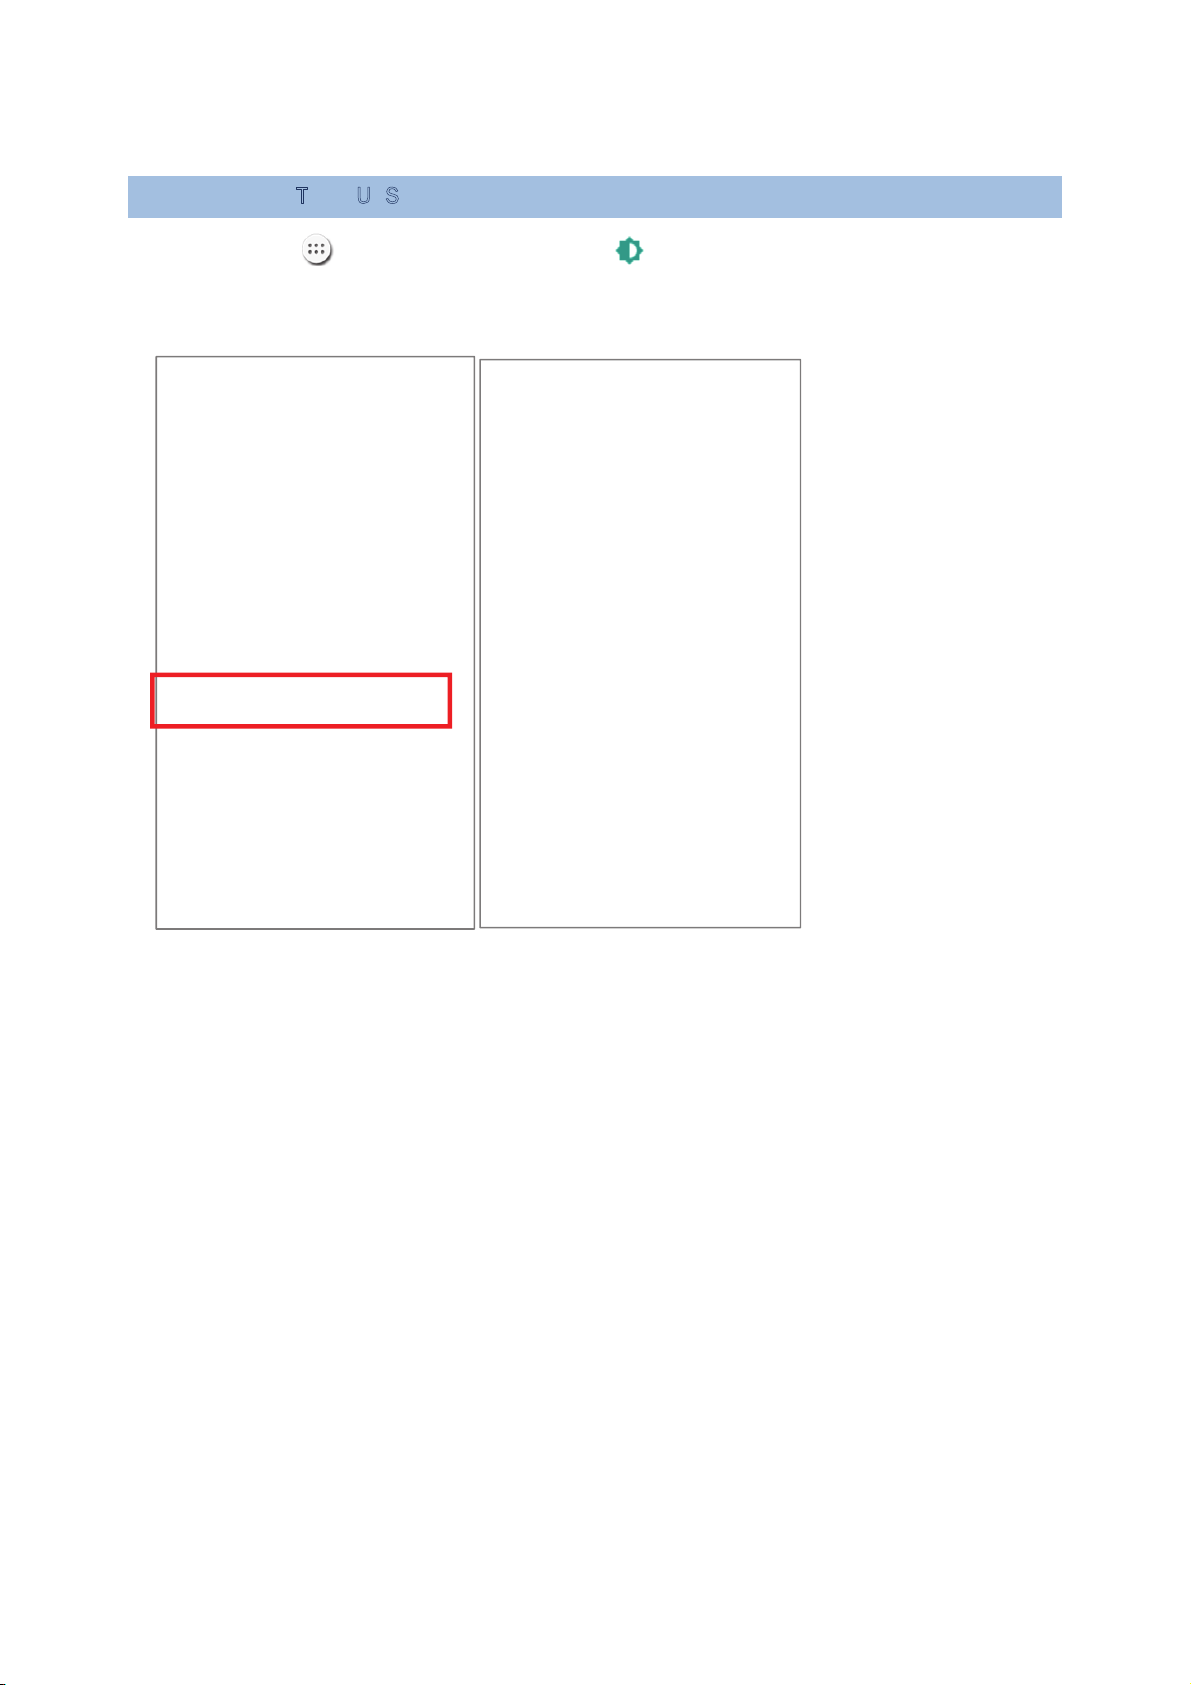
2.3.1. SCREEN BRIGHTNESS
Tap All Apps | Settings | Display | Brightness.
Adjust screen brightness by dragging the slider to the right (to increase brightness) or left
(to reduce brightness). Switch on the Adaptive brightness to enable automatic backlight
adjustment with the handy terminal’s built-in sensor. You can also use the shortcut button
on Quick Settings menu to adjust the brightness level.
Note:
To save battery power, dim the screen brightness while working in a well-lit area, or set a
shorter sleeping plan for the screen backlight to go off.
Page 53

2.3.2. SCREEN ROTATION
By default, the device automatically rotates the screen to when you turn the device
sideways. To switch this function on or off:
1) Tap All Apps | Settings | Display .
2) Tap When device is rotated and them select Stay in portrait view to turn the rotation
function off or tap “Rotate the contents of the screen” to enable it.
OR
Use two fingers to swipe down from the top of the sc
reen to open Quick Settings and tap
the Auto rotate status icon. This quick setting method allows you to temporarily enter
landscape mode to enhance your typing experience by using a wide keyboard.
Page 54

You can entirely disable the switch on the interface to minimize the possibility of
accidentally turning on the auto-rotation function.
Tap All Apps | Settings | Accessibility and switch off Auto-rotate screen.
By doing so, the auto-rotation option will be hidden on Quick Settings menu as well as in
Settings | Display .
Note:
Auto-rotation is not supported in Home Screen, All apps list and certain applications.
The Auto-rotate status icon
is absent.
Page 55
2.3.3. SCREEN TIMEOUT SETTINGS
Tap All Apps | Settings | Display | Sleep.
Select the time lapse for screen timeout.
Page 56

2.3.4. TEXT SIZE
Tap All Apps | Settings | Display | Font size. Select the font size
between Small, Normal, Large and Huge.
.
Page 57

2.4. NOTIFICATIONS
2.4.1. STATUS LED
An LED indicators located above the touch screen provide information about charging
status, scanner light beam, and scanner "Good Read" during data collection.
Indicator
Status Description
Charging
Green, solid Charging complete
Red, solid Charging the handy terminal
Red, blinking
Charging error (for instance, battery not in
place)
Barcode or RFID tag
decode
Green, flash once Good read
The device is on
backup battery power
(the battery cover is
removed)
Red, solid
Upon the removal of the battery cover, the
red light is on for a while and then goes off to
signal that the main battery is ready to be
removed. Please refer to Battery Hot Swap to
perform a successful battery hot-swapping.
Note: For Scanner decode and Scanner beam LED to function, LED notification must be
enabled in Reader Configuration.
2.4.2. AUDIO
The speaker is used to play sounds for events in windows and programs, or play audio files.
In addition, it can be programmed for status feedback. In noisy environments, you may
consider connecting a headset instead. A headset jack is provided on the top of the handy
terminal, which is a 3.5 mm DIA stereo earphone jack. The handy terminal also supports
using Bluetooth headsets.
Supported audio file formats include: WAV, MP3, AAC, AAC+, Enhanced AAC+, AU
(including ADPCM), Midi, XMF, AMR (NB and WB).
Use the volume buttons on the side of the handy terminal to adjust the system volume.
Page 58

2.4.3. SOUNDS AND VIBRATION
The handy terminal is integrated with a vibrator, which is software programmable for
tactile feedback. This can be helpful when working in noisy environments.
You may also set the handy terminal to vibrate only, in which all system sounds will be
muted and replaced by the vibrator.
On any screen, press down Volume Up or Volume Down key to open quick sound menu.
Tap to switch this device to Vibration mode. To modify specific sound settings, tap
to access more settings.
Page 59

2.5. DATE AND TIME
2.5.1. SET DATE, TIME AND TIME ZONE
By default, the handy terminal automatically synchronizes the date and time to the WWAN
network (if connected).
To set the date and time manually:
1) Tap All Apps | Settings | Date & time .
2) Tap Automatic date & time and select Off to disable using network-provided time.
3) Deselect Automatic time zone.
4) Tap Set date. Use the sliders to select the correct month, date and year. Tap OK to
save.
5) Tap Set time. Use the sliders to select the correct time. Tap OK to save.
6) Tap Select time zone. Select the correct time zone from the list.
Page 60

2.6. LANGUAGE & KEYBOARD INPUT
Tap All Apps | Settings | Language & input to change the system language,
default keyboard type, and configure keyboard input and speech settings.
2.6.1. CHANGE DISPLAY LANGUAGE
On Language & input screen, tap Language and then select your desired system
language, the new setting will immediately be applied after your selection.
Page 61

2.6.2. ON-SCREEN KEYBOARD
Tap a text input field to automatically open an on-screen keyboard. The virtual keyboard
will vary depending on the data type (text or numbers) this field requires.
SELECT KEYBOARD (INPUT METHOD)
On Language & input screen, select Current Keyboard to change your current
keyboard or manage the selectable keyboards by entering “CHOOSE KEYBOARDS” and
enable the input methods you need.
Page 62

ADJUST KEYBOARD SETTINGS
To configure keyboard settings, tap and hold the comma button until a settings button
appears. A menu will open, allowing you to adjust input language (if you would like to
use an input language different from the system language) or keyboard settings.
By tapping Android Keyboard Settings (AOSP), you can further adjust the settings to
suit your needs.
Page 63

CHANGE KEYBOARD (INPUT METHOD)
The input methods you enabled in Current Keyboard under Language & input are
available by tapping on the on-screen keyboard, to use other input methods, simply tap
it to cycle through the options.
English (US) Keyboard
Japanese Keyboard
1
2
1
2
Page 64

EDIT TEXT
Tap and hold text on the screen to enable a text editing menu for selecting all text, or
copying and pasting text within or across applications. Some applications may use different
ways to select or edit text.
Page 65

ENTER NUMBERS AND SYMBOLS
The appearance of the switch button to numeric or symbol keyboard may vary; the example
below demonstrates how to use the switch key to access your desired numeric or symbol
keyboards from the default Android English (US) keyboard. To enter Numeric / Symbol
keyboard, tap .On Numeric / Symbol keyboard, tap to access more symbols or
tap to return to Android English (US) keyboard
On Android English (US) keyboard, you can input number or symbols without switching
to Numeric / Symbol keyboard.
Tap and hold the period button to open quick symbol keyboard.
Tap and hold a letter from q~p on the top row to bring up the specific number
key.
English (US) Keyboard
Numeric / Symbol Keyboard
Symbol Keyboard
Page 66

English (US) Keyboard
Page 67

ENTER UPPERCASE LETTERS
Tap and hold the Shift key , and tap a character key to enter an uppercase letter. The
letters will return to lower case once an uppercase letter is entered.
English (US) Keyboard
Page 68

2.7. SOUND AND VOLUME
Use the volume buttons on the left side of the handy terminal to adjust system and ringer
volume.
Page 69

2.8. PROGRAMMABLE KEYS
Use the volume buttons on the left side of the handy terminal to adjust system and ringer
volume.
Tap All Apps | Settings | Programmable Keys to assign specific functions
to the four programmable keys: volume up, volume down, and the left and right function
keys (side keys).
After redefining the programmable keys, the changes will immediately take effect.
ENABLE WAKEUP
Select the Enable wakeup checkbox to enable pressing the key to wake the handy
terminal from suspend mode.
Note:
This checkbox is automatically disabled if an application is selected for the key on the Apps
tab page.
Page 70

ASSIGN KEYCODE
Tap the key you would like to assign. A screen opens showing a list of available keycodes
or applications. On the Keycodes tab page, scroll down to view the entire list of keycodes,
and tap a keycode to apply.
Page 71

ASSIGN APPLICATION
Tap the key you would like to assign. Tap the Apps tab page to open a list of available
applications. Scroll down to view the entire list of applications, and tap an application to
apply.
After an application is selected, an icon will appear next to the assigned key. Also, the
Enable wakeup checkbox will be automatically disabled.
Page 72

IMPORT AND EXPORT SETTING
After finishing configuring the keys, you can save the setting to a txt file, allowing you to
apply the same setting to other devices. To do this, tap More and then “Export”.
This configuration file will be saved in the internal storage as keys_config.txt. To share
it with other devices, tap and hold the file name, tap share to select a file-sharing
method from Send file menu. Please make sure the filename is not renamed.
Page 73

To import the configuration file to be used in Programming Keys, make sure the file is
saved in the phone’s internal storage with the file name keys_config.txt. On
Programming Key screen, tap More and then “Import”. The new setting will be
immediately applied to the keys.
Page 74

RESTORE FUNCTION
To restore a key to its previously assigned function, tap menu key and then tap “Reset
to default”.
Page 75

2.9. DATA CAPTURE
2.9.1. BARCODE READER
A selection of scan engines is available for delivering flexibility to meet different
requirements. Depending on the scan engine integrated, the handy terminal is capable of
scanning barcodes of a number of symbologies that are enabled by default while running
the ReaderConfig application. If you need to scan barcodes that are encoded in a different
symbology, enable the symbology first.
2.9.2. DIGITAL CAMERA
An integrated 8 megapixel rear camera in the handy terminal is specifically designed for
collecting image data. You may use the image capture utility to turn on the camera and
capture images. By default, the images taken by this camera application are saved as JPG
files in DCIM folder in the device’s primary storage.
Page 76

Chapter 3
BASIC OPERATION
This chapter describes the basic skills to work with the RS31/BHT-1600 handy terminal,
for instance how to operate the home screen, check system statuses and manage
notifications. The add-on utilities for applications regarding data collection, processing, and
transmission are introduced in the following chapters.
IN T
HIS CHAPTER
3.1 Home Screen ............................................................ 75
3.2 Status Bar ................................................................ 86
3.3 Manage Applications ................................................... 89
3.4 Suspend & Lock ......................................................... 92
3.5 OS Update ................................................................ 94
3.6 Back up Your Data ..................................................... 96
3.7 Reset to Factory Default ............................................. 97
Page 77

3.1. HOME SCREEN
When the handy terminal is fully charged, press the Power key for three seconds to turn on
the handy terminal. A locked screen will appear. Slide the lock button in either
direction to unlock the screen.
Page 78
The Home Screen appears showing a status bar, shortcut icons, and a dock bar
containing an All Apps button. The home screen allows multiple pages for placing shortcut
icons and widgets. You may customize the home screen according to your preferences.
Shortcut icons
Dock
All Apps button
Status bar
Search bar
Widget icons
Page 79

3.1.1. CUSTOMIZE HOME SCREEN
ADD APPLICATION SHORTCUT TO HOME SCREEN
1) On the home screen you would like to customize, tap All Apps .
2) Locate the application to add, tap and hold the application icon.
3) The home screen will appear. Drag the application icon to your preferred position
and release to have it placed.
Page 80

ADD WIDGET TO HOME SCREEN
1) Tap and hold any empty spot on the home screen.
2) The current layout will shrink, and the available options related to home screen
appear on the bottom. Tap Widgets to enter the widget selection list.
3) In the widget selection list, scroll to locate your desired widget.
4) Tap and hold the widget until the home screen layout appears. Drag the widget to
your preferred position and release to have it placed. For a setting shortcut, you will
have to select a specific setting from the shortcuts list.
Page 81

ARRANGE THE SHORTCUTS AND WIDGETS ON HOME SCREEN
1) To move or remove a shortcut / widget, on the home screen you would like to
customize, tap and hold it to enter layout edit mode, a floating option “X Remove” will
appear on top of the screen, to which you can drag the unwanted shortcut to remove it.
Drag the icon to the preferred position and release it to have it placed.
2) To resize a widget, tap and hold it until a white frame appears. Tap and drag a white
dot to re-scale the widget.
Page 82

CHANGE HOME SCREEN WALLPAPER
1) Tap and hold any empty spot on the home screen.
2) Tap Wallpapers in the menu that appears.
3) Select an image to apply as the wallpaper.
4) Tap Set wallpaper at the bottom of the wallpaper preview screen to apply it.
Page 83

Page 84

Page 85

CREATE FOLDER
1) On the home screen you would like to customize, tap and hold the application
shortcut you would like to move, drag the icon on the top of another icon to create a
folder.
2) As these icons overlap, a folder is created.
3) After you let go your finger, these icons are enclosed in a circle.
Page 86

NAME FOLDER
1) Tap the folder you would like to name.
2) The folder will expand from a small circle to a full rectangle to show all the shortcuts
in it. Tap “Unnamed Folder” and edit the folder name.
3) Tap Done on the on-screen keyboard.
4) Tap elsewhere on the screen, the folder will shrink to a small circle with its new
name.
Page 87

REMOVE FOLDER
1) Tap and hold the folder you would like to remove.
2) Drag the folder to the top of the screen where the option “X Remove” is located.
Note:
Please note that, when you remove a folder, the shortcuts contained in it will be removed as
well.
Page 88

3.2. STATUS BAR
The left side of the status bar shows notification icons, and the right side of the status
bar shows status icons.
3.2.1. OPEN QUICK SETTING MENU
The status icons are related to essential settings regarding the device’s remaining power,
Bluetooth status or Wi-Fi connectivity status. The status bar offers a quick access for you to
easily make adjustments of the settings. To open Quick Setting menu, use you two fingers,
swipe from the top to the bottom of the screen. You can tap on each status icon on the menu
to switch among different modes or enter the settings.
Status icons
Notification
Quick
Setting
Page 89

3.2.2. OPEN NOTIFICATIONS PANEL
The notifications icons on status bar inform you of the new events such as incoming calls,
messages or USB connection.
CHECK OUT NOTIFICATION
To check out details of the events, swipe down from the status bar to open Notifications
Panel. Tap on the individual notification card to carry our immediate action or to open the
corresponding application.
DISABLE NOTIFICATION
You can change or turn off the notification of a specific app by tapping and holding on the
notifications card until the corresponding app name reveals along with an icon, tap it to
modify the notification-related setting.
Page 90

CLEAR NOTIFICATION
To dismiss a single notification, simply swipe the notification card right or left. You can also
dismiss all notifications at a time by tapping . Ongoing notifications and notifications
that require subsequent activity to be cleared will remain on the list.
Page 91

3.3. MANAGE APPLICATIONS
3.3.1. APPLICATION MENU
Tap All Apps on the Home screen to open the applications menu.
Icon Name Description
AppLock
An application used to limit the system resources made
available to Users
Browser Accesses the internet or intranet.
Calculator Performs mathematical calculations.
Calendar Creates and manages events, meetings and appointments.
Camera Takes pictures and shoots videos.
Chrome
An Android built-in browser application developed by Google.
Clock
Sets date, time, time zone according to your locale, and sets
and manages alarms.
Contacts
Manages contact information, and shares or exports/imports
the information to other devices or SD card.
Downloads List all files downloaded on the handy terminal.
Drive
An Android built-in application for a file storage and
synchronization service created by Google.
File Manager
Browses and manages files on the local storage and storage
card.
Gallery Views photos and videos stored on the handy terminal.
Gmail
An Android built-in application for Gmail, a free email service
provided by google.
Google
An Android built-in application providing you easy access to
handy services provided by Google such as searching for
nearby restaurants or updates on traffic alerts.
Hangout
An Android built-in application for a communication
platform developed by Google.
Page 92

Maps An Android built-in app developed by Google.
Messaging Sends SMS and MMS messages.
Phone
Places and receives calls, accesses voicemail, views call
history, manages phone contacts and adjusts phone settings.
Photos
An Android built-in application for a photo and video
sharing and storage service developed by Google.
Play Movies & TV
An Android built-in application for an online video on
demand service operated by Google.
Play Music
An Android built-in application for a music streaming
service and online music locker operated by Google.
Play Store
An Android built-in application providing access to a digital
distribution service, including a digital media store,
the Google Play Store, operated and developed by Google.
Reader Config
Sets scanner preferences, data output format and
destination, symbology settings, and reads barcodes.
Search
Searches the internet and handy terminal with the Google
search engine.
Settings Opens settings to configure the handy terminal.
SoftwareTrigger
An application serving as a real trigger key, floating on top of
all other programs for convenient trigger control of the
bardcode scanner.
Sound Recorder Records and plays audio information.
Voice Search
An Android built-in Google product allowing users to
use Google Search by speaking on a mobile phone.
YouTube
An Android built-in application for a video-sharing service.
Page 93

3.3.2. CURRENT APPLICATIONS
Tap the Recent Apps button . The screen will show a list of recently used
applications.
On this screen, you can:
SWITCH BETWEEN APPLICATIONS
Swipe up or down to cycle through the listed applications, tap on your desired one to open
it on the screen.
END APPLICATION
Slide an application to the left or right, or tap the X on top right to close it.
Note:
Close unused applications in order to release RAM. Remember to save your data or settings
before closing any application.
Page 94

3.4. SUSPEND & LOCK
3.4.1. SUSPEND DEVICE
The handy terminal operates continuously once it is powered on. To minimize power
consumption and prevent unintended operation, suspend the handy terminal if you are not
actively using it. The handy terminal can be quickly awoken from suspend mode to operate
as needed. When the handy terminal enters suspend mode, the system is in a power-saving
status, meaning the device will not respond to screen touch, and volume keys and side
buttons will also be unavailable until the device is unlocked.
SUSPEND RS31/BHT-1600
Press the power button to suspend the handy terminal. The handy terminal will automatically
suspend when the time period set in
Screen Timeout Settings has passed without any activity.
3.4.2. LOCK DEVICE
Setting a screen lock allows you to protect your personal data on this device while the
device is not at your hand. With various types of screen lock available and Smart Lock, you
can not only enjoy the benefits of this function but also great convenience.
LOCK RS31/BHT-1600
Tap All Apps | Settings | Security | Screen lock to change the lock
method.
Disable screen lock
Default slide gesture
Enter a pattern to unlock
Set a voice command to unlock
Uses the PIN code to unlock
Enter a password of at least 4 characters
to unlock.
Page 95

By selecting a pattern, Voice Unlock, Pin or Password method, you can access advanced
settings and Smart Lock to customize personal lock settings.
Warning:
To save battery power, suspend the handy terminal when not in use.
Page 96

3.5. OS UPDATE
Updating the operating system on the handy terminal helps maintain it at an optimized
state. You may choose to update the system by establishing a wireless network connection
to the Internet and downloading the update file from the OTA server.
Note:
The handy terminal will shut down during system update. Save any unfinished tasks and
data before updating the system in order to avoid data loss.
NETWORK UPDATE
In order to check for and download the latest system update file on the server, make sure
a wireless network connection to the Internet is established on the handy terminal.
Note:
To avoid any additional charges to your wireless data plan, Wi-Fi connection to the Internet
is recommended for downloading the file.
1) Tap All Apps | Settings | About phone | System updates. A
window pops up asking you to input the password for system update. Please contact
manufactory for the password. Enter the password and tap OK.
2) The handy terminal searches for the latest system update file on the server. Tap
DOWNLOAD AND INSTALL to download the update file.
3) When a new system update file is detected on the server, a notification icon will
appear on the status bar, and a text notification will pop up in the notifications panel.
Page 97

SD CARD UPDATE
1) Obtain the latest system update file, and copy the file onto the root storage of your
SD card.
2) Insert the SD card into the memory card slot on the handy terminal. Press the power
button to power it on.
3) Tap All Apps | Settings About phone | System updates.
A window pops up asking you to input the password for system update. Please contact
manufactory for the password. Enter the password and tap OK.
4) The handy terminal searches for an available system update file on the SD card.
Note:
Make sure the SD card is inserted in the handy terminal. If not, the screen will show that
your system is currently up to date.
If there is a later version of the system update file available on the server, it will be listed
on the screen along with the update file found on the SD card. Tap the update file you would
like to use and proceed.
5) Tap INSTALL to open an “Install update” confirmation window. Tap Install in the
confirmation window to begin the installation.
Once complete, a notification will appear showing that the system has been updated
successfully. Tap OK to show the Home screen.
Page 98

3.6. BACK UP YOUR DATA
With Android Backup Service, you can have your personal data (Google calendar
settings, Google contacts, Chrome browser data and Gmail settings) and certain system
settings under your Google account backed up (over network connection) on the cloud. This
allows you to easily restore the settings on this device after a Factory Reset (refer to Reset
to Factory Default ).
Note:
1) To back up your photos and videos, Tap All Apps | Photos to sync the files on
your device with Google Photo Library.
2) To back up other documents such as audio or video files on the device’s storage, you can
make use of Google Drive service.
3) Android Backup Service does not handle SMS messages and certain app progress data
and settings.
To start:
1)Make sure you device is connected with network.
2)Tap All Apps | Backup & reset and enable Back up my data.
3)Tap Backup Account to log in to your Google account.
To restore your backed up personal data of a Google Account, just add that account to the
device.
Page 99

3.7. RESET TO FACTORY DEFAULT
Performing a factory reset will erase all data on your handy terminal (including call logs,
messages, files as well as your installed apps and their associated data) and revert the
device back to its original state in which it is powered on by you for the first time.
It is strongly recommended that you follow the instructions in
Back up Your Data to back
up important data before performing a factory reset.
To start:
1)Tap All Apps | Settings | Backup & reset and Factory data reset.
Confirm the action by tapping on the buttons and input the verification code. Finally, tap
OK to perform a factory reset.
Page 100

Chapter 4
WIRELESS RADIOS
The Wi-Fi module integrated on the handy terminal lets you configure and connect to
network wirelessly.
IN T
HIS CHAPTER
4.1 Use Wireless Wide Area Network .................................. 99
4.2 Use Wireless Local Area Network (Wi-Fi) ..................... 109
4.3 Use Bluetooth ...........................................................115
4.4 Use Near Field Communications .................................. 119
 Loading...