

Page 1
Page 2

Banshee Plus Plus includes:
1* Banshee Plus BOX MOD
1* User Manual
Specification
Size: 55mm*95mm*26mm
Output Mode:TEMP-Ti/TEMP-Ni/Temp-SS/POWER
Output Wattage:1W-150W
Support resistance: above 0.1ohm
Temperature Range: 100C-315C (200F-600F);
Each +/- increase or decrease 5C/10F
Hidden full length LED display, durable stainless steel,
Dual 18650 Batteries (Sold saperately)/
Max discharge current over 20A
510 Thread
Page 3
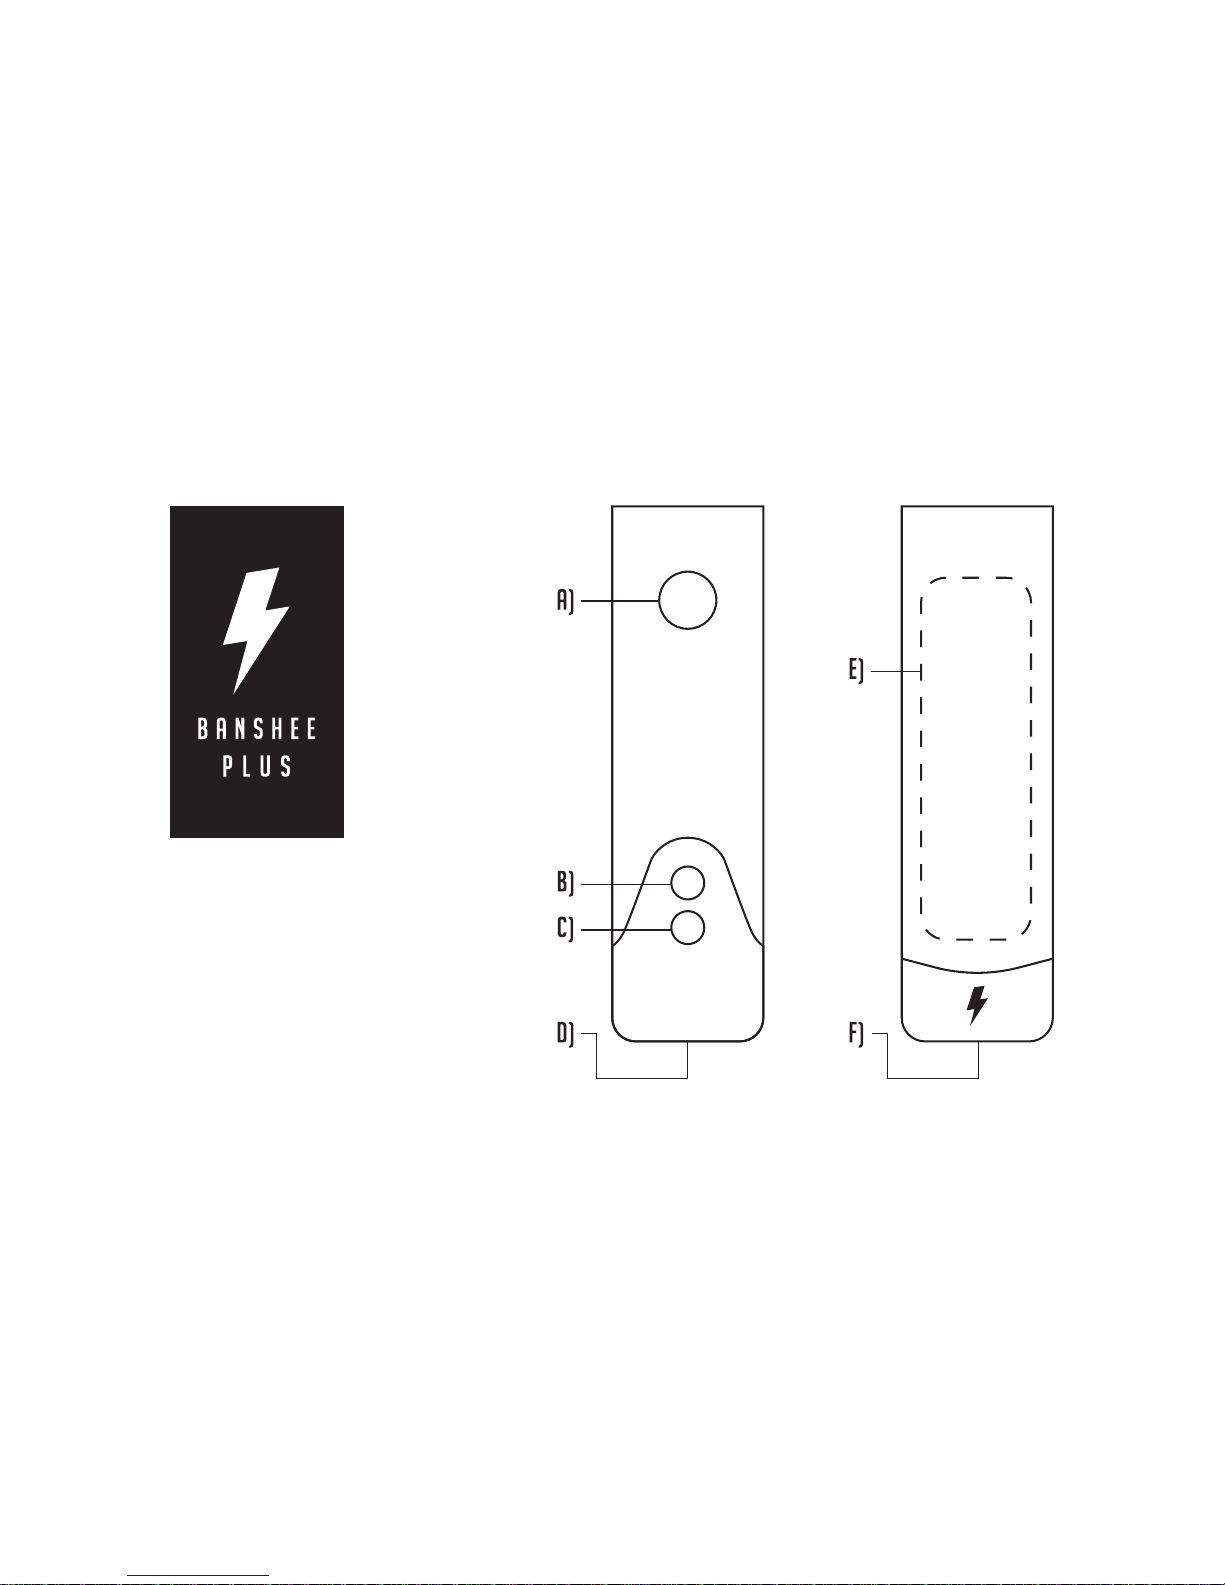
Pieces & Parts
A) Firing button
B)Adjust up button
C)Adjust down button
D)USB port (underneath) for firmware only!
E)Hidden display area
Page 4

How to Use
1. Power on/off
Slide off the battery cover, and put 2pcs 18650 cell into the battery holder(recommends:high-rate and
better branded 18650 cells,Max discharge current over 20A)
Press the firing button 5 times within 2S to turn on the devise on/off,
Power on screens display “CIGGO” → Resting Screen
2. Details Operation Steps
Enter Setting Mode:
Press both adjustment buttons simultaneously. Come out interface image B, then press”+” or “-” to
select a working mode. Once desired mode is reached, press the fire button to confirm.
Page 5
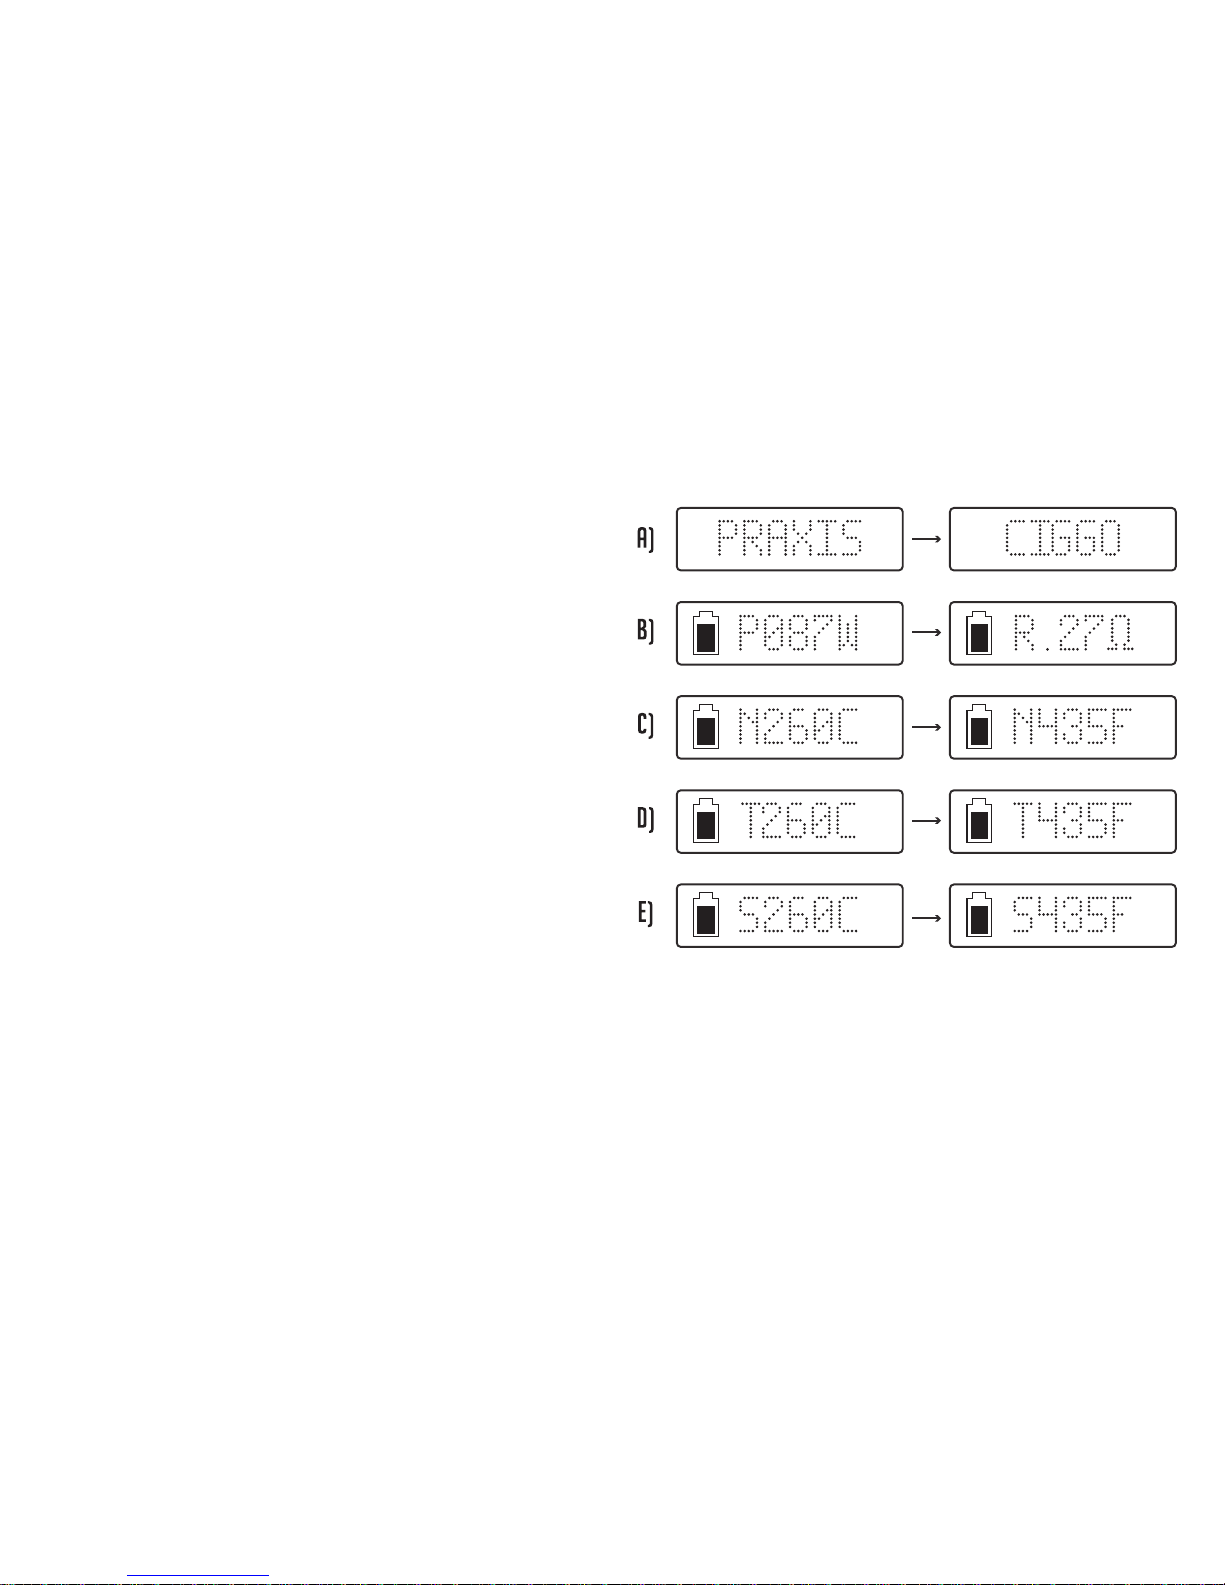
Display Screens:
A)Powering on screen
B)Resting screen (Power Mode)
C)Nichrome TC Mode
D)Titanium TC Mode
E)Stainless steel TC Mode
Page 6

3. Vaping
Hold the firing button and inhale from the atomizer mouthpiece, release the firing button and exhale
The “ ” battery symbol will change to “ ”lightning symbol
4. Adjust power:
Press adjustment buttons. Longer press=Faster adjustment
(After you have made your selection/adjustments, the display will show your power output for 1s and
then your resistance for 3s)
How to Switch Fahrenheit and Celsius
Under TEMP NI/TI/SS working mode, firstly set Celsius up to 315C, then press “+” switch Fahrenheit,
after that press +/- to get remperature up/down.
Repeat the operation, Celsius and Fahrenheit will switch.
Notice: To full fill the switch, each time need to set Celsius or Fahrenheit on the top date. Then you
could switch between each other.
Page 7

How to adjust Wattage
Under TEMP NI/TI/SS working mode, press firing button and “+” together to increase the wattage,
Press firing button and “-” button together to decrease the wattage.
5. Short circuit protection
If the devise didn’t screw with atomizer or the atomizer resistance is exceed supporting range, screen
display “Ω” symbol flashing 3 times(Picture 2])
6. Standby Mode
If no more operation within 30s, the device will shut off screen. Press firing button, display screen will
light up again.
7. Over vaping protection
Single puff over 10s, devise will stop output.
Page 8
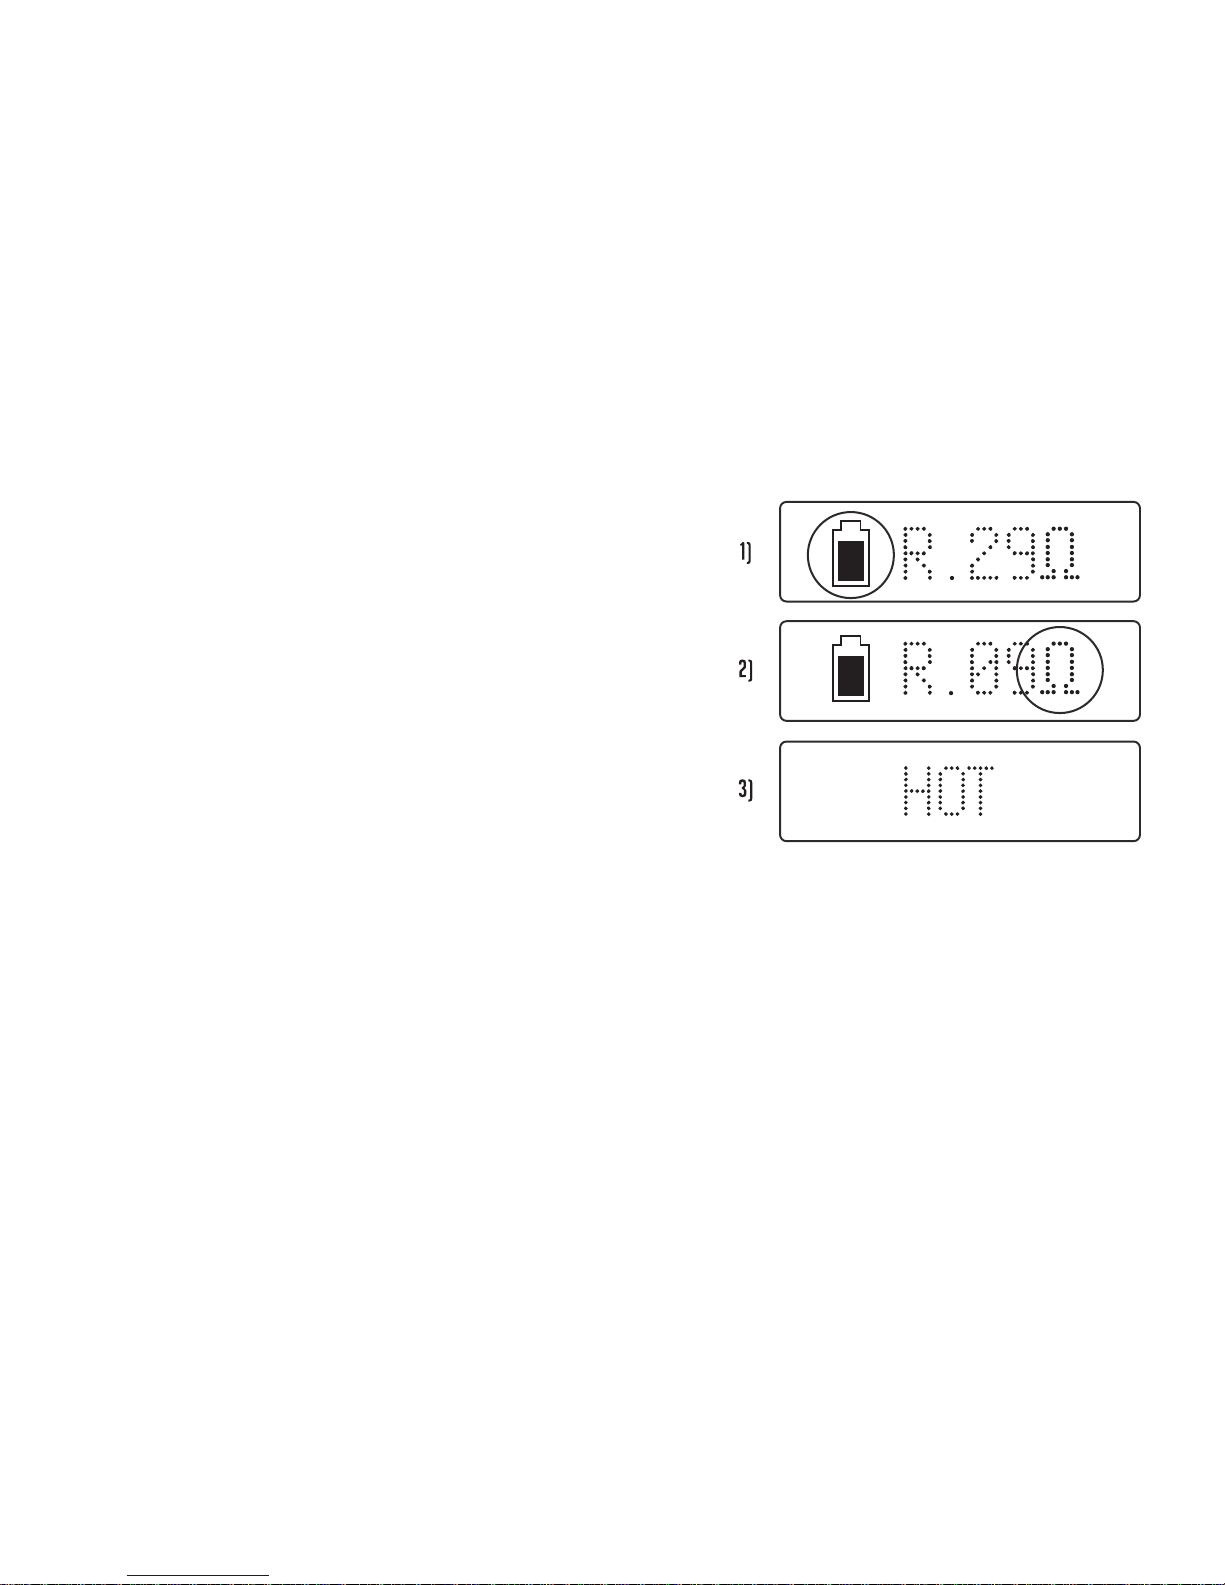
8. Over discharge remind protection
If vaping voltage is lower than 6.8V, the battery symbol will
flashing 5 times to remind you the devise needs to charging,
and device turns off automatically.(Picture 1])
9. Over Hot Protection
If device inner temperature over 70C, Screen will display
“HOT” , you need to wait the temperature go down to 68C,
then continue your vaping.(Picture 3])
10. Upgrade Your Devise
Upgrade your program at the Micro USB charger port.
Page 9
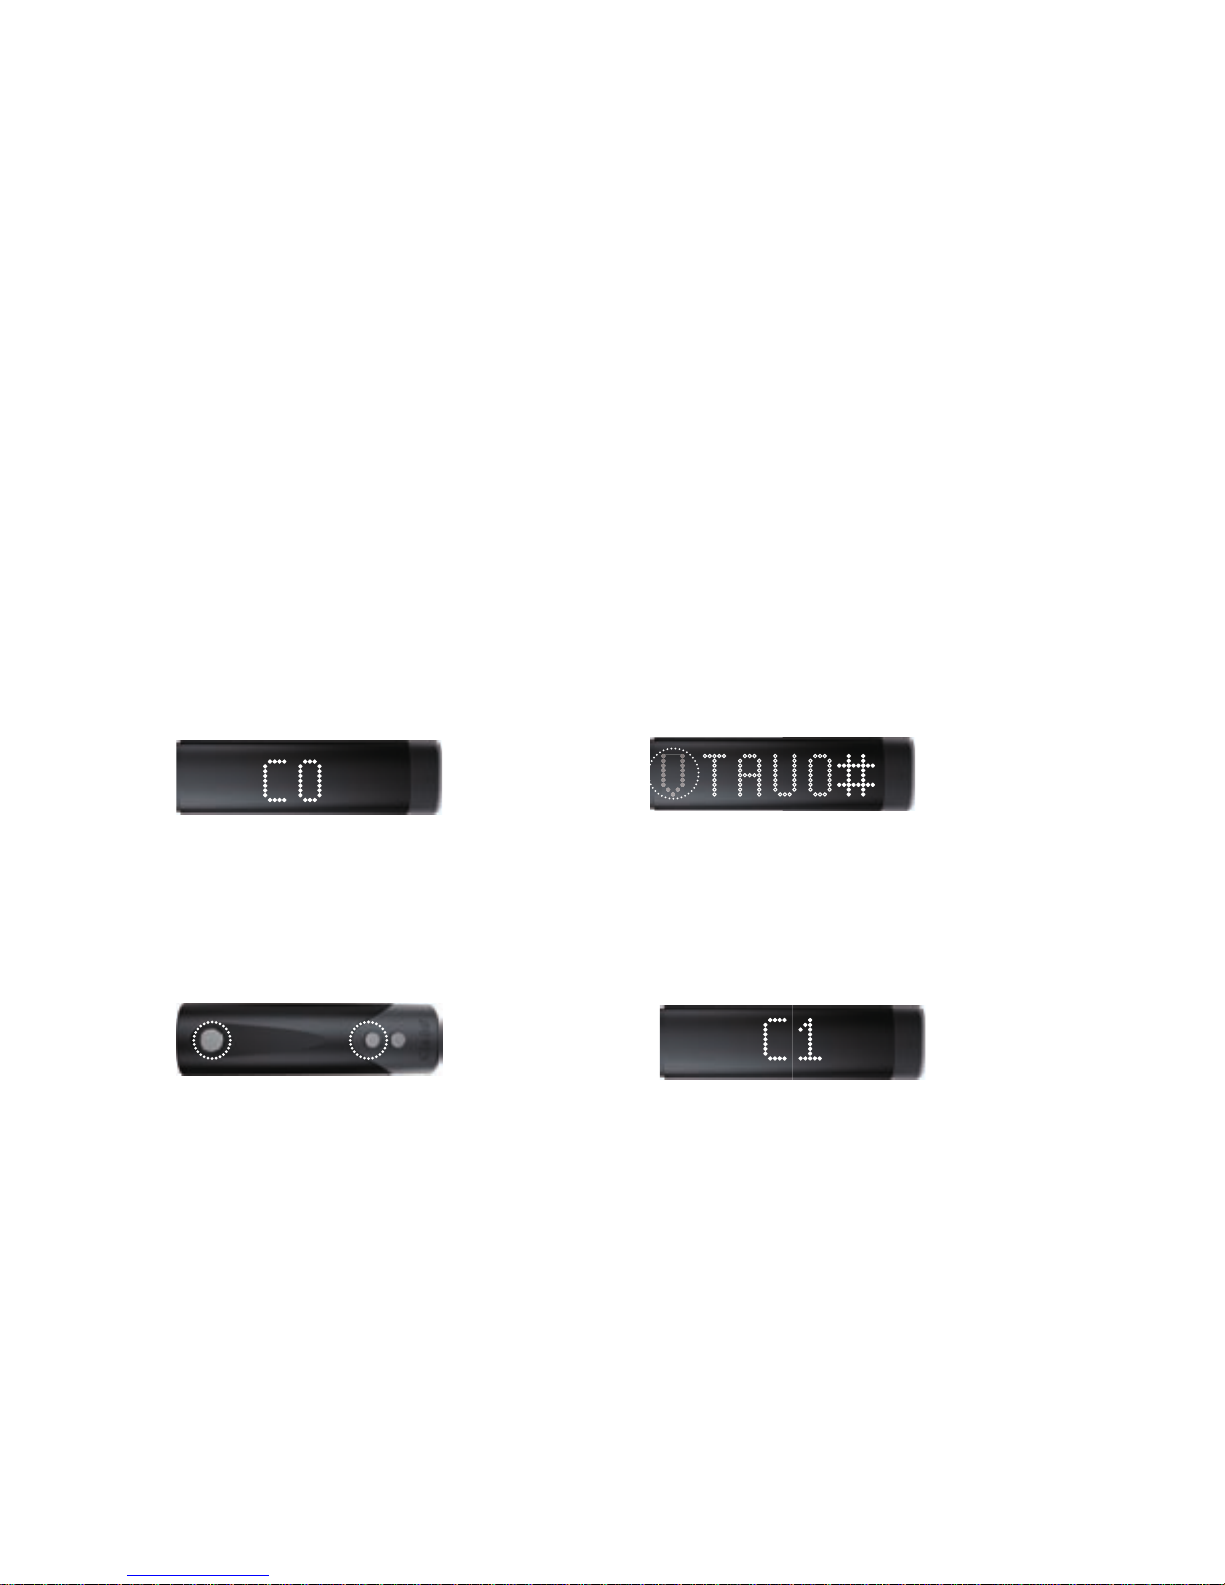
How to edit your led screen:
1. 1) Make sure your box mod don't have battery cell inside.
(if you already have battery cell inside , please take it out), keep the box mod empty or at least the battery slider is open.
2) Press both "+" and "-" at the same time , and put the battery cells into the box mod , then cover back the the battery slider.
3) after operation 2) , screen shows"C0" (image F), it means you are setting the first word. When the setting letter chosen , the
letter will flash (image G), press "+" or "-" to select the letter or number you want to choose.
2. Short press both "+" and "-" edit next letter.
3. Press fire button and "+" at the same time (image H), editing next word , screen shows Co, C1(image I), C2, ...C9, then the
word first letter is flashing , it means you are editing.
Repeat the operation, you will see C0, C1,C2, C3, C4, C5,C6,C7.C8,C9 , total 10 sets of words.
image F (C0)
image G
TAUO
image H image I
Page 10
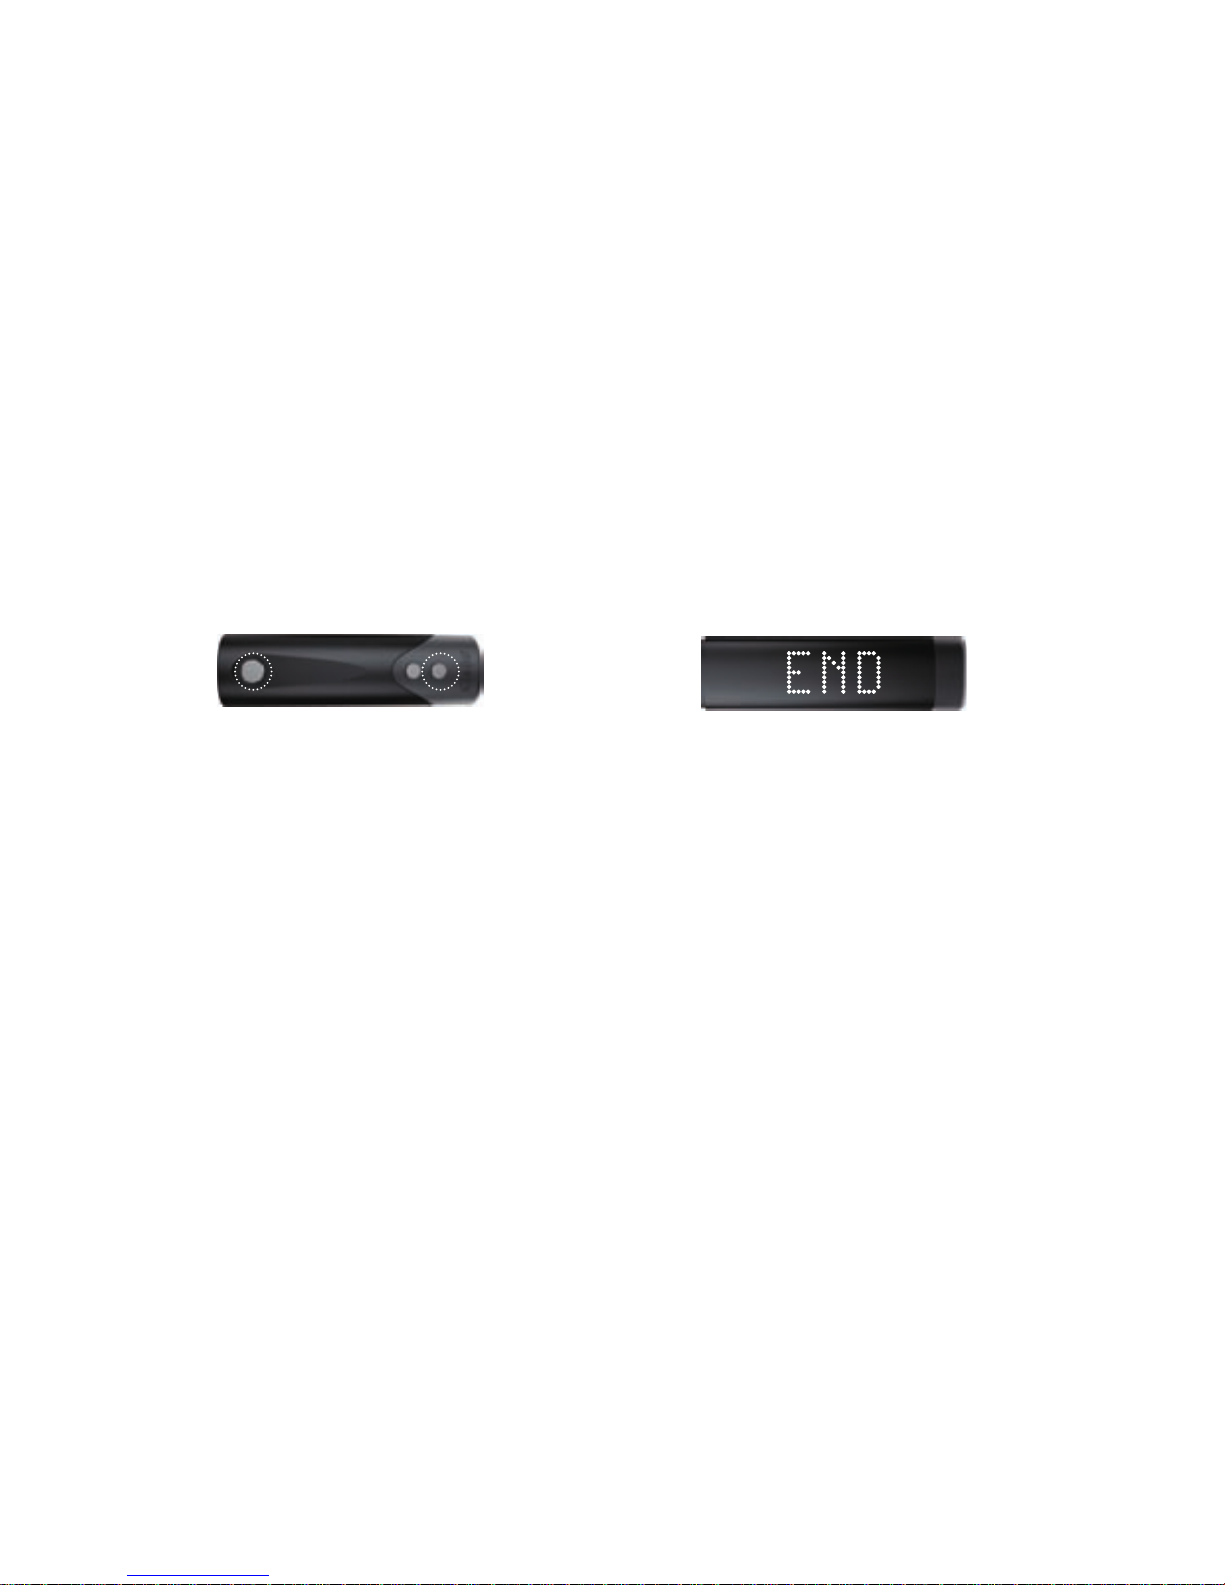
4. To finish the settings, long press on fire button and "-" (image J)until the screen shows "END"(image K) , settings
are done.
Warm promopt:
1.If you failed with screen editing, please recheck if you've followed correct operating steps , as buttons not press at the
same time , or cover back the battery slider too early, both will cause unsuccessful opeartion. Please be patient and try
more times.
2. If the screen occurs messy code, commonly take out the battery and instal the battery again will solve the problem.
image J image K
Page 11

Possible side effect:
Using this device can cause dehydration and lead to mouth and throat irritation, if it’s occurs, please
change your power and/or airflow setting and/or the your e-liquid.
The crossed-out dustbin symbol indicates that batteries, rechargeable batteries, button
cells, battery packs, etc. must not be put in the household waste; batteries are harmful to
health and the environment. Please help to protect the environment for health risks.
Dispose of battery in accordance with your local battery recycling or disposal law.
Waste Electrical and Electronic Equipment (WEEE)When this device is out of use. Bring
electrical appliance to the local collecting points for waste electrical and electronic
equipment. The rest of the component can be put in household waste.
Page 12

120 Day Limited Warranty
This limited warranty does not cover any problem that is caused by:
A)Conditions, malfunctions or damage not resulting from defects in material or workmanship.
B) Conditions, malfunctions or damage resulting from normal wear and tear, improper installation,
Improper maintenance, misuse, abuse, negligence or accidental alteration.
C) Connected materials and/or products not manufactured by Praxis vapors.
Our Limited warranties are void if a product is returned with removed, damaged or tampered labels or
any alterations, including removal or alteration of any internal or external components.
This Warranty extends to the original purchaser only and is non-transferable.
Purchaser is required to show proof of purchase for any clams.
Contact: [email protected] for warranty inquiries.
Page 13

Page 14

 Loading...