

Chungear Co CE10723 User Manual

CEILING FAN REMOTE CONTROLLER
OPERATION AND INSTALLATION INSTRUCTIONS
(Please keep this instruction pamphlet.)
IMPORTANT
YOU MUST SET CEILING FAN MANUAL SWITCH TO HIGH SPEED AND LIGHT KIT
(IF ANY) TO ON POSITION BEFORE OPERATING REMOTE CONTROL.
IMPORTANT POINTS TO REMEMBER
1.Read and save these instructions.
2.Please note that all fixed wiring appliances should be installed by a qualified electrician.
3.The supply to the remote control receiver should be connected through a mains switch, i.e. existing wall switch.
4.Disconnect from power supply at wall switch before working on remote control receiver or ceiling fan.
5.Install receiver into the ceiling fan canopy of the fan to ensure proper protection.
6.This unit is to be used for the control of ceiling fan and in a AC110/120V 60Hz power supply only.
7.Do not install in damp locations or immerse in water. (For indoor use only.)
8.Do not pull on or cut leads shorter.
9.Do not drop or bump the unit.
10. PLEASE NOTE: The battery will weaken with age and should be replaced before leaking takes place as this will
damage the transmitter. Dispose of used battery properly, keep the battery out of reach of children.
11. CAUTION: To reduce the risk of fire or injury, do not use this product in conjunction with any variable (rheostat)
wall control.
:
INSTALLATION INSTRUCTIONS
CAUTION: INCORRECT WIRE CONNECTION WOULD DAMAGE THIS RECEIVER.
1.Ceiling fan must be set at HIGH speed and light kit (If any) at ON position by pressing the “Light Switch” after
installation.
2.Once the connection has been made, the receiver inserts into the drop rod hanging bracket. The canopy comes up to
cover the receiver and bracket.
3.For better remote performance with WiFi system, let T-shape antenna stuck on ceiling and outside of the steel
canopy. (Fig. 1)
Fig. 1
CHANNEL SETTING STEPS:
want
1.
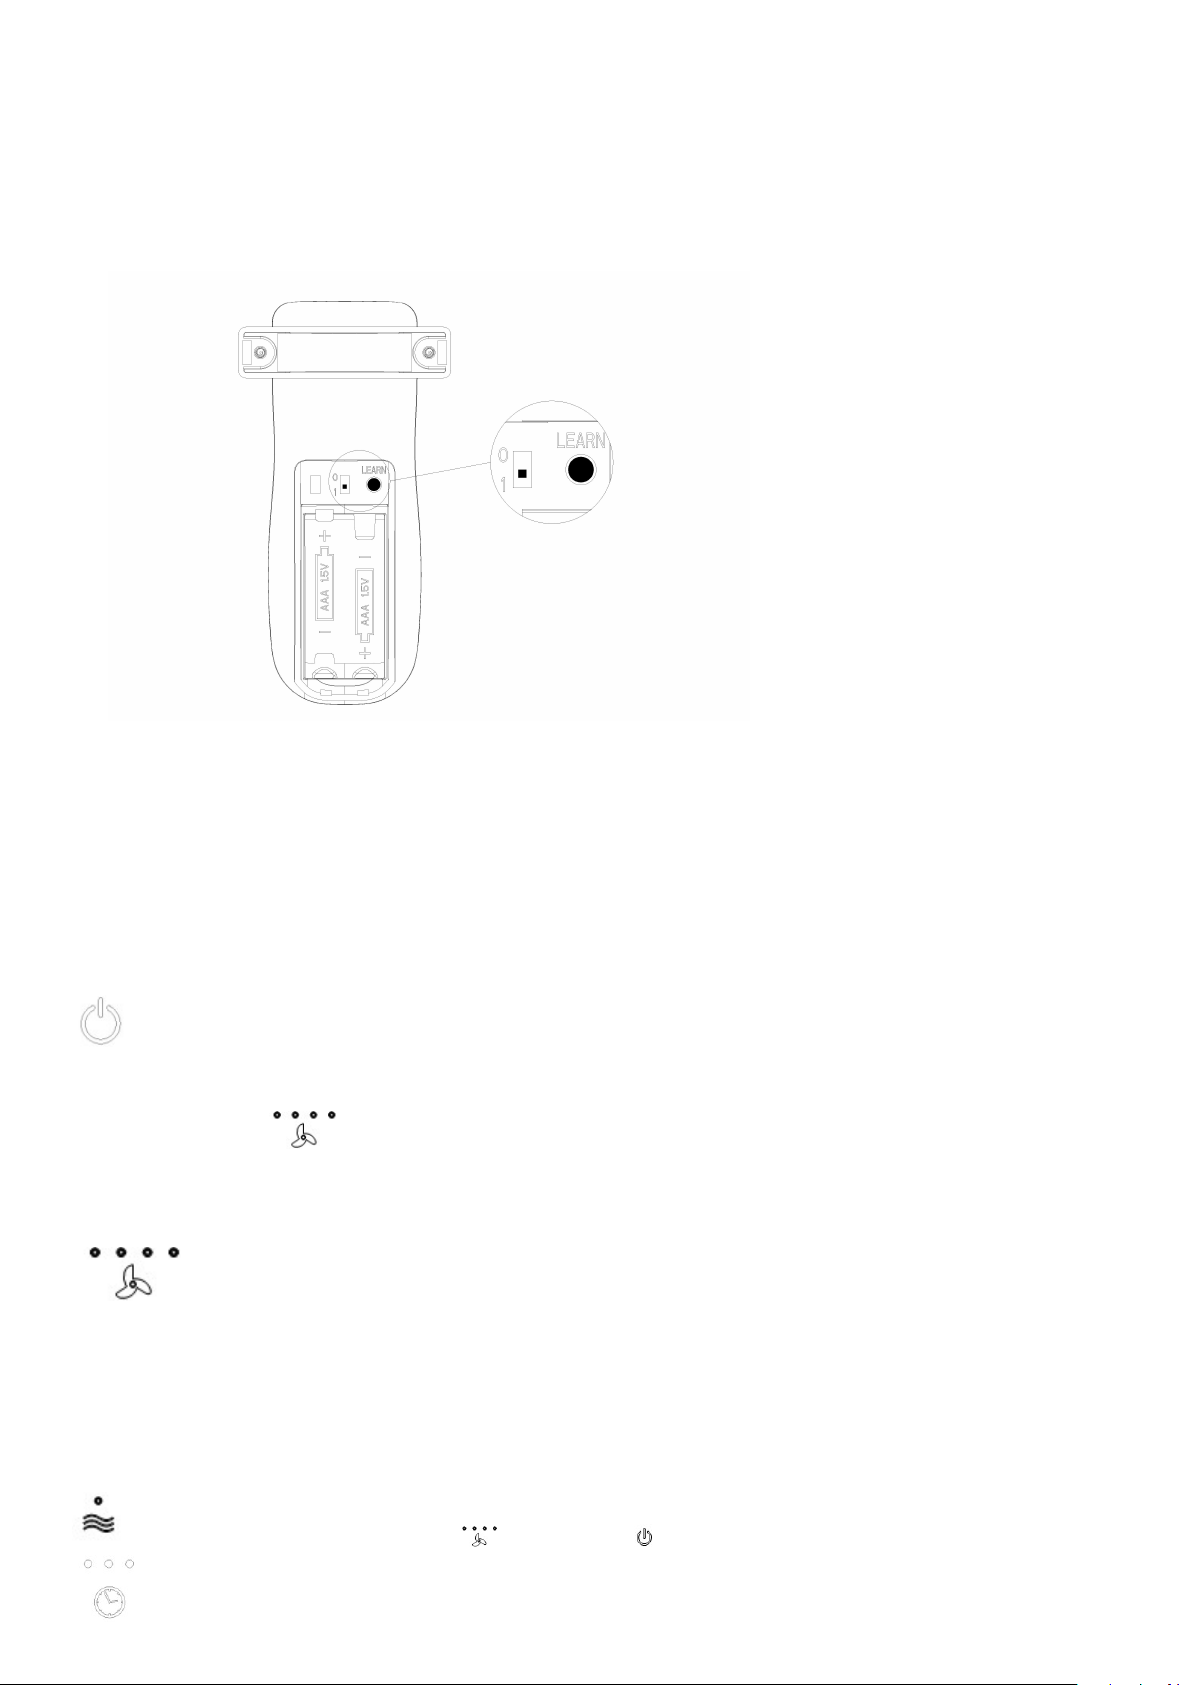
Make sure power to the fan is off. Open the remote battery cover and install 2pcs DC1.5V,AAA batteries. (Fig. 2).
2. Change the dip switch from 0 to 1 (Fig. 2).
3. Turn on power to the fan, and within 30 seconds press and hold the “Learn” button for 5 seconds to allow the
handset and receiver to pair. Fan will turn on at low speed and light (if installed) will turn off. This confirms that the
setting is active and ok.
Fig. 2
DIP SWITCH – 0 & 1
0: All handsets and receivers are factory pre-set to the same channel. You can operate the fan without
doing a channel setting above but we recommend that you set an individual channel for your fan.
1: This is to allow for each handset and receiver to be set on an individual channel.
FUNCTIONS OF TRANSMITTER
The power button will turn the fan and light power on or off when press this button within 3 seconds. When you
hold the power button over 3 seconds, the “walk away time delay” function is activated. When press the button each
time, the 4pcs LEDs will on. If you want to cancel “walk away time delay” function, you could press any
button of transmitter.
light kit will dim to 50%, turn off in 30 seconds.
1sttime press the button, four LEDs are on and turn fan on high speed
If dip switch to ON, then light kit will blink once, turn off in 30 seconds. If dip switch to DIM, then
2nd time press the button, left three LEDs are on and turn fan on medium speed
3rd time press the button,left two LEDs is on and turn fan on low speed
4th time press the button, left one LED is on and turn fan on lower speed
5th time press the button, and turn fan off
Press the button, LEDs will on about 3 seconds, for set fan speed being turned and changed at random. If you
to cancel this function, press fan button or power button.
When fan is on, press this button for set fan turn off automatically after 2 hours, 4 hours, 8 hours or off directly. The LED
 Loading...