

Chungear Co CE10715 User Manual
CEILING FAN REMOTE CONTROLLER
OPERATION AND INSTALLATION INSTRUCTIONS
(Please read and save this instruction .)
IMPORTANT POINTS TO REMEMBER:
1. Read and save these instructions.
2. Please note that all fixed wiring appliances should be installed by a qualified electrician.
3. The supply to the remote control receiver should be connected through a mains switch, i.e. existing wall
switch.
4. Disconnect from power supply at wall switch before working on remote control receiver or ceiling fan.
5. Install receiver into the ceiling fan canopy of the fan to ensure proper protection.
6. This unit is to be used for the control of ceiling fan and in an AC110/120V 60Hz power supply only.
7. Do not pull on or cut leads shorter.
8. Do not drop or bump the unit.
9. PLEASE NOTE: The battery will weaken with age and should be replaced before leaking takes place as
this will damage the transmitter. Dispose of used battery properly, keep the battery out of reach of
children.
10. CAUTION: To reduce the risk of fire or injury, do not use this product in conjunction with any variable
(rheostat) wall control.
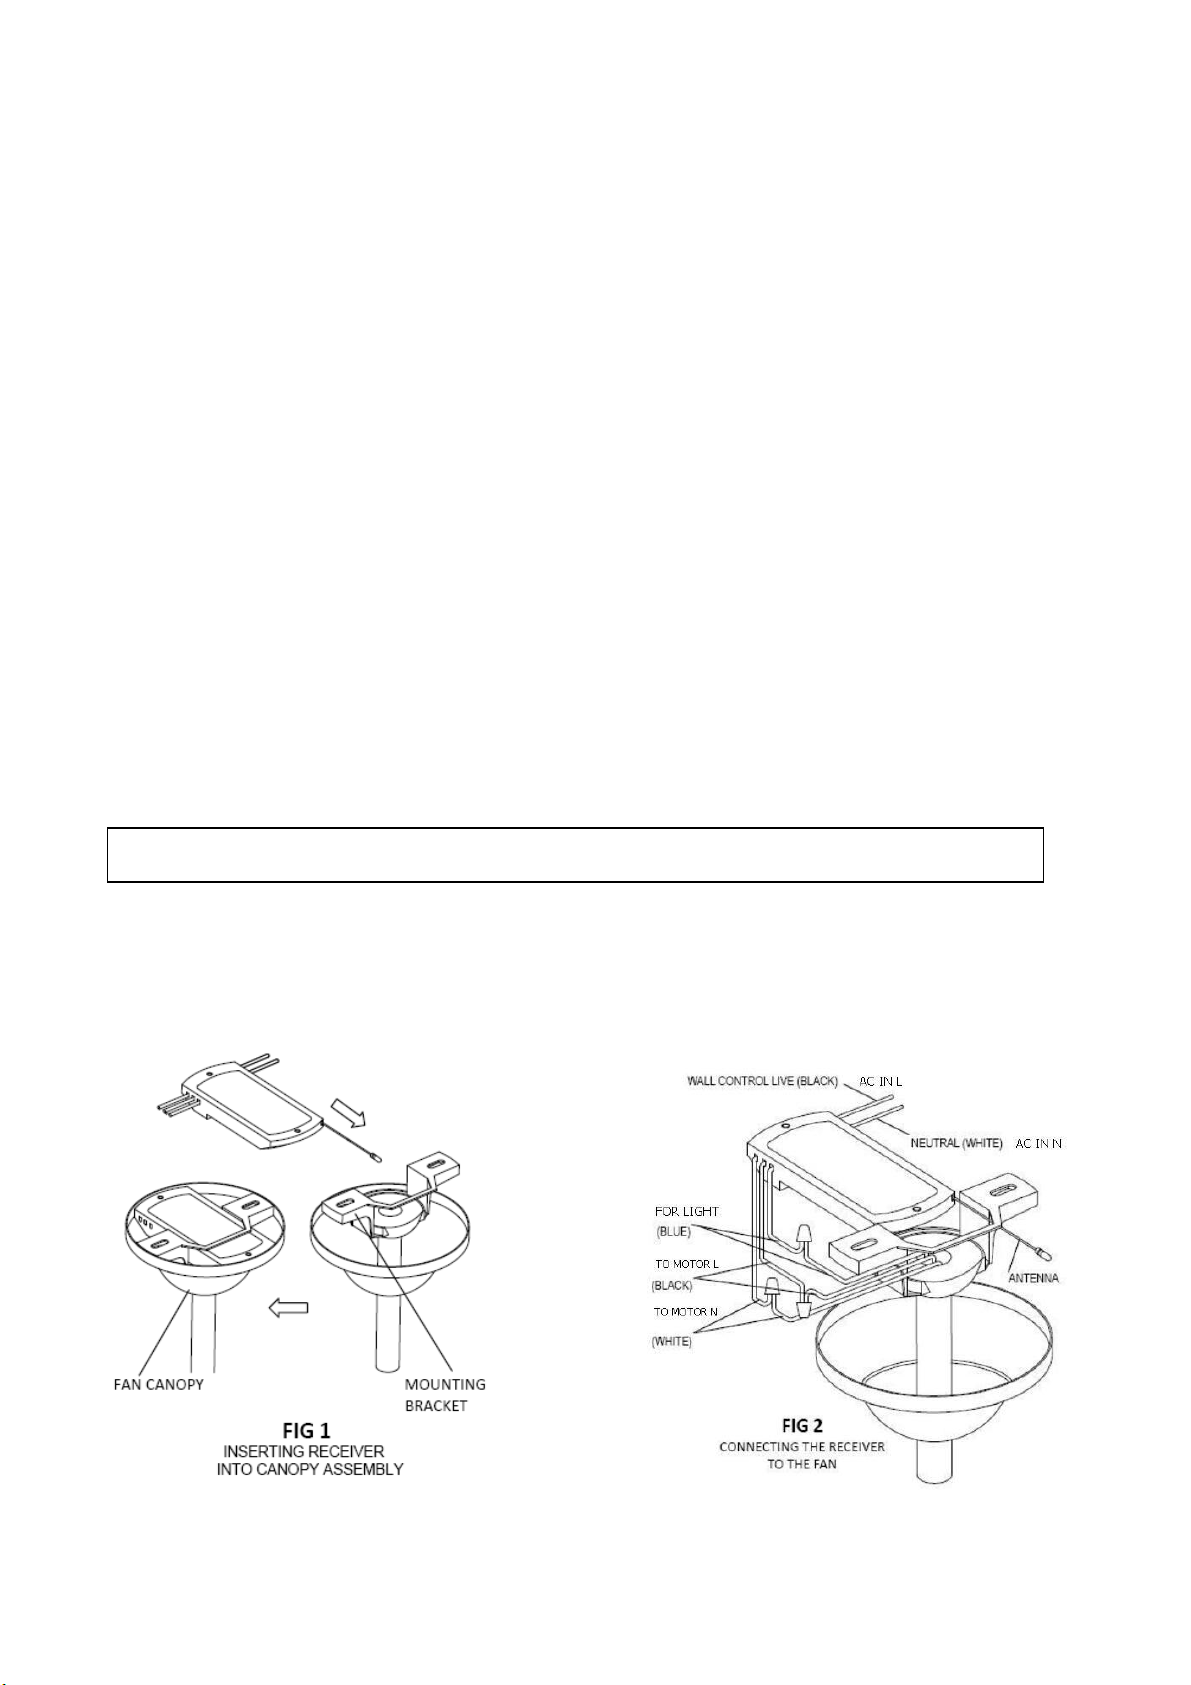
INSTALLATION INSTRUCTIONS
CAUTION: INCORRECT WIRE CONNECTION WOULD DAMAGE THIS RECEIVER.
1. Once the connection has been made, the receiver inserts into the drop rod hanging bracket.
The canopy comes up to cover the receiver and bracket.
LEARNING PROCESS
TR306A
The system for is equipped with a learning frequency function which has 16 code combinations to prevent
potential interference from other remote units. The frequency on your Receiver and Transmitter units have been
preset at the factory. No frequency change is necessary. If the fan is non-functional or if you desire to install
another fan within the same home or area with a separate frequency code, please see below instruction manual
to learn how to change the frequency.
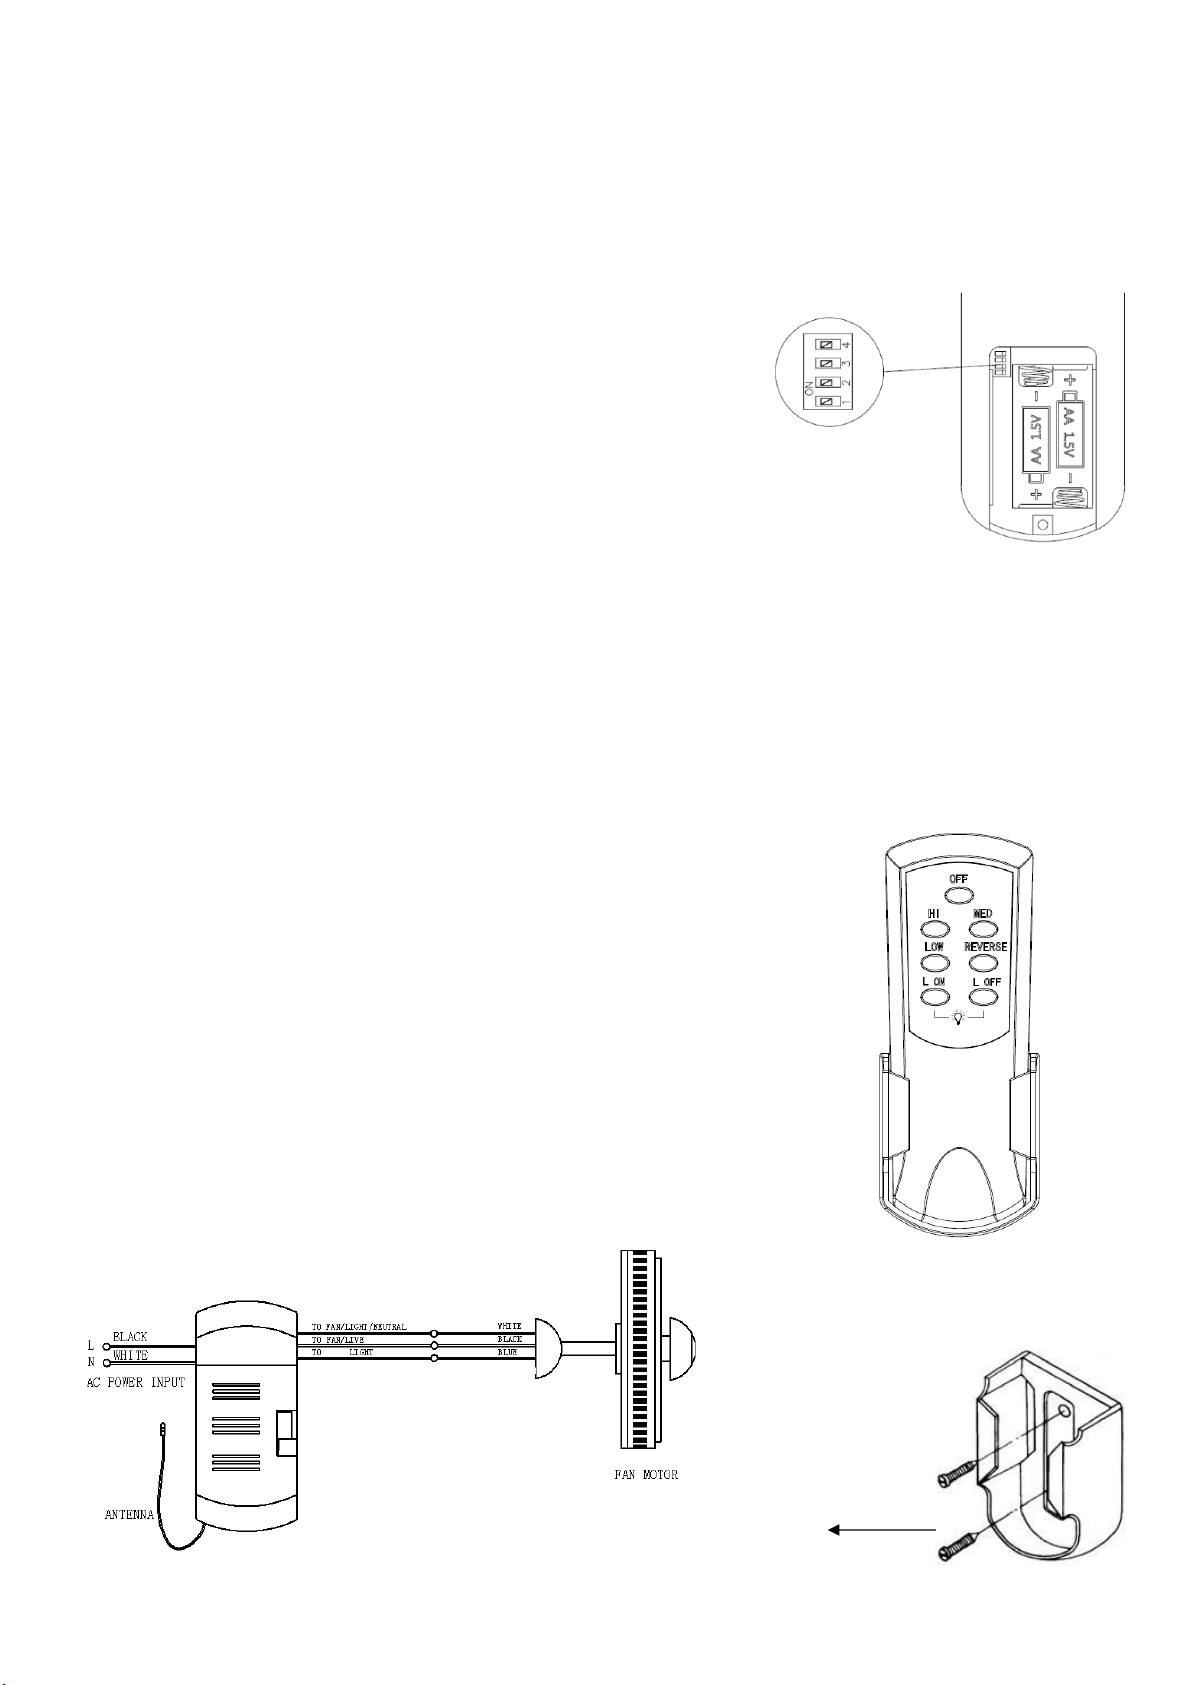
Install the AA 1.5V*2PCS batteries in transmitter
1 Turn the power off to your ceiling fan.
2 Please use a small size tool to change the frequency settings on the
control system
3 Return power to the unit.
NOTE: After the AC power is on, do not press any other button on the
remote control before pressing the (FAN OFF) button. Doing so will
cause the procedure to fail.
4 Within 30 seconds of turning the fan's AC power ON, press and hold the (FAN OFF)button for 10 seconds
to enter the learning function.
5 Once the receiver has detected the set frequency, the down light of your fan if applicable will blink twice and
fan will begin to rotate for a short period and then shut off..
6 The receiver has now learn the frequency which has been selected on the transmitter. After completing the
steps above, you should be able to operate the ceiling fan and light. If the fan is not responding to the transmitter.
please turn the power off to the receiver, and repeat the process.
FUNCTIONS OF TRANSMITTER
OFF : Turn off the ceiling fan.
HI : Turn on ceiling fan at high speed
MED : Turn on ceiling fan at medium speed.
LOW : Turn on ceiling fan at low speed.
REVERSE: To set fan wind direction up or down.
L ON : Turn on the light.
L OFF :Turn off the light.
Ceiling Fan Remote Control Wiring Connection
HOLDER FOR TRANSMITTER
(If desired, install onto the wall with
two screws.)
 Loading...