

Chungear Co CE10515 User Manual
WALL TRANSMITTER
OPERATION AND INSTALLATION INSTRUCTIONS
(Please keep this instruction pamphlet.)
IMPORTANT
YOU MUST SET CEILING FAN MANUAL SWITCH TO HIGH SPEED AND THE LIGHT KIT
TO THE ON POSITION BEFORE INSTALLING THE REMOTE CONTROL.
IMPORTANT POINTS TO REMEMBER:
1. Read and save these instructions.
2. Please note that all fixed wiring appliances should be installed by a qualified electrician.
3. The supply to the remote control receiver should be connected through a mains switch, i.e. existing
wall switch.
4. Disconnect from power supply at wall switch before working on remote control receiver or ceiling fan.
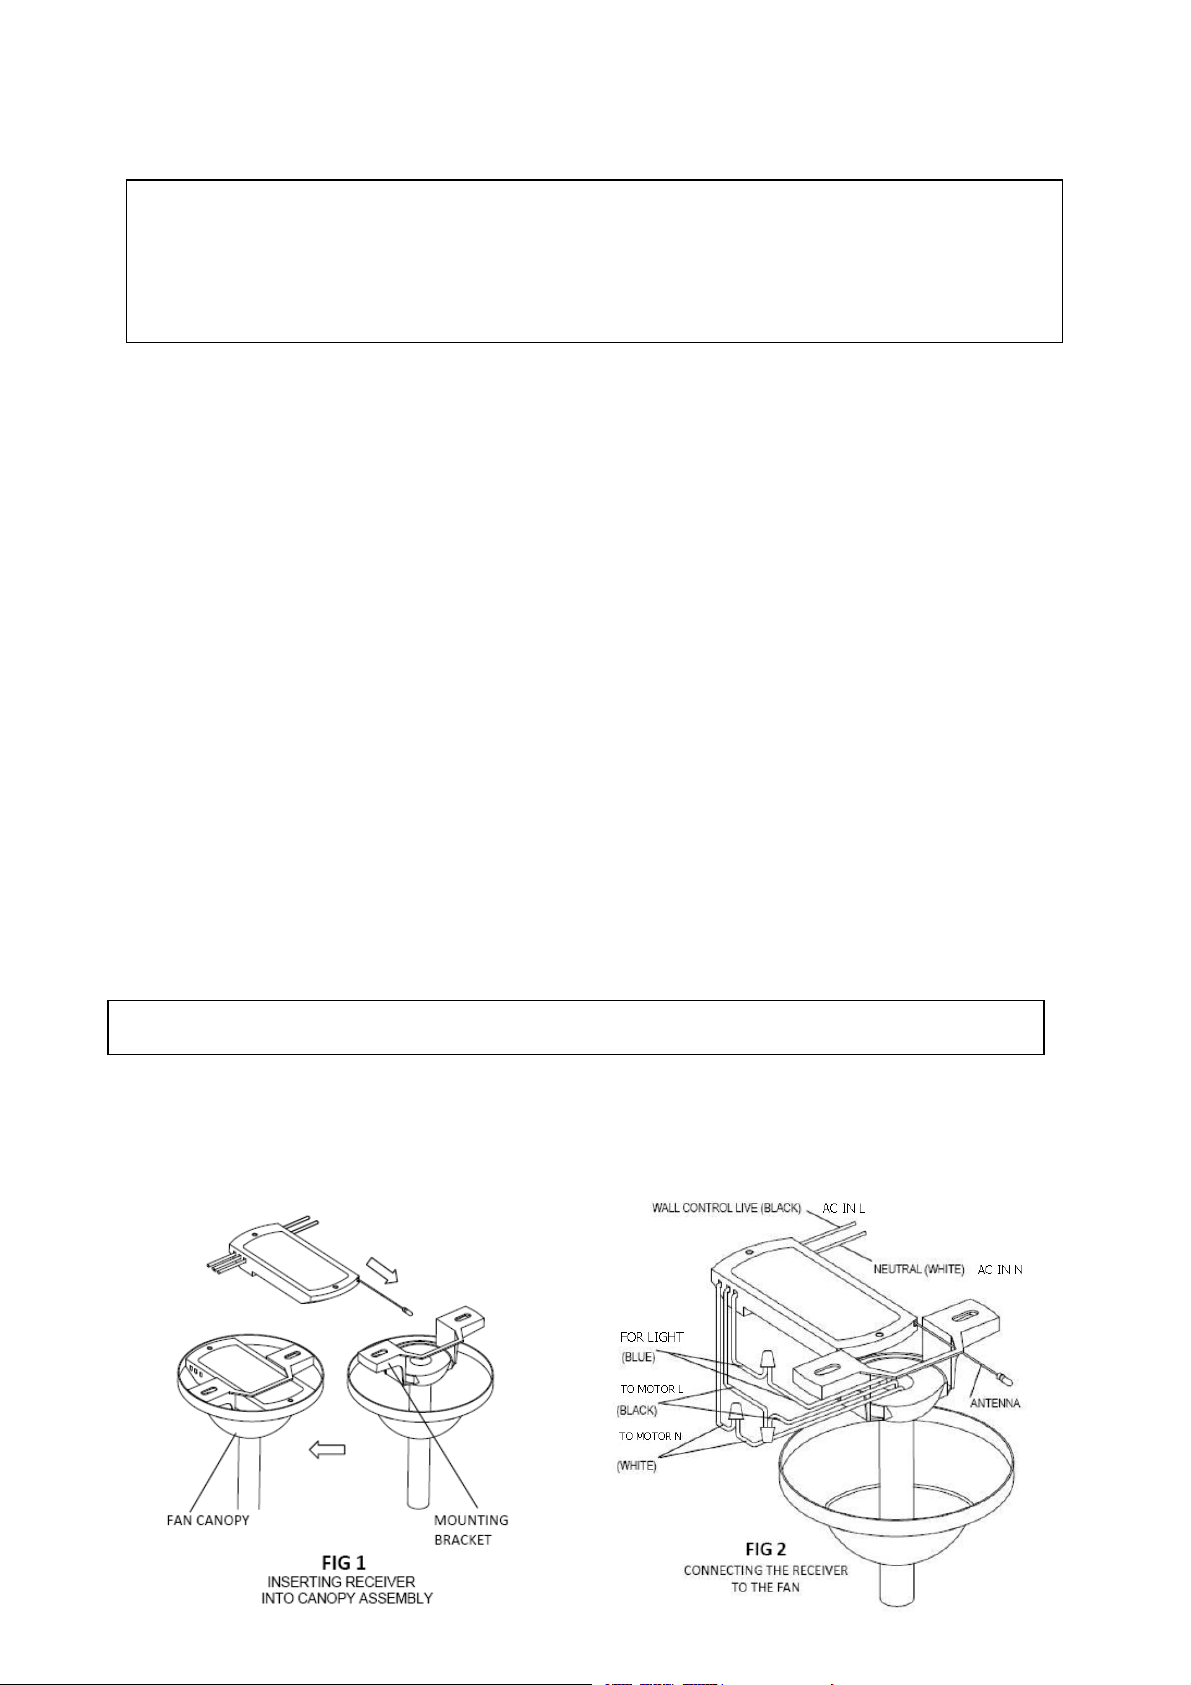
5. Install receiver into the ceiling fan canopy of the fan to ensure proper protection.
6. This unit is to be used for the control of ceiling fan and in an AC110/120V 60Hz power supply only.
7. The receiver is acceptable for installation in damp and wet rated fans, but cannot be submerged in
water. The wall transmitter is only to be installed indoors.
8. Do not pull on or cut leads shorter.
9. Do not drop or bump the unit.
10. PLEASE NOTE: The battery will weaken with age and should be replaced before leaking takes place
as this will damage the transmitter. Dispose of used battery properly, keep the battery out of reach of
children.
11. CAUTION: To reduce the risk of fire or injury, do not use this product in conjunction with any variable
(rheostat) wall control.
INSTALLATION INSTRUCTIONS
CAUTION: INCORRECT WIRE CONNECTION WILL DAMAGE THIS RECEIVER.
1. Ceiling fan must be set at HIGH speed before installation.
2. Once the connection has been made, the receiver inserts into the drop rod hanging bracket. The
canopy comes up to cover the receiver and bracket. (FIG 1and 2)
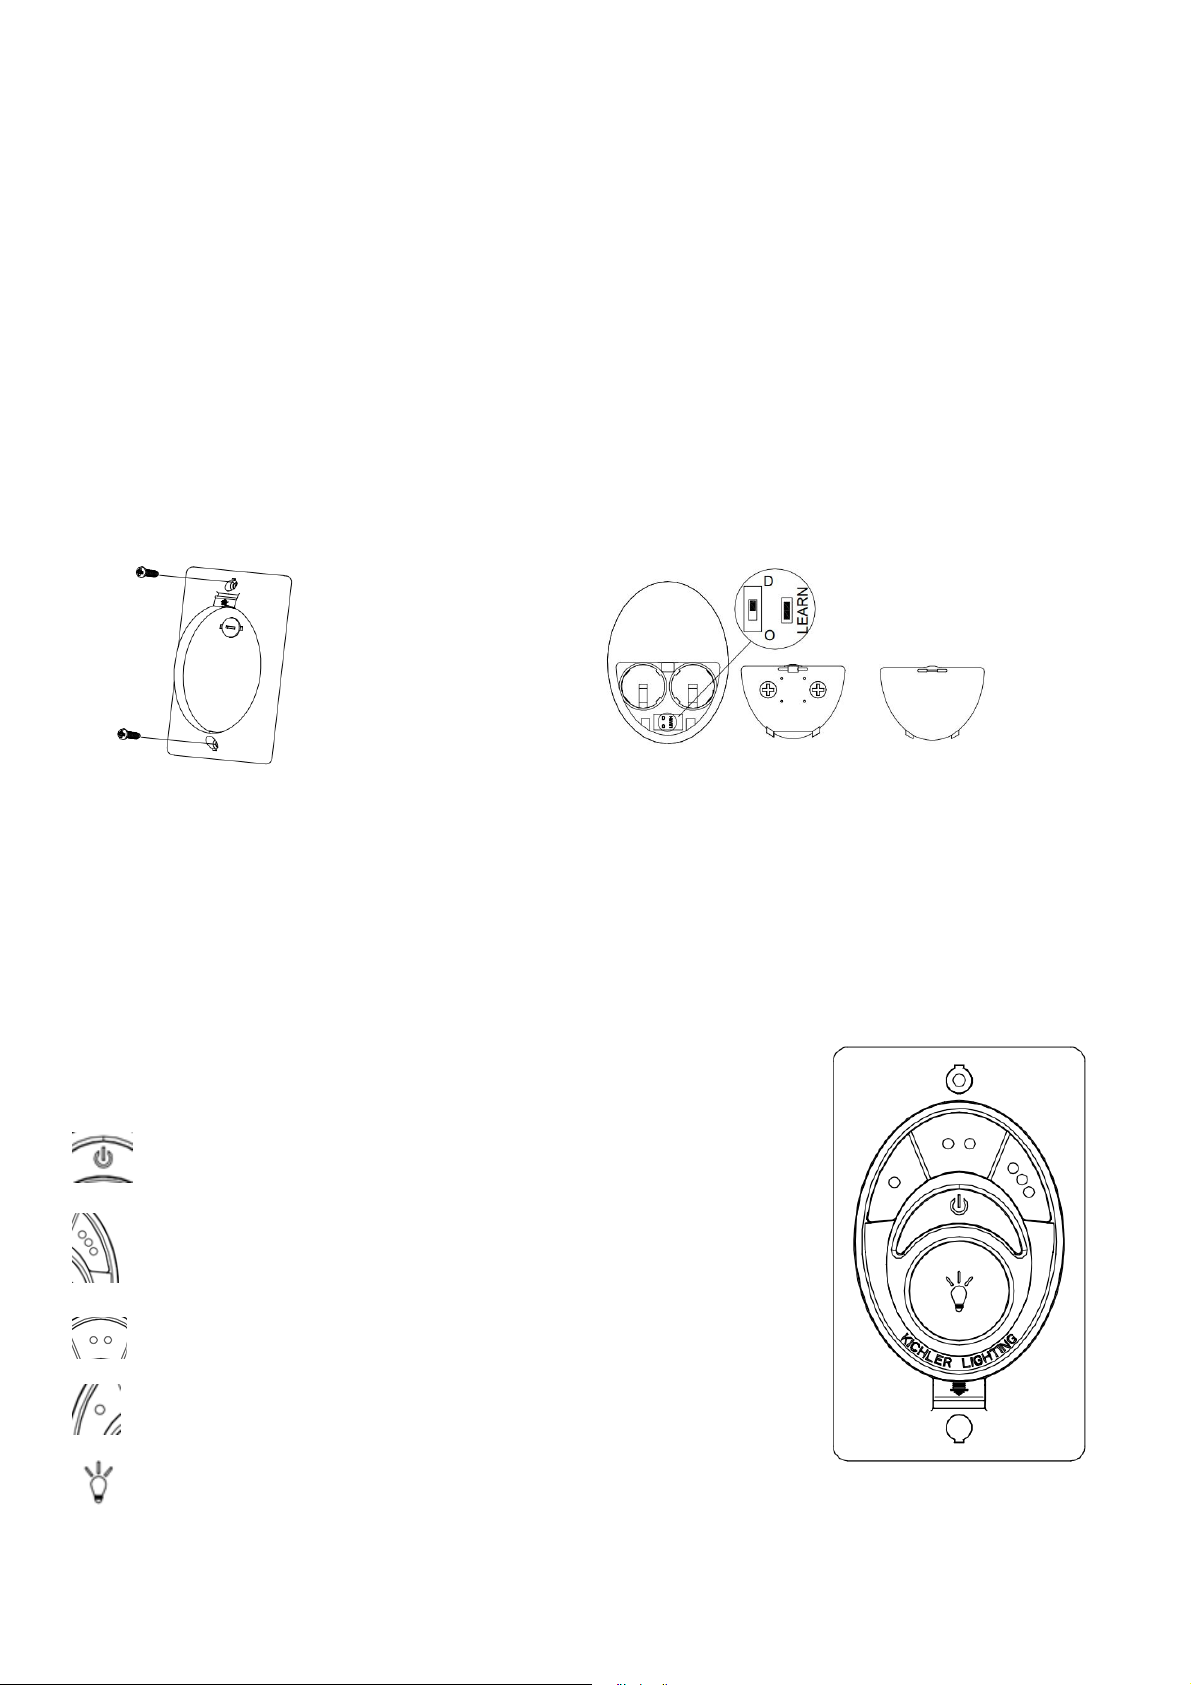
LIGHT FUNCTION SELECT SWITCH
1. If the ceiling fan has fluorescent lighting, please slide the “light function select switch” to “O” position. If
the ceiling fan has incandescent or halogen lighting, please slide the “light function select switch” to
“D” position. (FIG. 4)
2. Light load: 190W (Max.) If overloaded, the receiver will cut off light power automatically. Please
change the light load.
Installing Wall Bracket ( HANDSET TRANSMITTER):
The wall control can be used together with handset control,
You could install the bracket as the below FIG. 5 shows
FIG. 3 FIG. 4
HANDSET TRANSMITTER OPERATION
Activating the Learning process: Turn on the receiver power, press and hold the LEARN key (on the back
of the transmitter) for 1~3S. Refer to FIG. 4
Fan will turn on at medium speed and light (if installed) will turn on. This confirms that the SMART SYNC
setting is active and ok.
Transmitter use 2 pcs CR2032 3V batteries.
FUNCTIONS:
:Turn off the ceiling fan.
: Turn on the fan at high speed.
: Turn on the fan at medium speed.
: Turn on the fan at low speed.
: ON/OFF-Turn the light on or off.
DIMMER-Press and hold to dim or brighten light to the desired level
and release.
(Incandescent or halogen only and light function select switch on “D” position.)
TR250A
 Loading...