


Chungear Co CE10325 Users Manual
WALL TRANSMITTER
OPERATION AND INSTALLATION INSTRUCTIONS
(Please keep this instruction pamphlet.)
IMPORTANT
YOU MUST SET CEILING FAN MANUAL SWITCH TO HIGH SPEED LIGHT KIT ON
POSTION BEFORE OPERATING REMOTE CONTROL.
IMPORTANT POINTS TO REMEMBER:
1. Read and save these instructions.
2. Please note that all fixed wiring appliances should be installed by a qualified electrician.
3. The supply to the remote control receiver should be connected through a mains switch, i.e. existing wall switch.
4. Disconnect from power supply at wall switch before working on remote control receiver or ceiling fan.
5. Install receiver into the ceiling fan canopy of the fan to ensure proper protection.
6. This unit is to be used for the control of ceiling fan and in an AC110/120V 60Hz power supply only.
7. Do not install in wee locations or immerse in water.
8. Do not pull on or cut leads shorter.
9. Do not drop or bump the unit.
10. PLEASE NOTE: The battery will weaken with age and should be replaced before leaking takes place
as this will damage the transmitter. Dispose of used battery properly, keep the battery out of reach of
children.
11. CAUTION: To reduce the risk of fire or injury, do not use this product in conjunction with any variable (rheostat)
wall control.
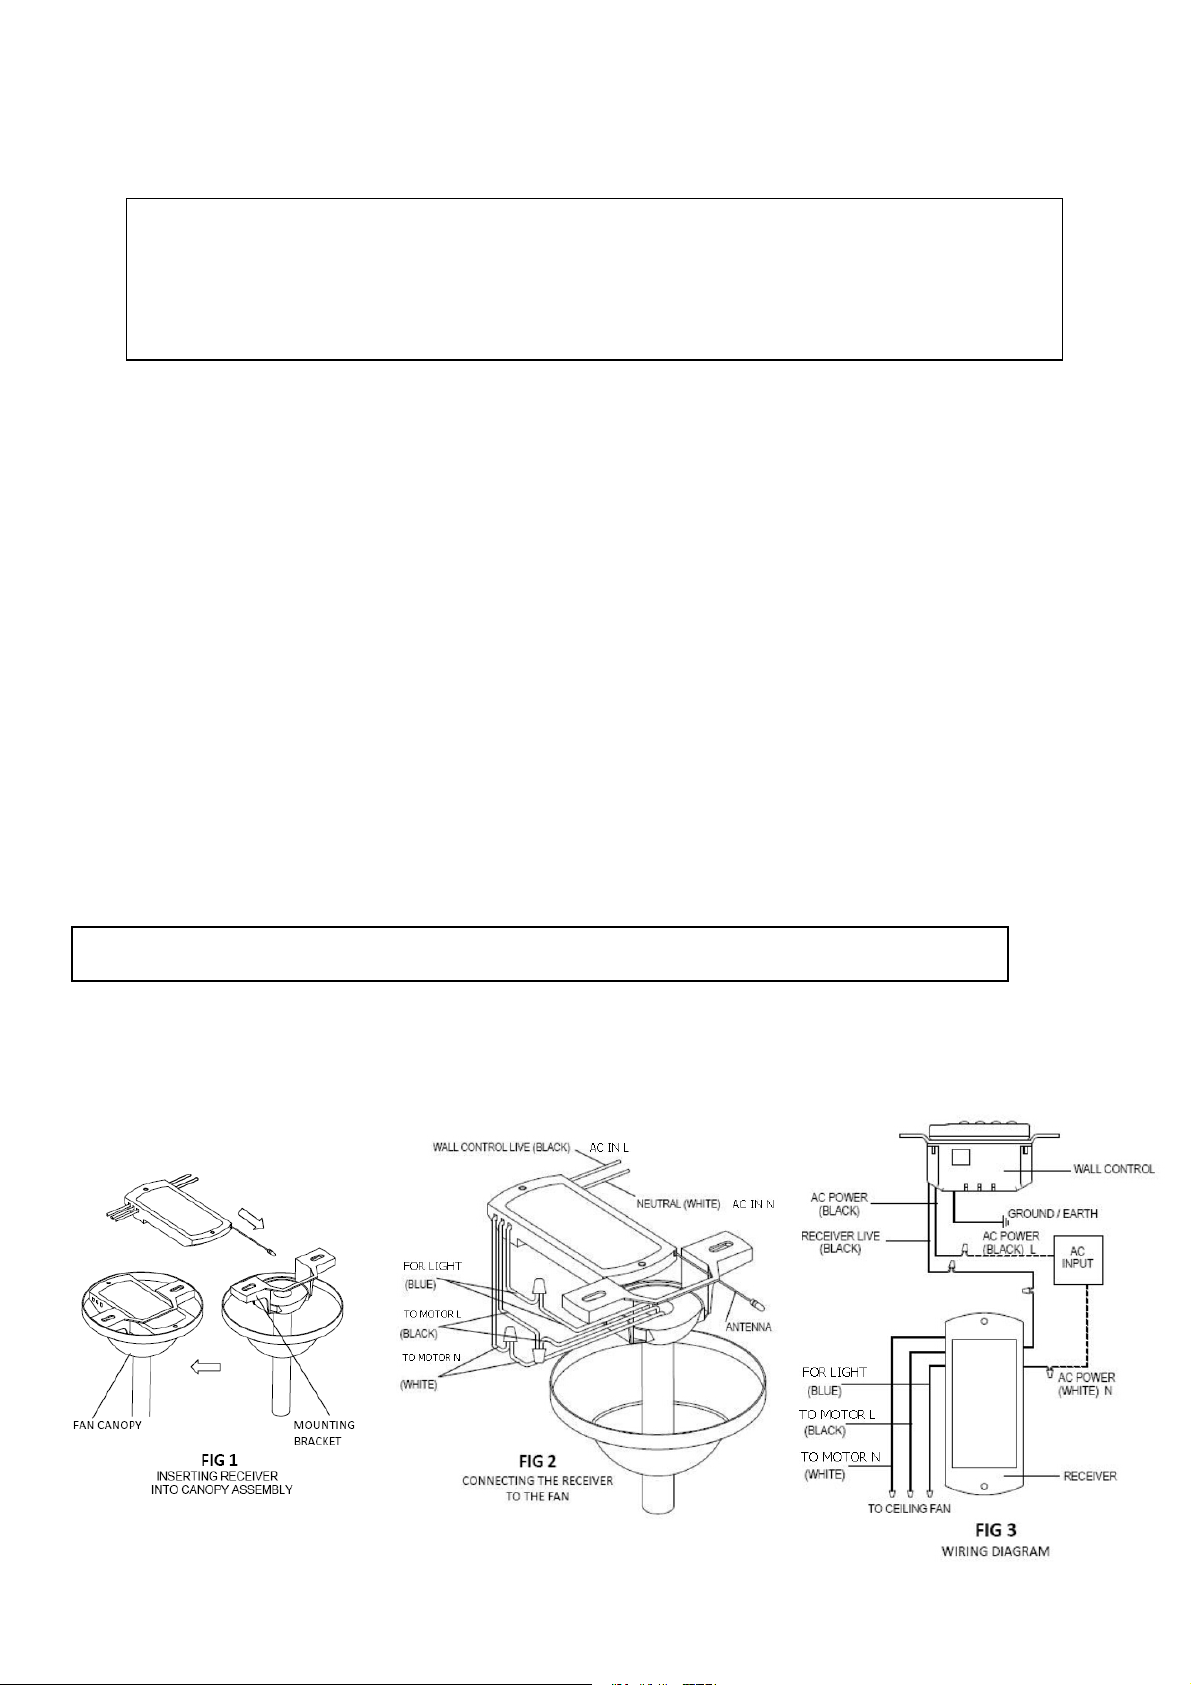
INSTALLATION INSTRUCTIONS
CAUTION: INCORRECT WIRE CONNECTION WOULD DAMAGE THIS RECEIVER.
1.Ceiling fan must be set at HIGH speed after installation.
2.Once the connection has been made, the receiver inserts into the drop rod hanging bracket. The canopy comes up to cover the
receiver and bracket.
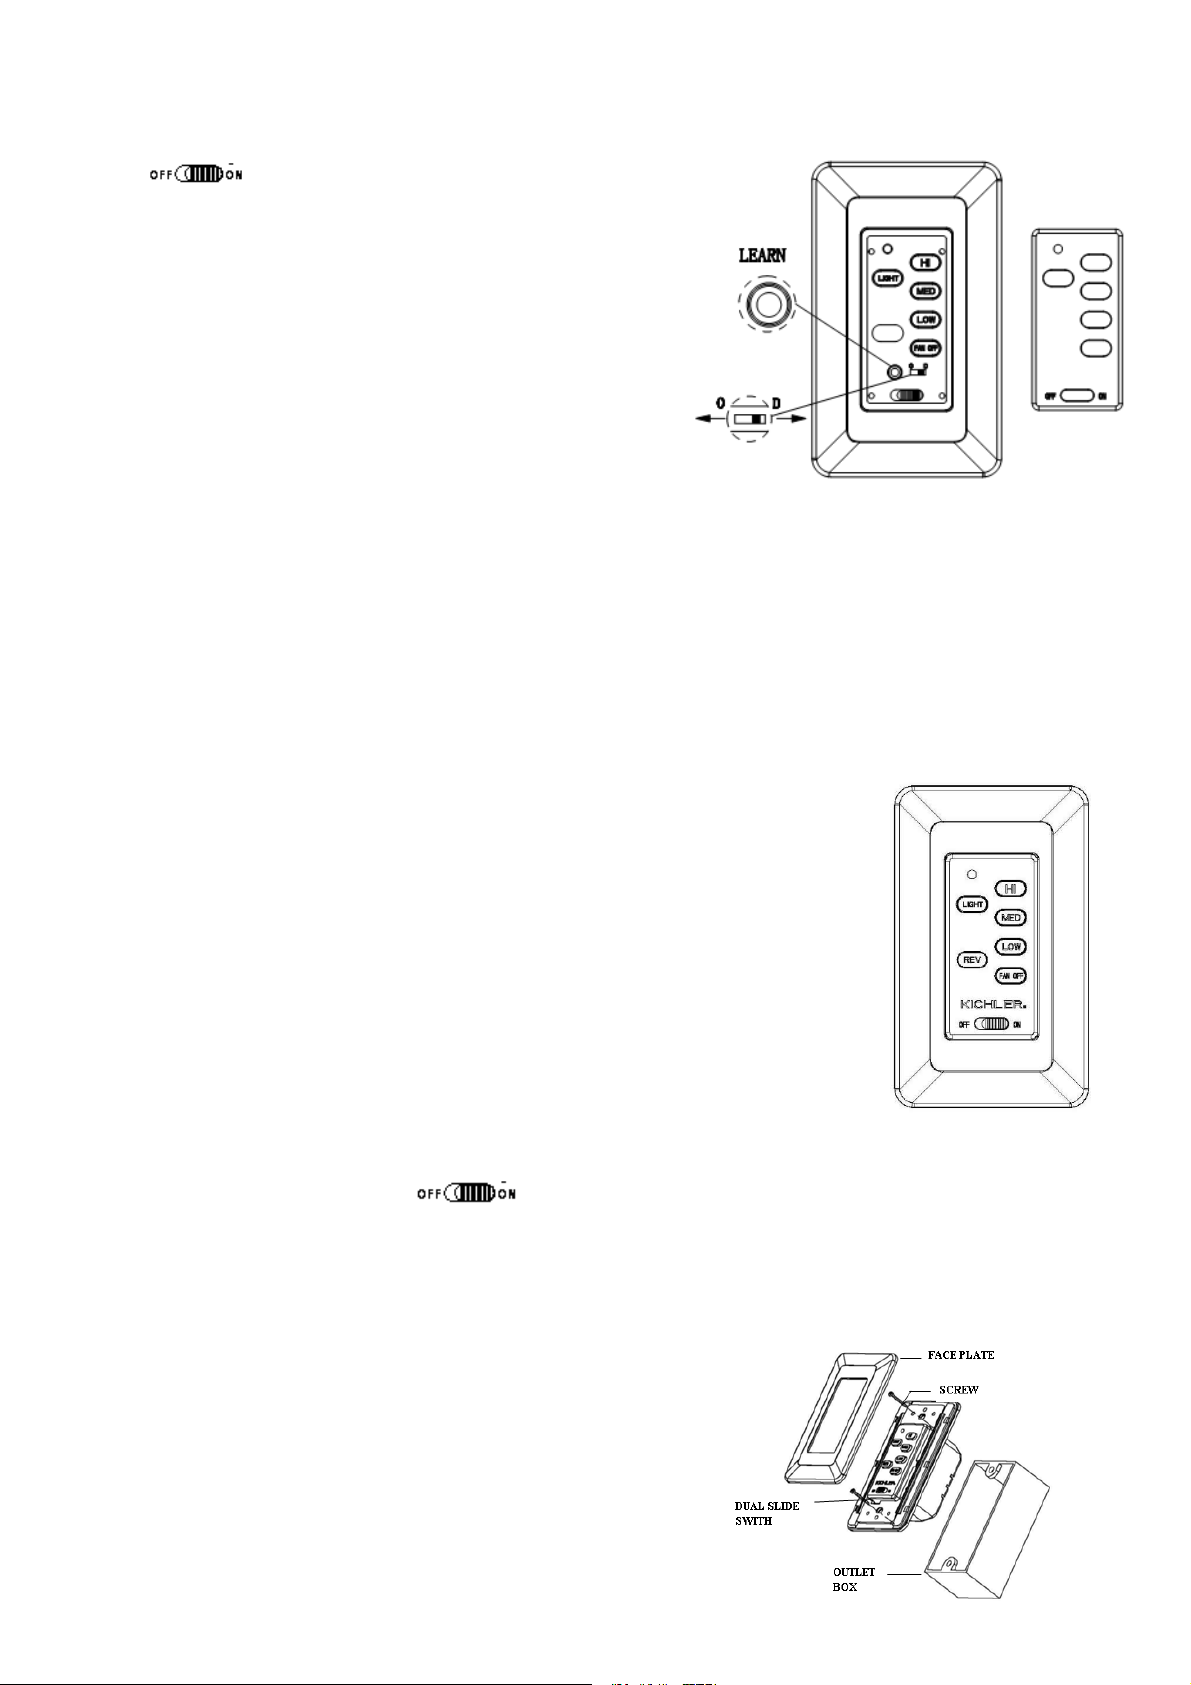
ACTIVATING THE LEARNING PROCESS
TR207A
1. After installation is complete, AC power is turned on
and SWITCH is at ON position within 30
seconds, press and hold the LEARN button for 3
seconds. Fan will turn on at medium speed and light
(if installed) will turn on. This confirms that the SMART
SYNC setting is active and ok. (FIG. 4)
2. If user cannot finish the setting within the 30 seconds
time frame, the main power must be turned off and
re-started again. This will reset the unit. Repeat step 1
until the LEARNING feature is activated as indicated.
TR206A
LIGHT FUNCTION SELECT SWITCH
1. If installed energy light onto ceiling fan, please slide the “light function select switch” to “O”
position. If installed tungsten light onto ceiling fan, please slide the “light function select
switch” to “D” position.
2. Light load: 190W (Max.) If overload, the receiver will cut off light power automatically. Please
change the light load.
FIG. 4
WALL TRANSMITTER OPERATION (FIG. 5)
FAN OFF :Turn off the ceiling fan.
HI : Turn on the fan at high speed.
MED : Turn on the fan at medium speed.
LOW : Turn on the fan at low speed.
LIGHT : ON/OFF-Turn the light on or off.
DIMMER-Press and hold to dim or
brighten light to the desired level and release.
(Tungsten only and light function select switch on “D” position.)
REV :Press this button for forward/reverse airflow
of ceiling fan. FIG. 5
AC POWER ON/OFF SWITCH( ): Before installing
wall control, slide to “OFF” position. After installed well, slide to “ON” position and could remote.
Installing Wall Control (TRANSMITTER):
Remove wall plate, disconnect and remove the toggle switch
from wall junction box. Using the wire connectors,
make the electrical connections to the wall control
(transmitter) unit. Carefully push all connected wires
inside wall switch box. Secure wall control unit with
2 screws previously removed. Face plate could be clicked
onto the transmitter.