

Chuango H4 User Manual

Printed in China
PA: H4-UM-EN-V1.0
H4
GSM/WiFi
Smart Home System
User Manual

Gentle Reminder:
Please read through this manual carefully before use.
Please keep this manual for further reference.
Please ensure proper usage based on a full understanding of this manual.
Contents
Characteristics of Smart Home System ------------------------------------------------ 01
Packaging List -------------------------------------------------------------------------02
Operating Principle --------------------------------------------------------------- 03-04
Categories of Detector Zones ------------------------------------------------------03
Operate Together with Multiple Smart Switch -------------------------------------- 04
Introduction of Panel -------------------------------------------------------------- 05-07
Powering on the Panel ------------------------------------------------------------- 06
Positioning of Panel ----------------------------------------------------------------- 07
Use of Accessories ---------------------------------------------------------------- 08-11
Remote Control ---------------------------------------------------------------------08
Door/Window Contact --------------------------------------------------------------09
PIR motion detector ----------------------------------------------------------------09
Smart Switch ------------------------------------------------------------------------ 11
Accessory Pairing /Removal ------------------------------------------------------- 11-12
Pairing Wireless Accessories --------------------------------------------------------11
Pairing Wireless siren (requires separate purchase) ---------------------------------12
Removal of Wireless Accessories ----------------------------------------------------12
Removal of Wireless Siren (requires separate purchase) ----------------------------12
Installation of Accessories --------------------------------------------------------- 13-14
Installation of Door/Window Contact -----------------------------------------------13
Installation of PIR Motion Detector -------------------------------------------------14
App Setting and Operation ------------------------------------------------------- 15-20
Step 1: Download App --------------------------------------------------------------15
Step 2: WiFi Network Setting -------------------------------------------------------16
Step 3: Registration ----------------------------------------------------------------16
Step 4: App Operation --------------------------------------------------------------17
APN Settings --------------------------------------------------------------------------22
Remote Control by Phone ------------------------------------------------------------23
Restore Default Settings ---------------------------------------------------------------23
FAQs ------------------------------------------------------------------------------ 24-25
Specication ---------------------------------------------------------------------- 26-28
Safety Reminder ----------------------------------------------------------------------29
Maintenance and Repair --------------------------------------------------------------30
Disclaimer -----------------------------------------------------------------------------31
01 02
Characteristics of Smart Home System
1. Stable Transmission
Stable transmission at 315MHz or 433MHz direction frequency and at 868 MHz or
915 MHz bidirectional frequency
2. Powerful Functions
Security system and home automation 2 in 1
Supports WiFi and SIM card
Supports 5 alarm notication numbers
Supports 50 wireless accessories (10 remote controls, 40 detectors/smart switches)
3. High Level of Security
Hidden tamper switch to prevent malicious damage
Built-in 1,000,000 RF codes
105-dB siren deterrence
4. User-friendliness
Addition and removal of accessories by category
App remote control alarm system and home appliance switch control
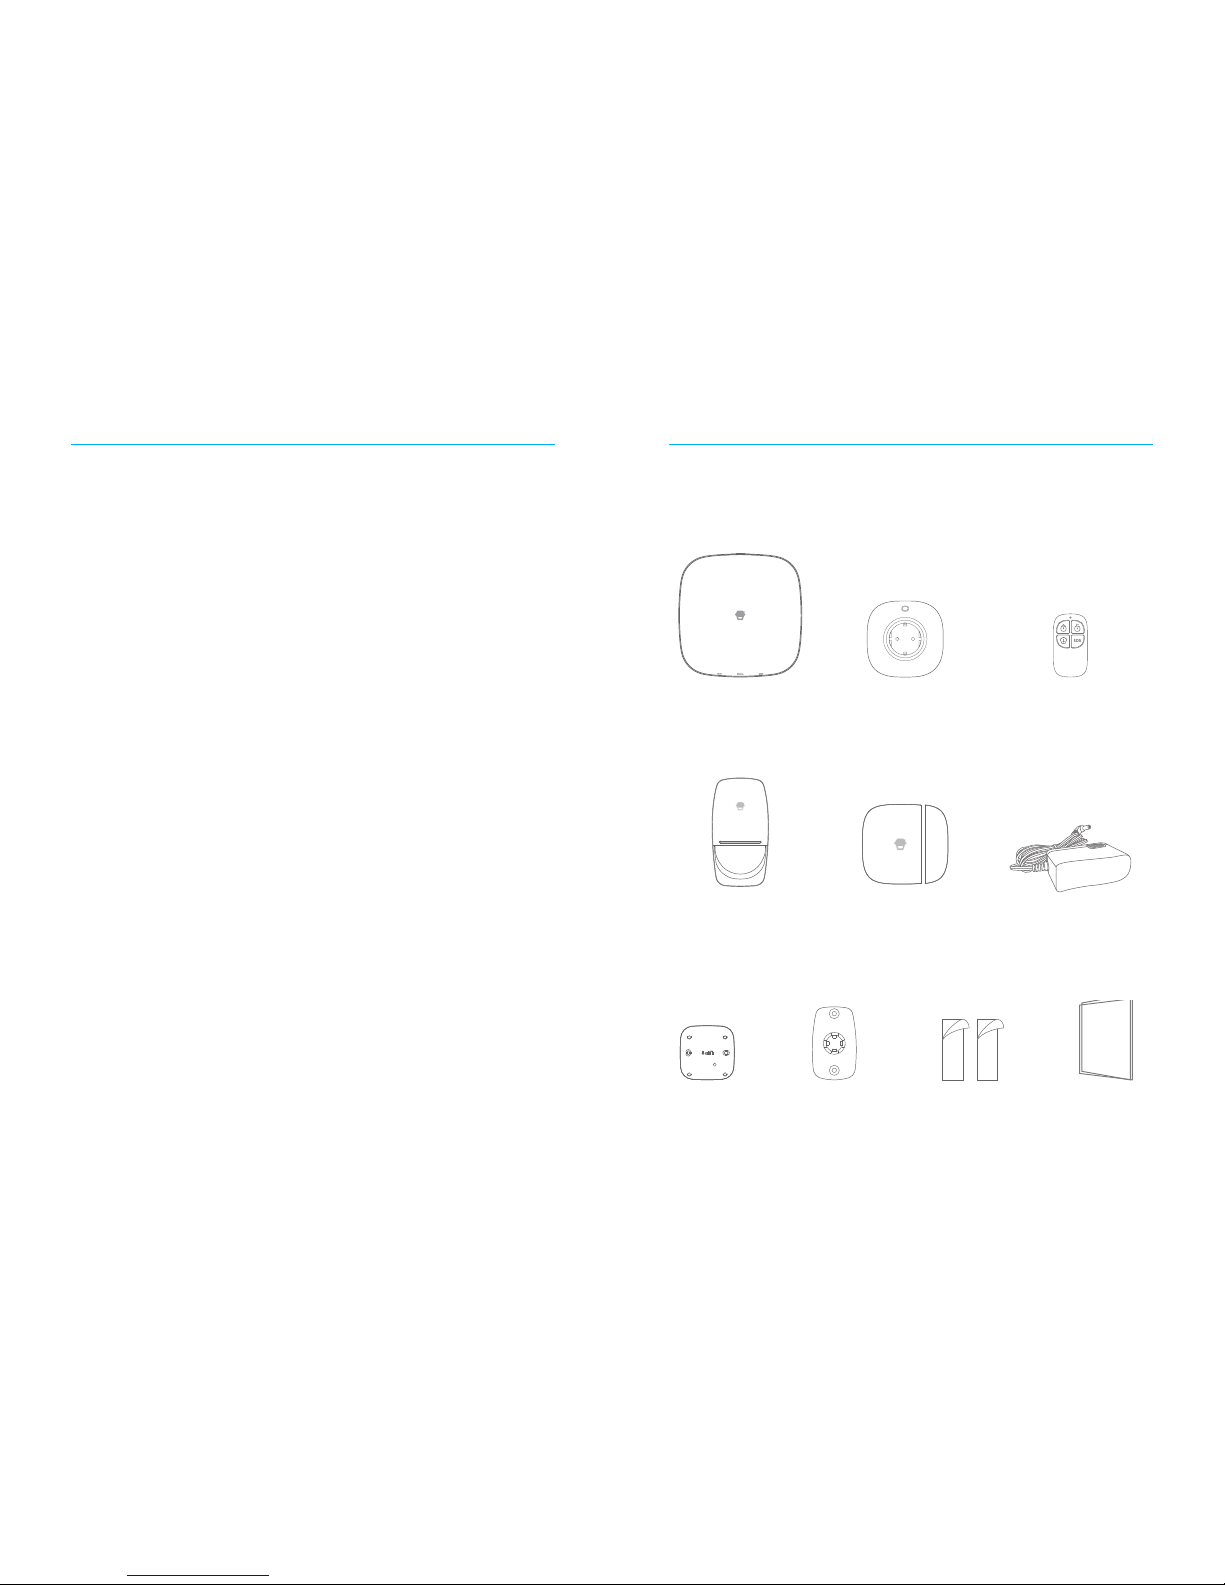
Packaging List
Please check if the following items are contained in the package. In case of any missing
parts, please contact the distributor/retailer.
H4 panel ×1 H4-PW smart switch ×1 RC-86 bidirectional
remote control ×2
PIR-860 bidirectional
PIR motion detector ×1
DWC-86 bidirectional
door/window contact ×1
AC adapter ×1
H4 stand ×1
Double-sided adhesive
tape (Two for PIR
detector and two for
door contact)
User manual ×1PIR stand ×1

03 04
Operating Principle
PIR motion detector after pairing
Door/window contact after pairing
Intrusion
detected
Panel alarm/
App notication/
phone call
Manage through remote
control/mobile phone
User
Operating Principle of Panel Alarm
Categories of Detector Zones
Normal Zone: If panel is set to Arm or Home arm, normal zone detector will enter
operating mode. Any detection of intruders or an emergency situation will trigger the
panel alarm.
Home Zone: If panel is set to Arm, home zone detector will enter operating mode.
Any detection of intruders will trigger the panel alarm. If panel is set to Home Arm, no
alarm signal sent from the home zone detector will be processed.
Delay Zone: This is the alarm delay zone. If panel is set to Arm, delay zone detector
will turn the alarm on after the designated period of time once triggered. This usually
applies to the door/window contact of the entrance door. For example, if door/window
contact of entrance door is set as delay zone and the delay time is 30 seconds, the
user will be reminded with a warning sound from the panel to set the system to Disarm
mode after entering the home under the Arm condition. If panel has not been set to
Disarm after 30 seconds, it will sound the alarm.
24-Hour Zone: 24-hour zone operates independently of the setting of Arm or Disarm.
Once the zone is triggered, the alarm will be immediately activated.
Categories Factory Default Zone
PIR-860 PIR Motion Detectorr Home Zone (Modiable via App)
DWC-86 Door/Window Contact Normal Zone (Modiable via App)
Operating together with Multiple Smart Switches
Lamp
TV
Fan
Microwave oven
Coffee machine
H4 Panel
Home appliance
switches can be
freely controlled
through App.
Operating Principle of Home Appliance Control

05 06
Introduction of Panel
WiFi
Indicator
Light
GSM Indicator Light
Status Indicator Light
Front Side
SOS button
Top Side
Description of Indicator Light
Indicator Light Status Meaning
WiFi Indicator
Light
Flash slowly (once every 3 seconds) WiFi network searching
Flash quickly(once every second) Conguration status
Steady on WiFi network connected
Status Indicator
Light
Blue light is steady on Home arm
Green light is steady on Disarm
Red light is steady on Arm
Flashing Panel alarm
Red, green and blue lights ash
simultaneously
Panel is in low battery condition.
Please connect with AC power.
Off
Panel is not powered on, or not
powered with adapter
GSM Indicator
Light
Flash quickly (once per second) GPRS network searching
Flash slowly (once every 3 seconds) GPRS network connected
Off No SIM card
Note: After pressing the SOS button, the panel will immediately sound the alarm.
Tamper Switch
SIM Card Slot
AC Adapter Port
Power Switch
Pairing Button
Back Side
Note: After pressing the Tamper Switch, the panel will immediately sound the alarm.
Powering on the Panel
Connect AC adapter to power outlet → When the power is OFF, insert your own SIM
card → Turn power switch from OFF to ON → When GSM indicator light ashes slowly
(once every three seconds), GPRS network has been connected.
Note: The SIM card should allow you to make and receive calls, with function of GPRS, SMS
and caller ID activated. If the user only chooses WiFi control system, insertion of SIM card is
not required. Then there will be push messages sent from the APP instead of alarm phone
calls upon sounding of alarm.

07 08
Positioning of Panel
Place on the table. For best reception of the wireless signal, it is recommended that
you place the panel in an open area that is located centrally to the whole alarm system.
Avoid placing the panel on a load-bearing wall or beside any electrical appliances.
Set on the Table
After closing the back cover of the panel and tightening the screws, it can be placed
on the table for use.
Use of Accessories
Remote Control
Arm button
Disarm button
SOS button
Home Arm button
Description of Indicator Light
Buttons Status
Press Arm button and the panel will make a “Di” sound once, setting the
system to Arm.
Press Arm button for at least 3 seconds, the indicator light goes on.
The system will be set to Mute Arm.
Press Disarm button and the panel will make a ““Di” sound twice, setting
the system to Disarm.
Press Disarm button for at least 3 seconds, the indicator light goes on.
The system will be set to Mute Disarm.
Press Home Arm button and the panel will make a “Di” sound once,
setting the system to Home Arm. Under this condition, home zone
accessories will be set to Disarm to enable home activities of the owner.
Press Home Arm button for at least 3 seconds, the indicator light goes
on. The system will be set to Mute Home Arm.
Press SOS button, the indicator light goes on. The panel will immediately
sound the alarm.
Note: If, upon pressing a button, the LED light flickers twice and then goes out, then the
remote control battery is low. Please replace the battery as soon as possible.
 Loading...