

Page 1
Installing a Christie One
Mount/
Christie One
Mount Plus
This document provides instructions for installing the Christie One Mount or Christie One Mount Plus
and optional accessories to mount Christie projectors to a ceiling or truss.
Safety and warning guidelines
Read all safety and warning guidelines before installing the Christie One Mount/Christie One Mount
Plus.
Warning! F
• SHOCK HAZARD! Disconnect the from AC before moving, servicing, cleaning, removing
• A minimum of two people or appropriately rated lift equipment is required to safely lift, install,
• FIRE HAZARD! Do not install near any devices that produce heat such as amplifiers, radiators,
• Do not exceed the maximum load capacity of the product.
• Do not install on a structure susceptible to vibration, movement, or change due to impact.
ailure to comply with the following could result in death or serious injury.
components, or opening any enclosure.
or move the product.
heat registers, or stoves.
Required tools
The following tools are required to install a
• 3 mm hex key
• 5 mm hex key
Christie One Mount or Christie One Mount Plus.
Required components
Ensure the necessary components are available before installing a Christie One Mount or Christie One
Mount Plus.
• Christie One Mount (P/N: 108-506102-XX)
Installing a Christie One Mount Instruction Sheet 1
020-102437-01 R
Copyright © 2016 Christie Digital Systems USA Inc. All rights reserved.
ev. 1 (10-2016)
Page 2
Installing a Christie One Mount/Christie One Mount Plus
• Christie One Mount Plus (P/N: 140-117100-03)
•
Christie One Mount extender rod (P/N: 121-125109-XX)
• Christie One Mount Rigging kit (P/N: 121-126100-XX)
Prerequisites
Before installing Christie One Mount or Christie One Mount Plus, ensure the following is met for the
mount and the supporting structure.
• The maximum loaded a Christie One Mount can support is 20 kg (44 lbs).
• The maximum load a Christie One Mount Plus can support is 45 kg (99 lbs).
• Mount the ceiling plate to a structure capable of handling the combined maximum weight of
the projector with installed accessories and the mount.
• The installation of the ceiling mount and supporting structure must meet local building codes.
• Attach the ceiling plate to the supporting structure using all four holes (mounting screws and
bolts are not included with the mount).
• If mounting to ceiling studs, ensure that the mounting screws are anchored into the center of
the ceiling studs. Christie recommends using an edge-to-edge stud finder.
• Be aware of the mounting environment. If drilling and/or cutting into the mounting surface,
always make sure no electrical wires are in the wall.
• To prevent image vibration, Christie recommends not installing the fog filters on HS Series
projectors mounted with Christie One Mount Plus.
Installing a Christie One Mount/Christie One
Mount Plus
Follow these instructions to install a Christie One Mount or Christie One Mount Plus.
1. To determine the correct mount to use with your projector, refer to the Accessories section of
the Christie website (https://www.christiedigital.com/en-us/products/accessories), select
Ceiling Mounts > Christie One Mount or Christie One Mount Plus.
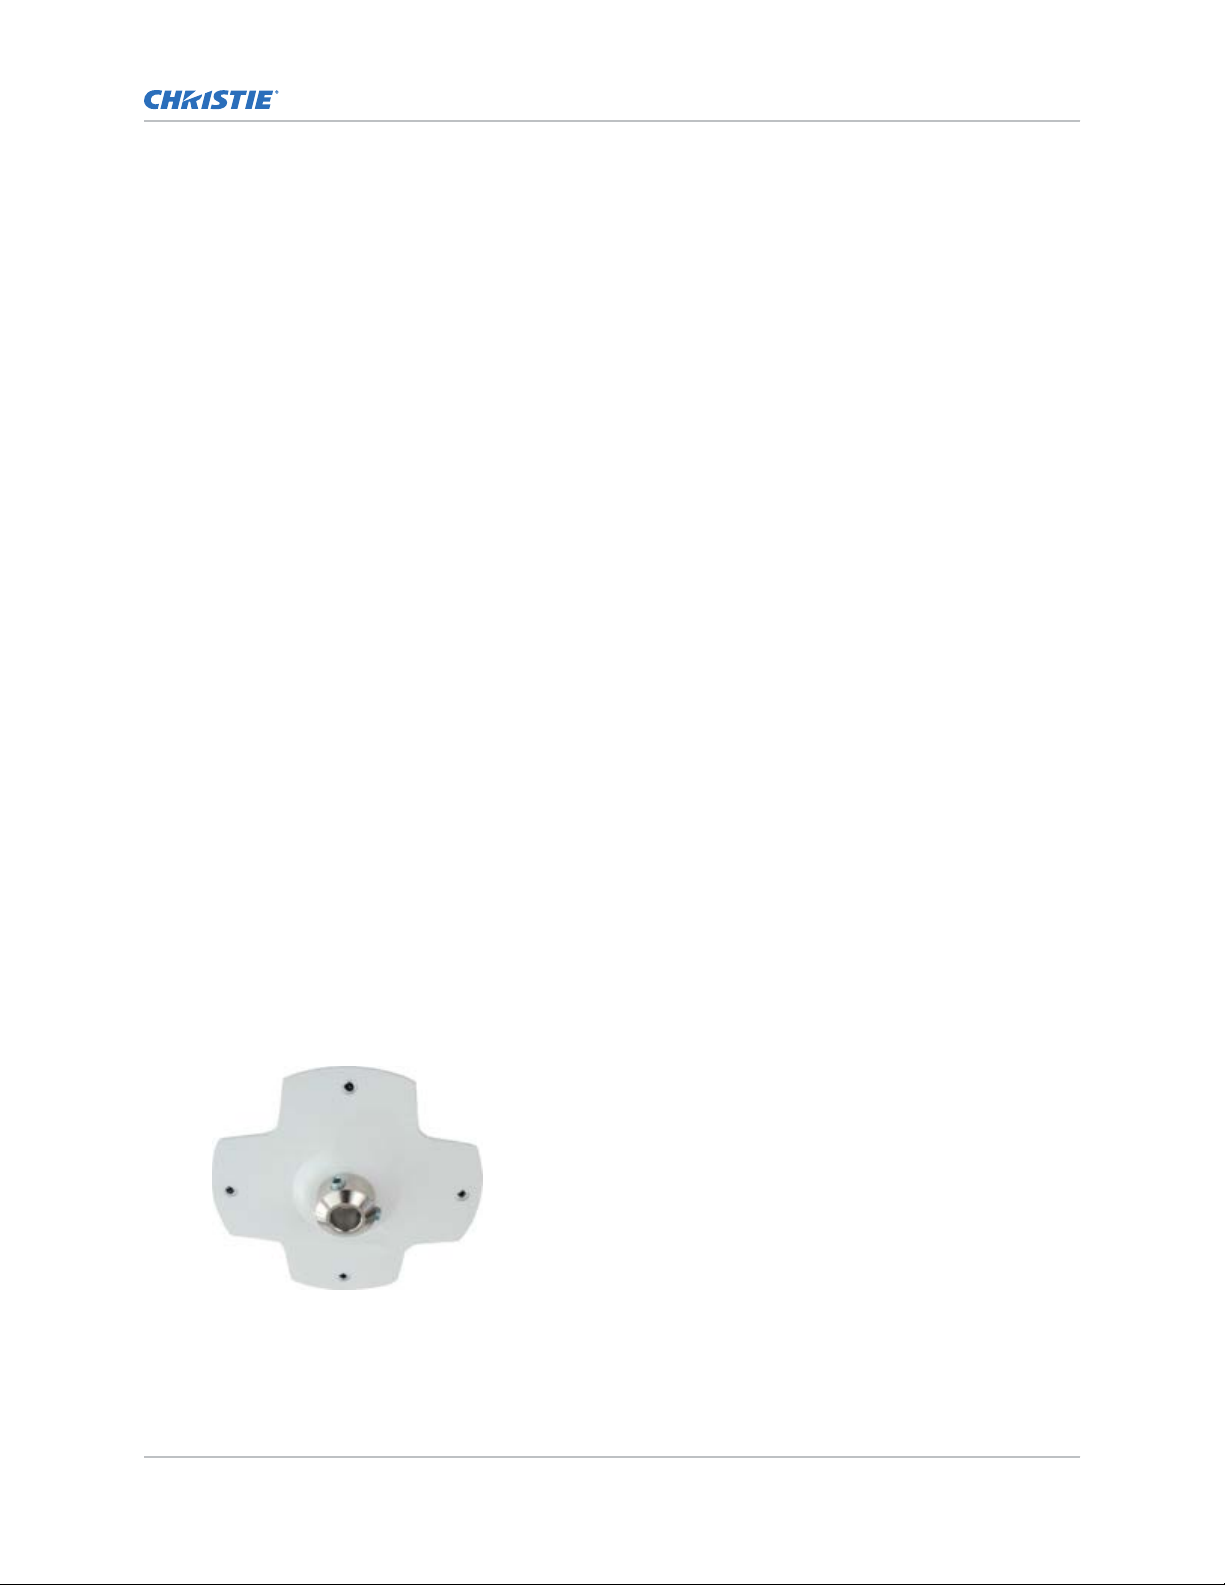
2. Position and securely fasten the ceiling plate to the ceiling.
3. Insert the calibration device into the ceiling plate and secure with the two setscrews.
Installing a Christie One Mount Instruction Sheet 2
020-102437-01 R
Copyright © 2016 Christie Digital Systems USA Inc. All rights reserved.
ev. 1 (10-2016)
Page 3
Installing a Christie One Mount/Christie One Mount Plus
4. Position the projector adapter plate with adjustable arms on the bottom side of the projector.
5. Secure the adjustable arm plate to the projector by positioning the screws of the plate with the
designated holes on the bottom of the projector
.
When mounting projectors with the Christie One Mount Plus, select the bolt size appropriate
for your projector and tighten to the specified torque.
• M6-1.0: length = 50 mm, torque = 16 Nm, with the 3 mm washer and rubber bushings
• M8-1.25: length = 55 mm, torque = 38 Nm, without washer
When mounting projectors with the Christie One Mount, select the bolt size appropriate for
your projector and tighten to the specified torque.
• M4-0.7: length = 35 mm, torque = 3.5 Nm
• M6-1.0: length = 35 mm, torque = 16 Nm
6. Use the four brass leveling standoffs to attach and level the adapter plate on the projector.
Projector standoffs are adjustable spacers which can be used to lev
el the arms of the Christie
One Mount. The projector standoffs also ensure screws are centered when the projector is
attached to the mount.
Installing a Christie One Mount Instruction Sheet 3
020-102437-01 R
Copyright © 2016 Christie Digital Systems USA Inc. All rights reserved.
ev. 1 (10-2016)
Page 4

BAB
A
Installing a Christie One Mount/Christie One Mount Plus
7. Ensure the quick-release ring is seated in the slotted groove and the set screw is loosened.
Use the quick
-release for rapidly attaching the projector to the mount. It is a spring lock pin
and the quick release ring can be turned to be in or out of the slotted groove.
8. Secure the projector to the ceiling mount with the quick-release.
Ensure the projector is lock
ed into place by verifying that the spring lock pin is seated in the
calibration device slot. A clicking sound indicates the lock pin is seated properly in the holder.
Ensure no gap exists between the ceiling plate collar and calibration device.
ID Description
A Calibration device
B Collar
9. Tighten the setscrew.
Installing a Christie One Mount Instruction Sheet 4
020-102437-01 R
Copyright © 2016 Christie Digital Systems USA Inc. All rights reserved.
ev. 1 (10-2016)
Page 5

B
C
A
B
C
A
Installing a Christie One Mount/Christie One Mount Plus
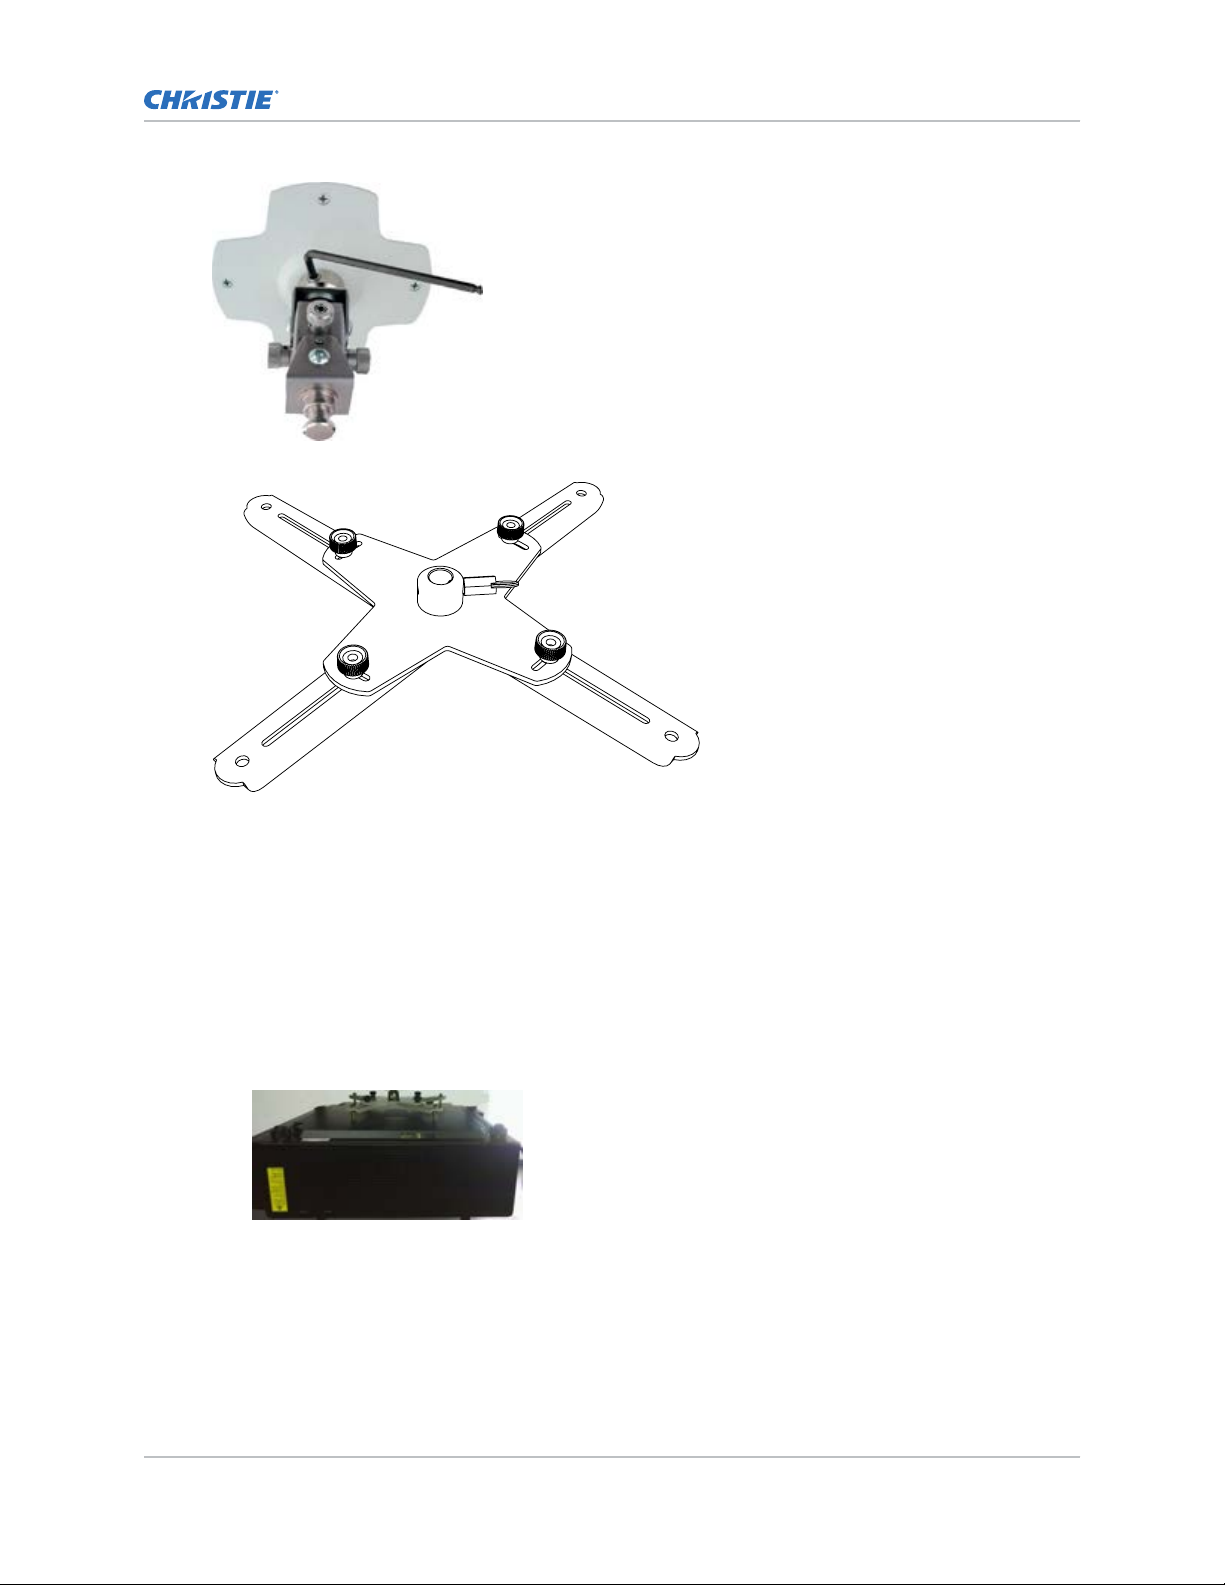
10. Calibrate and position the mount with the four adjustment knobs.
11. In the case of heavy loads, use a hex key to calibrate the projector position.
Tilt and roll knobs differ based on the orientation of the projector on the mount.
ID Description
A Tilt +30°/=30°
B Roll +30°/=30°
C Swivel 360°
12. To eliminate vibration or movement during operation tighten the four button screws.
Installing a Christie One Mount Instruction Sheet 5
020-102437-01 R
Copyright © 2016 Christie Digital Systems USA Inc. All rights reserved.
ev. 1 (10-2016)
Page 6

Installing a Christie One Mount/Christie One Mount Plus
Installing a Christie One Mount extender rod
The extender rod is an accessory used to adjust the distance between the projector and the mounting
location.
Install the extender rod between the ceiling plate/rigging kit and the calibration device.
1.
2. Secure the extender rod to the ceiling plate/rigging kit and calibration device by tightening all
four setscrews.
3. To install the extended mount follow the instructions for Installing a Christie One Mount/
Christie One Mount Plus (on page
2).
Installing a Christie One Mount Rigging kit
The rigging kit is an accessory used to mount to a truss or similar structure.
1. Install the rigging kit to the calibration device or extender rod.
2. To secure the rigging kit, tighten the two setscrews.
Installing a Christie One Mount Instruction Sheet 6
020-102437-01 R
Copyright © 2016 Christie Digital Systems USA Inc. All rights reserved.
ev. 1 (10-2016)
Page 7

Installing a Christie One Mount/Christie One Mount Plus
Product details
The following shows the product details for Christie One Mount and Christie One Mount Plus, including
the extender rods. M6 and M8 screws are used for the projector.
Christie One Mount
Installing a Christie One Mount Instruction Sheet 7
020-102437-01 R
Copyright © 2016 Christie Digital Systems USA Inc. All rights reserved.
ev. 1 (10-2016)
Page 8

Christie One Mount Plus
Installing a Christie One Mount/Christie One Mount Plus
Installing a Christie One Mount Instruction Sheet 8
020-102437-01 R
Copyright © 2016 Christie Digital Systems USA Inc. All rights reserved.
ev. 1 (10-2016)
Page 9

Extender rods
Installing a Christie One Mount/Christie One Mount Plus
Technical support
echnical support for Christie products is available at:
T
• North and South America: +1-800-221-8025 or Support.Americas@christiedigital.com
• Europe, Middle East, and Africa: +44 (0) 1189 778111 or Support.EMEA@christiedigital.com
• Asia Pacific: +65 6877-8737 or Support.APAC@christiedigital.com
Installing a Christie One Mount Instruction Sheet 9
020-102437-01 R
Copyright © 2016 Christie Digital Systems USA Inc. All rights reserved.
ev. 1 (10-2016)
 Loading...