

Page 1

GripNut
™
Congratulations! You have just pur-
chased what many people regard as the
finest headset in the world. Since 1976
Chris King has been supplying serious
cyclists with the best made, most reliable
headsets you can buy. With proper installation and maintenance you can expect to enjoy the many years of the legendary quality and performance built into
each and every component we make.
Installation
Please Note: To ensure proper installa-
tion, adapter kits are recommended.
Sizes are available to fit all popular headset pressing and setting tools. Our press
adapters help to correctly align the cups
with the head tube and prevent damage
to the bearings by directing pressure only
and evenly over the cups. The crown race
adapters prevent damage to the base
plate by protecting the conical bearing
contact surface from the crown race setting tool.
Preparation of Head
Tube and Installation
of Bearing Cups
•Proper preparation of the head tube
is essential for best headset performance. Ream and face the head
tube as necessary to ensure that the
ends are square and parallel to each
other, and the bores are the proper
dimension (see chart below).
• Using a small file or sand paper, carefully remove any sharp edges or
burrs and slightly round, or chamfer,
the inside edges of the head tube at
the top and bottom to prevent shearing any metal from the cups during
installation.
•Clean to remove any chips, shavings,
and/or cutting oil.
•The proper press fit should be with
no more than .1mm (.004") of interference. See chart below for correct
head tube bore size. Do not file or
otherwise remove material from the
cups to make them fit.
•Press in both bearing cups using a
headset installation press fitted with
our adapters. Check to assure the
cups are seated flatly against the
ends of the head tube.
Preparation of Fork
and Installation of
Base Plate
•Proper preparation of the fork is also
important for best headset performance. Ream and face the crown
race seat as necessary to ensure that
the face is square with the steer tube
and the press diameter is the proper
dimensions (see chart below).
•Clean to remove any chips, shavings,
and/or cutting oil. The proper press
fit should be with no more than .1mm
(.004") of interference. See chart below for correct crown race seat size.
• Slide the base plate, conical side up,
onto the steerer tube. With the beveled side of the base plate installation adapter against the base plate,
use a crown race setting tool to set
the base plate.
•When sizing the steerer length,
steerer tube should protrude 1114mm above the top of the top bearing cup.
Assembly of Chris
King GripNut
™
• Make sure the threads on the lock
ring and the inside thread of the adjusting ring are lubricated thoroughly
with an anti-seize compond or heavy
grease. Also apply grease to the tapered surfaces of the threaded collet.
• Place the threaded collet into the
threaded hole of the adjusting ring,
positioning the key on the collet in
the corresponding slot.
• Screw the lock ring into the adjusting ring/collet assembly until the
collet has very little float inside the
assembly.
Final Assembly and
Adjustment
• Once the GripNut™ is securely on the
steerer (about 4-5 turns and at least
1/8" prior to contacting the bearing),
tighten the lock ring into the adjusting ring until it feels as though the
entire GripNut™ assembly is dragging
as it turns on the threads.
• Once you feel this drag, advance the
entire GripNut™ assembly as a unit
down to touch the bearing (using
headset wrenches on both the lock
and adjusting ring if necessary).
• Adjust the preload on the bearing and
finish tightening the GripNut™ lock
and adjusting rings together to 130150 in/lb.
•To test GripNut™: Using both
wrenches, try to turn the GripNut™ as
a unit in the loosening direction. It
should be extremely difficult, if not impossible, to turn. If it turns easily,
continue to turn the entire unit 1/4 turn
in the loosening direction and retorque.
PLEASE NOTE: New seals will produce
some resistance in rotation for the first
50-100 hours of use. Avoid confusing
this with rubbing or binding that may result from improper installation or stems
that are not properly faced.
Maintenance
CHRIS KI NG H EADS ETS are designed
to provide the maximum life of any headset with a minimum of maintenance. Besides an occasional adjustment, the only
service necessary is an occasional cleaning and regreasing of the bearings. Riding
conditions will dictate how often to ser-
ebutdaeH
erob
taesnworC
DO
"1 mm1.03mm5.62
XMB"1 mm7.23mm5.62
"8/1-1 mm9.33mm1.03
"4/1-1 mm9.63mm1.33
Page 2
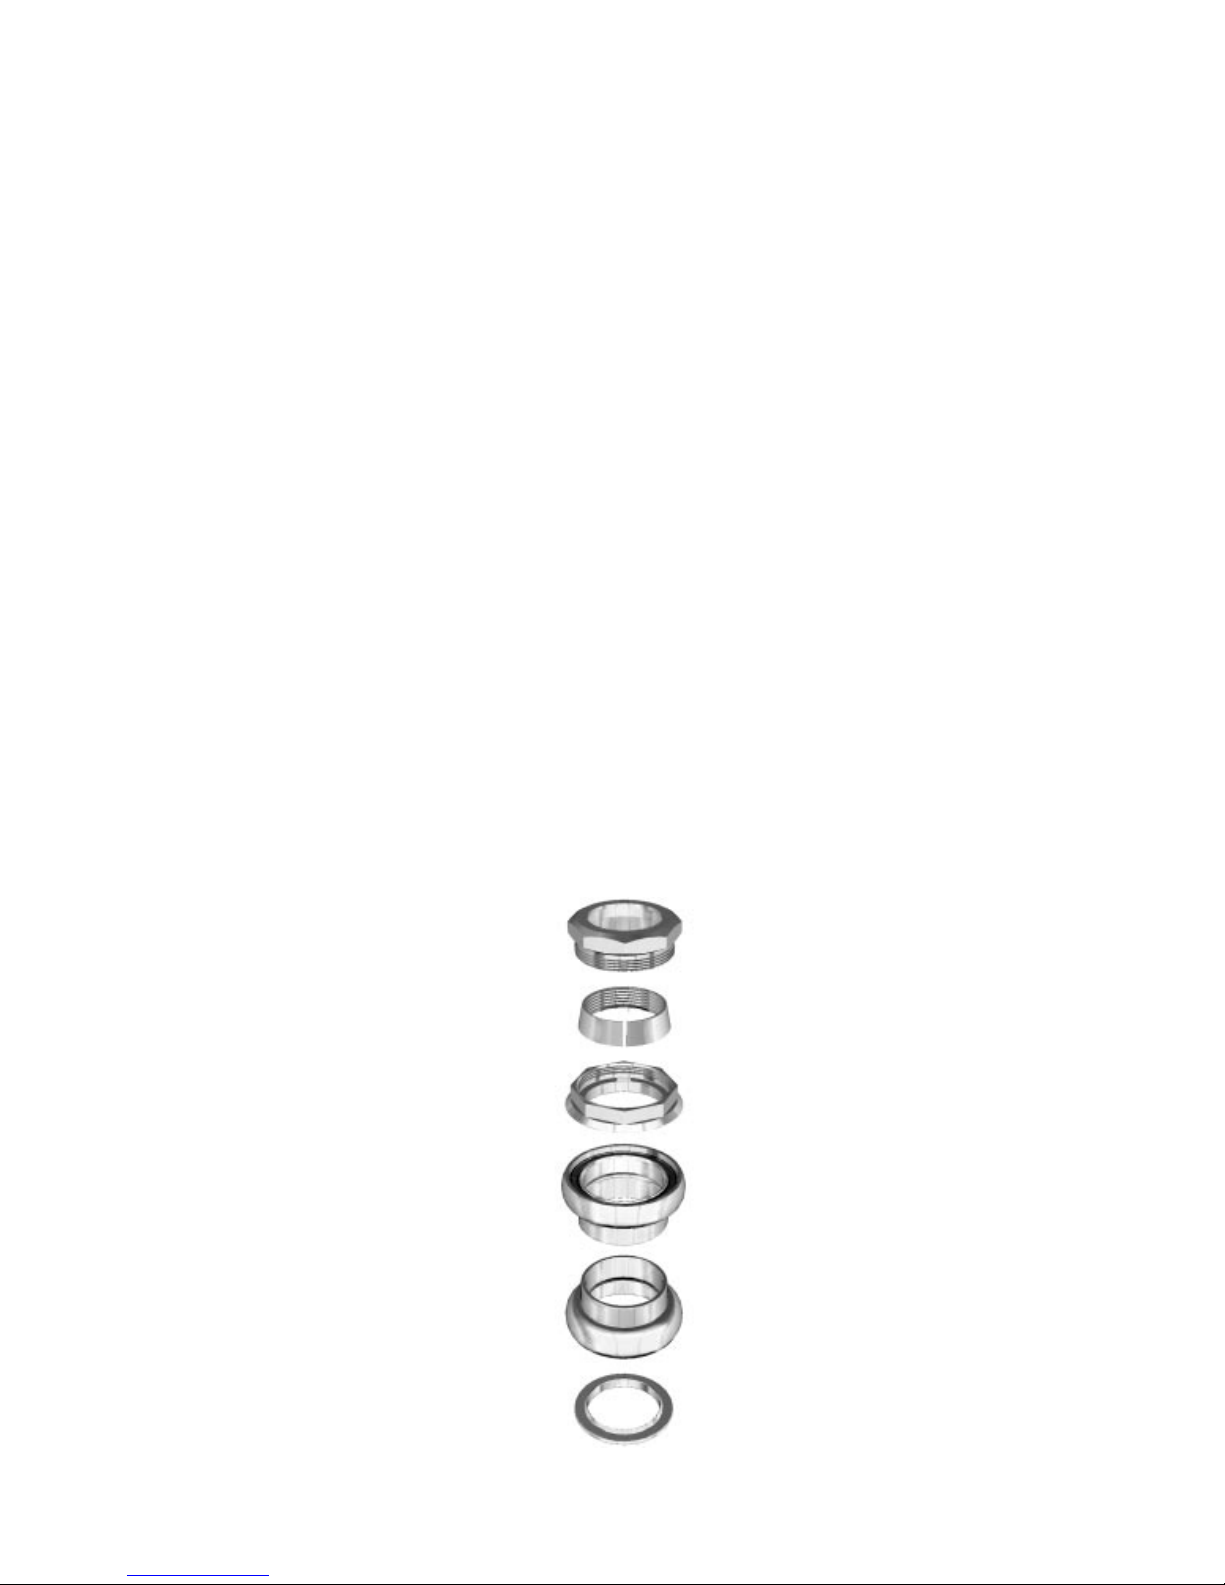
Lock
ring
Adjusting
ring
Base
plate
Bearing
cups
Thread
collet
vice your headset. In wet conditions, service may be necessary as often as every
6 months; in dry conditions, up to every
5 years.
Service of Bearings
•Our sealed bearings have removable
snap rings holding the seals in place.
Carefully remove snap ring and then
seal to gain access to the bearings.
Flush with solvent, blow dry, then lubricate with a waterproof grease and
reassemble. Reuse seals and snap
rings unless damaged.
• If necessary, seals and snap rings are
available through your dealer or directly from Chris King Precision Components.
PLEASE NOTE: Water is the most common cause of problems with any sealed
bearing. When water enters the frame
through breather or other holes it can
eventually work its way to the head tube
and into the headset bearings. High pressure spray wash, transporting or riding
the bicycle in the rain, or submersion in
water while riding can quickly lead to this
condition. Although the stainless steel
bearings will resist corrosion, the grease
will eventually deteriorate. Avoid these
situations if possible or service as if in
wet conditions.
Removal and
Reinstallation
• Remove cups from head tube with a
standard cup removal tool, taking
care that tool contacts the inside
edges of the cup, not the bearing.
•To remove base plate from fork, we
recommend using a 1/4" or 3/8" drift
punch
alternating strikes
on either
side of fork crown to lessen the possibility of warping or bending.
• After removing base plate from fork,
carefully inspect for damage. Some
warpage may flatten upon reinstallation. If not, or if bearing contact surface has become damaged, replace.
• Base plates and other parts are available individually through your dealer
or directly from Chris King Precision
Components.
Warranty
Chris King Precision Components warrants its bicycle headsets to be free from
defects in materials or workmanship for
a period of 10 years from the original date
of purchase. Any Chris King product that
is found by Chris King Precision Components to be defective in materials or
workmanship will be repaired or replaced
at the sole discretion of Chris King Precision Components providing it is returned
to the factory freight prepaid. This warranty does not cover damage or failure
resulting from misuse, abuse, alteration,
neglect, normal and reasonable wear and
tear, crash or impact, failure to perform
routine maintenance as instructed, or use
other than that for which the product was
intended.
If a defect is found, our entire liability and
your sole remedy shall be, at our option,
free repair or replacement. Chris King
Precision Components shall not be held
liable for any indirect, special, or consequential damages. The warranty does
not cover any Chris King Precision Components product where the serial number has been altered or removed. This
written express warranty is in lieu of all
other warranties, implied or expressed,
and does not cover any representation
or warranty made by dealers beyond the
provisions of this warranty. This warranty
gives you specific legal rights, and you
may also have other rights which vary
state to state.
Thank you for your purchase!
KING CYCLE GROUP
2801 NW Nela Street
Portland, Oregon 97210
800.523.6008
http://www.chrisking.com
email: [email protected]
Rev. 3/04-A
 Loading...