

Page 1

INSTALLATION INSTRUCTIONS
Universal Interface Bracket
Instrucciones de instalación
Installationsanleitung
Instruções de Instalação
Istruzioni di installazione
Installatie-instructies
Instructions d´installation
Spanish Product Description
German Product Description
Portuguese Product Description
Italian Product Description
Dutch Product Description
French Product Description
JSBU
Page 2
JSBU Installation Instructions
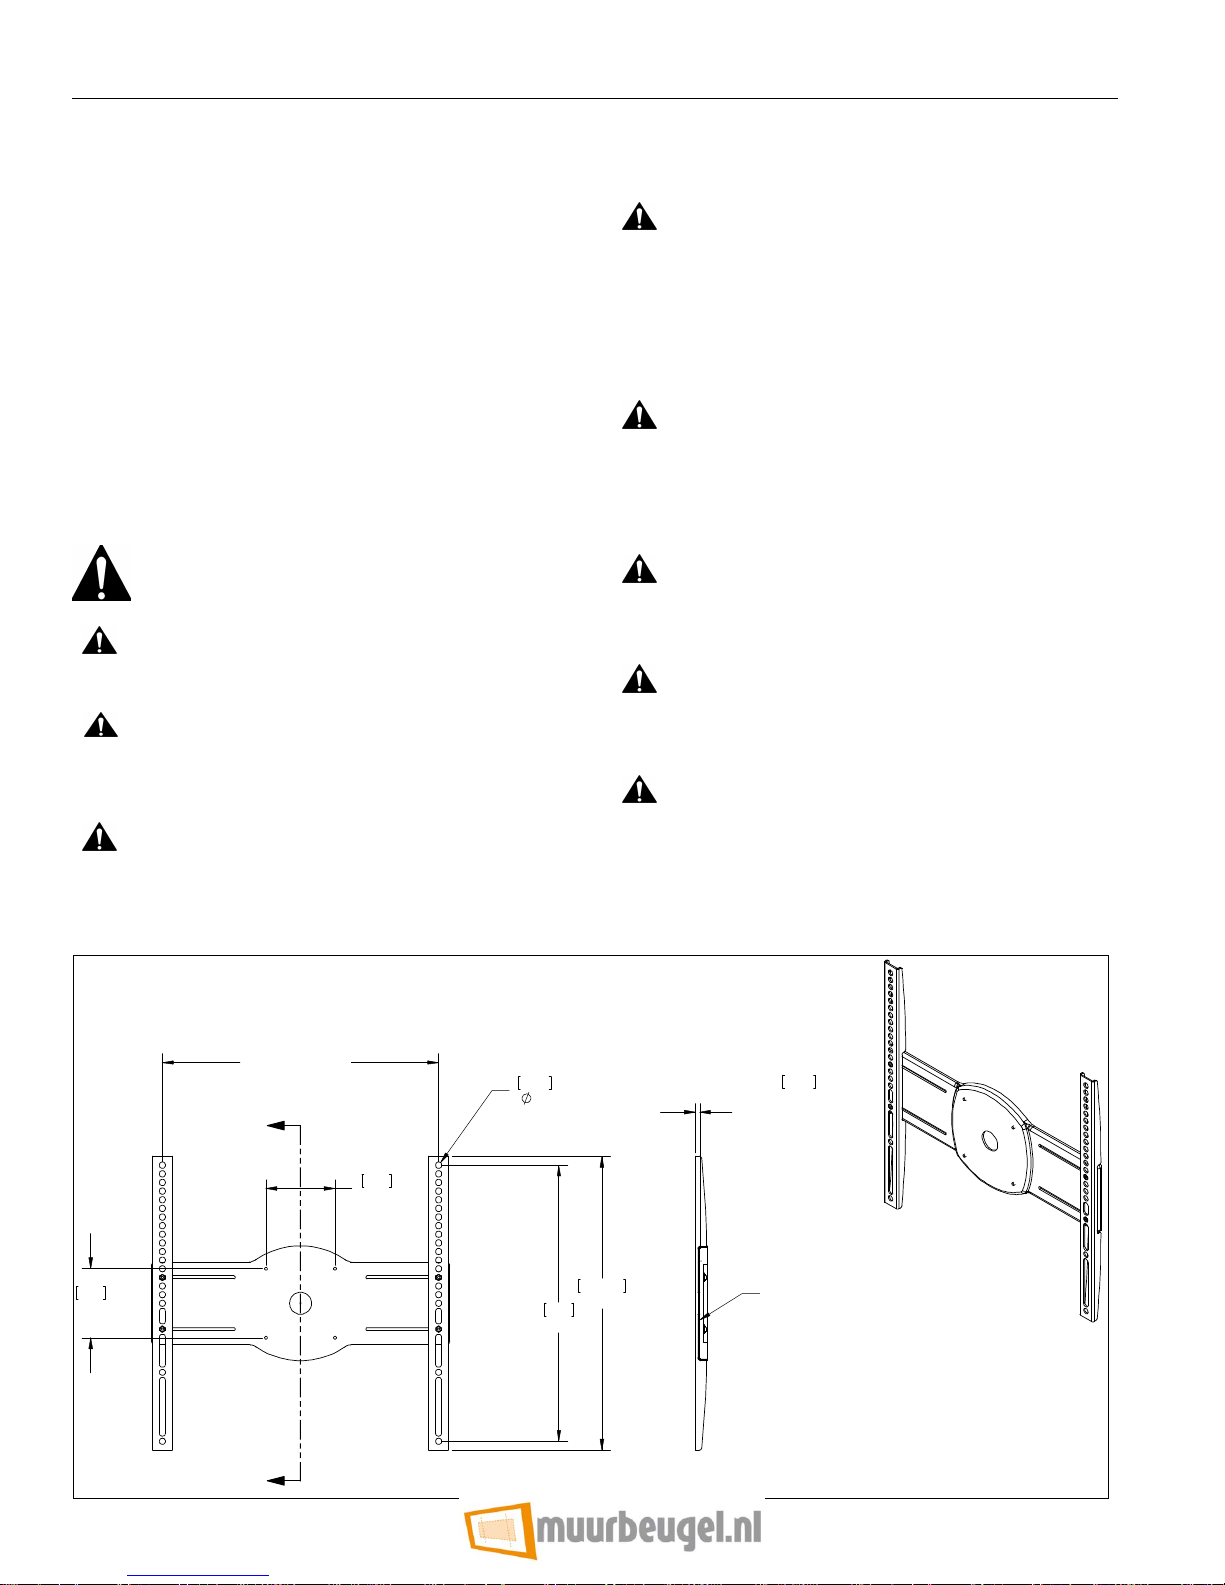
INTERFACE SURFACE
SECTION A-A
DISCLAIMER
Milestone AV Technologies and its affiliated corporations and
subsidiaries (collectively “Milestone”), intend to make this
manual accurate and complete. However, Milestone makes no
claim that the information contained herein covers all details,
conditions or variations, nor does it provide for every possible
contingency in connection with the installation or use of this
product. The information contained in this document is subject
to change without notice or obligation of any kind. Milestone
makes no representation of warranty, expressed or implied,
regarding the in formation cont ai ned her ein. Mil estone assu mes
no responsibility for accuracy, completeness or sufficiency of
the information contained in this document.
Chief® is a trademark of Milestone AV Technologies, Inc. All
rights reserved.
IMPORTANT SAFETY INSTRUCTIONS!
WARNING: A WARNING alerts you to the possibility of
serious injury or death if you do not follow the inst ructions.
CAUTION: A CAUTION alerts you to the possibility of
damage or destruction of equipment if you do not follow the
corresponding instructions.
WARNING: Failure to read, thoroughly understand, and
follow all instructions can result in serious personal injury,
damage to equipment, or voiding of factory warranty! It is the
DIMENSIONS
installer’s responsibility to make sure all components are
properly assembl ed and installed using the instructions
provided.
WARNING: Failure to provide adequat e structural strength
for this component can result in serious personal injury or
damage to equipment! It is the installer’s responsibility to
make sure the structure to which this component is attached
can support five times the combined weight of all equipment.
Reinforce the structure as required before installing the
component.
WARNING: Exceeding the weight capacity can result in
serious personal injury or damage to equipment! It is the
installer’s responsibility to make sure the combined we ight of
the mount and all attached components does not exceed
75 lbs (34.02 kg).
WARNING: Use this mounting system only for its intended
use as described in these instructions. Do not use
attachments not recommended by the manufacturer.
WARNING: Never operate this mounting system if it is
damaged. Return the mounting system to a servi ce cen ter fo r
examination and repair.
WARNING: Do not use this product outdoors.
NOTE: The JSBU is for use ONLY with J-Series mounts.
--SAVE THESE INSTRUCTIONS--
MAX [400] 15.87
MIN [200] 7.87
A
100
3.94
100
3.94
A
2
8.89
.35
400
15.75
425.45
16.75
6.11
.24
FROM BAC K OF
DISPLAY TO
INTERFACE
SURFACE
MEASUREMENTS: [MILLIMETERS]
INCHES
Page 3
Installation Instructions JSBU
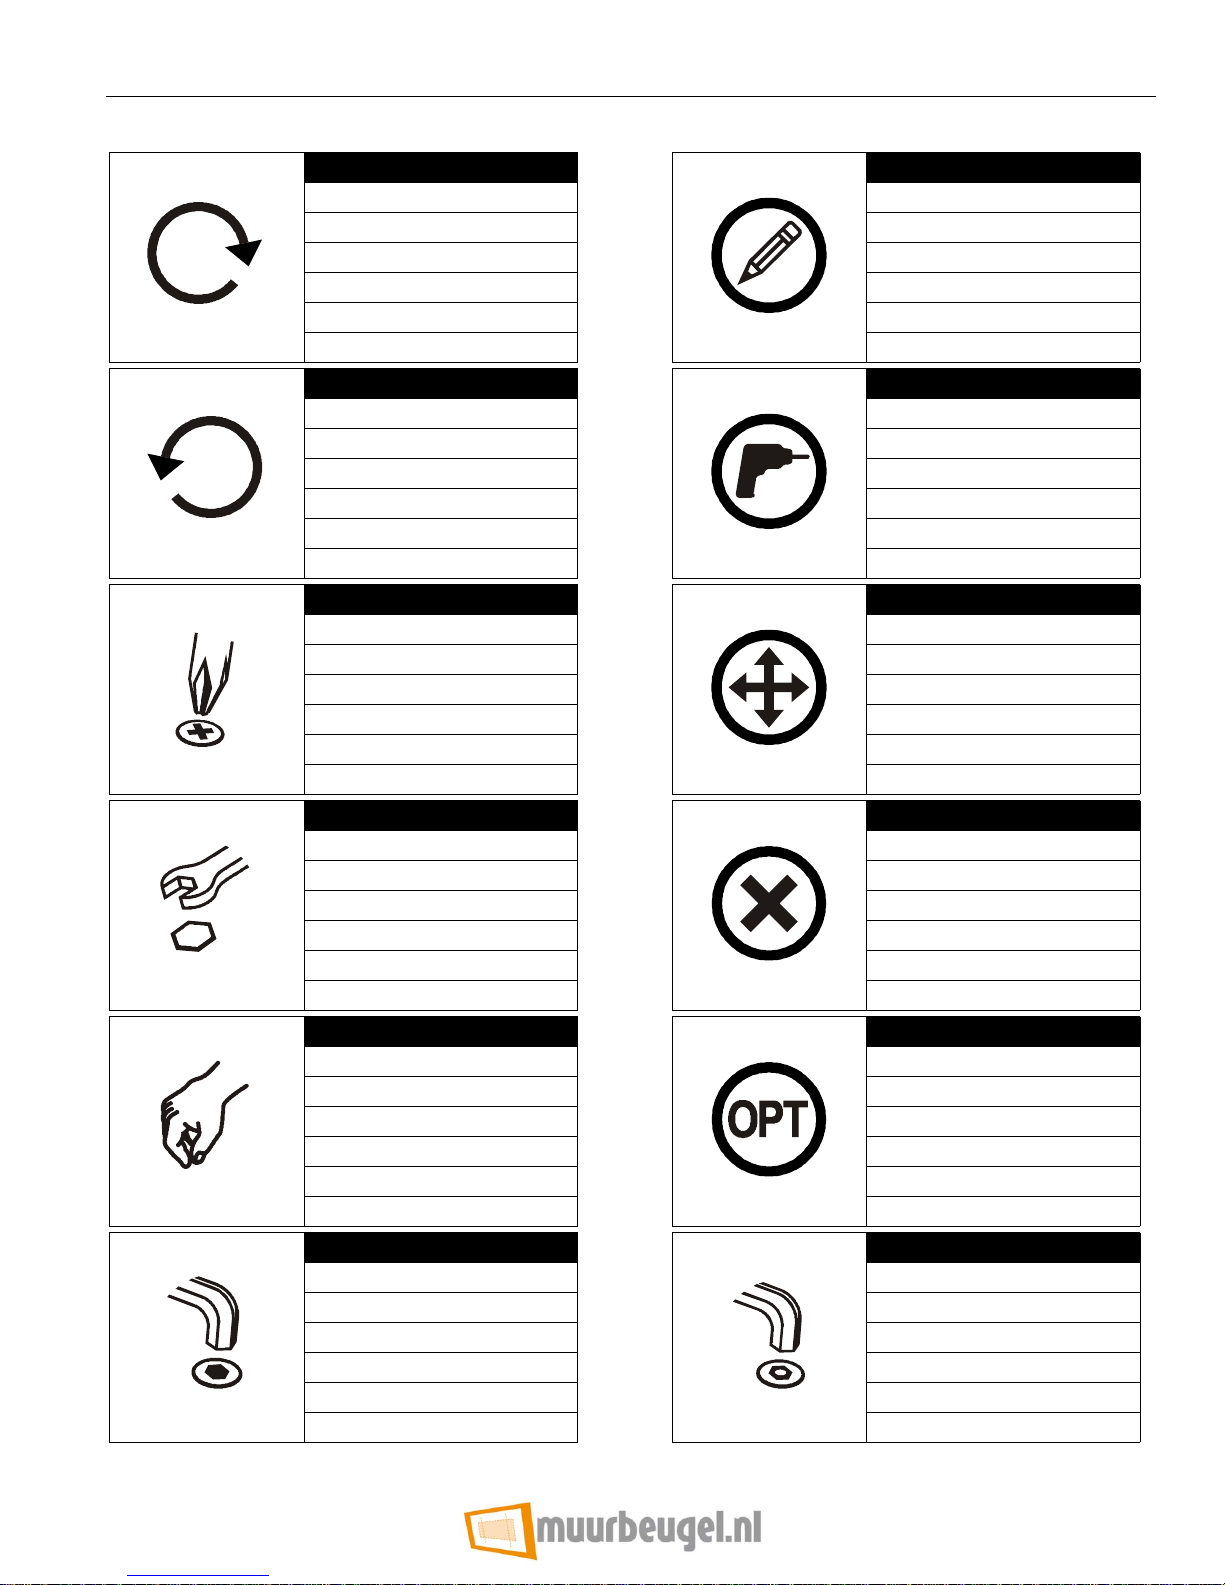
LEGEND
Tighten Fastener
Apretar elemento de fijación
Befestigungsteil festziehen
Apertar fixador
Serrare il fissaggio
Bevestiging vastdraaien
Serrez les fixations
Pencil Mark
Marcar con lápiz
Stiftmarkierung
Marcar com lápis
Segno a matita
Potloodmerkteken
Marquage au crayon
Loosen Fastener
Aflojar elemento de fijación
Befestigungsteil lösen
Desapertar fixador
Allentare il fissaggio
Bevestiging losdraaien
Desserrez les fixations
Phillips Screwdriver
Destornil lador Phillips
Kreuzschlitzschraubendreher
Chave de fendas Phillips
Cacciavite a stella
Kruiskopschroevendraaier
Tournevis à pointe cruciforme
Open-Ended Wrench
Llave de boca
Gabelschlüssel
Chave de bocas
Chiave a punte aperte
Steeksleutel
Clé à fourche
Drill Hole
Perforar
Bohrloch
Fazer furo
Praticare un foro
Gat boren
Perc ez un trou
Adju st
Ajustar
Einstellen
Ajustar
Regolare
Afstell en
Ajuster
Remove
Quitar
Entfernen
Remover
Rimuovere
Verw ijder en
Retirez
By Hand
A mano
Von Hand
Com a mão
A mano
Met de hand
À la main
Hex-Head Wrench
Llave de cabeza hexagonal
Sechskantschlüssel
Chave de cabeça sext avada
Chiave esagonale
Zeskantsleutel
Clé à tête hexagonale
Optional
Opcional
Optional
Opcional
Opzionale
Optie
En option
Security Wrench
Llave de seguridad
Sicherheitsschlüssel
Chave de segurança
Chiave di sicurezza
Veiligheidssleutel
Clé de sécurité
3
Page 4
JSBU Installation Instructions
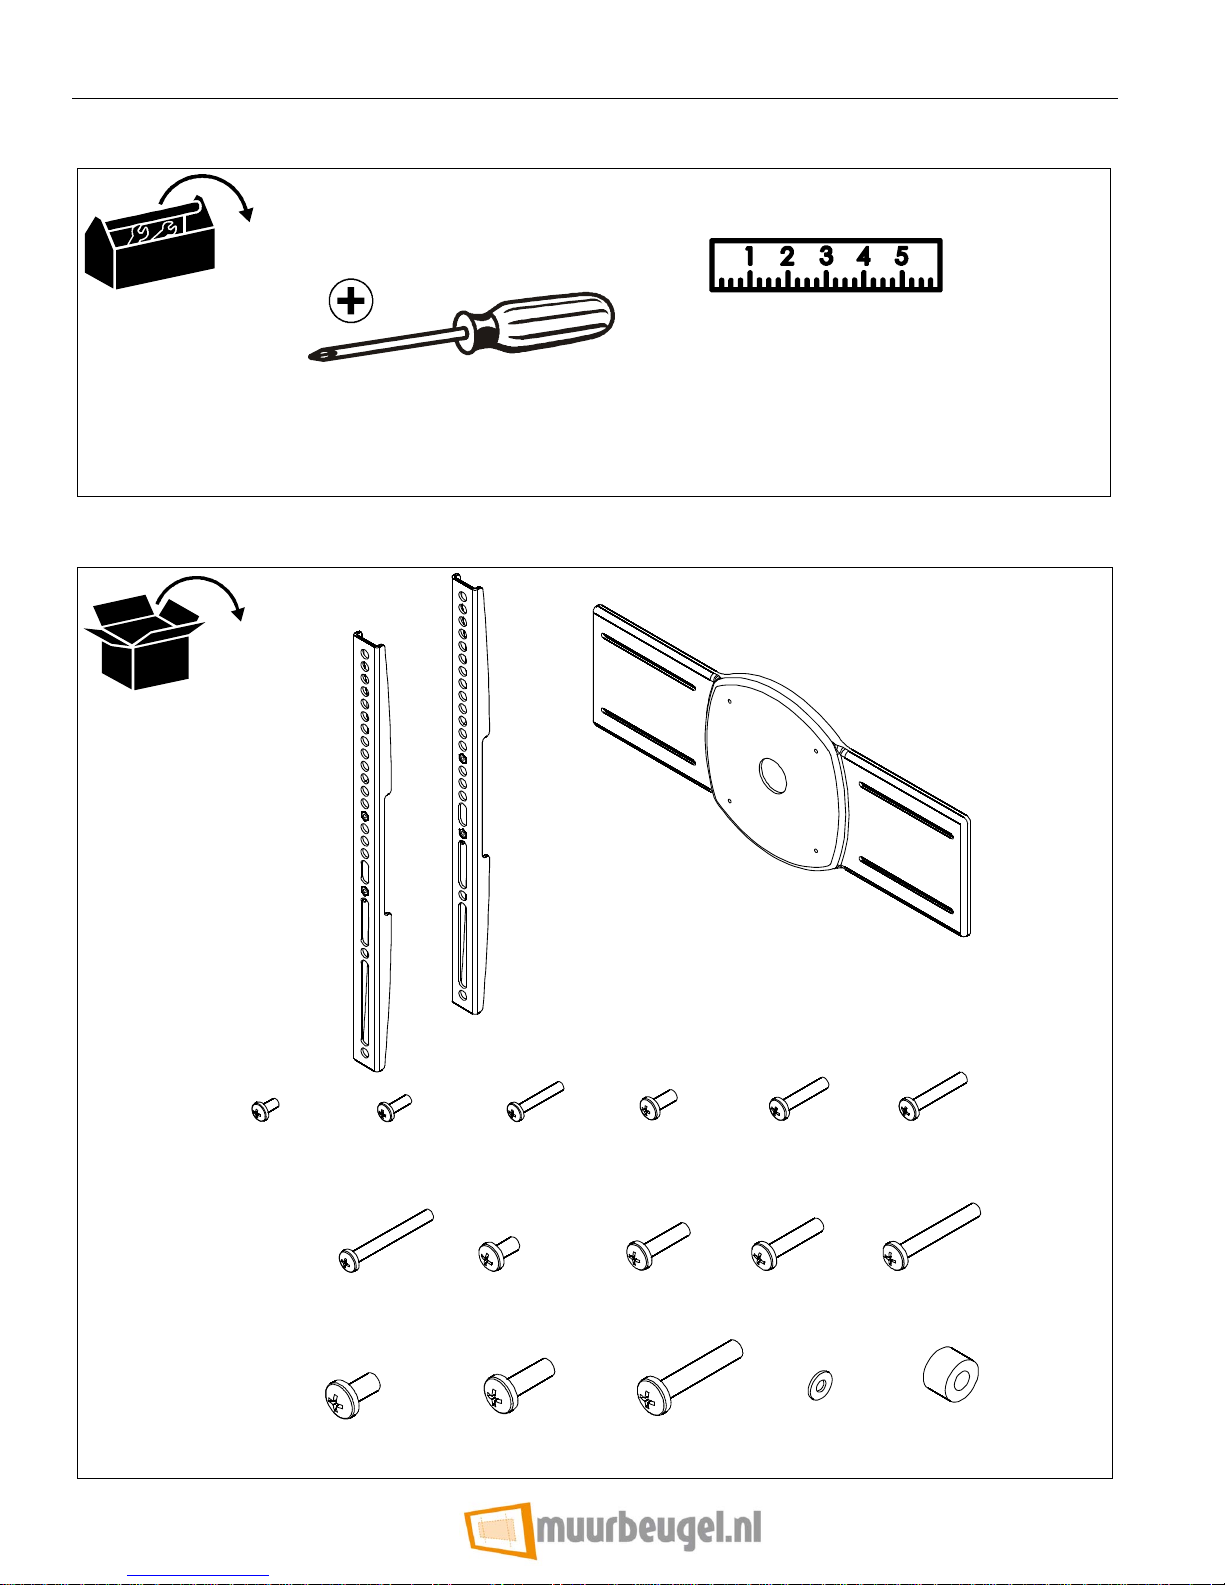
TOOLS REQUIRED FOR INSTALLATION
PARTS
C (4)
M4 x 6mm
A (2)
D (10 )
M4 x 12mm
J (6)
M5 x 45mm
E (6)
M4 x 25mm
K (6)
M6 x 12mm
F (6)
M5 x 12mm
L (6)
M6 x 25mm
B (1)
G (6)
M5 x 25mm
M (6)
M6 x 30mm
H (6)
M5 x 30mm
N (6)
M6 x 45mm
P (6)
M8 x 16mm
4
Q (6)
M8 x 25mm
R (6)
M8 x 45mm
S (10)
#10
T (8)
.750 x .344 x .500
Page 5
Installation Instructions JSBU
INSTALLATION
WARNING: IMPROPER INSTALLATION CAN LEAD TO
MOUNT FALLING CAUSING SERIOUS PERSONAL
INJURY OR DAMAGE TO EQUIPMENT! DO NOT substitute
hardware. Only use hardware provided or specified by
manufacturer.
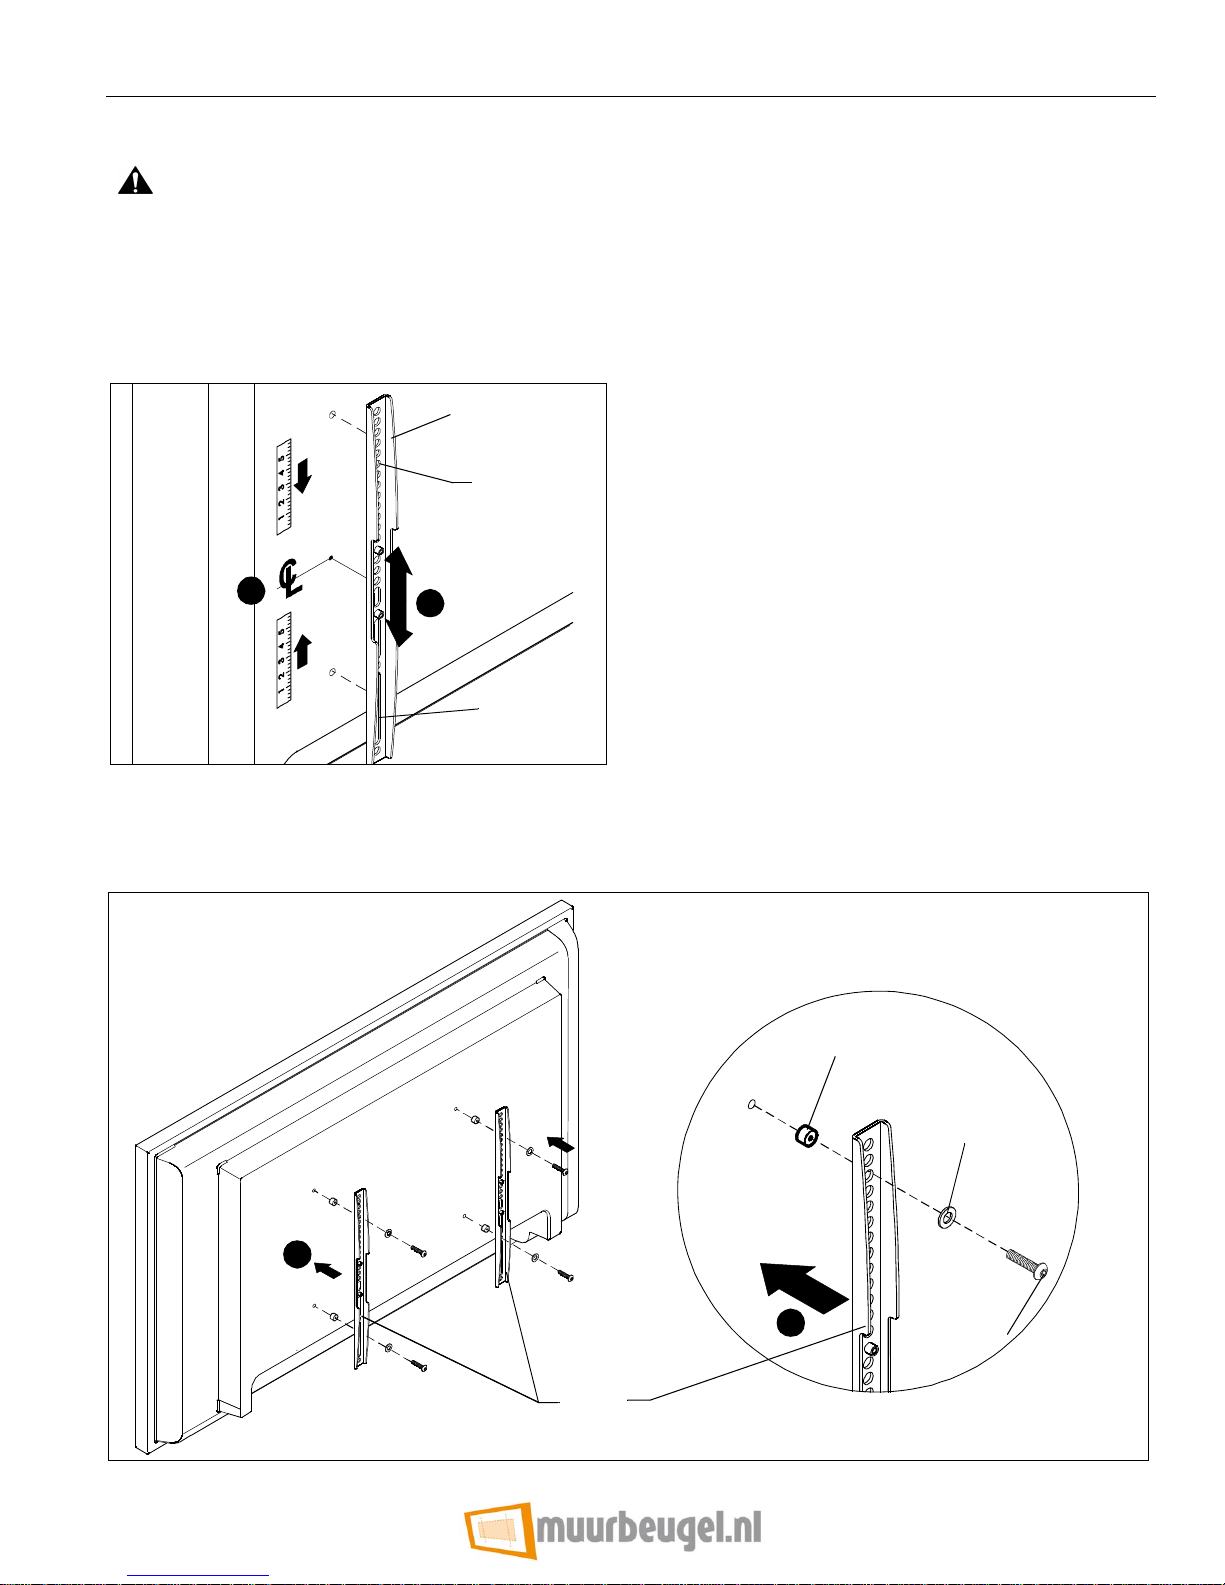
1. Determine and mark the vertical center position between
the left side upper and lower mounting holes in display.
(See Figure 1)
(A) x 2
Mounting
Holes
1
4
Mounting
Slots
2. Determine and mark the vertical center position between
the right side upper and lower mounting holes in display.
(See Figure 1)
3. Orient vertic al mou nting brack et (A ) so that m ounti ng holes
are on top and mount i ng sl ots ar e on bottom .(See Fi gur e 1)
4. Align mount ing ho les a nd slots in vertical mount ing br acket
(A) with upper and lower mounting holes in display.
5. Adjust vertical mounting bracket (A) position until mark
made in Step 1 alig ns wit h ce nter mark i n ve rtic al mou nting
bracket (A).
6. Secure left side vertical mounting br acket (A) to display
using two Phillips pan head screws (D through R). (See
Figure 2)
NOTE: Also use #10 flat washers (S) if using screws D or E.
NOTE: If the display has a recessed mounting surface,
protrusions or a power box, a spacer and longer
mounting hardware must be placed between the
display and vertical mounting brackets (A).
(See Figure 2)
7. Repeat Steps 3 through 6 for right side vertical mounting
bracket using the same hole locations to align brackets
horizontally.
Figure 1
3
6
(T) x 4
(S) x 4
[Only used
with screws
D or E]
(D through R)
x 4
(A) x 2
Figure 2
5
Page 6

JSBU Installation Instructions
8. Attach center br acket (B) to vertical mounting brackets (A)
using four M4 x 12m m Phillips head sc rews (D) and fou r #10
flat washers (S). (See Figure 3)
(A) x 2
(B) x 1
(S) x 4
(D) x 4
Figure 3
9. Attach J-Series mount to JSBU us ing two M4 x 6mm Phil lips
head cap screws (C) in the upper two mounting holes.
(See Figure 4)
10. Complete attachment of J-Series mount using two
M4 x 6mm Phillips head cap screws (C) in the lower two
mounting holes. (See Figure 4)
11. Complete installation following the J-Series mount
installation instructions.
9
10
Figure 4
6
(C) x 2
(C) x 2
 Loading...