

Chief PNRIW2000B Installation Guide
INSTALLATION INSTRUCTIONS
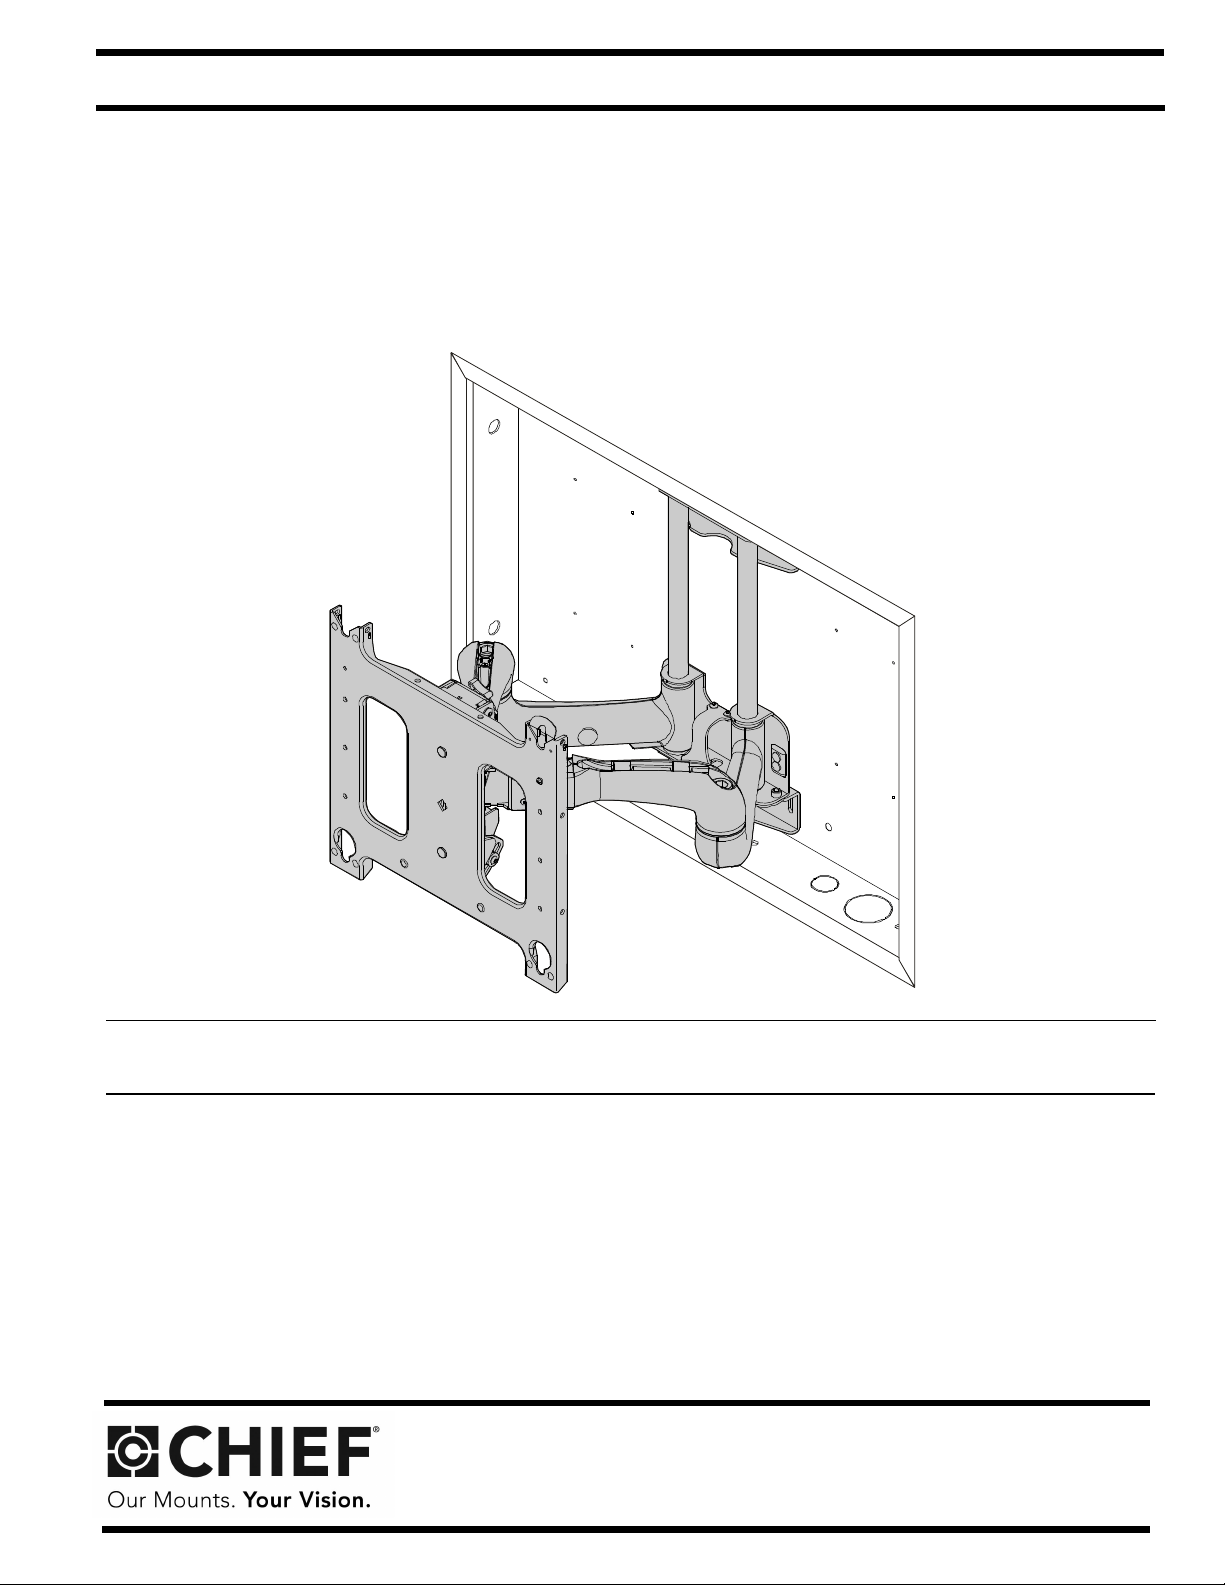
Large Flat Panel In-Wall Swing Arm Mount
Spanish Product Description
German Product Description
Portuguese Product Description
Italian Product Description
Dutch Product Description
French Product Description
PNRIW Series

PNRIW Series Installation Instructions
DISCLAIMER
Milestone AV Technologies, and its affiliated corporations and
subsidiaries (collectively, "Milestone"), intend to make this
manual accurate and complete. However, Milestone makes no
claim that the information contained herein covers all details,
conditions or variations, nor does it provide for every possible
contingency in connection with the installation or use of this
product. The information contained in this document is subject
to change without notice or obligation of any kind. Milestone
makes no representation of warranty, expressed or implied,
regarding the in formation cont ai ned her ein. Mil estone assu mes
no responsibility for accuracy, completeness or sufficiency of
the information contained in this document.
Chief®, ClickConnect™ and Centris Select™ are registered
trademarks of Milestone AV Technologies. All rights reserved.
WARNING: Exceeding the weight capacity can result in
serious personal injury or damage to equipment! It is the
installer’s responsibility to make sure the combined we ight of
all components located between the PNRIW up to (and
including) the display does not exceed 200 lbs (90.72 kg).
WARNING: Use this mounting system only for its intended
use as described in these instructions. Do not use
attachments not recommended by the manufacturer.
WARNING: Never operate this mounting system if it is
damaged. Return the mounting system to a ser vice cen ter for
examination and repair.
DEFINITIONS
MOUNTING SYSTEM: A MOUNTING SYSTEM is the
primary Chief product to wh ic h an accessory and/o r com ponent
is attached.
ACCESSORY: AN ACCESSORY is the secondary Chief
product which is attached to a primary Chief product, and may
have a component attached or setting on it.
COMPONENT: A COMPONENT is an audiovisual item
designed to b e atta ched or rest ing o n an a ccessor y or mount ing
system such as a video camera, CPU, scree n, display,
projector, etc.
WARNING: Do not use this product outdoors.
IMPORTANT ! : The PNRIW mounts are designed to be
mounted within a Chief Listed PAC501 in-wall enclosure (not
included).
NOTE: The PNRIW Series includes:
• Accessory Model PNRIW2000 (to be used with Listed
Chief accessory PSBU interface bracket - not
included).
• Model PNRIWU which includes the Listed Chief
accessory PSBU interface bracket.
WARNING: A WARNING alerts you to the possibility of
serious injury or death if you do not follow the i nstructions.
CAUTION: A CAUTION alerts you to the possibility of
damage or destruction of equipment if you do not follow the
corresponding instructions.
IMPORTANT SAFETY INSTRUCTIONS
WARNING: Failure to read, thoroughly understand, and
follow all instructions can result in serious personal injury,
damage to equipment, or voiding of factory warranty! It is the
installer’s responsibility to make sure all mounting systems
are properly assembled and installed using the instructions
provided.
WARNING: Failure to provide ad equate structural strength
for this mounting system can result in serious persona l injury
or damage to equipment! It is the installer’s responsibility to
make sure the structure to which this mounting system is
attached can support five times the combined weight of all
equipment. Reinforce the structure as required before
installing the mounting system. The wall to which the mount
is being attached may have a maximum drywall thickness of
5/8" (1.6cm).
-SAVE THESE INSTRUCTIONS
2
Installation Instructions PNRIW S eries
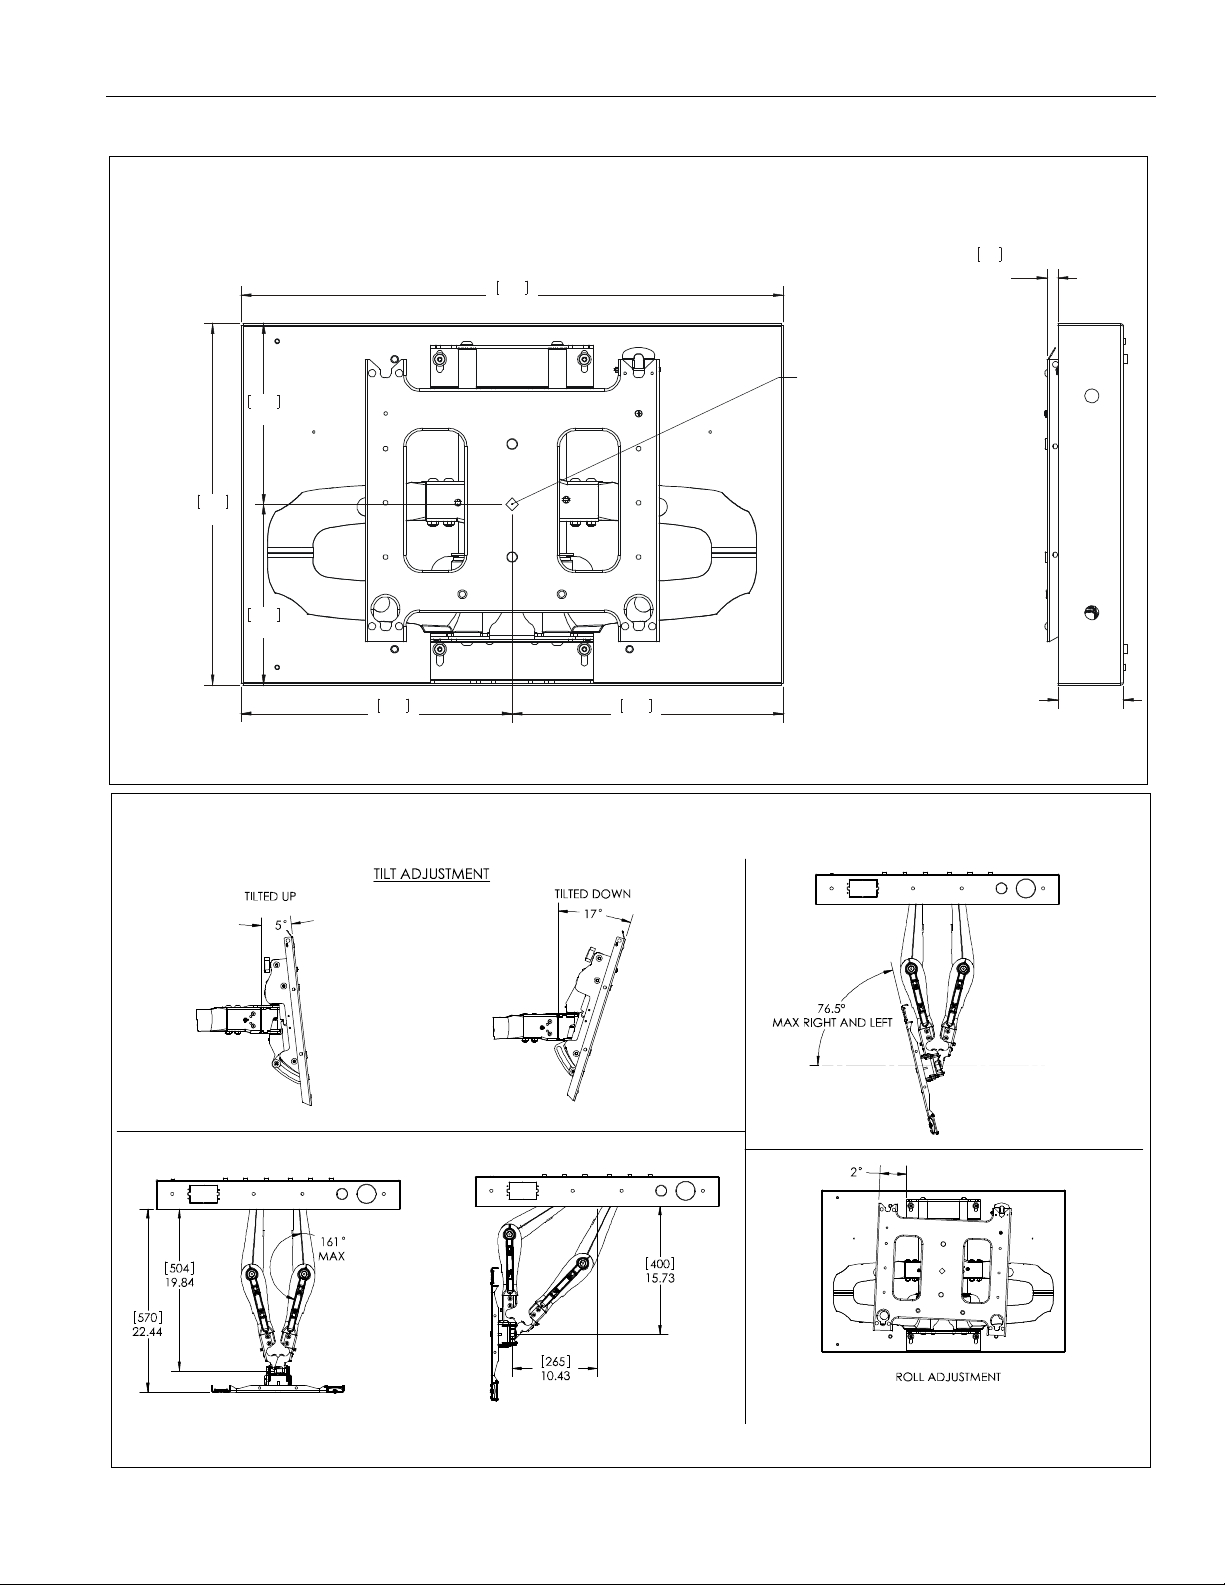
15.00
15.00
NOTE:
PSBU INTERFACE BRACKET NOT
SHOWN. THE PSBU INTERFACE BRACKET
LOCATION OF THE DISPLAY ON THE MOUNT.
DIMENSIONS
WILL ADD 1” IN DEPTH AND MAY AFFECT
254
10.00
508
20.00
254
10.00
381
PNRIW SHOWN IN PAC-501
WHICH MUST BE ORDERED SEPARATELY
762
30.00
381
C/L OF 14"
MOUNTING PATTERN
WHEN RETRACTED
DIMEN S ION S : [MILLIME T E R S]
INCHES
16
ADDED DEPTH
.62
3.63
DIMENSIONS: [MILLIMETERS]
INCHES
3
PNRIW Series Installation Instructions
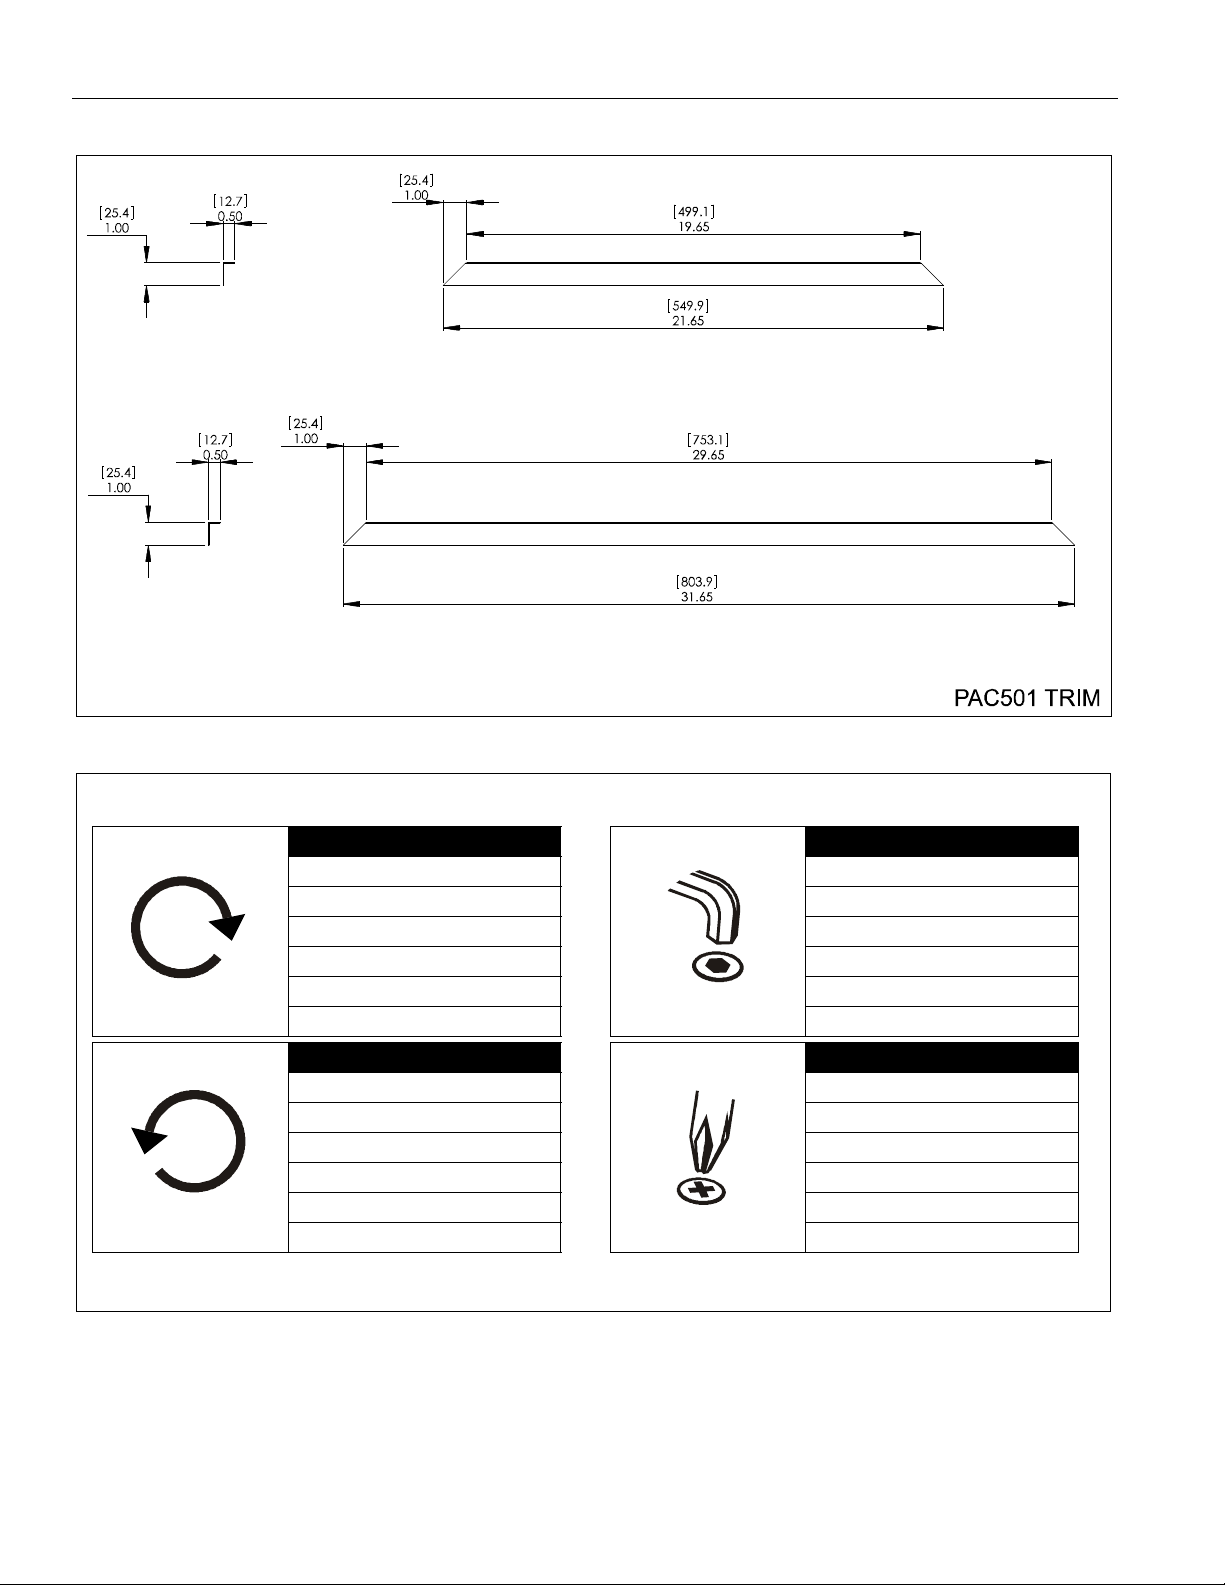
DIMENSIONS (CONT’D)
DIMENSIONS: [MILLIMETERS]
INCHES
LEGEND
Tighten Fastener
Apretar elemento de fijación
Befestigungsteil festziehen
Apertar fixador
Serrare il fissa ggio
Bevestiging vas tdraaien
Serrez les fixations
Loosen Fastener
Aflojar elemento de fijación
Befestigungsteil lösen
Desapertar fixador
Allentare il fissaggio
Bevestiging losdraaien
Desserrez les fixations
Hex-Head Wrench
Llave de cabeza hexagonal
Sechskantsch lüssel
Chave de cabeça sextavada
Chiave esagonale
Zeskantsleute l
Clé à tête hexagonale
Phillips Screwdriver
Destornillador Phillips
Kreuzschlitzschraubendreher
Chave de fendas Phillips
Cacciavite a stella
Kruiskopschroevendraaier
Tournevis à pointe cruciforme
4
 Loading...