

Page 1
Motif Creator™
Version 1.2, Build 1
Page 1
Page 2

(This page is intentionally left blank.)
Page 2
Page 3

Motif Creator™ Table Of Contents
Motif Creator™
Table Of Contents
Introduction..................................................
Basic Concepts..............................................
The Motif Document
Main Screen...................................................
Motif Object Views..........................................
Keyboard Optional Display...............................
Wave Optional Display ....................................
Working with Objects
Adding Objects...............................................
Deleting Objects.............................................
Editing Objects...............................................
Renaming Objects...........................................
The Motif Player.............................................
Preparing and Re-importing..............................
Editing Single Samples Externally.........................
Exchanging Objects..........................................
Auditioning Samples and Waveforms.................
Importing External Instruments........................
..................................................................5
..................................................................6
..................................................................8
................................................................11
................................................................13
................................................................14
................................................................15
................................................................16
................................................................17
................................................................18
................................................................19
................................................................21
................................................................23
................................................................24
................................................................25
................................................................26
Editors.........................................................
The Voice Editor..............................................
The Element Editor.........................................
The Waveform Editor.......................................
The Sample Editor...........................................
The Performance Editor....................................
The Part Editor................................................
Menus
File...............................................................
Voice/ Performance.........................................
Element/Part..................................................
Waveform.....................................................
Sample.........................................................
View.............................................................
Help..............................................................
Gear Menus - Voice/Performance.......................
Gear Menus - Waveform..................................
Gear Menus - Sample......................................
Preferences
Preferences...................................................
Support
Troubleshooting..............................................
FAQ.............................................................
Bug Reports..................................................
Contacting Technical Support.............................
Updating......................................................
Contact Us.....................................................
Credits..........................................................
Page 3
................................................................27
................................................................28
................................................................29
................................................................30
................................................................31
................................................................32
................................................................33
................................................................34
................................................................35
................................................................36
................................................................37
................................................................38
................................................................39
................................................................40
................................................................41
................................................................42
................................................................43
................................................................44
................................................................50
................................................................50
................................................................50
................................................................52
................................................................53
................................................................54
................................................................55
Page 4

(This page is intentionally left blank.)
Page 4
Page 5
Motif Creator™ Introduction
Motif Creator™
Introduction
Motif Creator™ is a powerful Voice, Performance, Waveform, and Sample creator/editor for
Yamaha Motif Classic, ES, XS, XF les.
The Yamaha Motif™ is a new
generation Workstation-style
keyboard system that has excellent
sounds and advanced functionality,
for superior usage in the studio and
playing live. The most immediate
gratication of the Motif is playing
it’s onboard sounds, which are topshelf and professional standard.
However, the Motif also allows
for playback of user-dened
multisampled keymaps (called
“Waveforms” on the Motif) with the
same possibilities as the onboard
ROM waveforms. This functionality
is entirely under the Integrated
Sampling button on the Motif.
Although the Motif is a little less exible then the older specialized hardware samplers (e.g. Akai
S-5000/Z-Series, Emu Emulator 4, Ensoniq ASR-10, Roland S-7x and so on), and more less so
then powerful software samplers such as Kontakt, it is still very powerful, and with the right
software platform to assist in creating these sampled Waveforms and Voices, the Motif can go
beyond it’s stock sounds and y high with your own custom Voices. That is the goal and stated
purpose of Motif Creator.
Like most (if not all) hardware musical instruments, the onboard display and provided access do
not give access to the Motif user-sampled area exceptionally well. Some Supermen have used it
and worked with it, but among us Mere Mortals it’s “in and out”, since it is slow and difcult not
only to view the total range of information, but also to apply new edits etc. Again, Motif Creator
leverages the natural power of your computer to access, display, and arange information that
it’s a perfect and powerful bridge to create and edit Motif user-created content.
You will notice that a signicant difference between Chicken System’s Motif Creator™ and
Yamaha’s own provided Motif Editor is that the Motif Editor communicates via MIDI or USB
to the Motif ITSELF, whereas Motif Creator™ simply works with Motif les themselves. This
is because of lacking functionality in the Motif itself; it does not allow user wavedata to be
transferred or detected through MIDI or USB. That is a signicant ommission in the Motif
Editor; although the immediate voice editing and librarian functions are wonderful, there is no
access to the user Waveforms. In fact, on older Motif models the editor actually crashes when
encountering a user Waveform.
Motif Creator™ takes advantage of only access to user Waveform data - via the les
themselves. Motif Creator™ is practically a virtual Motif specialized for editing. You can
make your own user Waveforms, edit and create your own Samples within those Waveforms,
and much more. Motif Creator also allows innovate ways to listen and audition those sounds.
Since it’s not a Motif, it can’t substitute for it, but with sampled sounds you can come awfully
close. Most of the time, we foresee Motif users to operate Motif Creator™ to take care of
Page 5
Page 6

Introduction Motif Creator™
the sampled side, since it more clear, powerful, and effecient then the Motif itself, but when
it comes time to tweak the sounds and do the realtime parameter editing, we expect them to
write the les and read them into Motif, edit away, then resave.
Motif Creator™ also includes management of ROM data. Renaming objects (Voices,
Waveforms, etc.) is a breeze on Motif Creator™. You can manage your Categories (sometimes
the center of most Motif user’s experience!) in new powerful ways beyond what the Motif itself
can do. You can even set up a library of Voices and create your own compilations to be written
into a le for particular uses.
Motif Creator™, while powerful, is still a simple application. It was designed to give you
easy and intuitive access to Motif data, with no funny business or confusing Corvette-looking
widgetry.
Some notes regarding the documentation:
This document is synced to the Motif Creator™ version denoted on the cover of this document.
It is a dynamic document and often is revised with every major, minor, or even build of Motif
Creator™.
In this document, the term “right-click” also refers to “control-click” on a Mac. Only “rightclick” will be used. Similarly, “Preferences” is term for different optional parameters that can be
set in the program; on the Mac you will see the word “Preferences”, but on Windows you will
see “Options”. In this document, Preferences will be used. Graphics are all Mac, but look very
similar to the Windows version.
Since the Motif regards the middle C key on a keyboard (MIDI note 60) as C3, by default
Motif Creator™ shows the textual representation of MIDI note 60 as C3. This is the non-US
representation. However, if you are more used to seeing C4 as middle C (like GigaStudio or
other US models - or even some varied non-US samplers), you can change this in PreferencesGeneral.
If you are a registered owner, you are qualied for free updates for the life of the program.
You can download these from your program using the Check for Update feature, or from the
Chicken Systems Update Area.
Page 6
Page 7
Motif Creator™ Basic Concepts
Basic Concepts
The Motif Creator™ Motif document represents a single Motif le. It can be one that is existing,
or a new one that hasn’t been saved to disk yet.
Your experience with Motif Creator™ revolves around creating a new (or opening an existing)
Motif le into a Motif document, editing the objects within that document, then saving the
document as a Motif Bank le. This
saves all objects, such as Voices and
Waveforms, into a single le set.
Motif Creator supports Motif All Files
(.w2a, .w7a, .x0a, .x3a) and All Voice
Files (.w2v, .w7v, .x0v, and .x3v).
Future versions will support All
Waveform Files (.w2w, .w7w, .x0w,
.x3w).
All Files contain Motif Performances,
Voices, Waveforms, Song, and System
information. All Voice Files only contain
Voices and Waveforms.
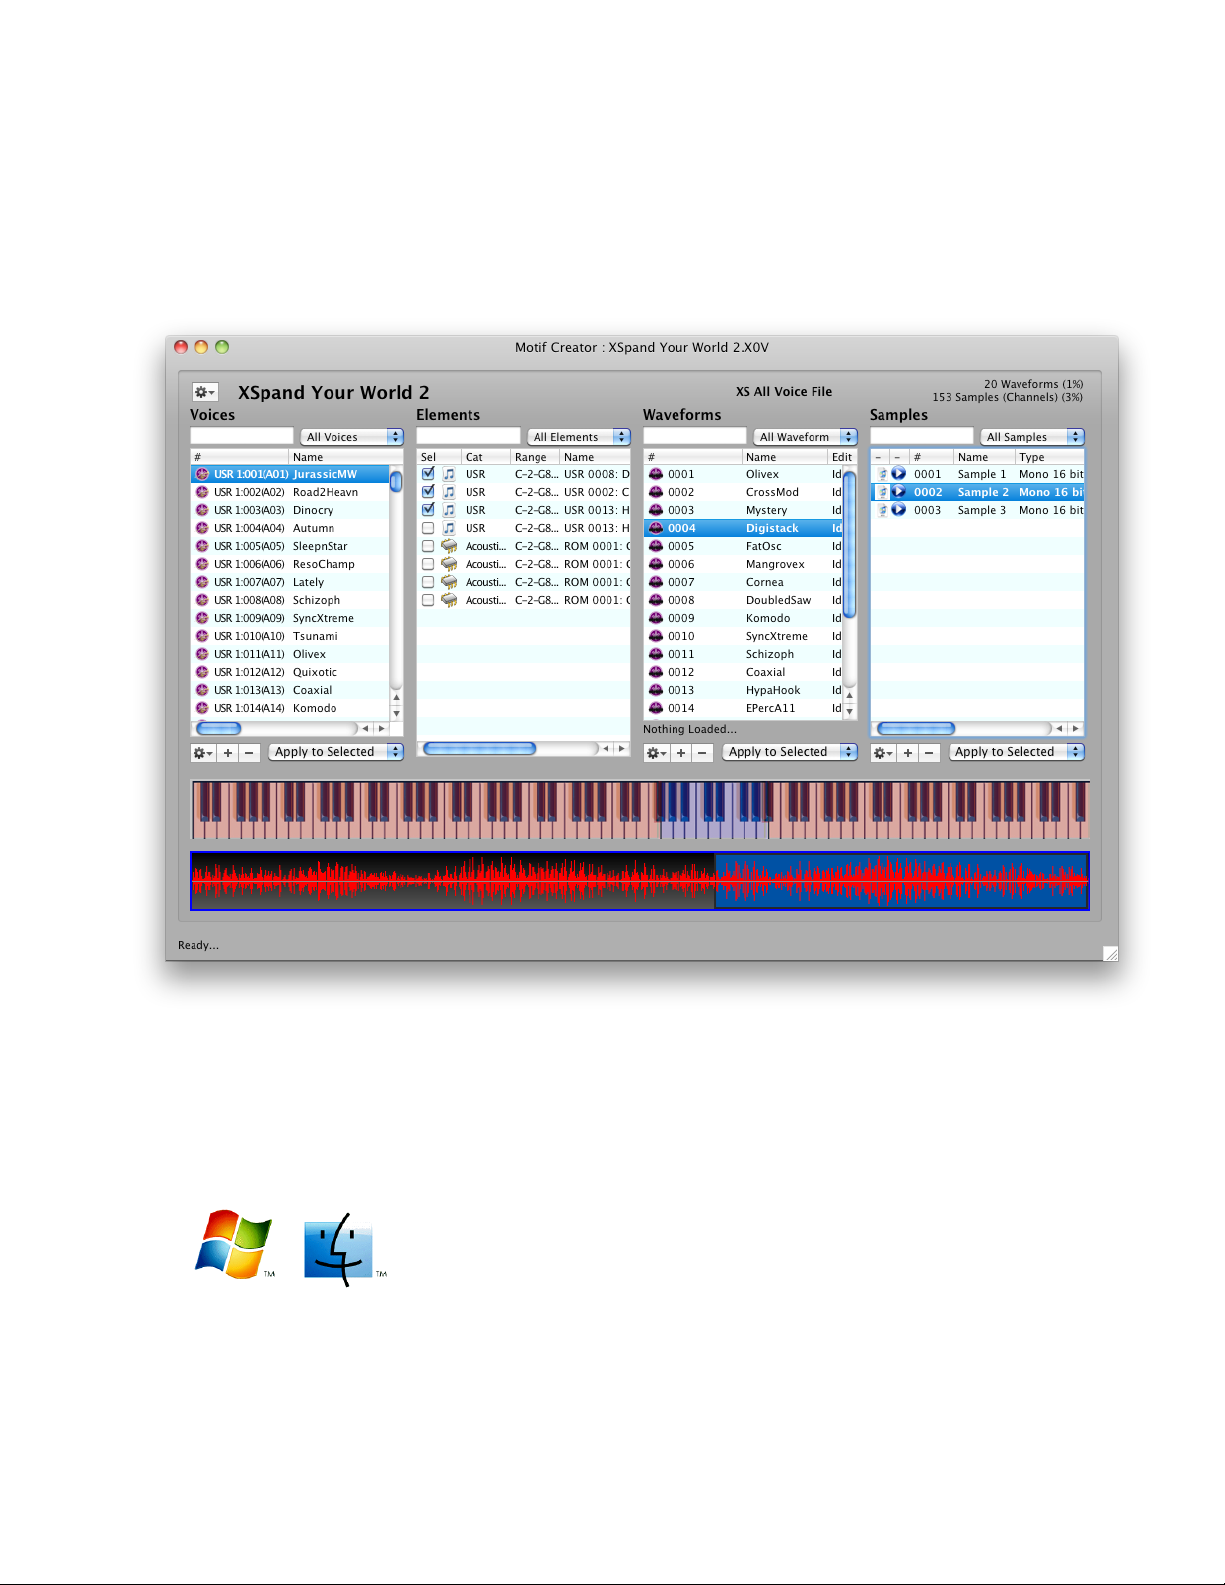
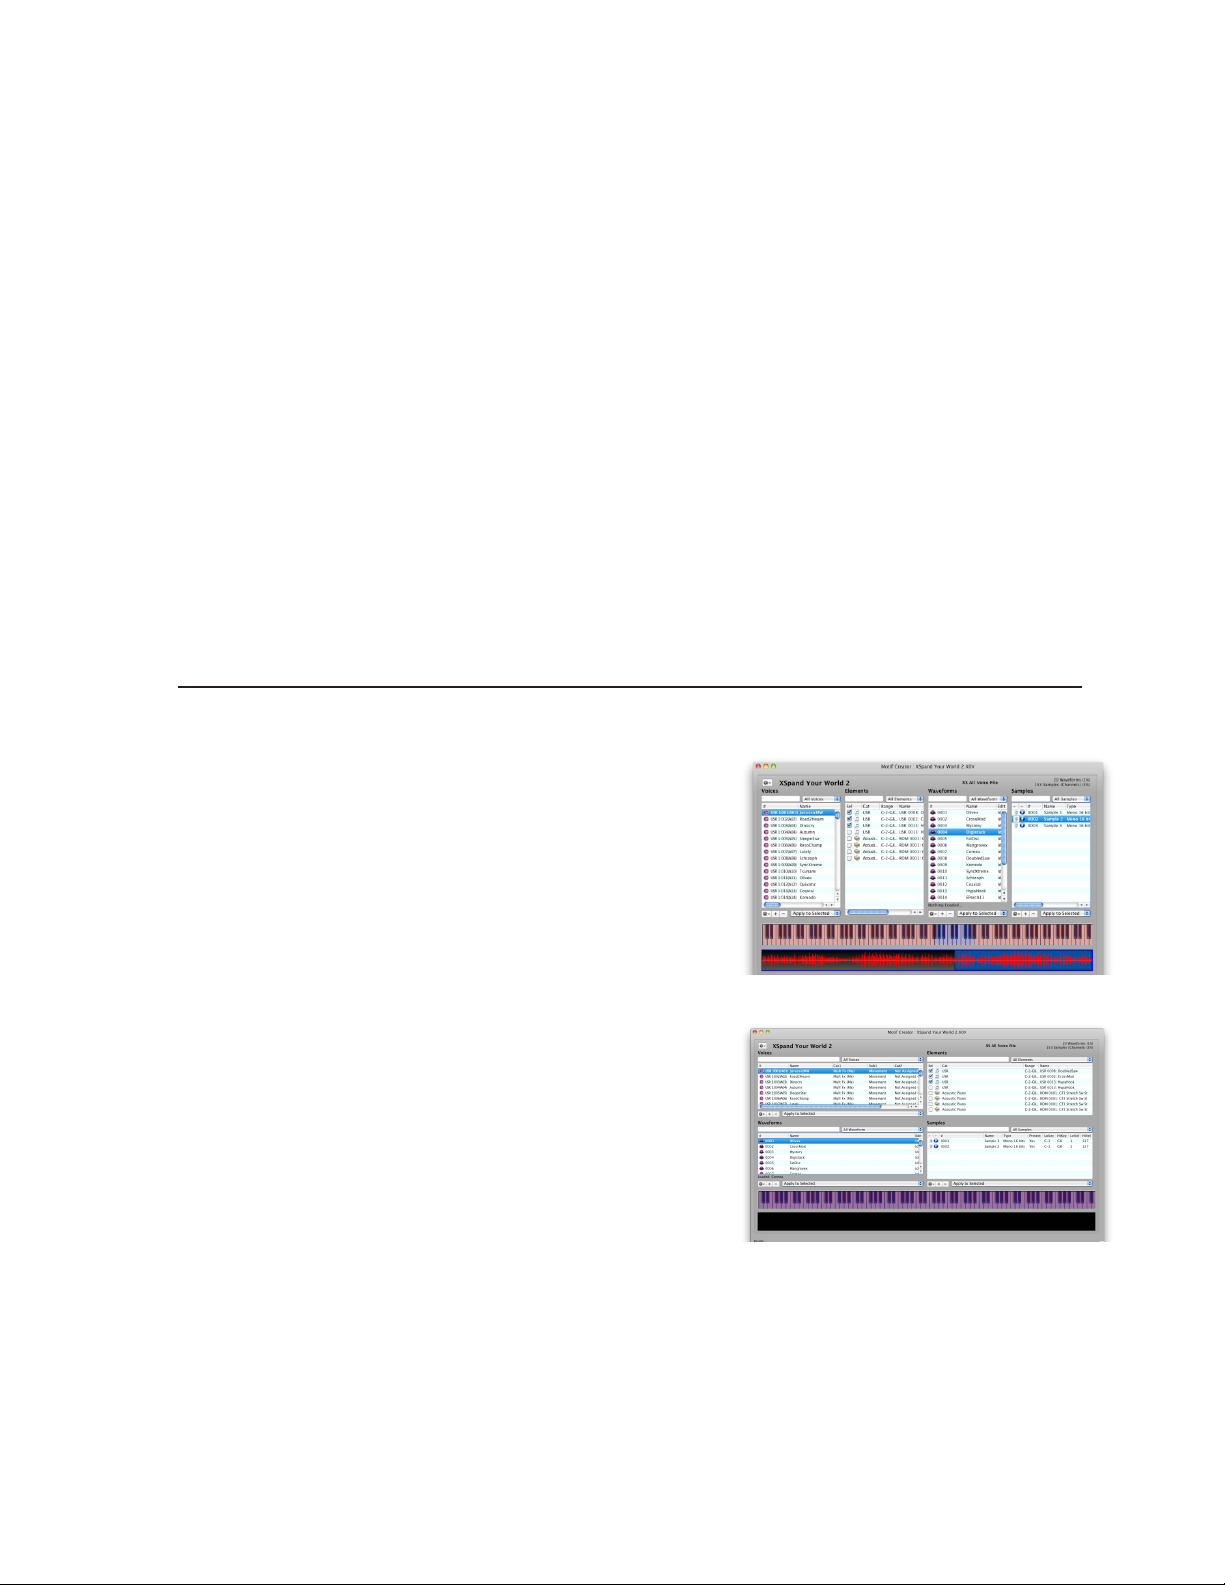
The Motif Document shows you the most important aspects of the Motif les: the Voices, the
Elements within each Voice, the Waveforms, and the Samples within a Waveform. These are
represented in four Lists; the Voices with the Elements, and the Waveforms with the Samples.
There is also a Performance List and a Part List, shown in the Performance View.
From there, you are free to add, delete, or edit any of the objects to your needs. For more
information on the Motif document, where you’ll do the majority of your work, see The Motif
Document elsewhere in this document.
Each object has an Editor. There is a Voice Editor, Element Editor, Waveform Editor, and Sample
Editor; and additionally, a Performance Editor and Part Editor. One editor can be open at a time,
and it edits the current selection in the list on the Motif document. For more information on
Editors, please see the Editors section elsewhere in this document.
Page 7
Page 8
Motif Creator™The Motif Document
The Motif Document
The Motif Creator™ Motif document represents a single Motif le, existing or a new one that
hasn’t been written yet. Your experience with Motif Creator relvolves around creating a new or
opening an existing Motif le, changing the
objects within using the Motif document,
then saving the document which saves
everything to the a new or existing Motif
le, for immediate use in your Motif.
Lists
The Lists on a normal Motif document show
the principal objects; the Voices (List 1)
and the Waveforms (List 3). The Element
List (List 2) shows the Elements contained
in the currently selected Voice, and the
Sample List (List 4) shows the Samples in
the currently selected Waveform.
There are two other Lists; the Performance
List and the Part List. These appear when
you are in the Performance View.
The purpose of the Listst is so you can view the contents of the File that is represented by the
document and apply functions to change, edit, or build up the le.
Views
Speaking of Views, the Motif document interface is highly customizable, so you can either have
all the List on the document at one time (admittedly crowded), or you can see only what you
want to see for handy editing. The Views are:
- Voice/Element/Waveform
- Waveform/Sample
- Performance/Part/Voice
- “Four Corners” (Voice & Element on top, Waveform & Sample on the bottom)
- Full View
You can choose which view you’d like with the Gear menu on the upper right, or the top level
Views menu. For more information of Views, see the Views section in this manual.
Range Maps
On top of the Element List and the Part List you can have Range Maps perched on top of
them. This allows for graphical editing of the Ranges (Key and Velocity) of Each Element or
Part. Key is selected by the top button to the left of the Range Maps, Velocity by the second
button. A green color indicates which Range you are viewing. The third button (yellow) gives
you a context menu byselecting it, giving you some auto-mapping options, plus some viewing
options. If you have no immediate use for them, you can hide them using the context menu or
the Views top-level menu.
Having the Range Maps mounted on top of each other makes it easy to see how Elements or
Parts are arranged against each other. Alter the range by simply grabbing and pulling each end
with the mouse. Selecting the middle of the range allows you to slide it back and forth.
(Remember, these Ranges are actually “Limits”; that is, with an Element, you are restricting the
key/velocity response. The Waveform the Element refers to may have information beyond the
limits, you are simply creating a smaller “window” into the Waveform (or Voice).
Page 8
Page 9

Motif Creator™ The Motif Document
Also remember that the Ranges do not appear on Drum Voices, since there are no Key/Vel
Ranges to deal with, just the natural 1-Key limit of a Drum Element.
Optional Displays
There are two option items you can display on a Motif Document; the Keyboard Display and
the Wave Display. The Keyboard Display shows the contents of the Waveform that is selected
in the Waveform List, and also responds to dragging and dropping of external Samples into
that Waveform. It makes mapping incoming samples a breeze. The Wave Display shows the
waveform of the Sample selected in the Sample List, for easy recognition.
For more information on the Optional Displays, see either the Keyboard Display or the Wave
Display areas of this document.
Filtering Lists
The text eld and popup menu above each list lter the lists contents. Typing into the text eld
lters the list based on what you typed; e.g. typing in “Trum” (without the quotes) in the text
eld above the Voice List brings up Voices with the names “Trumpet Short”, “TrumLngBrght”,
and “Guitar Strum”. Multiple criteria can be inputted by seperating them with commas.
The popup menu varies with each List. but give you common ways of making each list more
specic; e.g in the Sample List you can view just the external samples.
Performing Functions on List Objects
The whole purpose of Motif Creator is to add, edit, delete and change objects. Voices can’t be
deleted per se but they can be initialized. A “blank” Voice is one that starts with the letters
“INIT” (case insensitive); initialized voices usually have no sampled waveforms referenced, just
has the rst Element enabled, and is set to the rst Piano waveform.
Mostly what you’ll edit in Voices is the contents of the Elements. Other then providing a set of
real-time parameters, an Element’s main purpose is to playback a Waveform, whether it is a
ROM Waveform or sampled (RAM) Waveform.
RAM Waveforms are listed in the Waveforms List. A RAM Waveform is a collection of nonoverlapping samples within a MIDI Keyboard with variable Velocities. By selecting a Waveform
in the Waveform List, the associated Samples show in the Samples List, with their properties.
There are many ways of adding, editing, and deleting objects. Most of these are standard
computer methods. More specic information will be given in other places in this document, so
we’ll cover them briey here.
You can use the Gear and Plus (+) and Minus (-) buttons below each list. Clicking the Gear
button exposes a Menu that is very much like the top-level menus titled Voices-ElementsWaveforms-Samples. You can apply the function to selected objects in the list, or to all of them,
by selecting the popup menu next to the buttons (Apply to All, Apply to Selected).
Ctl/Right-clicking on a list brings up a Context Menu which is usually identical to the Gear Menu
for that list. It ALWAYS applies to the selected items in that list.
Dragging objects is a very powerful editing method. All drags and drops do what you would
think they would do. If you drag a Wavefrom and drop it on an Element, it will set that Element
to that Waveform. If you drag a couple of WAVE les from outside Motif Creator and drop them
on the Sample List, it will automatically add those WAVE les to the Samples List. You can also
drag Voices, Waveforms, or any object from one Motif document to another.
The INS and DEL buttons are active to make new Waveforms or Samples, and Backspace serves
as another DEL button.
Page 9
Page 10

Motif Creator™The Motif Document
Two very powerful functions are included on the Main Screen; Importing and Preparing. These
are covered in depth in other areas of this document. Consider turning this viewer off in
Preferences.
Page 10
Page 11
Motif Object ViewsMotif Creator™
Motif Object Views
The Motif Creator™ Motif Document has several views so you can work effeciently. Sometimes it
is important to get a birds eye look at your Motif le, and sometimes you need to only look at a
portion of the le.
Views can be access either by the Views top-level menu, or the Master Gear Menu on the upper
right of the document.
Motif les (or we call them Banks) have up to 6 components to them:
Voices
Elements
Waveforms
Samples
Performances (All Files only)
Parts (All Files only)
Generally the Voice is the Queen of the Bank, because so much centers on the Voice. Because
of this, most Views have at least something to do with the Voices.
There are 5 Views, separated into 3 Categories: General, Detailed, and Special.
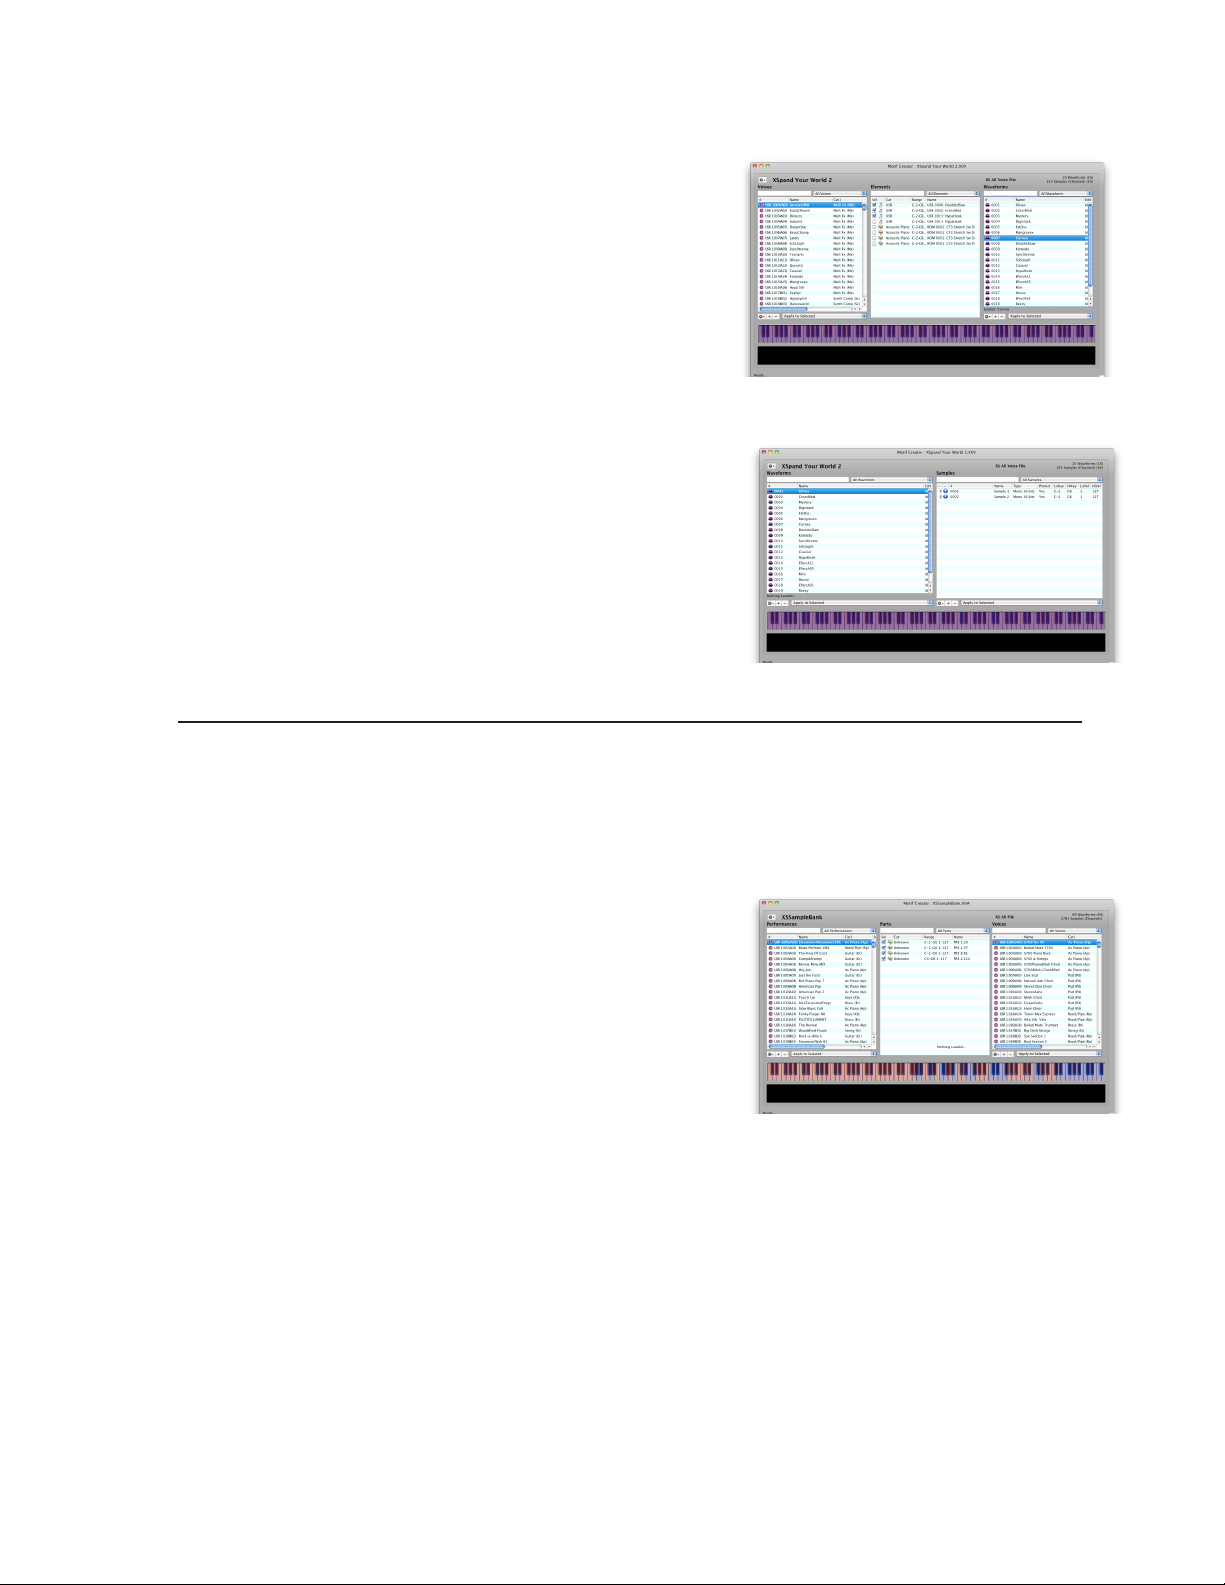
There are two General Views:
Full View
This includes from right to left: Voice-Elements,
Waveform-Samples.
This is a good general view of the Bank. You can select
Voices and see the Elements that work within them.
You can view the Waveforms, and view the Samples
referenced by them. And you can assign Waveforms to
Elements very easily, since the lists are ght next to
each other.
Four Corners
This includes from right to left: Voice-Elements, the
below that left to right Waveform-Samples.
This performs the same purposes of Full View, except
that it values the details of each view (you can see
more of the columns) because of 2x2 alignment. Full
view is more valuable when you want to see more
entries of one list.
Page 11
Page 12
There are two Detailed Views:
Voice-Element-Waveform View
This includes from right to left: Voice, Elements,
Waveforms.
This is when you are most concerned with assign
already-designed Waveforms to Elements. The Samples
list is omitted since you are already comfortable with
the contents of the Waveforms.
You have more horizontal information since there are
only 3 lists.
Waveform-Sample View
This includes from right to left: Elements and Samples
This is for hardcore Waveform designing, you can see
the minutiae of the Waveforms and of the Samples. You
are not concerned with Voices or anything other then the
Waveforms and Samples.
You have much more horizontal information since there
are only 2 lists.
Motif Creator™Motif Object Views - Voice-Element-Waveform
Finally, there is one Special View:
Performance View
This includes from right to left: Performances, Parts, and Voices.
This is the Performance Editor, where you can assign
Voices to Parts, and thus develop your own Performances
easily. Performances do not exist on any other list, since
Voices are more commonly used and Performances are
“far away” from Waveforms and their dealings.
Page 12
Page 13

Keyboard Optional DisplayMotif Creator™
The Keyboard Optional Display
Since the Motif is basically a keyboard, and everything revolves around a keyboard, so it’s just
natural that we put a keyboard display on a Motif document. It shows you what the contents of
the current Waveform are, allows you to select a Sample within the Waveform, and also allows
dropping to import Samples into the currently selected Waveform and determine their Key
Ranges.
Sample View
The Keyboard display shows in alternating pink and green the Samples that are referenced in
the currently selected Waveform (on the Waveforms List). Velocities are also shown, in various
tints.
Sample Select
By clicking on the Keyboard display, this selects the Sample according to where you clicked.
This also pertains to Velocity -the higher up you click, the higher velocity gets selected.
Sample Import
By dragging and dropping external Samples (WAVE and AIFF) onto the Keyboard display, this
allows you to import Samples into the currently selected Waveform. If you drag more then one
Sample or a Folder, multiple overlays will appear as you drag onto top of the display, with a
maximum of an octave spread. Dragging higher on the Keyboard makes for wider spreads.
Dropping on the Keyboard display imports the Samples into the currently selected Waveform.
If there are overlapping Samples, they are deleted or cut-away - this is because Waveforms do
not allow overlapping.
Page 13
Page 14

Motif Creator™Wave Optional Display
The Wave Optional Display
No editor would be complete without a Wave Display!
Although there is one in the proper place in the Sample Editor, you can display one on the main
screen by checking the Wave Display menu in the top-level View menu, or the master Gear
Menu.
This displays what you play in the Sample list. There are no transport controls; well, there
actually is - the single button on the Sample List performs this function.
Page 14
Page 15

Motif Creator™ Adding Objects
Adding Objects
You add Voices, Waveforms, Samples, or Performances by dragging objects into the Lists,
by clicking the + button under the List, or pressing the Insert button (INS) on the computer
keyboard.
Voice List
Drop a Voice from another Motif document into this list, and it will add it to the Voice List. (We
should say it will replace the Voice selected.) Or drop an external le, like a Kontakt .nki, Apple
.exs, SoundFont, etc., or even one or more WAVE/AIFF les, on the Voice List and it will create
a Voice and make Waveforms that will hold the samples. Clicking the + button or pressing INS
will allow you to select one or more external Instruments to Import in (See Importing External
Instruments for more information.)
Waveform List
Drop a Waveform from another Motif document into this list, and it will add it. Or drop an
external le, like a Kontakt .nki, Apple .exs, SoundFont, etc., or even one or more WAVE/AIFF
les, on the Waveform List and it will create Waveforms that will hold the samples. (You then
have to assign the Waveforms to Elements within Voices, if you wish.) Clicking the + button or
pressing INS creates a blank Waveform, in which you can add Samples to.
Sample List
Drop a Sample from another Motif document into this list, and it will add it. Or drop a WAVE/
AIFF. When importing external samples, Motif Creator assigns the rst available key from the
left of the keyboard and gives it a one note range. You can edit the range afterwards. Clicking
the + button or pressing INS brings up a Open dialog where you can select WAVE/AIFF les to
import.
You can also add Samples by dropping them on the Keyboard Display at the bottom of a
Motif document. This provides an easy way to add a sample to a specic keyrange. For more
information, see the Keyboard Optional Display in this document.
Performance List
Drop a Performance from another Motif document into this list, and it will add it to the
Performance List. (We should say it will replace the Performance selected.) Note: you
cannot import external foreign formats into the Performances List yet, even if the format is a
Performance-type (like a Roland Performance). This will be incorporated in a future version.
Page 15
Page 16

Deleting Objects Motif Creator™
Deleting Objects
You delete objects in a List by clicking the minus sign (-) button under the List, selecting the
“Delete” Gear, Ctl/Right-click Context, or top-level menu option, or by pressing the Delete
button (DEL) on the computer keyboard.
The popup menus under the lists determine if you are deleting all the objects or just the
selected ones.
Since it is impossible to delete a Voice or Performance, in this context it means Initializing the
Voice(s).
Page 16
Page 17

Editing ObjectsMotif Creator™
Editing Objects
You edit an object by double-clicking the object in the list, or by selecting the Gear or top-level
menu “Edit...”. It is only possible to edit one object at a time, so if there are multiple objects
selected in a List, only the rst selection will be edited.
When you edit, the appropriate editor appears. For more information on Editors, see the Editors
section of this document.
For Samples, there is also an additiona; “Edit External...” menu option. This allows you to
edit the sample in an external editor that you specify in the Preferences dialog. For more
information, please see the Editing External Samples section in this document.
Page 17
Page 18

Renaming Objects Motif Creator™
Renaming Objects
You can rename any object by selecting it, then selecting it again. Although you can name
things whatever you want, Motif Creator will apply the natural Motif text and length restrictions,
depending on what type of Motif le (Classic, ES, XS, XF) the document represents. Also note
that Samples can be named, even though these names do not show up in the Motif interface.
(We are not sure why this is, must not be enough room. Well, there is though. Oh well.)
IMPORTANT! If you name your samples, the results are stored in a .motinfo le of the same
name, stored alongside your Motif le(s). The next time you open that Motif le - IF it has
not changed - the names will show up. If the Motif le has changed since (for instance, if you
resaved it using the Motif after editing) Motif Creator™ will erase the .motinfo and your
sample names will be lost.
Page 18
Page 19

Motif PlayerMotif Creator™
The Motif Player
Starting with Motif Creator 1.2 is included the Motif player, which can play from Motif Creator
itself a Motif Documents Waveforms.
Simply select a Waveform in the Waveform
list, right-click and select Play... (Or click the
Waveform Gear menu and click play... The
Waveform will load and you can play it on your
MIDI keyboard. Make sure to select the correct
MIDI In port in Preferences - Audio/MIDI.
IMPORTANT! On Windows the player is xed
to play out the ASIO type of driver and goes
through ASIO4ALL. You can download this
driver at www.asio4all.com. On Mac the output
is xed to Built-In Output.
Page 19
Page 20

Motif Player Motif Creator™
(This page is intentionally left blank.)
Page 20
Page 21

Motif Creator™
Preparing Objects
Preparing and Editing Waveforms/Elements
Externally
One of the most powerful and innovative features in Motif Creator™ is the ability to drag
(or select via menu) an Element, Waveform, or Sample outside of Motif Creator™ and load
it into a software sampler like Kontakt or a sample editor such as Sound Forge or PEAK. This
effectively gives Motif Creator™ a full-edged real-time editing engine! Simply edit your object
(Element, Waveform, or Sample), save it, and focus back to Motif Creator™ - Motif Creator™
will then reference the new information, so when you eventually the save the document, those
new changes will write into the new Motif le.
So, what is “preparing”? Kontakt (or any other sampler or editing program) has no idea what a
Motif Waveform or Sample is, so if you dragged that object into it (or tried to load it), it would
reject it. “Preparing” is the act of writing behind the scenes temporary les that will be provided
to the editing app. After you’ve “prepared” the Element/Waveform/Sample, the List is display it
as “prepared”, and then your drag to the destination app will be successful.
Future versions of Motif Creator™ will allow you to automatically prepare every object;
however, this is something you may not want to do because it may take a lot of time to
perform, and chances are you won’t be editing every Waveform. That is why it is implemented
as a manual process. You can prepared several or all objects at once though, just use the toplevel or Gear menus.
(Note: Currently Kontakt 4.2 and Kontakt 5 are supported formats, however, they do not
support modulators, lters, or effects.)
Preparing, Editing, and Re-importing Waveforms - An Example
First, locate the Waveform you want to edit or audition and select it in
the Waveform List. Under Edit Status it says it’s Idle; this means it’s
not prepared.
Click the Gear menu below and select Prepare
Selected. Motif Creator will then prepare the
Waveform. You will know when it’s done when
the Edit Status column shows Prepared.
For the purposes of this example we will
assume you have Kontakt, Native Instruments super-sampler. Open it up. Then drag the
prepared Waveform out of the List and onto the Kontakt rack. The Waveform loads right into
Kontakt!
Now, make some edits, add some samples,
whatever. Save the Kontakt Instrument.
Now, go back to Motif Creator™. The program
will check to see if the prepared le has been
updated; since it has, it updates the display and
notes that it has been Imported. See the Edit
Status column now; it says Imported. You have
edited a Motif Waveform using Motif Creator™!
Page 21
Page 22

Preparing Objects Motif Creator™
If you’d like to use another sampler besides Kontakt to audition
or edit your Waveforms, you have to load the les manually. As
of this writing, Kontakt is the only sampler that fully supports
dragging into the interface. The le to load is in the AppData
section of Motif Creator:
Mac:
/Users/[you]/Application Support/Chicken Systems/Motif Creator
Windows XP:
C:\Documents and Settings\[you]\
ApplicationData\Chicken Systems\Motif Creator
This assumes C: is your boot drive; also,
ApplicationData may be a hidden folder
Windows 7/Windows Vista:
C:\Users\[you]\AppData\Roaming\Chicken
Systems\Motif Creator
This assumes C: is your boot drive; also, AppData
may be a hidden folder
Page 22
Page 23

Motif Creator™
Editing Single Samples Externally
Editing Single Samples Externally
Motif Creator™ can edit whole Waveforms (that is, keymaps) or single Samples on the Sample
List. Motif Creator™ is a powerful program, but perhaps it’s greatest power is the compatibility
with other programs.
Instead of providing it’s own battery of sample editing DSP functions like other programs do,
Motif Creator™ instead provides the ability to edit the referenced samples within a Waveform
with any external sample editor you have installed on your system. These can be free editors
such as Audacity, or powerful commercial ones like SoundForge, WaveLab, Peak, DSP-Quattro,
or many others.
First you select your External Sample Editor in Preferences (see the screen shot on the right).
Then, select your sample (or samples) in the Sample List, and either right-click or use the
Gear menu and click on Edit Selected Samples. Motif Creator™ will then transparently transfer
the samples to a temporary location and open up the sample editor and that will open up the
samples. Edit the samples at your leisure, and make sure to save them! Once you put the focus
back to the Motif Creator™ application, Motif Creator™ will again references those new
samples. Then, when you save your Motif le, those edits will be included in your Motif le.
This is extremely powerful for mass editing of samples, it can’t get easier then this!
Page 23
Page 24

Motif Creator™Exchanging Objects
Exchanging Objects
When you have multiple Motif documents open, you can exchange information by dragging
objects (Voices, Elements, Waveforms, Samples,
Performances, or Parts) from and to one another. You can
multi-select objects and move them to another document.
For Voices and Elements, any user Waveforms that are
connected are carried along with them. Also, with Voices
and Elements, since there are a xed set amount of them,
they replace what you drop them on.
For Performances and Parts, any Voices (and their User
Waveforms that are connected) are carried along with
them. Also, with Performances and Parts, since there are a xed set amount of them, they
replace what you drop them on.
Page 24
Page 25

Motif Creator™ Auditioning
Auditioning Samples and Other Objects
Motif Creator™ allows you to audition both the individual samples of your Waveforms, but also
your Waveforms themselves.
Samples
Click on the Play icon on the Sample you wish to audition
on the Sample List. The Wave display shows in the Wave
Display below if you have it shown.
Or, open the Sample Editor on an item on the Sample List,
and click on the Play button on the Wave Display. You can
adjust your sound outputs etc, in Preferences-Audio/MIDI
tab.
Waveforms
To audition a Waveform, you can either use the included Motif Player, or you can Prepare the
waveform.
The Motif Player is much easier to use, see the Motif Player section in this document for more
information.
To use Preparation to be played back on an external software sampler, such as Kontakt to
EXS24. (For more information on Preparation, please see the Preparation section in this
document.) After the Waveform is prepared, drag it onto or load it into the software sampler,
and play it back. You also may edit it and import it back into the Motif document.
Page 25
Page 26

Motif Creator™Importing External Instruments
Importing External Instruments
Motif Creator™ contains the powerful Chicken Systems Conversion Engine, which
powers our ubiquitous Translator™ program and other products. This enables you to import
already-formed Bank or Instrument les, such as SoundFonts, Kontakt Instruments, EXS24
Instruments, GigaStudio les, and much more.
When you import an external Instrument, it adds Voices and Waveforms to their respective
Lists. This is done by dragging or select via menu; for instance, if you drag in a Kontakt .nki
and drop it on the Voice List, it will convert the Kontakt le and add a Voice to the rst “blank”
(that is, initialized) Voice, and add the converted Waveforms to the Waveform List. Importing
Banks simply creates one or more Voices to the Voice list.
Remember that any importing is temporary until you save your Motif document; importing does
not write to the representative le automatically.
Motif Creator™ supports just about any professional Instrument format that is available. (As
of Motif Creator™ version 1.2, Kontakt 4.2 is supported. Kontakt 5 is not supported yet but is
planned.)
However, instruments off proprietary disks are not supported, and Instruments that come from
exclusive protected libraries are not supported either. Reason Rells and HALion 3 les are not
supported (they are encrypted just like protected libraries are, for some reason). Below is list
of formats as of this writing we DON’T support for one reason or another. It is unlikely that any
of the formats below (with the exception of Kontakt 5) will be incorporated in Motif Creator
because usually these les are encrypted for copy-protection reasons.
Yamaha Motif factory banks that have the samples marked as “protected”, and ones that use the LPC
compression; these are very few though
Kontakt Player 1 and 2 libraries (that use samples within .nks or .nkx les)
Structure Factory libraries (the ones that come off the 32+GB library, using “.big” les)
SampleTank les that use “2-pak” compression
Alesis Fusion les that use their own compression scheme (that is, many Hollow Sun libraries)
ALL Steinberg HALion 3 and 4 les (Steinberg encrypts ALL les created with HALion (!))
Propellerhead Rells; any les in one, or a referenced le in a Rell
EastWest PLAY les (encrypted)
Garritan-distributed Aria (.sfz les with .audio les as the samples)
Stylus RMX Core Library-type les (includes XPanders)
Vienna Instruments (not the original .gig/exs/nki les, but the new Vienna Instruments player)
ALL Yellow Tools Independence les
Roland VP-9000
Page 26
Page 27

Motif Creator™ Editors
Editors
In large part you’ll do much of your adding/editing/deleting using the Main Screen. But when
you need to view or tweak a certain parameter within a Motif object, that’s where the Editors
come in.
You invoke an Editor by double-clicking on an object, or by using the Gear, Ctl/Right-click
Context, or top-level menu. Hint: don’t double-click on the Name, it just sets the Name up for
editing. Double-click to the left or right of the Name.
There are six Editors: Voice, Element, Waveform, Sample, Performance, and Part.
Page 27
Page 28

Voice Editor
Motif Creator™
Voice Editor
This exposes some of the Voice-level parameters (there aren’t too many, these are the
COMMON Voice parameters), and the Waveform assignments to the Elements. You can change
the Element assignments
much like you do on the Main
Screen.
To change the Element
parameters, you will need to
use the Element Editor, which
you can invoke from the Voice
Editor.
Please note that until you
close the dialog, none of
the changes you make are
permanent. If you make
changes, and try to close the
dialog, it will ask you if you
want to save your changes.
(This can be turned off in Preferences-General.) Also remember that even if you “save” those
changes, your Motif Document still can be reverted to its original state.
The are knob widgets to control most of the parameters, and Range Maps to control the Key
and Velocity Ranges of the Elements.
Page 28
Page 29

Motif Creator™
Element Editor
Element Editor
This exposes the Waveform assignment for that Element and all the Element-level parameters.
The Element parameters on the Motif are usually the most signicant. You can change the
Element’s assignment and edit
any of the parameters.
Please note that until you close
the dialog, none of the changes
you make are permanent. If you
make changes, and try to close
the dialog, it will ask you if you
want to save your changes. (This
can be turned off in PreferencesGeneral.) Also remember that
even if you “save” those changes,
your Motif Document still can be
reverted to its original state.
The are knob widgets to control
most of the common parameters. There are also graphical envelope widgets to customize the
envelopes.
Page 29
Page 30

Motif Creator™Waveform Editor
Waveform Editor
The Waveform Editor shows all the Samples assigned to the Waveform and performs much like
the Waveform List on the Main
Screen.
You can “prepare” a Waveform
here and edit externally (see
the External Editing topic in this
document).
Additionally, you can also invoke
the Sample Editor for a specic
Sample in the Waveform from
this Editor.
Please note that until you close
the dialog, none of the changes
you make are permanent. If you
make changes, and try to close
the dialog, it will ask you if you
want to save your changes. (This can be turned off in Preferences-General.) Also remember
that even if you “save” those changes, your Motif Document still can be reverted to its original
state.
Page 30
Page 31

Motif Creator™
Sample Editor
Sample Editor
This shows the sample-specic parameters (Tune, Pan, Volume, Ranges, Start/Loop points,
etc.) and shows the full waveform display, where you can audition the sample.
You can edit the KeyRange
and Velocity Range
parameters here. Please
remember that in a Motif
Waveform there can not be
overlapping ranges, even
though this editor will allow
you to do so. If there are
overlapping samples when
you save the Motif le, it will
warn you and give you the
option to Cancel and repair
the overlaps (then resave),
or it will automatically repair
the overlaps. However, keep
in mind that it may make
decisions you do not want.
You can “prepare” a Sample
here for external editing (see the External Editing topic in this document). You can replace the
sample with another one, plus you can edit the sample using an external sample editor. A small
but helpful complement of DSP functions is also included.
Please note that until you close the dialog, none of the changes you make are permanent. If
you make changes, and try to close the dialog, it will ask you if you want to save your changes.
(This can be turned off in Preferences-General.) Also remember that even if you “save” those
changes, your Motif Document still can be reverted to its original state.
The are knob widgets to control most of the parameters, and Range Maps to control the Key
and Velocity Ranges.
Page 31
Page 32

Performance Editor Motif Creator™
Performance Editor
The Performance Editor shows all the Parts contained in the Performance, plus some of the
Common parameters.
Please note that until you
close the dialog, none of
the changes you make are
permanent. If you make
changes, and try to close the
dialog, it will ask you if you
want to save your changes.
(This can be turned off in
Preferences-General.) Also
remember that even if you
“save” those changes, your
Motif Document still can be
reverted to its original state.
The are knob widgets
to control most of the
parameters.
Page 32
Page 33

Motif Creator™ Part Editor
Part Editor
The Part Editor shows all the Parts assigned to the selected Performance and performs much
like the Part List on the Main Screen. You can “prepare” a Part here. Additionally, you can also
invoke the Sample Editor
for a specic Sample in the
Waveform from this Editor.
Please note that until you
close the dialog, none of
the changes you make are
permanent. If you make
changes, and try to close the
dialog, it will ask you if you
want to save your changes.
(This can be turned off in
Preferences-General.) Also
remember that even if you
“save” those changes, your
Motif Document still can be
reverted to its original state.
The are knob widgets to
control most of the common
parameters.
Page 33
Page 34

Menus - File
New
Creates a new Motif document. You have the
choice of Classic, ES, XS, or XF, and an ALL le or
a ALL VOICE le.
Open
Displays a common Open dialog where you can
open an existing Motif Classic, ES, XS, or XF ALL
le or ALL VOICE le. This will be displayed in a
new Motif Document.
Open Recent
A list of previously selected Motif Documents.
Revert to Saved...
Reverts the current Motif Document to the original
saved version it references. If the current state of
the document is Edited, Motif Creator will ask you
if you want to save your changes elsewhere.
Motif Creator™Menus - File
Close Window
Closes the current Motif Document. If the current state of the document is Edited, Motif Creator
will ask you if you want to save your changes.
Import...
Allows you to select a non-Motif format to import into Motif Creator and create a new Motif
Document from it. This uses the famous Chicken Systems Conversion Engine™ to accomplish
the importing.
Export Voice List Text
Saves a Text le listing the contents of the Motif Document. See Preferences - Import for
different options how this list is formatted.
Export All Samples
This exports all the samples in a Motif Document to WAVE, AIFF, CAF, or SND sound les.
Save
Saves the current Motif Document, overwriting any previous information. Currently you cannot
save into another Motif type; although this will be possible in a upcoming version.
Save As...
Saves the current Motif Document, allowing you to name it and write it anywhere. Currently
you cannot save into another Motif type; although this will be possible in a upcoming version.
Quit/Exit
Quits the whole mess.
Page 34
Page 35

Motif Creator™ Menus - Voice/Performance
Menus - Voice/Performance
These Functions are also accessible via the Function Buttons on the Main Interface on the
bottom of the Main Screen. The menu is the same for Voices or Performances, they apply the
same.
Import
Allows you to import a non-Motif le into the
current Motif Document. It will replace the rst
“blank” Motif Voice or Performance (starting with
the text “Init”).
Initialize Selected (or All)
Initializes the selected Voices, or all the Voices/
Performances in the Motif Document. (Dependent
on the setting of the PopupMenu under the Voice
or Performance List.)
Duplicate
This duplicates the Voice or Performances
selected.
Page 35
Page 36

Menus - Element/Part
Motif Creator™
Menus - Element/Part
Import
Allows you to import a non-Motif le into
the current Motif Document as one or more
Waveforms. It will create the Waveforms(s)
and then assign them to the currently-select
Element (including the real-time parameters such
as envelopes and lters). If momre then one
Waveform is created, it will assign them to any
other “empty” Elements in that Voice.
Initialize Selected (or All)
Initializes the selected Voices, or all the Voices in the Motif Document. (Dependent on the
setting of the PopupMenu under the Voice List.)
Page 36
Page 37

Motif Creator™ Menus - Waveform
Menus - Waveform
New...
Adds a new blank Waveform to the Motif
Document.
Import...
Allows importing of a non-Motif Instrument into
the current Motif Document, only in the form of
one or more Waveforms.
Prepare Selected (or All)
Prepares the selected Waveforms, or all the
Waveforms in the Motif Document. (Dependent
on the setting of the PopupMenu under the
Waveform List.)
Import Selected (or All)
Re-imports the already Prepared Waveforms,
or all the Waveforms in the Motif Document.
(Dependent on the setting of the PopupMenu
under the Waveform List.)
Delete Selected (or All)
Deletes the selected Waveforms, or all the
Waveforms in the Motif Document. (Dependent on the setting of the PopupMenu under the
Waveform List.)
Page 37
Page 38

Menus - Sample
Motif Creator™
Menus - Sample
Add->Folder
Allows adding a folder of sample les to the
currently selected Waveform. Motif Creator™ will
include all sample les immediately within the
Folder and within any sub-Folders.
Add->Files
Allows adding one or more sample les to the
currently selected Waveform.
Delete Selected (or All)
Deletes the selected Samples, or all the Samples in the currently selected Waveform.
(Dependent on the setting of the PopupMenu under the Sample List.)
Page 38
Page 39

Motif Creator™
Menus - View
Menus - View
Voice/Element/Waveform View
This includes from left to right: Voice, Elements,
Waveforms.
Waveform/Sample View
This includes from left to right: Waveforms and
Samples.
Performance View (All Files only)
This includes from left to right: Performances, Parts, and Voices.
Four Corners View
This includes from left to right: Voice-Elements, then below that, from left to right, WaveformSamples.
Full View
The standard 4-List view.
Keyboard
Shows or Hides the Keyboard Display on the Motif Document. Please note that it does not
display in the Performance View.
Wave Display
Shows or Hides the Wave Display on the Motif Document. Please note that it only displays when
the Sample List is visible.
Element Ranges
Shows the Element Range widgets at the top of the Element List.
Part Ranges (All Files only)
Shows the Part Range widgets at the top of the Part List.
Page 39
Page 40

Menus - Help
Menus - Help
Contents
Displays the Help File; that is the manual. Hey, READ IT!!! =)
Troubleshooting
Goes to the Troubleshooting page in the
Manual.
Bug Reports
Goes online to the Chicken Systems Motif
Creator Bug Report page. You can ll out the
form there and submit any applicable les, to
report any issues Motif Creator has.
Sending Files
Displays the Help File section about sending
les within Bug Reports.
Motif Creator Home Page
Goes online to the Chicken System’s Motif
Creator Home page.
Motif Creator™
Check For Updates
Contacts the Chicken Systems Update Server
online and checks if there is a update for
your current running version of Motif Creator.
Online Documentation
Goes online to a online version of the Help File. Usually the same thing as the Help File.
Support - Forum
Goes online and takes you to the SamplerZone Motif Creator forum. You can get questions
answered here, as well as meet up with the most amazing people you’ll ever want to meet.
Support - Online Chat
Opens a online Chat window, where you can chat with a Chicken Systems engineer during
business hours and sometimes outside of business hours.
Support - Email
Allows you to directly send an email to Chicken Systems. All emails are replied to within 24-48
hours.
Support - Movies
Goes to the Motif Creator Product Video site for a full range of product videos and instruction.
About Motif Creator™
Shows the Motif Creator™ Splash Screen, whcih shows you your registration information and
the current version number you are using.
Page 40
Page 41

Motif Creator™
Gear Menus - Voice
Import
Allows you to import a non-Motif le into the
current Motif Document. It will replace the rst
“blank” Motif le (starting with the text “Init”).
Initialize Selected (or All)
Initializes the selected Voices, or all the Voices in
the Motif Document. (Dependent on the setting of
the PopupMenu under the Voice List.)
Gear Menus - Voice
Page 41
Page 42

Gear Menus -Wavefors
Gear Menus - Waveform
New...
Adds a new blank Waveform to the Motif
Document.
Prepare Selected (or All)
Prepares the selected Waveforms, or all the
Waveforms in the Motif Document. (Dependent
on the setting of the PopupMenu under the
Waveform List.)
Import Selected (or All)
Re-imports the already Prepared Waveforms,
or all the Waveforms in the Motif Document.
(Dependent on the setting of the PopupMenu
under the Waveform List.)
Play...
This loads the Waveform into the MC Player, so
you can play the Waveform through MIDI.
Motif Creator™
Split Selected... (or All)
This splits the Waveform(s) in half, one getting
the lower values, a new copy getting the top half,
in the Motif Document. (Dependent on the setting of the PopupMenu under the Waveform List.)
Merge Selected (or All)
Merges the selected Waveforms, or all the Waveforms in the Motif Document. (Dependent on
the setting of the PopupMenu under the Waveform List.)
Duplicate Selected (or All)
Duplicates the selected Waveforms, or all the Waveforms in the Motif Document. (Dependent on
the setting of the PopupMenu under the Waveform List.)
Delete Selected (or All)
Deletes the selected Waveforms, or all the Waveforms in the Motif Document. (Dependent on
the setting of the PopupMenu under the Waveform List.)
Remove Duplicates
Macro function that analyzes each Waveform and makes sure there are no duplicates. It also
updates the references in the Elements of the Voices automatically.
Page 42
Page 43

Motif Creator™
Gear Menus - Sample
New...
Allows adding one or more sample les to
the currently selected Waveform.
Delete Selected (or All)
Deletes the selected Samples, or all
the Samples in the currently selected
Waveform. (Dependent on the setting of
the PopupMenu under the Sample List.)
Gear Menus - Sample
Page 43
Page 44

Motif Creator™Preferences
Preferences
The Preferences dialog is viewed by clicking on (Windows) Tools-Preferences top menu, or
(Mac) App Menu-Preferences.
General Tab
Prepare Audition Format
This is the format that is written when preparing a Waveform for auditioning.
New Import Format
This is the format that is written when
preparing a Waveform for auditioning.
Parameter Tolerance
When importing into Motif format, there
may be structural limitations where if you
wanted to ensure all parameters were
converted perfectly, you’d end up with
multiple Programs/Presets being created,
perhaps in more of a mess than you prefer.
Setting Parameter Tolerance to a higher
percentage gives some grace to these
parameters so the conversion will be a
little exact but you’ll wind up with a cleaner
organization that will be more usable to you.
Use Custom Editor for Sample Edits
This is the app that you’ll use for editing samples within the Motif Document. Good sample
editors are SoundForge (Mac/Windows), Peak (Mac), DSP Quattro (Mac), Audacity (Mac/
Windows), Adobe Audition (Mac/Windows) and more.
Color Keyboard with selected Waveform Ranges
Usually this is set to be on. This colors the onscreen Keyboard with the ranges of the Samples
within the currently selected Waverform.
Autoload Waveforms when selected
Checking this has the MC Player load Waveforms as they are selected, allowing you to audition
them via MIDI.
Middle C displays as...
On some samplers/keyboards, middle C is dened as C4 (usually U.S.) while others it is C3.
All Motifs show it as C3, and by default this is what is shown throughout the program through
any Note Number (i.e. A#5, E1, etc.) However, you may feel comfortable seeing it as C4. This
control sets the display of Note Numbers program-wide.
Check For Updates
Unchecking this turns off Motif Creator checking for updates automatically when starting up.
Page 44
Page 45

Motif Creator™ Preferences - Colors
Colors Tab
Might as well make your Wave Display
look great, right? These are the options
you have on what your Wave Display looks
like.
Import Tab
Import Mapping Type
When adding samples to a Waveform, this
option allows you to select and operate
many different informational mechanisms
to map the samples where you want them
to go.
Chromatic: This simply puts each
sample on single notes, from lowest to
highest.
Embedded Root/INST: This simply
puts each sample on single notes,
from lowest to highest.
Velocity: This simply puts each sample
on single notes, from lowest to
highest.
Name Pattern: This simply puts each
sample on single notes, from lowest to
highest.
Use KeyRange
This is the format that is written when preparing a Waveform for auditioning.
Use Velocity Range
This is the format that is written when preparing a Waveform for auditioning.
Spread
This is the format that is written when preparing a Waveform for auditioning.
Export Tab
Destination Sample Type
Motif Creator allows you to export the samples in the Motif Document out into single samples;
this option selects the type. They can be
WAVE, AIFF, CAF, or Akai SND les.
Create Folder for Waveforms
If this is checked, Motif Creator will
organize the samples per Wavveform and
put them into f0olders named after the
Waveforms. Otherwise, the samples in the
Motif Document will just be written at.
Write “Inst” chunk into sample les
Although this is not used often in musical
circles, a WAVE or AIFF le can hold
keyrange and velocity range information
Page 45
Page 46

Motif Creator™Preferences - Data Processing
for a sample. If this is checked, Motif Creator will write this chunk into the sample. It does not
affect the sound of the sample, but it simply preserves it if it will be used again in the same
context.
Write SFZ le for every Waveform
This can be handy if you want to observe the layout of each Waveform, or perhaps if you want
to import it into another sampler.
Export Text
This controls the listing option in Motif Creator. You can export a formatted list of the contents
of a Motif Document for organizational purposes.
Delimiter
This controls the way the linefeeds are written for separated textual lines.
Include Bank - Slot Numbers
A Bank - Slot number is formatted like this: USER1:D14; checking this puts it into the
document.
Exclude Blank Voices
Sometimes the User banks have a lot of Voices or Performances with INIT has it’s name and
they don’t include anything in them. This option eliminates them from the list.
Data Processing Tab
Motif Creator can import WAVE/AIFF les that have not been beat detected (that is, the
transients have not been calculated) and
Motif Creator will detect those transients
and import them just like Recycle/ACID/
AppleLoops.
But, let’s talk about what a “slice le” (a
Recycle le, ACID le, or AppleLoop) is.
What Is A Slice File
A WAVE or AIFF le is simply a piece of
audio data. And any “slice le”, such as
a Recycle le, ACID le, AppleLoop, or
Stylus RMX le, are just pieces of audio
data as well.
The only difference between a regular sample le and a slice le is that a slice le has markers
written in a information chunk in the le. These markers are placed strategically where
transients (sharp sounds) in the le start, so a player that reads slice les knows where the
slices are. This is how a Slice File can be played back at various tempos: the player plays back
a slice at the position the tempo dictates. At faster tempos, the slices fade out to make way
for the next slice; at slower tempos, there is a gap between the slices. (However, some players
articially add sample data to “plug the holes”. Also, good Slice Files are originally recorded at
the slowest tempo reasonably allowed, so they never have to be played back at a slower tempo
than their “unity tempo”.)
To create a Slice File, one has to “slice” the audio into slices of energy (“beats”) so the playback
engine plays it back in a way that makes rhythmic sense. This requires a beat detector.
Slice editors, most notably Recycle, but also ACID itself and the AppleLoop Utility that Apple
provides, have beat detection. They do 2 things: They beat-detect a sound le, plus they can
Page 46
Page 47

Motif Creator™ Preferences - Audio/MIDI Tab
play the slice les back at different tempos. They do this with the assistance of the detected
markers. Once you have what you want, then you save into a slice le, where the audio stays
constant but the markers are written in the le. So when a slice player reads the le, the slices
are the secret to it’s capability to play them back at any tempo.
Motif Creator’s Beat Detection
Motif Creator now has a Beat Detector, giving you the ability to import WAVE/AIFF les just like
Slice Files.
It is vitally important to pay attention to these Beat Detector preferences. The defaults work for
most clear and simple beats, but they denitely will not work with everything. You will need to
experiment with these on a case-by-case basis, but keep trying, there usually is a solution to
any rhythmic piece of data.
Here is the explanation of the Beat Detector’s parameters:
Type: The Beat Detector uses two passes through the audio to detect beats. The rst pass
does the best detection it can, then the second pass “checks” the results.
Threshold: This is like the Sensitivity control on Recycle and other slice editors. Higher
values produce less detection, lower values produce more detection.
Silence: This is terms of samples. This is the MINIMUM amount of samples that need to
exist between markers. If you are getting lots of “double beats”, raise this value.
Tempo: You can bypass the whole detection thing and just put slice points at beat values,
regardless of whether a burst of energy exists at that point.
Importing Slice Files is not as seamless nor as perfect as it appears. But it is very doable, don’t
let these options deter you.
Pitch Detection
Pitch Detection is helpful making a chromatic instrument out of bunches of WAVE/AIFF les.
Try dropping a host of WAV les of (say) a multisampled trumpet, and Motif Creator detects
the pitch of each sample and places it on the appropriate MIDI key for it’s pitch, and then sets
KeyRanges to ll up the spaces in-between the notes. All of a sudden, you have a trumpet
sound on for your Motif without the work of applying the proper rootkey and keyranges.
The Pitch Detection parameters determine how accurate or precise the pitch detection is. Pitch
detection does rely on certain variables so different types and styles of pitch detection do a
better or worse job than others. Try what seems best for you.
Audio/MIDI Tab
Audio Driver Types
These are the Sound Driver types on your
system. Selecting one shows the Audio
Outputs and Audio Inputs on the lists to the
right.
Audio Outputs
These are the outputs on your system for
the selected Audio Driver Type. Selecting
one selects the audio output for your app.
Audio Inputs
These are the inputs on your system for the selected Audio Driver Type. Selecting one selects
the audio input for your app.
Page 47
Page 48

Audio Properties
Shows the Properties of the Output or Input that is selected on the left.
MIDI In Drivers
Allows you to select the current MIDI In driver that will drive the MC Player.
MIDI Out Drivers
Allows you to select the current MIDI Out driver that your application will send MIDI out from.
Enable MIDI
Enables MIDI communication.
Enable MIDI Velocity
When unchecked, all MIDI notes coming in will be Velocity=127 in value.
Page 48
Page 49

(This page is intentionally left blank.)
Page 49
Page 50

Troubleshooting
Motif Creator™
Troubleshooting
Your Motif Creator™ program should be rock-solid and give you no problems. However, there
is always stuff that can go wrong.
You can start from scratch as far as Preferences go by trashing your preferences.
You can do that by:
Mac
Go to:
/Users/[you]/Library/Preferences, delete com.chickensys.motifcreator.plist
Windows
Go into the Registry and delete the HKEY_CURRENTUSER/Software/Chicken
Systems, Inc/Motif Creator key.
Mac and Windows
Press SHIFT when starting the program.
These techniques only trash your working preferences; they do not trash your auth codes etc.
For all other queries, please contact Chicken Systems Technical Support at the contact
points listed under Contacting Technical Support in this document.
FAQ
There is a Motif Creator™ FAQ up on the Chicken Systems Web site:
www.chickensys.com/support/software/motifcreator/faq
We revise this as needed, based on common questions previously asked about the Motif
Creator™.
It is extremely LIKELY that your question is answered here! Please do not contact us until you
have read completely through this resource. It probably will answer your question.
Bug Reports
Motif Creator™ should not crash or show errors, but reality insists that all programs do at some
point. Motif Creator™, since it sometimes deals with many undocumented formats and les
created from many sources, can be especially vulnerable.
If you have a problem with a translation, or receive an error within Motif Creator™ concerning a
le, the BEST way to communicate that is to le a Bug Report and send us any applicable les,
with a brief description of what the problem is.
To use the Bug Reports system, go to Help-Bug Reports in the program. It connects you to our
Bug Reports website, has a form you ll out that gets the information we need from you, and
permits you to send us the source le directly from that web page.
Page 50
Page 51

Motif Creator™
We recommend you to use Bug Reports the
page rst. We do invite you to email us or call us
with a problem, but most of the time we just direct
people to the Bug Reports web site to document
the information in writing and for them to send us
the le. Constructor has many users across the
globe, and it is not possible to track all our users
particular questions and issues through personal
correspondence.
Once you establish an issue with the Bug Reports
web site, you will get an email back with a link to
your issue that you can consistently check on. We
try to address and close issues within 24-48 hours.
BUT, THE IMPORTANT THING IS TO ENABLE
US TO EXACTLY REPLICATE YOUR ISSUE
ON OUR END! THIS IS WHY WE NEED THE
SOURCE FILE IN ALL CASES.
PLEASE REMEMBER THIS!
Bug Reports Page: www.chickensys.com/translator/bugreports
Email: support@chickensys.com
FTP: ftp.chickensys.com
(please make sure le names DO NOT have spaces in them!)
User: incoming@samplerzone.com
Pass: lesend123
You Send It: www.yousendit.com
Bug Reports
Additional Notes
Again, we make a special effort to analyze les and comment or x the problem with 24
business hours through our Bug Reports page listed above.
Regarding larger les: they are easier to FTP than to e-mail, although our systems can handle
either method of any size without problem. The Bug Reports web site can handle any size. Any
email limitation is usually on your end. If you FTP a le, make sure that the lename DOES NOT
have spaces in it. This is a natural limitation of the Internet and FTP servers in general.
Please give us a brief complete explanation of the problem. We try to answer all emails within
24 hours. Please be patient if the answer does not arrive immediately.
Page 51
Page 52

Contacting Technical Support
Motif Creator™
Contacting Technical Support
Chicken Systems Technical Support can be reached in many ways: Phone, Email, Chat, or via
our SamplerZone.com Forum. Please give us a brief complete explanation of the problem. With
Email and Forum questions, we try to respond within 24 hours, Please be patient if the answer
does not arrive immediately.
You may Phone or Chat with us also if, after reading and looking at the documentation, you
are stumped. Our usual ofce hours are 8am-6pm Monday-Friday. We are often in the ofce on
weekends and holidays on an infrequent basis.
Phone: 800-877-6377 United States, 320-235-9798 elsewhere. Please do not mind the
crabby technical support engineers.
Email: support@chickensys.com
Chat: www.chickensys.com, use the Chat link on the left
Forum: www.samplerzone.com/forums/motifcreator
Page 52
Page 53

Motif Creator™
Updating
Updating
We update Motif Creator™ as needed, for bug xes, improvements, and additions to the
library.
Motif Creator™ automatically checks if there is a update available when you start it up. (If
desired, you can turn this checking off in Preferences.) You can also check for updates by
selecting Check for Updates under the Help menu. (This only works, of course, if you are
connected to the Internet on that computer.)
If your Motif Creator™ computer is not connected to the Internet, or for some reason you
can’t run Motif Creator™, you can check for updates at:
www.chickensys.com/motifcreator/userupdates
You can check what is your Motif Creator™ version number by checking the About Box
(under Help in Windows and under the App Menu on Mac), or by checking Get Info [Mac]
or Properties [Windows].
If there is an update available for you, you can download it and then move it to your program’s
computer (if from a different computer). Run the updater and your program should be updated.
Page 53
Page 54

Contact Us Motif Creator™
Contact Us
Chicken Systems, Inc.
714 5th Street SE
Willmar, MN 56201
Phone: 800-877-6377 United States, 320-235-9798 elsewhere.
Email: support@chickensys.com
Chat: www.chickensys.com, use the Chat link on the left
Forum: www.samplerzone.com/forums
Page 54
Page 55

CreditsMotif Creator™
Credits
Developing software is at the core a one-man process, but making it good requires a team.
Motif Creator™ really benetted from good teamwork and solid commitment to quality
software.
Garth Hjelte: Project Lead
Jeff Godbloch: Programming and Technical Writer
Roger Weingarten: Programming
And thanks to:
Athan Billias at Yamaha US for the opportunity and much much help.
Avery Burdette at Yamaha US for his interest and help
Phil Clenninden at Yamaha US
Tim Swartz, Erik Norlander, Dave Polich for programming expertise and suggestions
Everyone at Motifator for their ideas and encouragement
And...
Cheryl Ann Mays at SamplerZone for the best sales team ever
Sandi Tepper with Provare Technology
Christian Schmitz, Glenn Austin, Joe Strout for prompt, clear, concise technical
assistance
Dan Dean and Ernest Cholakis for timely feedback and friendship
David Viens at Plogue for SFZ assistance
Kyle Zambora at Nine Volt Audio for great ideas and partnership
Larry Hopkins for more great ideas and hospitality
Native Instruments, Digidesign, Eastwest, Akai/Alesis, Kurzweil, and Emu product
managers and technical support crews for their thoroughness and assistance.
Page 55
 Loading...