

Page 1
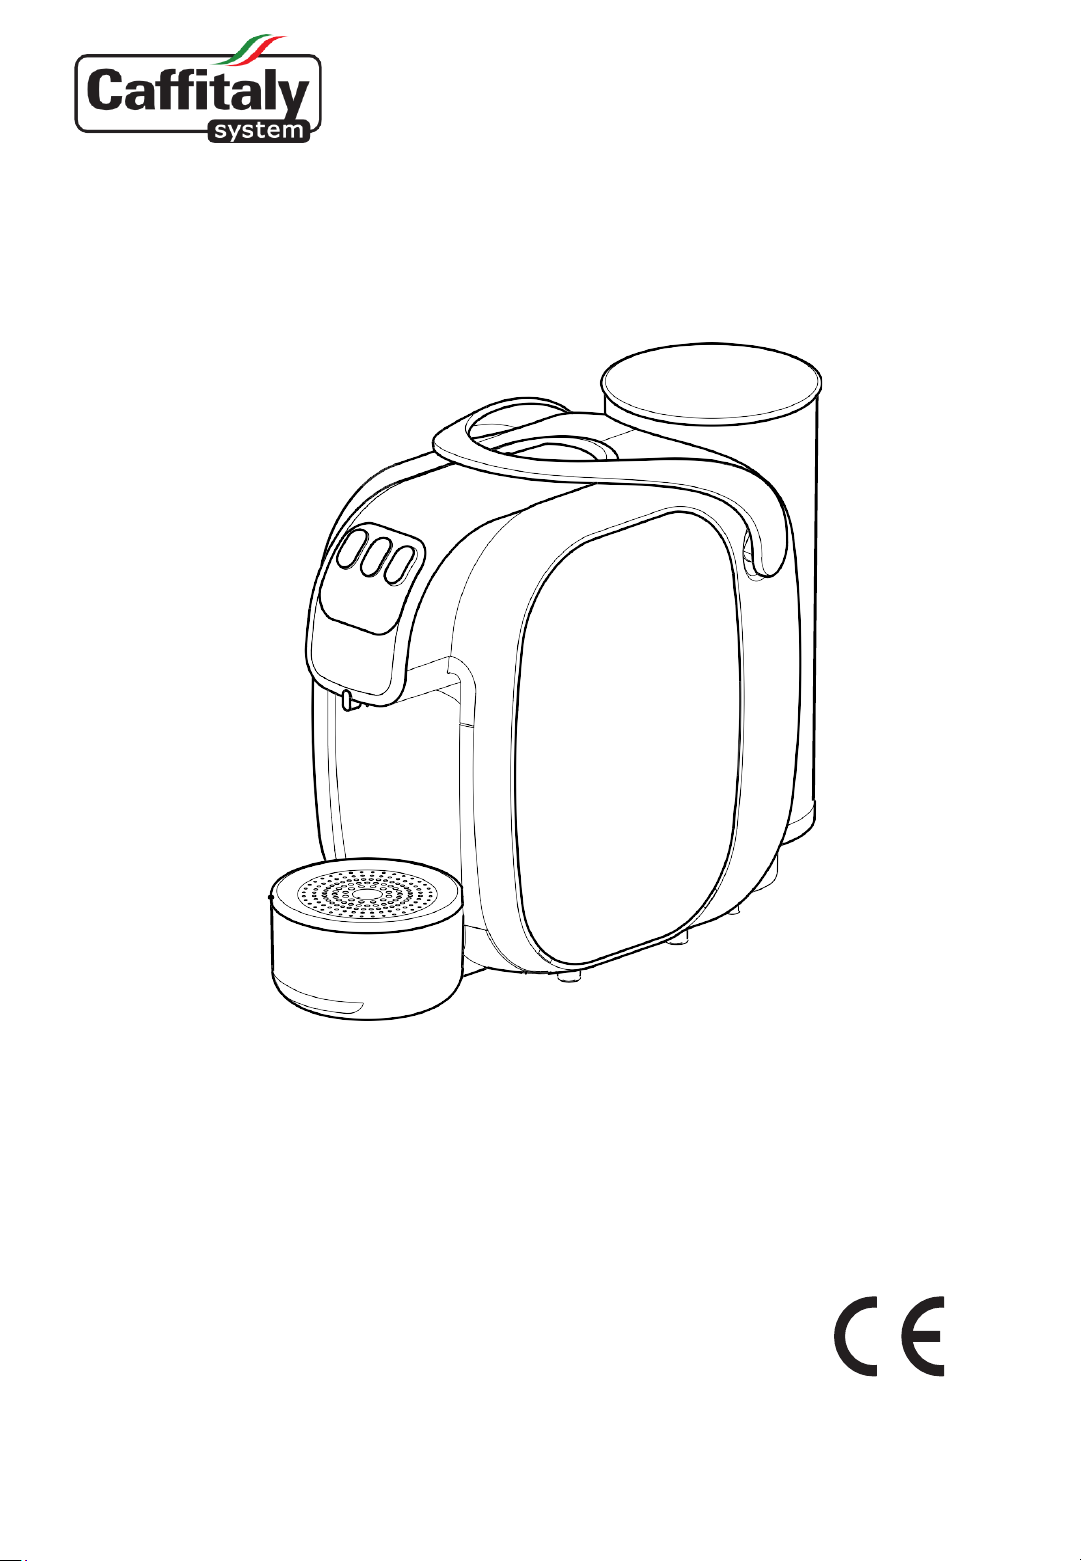
Model S07
Imported by '((FDIIH
Ph:
Hmail: GHHFDIIH@GHHIDVKLRQV.com
ZZZGHHIDVKLRQVcomGHHFDIIH
Page 2
SAFETY WARNINGS
CAREFULLY read the following instructions!
In this way you will avoid the risk of personal injury and damage to the appliance.
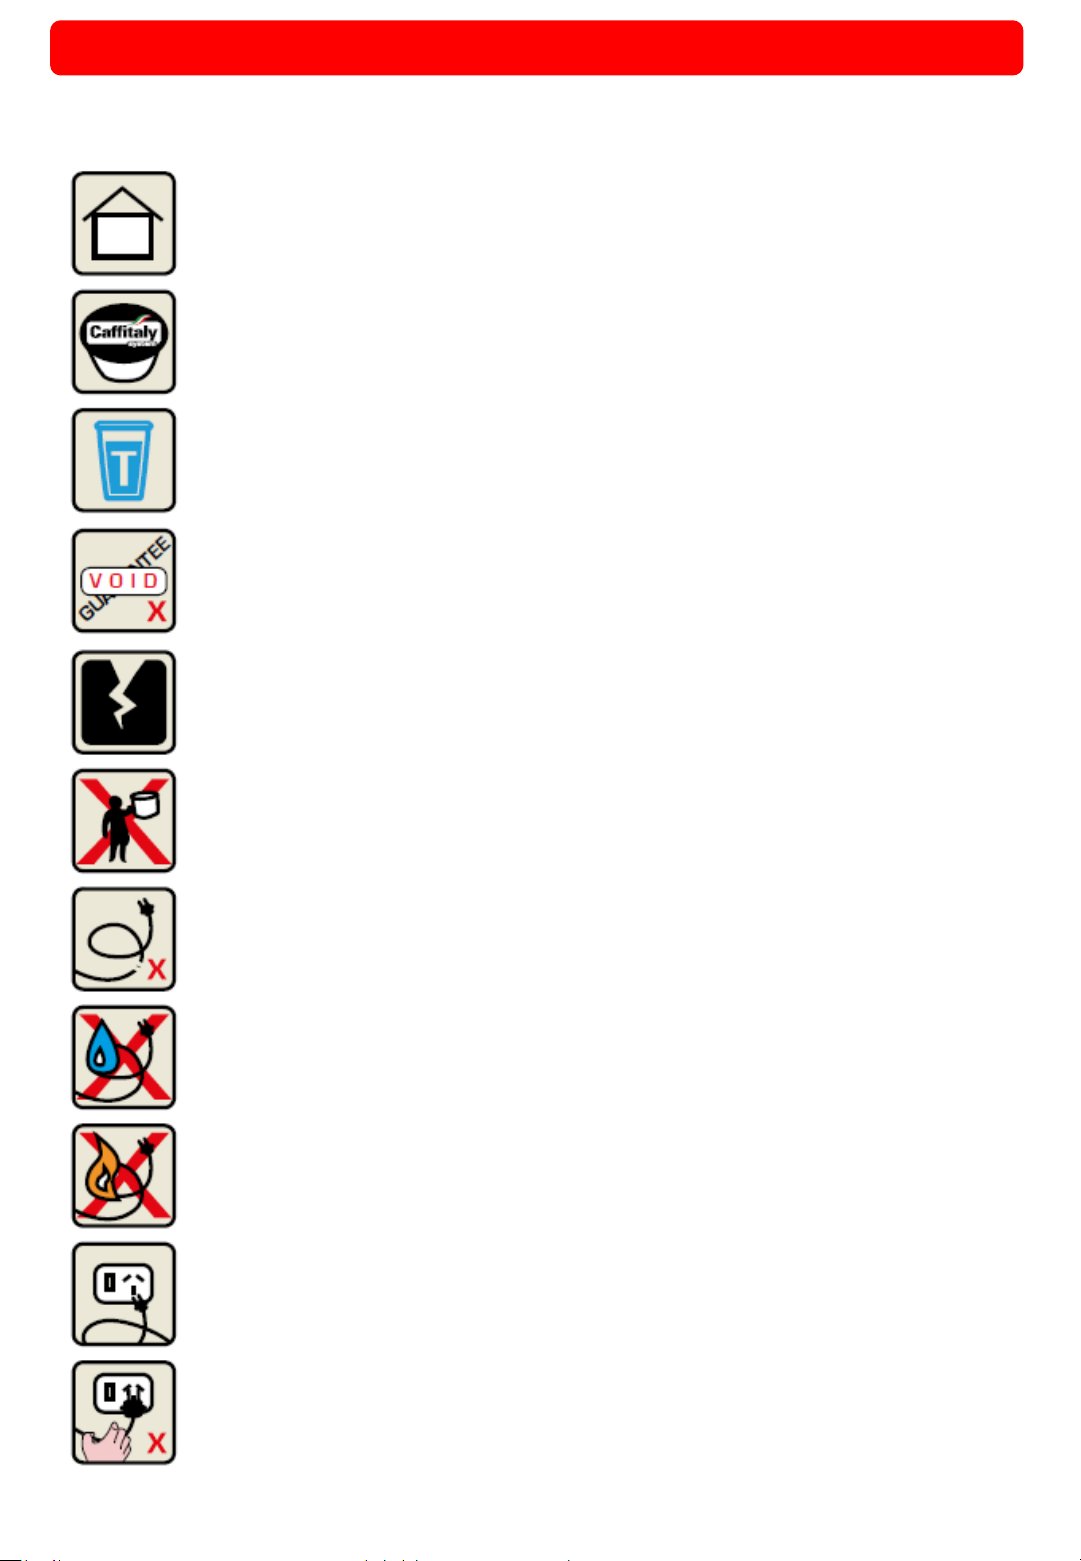
This appliance is intended to be used in domestic environments. Not suitable for
Professional use.
ONLY use Caffitaly System compatible capsules. Damage caused by using incorrect
capsules will void the Warranty.
Use the TEA button (Blue) for Tea and Hot Water ONLY! Incorrect use of this
button will cause damage to the machine and void the Warranty.
Use of the appliance in any manner other than as directed within this manual could
cause harm to the operator and void the Warranty. The manufacturer will not be
responsible for injury or damage resulting from improper use of the appliance.
After removing the packaging, check that the appliance is not damaged. If damage
is detected, or upon the first sign of a defect (unusual noise or odours), or if any
other problem is detected inside the appliance, do not use it and contact:
DEEcaffe at: 647.709.4869
The packaging elements (plastic bags, etc.) must not be left within reach
of children as they are potential sources of danger.
Only use the appliance if the power cord is intact. If the cord is damaged it must be
replaced by the manufacturer or importer due to potential electrical safety risks.
Contact DEEcaffe at: 647.709.4869
Use and store the appliance indoors. Make sure the electrical elements, plug and
cord are dry. Never submerge the appliance in water. Protect the appliance from
sprays and drips. Water and electricity together constitute a risk of electrocution.
Do not leave the power cord near hot surfaces, sharp edges or other sharp objects.
Only connect the appliance to power outlets complying with the requirements of
the law. Make sure that the power supply voltage matches the rating shown on the
data plate on the bottom of the appliance. This appliance includes an earthed pin
and must be used with a power outlet with earthed connection.
Do not pull on the power cord to disconnect it. Remove the plug carefully to avoid
damage to the outlet.
1
Page 3
SAFETY WARNINGS - Continued
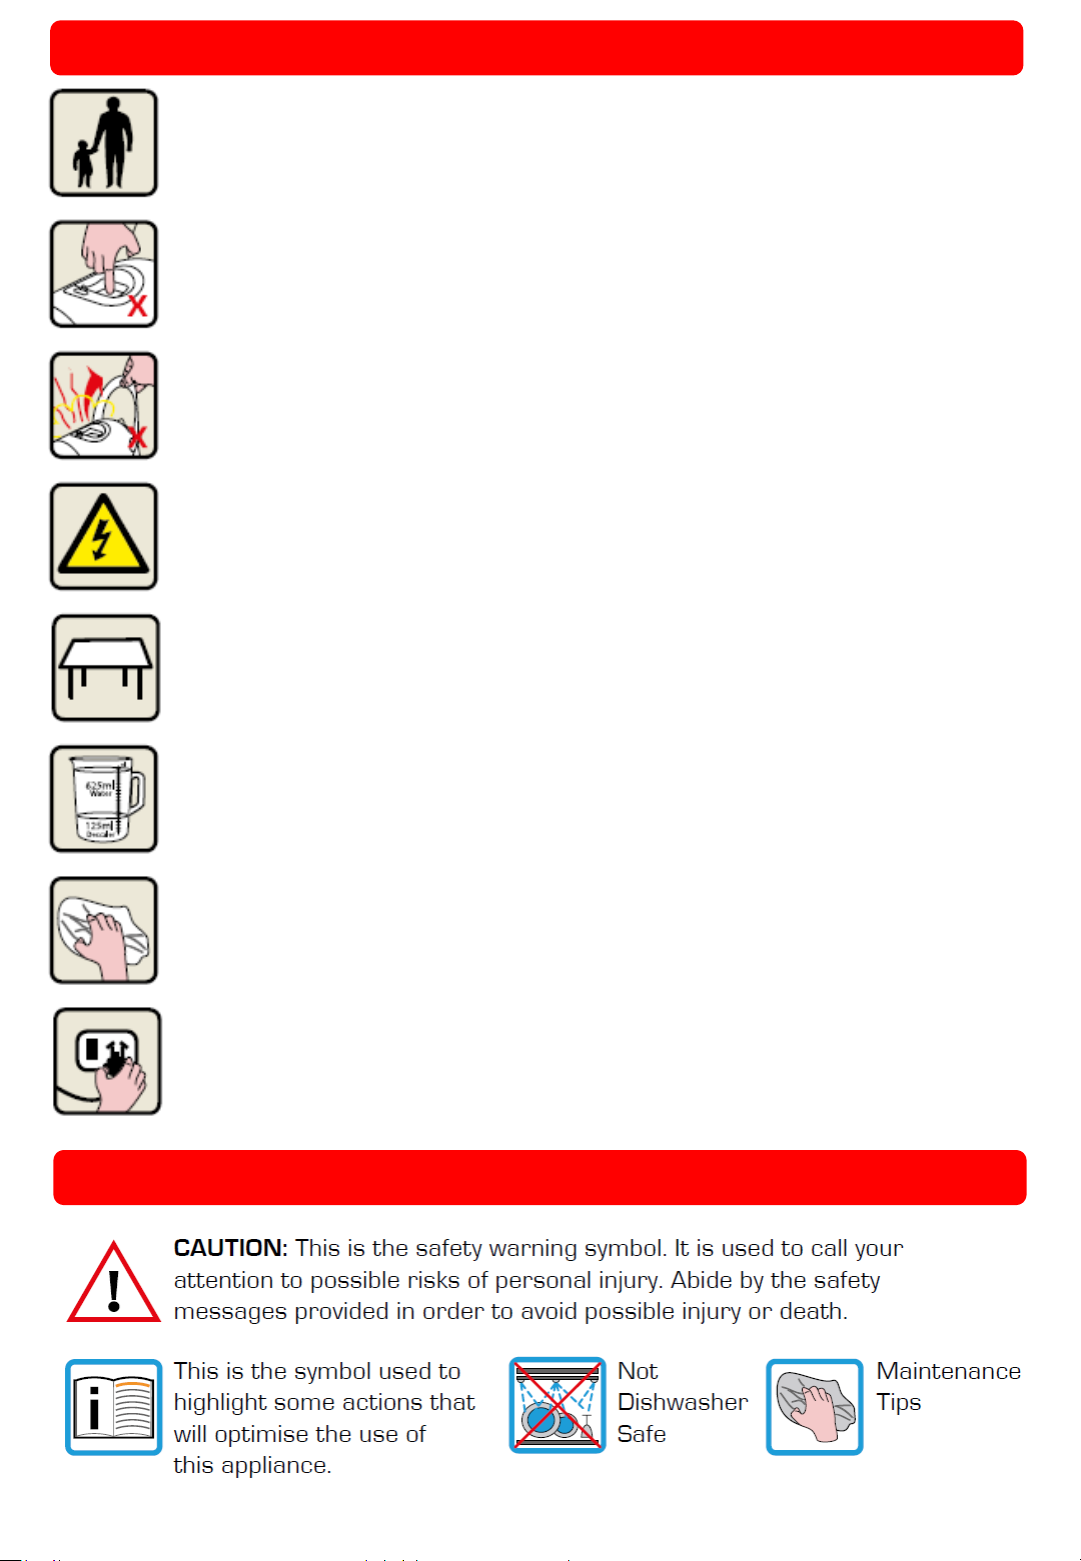
This appliance is not intended for use by persons (including children) with reduced
physical, sensory or mental capabilities, or lack of experience and knowledge, unless
they have been given supervision or instruction concerning use of the appliance by a
person responsible for their safety. Children should be supervised to ensure that they
do not play with the appliance
Never place your hands inside the capsule compartment. There is a risk of injury.
Do not open the lever while the appliance is operating. If the lever is raised during
the delivery of a product, the machine can emit jets of hot water. Risk of Burns!
Do not remove parts of the appliance, OR insert objects into the openings. This could
cause electric shocks! Any operation that is not described in this instruction manual
should only be performed by an Authorised Support Centre.
Please contact: DEEcaffe at: 647.709.4869
Install the appliance on a solid, stable, heat resistant surface with an incline no greater
than 2 degrees.
When the Indicator Light blinks ORANGE and the machine beeps, it is advisable to
perform the descaling cycle, as illustrated on Page 15. If you do not, the appliance may
be damaged.
Clean the appliance carefully and regularly with a soft cloth and a mild detergent, do
not use alkaline cleaning agents. If it is not cleaned, the build-up that forms may be
hazardous to your health. Unplug the appliance and allow it to cool before cleaning.
Unplug the machine if you do not expect to use the appliance for a long period of time
(leaving on vacation, etc.)
SYMBOLS GUIDE
2
Page 4

INTRODUCTION
Safety Warnings 1
Symbol Guide 2
Contents 3
Caffitaly System Customer Care Line 3
INSTALLATION AND USE
Machine Components 4
Instruction Images 5
First Use or after a long period of disuse 7
Correct Use of Buttons 7
Turning on the Appliance 8
Dispensing Coffee using Factory Settings 8
Adjusting the Cup / Mug Height 8
Programming the Quantity of Coffee in a Cup 9
General Operating Indications 9
CLEANING AND MAINTENANCE
Daily Maintenance 10
Descaling 10
Troubleshooting 10
Energy Saving 11
Instructions for Use and Disposal 12
Troubleshooting 12
Technical Data 12
Thank you for having chosen our product and for your confidence in our company.
You can savour your favourite hot beverages at any time of the day with our appliance
by choosing one of the capsules that Caffitaly System offers you.
For example: an espresso, a cocoa flavoured beverage or a tea will be
ready in just a few seconds.
DEEcaffe
647.709.4869
Ph.:
email: deecaffe@deefashions.com
www.deefashions.com/deecaffe/
Page 5
MACHINE COMPONENTS
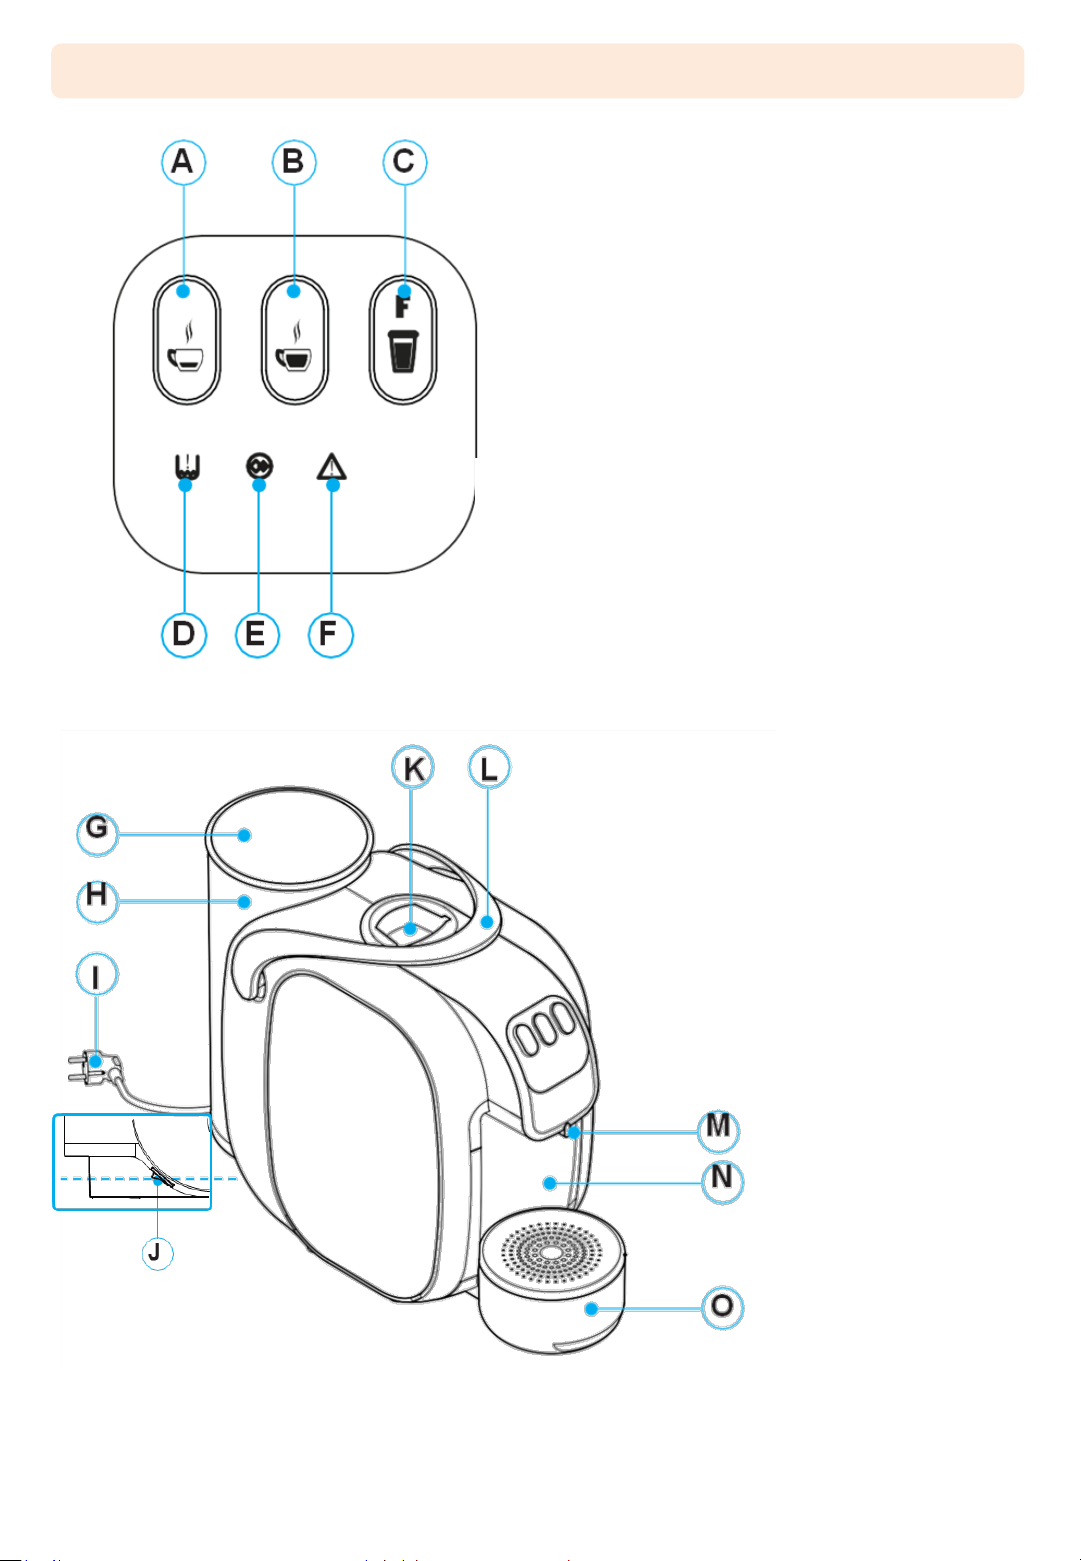
Buttons
A: Single Espresso Button
B: Double Espresso button
C: Tea / Hot Water Button
D: ‘No Water’ Indicator Light
E: Descaling Indicator Light
F: Multifunction Indicator Light
Machine Elements
G: Water Ta nk C ov er
H: Water Ta n k
I: Power Cord
J: Power On/Off Switch
K: Capsule Compartment;
L: Lever for Opening / Closing Capsule
Compartment
M: Dispensing Spout
N: Used Capsule Drawer
O: Drip tray
4
Page 6
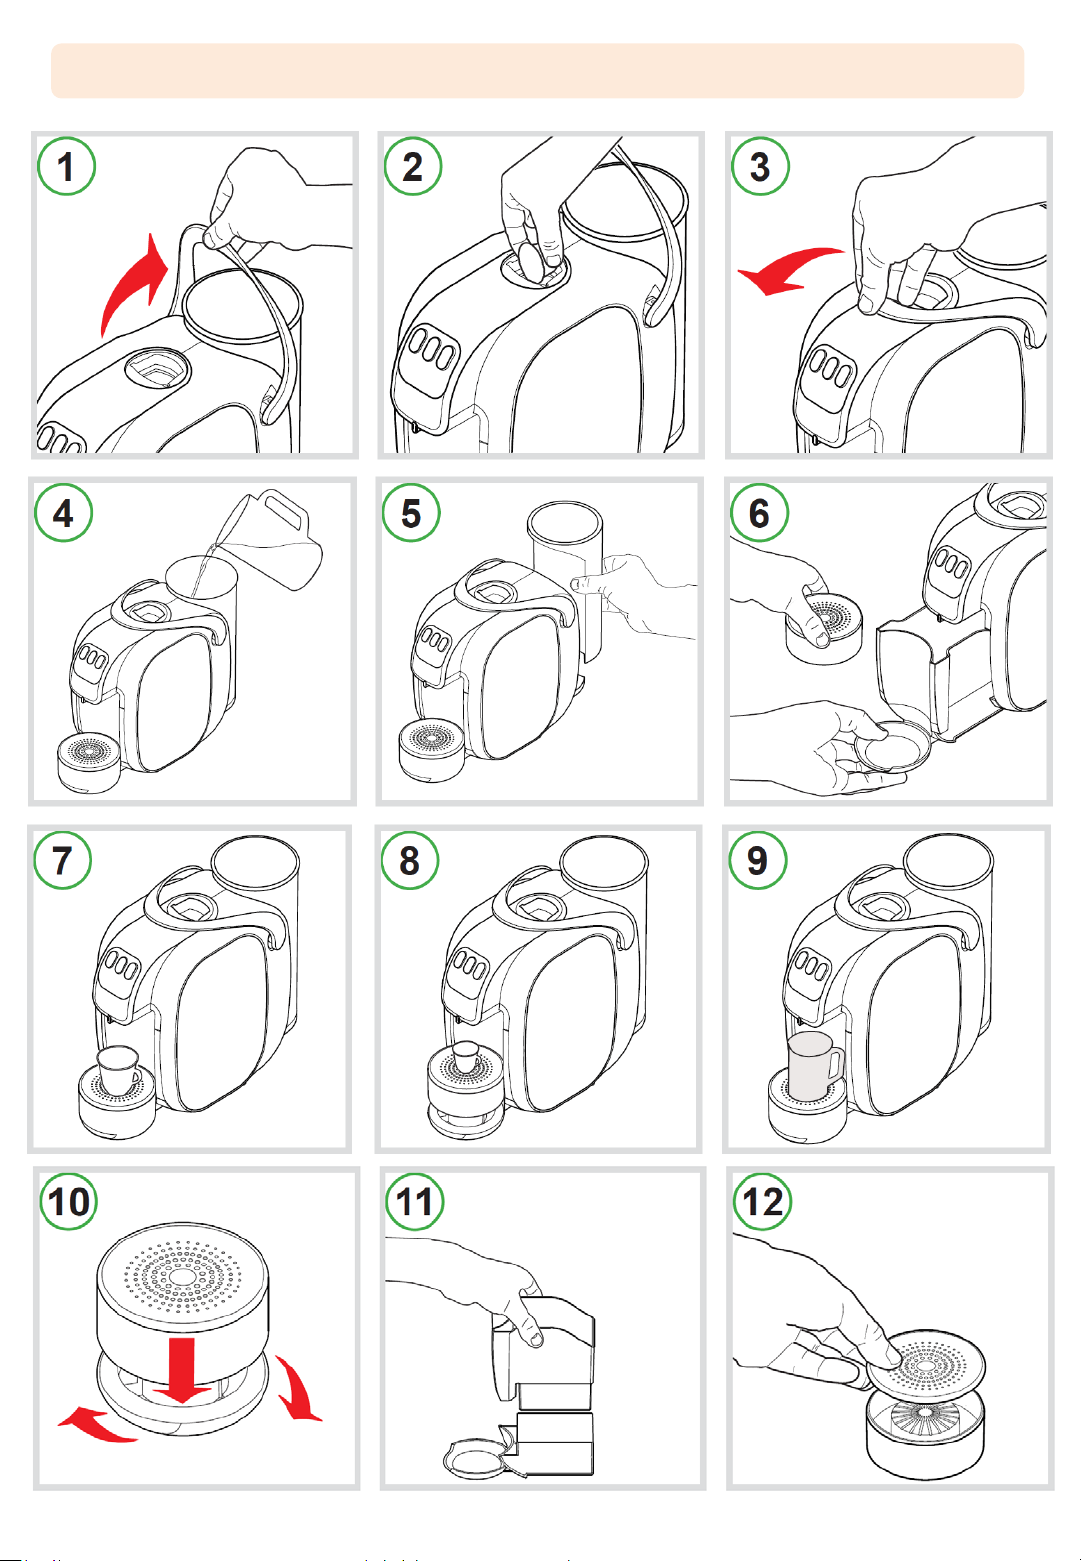
INSTRUCTION DIAGRAMS
5
Page 7
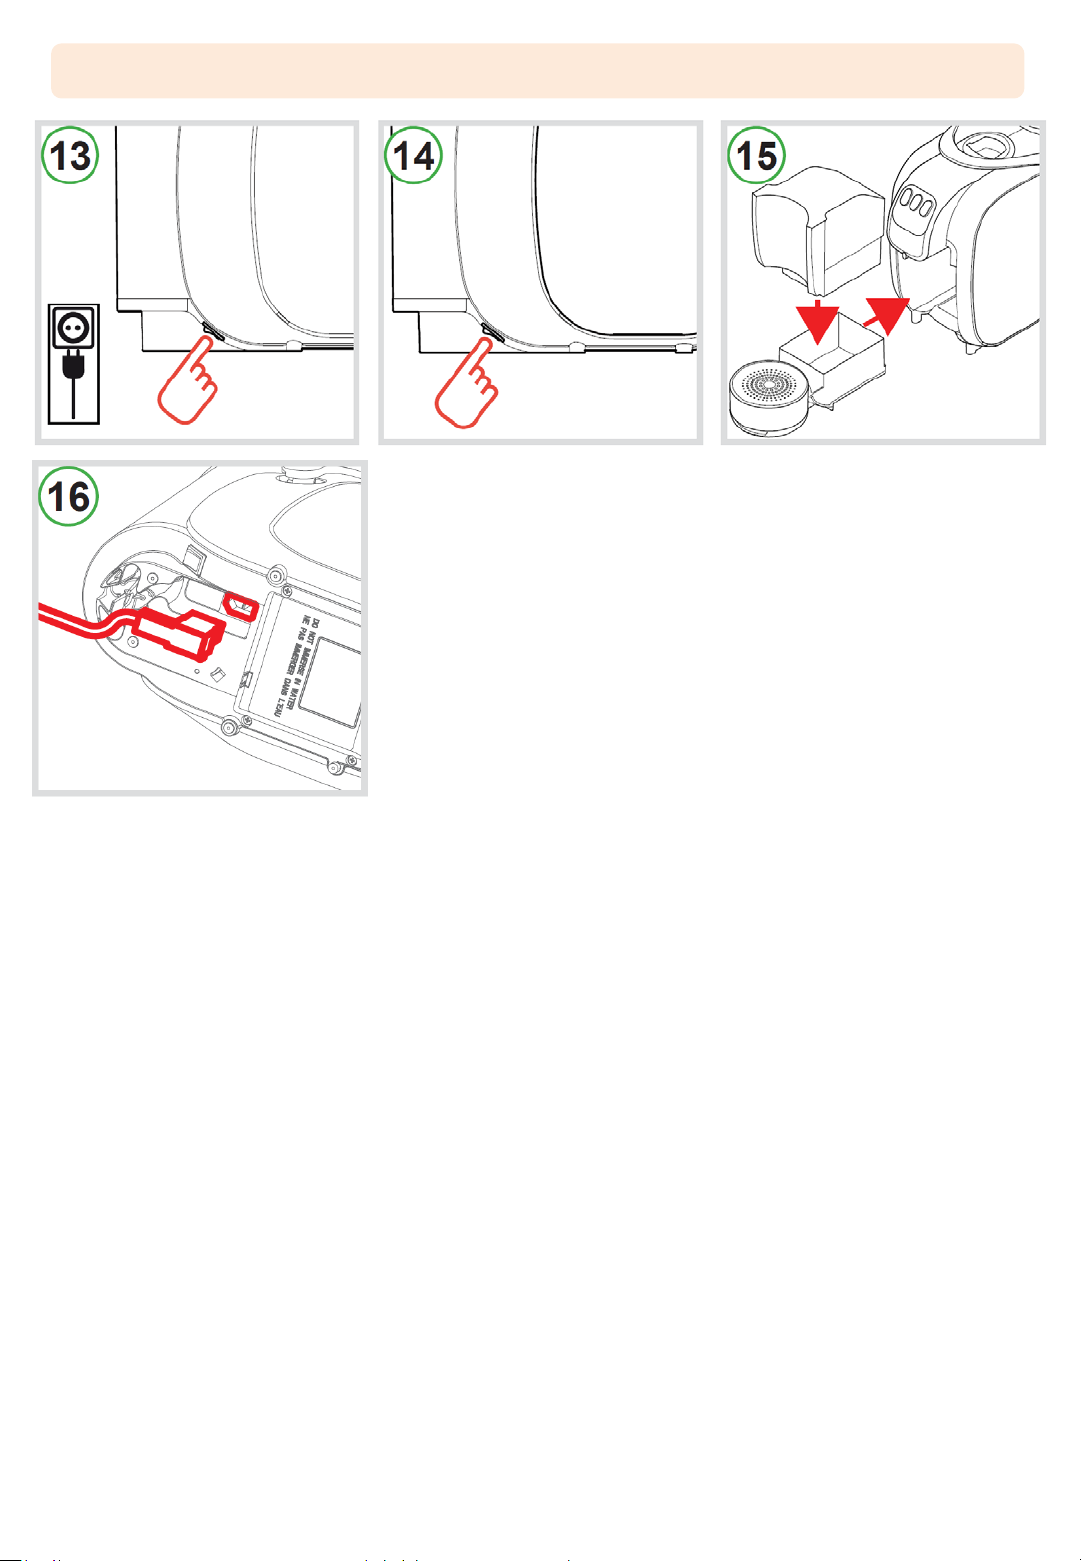
INSTRUCTION DIAGRAMS Continued…
6
Page 8
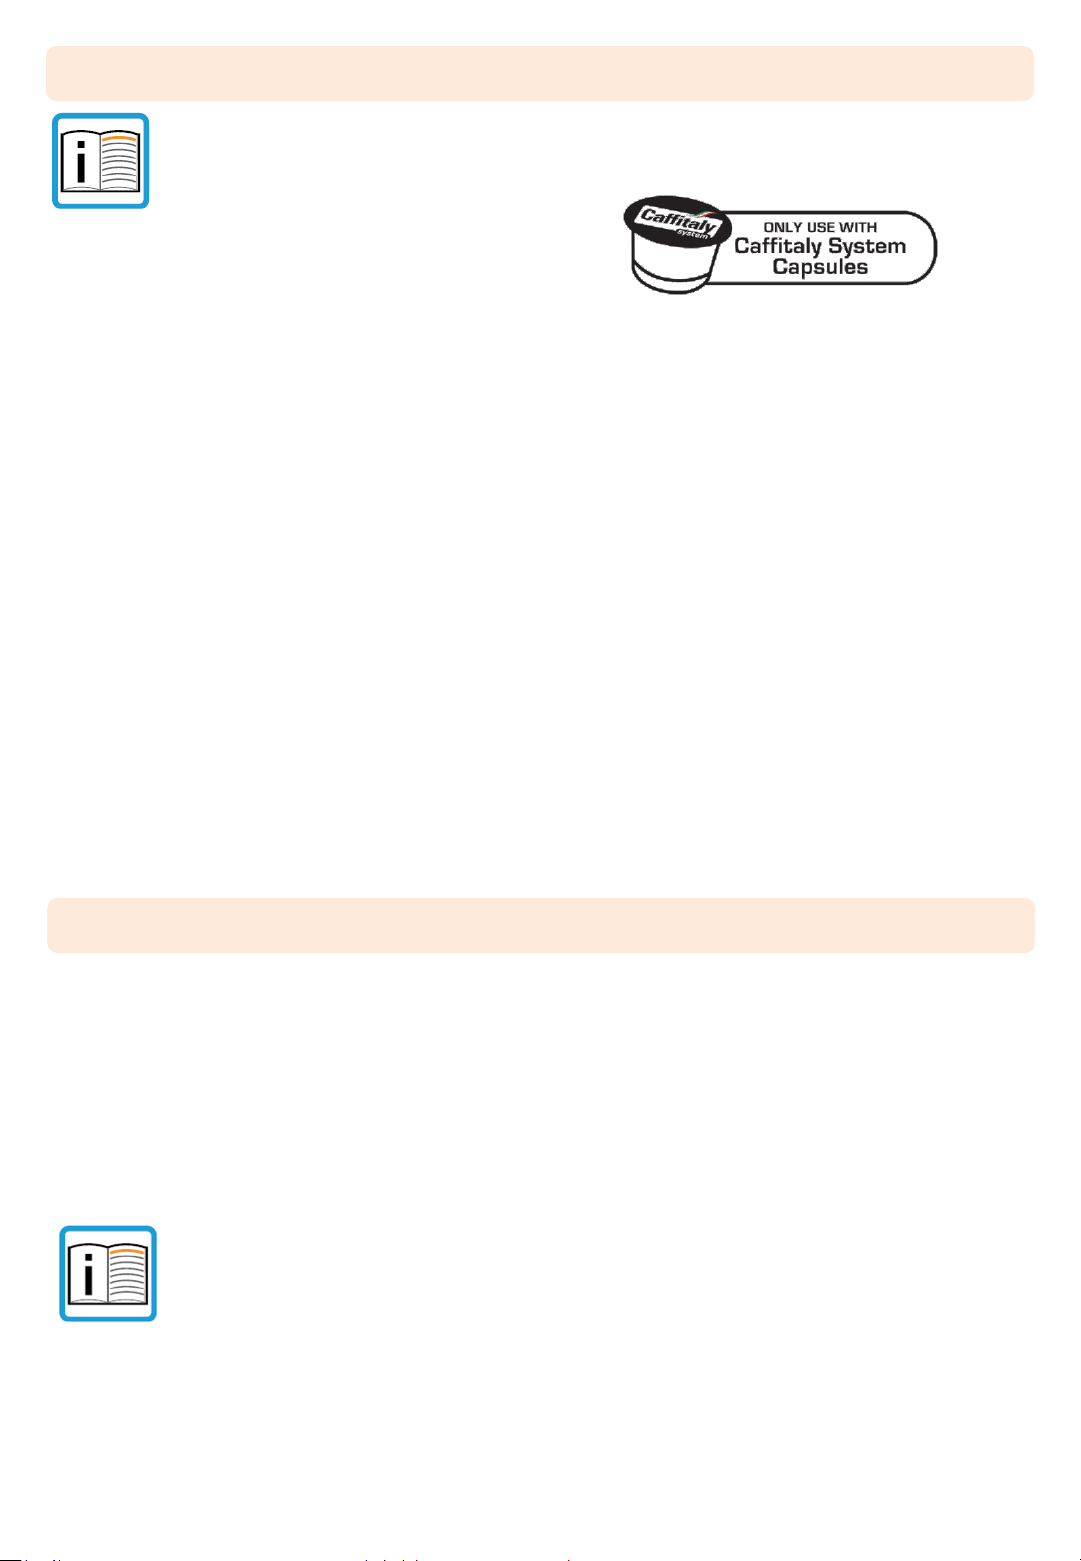
FIRST TIME USE
We recommend following these steps after not having used the machine for a long
period of time.
Please ensure you only use Caffitaly System Capsules
which can be identified by the Caffitaly logo.
1. Fit the used capsule drawer inside the drip tray and place in the machine (Fig. 15).
2. Plug the power cord supplied into the relevant socket on the bottom of the appliance (Fig. 16).
3. Fill the tank with fresh, still water (Fig. 4).
4. Plug in the appliance and turn it on (Fig. 13).
5. Make sure the lever is closed (Fig. 3).
6. As well as buttons A-B-C, indicator light D also blinks RED.
7. Place a large container (at least 250 ml) under the dispensing spout (Fig. 9).
9. Press one of the buttons A-B-C. Wait for the machine to complete the priming cycle and fill with
water. Indicator light D will switch off.
NOTE: if, at the end of the priming cycle, buttons A-B-C and indicator light D continue to blink,
repeat the procedures as listed in the previous step.
10. Buttons A-B-C will blink simultaneously to indicate that the machine is warming up.
11. When buttons A-B-C turn on and remain steadily lit, perform a rinse by pressing button C.
12. Press the button again to perform a second rinse. Wait for the machine to complete the rinse
cycle.
13. At the end of this operation, empty out the water from the used capsule drawer (Fig. 6).
CORRECT USE OF BUTTONS
- To dispense “Espresso” or “Caffè crema”, use solely buttons A or B (1st and 2nd from the left
respectively, lit in WHITE). The same buttons, depending on the quantity, are to be used for
dispensing capsules of orzo, ginseng, cocoa or milk.
- Button C (3rd from the left, lit in BLUE) must be used solely for capsules of tea, chamomile tea or
herbal tea.
Do not use button C for espresso or any other coffee with an intense flavour. In this function the
machine is set for low pressure and this reduces the "crema", diminishes the flavour of the
coffee, and could cause a break in the flow.
NOTE: traces of the product just dispensed may remain inside the machine. When
dispensing milk, hot chocolate or instant beverages, for full flavour we suggest rinsing
the machine by pressing any button (A , B or C) without inserting a capsule. In any
case, we recommend carrying out this procedure daily or at least every ten
dispensings or before a long period of appliance disuse.
7
Page 9
TURNING ON THE APPLIANCE
1. Fill the tank with fresh, still water (Fig. 4).
2. Switch on the appliance by pressing the power on/off switch (Fig. 14).
3. Buttons A-B-C will blink simultaneously to indicate that the machine is warming up.
4. When the buttons turn on and remain steadily lit, the appliance is ready for use.
DISPENSING COFFEE USING FACTORY SETTINGS
1. Raise the lever to open the capsule compartment (Fig. 1).
2. Insert the capsule, pressing it gently into place (Fig. 2).
3. Close the lever fully (Fig. 3).
4. Place a cup or espresso cup under the coffee dispensing spout (Fig. 7 or 8).
5. Press and release button A or B, depending on the desired coffee.
The pressed button will blink. The machine will stop dispensing on reaching the programmed
quantity and emit a beep.
6. Raise the lever to eject the used capsule into the drawer (Fig. 1).
7. Close the lever (Fig. 3).
NOTE: the quantities of coffee dispensed can be programmed according to
personal taste and the size of the cups or espresso cups used.
To program the quantities, please refer to chapter. "Programming the quantity of
coffee in a cup".
ADJUSTING THE CUP/ MUG HEIGHT
The machine can be adjusted for the use of large cups or espresso cups.
- The machine is initially set for the use of large cups (Fig. 7).
- For the best possible results when using espresso cups, raise the drip tray, expand the bottom
part and fix it in place by turning it clockwise (Fig. 10).
- Reposition the drip tray and start using the espresso cups (Fig. 8).
8
Page 10

PROGRAMMING THE QUANTITY OF BEVERAGE IN A CUP
1. Raise the lever to open the capsule compartment (Fig. 1).
2. Insert the capsule, pressing it gently into place (Fig. 2).
3. Close the lever fully (Fig. 3).
4. Place a cup or espresso cup under the dispensing spout (Fig. 7 or 8).
5. Press and hold the desired coffee button.
On reaching the desired amount of coffee, release the button; the machine will beep three
times. Now the button is programmed. The quantity of coffee dispensed can be programmed
from a minimum of 20 up to a maximum of 250 ml.
6. Raise the lever to eject the used capsule into the drawer (Fig. 1).
7. Close the lever (Fig. 3).
GENERAL OPERATING INDICATIONS
DESCALING SIGNAL:
• When indicator light E blinks YELLOW and the machine beeps 3 times, a descaling cycle
should be carried out (see chapter on Descaling).
HEAT ING :
• Buttons A-B-C blink simultaneously.
WHEN THE WAT ER RUNS OUT DURING OPERATION:
• The water tank is empty when indicator light D blinks RED and the appliance emits 3 beeps
followed by a single intermittent beep.
• Fill the water tank with fresh, still water (Fig. 4).
• Press one of the buttons A-B-C. Wait for the machine to complete the priming cycle and fi ll
with water.
• When buttons A-B-C turn on and remain steadily lit, the appliance is ready for use.
IF THE LEVER IS RAISED WHILE DISPENSING:
• Raising the lever while dispensing a product (Fig. 1) may cause splashes of hot water.
Danger of scalding!
• Indicator light F blinks RED. The appliance will immediately stop dispensing.
• Close the lever (Fig. 3).
• Press one of the buttons A-B-C to reset the alarm.
• The appliance is ready for use again.
9
Page 11
DAILY MAINTENANCE
1. Remove the drip tray and used capsule drawer (Fig. 6).
2. Lift the used capsule drawer (Fig. 11); empty and rinse it.
3. Remove the grid (Fig. 12). Empty the drip tray and rinse it out with water.
4. Remove the water tank (Fig. 5); empty and rinse it.
NOTE: traces of the product just dispensed may remain inside the machine. When
dispensing milk, hot chocolate or instant beverages, for full flavour we suggest
rinsing the machine by pressing any button (A , B or C) without inserting a capsule.
In any case, we recommend carrying out this procedure daily or at least every ten
dispensing's or before a long period of appliance disuse.
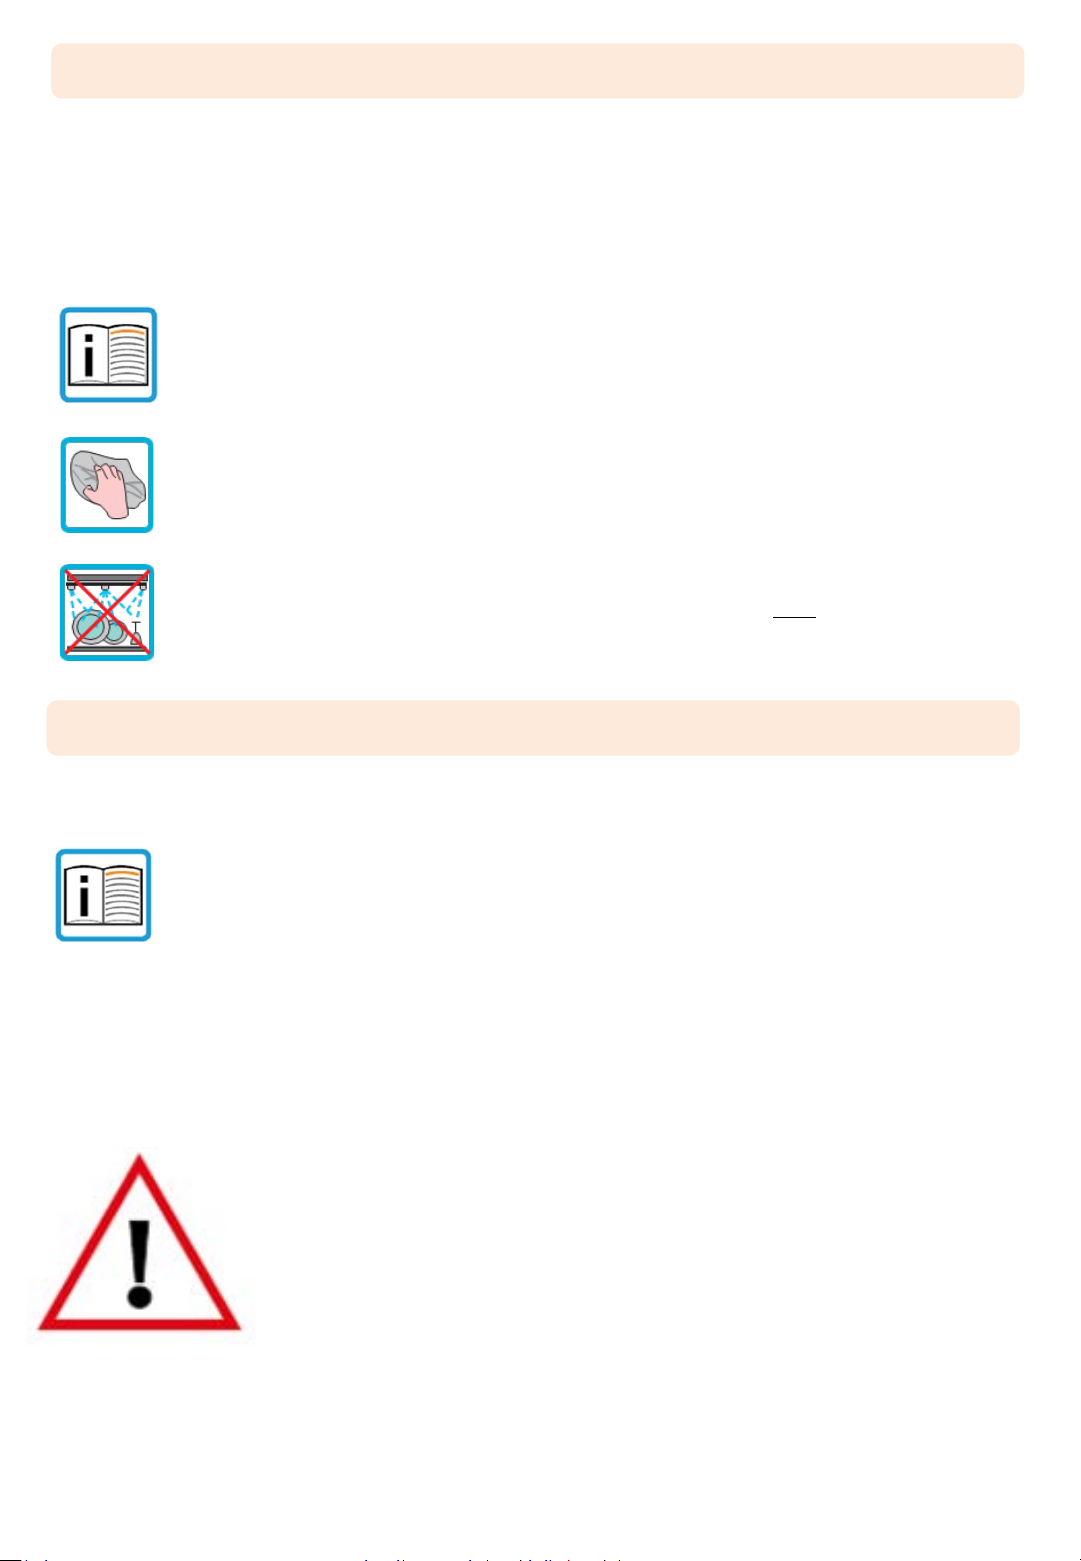
Use a soft cloth and a neutral detergent to clean the surfaces of the appliance.
Do not use jets of water to clean the appliance.
The plastic parts of the machine including the Water Tank are NOT dishwasher
safe.
DESCALING
Descaling signal: when indicator light D blinks YELLOW and the machine beeps 3 times, a
descaling cycle should be carried out, as illustrated below.
The machine features an advanced program that monitors how much water is used
to dispense beverages. This measurement provides the user with indications as to
when the machine needs to be descaled.
It is advisable to use the Caffitaly System descaling agent, designed to comply with
the technical characteristics of the machine, in full observance of consumer safety.
The descaling agent must be disposed of in compliance with manufacturer
instructions and/or with current regulations in force in the country where the
appliance is used.
CA RE FU LLY read the directions for use on the packaging of the
descaling agent. Avoid contact with eyes, skin and machine surfaces.
Switch the machine off during descaling, and do not lift the lever. A
person must be present during the operation.
Do not use vinegar: it could damage your machine!
10
Continued over page…
Page 12

DESCALING Continued…
1. Switch the machine off by pressing the power on/off switch (Fig. 14).
2. Empty and rinse out the used capsule drawer and drip tray (Fig. 6).
3. Remove and empty the water tank (Fig. 5).
4. Mix the contents of a bottle of Caffitaly System descaling agent with approximately 750 cc. of
water (a total of 1 litre) and pour into the tank.
5. Place a container (at least 500 ml) under the dispensing spout (Fig. 9).
6. Make sure that the lever is lowered (Fig. 3) and that there is no capsule inside the capsule
compartment.
7. Press and hold buttons A and B while switching the machine on by pressing the power on/off
switch.
Button B will be lit, while indicator lights E and F blink YELLOW and RED alternately.
8. Press button B to start the descaling cycle.
The machine dispenses the descaling solution at intervals (5 doses with a 4-minute pause
between each one, for a total duration of about 25 minutes). During this step, when the
buttons must not be pressed, indicator lights E and F blink YELLOW and RED alternately.
- If the container fills up, empty it out.
- When the first step is over, button B lights up and the machine beeps repeatedly. The water
tank is empty.
9. Carefully rinse out the water tank and refill it with fresh water (Fig. 4).
Empty and rinse the used capsule drawer, the drip tray and the container used and put them
back in place.
10. Press button B to start the rinse cycle.
Rinse water (about 500 ml) will be run through the machine. During this stage, indicator
lights E and F blink alternately.
When the rinse cycle is complete, the machine beeps and buttons A-B-C blink
simultaneously; the machine is warming up. When the buttons turn on and remain steadily
lit, the appliance is ready for use.
11. Carefully empty and rinse out the water tank and refi ll it with fresh, still water (Fig. 4).
12. Empty and rinse out the used capsule drawer and drip tray (Fig. 6).
ENERGY SAVING
The machine will automatically reduce consumption after 10 minutes of inactivity.
Buttons A-B-C blink WHITE slowly and sequentially. To restore normal operating conditions,
press any button or raise the lever.
The appliance will start warming up. When buttons A-B-C turn on and remain steadily lit, the
appliance is ready for use.
11
Page 13
INSTRUCTIONS FOR USE AND DISPOSAL
The appliance has been manufactured using high quality materials that can be reused or
recycled. Dispose of the appliance in a suitable waste collection centre.
TROUBLESHOOTING
PROBLEM POSSIBLE CAUSE SOLUTION
No coffee comes out.
Indicator light D blinks RED.
The coffee is not hot
enough.
The lever cannot be
lowered.
Indicator light F is lit steadily
in RED.
When a button is pressed Incorrect quantity Reprogram the quantity
to dispense coffee, the programming. associated with that button.
machine seems to work See ch. "Programming the
but then stops without quantity of coffee in a cup".
dispensing any coffee,
or only dispenses a tiny
amount.
The water tank is empty.
- Cold cups / espresso cu
- Scale build-up
-The used capsule drawer is
full.
-Capsule stuck inside the
machine.
Heating problems.
in machine.
ps.
Fill the tank with fresh water. Press
a button to refi ll the circuit. When
the buttons remain steadily lit, the
appliance is ready for use.
- Preheat cup.
escale.
- D
-Empty out the used ca
drawer.
- Remove the used ca
Turn off the machine, then turn it
back on. If the problem persists,
take the machine to an Authorised
Service Centre.
psule
psule.
Coffee is dispensed very
slowly, and is of poor quality.
See the data plate on the base of the machine.
Max. 15 bar
< 70 dB A
About 4 kg
1 litre
Ambient temperature: 10°C - 40°C
162 mm 283 mm 370 mm
12
Button C was used with an
espresso capsule.
TECHNICAL DATA
Use buttons A or B.
Page 14

www.deefashions.com/deecaffe/
 Loading...