

Chicago Faucet MeterMix 4, 3300 Installation Manual
METERMIX™ 4" CENTERSET FAUCET
Installation Instructions
Pressurized plumbing fixtures shall be installed in accordance with manufacturer’s recommendations. The supply piping to these devices shall be securely anchored to the building
structure to prevent installed device from unnecessary movement when operated by the
user. Care shall be exercised when installing the device to prevent marring the exposed
significant surface.
© 2004 Geberit. All rights reserved. The information in this manual is subject to change
without notice.
Please leave this manual with the facility manager after completing the faucet installation.
This document contains information necessary for routine maintenance and
servicing.
T-319
NOTE
Copyrights
Notice to Installers
ADA Compliant
MeterMix Faucet
23
15
6
7
4
5
2
3
1
9
10
11
12
13
14
8
16
17
18
19
20
21
22
Installation Instructions
PRODUCT OVERVIEW
The MeterMix™ faucet provides the water
savings of a metering faucet combined with the
convenience of temperature adjustment.
METERMIX FEATURES
• MVP™ Metering Cartridge has proven
performance and is backed by a 5-year
warranty
• Two in-line check/screen assemblies
• Vandal resistant .5 GPM spray
outlet
• Adjustable timing
• Variable temperature control
• Concealed adjustable temperature limit stop
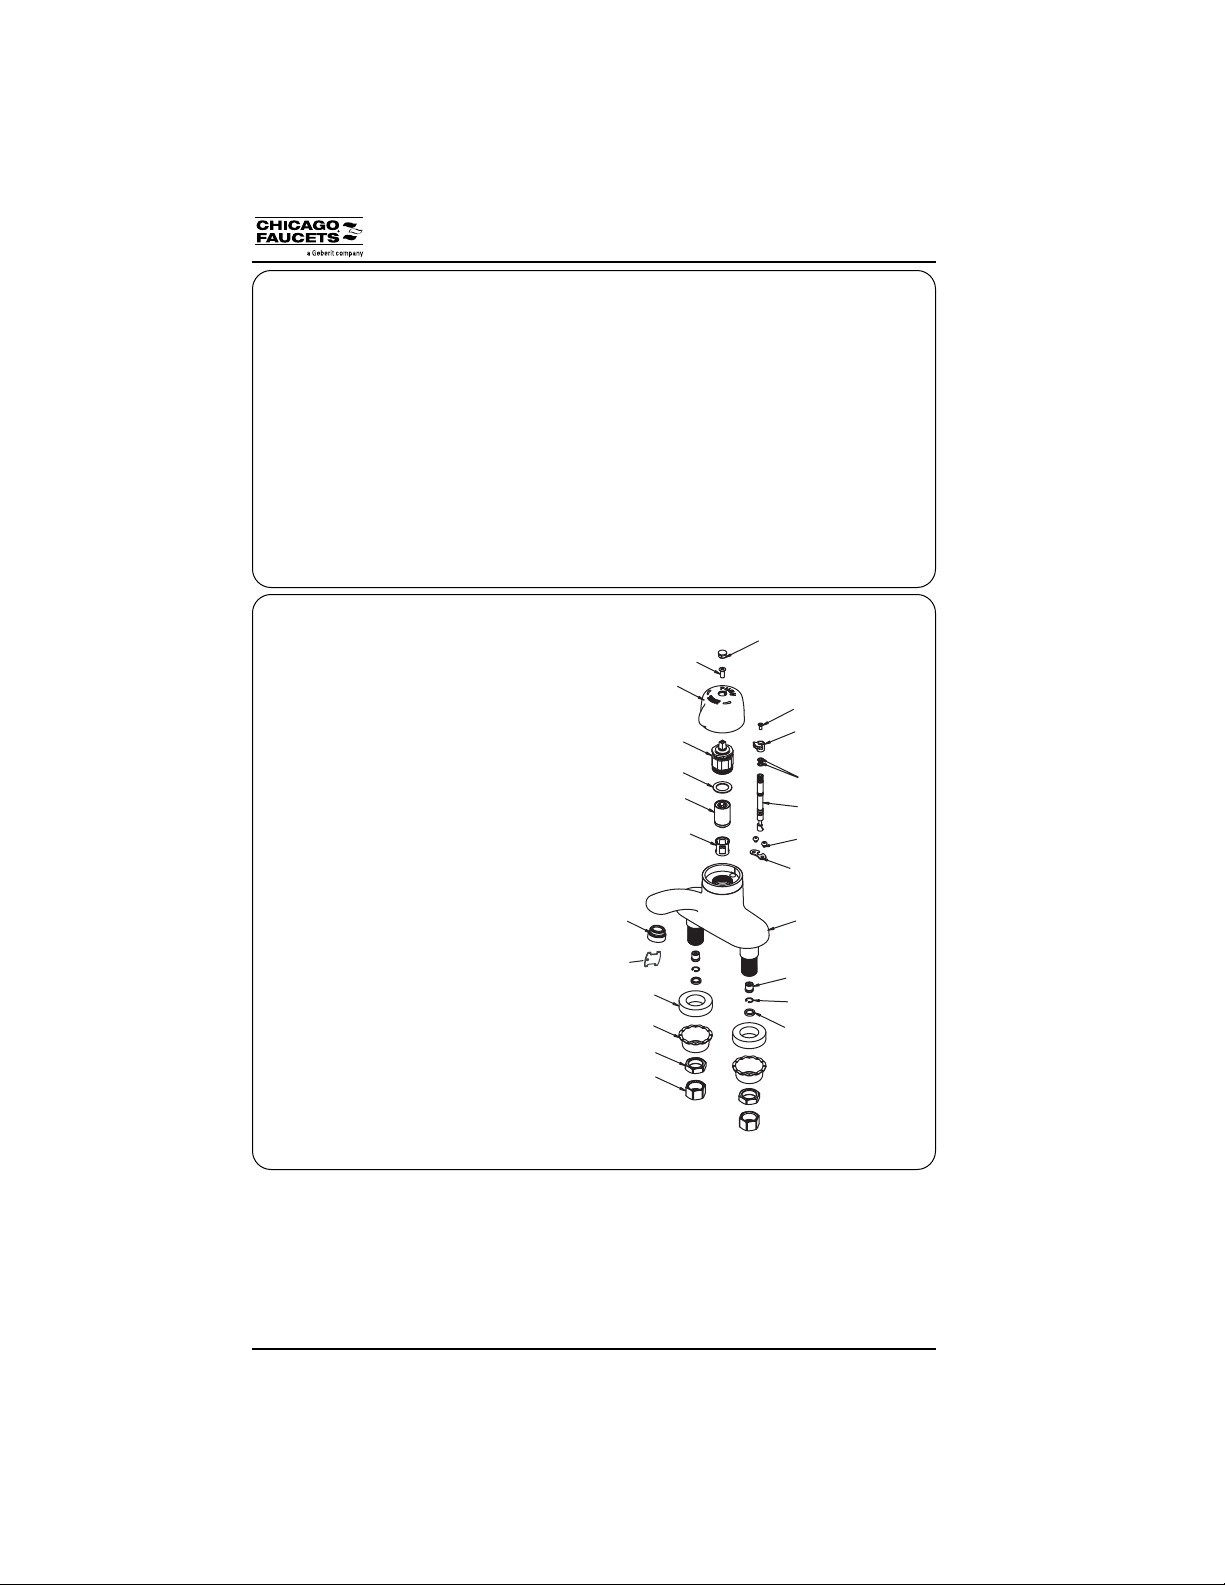
The MeterMix Faucet consists of:
1. Handle Button
2. Screw (assembled)
3. Handle (assembled)
4. Actuator Assembly
5. Gasket
6. MVP Cartridge
7. Filter Basket
8. Faucet Body
9. Screw, Mixing Stem
10. Gear
11. O-Ring, Mixing Stem (Qty. 2)
12. Mixing stem
13. Screw (Qty. 2)
14. Bracket
15. Outlet
16. Check Cartridge (Qty. 2)
17. C-Clip (Qty. 2)
18 Filter/Screen (Qty. 2)
19. Plastic Spacer (Qty. 2)
20. Basin Washer (Qty. 2)
21. Locknut (Qty. 2)
22. Supply Nut (Qty. 2)
23. Vandal Resistant Outlet Key
• Vandal resistant, ADA compliant
handle
SAFETY INFORMATION
• Read this entire instruction sheet
to ensure proper installation.
• Compliance and conformity to
local codes and
ordinances is the responsibility of
the installer.
TECHNICAL SUPPORT
For additional technical assistance, call
800 / TEC-TRUE (800-832-8783) or visit
our website at www.chicagofaucets.com.
2
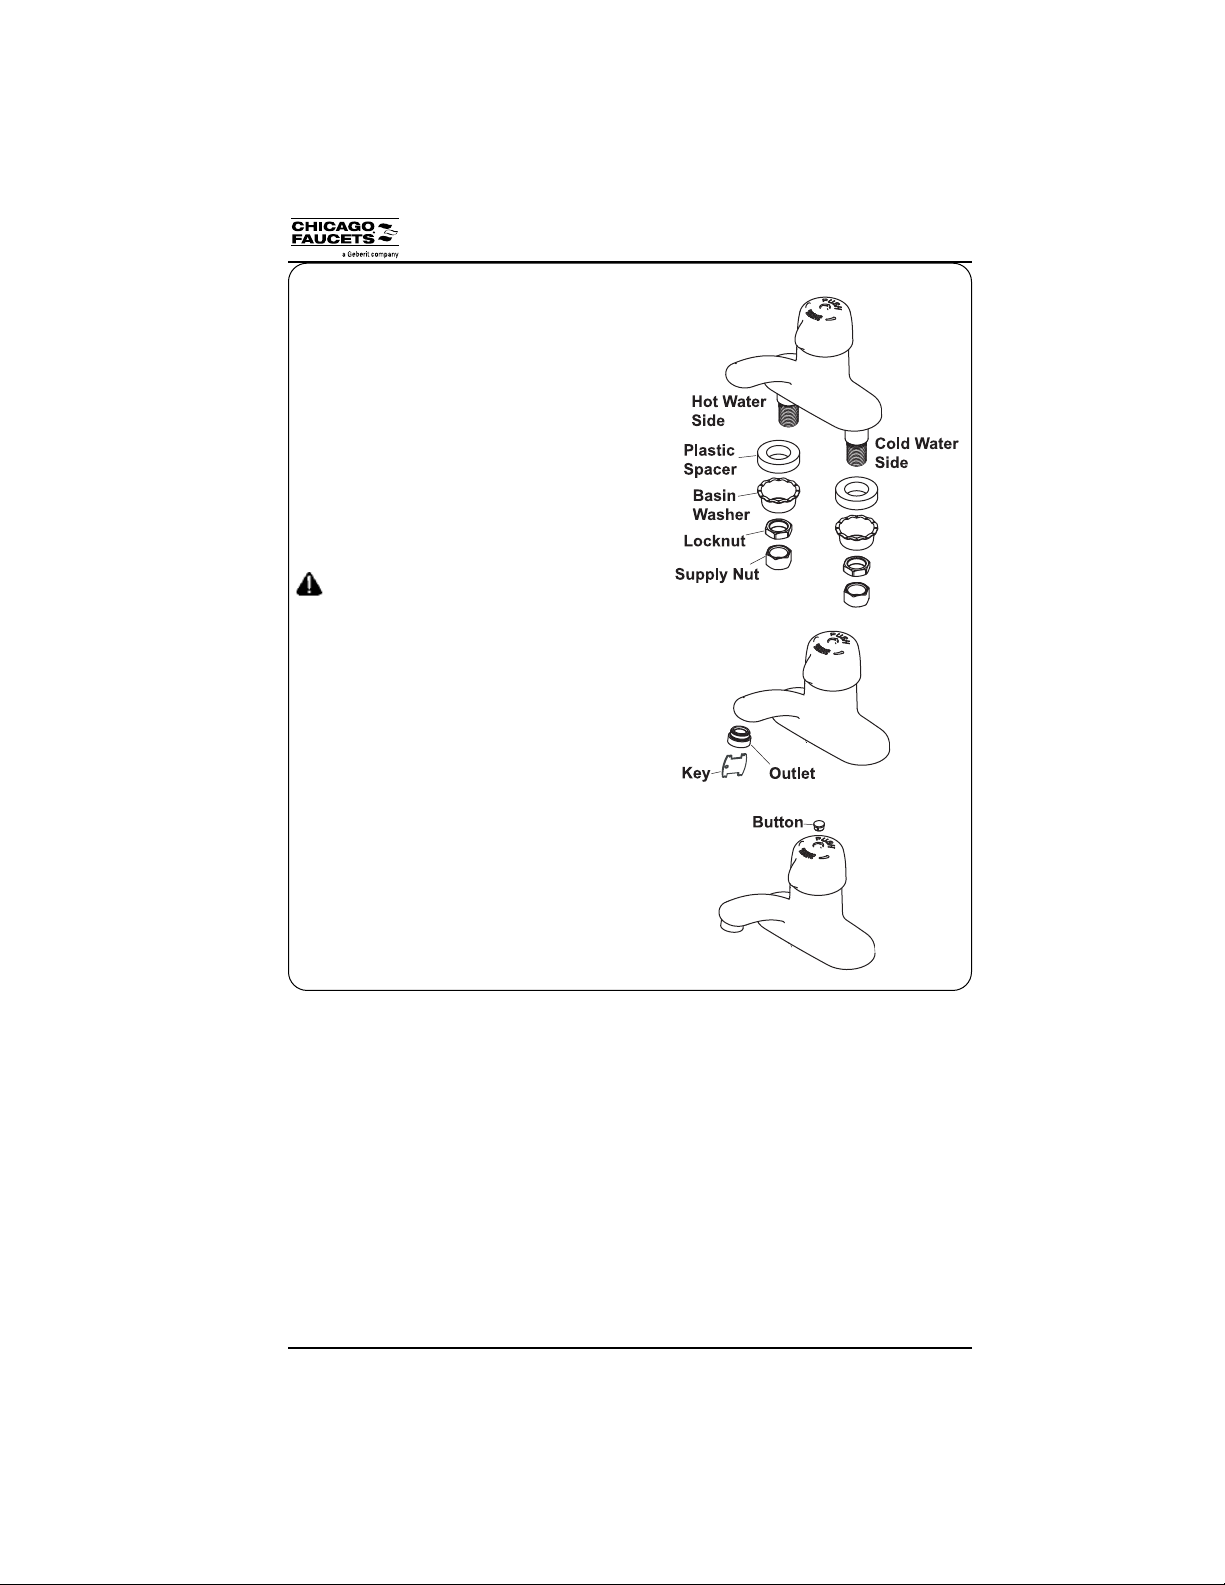
INSTALLATION
1. Turn off water supply to existing
faucet and remove faucet, if necessary.
2. Clean faucet basin and clear away
debris.
3. Mount the spout to top of base. Install
the plastic spacer (if required), basin
washers and locknuts to the faucet
from underneath the base. Securely
tighten the locknuts.
NOTE: Use silicon sealant for porous
stone or plumbers putty as recommended
by counter manufacturer.
Do not use a wrench on spout or
inlet tubes. Flush lines before connecting supply tube to faucet.
Faucet has inlet screens that can
clog if not flushed.
4. Install the supply nuts to the water
inlet tubes and connect tubes to
faucet. Tighten connections securely.
5. Flush installed faucet before installing
outlet.
6. Install outlet using key supplied. Do
not overtighten.
7. Make all hot limit stop & timing adjustments (see page 4) prior to performing
step 8.
8. Install handle button.
MeterMix Faucet
Installation Instructions
3
 Loading...