

Chevrolet Kodiak 2008 Owner's Manual

Seats and Restraint Systems
........................... 1-1
Front Seats
............................................... 1-2
Rear Seats
.............................................. 1-10
Safety Belts
............................................. 1-11
Child Restraints
....................................... 1-28
Airbag System
......................................... 1-48
Restraint System Check
............................ 1-60
Features and Controls
..................................... 2-1
Keys
........................................................ 2-2
Doors and Locks
....................................... 2-6
Windows
.................................................. 2-8
Starting and Operating Your Vehicle
........... 2-10
Mirrors
.................................................... 2-51
Storage Areas
......................................... 2-53
Instrument Panel
............................................. 3-1
Instrument Panel Overview
.......................... 3-4
Climate Controls
...................................... 3-20
Warning Lights, Gages, and Indicators
........ 3-24
Audio System(s)
....................................... 3-47
Driving Your Vehicle
....................................... 4-1
Your Driving, the Road, and Your Vehicle
..... 4-2
Towing
................................................... 4-24
Service and Appearance Care
.......................... 5-1
Service
..................................................... 5-4
Fuel
......................................................... 5-7
Checking Things Under the Hood
............... 5-22
Rear Axle
............................................... 5-72
Four-Wheel Drive
..................................... 5-73
Front Axle
............................................... 5-74
Noise Control System
............................... 5-75
Bulb Replacement
.................................... 5-76
Windshield Wiper Blade Replacement
......... 5-76
Other Service Items
.................................. 5-78
Tires
...................................................... 5-82
Appearance Care
..................................... 5-94
Vehicle Identification
............................... 5-101
Electrical System
.................................... 5-102
Capacities and Specifications
................... 5-109
Maintenance Replacement Parts
............... 5-115
Maintenance Schedule
..................................... 6-1
Maintenance Schedule
................................ 6-2
Customer Assistance Information
.................... 7-1
Customer Assistance and Information
........... 7-2
Reporting Safety Defects
............................ 7-9
Vehicle Data Recording and Privacy
........... 7-11
Index
................................................................ 1
2008 Chevrolet Kodiak Owner Manual M
GENERAL MOTORS, GM, the GM Emblem,
CHEVROLET, the CHEVROLET Emblem, and the
name KODIAK are registered trademarks of General
Motors Corporation.
This manual includes the latest information at the time it
was printed. We reserve the right to make changes
after that time without further notice. For vehicles first
sold in Canada, substitute the name “General Motors of
Canada Limited” for GM Medium Duty Truck Division
when it appears in this manual.
This manual describes features that may be available in
this model, but your vehicle may not have all of them.
For example, more than one entertainment system may
be offered or your vehicle may have been ordered
without a front passenger or rear seats.
Keep this manual in the vehicle for quick reference.
Using this Manual
Many people read the owner manual from beginning to
end when they first receive their new vehicle to learn
about the vehicle’s features and controls. Pictures
and words work together to explain things.
Index
A good place to quickly locate information about the
vehicle is the Index in the back of the manual. It is an
alphabetical list of what is in the manual and the
page number where it can be found.
Litho in U.S.A.
Part No. 15862473 A First Printing
©
2007 General Motors Corporation. All Rights Reserved.
ii
Safety Warnings and Symbols
There are a number of safety cautions in this book. A
box with the word CAUTION is used to tell about things
that could hurt you or others if you were to ignore the
warning.
{CAUTION:
These mean there is something that could hurt
you or other people.
We tell you what the hazard is and what to do to help
avoid or reduce the hazard. Please read these cautions.
If you do not, you or others could be hurt.
A circle with a slash
through it is a safety
symbol which means “Do
Not,” “Do Not do this”
or “Do Not let this happen.”
iii

Vehicle Damage Warnings
You will also find notices in this manual.
Notice: These mean there is something that could
damage your vehicle.
A notice tells about something that can damage the
vehicle. Many times, this damage would not be covered
by your vehicle’s warranty, and it could be costly.
The notice tells what to do to help avoid the damage.
When you read other manuals, you might see CAUTION
and NOTICE warnings in different colors or in different
words.
There are also warning labels on the vehicle which use
the same words, CAUTION or NOTICE.
Vehicle Symbols
The vehicle has components and labels that use
symbols instead of text. Symbols are shown along with
the text describing the operation or information
relating to a specific component, control, message,
gage, or indicator.
iv

Front Seats ......................................................1-2
Bucket Seats .................................................1-2
Split Bench Seat (80/20 Split) ..........................1-6
Air Suspension Seats ......................................1-6
Rear Seats .....................................................1-10
Rear Seat Operation .....................................1-10
Safety Belts ...................................................1-11
Safety Belts: They Are for Everyone ................1-11
How to Wear Safety Belts Properly .................1-16
Lap-Shoulder Belt .........................................1-24
Safety Belt Use During Pregnancy ..................1-26
Lap Belt ......................................................1-27
Safety Belt Extender .....................................1-28
Child Restraints .............................................1-28
Older Children ..............................................1-28
Infants and Young Children ............................1-31
Child Restraint Systems .................................1-35
Where to Put the Restraint .............................1-38
Lower Anchors and Tethers for
Children (LATCH) ......................................1-40
Securing a Child Restraint in a Rear Outside
Seat Position (Crew Cab) ...........................1-40
Securing a Child Restraint in the Center Rear
Seat Position (Crew Cab) ...........................1-42
Securing a Child Restraint in the Center Front
Seat Position ............................................1-44
Securing a Child Restraint in the Right Front
Seat Position ............................................1-44
Airbag System ...............................................1-48
Where Are the Airbags? ................................1-51
When Should an Airbag Inflate? .....................1-52
What Makes an Airbag Inflate? .......................1-53
How Does an Airbag Restrain? .......................1-54
What Will You See After an Airbag Inflates? .....1-54
Airbag Off Switch ..........................................1-56
Servicing Your Airbag-Equipped Vehicle ...........1-59
Adding Equipment to Your Airbag-Equipped
Vehicle ....................................................1-59
Restraint System Check ..................................1-60
Checking the Restraint Systems ......................1-60
Replacing Restraint System Parts
After a Crash ............................................1-61
Section 1 Seats and Restraint Systems
1-1

Front Seats
Bucket Seats
If your vehicle has bucket seats, you can adjust the
seats several different ways.
Fore-and-Aft Adjustment
{CAUTION:
You can lose control of the vehicle if you try to
adjust the seat while the vehicle is moving.
The sudden movement could startle and
confuse you, or make you push a pedal when
you do not want to. Adjust the driver’s seat
only when the vehicle is not moving.
You can adjust the seat forward or rearward with the
bar located under the front of the seat cushion.
Lift the bar to unlock the seat. Slide the seat to where
you want it and release the bar. Try to move the
seat with your body to be sure the seat is locked in
place.
1-2
Lumbar Adjustment
Your seats may have this feature.
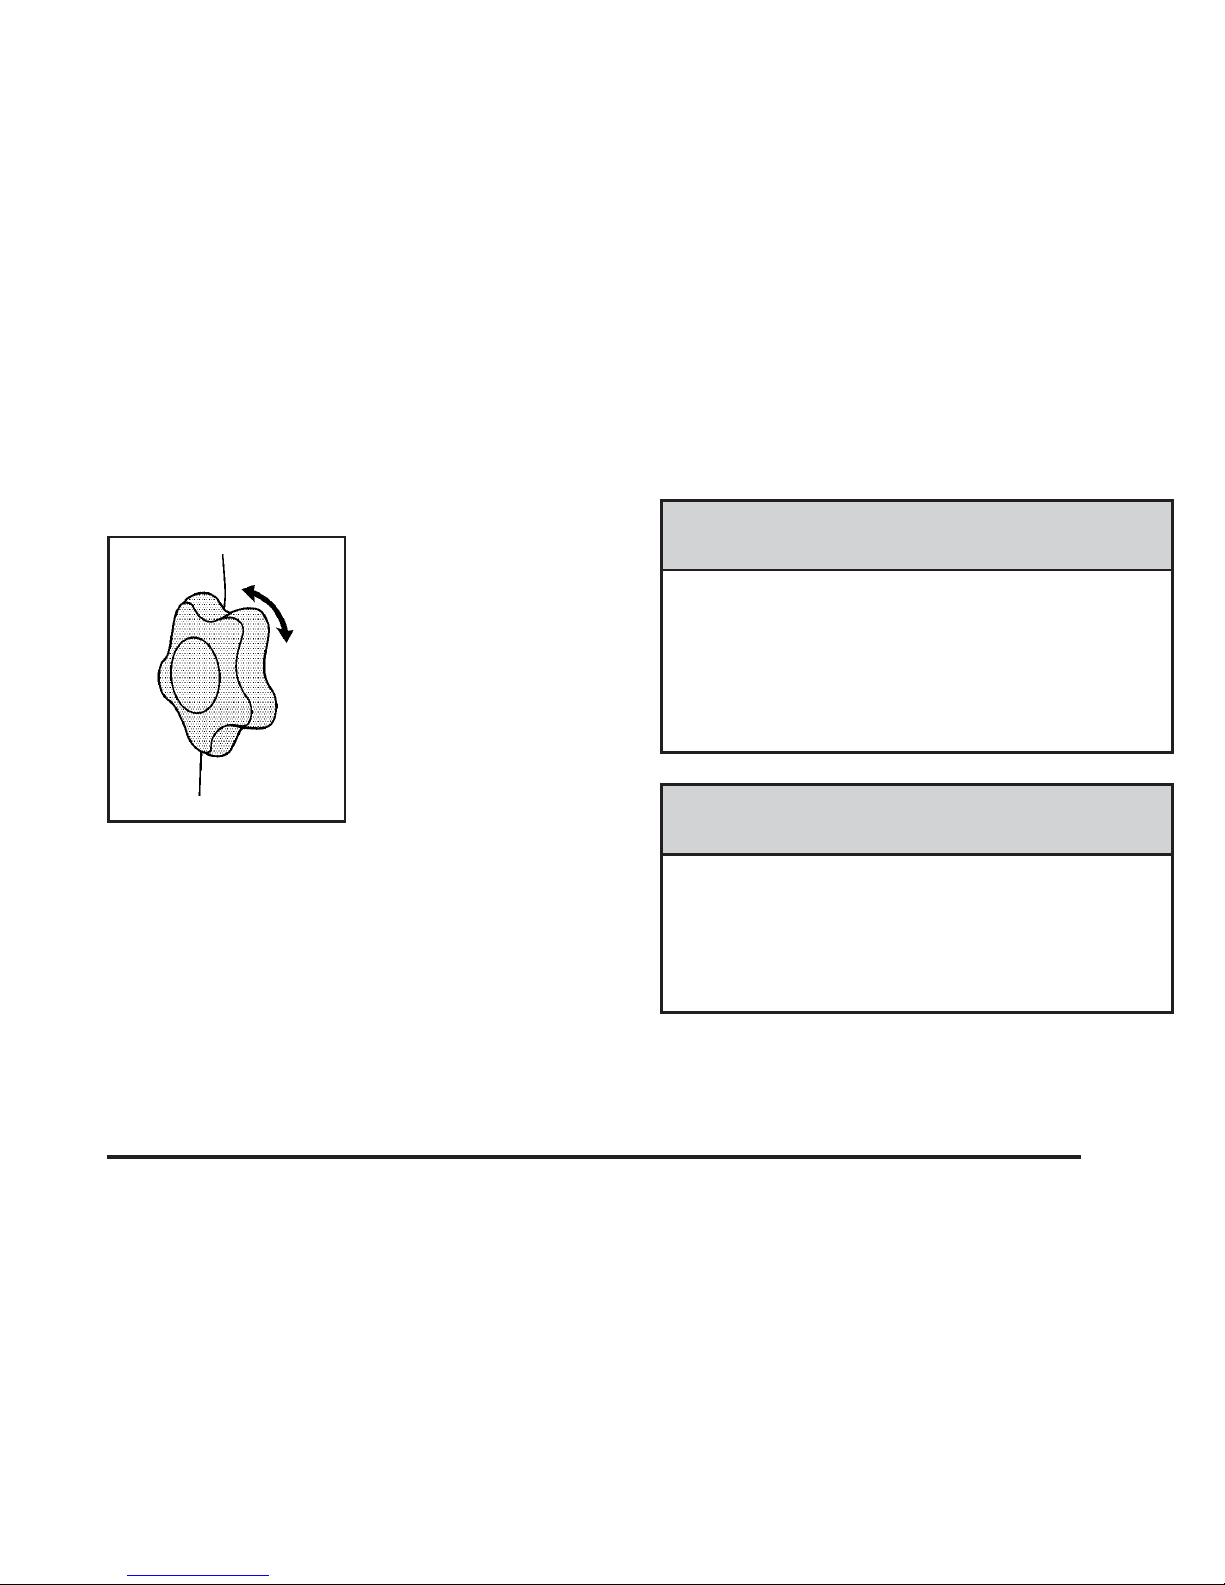
The lumbar adjustment
knob is located on the
seatback, on the inboard
side of the driver’s seat and
on the outboard side of the
passenger’s seat.
For more support to your lower back, turn the lumbar
adjustment knob clockwise. To decrease the amount of
lumbar support, turn the knob counterclockwise.
Seatback Adjustment
{CAUTION:
You can lose control of the vehicle if you try to
adjust a manual driver’s seat while the vehicle
is moving. The sudden movement could startle
and confuse you, or make you push a pedal
when you do not want to. Adjust the driver’s
seat only when the vehicle is not moving.
{CAUTION:
If the seatback is not locked, it could move
forward in a sudden stop or crash. That could
cause injury to the person sitting there. Always
push and pull on the seatback to be sure it is
locked.
1-3
The recline lever is located on the outboard side of the
driver’s and passenger’s seat cushions.
To recline the seatback, do the following:
1. Lift the recline lever.
2. Move the seatback to the desired position, then
release the lever to lock the seatback in place.
3. Push and pull on the seatback to make sure it is
locked.
To return the seatback to an upright position, do the
following:
1. Lift the lever fully without applying pressure to the
seatback and the seatback will return to the upright
position.
2. Push and pull on the seatback to make sure it is
locked.
1-4
{CAUTION:
Sitting in a reclined position when your vehicle
is in motion can be dangerous. Even if you
buckle up, your safety belts cannot do their
job when you are reclined like this.
The shoulder belt cannot do its job. In a crash,
you could go into it, receiving neck or other
injuries.
The lap belt cannot do its job either. In a crash
the belt could go up over your abdomen. The
belt forces would be there, not at your pelvic
bones. This could cause serious internal
injuries.
For proper protection when the vehicle is in
motion, have the seatback upright. Then sit
well back in the seat and wear your safety belt
properly.
Do not have a seatback reclined if your vehicle is
moving.
1-5
Split Bench Seat (80/20 Split)
If your vehicle has a split bench seat, the passenger
seat is not adjustable.
There is a storage area underneath the seat cushion.
See Storage Areas on page 2-53.
Air Suspension Seats
Your vehicle may have a low-back or high-back air
suspension seat. There are several ways to adjust
the seat.
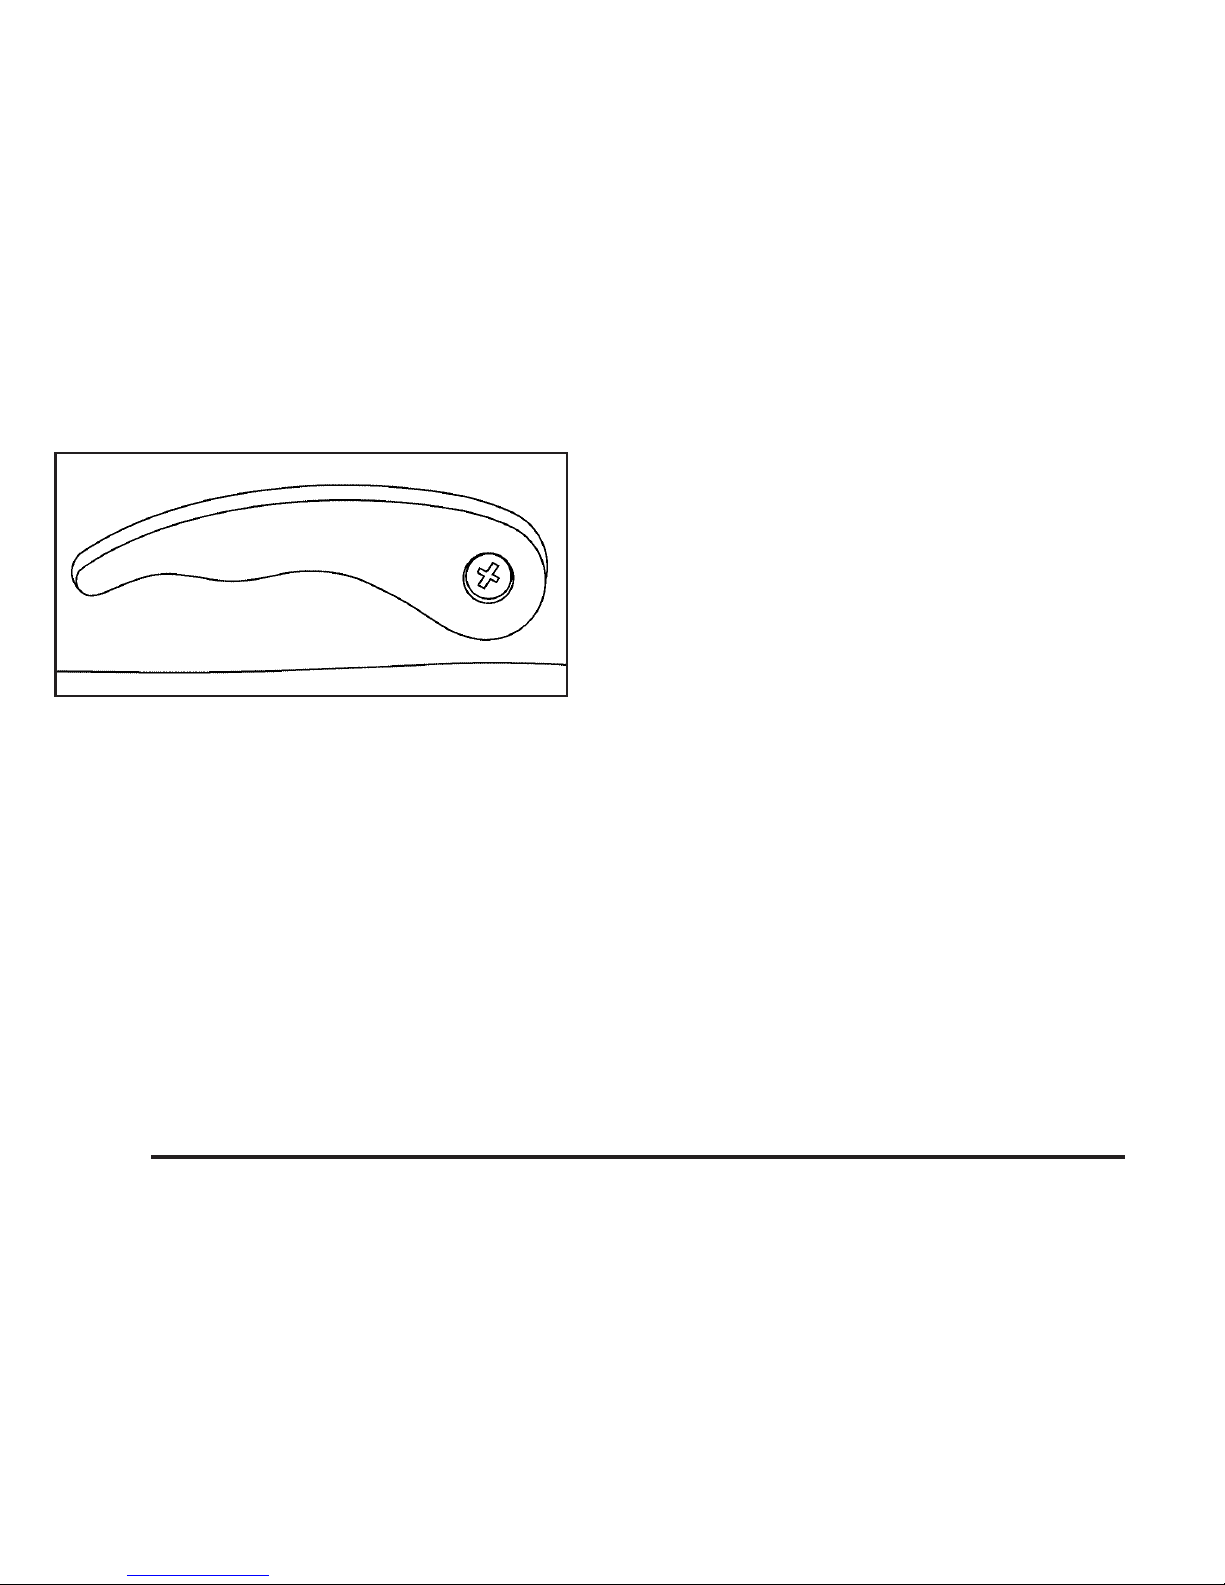
Fore-and-Aft Adjustment
If your vehicle has this
lever it is located
underneath the front of the
driver’s seat.
To slide the seat forward or rearward, move the lever
toward the outboard side of the seat. The seat will lock
in at 1/2 inch (1.5 cm) increments. Try to move the
seat with your body to be sure the seat is locked
in place.
1-6
Height Adjustment
If your vehicle has an air suspension seat height
adjustment lever, it is located on the front inboard side
of the seat.
To adjust the height of the air suspension seat, pull the
lever up to inflate. Push the lever down to deflate.
Your seat cushion may also be able to be raised or
lowered.
If your vehicle has this
feature, the seat cushion
height adjustment handle is
located underneath the
front of the seat.
To adjust the height of the cushion, lift the handle up
and pull it forward. You can choose between two
settings.
Seat Height Adjustment
Lever
1-7

Lumbar Adjustment
If your vehicle has a lumbar adjustment knob, it is
located on the inboard side of the driver’s seatback, or
on the outboard side of the passenger’s seatback.
For more support to your lower back, turn the lumbar
adjustment knob clockwise. To decrease the amount of
lumbar support, turn the knob counterclockwise.
Seatback Adjustment
Your vehicle has a seatback adjustment control located
on the outboard side of the seat.
Recline the seatback by turning the control
counterclockwise.
Return the seatback to an upright position by turning the
control clockwise.
Lumbar
Adjustment Knob
1-8
{CAUTION:
Sitting in a reclined position when your vehicle
is in motion can be dangerous. Even if you
buckle up, your safety belts cannot do their
job when you are reclined like this.
The shoulder belt cannot do its job. In a crash,
you could go into it, receiving neck or other
injuries.
The lap belt cannot do its job either. In a crash
the belt could go up over your abdomen. The
belt forces would be there, not at your pelvic
bones. This could cause serious internal
injuries.
For proper protection when the vehicle is in
motion, have the seatback upright. Then sit
well back in the seat and wear your safety belt
properly.
Chugger-Snubber Lock-Out Feature
If your vehicle has this
feature, the handle is
located on the outboard
side of the driver’s
and passenger’s seats.
Move the handle down to reduce any backslap
experienced while in tractor/trailer operation or while
operating a dump truck application.
1-9
Rear Seats
Rear Seat Operation
Folding the Rear Seat (Crew Cab)
{CAUTION:
A safety belt that is improperly routed, not
properly attached, or twisted will not provide
the protection needed in a crash. The person
wearing the belt could be seriously injured.
After raising the rear seatback, always check
to be sure that the safety belts are properly
routed and attached, and are not twisted.
Notice: Folding a rear seat with the safety belts
still fastened may cause damage to the seat or the
safety belts. Always unbuckle the safety belts
and return them to their normal stowed position
before folding a rear seat.
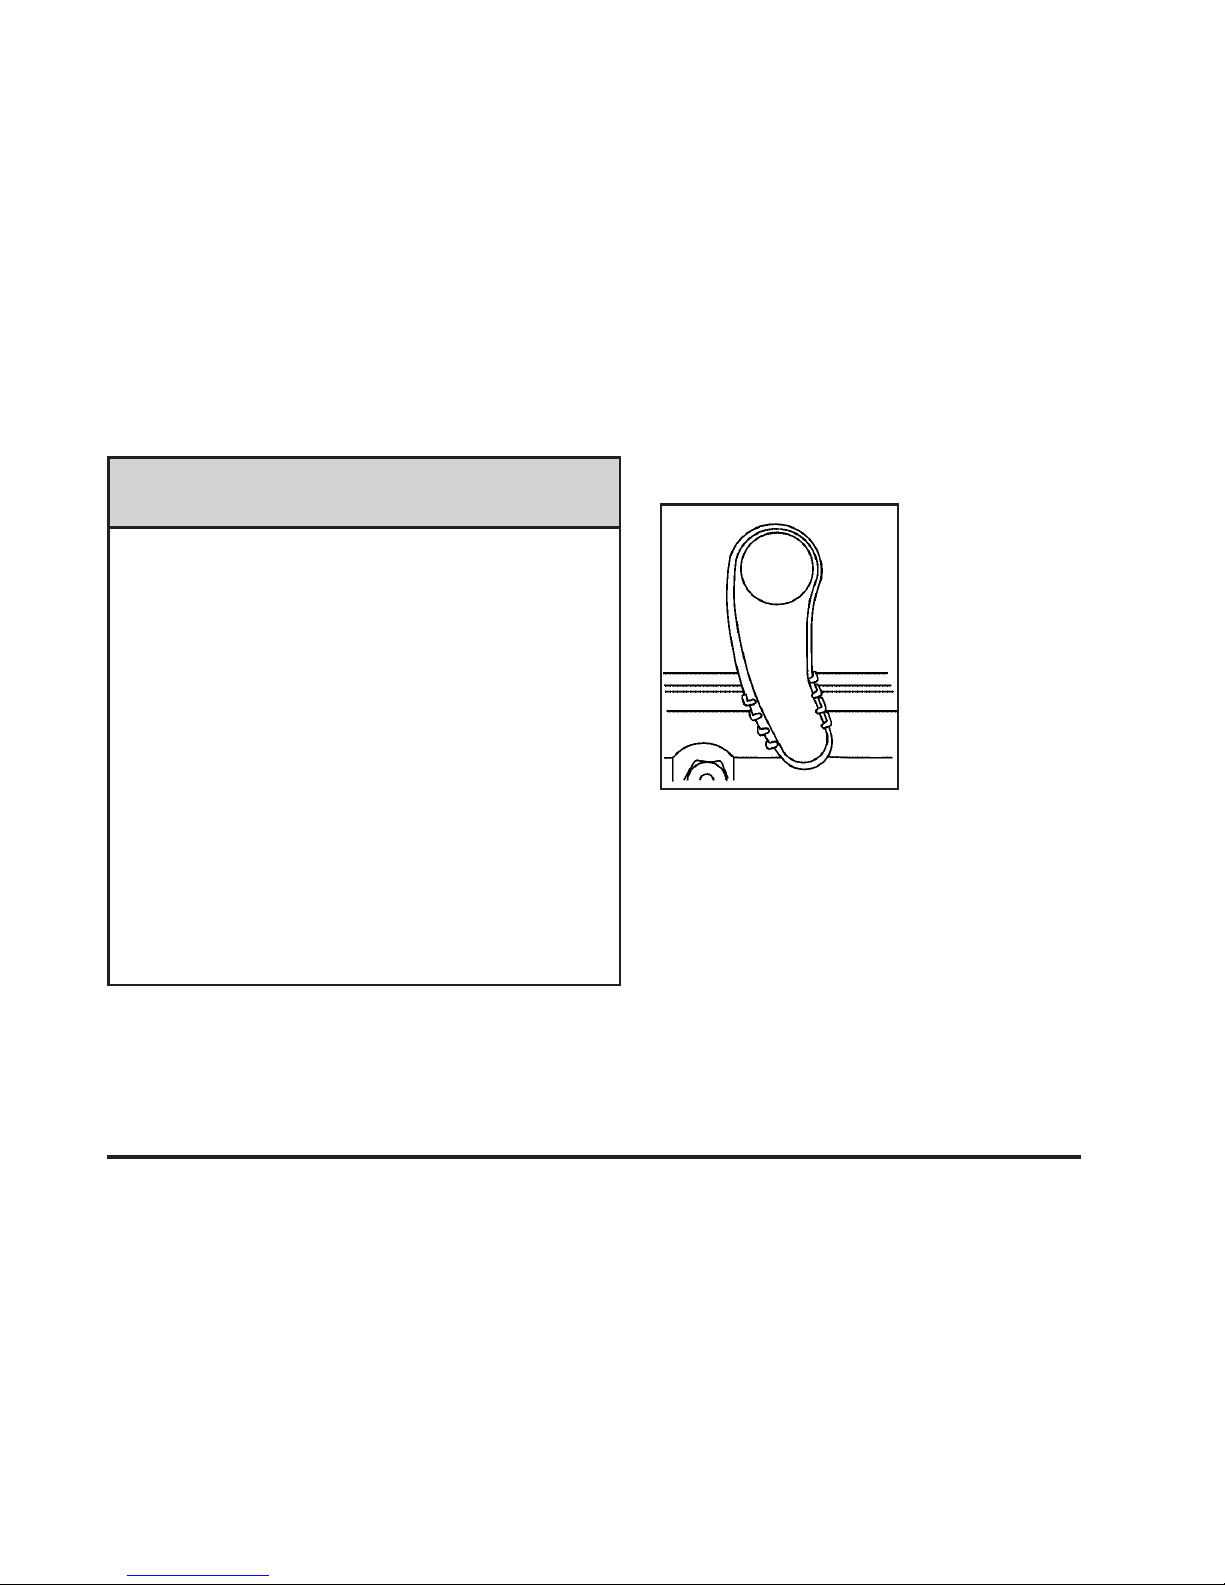
The rear bench seat on the crew cab can be folded
down to provide more cargo space.
To fold down the seatback,
pull this nylon strap
located on the rear of the
seat, while pulling the
seatback down.
To raise a seatback, pull the nylon strap while raising
the seatback until it locks upright.
{CAUTION:
If the seatback is not locked, it could move
forward in a sudden stop or crash. That could
cause injury to the person sitting there. Always
push and pull on the seatback to be sure it is
locked.
After raising a seatback to an upright position, push and
pull on the seatback to check that it is locked in place.
1-10
Safety Belts
Safety Belts: They Are for Everyone
This part of the manual tells you how to use safety
belts properly. It also tells you some things you should
not do with safety belts.
{CAUTION:
Do not let anyone ride where he or she cannot
wear a safety belt properly. If you are in a
crash and you are not wearing a safety belt,
your injuries can be much worse. You can hit
things inside the vehicle harder or be ejected
from it and be seriously injured or killed. In the
same crash, you might not be, if you are
buckled up. Always fasten your safety belt,
and check that your passenger(s) are
restrained properly too.
{CAUTION:
It is extremely dangerous to ride in a cargo area,
inside or outside of a vehicle. In a collision,
people riding in these areas are more likely to
be seriously injured or killed. Do not allow
people to ride in any area of your vehicle that is
not equipped with seats and safety belts. Be
sure everyone in your vehicle is in a seat and
using a safety belt properly.
Your vehicle has indicators as a reminder to buckle your
safety belts. See Safety Belt Reminders on page 3-27.
In most states and in all Canadian provinces, the law
requires wearing safety belts. Here is why:
You never know if you will be in a crash. If you do have a
crash, you do not know if it will be a serious one.
A few crashes are mild, and some crashes can be so
serious that even buckled up, a person would not survive.
But most crashes are in between. In many of them,
people who buckle up can survive and sometimes walk
away. Without belts they could have been badly hurt or
killed.
After more than 40 years of safety belts in vehicles, the
facts are clear. In most crashes buckling up does
matter... a lot!
1-11
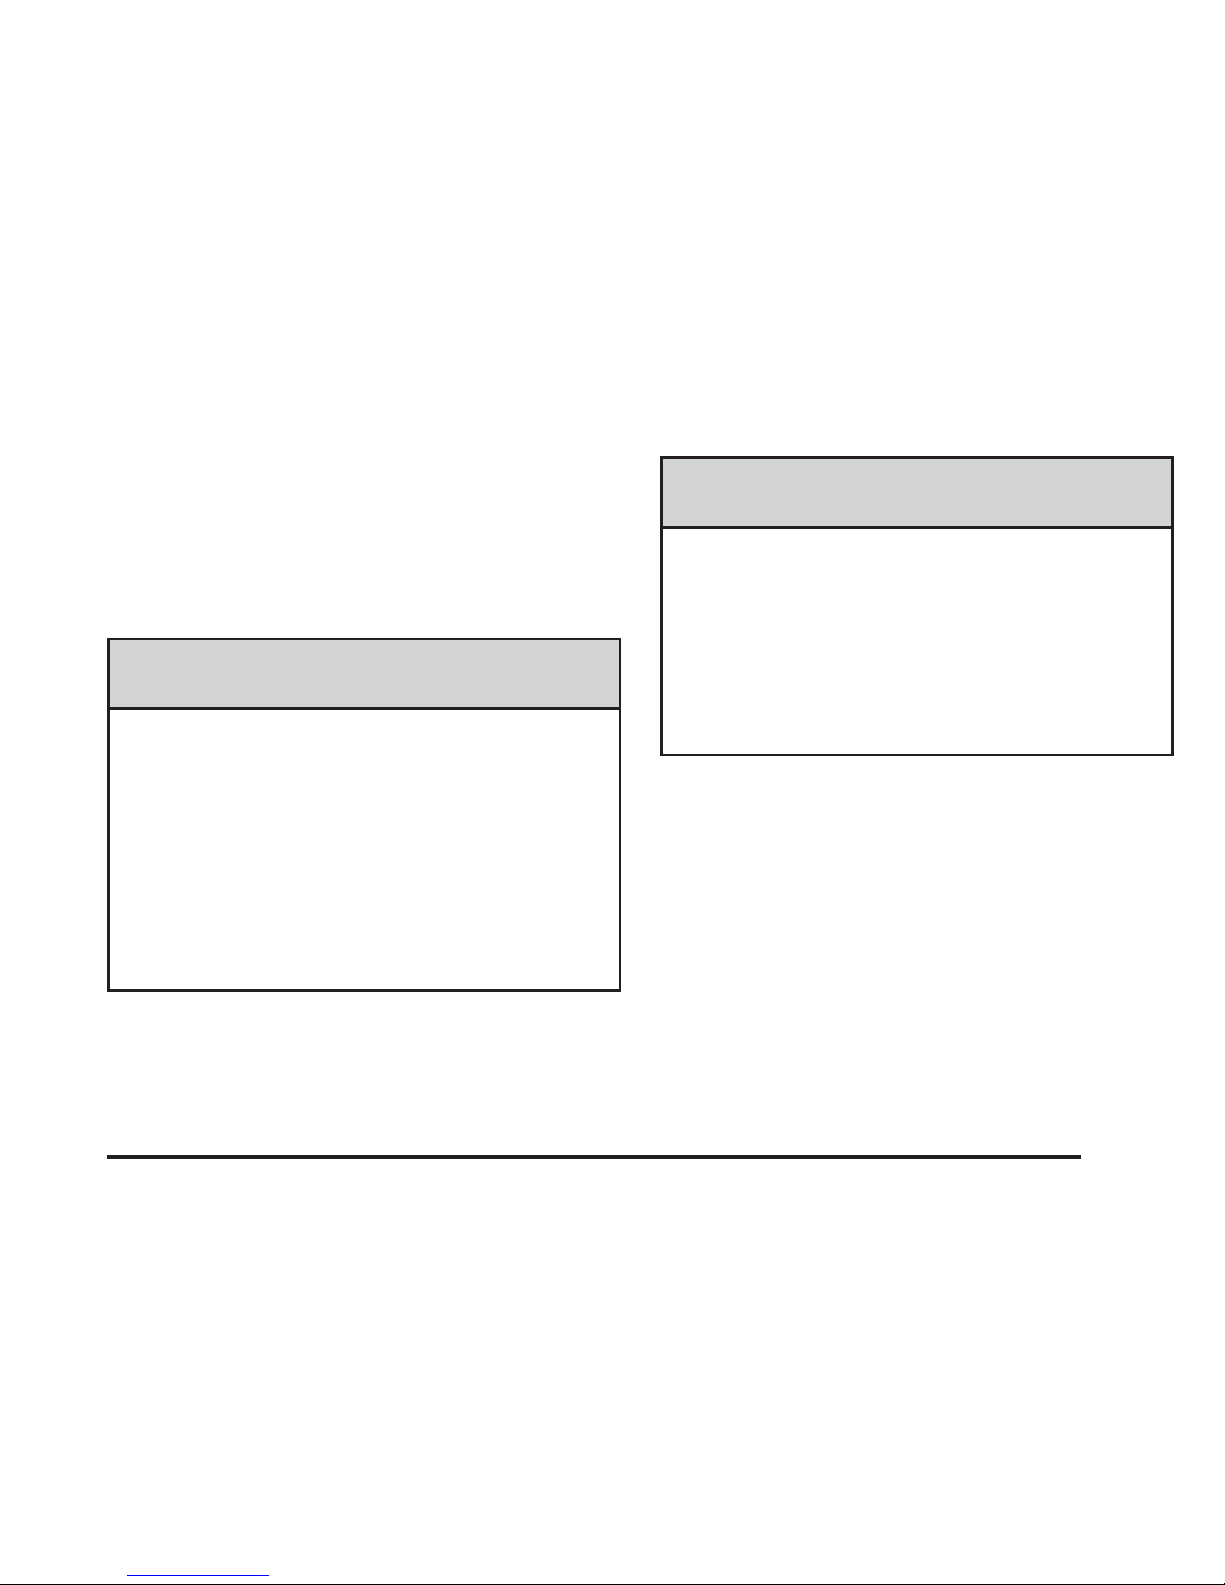
Why Safety Belts Work
When you ride in or on anything, you go as fast as
it goes.
Take the simplest vehicle. Suppose it is just a seat on
wheels.
Put someone on it.
1-12
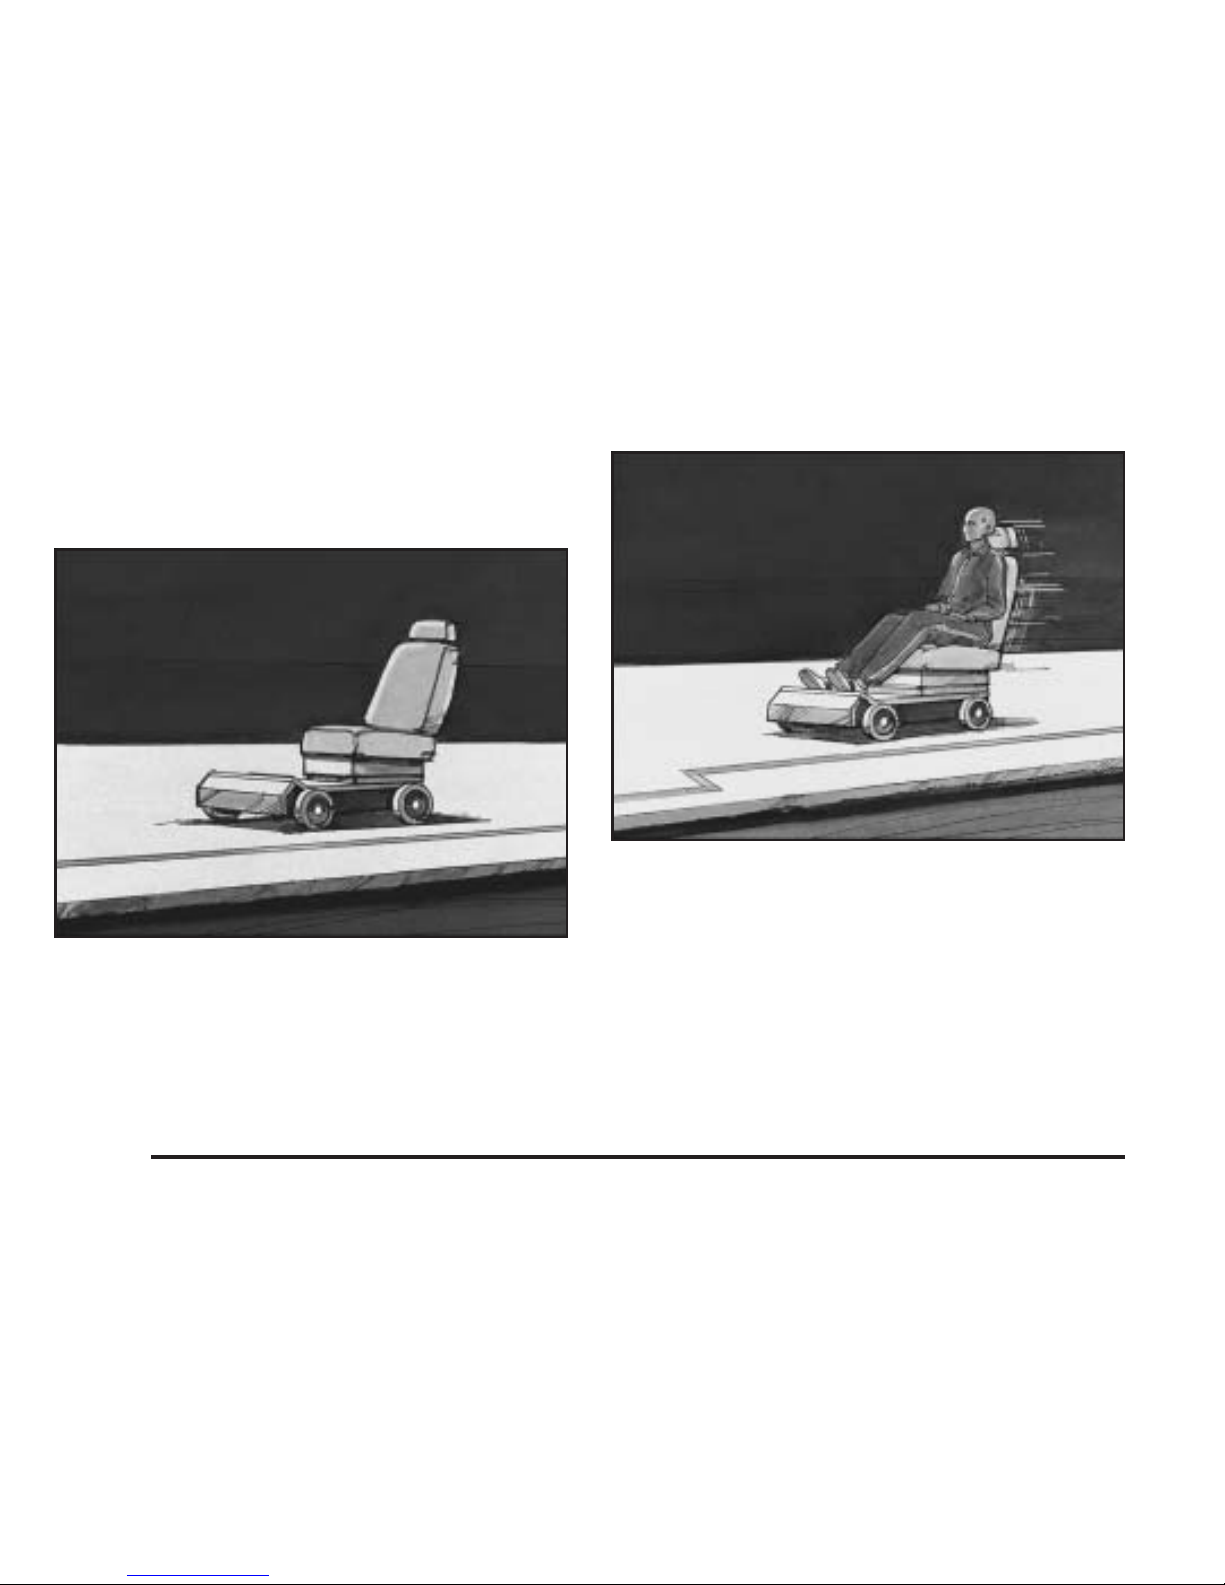
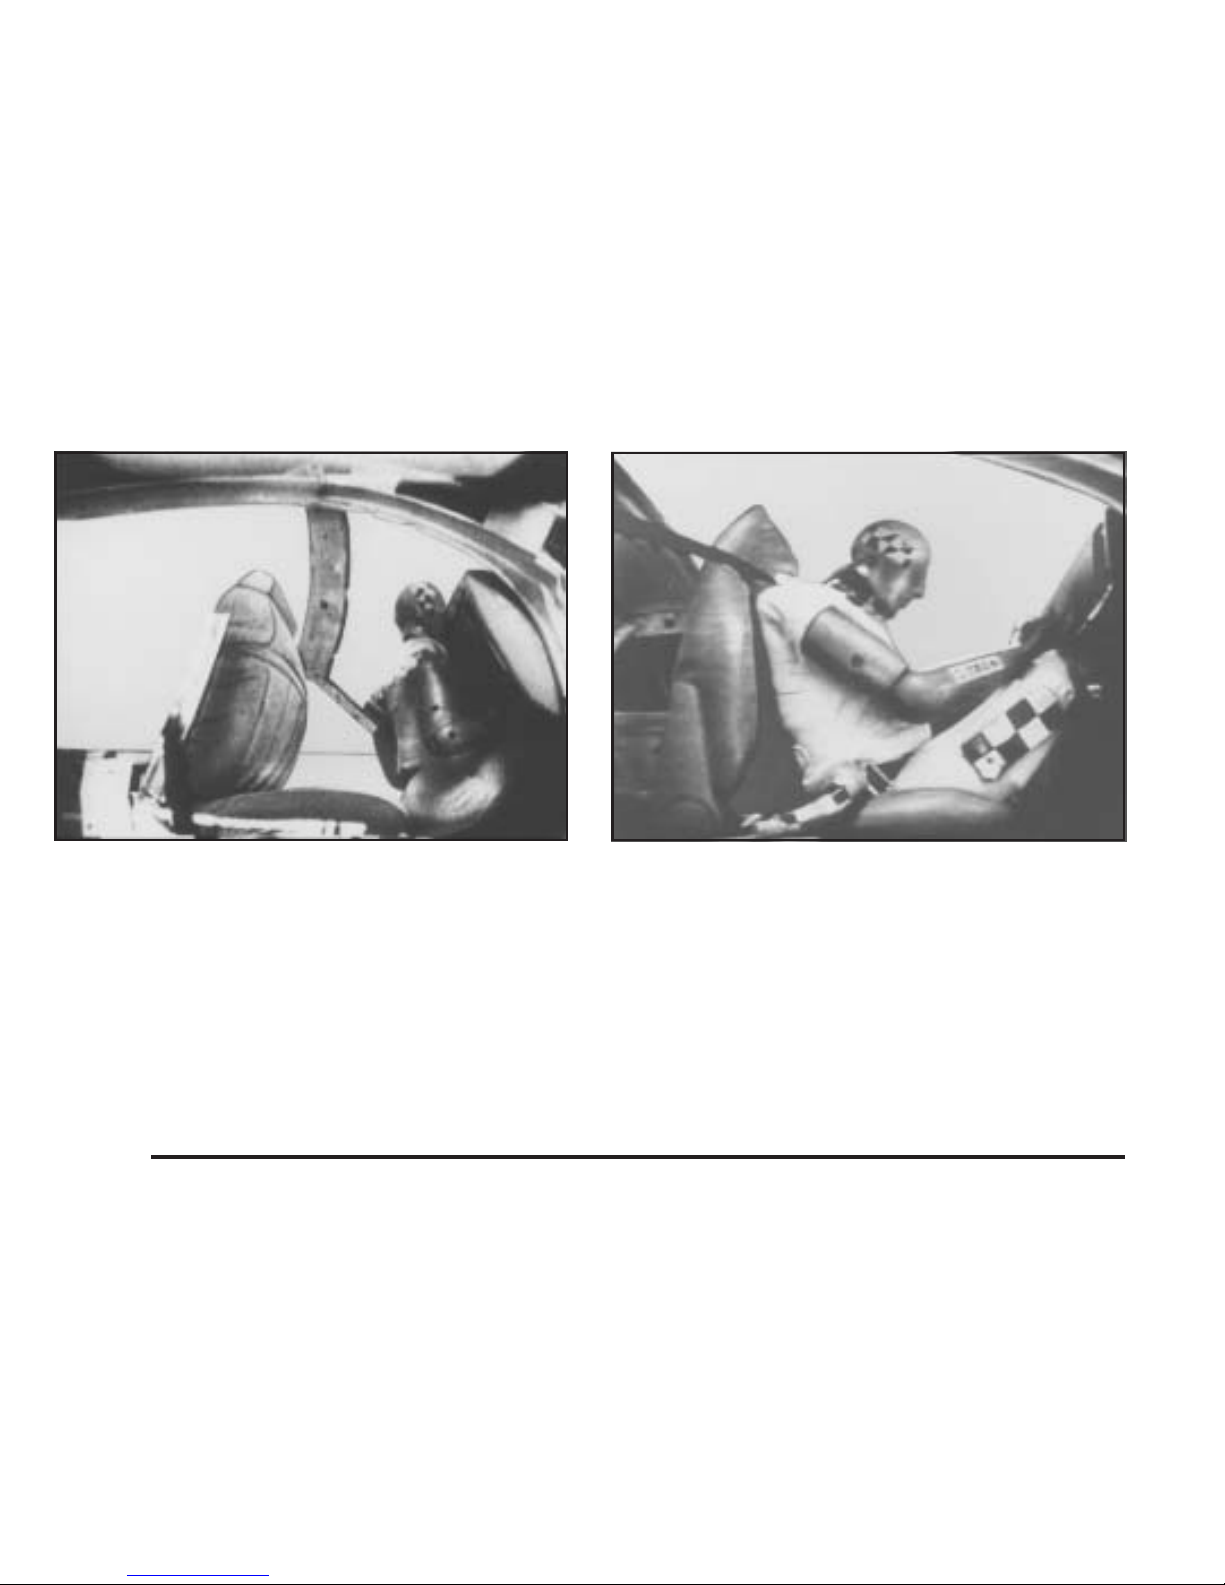
Get it up to speed. Then stop the vehicle. The rider
does not stop.
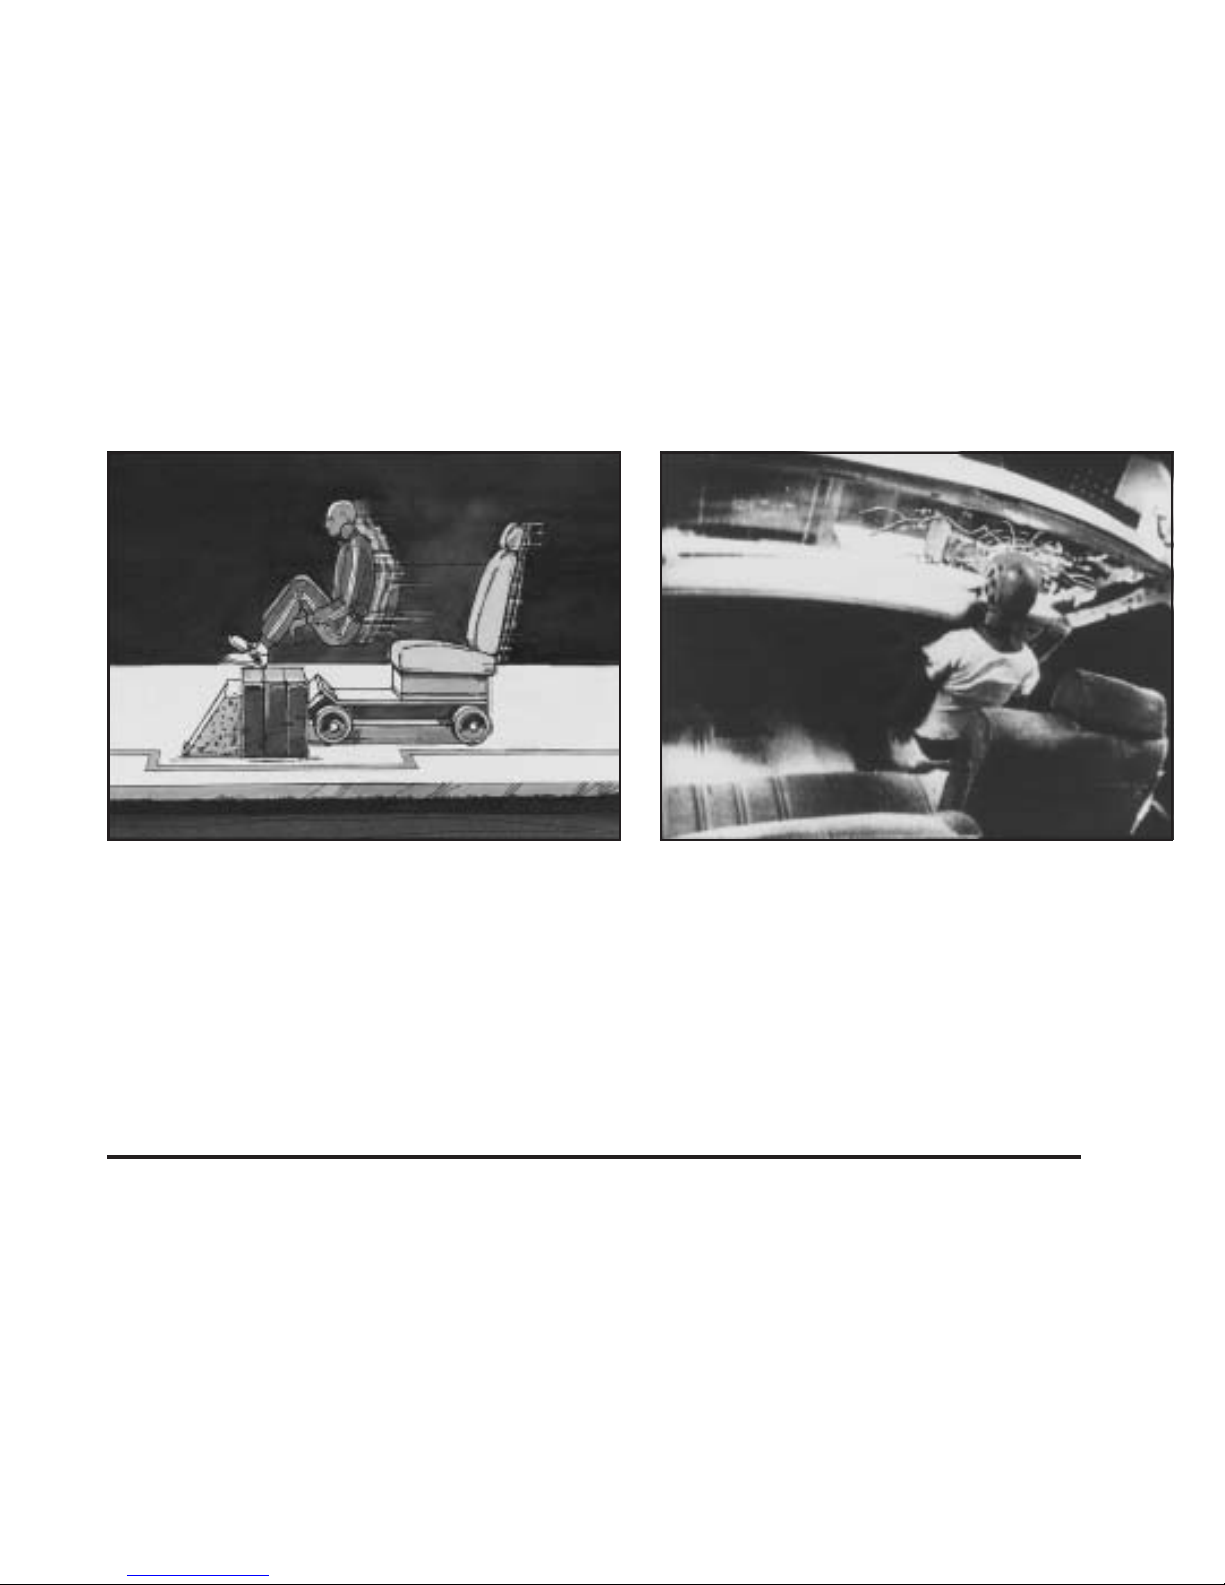
The person keeps going until stopped by something. In
a real vehicle, it could be the windshield...
1-13
or the instrument panel... or the safety belts!
With safety belts, you slow down as the vehicle does.
You get more time to stop. You stop over more distance,
and your strongest bones take the forces. That is why
safety belts make such good sense.
1-14

Questions and Answers About Safety
Belts
Q: Will I be trapped in the vehicle after a crash if I
am wearing a safety belt?
A: You could be — whether you are wearing a safety
belt or not. But your chance of being conscious
during and after an accident, so you can unbuckle
and get out, is much greater if you are belted.
And you can unbuckle a safety belt, even if you are
upside down.
Q: If my vehicle has airbags, why should I have to
wear safety belts?
A: Airbags are supplemental systems only; so they
work with safety belts — not instead of them.
Whether or not an airbag is provided, all occupants
still have to buckle up to get the most protection.
That is true not only in frontal collisions, but
especially in side and other collisions.
Q: If I am a good driver, and I never drive far from
home, why should I wear safety belts?
A: You may be an excellent driver, but if you are in a
crash — even one that is not your fault — you and
your passenger(s) can be hurt. Being a good
driver does not protect you from things beyond your
control, such as bad drivers.
Most accidents occur within 25 miles (40 km) of
home. And the greatest number of serious injuries
and deaths occur at speeds of less than 40 mph
(65 km/h).
Safety belts are for everyone.
1-15
How to Wear Safety Belts Properly
This section is only for people of adult size.
Be aware that there are special things to know about
safety belts and children. And there are different
rules for smaller children and babies. If a child will be
riding in your vehicle, see Older Children on page 1-28
or Infants and Young Children on page 1-31. Follow
those rules for everyone’s protection.
It is very important for all occupants to buckle up.
Statistics show that unbelted people are hurt more often
in crashes than those who are wearing safety belts.
Occupants who are not buckled up can be thrown out of
the vehicle in a crash. And they can strike others in
the vehicle who are wearing safety belts.
First, before you or your passenger(s) wear a safety
belt, there is important information you should know.
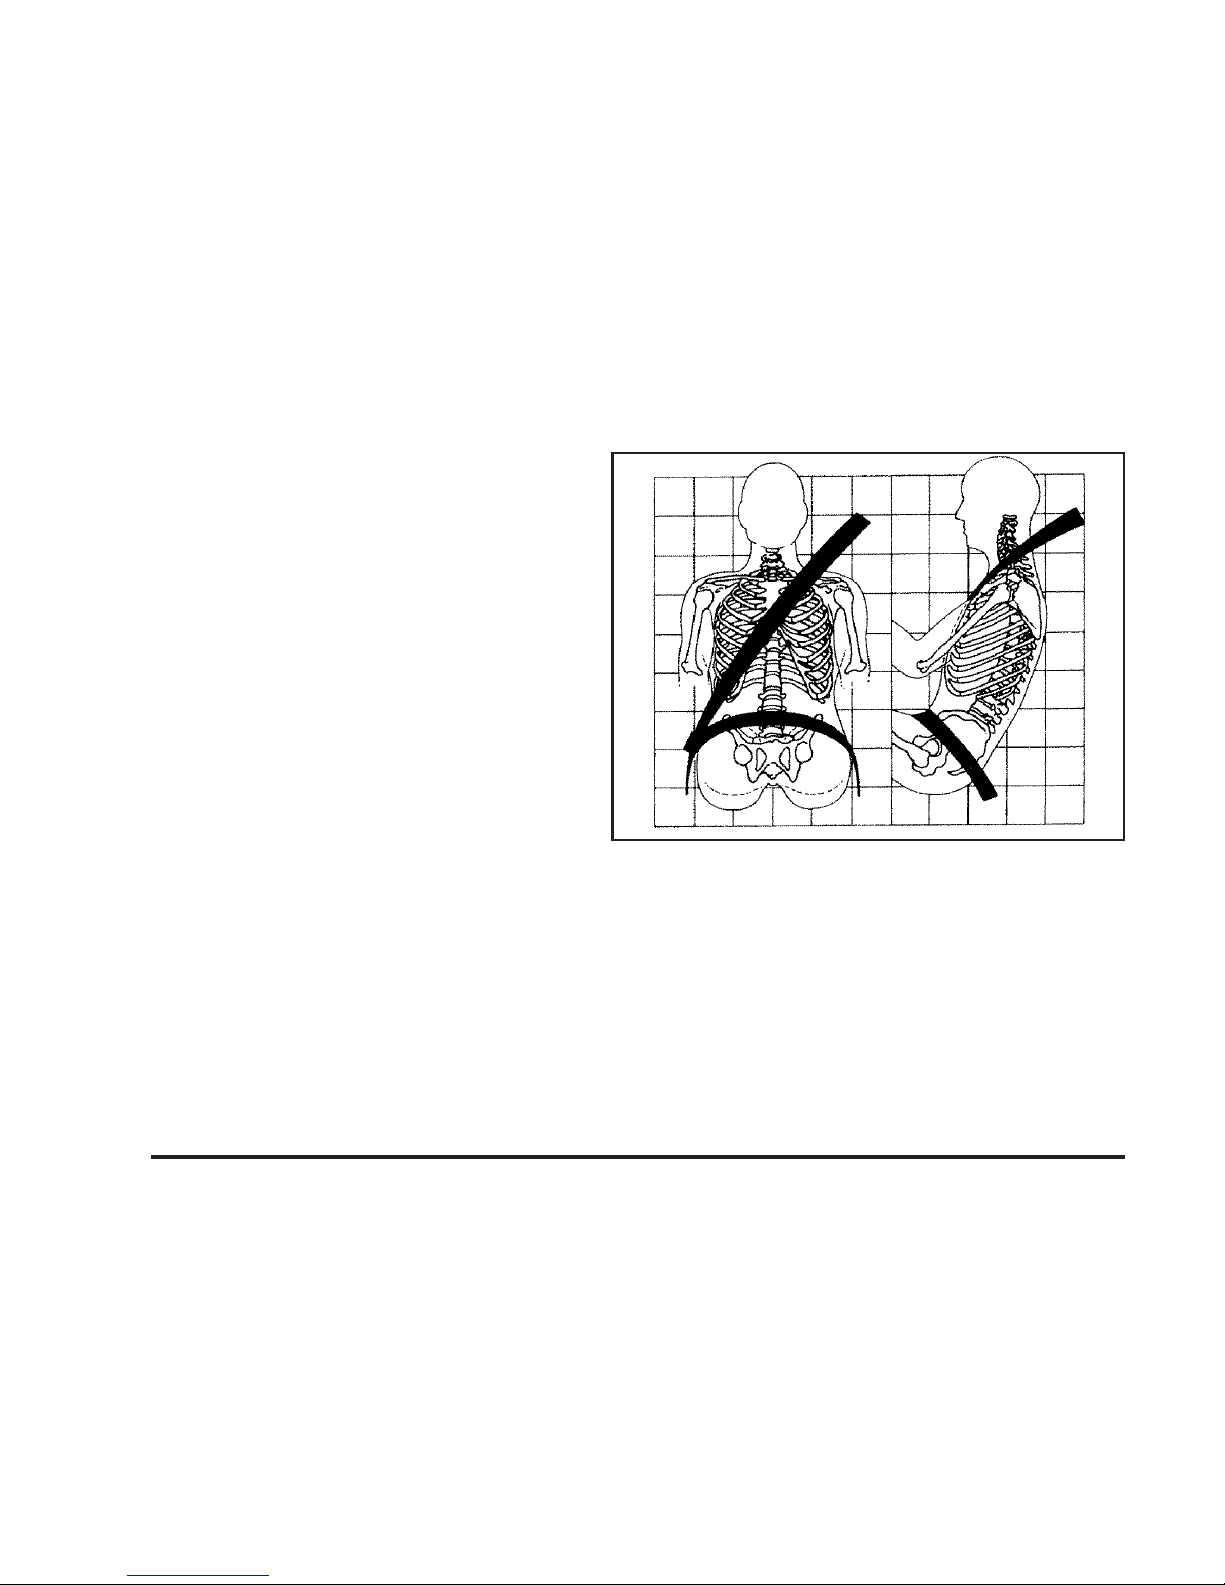
Sit up straight and always keep your feet on the floor in
front of you. The lap part of the belt should be worn low
and snug on the hips, just touching the thighs. In a crash,
this applies force to the strong pelvic bones and you
would be less likely to slide under the lap belt. If you slid
under it, the belt would apply force on your abdomen.
This could cause serious or even fatal injuries. The
shoulder belt should go over the shoulder and across the
chest. These parts of the body are best able to take belt
restraining forces.
The shoulder belt locks if there is a sudden stop or crash.
1-16

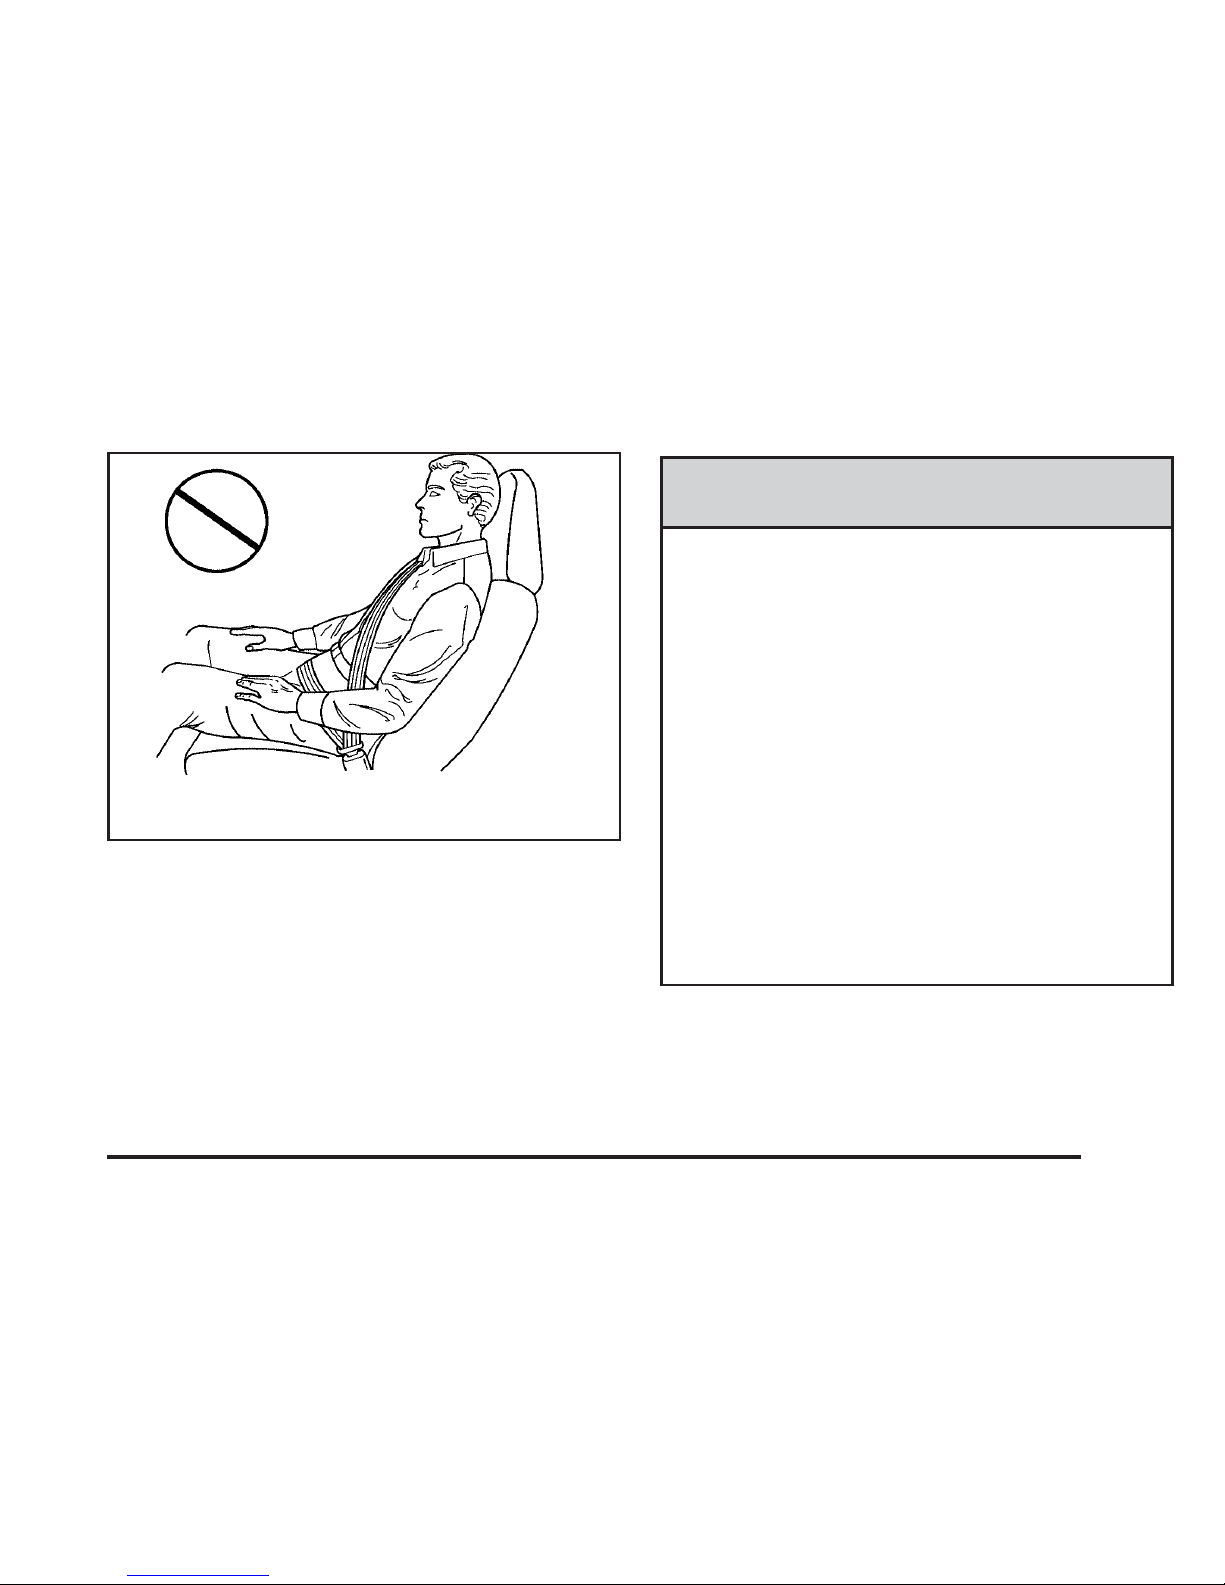
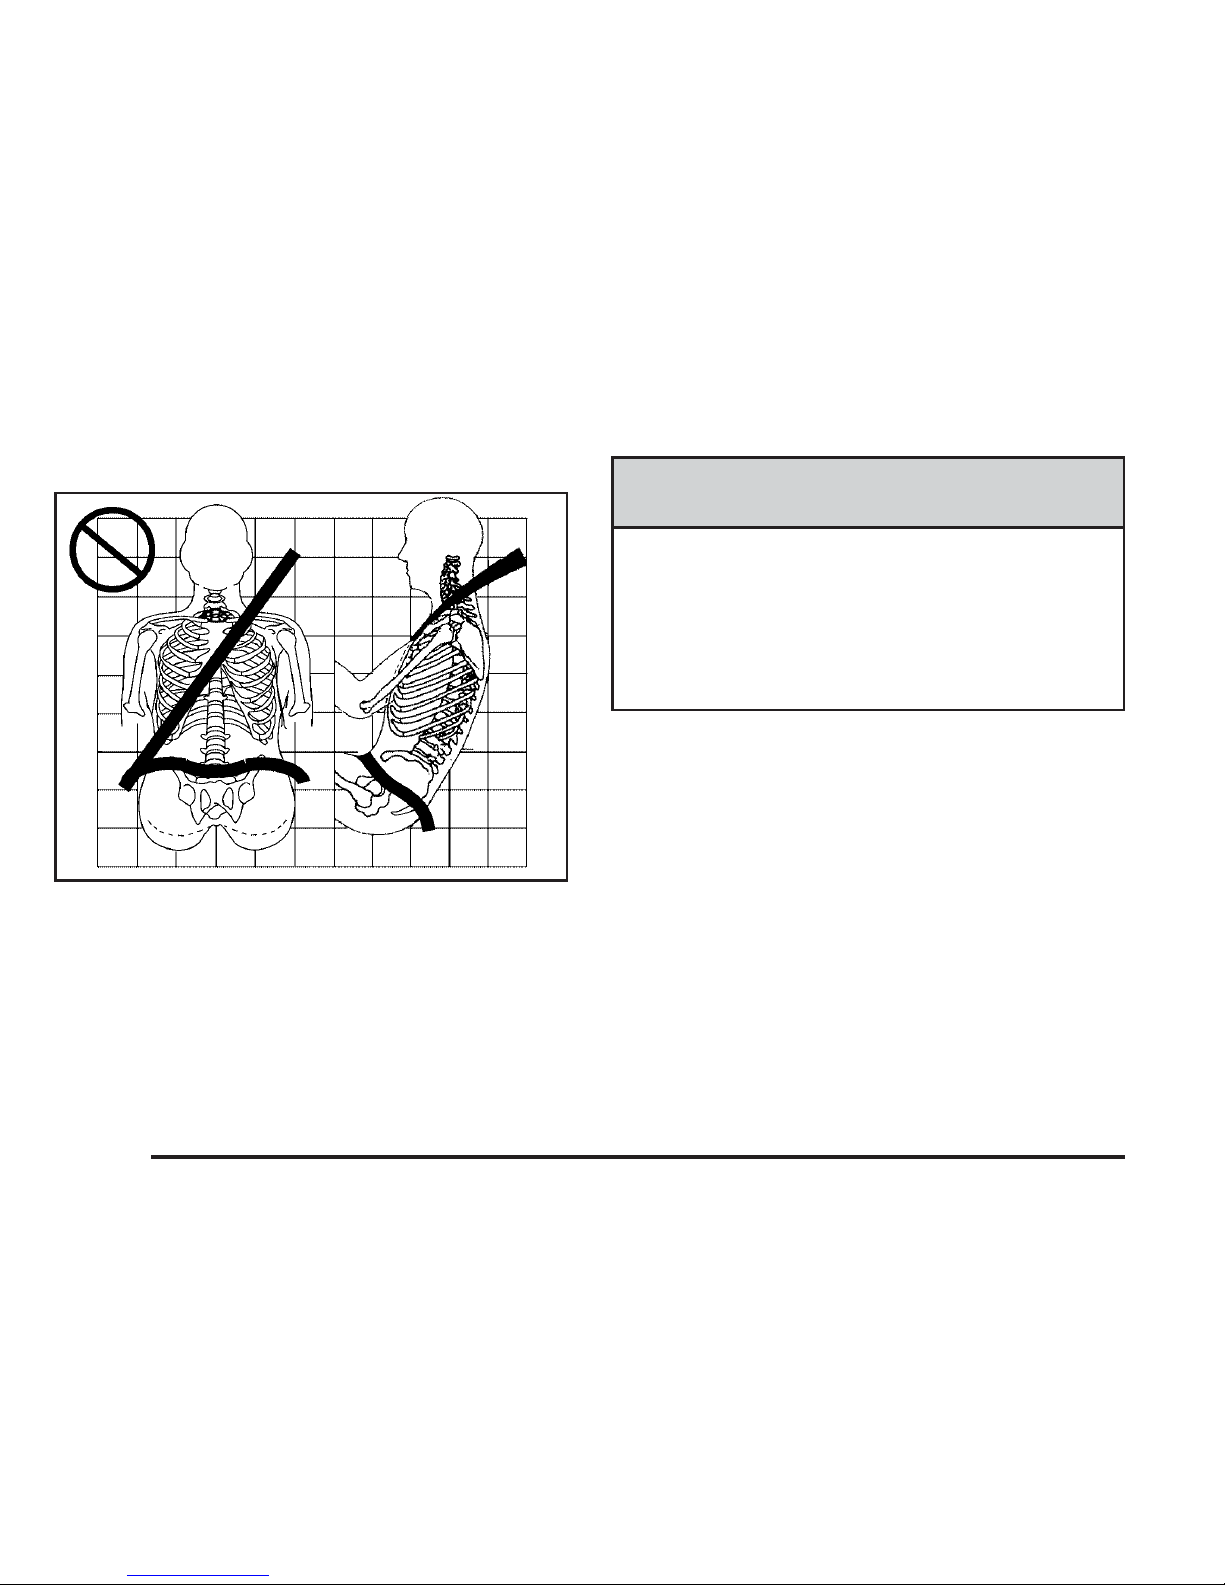
Q: What is wrong with this?
A: The shoulder belt is too loose. It will not give as
much protection this way.
{CAUTION:
You can be seriously hurt if your shoulder belt
is too loose. In a crash, you would move
forward too much, which could increase injury.
The shoulder belt should fit snugly against
your body.
1-17
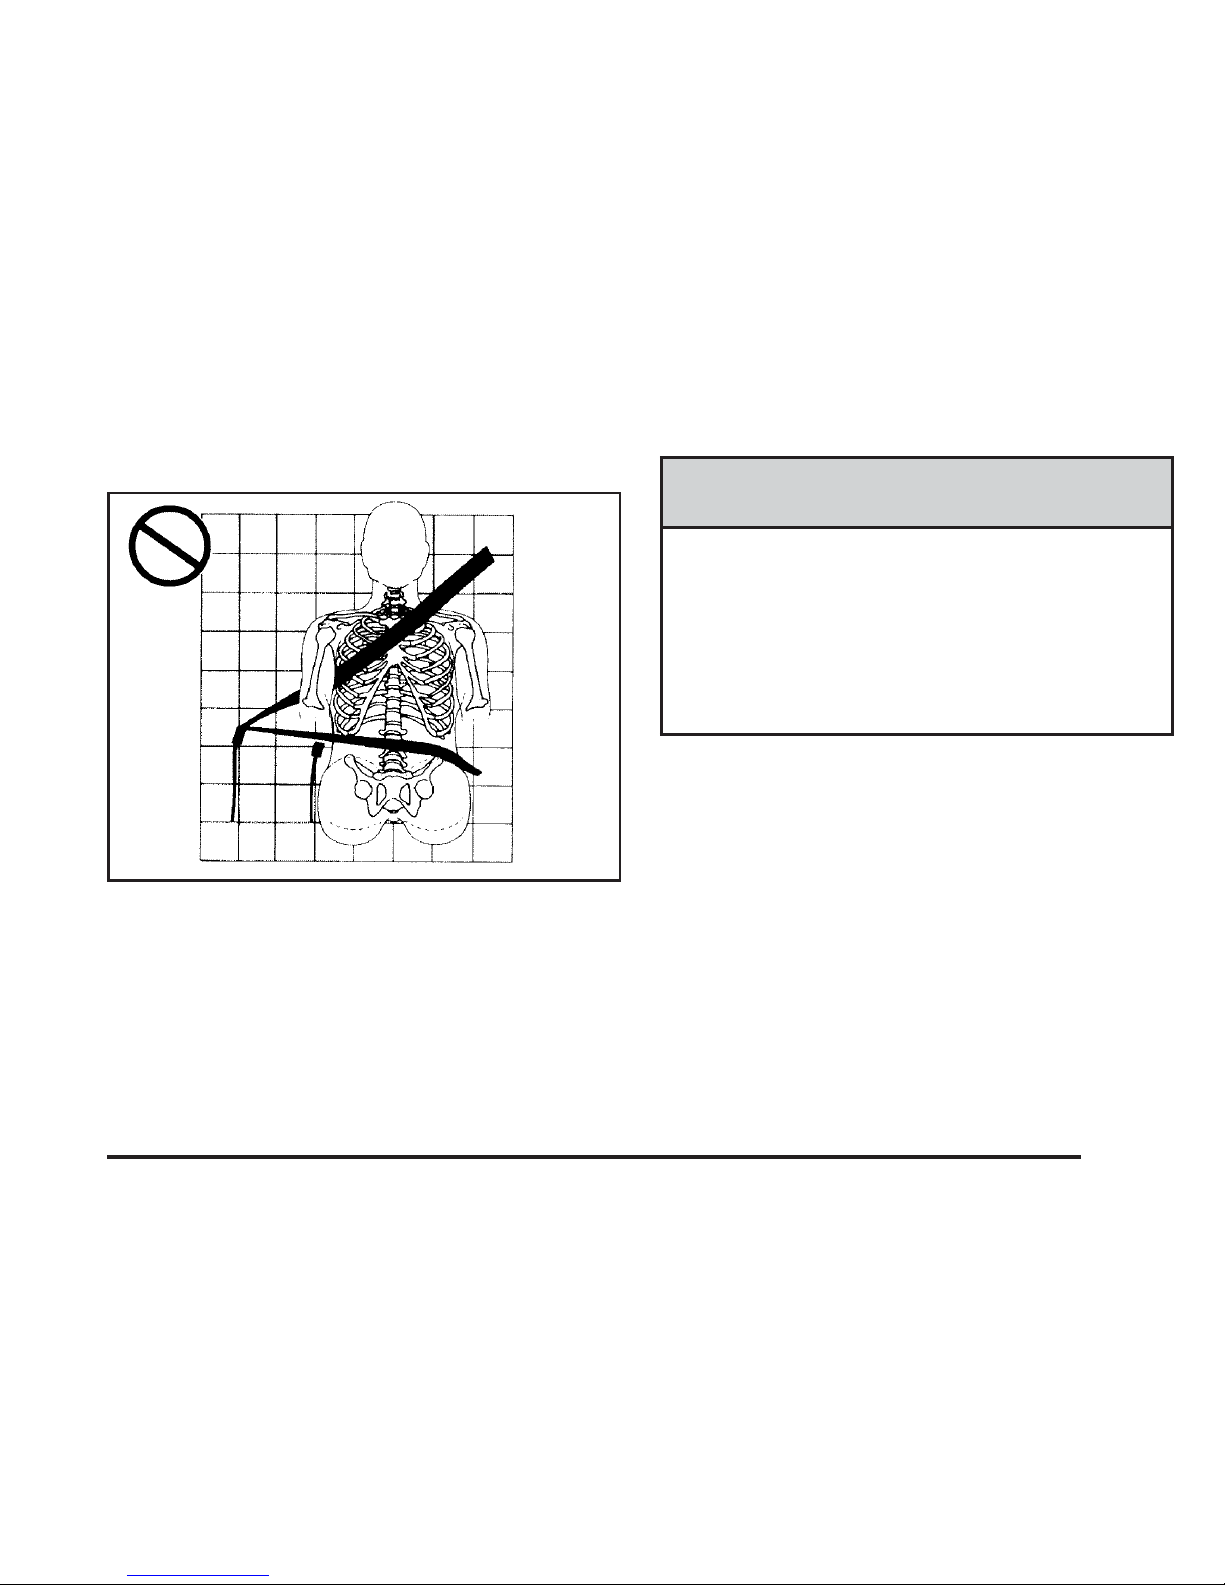
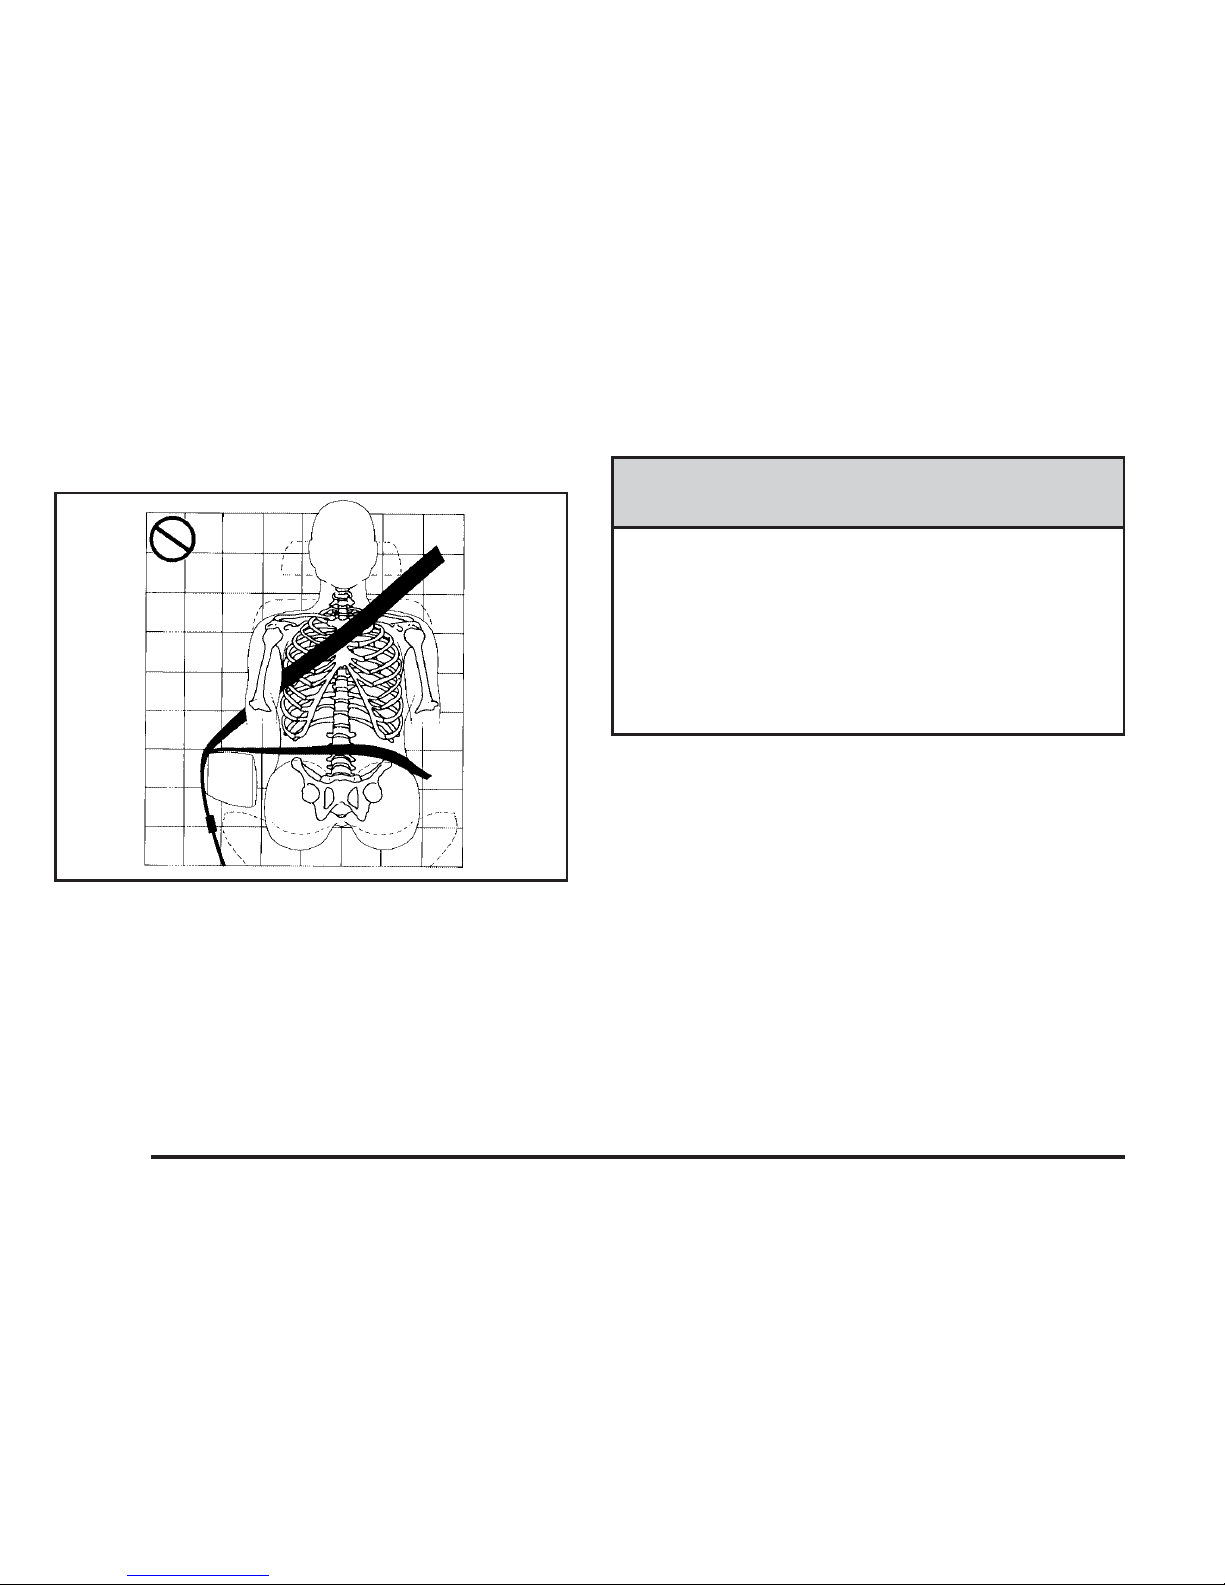
Q: What is wrong with this?
A: The lap belt is too loose. It will not give nearly as
much protection this way.
{CAUTION:
You can be seriously hurt if your lap belt is too
loose. In a crash, you could slide under the lap
belt and apply force on your abdomen. This
could cause serious or even fatal injuries. The
lap belt should be worn low and snug on the
hips, just touching the thighs.
1-18
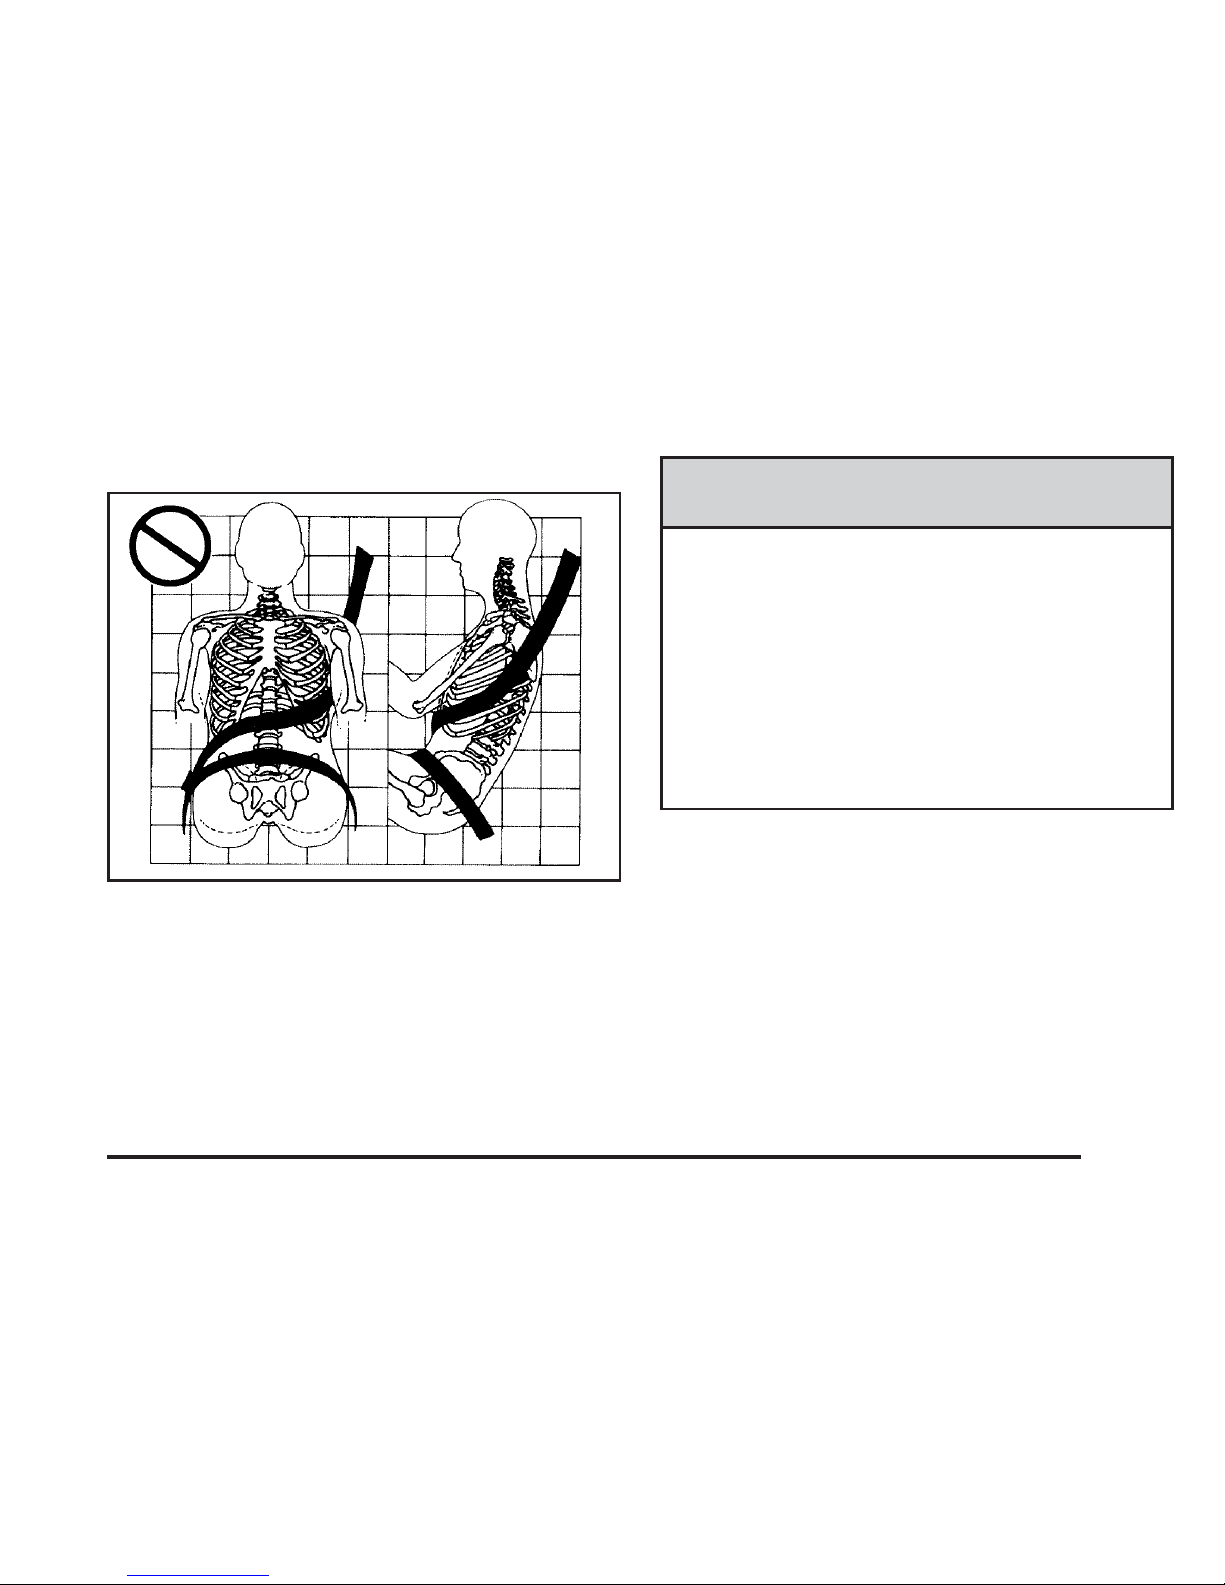
Q: What is wrong with this?
A: The belt is buckled in the wrong place.
{CAUTION:
You can be seriously injured if your belt is
buckled in the wrong place like this. In a crash,
the belt would go up over your abdomen. The
belt forces would be there, not on the pelvic
bones. This could cause serious internal
injuries. Always buckle your belt into the
buckle nearest you.
1-19
Q: What is wrong with this?
A: The belt is over an armrest.
{CAUTION:
You can be seriously injured if your belt goes
over an armrest like this. The belt would be
much too high. In a crash, you can slide under
the belt. The belt force would then be applied
on the abdomen, not on the pelvic bones, and
that could cause serious or fatal injuries. Be
sure the belt goes under the armrests.
1-20
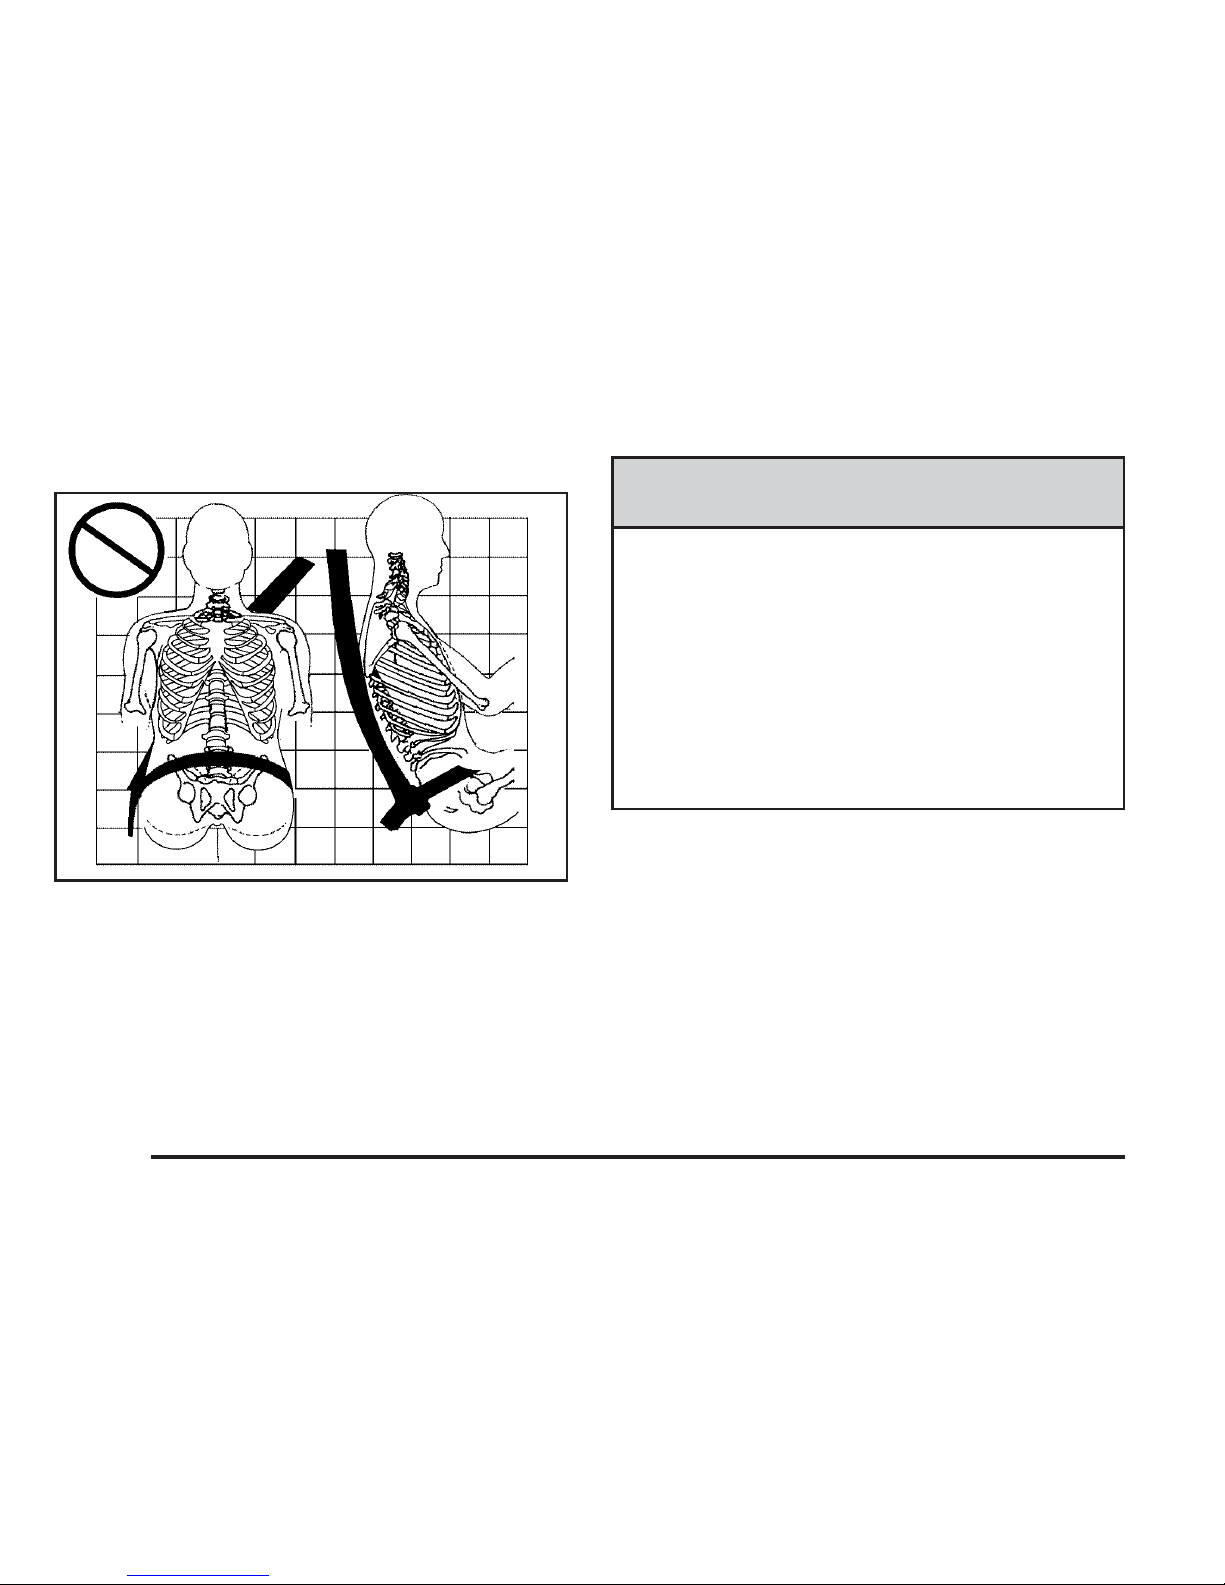
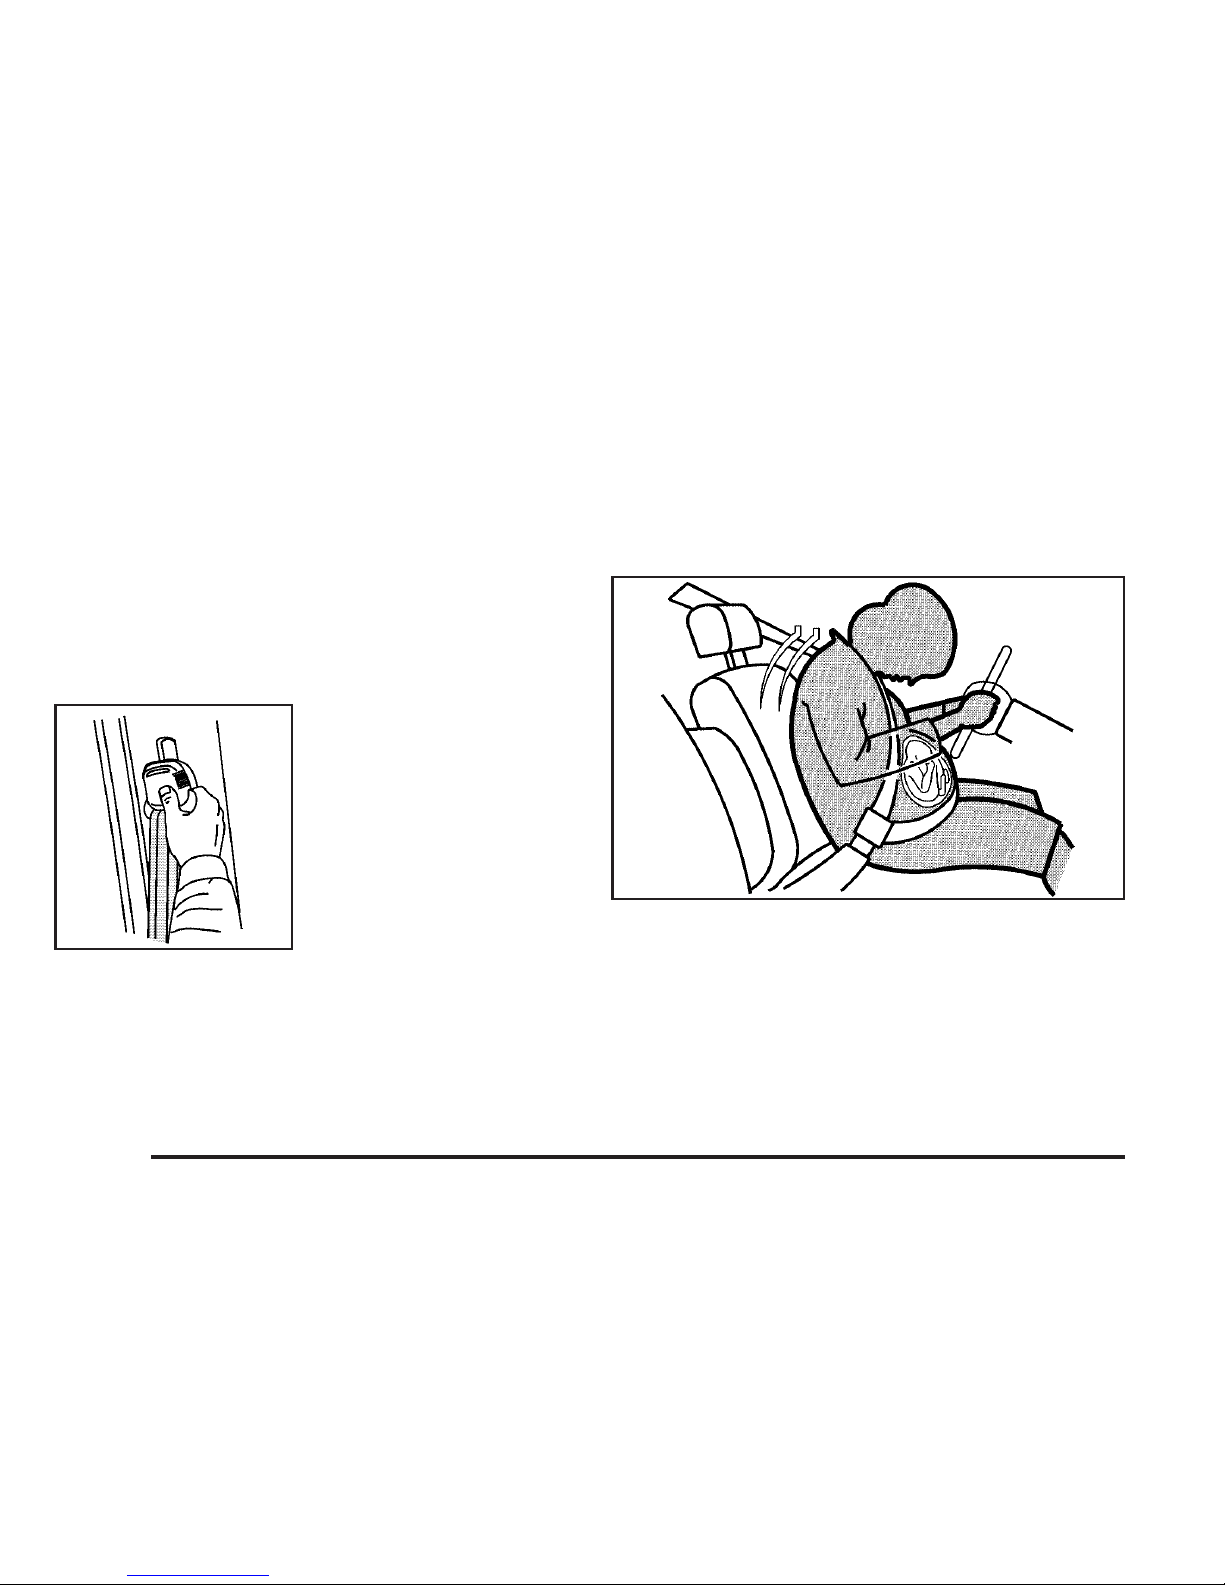
Q: What is wrong with this?
A: The shoulder belt is worn under the arm. It should
be worn over the shoulder at all times.
{CAUTION:
You can be seriously injured if you wear the
shoulder belt under your arm. In a crash, your
body would move too far forward, which would
increase the chance of head and neck injury.
Also, the belt would apply too much force to
the ribs, which are not as strong as shoulder
bones. You could also severely injure internal
organs like your liver or spleen. The shoulder
belt should go over the shoulder and across
the chest.
1-21
Q: What is wrong with this?
A: The belt is behind the body.
{CAUTION:
You can be seriously injured by not wearing
the lap-shoulder belt properly. In a crash, you
would not be restrained by the shoulder belt.
Your body could move too far forward
increasing the chance of head and neck injury.
You might also slide under the lap belt. The
belt force would then be applied right on the
abdomen. That could cause serious or fatal
injuries. The shoulder belt should go over the
shoulder and across the chest.
1-22
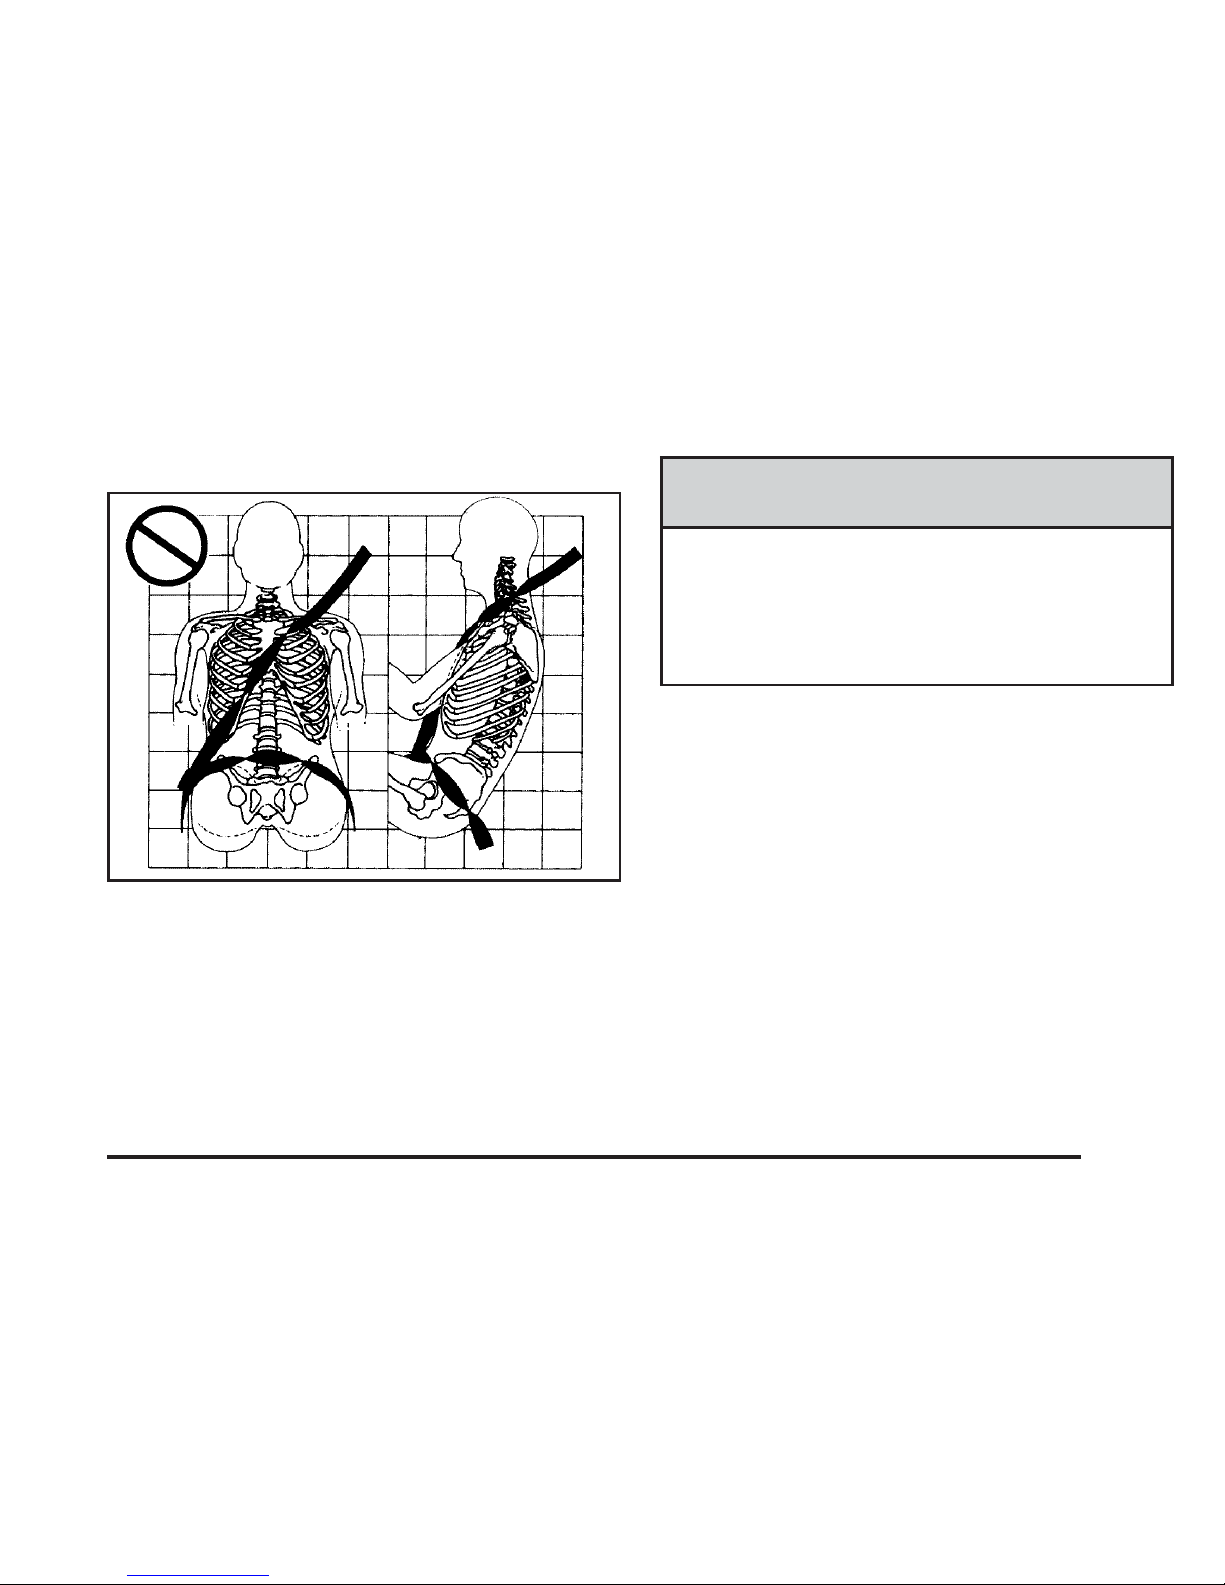
Q: What is wrong with this?
A: The belt is twisted across the body.
{CAUTION:
You can be seriously injured by a twisted belt.
In a crash, you would not have the full width of
the belt to spread impact forces. If a belt is
twisted, make it straight so it can work
properly, or ask your dealer/retailer to fix it.
1-23

Lap-Shoulder Belt
All seating positions in your vehicle have a lap-shoulder
belt except for the center front or rear passenger
positions, which may have a lap belt. See Lap Belt on
page 1-27 for more information.
Here is how to wear a lap-shoulder belt properly.
1. Adjust the seat, if the seat is adjustable, so you can
sit up straight. To see how, see “Seats” in the Index.
2. Pick up the latch plate and pull the belt across you.
Do not let it get twisted.
The lap-shoulder belt may lock if you pull the belt
across you very quickly. If this happens, let the belt
go back slightly to unlock it. Then pull the belt
across you more slowly.
If you ever pull the shoulder portion of a passenger
belt out all the way, you may engage the child
restraint locking feature. If this happens, just let the
belt go back all the way and start again.
3. Push the latch plate into the buckle until it clicks.
Pull up on the latch plate to make sure it is secure.
If the belt is not long enough, see Safety Belt
Extender on page 1-28.
Make sure the release button on the buckle is
positioned so you would be able to unbuckle the
safety belt quickly if necessary.
4. If equipped with a shoulder belt height adjuster,
move it to the height that is right for you. Improper
shoulder belt height adjustment could reduce
the effectiveness of the safety belt in a crash. See
“Shoulder Belt Height Adjustment” later in this
section.
1-24
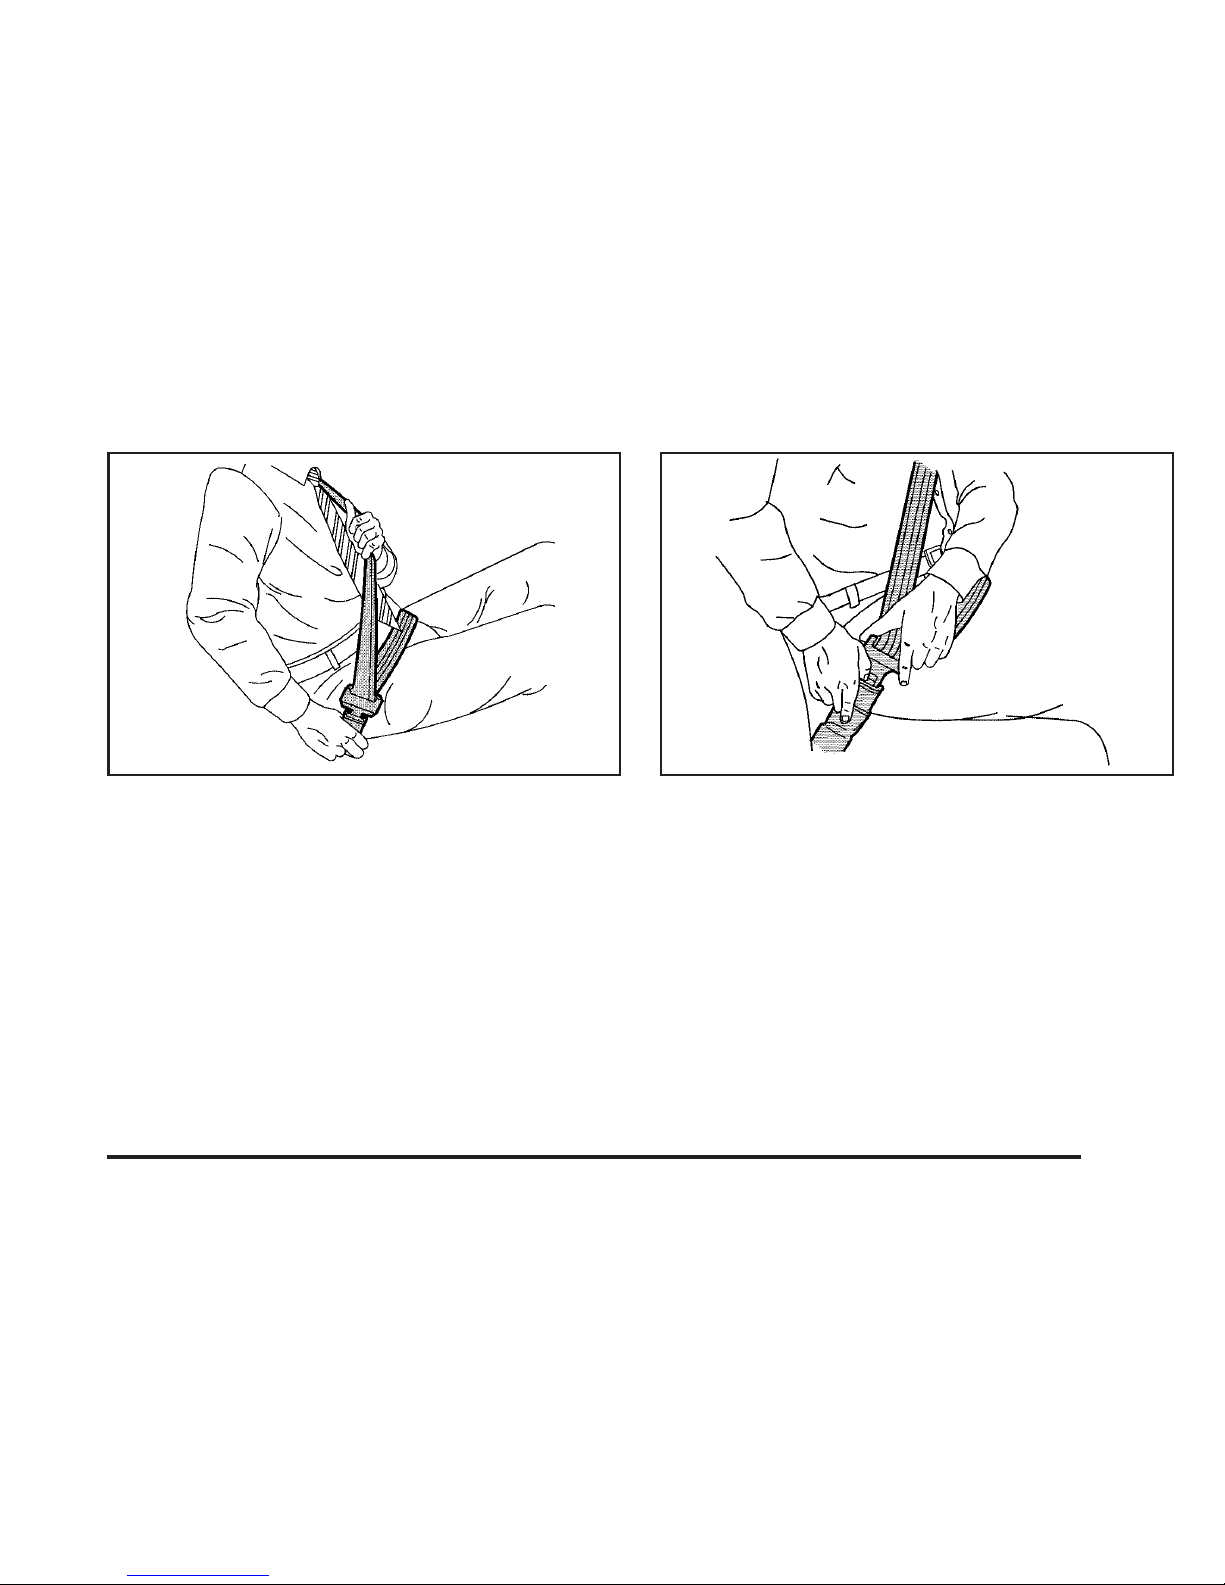
5. To make the lap part tight, pull up on the
shoulder belt.
It may be necessary to pull stitching on the safety
belt through the latch plate to fully tighten the
lap belt on smaller occupants.
To unlatch the belt, push the button on the buckle. The
belt should go back out of the way.
Before you close a door, be sure the belt is out of the
way. If you slam the door on it, you can damage
both the belt and your vehicle.
1-25
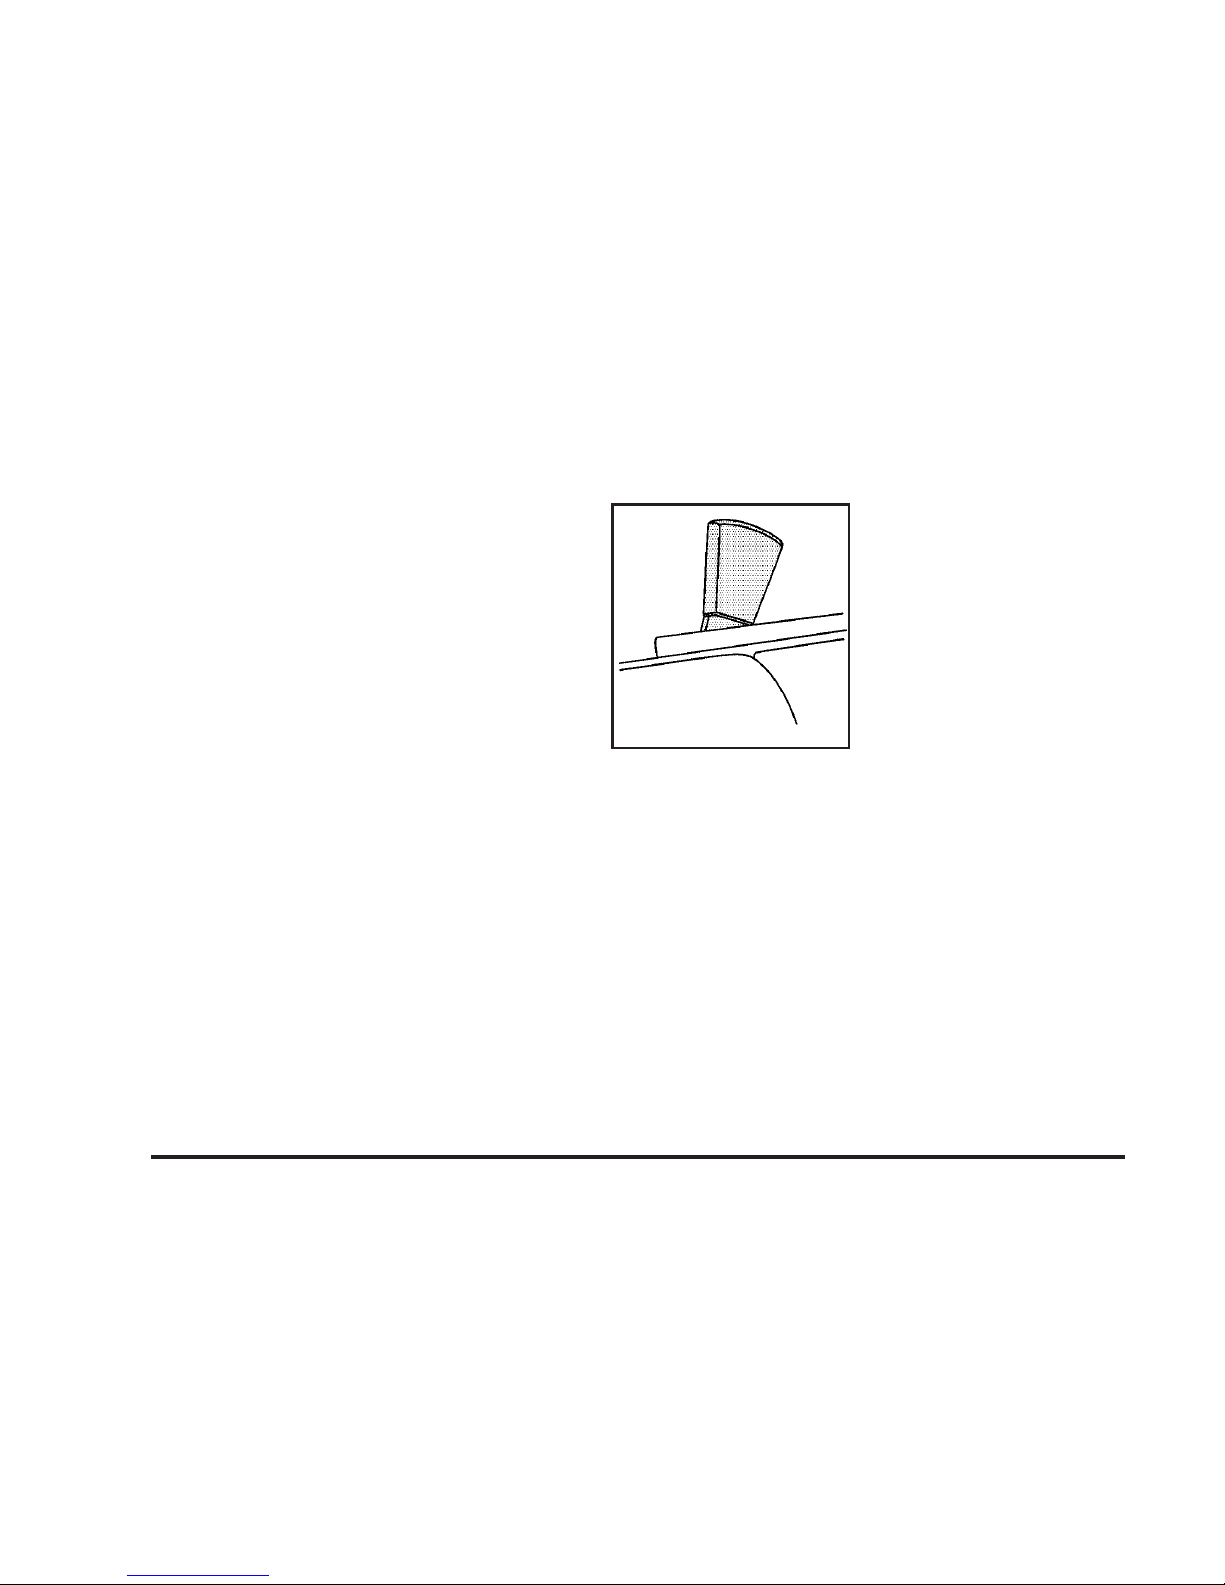
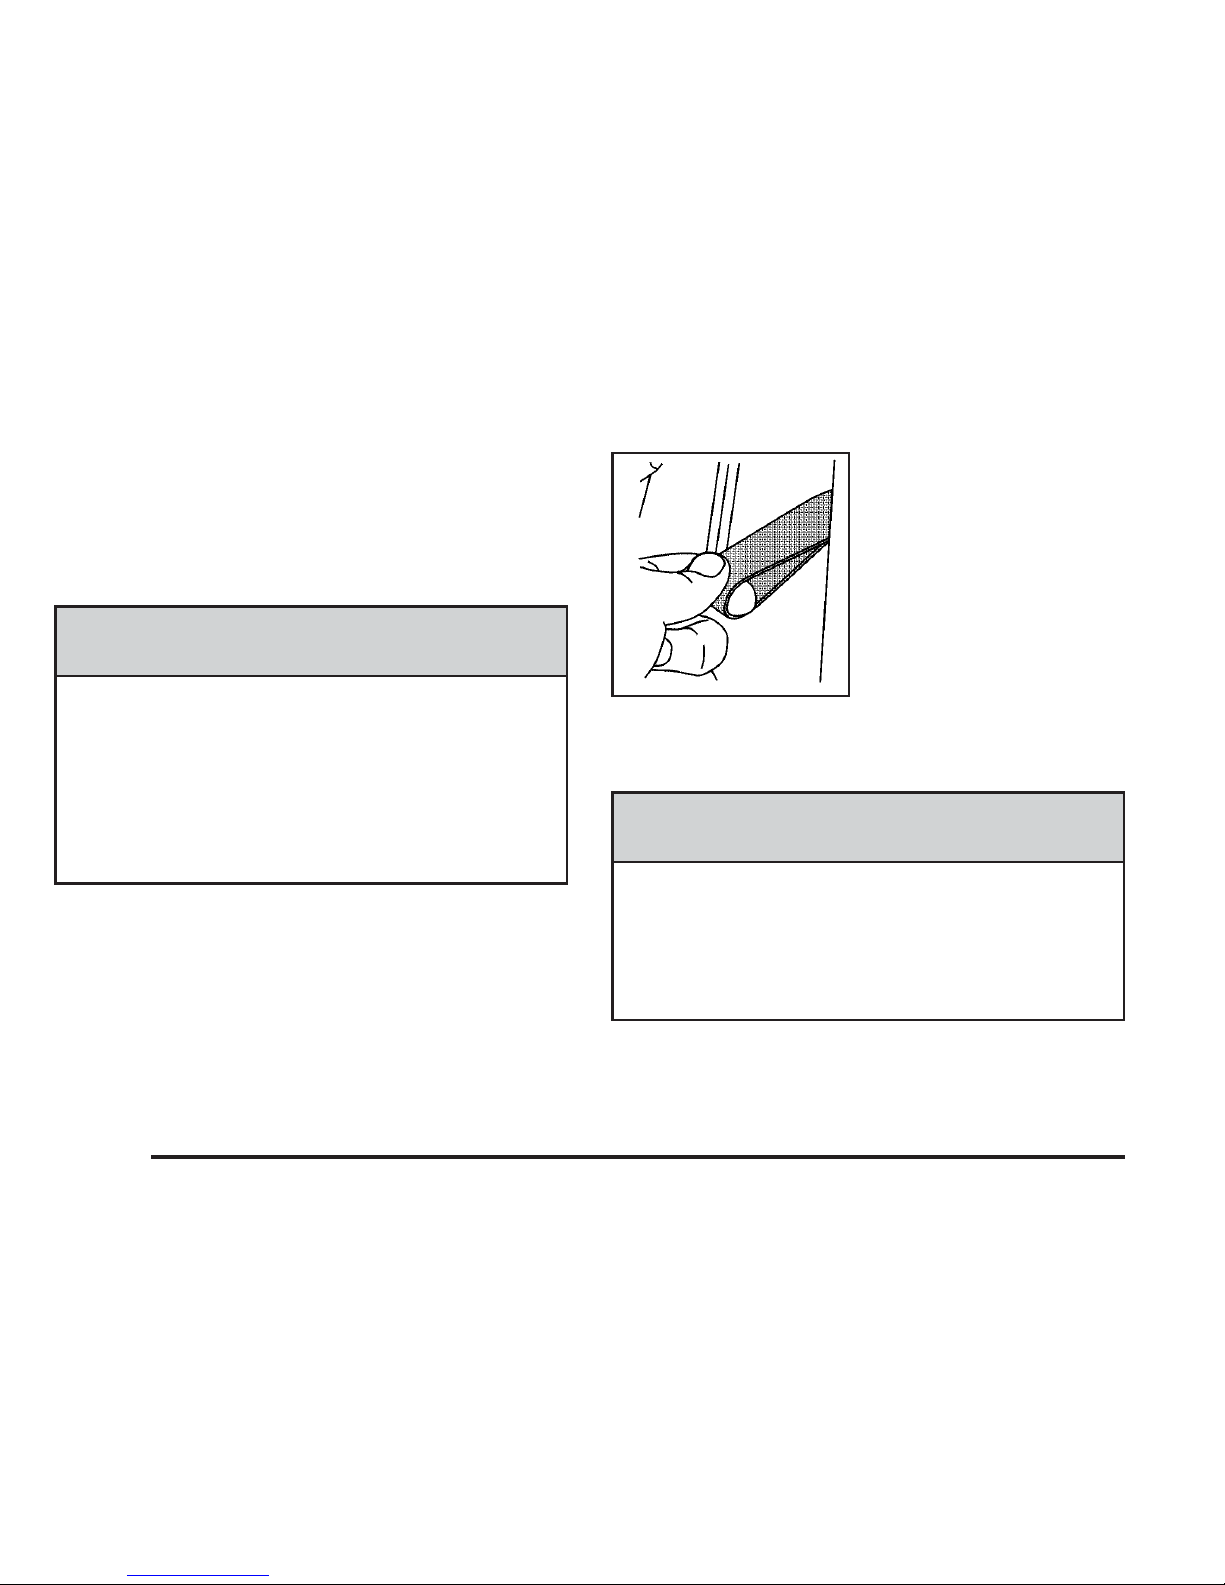
Shoulder Belt Height Adjustment
Your vehicle has a shoulder belt height adjuster for
each seating position next to a window.
Adjust the height so that the shoulder portion of the belt
is centered on your shoulder. The belt should be
away from your face and neck, but not falling off your
shoulder. Improper shoulder belt height adjustment
could reduce the effectiveness of the safety belt
in a crash.
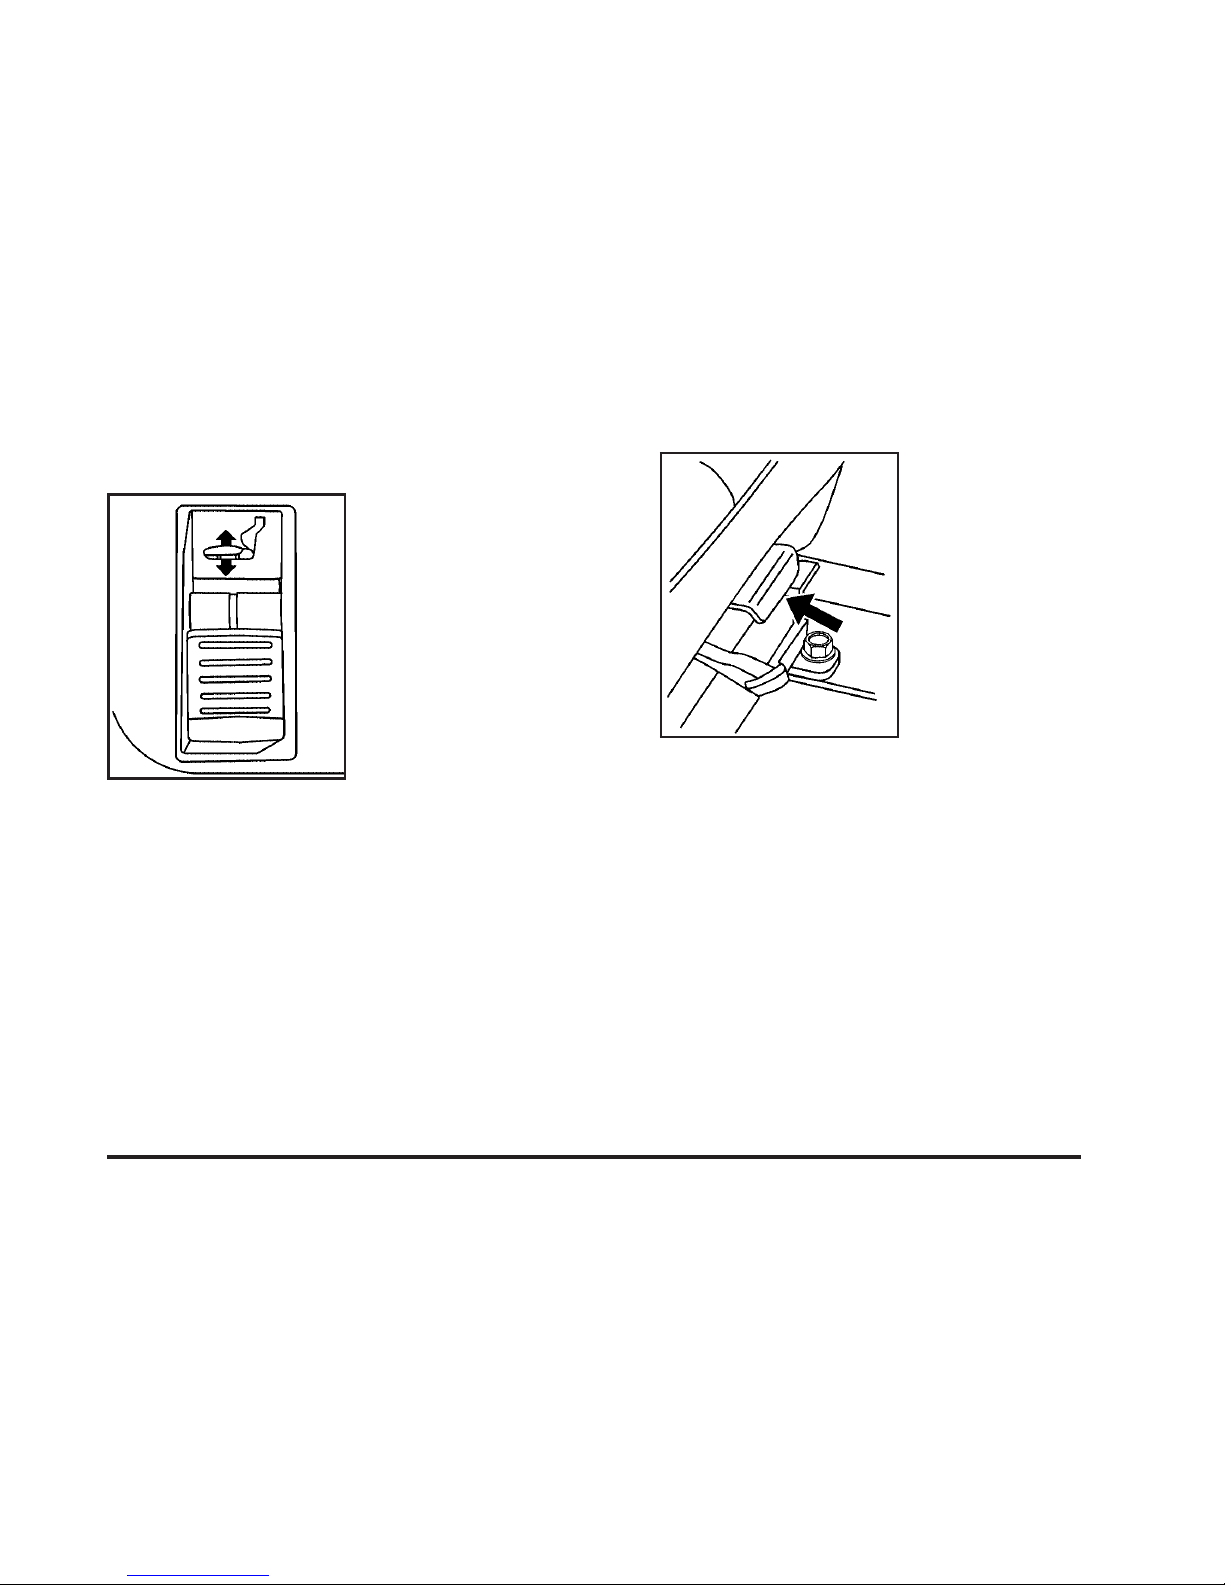
To move it down, press in
at the top of the arrows
and move the height
adjuster to the desired
position. You can move the
height adjuster up just
by pushing up on the
shoulder belt guide.
After you move the height adjuster to where you want it,
try to move it down without pressing in to make sure
it has locked into position.
Safety Belt Use During Pregnancy
Safety belts work for everyone, including pregnant
women. Like all occupants, they are more likely to be
seriously injured if they do not wear safety belts.
A pregnant woman should wear a lap-shoulder belt, and
the lap portion should be worn as low as possible,
below the rounding, throughout the pregnancy.
The best way to protect the fetus is to protect the
mother. When a safety belt is worn properly, it is more
likely that the fetus will not be hurt in a crash. For
pregnant women, as for anyone, the key to making
safety belts effective is wearing them properly.
1-26
 Loading...