

Page 1
Warning
1. Product is for single person use only.
2. Do not use this chair unless all screws are securely tightened.
3. Check all screws are tightened every six months or as needed.
4. Dispose of packing material properly. Do not use plastic cover as a head covering.
Suocation may result.
5. Do not use this chair as a stepladder.
For assistance, call (888) 471-1616, or visit www.cherrymanindustries.com
A
D
E
F
G
Assembly Instructions
411, 415 & 416 Eon Chairs
B1
B2
*
*
*
*
*
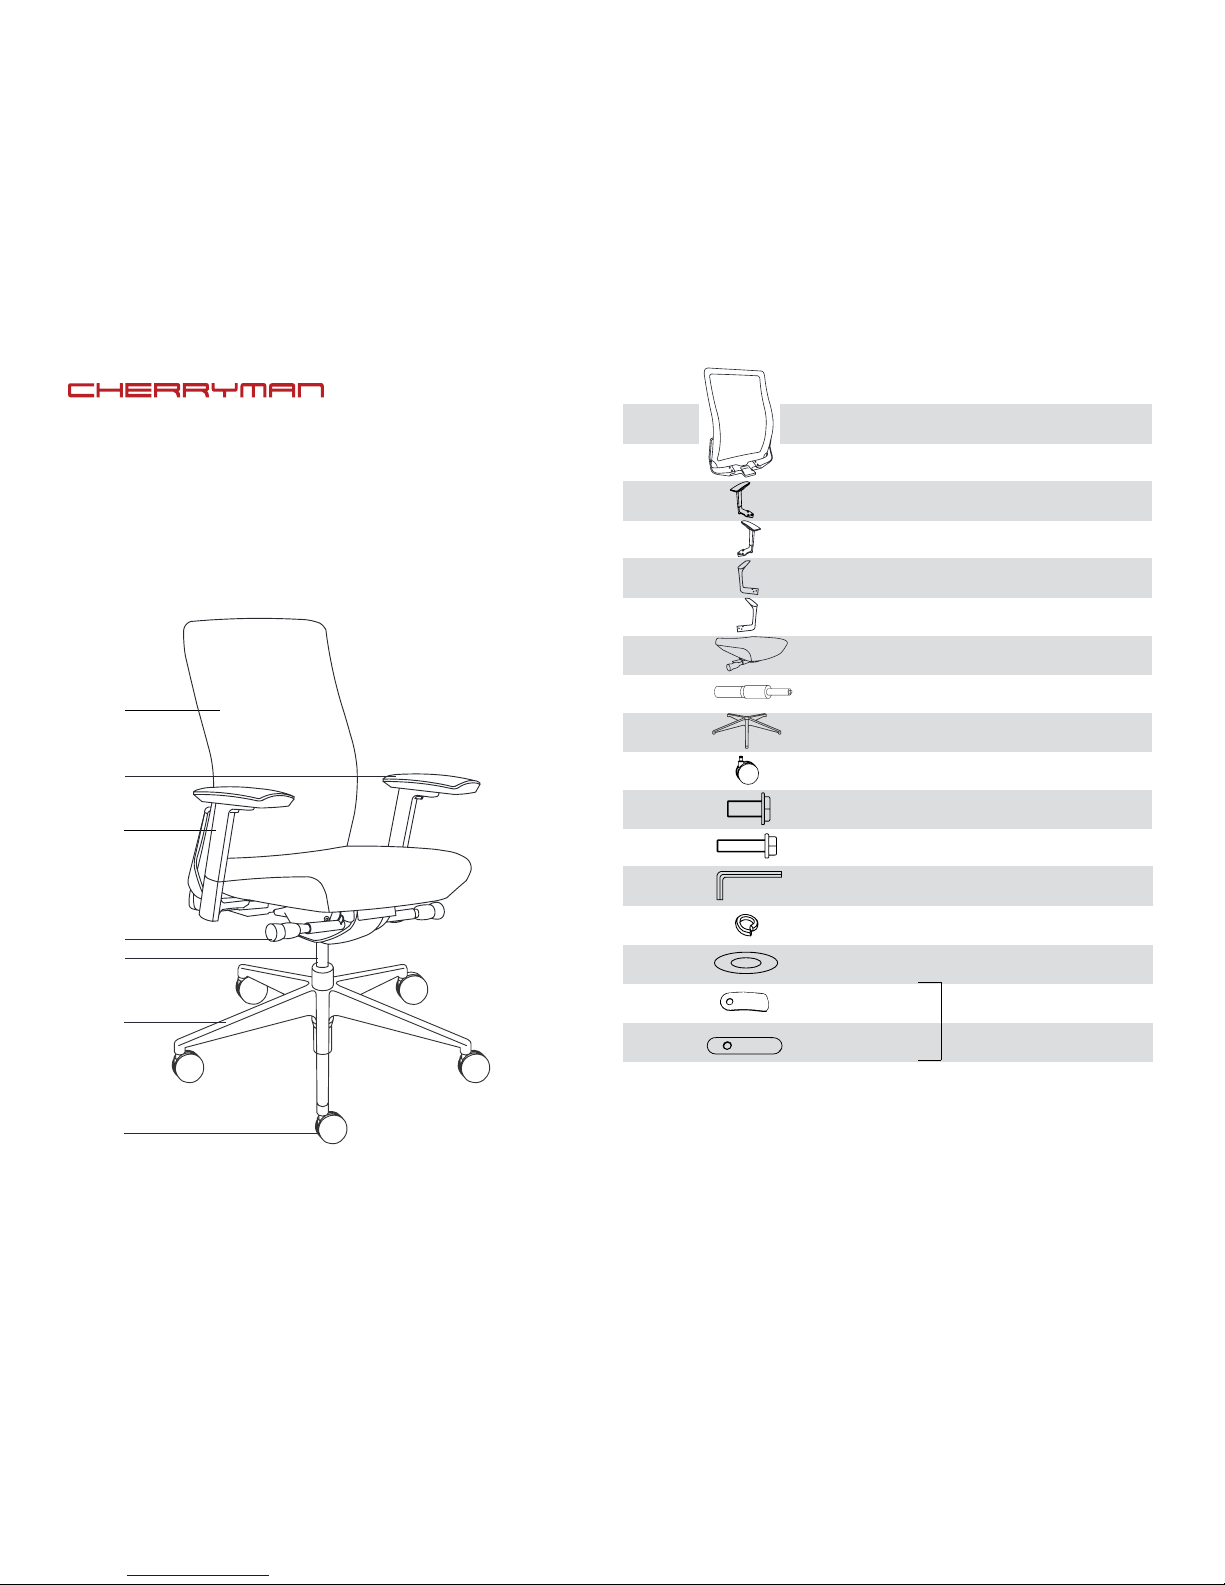
Item Part Name Part # Qty
1
1
1
1
1
1
1
3
6
5
3
3
2
2
1
Back Frame Black/White
G00300/G00311
Le Arm Black/White
G00301/ G00312
Le Arm Black/White
G00303/G00314
Right Arm Black/White
G00302/G00313
Right Arm Black/White
G00304/G00315
Gas Cylinder
G00306
Base
G00026
Caster
G00008
Short Bolt M8x20
G00307
Long Bolt M6x35
G00308
Hex Wrench
G00137
Spring Washer M8
G00309
Flat Washer M8
G00310
2
Slide Lock Bracket
Pivot Lock Bracket
G00067
G00068
Seat Pan Black/White
G00305/G00316
A
D
E
F
G
H
I
J
K
L
M
N
B1
C1
B2
C2
* Arms are packed in a separate box
** Optional arm pad pivot and slide locks for task chair; see instructions on page 2.
**
**
Page 2
1 2B2A
3 4
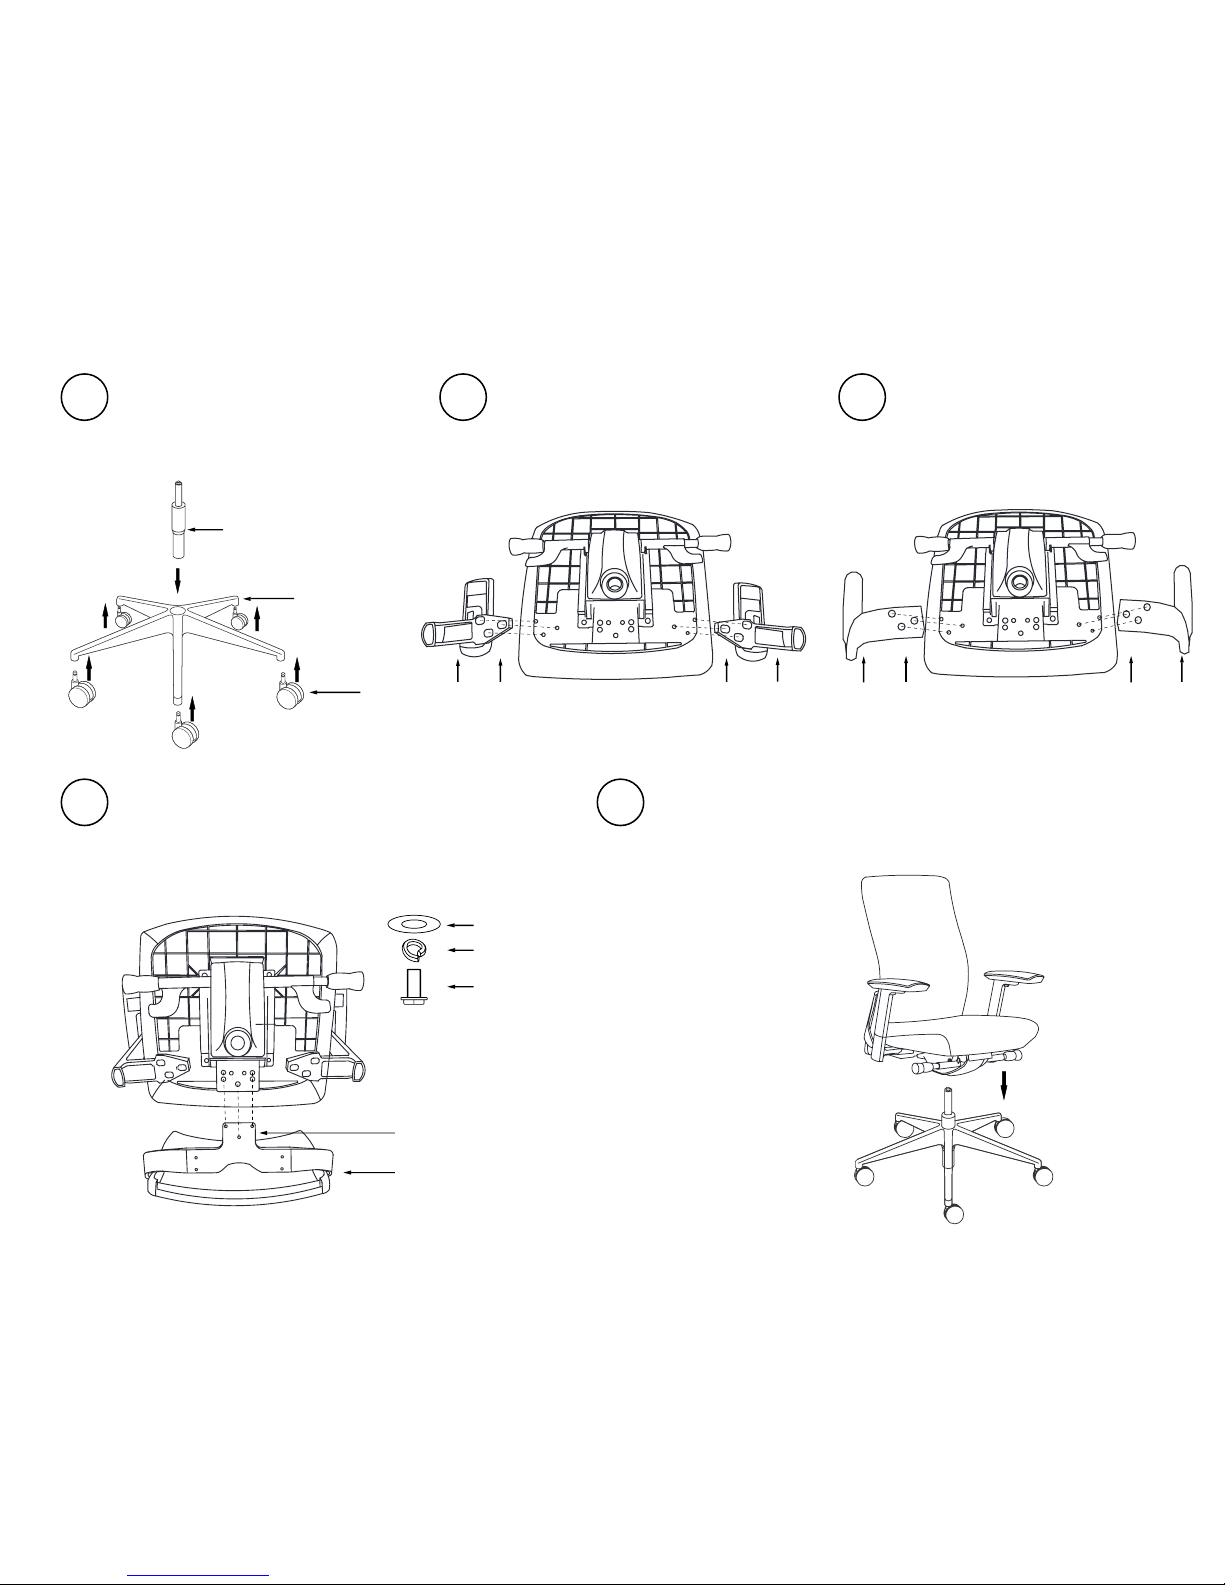
Base Assembly
Firmly snap the 5 Casters (G) in to the
Base (F). With the base on the ground,
wheels down, drop in the Gas Cylinder (E)
so that the skinny end is pointing up.
Seat /Back Assembly
Carefully align the Back Frame (A) to the Seat
Pan (D). Using the Short Bolt (H), Spring Washer
(K) and Flat Washer (L), in that order, tighten the
Back Frame to the Seat Pan.
Final Assembly
With the Base on the ground, carefully
align the Gas Cylinder with the hole in the
center of the underside of the Seat Pan,
applying pressure.
Task Chair Arm Assembly (B1 + B2)
Using the Long Bolts (I) screw in the arms
to the underside of the Seat Pan.
Conference Chair Arm Assembly (C1 + C2)
Using the Long Bolts (I) screw in the arms to
the underside of the Seat Pan.
Ex1
Fx1
Gx5
Ix3Ix3
Ix3Ix3C2x1
Ax1
Hx3,Kx3,Lx3
K
L
H
B1x1
C1x1
B2x1
1/2
Page 3
1
2
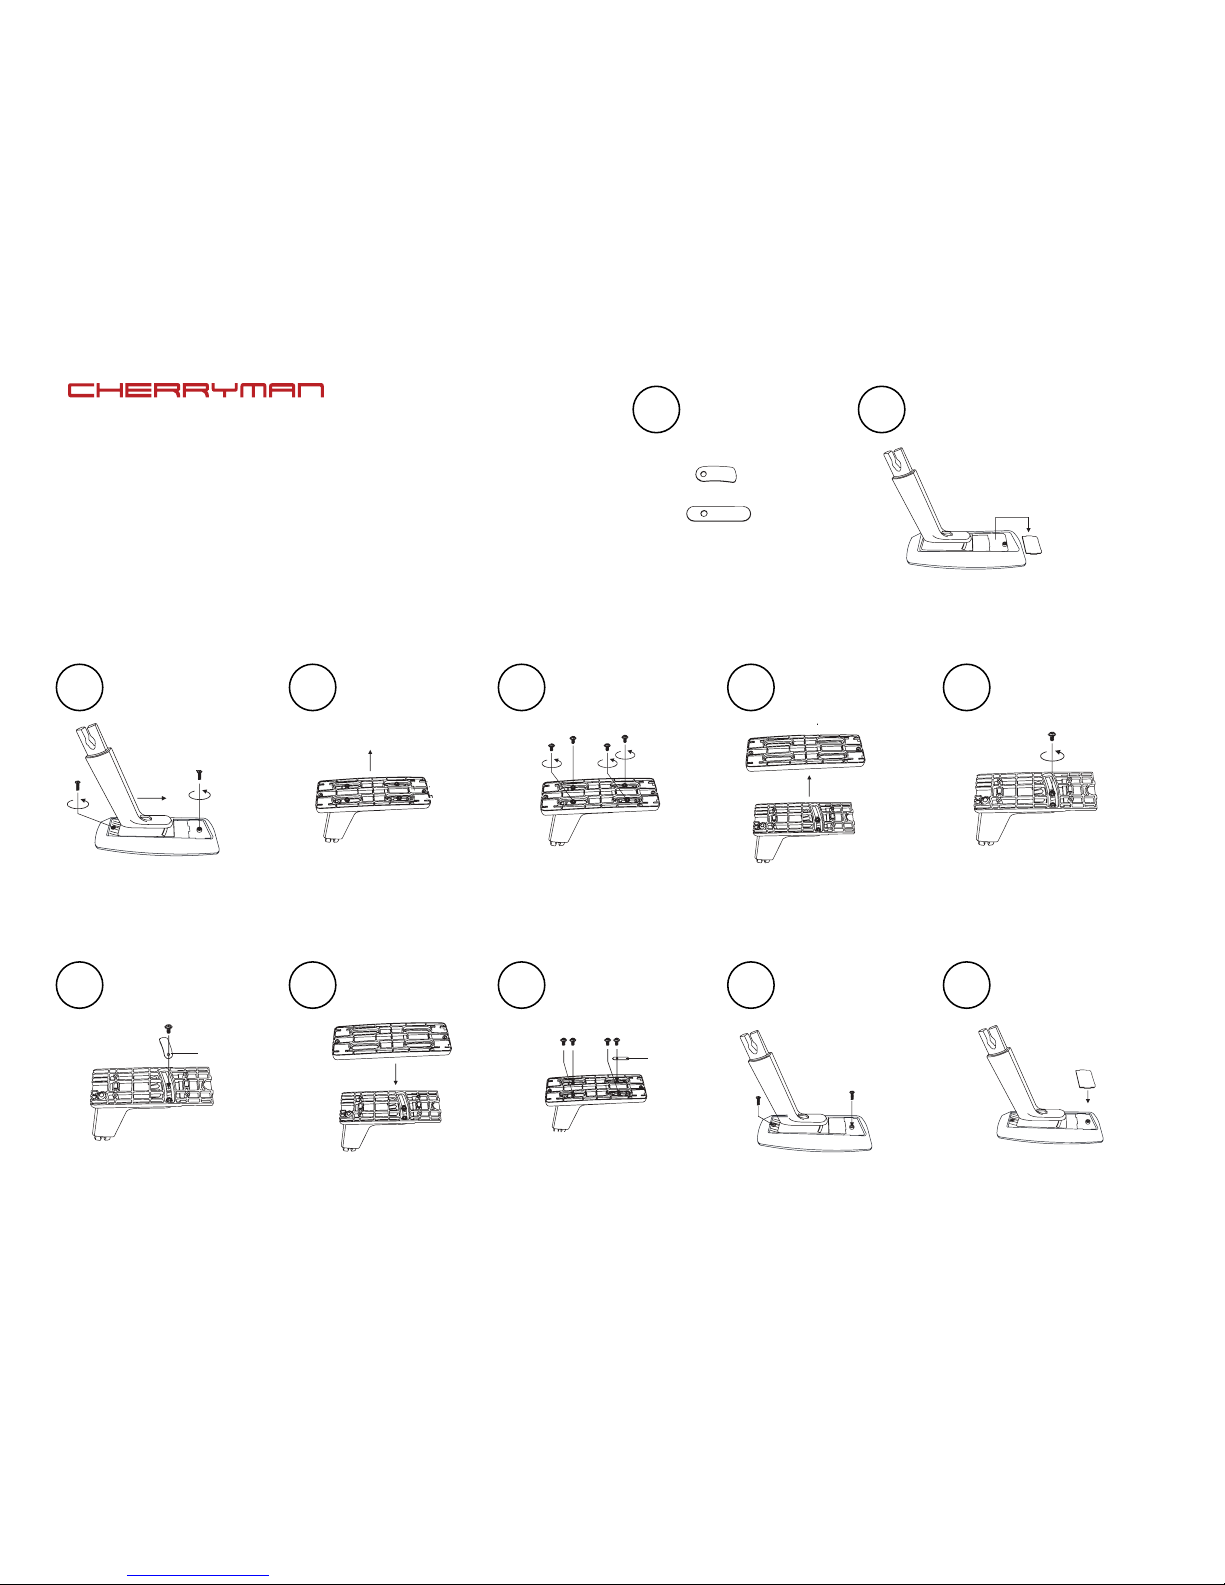
Instructions for Arm Pad Pivot & Slide
Locks for Task Chair (Optional)
411, 415 & 416 Eon Chairs
1) Item M & Item N
3) Slide the arm pad forward
and remove screws
8) Place Item M and use the
same screw to secure it
2) Slide the arm pad back and
take a flat screwdriver and
pop o the cover
4) Remove the arm pad
9) Place sliding part
back on
5) Remove four screws that
secure the part for sliding
10) Place Item N and use the
same screw to secure it
5) Remove part
11) Reinstall the arm pad using the same two screws
and secure the pad.
5)
Make sure the angle adjustment
is straight, then remove center
screw
12) Reinstall cover
M
N
3
8
4
9
5
10
6
11
7
12
x2
x2
x1
x1
Page 4
1
2
3
4 5
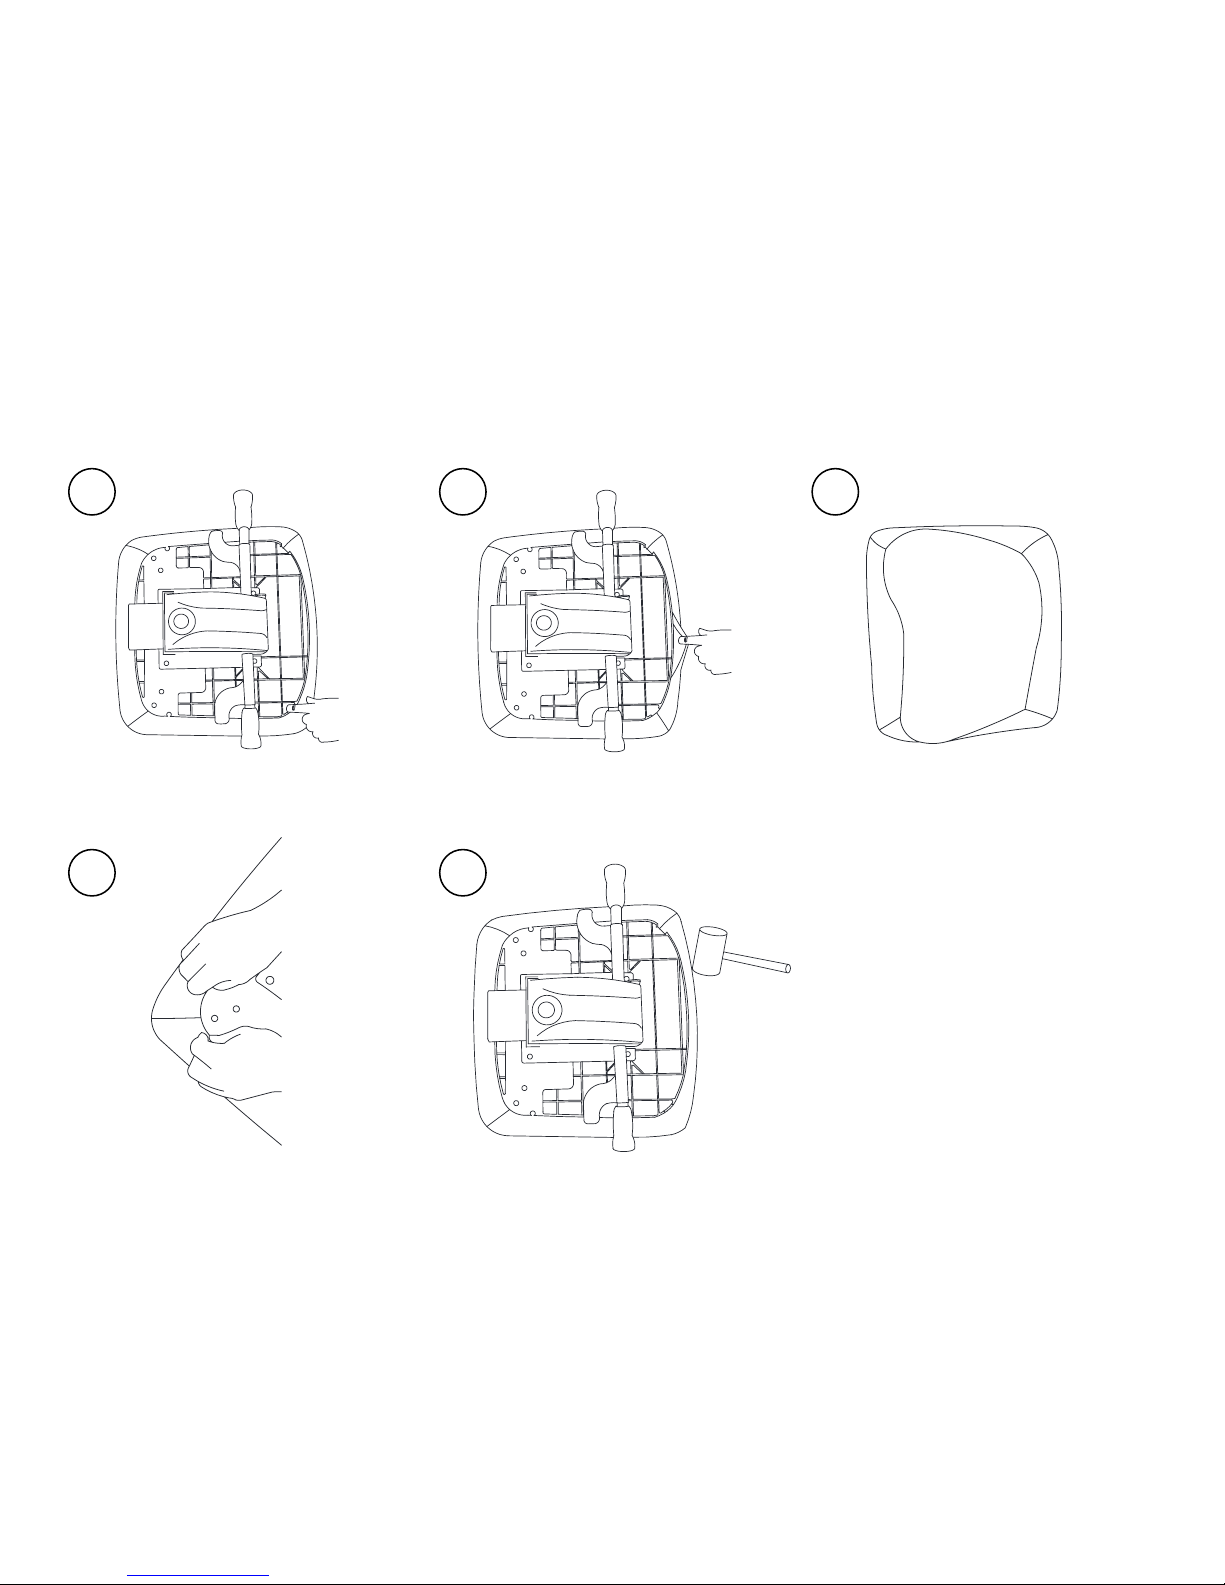
Assembly Instructions Slip Cover (Optional)
411, 415 & 416 Eon Chairs
2/2
Use finger to pull & remove
the seat cover stiener
Re-insert the seat cover stiener
Pull along edge to
remove seat cover
Use rubber hammer to tap fit the
seat cover with the seat base
New seat cover
 Loading...