

Cherry MultiBoard G8 7 Series, MultiBoard G8 8 Series, MultiBoard G80-8113, MultiBoard G81-7000, MultiBoard G81-8000 Quick Start Instructions
...Page 1

Kurzanleitung
MultiBoard
G8x-7xxx/8xxx
USB-Hub-Ausführung
mit 2 Downstream Ports
1 Informationen auf Papier,
als Direkthilfe und auf CD
2 Vorteile der Tastaturen
• Cherry MX-Technologie mit Gold Crosspoint
Kontakten (G80)
• Cherry FTSC-Technologie (G81)
• Robust und zuverlässig
Neben den Funktionen einer Standard-Tastatur
bieten Ihnen die Tastaturen − je nach Variante −
folgende zusätzliche Funktionen:
• Magnetkarten-Leser
• Touchpad als Mausersatz
• Beschriftbare Tasten
• Zusatztasten zur freien Belegung
• Die Tasten sind durch die Software Cherry
Tools frei programmierbar
An 2 USB-Anschlüssen (Downstream Ports) können Sie weitere USB-fähige Peripheriegeräte nutzen.
Informationen zu Inbetriebnahme, Bedienung und
Konfiguration erhalten Sie in der vorliegenden
Kurzanleitung, als Direkthilfe und als Bedienungsanleitung. Bitte beachten Sie die allgemeinen
Anwenderhinweise und die Lizenzvereinbarungen.
Die Informationen sind nach folgenden Kriterien
aufgeteilt:
• Die Kurzanleitung beschreibt im Wesentlichen
den Anschluss des Geräts und die Installation
der Software.
• Die Direkthilfe ist Bestandteil der Software. Sie
bietet Ihnen Informationen zur Bedienung dort,
wo Sie diese benötigen, und wird mit F1 aufgerufen.
• Die Bedienungsanleitung beschreibt die Bedienung und Konfiguration. Sie befindet sich als
PDF auf der beiliegenden CD (CD-ROM/Manu-
als). Hier können Sie die gewünschten Inhalte
am Bildschirm lesen oder ausdrucken.
Dadurch, dass wir Ihnen nur die wichtigsten Informationen gedruckt liefern, verringern wir den
Papierverbrauch und leisten einen Beitrag zum
Umweltschutz.
Vorsicht
Gefahr durch zu hohe Stromaufnahme!
Kurzschluss und Folgeschäden bei Anschluss
defekter oder nicht dafür vorgesehener Geräte an
die USB-Anschlüsse.
Schließen Sie an die USB-Anschlüsse nur Geräte
mit maximal 100 mA Stromaufnahme an (LowPower-Peripheriegeräte).
Bei USB-fähigem Betriebssystem sind folgende
Grundfunktionen der Tastatur direkt nach dem
Anschließen vorhanden:
• Standardtasten
•Nummernfeld
• USB-Anschlüsse (Downstream Ports)
• Touchpad (falls vorhanden)
2.1 Statusanzeigen
Beim Anstecken der Tastatur oder Einschalten des
PCs führt die Tastatur einen Selbsttest durch: Alle
LEDs leuchten einmal kurz auf. Im Betrieb zeigen
die LEDs den Status der Feststellfunktion der
Num-, Umschalt- und Rollentaste.
644-0294.00 DE, US, FR Mai 2003
1
Page 2

3 Technische Daten aller
5 Technische Daten
Varianten
Bezeichnung Wert
Schnittstellen USB-Stecker, 2 USB-
Downstream Ports
nach USB 2.0
(full speed, 12 Mbit/s)
Lesegeschwindigkeit
Magnetkarten-Leser
Lesezyklen
Magnetkarten-Leser
Spannungsversorgung +5 V/DC ±5 % SELV
Stromaufnahme max. 400 mA
Stromabgabe max. 100 mA pro
Lagertemperatur −20 °C bis +60 °C
Betriebstemperatur 0 °C bis +50 °C
Kabellänge ca. 1,75 m
3 bis 125 ips bei 75
bpi, 3 bis 50 ips bei
210 bpi (ips = Inches
pro Sekunde,
bpi = Bits pro Inch)
bis zu 1.000.000
Downstream Port
MultiBoard G81-8000
Bezeichnung Wert
Tastaturtyp 104/105 Tasten,
Magnetkarten-Leser,
FTSC-Technologie
Gewicht
(incl. Verpackung)
Abmessungen
(L x B x H)
ca. 2250 g
470 x 220 x 64 mm
6 Technische Daten
MultiBoard G80-8113
Bezeichnung Wert
Tastaturtyp 120/121 Tasten, davon
41 beschriftbar,
Magnetkarten-Leser,
Touchpad, MX-Technologie mit Gold
Crosspoint Kontakten
Auflösung Touchpad 1000 dpi
4 Technische Daten
MultiBoard G81-7000
Bezeichnung Wert
Tastaturtyp 104/105 Tasten,
Magnetkarten-Leser,
19-Zoll-Kompaktformat, FTSC-Technologie
Gewicht
(incl. Verpackung)
Abmessungen
(L x B x H)
ca. 2050 g
405 x 220 x 64 mm
Gewicht
(incl. Verpackung)
Abmessungen
(L x B x H)
ca. 2000 g
470 x 220 x 64 mm
2
Page 3

7 Technische Daten
MultiBoard G80-8200
Bezeichnung Wert
Tastaturtyp 120/121 Tasten, davon
48 beschriftbar,
Magnetkarten-Leser,
MX-Technologie mit
Gold Crosspoint Kontakten
9 Anschluss des Geräts
Gerät über USB-Anschluss anschließen
1 Ermitteln Sie einen USB-Anschluss an der
Rückseite Ihres PCs oder an einer Cherry-Tastatur mit USB-Hub.
Gewicht
(incl. Verpackung)
Abmessungen
(L x B x H)
ca. 2250 g
470 x 220 x 64 mm
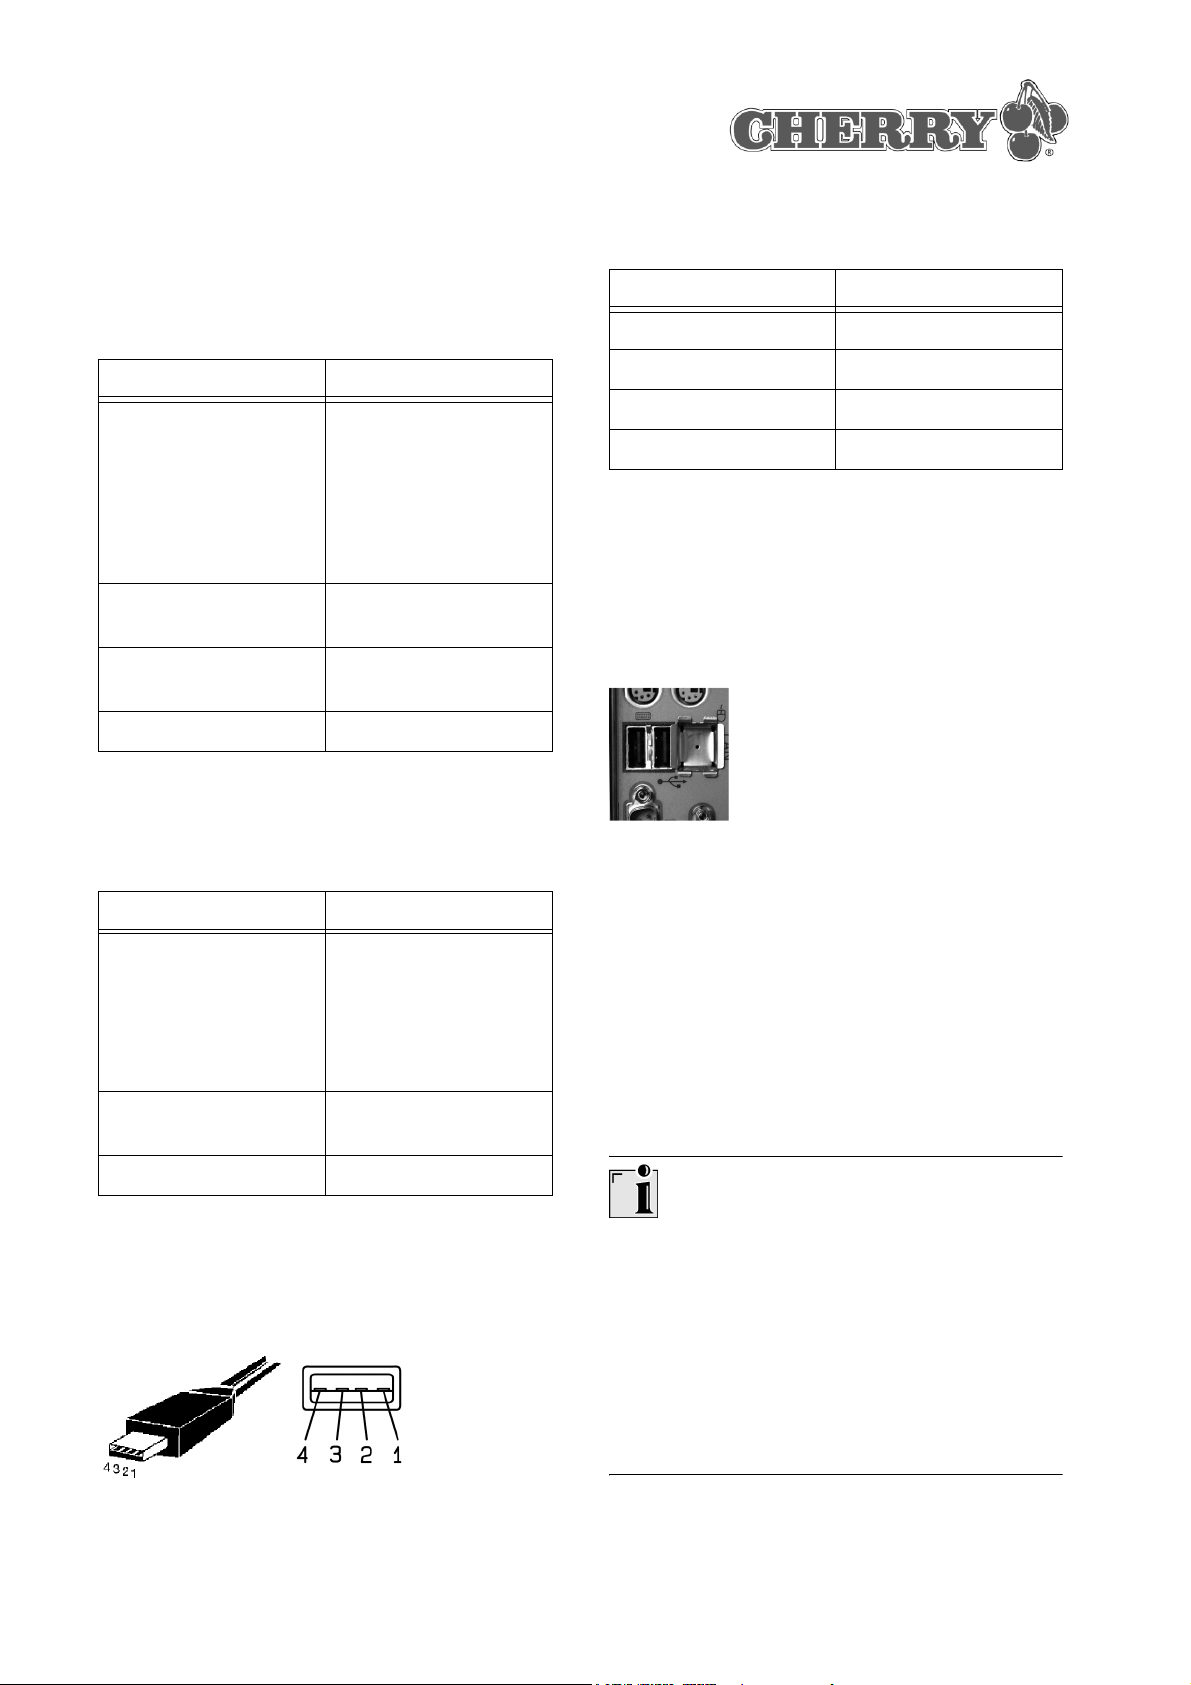
8 Belegung USB-Stecker
und -Anschluss
USB-Stecker und -Anschluss (Downstream Port)
der Tastatur
Position Belegung
1+5 V
2 −DATA
3+DATA
4GND
2 Stecken Sie den USB-Stecker des Geräts in
einen beliebigen USB-Anschluss.
10 Installation der Software
Die Installation erfolgt in zwei Schritten:
• Installation der Standard-USB-Treiber
• Installation der Software Cherry Tools
10.1 Installation der
Standard-USB-Treiber
Windows XP oder Windows 95/NT?
Windows XP enthält bereits Standard-USB-Trei-
ber für eine Tastatur.
Windows 95/NT unterstützen kein USB. Wenn der
PC einen USB-Anschluss hat, muss im BIOS des
PCs der USB-Keyboard-Support bzw. USBLegacy-Mode auf enabled gesetzt sein. Dann
funktionieren die Standard-Tasten, die Sondertasten werden nicht unterstützt.
Standard-USB-Treiber unter
Windows 98/2000/ME installieren
Voraussetzung: Bei der Installation benötigen Sie
ggf. die Installations-CD für Windows.
1 Schließen Sie das Gerät an den PC an.
3
Page 4

2 Starten Sie den PC.
Das Betriebssystem erkennt das Gerät. Die Meldung Neue Hardware-Komponente gefunden
erscheint auf dem Bildschirm. Das Programm
Hardware Assistent wird gestartet.
3 Klicken Sie auf die Schaltfläche Weiter.
Das Dialogfenster Suche nach Treiberdateien
erscheint und informiert Sie, welche Datei benötigt wird.
4 Legen Sie die Installations-CD für Windows ein.
Ggf. müssen Sie den Pfad zu den Installationsdateien eintragen. Beispiel: Bei CD-ROM-Laufwerk D und Betriebssystem Windows 98:
D:\Win98.
5 Folgen Sie den Anweisungen zur Treiberinstal-
lation auf dem Bildschirm.
10.3 Installation der Software
Cherry OPOS/JPOS Unterstützung
Wenn Sie Applikationen verwenden, die über
OPOS oder JPOS auf die Tastatur oder den Magnetkarten-Leser zugreifen:
• Installieren Sie die Software Cherry OPOS
Unterstützung oder Cherry JPOS Unterstützung.
Die Funktionen des Magnetkarten-Lesers stehen
Ihnen zur Verfügung. Die Software Cherry Tools
braucht nicht installiert zu werden.
11 Programmierung der Tasten
10.2 Installation der
Software Cherry Tools
Aktuelle Cherry-Software im Internet
Die Software wird ständig weiterentwickelt. Die
aktuelle Version können Sie von Cherry über das
Internet herunterladen: http://support.cherry.de
Software „Cherry Tools“ unter
Windows 98/ME/2000/XP installieren
1 Legen Sie die Cherry-CD in Ihr CD-ROM-Lauf-
werk.
Die CD-ROM startet automatisch. Die Installa-
tion beginnt.
2 Wenn die CD-ROM nicht automatisch startet,
doppelklicken Sie im Windows-Explorer auf das
CD-ROM-Laufwerk und dann auf die Datei
Start.exe.
Die Installation beginnt.
3 Folgen Sie den Installationsanweisungen auf
dem Bildschirm.
Die Software Cherry Tools ist installiert.
Die Konfiguration wird nicht in der Tastatur, sondern als Datei auf dem PC gespeichert.
• Installieren Sie die Software Cherry Tools.
Die freie Belegung der Tasten steht Ihnen zur
Verfügung.
Die Programmierung der Tasten ist in der Direkthilfe der Software Cherry Tools beschrieben.
12 Magnetkarten-Leser
Die Konfiguration wird nicht in der Tastatur, sondern als Datei auf dem PC gespeichert.
• Installieren Sie die Software Cherry Tools.
Die Funktionen des Magnetkarten-Lesers stehen
Ihnen zur Verfügung.
Die Programmierung des Magnetkarten-Lesers ist
in der Direkthilfe der Software Cherry Tools
beschrieben.
4
Page 5

13 Reinigung des Geräts
Vorsicht!
Beschädigung durch aggressive Reinigungsmittel
oder Flüssigkeit im Gerät
1 Verwenden Sie zur Reinigung keine Lösungs-
mittel wie Benzin oder Alkohol und keine Scheuermittel oder Scheuerschwämme.
2 Verhindern Sie, dass Flüssigkeit ins Gerät
gelangt.
1 Befeuchten Sie ein weiches Tuch mit einem mil-
den Reinigungsmittel. Beispiel: Geschirrspülmittel.
2 Entfernen Sie Verschmutzungen von der Ober-
fläche des Geräts.
3 Entfernen Sie ggf. Rückstände des Reinigungs-
mittels mit einem mit Wasser befeuchteten
Tuch.
4 Trocknen Sie das Gerät mit einem fusselfreien,
weichen Tuch.
14 Support
Bei Problemen mit der Installation von Tastatur
oder Software bieten wir Ihnen einen kostenlosen
Support.
Unter http://support.cherry.de erreichen Sie den
Cherry-Support. Dort können Sie Ihre Anfragen
rund um die Uhr, sieben Tage in der Woche, direkt
an uns übermitteln.
Sollten Sie über keinen Internet-Zugang verfügen,
kontaktieren Sie uns bitte unter folgender Adresse:
Cherry GmbH
Cherrystraße
D-91275 Auerbach
Hotline:
Tel. +49(0)9643-18-206
Fax: +49(0)9643-18-1545
Wir stehen Ihnen Mo bis Do von 7:15 bis 16:00 Uhr
und Fr von 7:15 bis 13:30 Uhr (GMT + 1h) zur Verfügung.
15 Allgemeiner Anwenderhinweis
Cherry optimiert seine Produkte ständig im Zuge
der Entwicklung von neuen Technologien. Technische Änderungen behalten wir uns deshalb vor.
Die Ermittlung der Zuverlässigkeit sowie die Definition von technischen Angaben erfolgen gemäß
Cherry-interner Prüfung, um international anerkannte Vorschriften bzw. Normen zu erfüllen.
Davon abweichende Anforderungen können durch
gegenseitige Zusammenarbeit erfüllt werden.
Unsachgemäße Behandlung, Lagerung und
äußere Einflüsse können zu Störungen und Schäden im Einsatz führen.
Wir übernehmen keinerlei Gewährleistung für Mängel, die auf einer anwenderseitigen Veränderung
des Produkts beruhen, und haften nicht im Falle
unbefugter Veränderungen. Alle Reparaturen müssen durch Cherry oder eine offiziell berechtigte
Person oder Organisation durchgeführt werden.
Bei unsachgemäßem Austausch der optional eingesetzten Lithiumbatterie besteht Explosionsgefahr! Etwaige Schadensersatzansprüche gegen
Cherry oder seine eingesetzten Vertreter − gleich
aus welchem Rechtsgrund (einschließlich stressbedingte körperliche Schäden) − sind ausgeschlossen, soweit uns nicht Vorsatz, grobe Fahrlässigkeit
oder die Nichtbeachtung zwingender Produkthaftungsbestimmungen treffen oder bei Verletzungen
von Leben, Körper oder Gesundheit. Die vorliegende Anleitung ist nur gültig für das mitgelieferte
Produkt.
Weitere Informationen darüber sind bei den jeweiligen Cherry Distributoren oder direkt über die
Cherry GmbH erhältlich.
5
Page 6
16 Zertifizierung
16.1 CE-Konformitätserklärung
Wir, Cherry GmbH, erklären, dass die Tastaturen
der Serie MultiBoard G8x-7xxx/8xxx
(MX 7000 USB, MY 7000 USB, MX 8000 USB,
MY 8000 USB, MX 8100 USB) mit folgender
Anforderung übereinstimmen:
• Niederspannungsrichtlinie 73/23/EWG, geprüft
nach EN 60950
• EMV-Richtlinie 89/336/EWG, geprüft nach
EN 55024
• Increase the separation between the equipment and receiver.
• Connect the equipment into an outlet on a circuit different from that to which the receiver is
connected.
• Consult the dealer or an experienced radio/TV
technician for help.
Caution: Unauthorized changes or modifications
could void the authority to operate the equipment.
16.4 Canadian Radio Interference
Regulations
Getestet gemäß Cherry-Standard-Testverfahren.
16.2 Hinweis zum GS-Zeichen
Aufgrund der Position der Nulltaste des numerischen Bereichs ist die Tastatur für Saldiertätigkeiten, die überwiegend blind erfolgen, in
Deutschland nicht anzuwenden. Eine Tastatur mit
nicht-deutscher Tastenknopfbelegung ist in
Deutschland aufgrund der Zeichenbelegung (DIN
2137 Teil 2) nicht für den Dauereinsatz an Bildschirmarbeitsplätzen zu verwenden.
16.3 Federal Communications
Commission (FCC) Radio
Frequency Interference Statement
Information to the user: This equipment has been
tested and found to comply with the limits for
Class B digital device, pursuant to Part 15 of the
FCC Rules. These limits are designed to provide
reasonable protection against harmful interference
in a residential installation. This equipment generates, uses and can radiate radio frequency energy
and, if not installed and used in accordance with
the instructions, may cause harmful interference to
radio communications. However, there is no guarantee that interference will not occur in a particular
installation. If this equipment does cause harmful
interference to radio or television reception, which
can be determined by turning the equipment off
and on, the user is encouraged to try to correct the
interference by one or more of the following measures:
• Reorientate or relocate the receiving antenna.
Notice of CSA C 108.8 (DOC Jan. 1989)
This digital apparatus does not exceed the Class B
limits for radio noise emissions from digital apparatus set out in the Radio Interference Regulations of
the Canadian Department of Communications.
Le présent appareil numérique n’émet pas de
bruits radioélectriques dépassant les limites applicables aux appareils numériques de la classe B
prescrites dans le Règlement sur le brouillage
radioélectrique édicté par le ministère des Communications du Canada.
16.5 VCCI-Statement
6
Page 7
Quick-Start Instructions
MultiBoard
G8x-7xxx/8xxx
USB Hub Version with
2 Downstream Ports
1 Information available as
hardcopy, direct help and on CD
Information on setup, operation and configuration
can be obtained in these quick-start instructions,
as direct help and as operating instructions. Please
observe the general user information and the
license agreements.
The information is split up based on the following
criteria:
• The quick-start instructions essentially describe
connection of the device and software installation.
• The direct help is a component of the software.
It provides you with information on operation
where you need it. It is called up via F1.
• The operating instructions describe operation
and configuration. They are contained in a PDF
file on the accompanying CD (CD-ROM/Manu-
als). You can read the desired content on the
screen or print it out here.
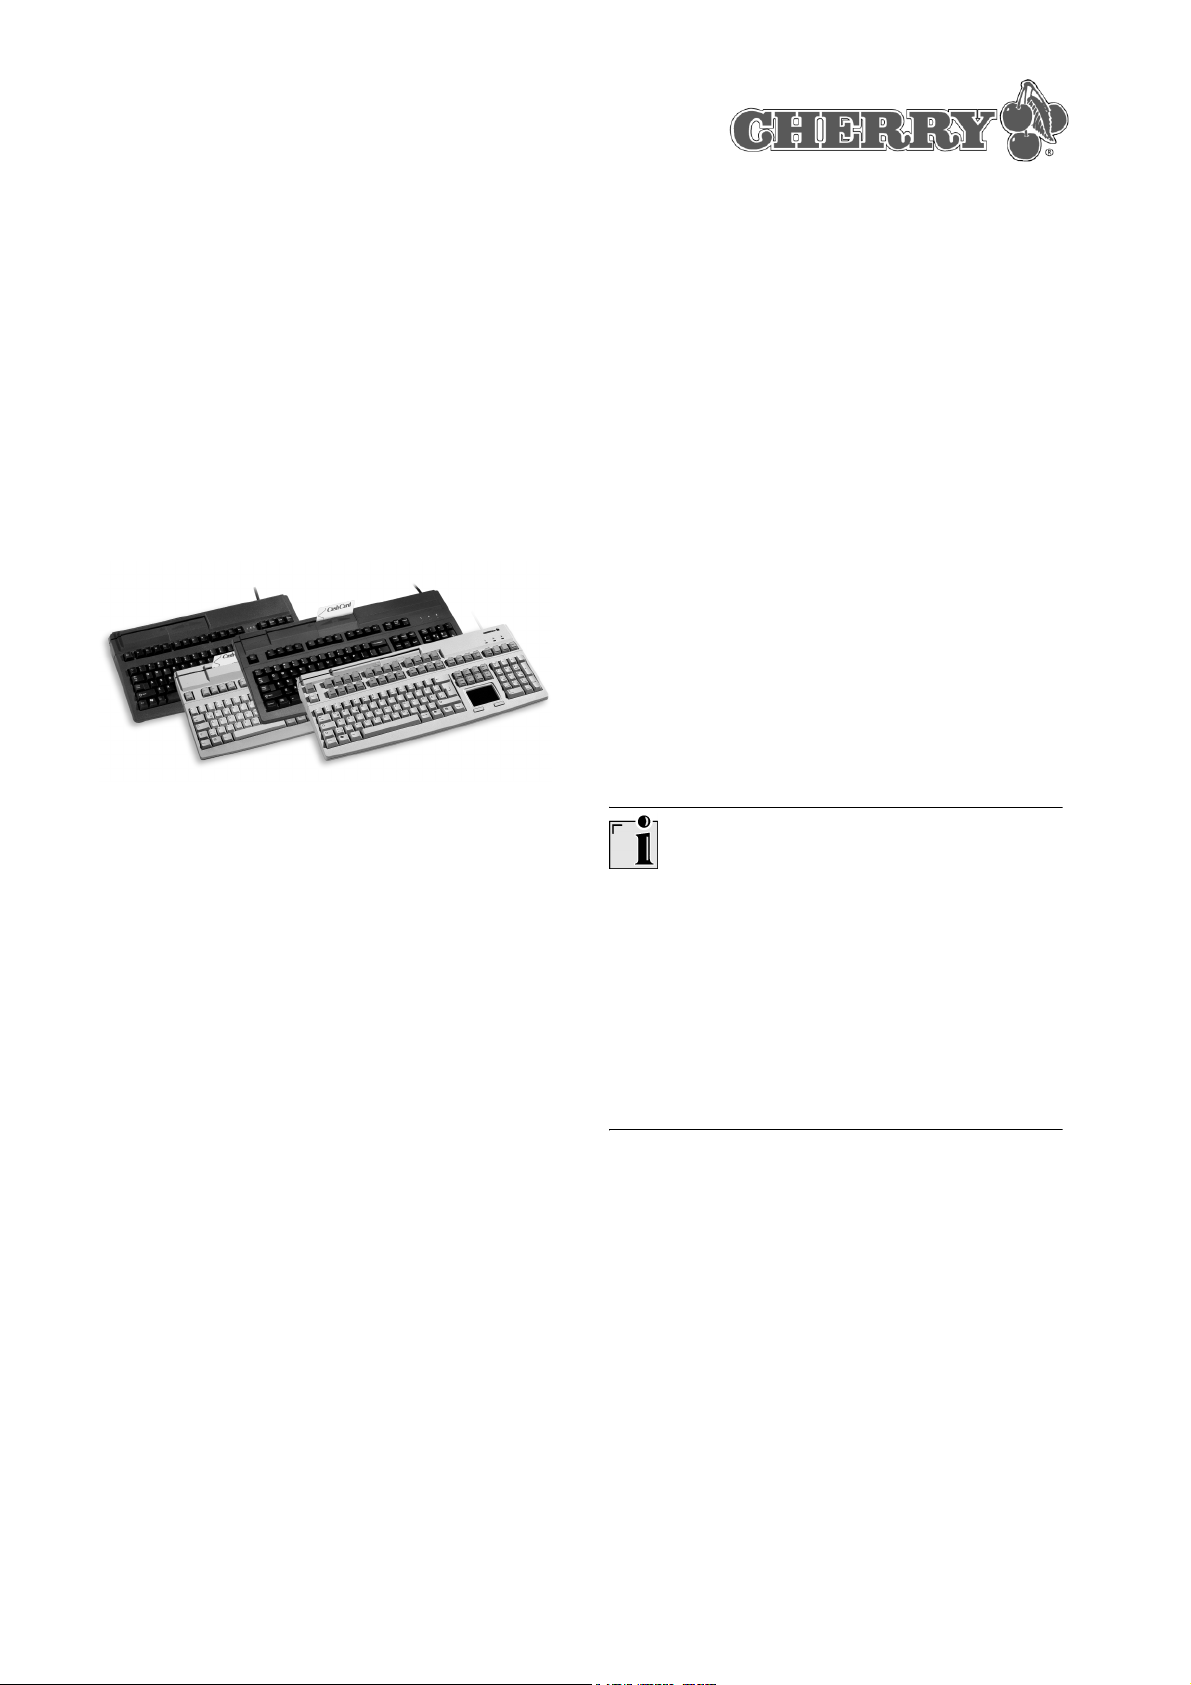
2 Advantages of the keyboards
• Cherry MX technology with "Gold Crosspoint"
contacts (G80)
• Cherry FTSC technology (G81)
• Robust and reliable
In addition to the functions of a standard keyboard, the keyboards feature the following additional functions, depending on the variant:
• Magnetic card reader
• Touchpad, mouse replacement
• Blank keys which can be labeled
• Additional, freely assignable keys
• The keys are freely programmable via the
Cherry Tools software
You can connect other USB peripheral devices to
the two USB ports (downstream ports).
Caution
Danger is present if the current consumption is
too high!
Short-circuits and subsequent damage may occur
if defective or unsuitable devices are connected to
the USB ports.
Only devices with a maximum current consumption of 100 mA (low-power peripherals) may be
connected to the USB ports.
The following standard functions of the keyboard
are available immediately after plug-in, with operating systems supporting USB:
• Standard keys
• Numeric keypad
• USB ports (downstream ports)
• Touchpad (if present)
By supplying only the most essential information as
a printout, we are reducing the unnecessary use of
paper and thus making our contribution towards
environmental protection.
7
Page 8
2.1 Status indicators
4 Technical data of the
The keyboard performs a self-test when plugged in
or when the PC is switched on: All of the LEDs illuminate once briefly. In normal operation, the LEDs
show the status of the locked-key function of the
Num, Caps and Scroll keys.
3 Technical data of all variants
Designation Value
Interfaces USB plug, 2 USB
downstream ports in
accordance with
USB 2.0 (full speed,
12 Mbit/s)
Reading speed of
magnetic card reader
Total number of reads
by magnetic card
reader
Power supply +5 V/DC ±5 % SELV
Current consumption max. 400 mA
Current output max. 100 mA per
Storage temperature
range
3 to 125 ips at 75 bpi,
3 to 50 ips at 210 bpi
(ips = inches per second, bpi = bits per
inch)
up to 1,000,000
downstream port
−20 °C to +60 °C
MultiBoard G81-7000
Designation Value
Keyboard type 104/105 keys,
magnetic card reader,
19" compact size,
FTSC technology
Weight
(incl. packaging)
Dimensions
(L x W x H)
approx. 2050 g
405 x 220 x 64 mm
5 Technical data of the
MultiBoard G81-8000
Designation Value
Keyboard type 104/105 keys,
magnetic card reader,
FTSC technology
Weight
(incl. packaging)
Dimensions
(L x W x H)
approx. 2250 g
470 x 220 x 64 mm
6 Technical data of the
MultiBoard G80-8113
Operating temperature range
Cable length approx. 1.75 m
8
0 °C to +50 °C
Designation Value
Keyboard type 120/121 keys, 41 of
which can be labeled,
magnetic card reader,
touchpad, MX technology with "Gold Crosspoint" contacts
Touchpad resolution 1000 dpi
Weight
(incl. packaging)
Dimensions
(L x W x H)
approx. 2000 g
470 x 220 x 64 mm
Page 9
7 Technical data of the
MultiBoard G80-8200
Designation Value
Keyboard type 120/121 keys, 48 of
which can be labeled,
magnetic card reader,
MX technology with
"Gold Crosspoint" contacts
9 Device connection
Attaching the device via the USB port
1 Find a USB port on the back of your PC or on a
Cherry keyboard with USB hub.
Weight
(incl. packaging)
Dimensions
(L x W x H)
approx. 2250 g
470 x 220 x 64 mm
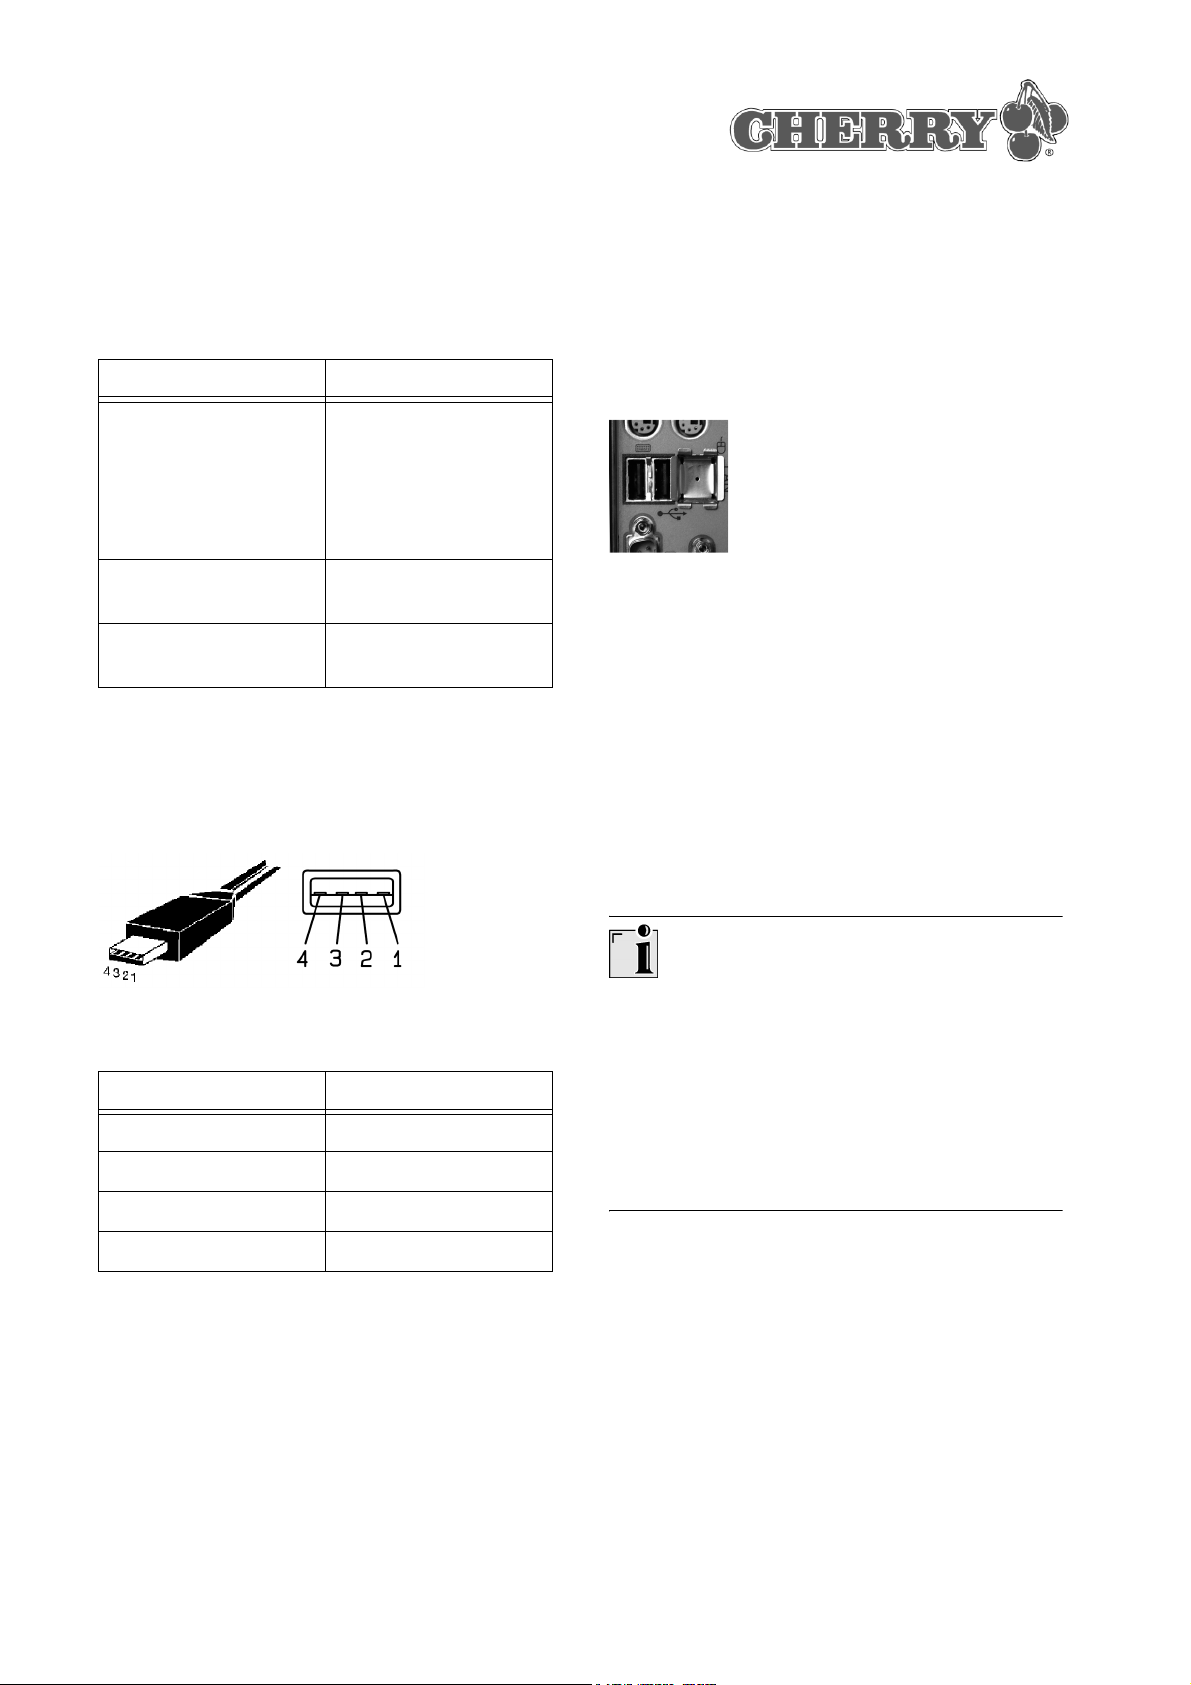
8 Pin assignment of USB plug and
port
USB plug and port (downstream port) of the keyboard
Pin Assignment
1+5 V
2 −DATA
3+DATA
2 Insert the USB plug of the device into any USB
port.
10 Installation of the software
Installation consists of two steps:
• Installation of the standard USB drivers
• Installation of the Cherry Tools software
10.1 Installation of the standard
USB drivers
Windows XP or Windows 95/NT?
Windows XP already contains standard USB driv-
ers for a keyboard.
Windows 95/NT do not support USB. If the PC
has a USB port, USB Keyboard Support or USB
Legacy Mode must be set to enabled in the BIOS
of the PC. The standard keys will now function, but
the special keys are not supported.
4GND
Installing the USB drivers under
Windows 98/2000/ME
Precondition: You may need the Windows instal-
lation CD during installation.
1 Connect the device to the PC.
2 Start the PC.
The operating system detects the device. The
message New hardware component found is
displayed on the screen. The Hardware Assis-
tant program is started.
9
Page 10
3 Click on the Continue button.
The Locate Driver Files dialog box is displayed
and informs you which file is required.
4 Place the Windows installation CD into your
CD-ROM drive. You may need to enter the path
of the installation files. Example: With a
CD-ROM drive D and the Windows 98 operating system: D:\Win98.
5 Follow the driver installation instructions on the
screen.
10.2 Installation of the Cherry Tools
software
11 Programming the keys
The configuration is not saved in the keyboard, but
rather as a file on the PC.
• Install the Cherry Tools software.
The keys can be configured freely.
Programming of the keys is described in the direct
help of the Cherry Tools software.
12 Magnetic card reader
The configuration is not saved in the keyboard, but
rather as a file on the PC.
Current Cherry software on the Internet
The software is continually updated. The current
version can be downloaded from Cherry via the
Internet: http://support.cherry.de
Installing "Cherry Tools" software under
Windows 98/ME/2000/XP
1 Place the Cherry CD in your CD-ROM drive.
The CD-ROM starts automatically. Installation
begins.
2 If the CD-ROM does not start automatically,
double-click the CD-ROM drive in Windows
Explorer and then the Start.exe file.
Installation begins.
3 Follow the installation instructions on the screen.
The Cherry Tools software is installed.
10.3 Installation of the Cherry OPOS/
JPOS Support software
• Install the Cherry Tools software.
The functions of the magnetic card reader are
available.
Programming of the magnetic card reader is
described in the direct help of the Cherry Tools
software.
13 Cleaning the device
Caution!
Damage may be caused by harsh cleaning agents
or liquids in the device
1 Do not use solutions such as gasoline or alco-
hol and scouring agents or scouring foam for
cleaning.
2 Avoid allowing fluids to enter the device.
If you use applications which access the keyboard
or magnetic card reader via OPOS or JPOS:
• Install the Cherry OPOS Support or Cherry
JPOS Support software.
The functions of the magnetic card reader are
available. You do not need to install the Cherry
Tools software.
10
1 Moisten a soft cloth with a mild cleaning agent.
Example: Dish detergent.
2 Remove soiling from the surface of the device.
3 Remove any cleaning agent residue with a
water-moistened cloth.
4 Dry off the device with a soft, lint-free cloth.
Page 11

14 Support
To help you with any problems you may encounter
in the installation of the keyboard or the software,
we provide you with a free support service.
Cherry Support can be contacted at
http://support.cherry.de. There you can submit
your questions to us directly around the clock and
seven days a week.
If you do not have an Internet connection, please
contact us at the following address:
Cherry GmbH
Cherrystraße
D-91275 Auerbach, Germany
Hotline:
Tel.: +49(0)9643-18-206
Fax: +49(0)9643-18-1545
We are available to help you Monday to Thursday
from 7:15 a.m. to 4:00 p.m. and Friday from 7:15
p.m. to 1:30 p.m. (GMT + 1 h).
instructions only apply to the accompanying product.
Full details can be obtained from your local Cherry
dealer or direct from Cherry GmbH.
16 Certification
16.1 CE Declaration of Conformity
We, Cherry GmbH, hereby declare that the keyboards of series MultiBoard G8x-7xxx/8xxx
(MX 7000 USB, MY 7000 USB, MX 8000 USB,
MY 8000 USB, MX 8100 USB) accord with the fol-
lowing requirements:
• Low-Voltage Directive 73/23/EEC tested in
accordance with EN 60950
• EMC Directive 89/336/EEC, tested in accordance with EN 55024
Tested according to the standard Cherry testing
procedures.
15 General Advice
Cherry continuously optimizes products as new
technologies are developed. For this reason we
reserve the right to make technical alterations. The
evaluation of product reliability and the definition of
the product’s technical performance are carried out
according to Cherry’s own requirements in order to
meet internationally recognized regulations and
standards. Requirements in addition to these can
be met through mutual cooperation. Improper
usage, handling, storage and external influences
could lead to faults and defects during use.
We do not accept warranty for defects caused by
alterations to our product by the user and shall not
be held liable for unauthorized modifications. All
repairs must be made by Cherry or an officially
appointed organization or persons. There is a danger of explosion if the optional lithium battery is not
exchanged in the correct manner! Possible compensation claims against Cherry or its nominated
officers − whatever the legal justification including
physical or stress related injuries − are excluded.
Exceptions to this exist in the case of intent or
gross negligence on the part of Cherry, infringements of Product Liability Law or in cases of injury,
bodily harm or risk to health. These operating
16.2 Information on the GS Approval
Due to the position of the zero key on the number
block the keyboard is not to be used in Germany
for balancing work which is carried out blind to a
great extent. A keyboard with non-German key button assignment is not to be used on a long-term
basis at computer workplaces in Germany in view
of the character assignment (DIN 2137, Part 2).
11
Page 12
16.3 Federal Communications
Commission (FCC) Radio
Frequency Interference Statement
Information to the user: This equipment has been
tested and found to comply with the limits for
Class B digital device, pursuant to Part 15 of the
FCC Rules. These limits are designed to provide
reasonable protection against harmful interference
in a residential installation. This equipment generates, uses and can radiate radio frequency energy
and, if not installed and used in accordance with
the instructions, may cause harmful interference to
radio communications. However, there is no guarantee that interference will not occur in a particular
installation. If this equipment does cause harmful
interference to radio or television reception, which
can be determined by turning the equipment off
and on, the user is encouraged to try to correct the
interference by one or more of the following measures:
• Reorientate or relocate the receiving antenna.
• Increase the separation between the equip-
ment and receiver.
• Connect the equipment into an outlet on a cir-
cuit different from that to which the receiver is
connected.
• Consult the dealer or an experienced radio/TV
technician for help.
16.5 VCCI-Statement
Caution: Unauthorized changes or modifications
could void the authority to operate the equipment.
16.4 Canadian Radio Interference
Regulations
Notice of CSA C 108.8 (DOC Jan. 1989)
This digital apparatus does not exceed the Class B
limits for radio noise emissions from digital apparatus set out in the Radio Interference Regulations of
the Canadian Department of Communications.
Le présent appareil numérique n’émet pas de
bruits radioélectriques dépassant les limites applicables aux appareils numériques de la classe B
prescrites dans le Règlement sur le brouillage
radioélectrique édicté par le ministère des Communications du Canada.
12
Page 13
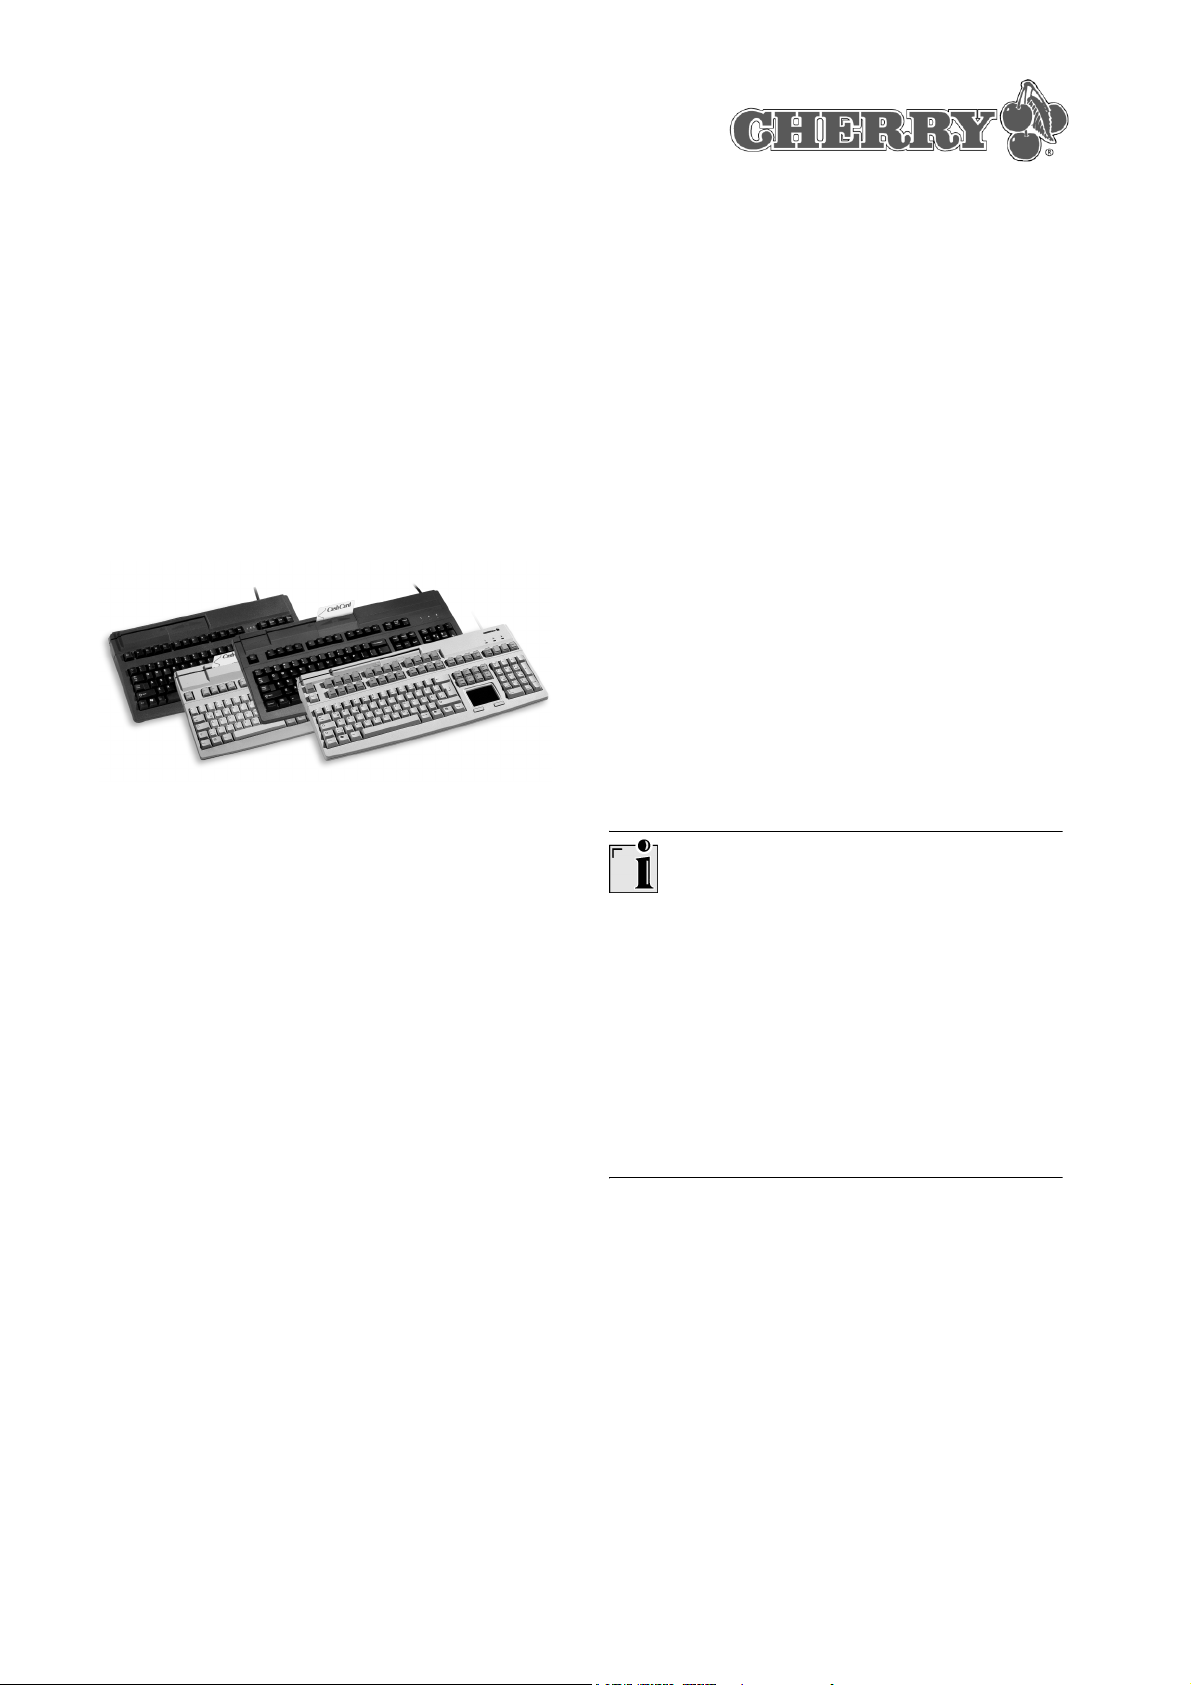
Mode d’emploi abrégé
MultiBoard
G8x-7xxx/8xxx
Concentrateur USB intégré
avec 2 connecteurs de sortie
1 Informations sur papier,
contextuelle et sur CD
2 Avantages des claviers
• Technologie MX Cherry avec contacts Gold
Crosspoint (G80)
• Technologie Cherry FTSC (G81)
• Robuste et fiable
En plus des fonctions d'un clavier standard, les
claviers vous offrent − selon la variante − les fonctions supplémentaires suivantes:
• Lecteur de cartes magnétiques
• Pavé tactile en remplacement de la souris
• Touches inscriptibles
• Touches supplémentaires pour affectation libre
• Les touches sont librement programmables
avec le logiciel Cherry Tools
A l'aide de 2 connecteurs de sortie USB (Downstream Ports), vous pouvez utiliser d'autres périphériques USB de faible puissance.
Vous trouverez les informations concernant la mise
en service, la manipulation et la configuration dans
le présent mode d'emploi abrégé, comme aide
contextuelle et sous forme de mode d'emploi.
Veuillez tenir compte des remarques générales
pour l'utilisateur et des conventions de licence.
Les informations sont classées suivant les critères
suivants:
• Le mode d'emploi abrégé décrit essentiellement le raccordement de l'appareil et l'installation du logiciel.
• L'aide en ligne fait partie intégrante du logiciel.
Elle vous donne des informations sur la commande là où vous en avez besoin et vous
l'appelez avec F1.
• Le mode d'emploi décrit la manipulation et la
configuration. Il se trouve sous forme de fichier
PDF sur le CD d'accompagnement (CD-ROM/
Manuals). Vous pouvez lire ce qui vous intéresse à l'écran ou l'imprimer.
En vous donnant seulement les informations
essentielles sur papier, nous réduisons la consommation de feuilles et contribuons à la protection de
l'environnement.
Attention
Danger en cas d'intensité de courant trop
élevée!
Le branchement sur les connecteurs de sortie USB
d'appareils défectueux ou non prévus à cet effet
peut provoquer un court-circuit et des dommages
consécutifs.
Ne branchez sur les connecteurs de sortie USB
que des appareils consommant au maximum
100 mA (appareils périphériques Low Power).
Pour les systèmes d'exploitation supportant l'USB,
les fonctions de base suivantes du clavier sont
directement présentes après la connexion:
• touches standard
• pavé numérique
• connecteurs de sortie USB (Downstream Ports)
• pavé tactile (si présent)
13
Page 14
2.1 Affichages d'état
4 Caractéristiques techniques
Lors de la connexion du clavier ou de la mise en
service du PC, le clavier effectue un autodiagnostic: Toutes les LED s'allument brièvement une fois.
En service, les LED indiquent l'état de fonction de
verrouillage des touches Num, Majuscule et de la
touche roulette.
3 Caractéristiques techniques de
toutes les variantes
Désignation Valeur
Interfaces Connecteur USB,
2 connecteurs USB
suivant USB 2.0
(full speed, 12 Mbit/s)
Vitesse de lecture du
lecteur de cartes
magnétiques
Cycles de lecture du
lecteur de cartes
magnétiques
Tension d'alimentation +5 V/DC ±5 % SELV
Consommation de
courant
3 à 125 pps à 75 bpp,
3 à 50 pps à 210 bpp
(pps = pouce par
seconde, bpp = bits
par pouce)
jusqu'à 1.000.000
max. 400 mA
MultiBoard G81-7000
Désignation Valeur
Description 104/105 touches, lec-
teur de cartes magnétiques, format compact
19 pouces, technologie FTSC
Poids
(emballage inclus)
Dimensions (L x l x H) 405 x 220 x 64 mm
env. 2 050 g
5 Caractéristiques techniques
MultiBoard G81-8000
Désignation Valeur
Description 104/105 touches, lec-
teur de cartes magnétiques, technologie
FTSC
Poids (emballage
inclus)
Dimensions (L x l x H) 470 x 220 x 64 mm
env. 2 250 g
Débit de courant max. 100 mA par
connecteur de sortie
Température
de stockage
Température
de fonctionnement
Longueur de câble env. 1,75 m
14
−20 °C à +60 °C
0 °C à +50 °C
Page 15
6 Caractéristiques techniques
MultiBoard G80-8113
Position Affectation
1+5 V
Désignation Valeur
Description 120/121 touches, dont
41 inscriptibles, lecteur de cartes magnétiques, pavé tactile,
technologie MX avec
contacts Gold Crosspoint
Résolution du pavé
tactile
Poids
(emballage inclus)
Dimensions (L x l x H) 470 x 220 x 64 mm
1000 ppp
env. 2 000 g
7 Caractéristiques techniques
MultiBoard G80-8200
Désignation Valeur
Description 120/121 touches, dont
48 inscriptibles, lecteur de cartes magnétiques, technologie MX
avec contacts Gold
Crosspoint
2 −DONNEES
3 +DONNEES
4GND
9 Raccordement de l'appareil
Raccorder l'appareil via le raccordement USB
1 Trouvez un raccordement USB à l'arrière de
votre PC ou d'un clavier Cherry avec concentrateur USB.
2 Insérez la fiche USB de l'appareil dans un con-
necteur USB quelconque.
10 Installation du logiciel
L'installation se fait en deux étapes:
• Installation des pilotes USB standard
• Installation du logiciel Cherry Tools.
Poids
(emballage inclus)
Dimensions (L x l x H) 470 x 220 x 64 mm
env. 2 250 g
8 Affectation des fiches et
connecteurs USB
Fiches et connecteurs USB (Downstream Port) du
clavier
10.1 Installation des pilotes USB standard
Windows XP ou Windows 95/NT?
Windows XP contient déjà des pilotes USB stan-
dard pour un clavier.
Windows 95/NT ne supportent pas l'USB. Si le PC
possède un connecteur USB, le support de clavier
USB ou le mode USB existant dans le Bios de
votre PC doit être mis sur enabled. Les touches
standard fonctionnent alors, les touches spéciales
ne sont pas supportées.
15
Page 16
Installer les pilotes USB standard sous
Windows 98/2000/ME
Condition: Lors de l'installation, vous aurez peut-
être besoin du CD d'installation de Windows.
1 Raccordez l'appareil au PC.
2 Démarrez le PC.
Le système d'exploitation reconnaît l'appareil. Le
message Trouvé un nouveau composant
matériel apparaît à l'écran. Le programme
Assistant Ajout/Suppression de matériel est
lancé.
3 Cliquez sur le bouton de commande Suivant.
La boîte de dialogue Recherche de fichiers de
pilotes s'ouvre et vous signale quel est le fichier
requis.
10.3 Installation du logiciel Support
OPOS/JPOS Cherry
Si vous utilisez des applications qui accèdent au
clavier ou au lecteur de cartes magnétiques via
OPOS ou JPOS:
• Installez le logiciel Support OPOS Cherry ou
Support JPOS Cherry.
Les fonctions du lecteur de cartes magnétiques
sont à votre disposition. Le logiciel Cherry Tools
ne doit pas être installé.
11 Programmation des touches
4 Insérez le CD d'installation de Windows. Le cas
échéant, vous devez introduire le chemin vers
les fichiers d'installation. Exemple: Pour le lecteur de CD-ROM D et le système d'exploitation
Windows 98: D:\Win98.
5 Suivez les instructions d'installation des pilotes à
l'écran.
10.2 Installation du logiciel Cherry Tools
Logiciel Cherry actualisé sur internet
Le logiciel est en développement permanent. Vous
pouvez télécharger la dernière version de Cherry
via l'internet: http://support.cherry.de
Installation du logiciel ”Cherry Tools“ sous
Windows 98/ME/2000/XP
1 Placez le CD Cherry dans votre lecteur de CD-
ROM.
Le CD-ROM démarre automatiquement. L'installation commence.
2 Si le CD-ROM ne démarre pas automatique-
ment, faites un double clic sur le lecteur de
CD-ROM dans l'Explorateur et ensuite sur le
fichier Start.exe.
L'installation commence.
La configuration n'est pas mémorisée dans le pavé
numérique, mais sous forme de fichier dans le PC.
• Installez le logiciel Cherry Tools.
La libre affectation des touches est à votre disposition.
La programmation des touches est décrite dans
l'aide en ligne du logiciel Cherry Tools.
12 Lecteur de cartes magnétiques
La configuration n'est pas mémorisée dans le pavé
numérique, mais sous forme de fichier dans le PC.
• Installez le logiciel Cherry Tools.
Les fonctions du lecteur de cartes magnétiques
sont à votre disposition.
La programmation du lecteur de cartes magnétiques est décrite dans l'aide en ligne du logiciel
Cherry Tools.
3 Suivez les instructions d'installation à l'écran.
Le logiciel Cherry Tools est installé.
16
Page 17

13 Nettoyage de l'appareil
Attention!
Détérioration en cas d'utilisation de produits de
nettoyage agressifs ou de pénétration de liquide
dans l'appareil
1 Pour le nettoyage, n'utilisez pas de solvants tels
que l'essence ou l'alcool ni aucun produit ou
éponge abrasif.
2 Empêchez tout liquide de pénétrer dans l'appa-
reil.
1 Humidifiez un chiffon doux avec un produit de
nettoyage doux. Exemple: détergent pour vaisselle.
2 Eliminer les salissures de la surface de l'appa-
reil.
3 Eliminez les résidus éventuels de produit de net-
toyage avec un chiffon humide.
4 Séchez l'appareil avec un chiffon doux non pelu-
chant.
14 Assistance
En cas de problèmes lors de l'installation du clavier ou du logiciel, nous vous offrons une assistance gratuite.
Vous atteindrez le support Cherry sous
http://support.cherry.de. Vous pourrez ainsi nous
transmettre directement vos questions 7 jours sur
7 et 24 h sur 24.
Si vous ne disposez pas d'un accès internet,
veuillez nous contacter à l'adresse suivante:
Cherry GmbH
Cherrystraße
D-91275 Auerbach
Ligne d'assistance:
Tel. +49(0)9643-18-206
Fax: +49(0)9643-18-1545
Nous sommes à votre disposition Lu-Je de 7:15 à
16:00 heures et le Ve de 7:15 à 13:30 heures
(GMT + 1h).
15 Généralités
Cherry optimise continuellement ses produits en
fonction des progrès technologiques. Par conséquent, nous nous réservons le droit de faire des
modifications techniques. L’évaluation de la fiabilité ainsi que la définition des détails techniques
sont le résultat des tests internes conformes aux
normes internationales en vigueur. D’autres spécifications peuvent être appliquées suite à une coopération mutuelle. Des mauvaises conditions
d’utilisation, de stockage, ou d’environnement peuvent entraîner des dysfonctionnements ou des
dommages lors de l’utilisation.
Nous insistons sur le fait que nous ne pouvons
accorder quelque garantie que ce soit causée par
une modification du matériel par l’utilisateur. Ceci
est valable également pour d’éventuels travaux de
réparation ou de maintenance effectués par des
personnes non agréées. Danger d’explosion en
cas d’échange inadéquat de la batterie Lithium
optionnelle! Toute demande d’indemnisation éventuelle contre Cherry ou ses représentants − quoi
que soit la cause (ainsi que des dommages corporels dus a une réaction émotionnelle) − sera rejetée dans la mesure où elle n’est pas la
conséquence d’une négligence de notre part. Les
restrictions ci-dessus ne s’appliquent pas dans le
cadre de la loi sur la Responsabilité Produit allemande ainsi qu’en cas de blessures corporelles ou
d’atteintes à la santé. Les conditions d’utilisation cidessus ne sont valables que pour le produit livré
avec cette notice.
Pour tout complément d’information, veuillez contacter votre revendeur Cherry ou directement
Cherry GmbH.
17
Page 18
16 Certification
16.1 Déclaration de conformité CE
Nous, Cherry GmbH, déclarons que les claviers de
la série MultiBoard G8x-7xxx/8xxx
(MX 7000 USB, MY 7000 USB, MX 8000 USB,
MY 8000 USB, MX 8100 USB) sont conformes aux
exigences suivantes:
• Directive basse tension 73/23/CEE, contrôle
suivant EN 60950
• Directive CEM 89/336/CEE, contrôle suivant
EN 55024
• Increase the separation between the equipment and receiver.
• Connect the equipment into an outlet on a circuit different from that to which the receiver is
connected.
• Consult the dealer or an experienced radio/TV
technician for help.
Caution: Unauthorized changes or modifications
could void the authority to operate the equipment.
16.4 Canadian Radio Interference
Regulations
Testé suivant procédure de test standard Cherry.
16.2 Indications concernant le sigle GS
En raison de la position de la touche zéro du pavé
numérique, le clavier ne doit pas être utilisé en
Allemagne pour des activités de comptabilité qui
se font principalement à l'aveugle. En raison de
l'attribution des touches (DIN 2137 partie 2), un
clavier avec une attribution des touches différente
du clavier allemand ne doit pas être utilisé en Allemagne pour des travaux permanents sur écran.
16.3 Federal Communications
Commission (FCC) Radio
Frequency Interference Statement
Information to the user: This equipment has been
tested and found to comply with the limits for
Class B digital device, pursuant to Part 15 of the
FCC Rules. These limits are designed to provide
reasonable protection against harmful interference
in a residential installation. This equipment generates, uses and can radiate radio frequency energy
and, if not installed and used in accordance with
the instructions, may cause harmful interference to
radio communications. However, there is no guarantee that interference will not occur in a particular
installation. If this equipment does cause harmful
interference to radio or television reception, which
can be determined by turning the equipment off
and on, the user is encouraged to try to correct the
interference by one or more of the following measures:
• Reorientate or relocate the receiving antenna.
Notice of CSA C 108.8 (DOC Jan. 1989)
This digital apparatus does not exceed the Class B
limits for radio noise emissions from digital apparatus set out in the Radio Interference Regulations of
the Canadian Department of Communications.
Le présent appareil numérique n’émet pas de
bruits radioélectriques dépassant les limites applicables aux appareils numériques de la classe B
prescrites dans le Règlement sur le brouillage
radioélectrique édicté par le ministère des Communications du Canada.
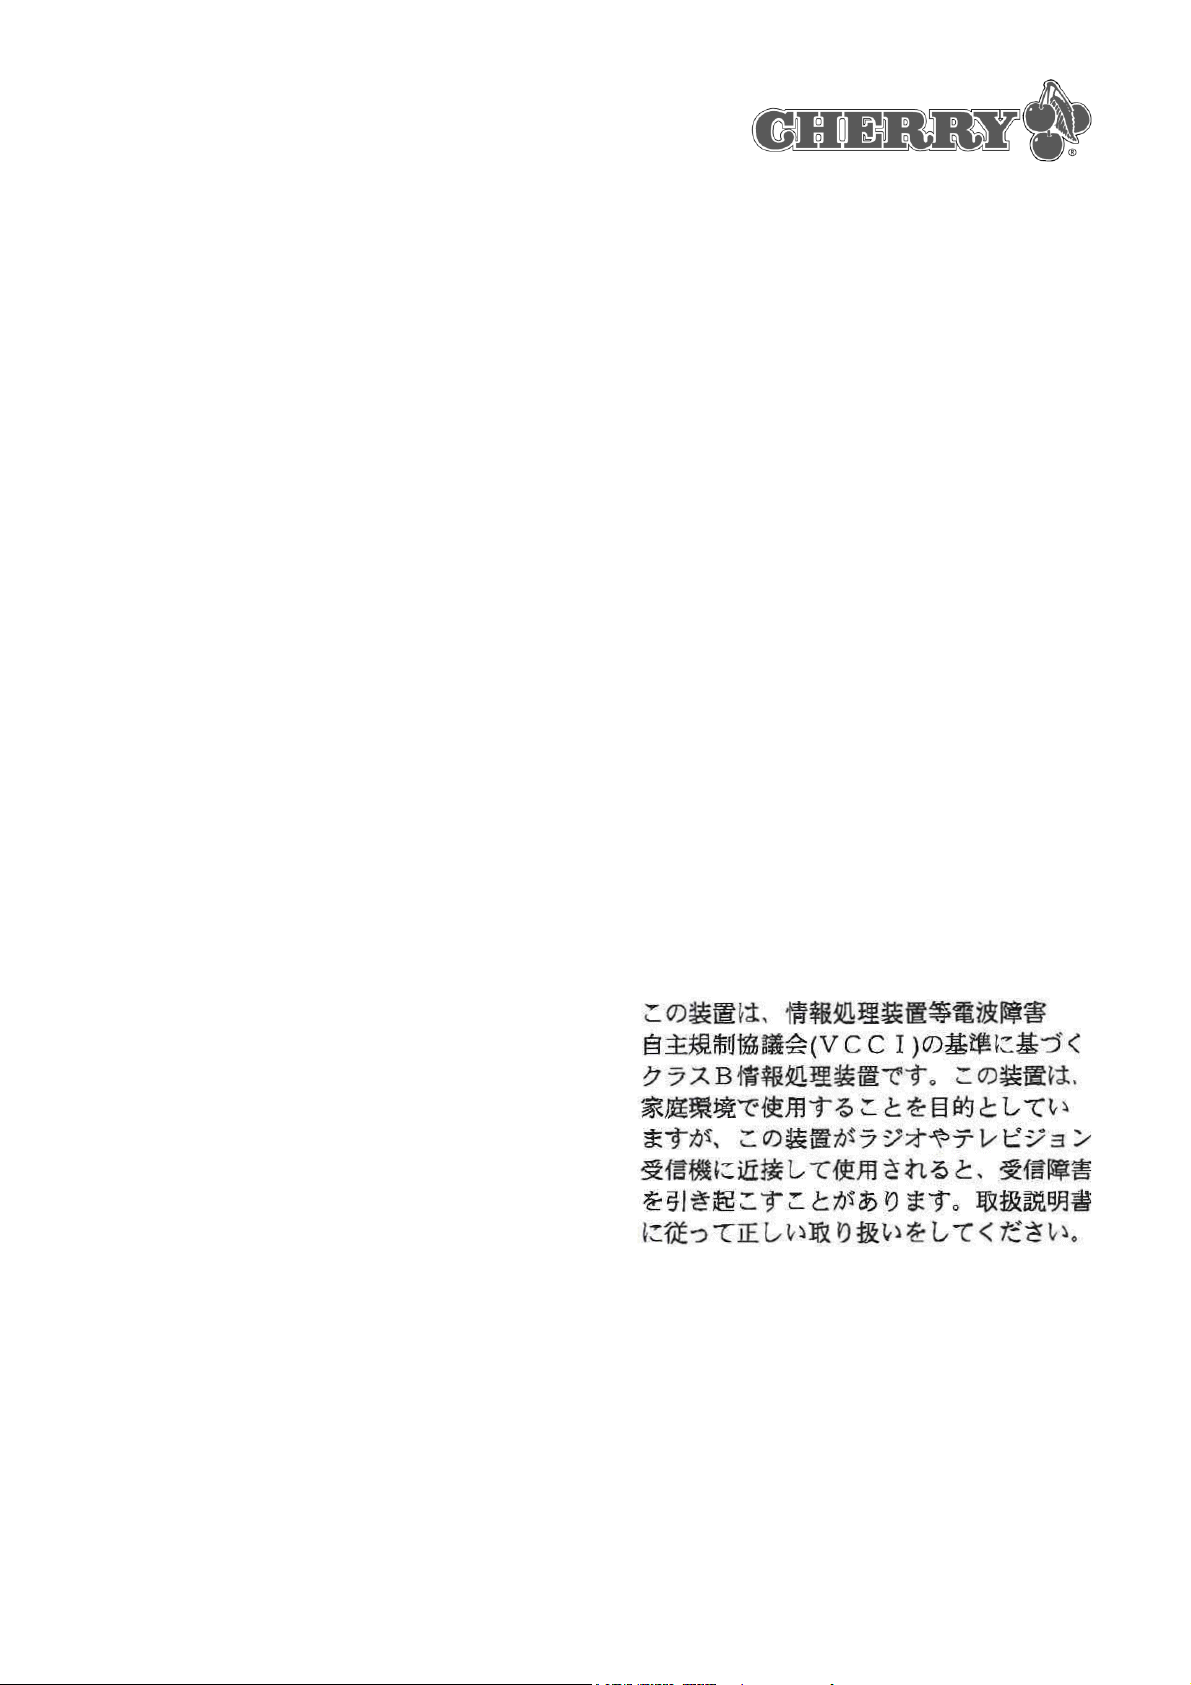
16.5 VCCI-Statement
18
 Loading...