

DE
CHERRY SECURE BOARD 1.0
BEDIENUNGSANLEITUNG / OPERATING MANUAL / MODE D’EMPLOI /
MANUAL DE INSTRUCCIONES / ISTRUZIONE D’USO
Bevor Sie beginnen ...
Jedes Gerät ist anders!
In der Bedienungsanleitung erhalten
Sie Hinweise zur effektiven und
zuverlässigen Verwendung.
• Lesen Sie die Bedienungsanleitung
aufmerksam durch.
• Bewahren Sie die Bedienungsanleitung auf
und geben Sie sie an andere Benutzer weiter.
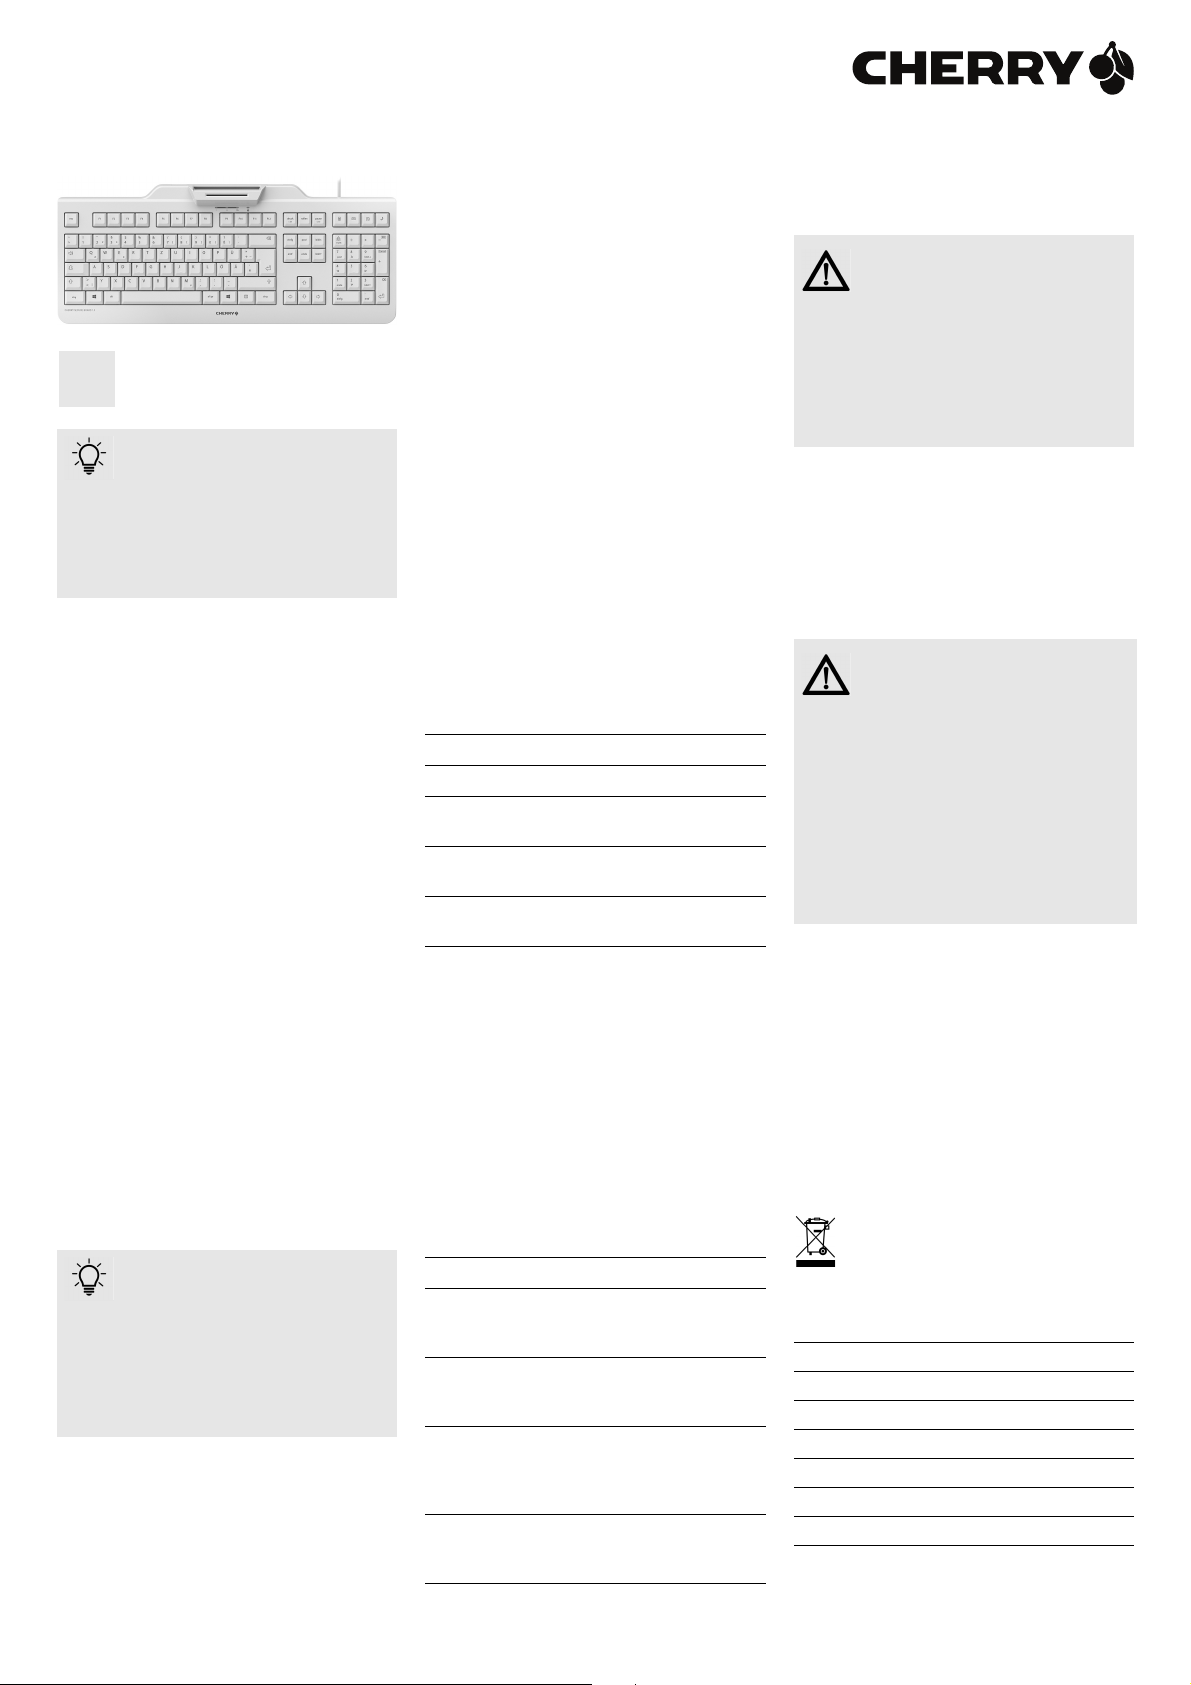
Das CHERRY SECURE BOARD 1.0 ist eine Tastatur
mit integriertem Chipkarten-Leser für
kontaktbehaftete und kontaktlose Chipkarten.
Sie zeichnet sich besonders durch folgende
Eigenschaften aus:
• Secure PIN Entry für direkte Übertragung der
PIN an die Chipkarte
• Secure Modus für verschlüsselte Übertragung
der Daten zwischen Tastatur und System
Für Informationen zu weiteren Produkten,
Downloads und vielem mehr, besuchen Sie bitte
www.cherry.de.
1 Tastatur an den PC
anschließen und Treiber
installieren
• Verbinden Sie den USB-Stecker der Tastatur mit
dem USB-Anschluss des PCs/Notebooks.
Der integrierte Kartenleser wird von Windows
erkannt und der Treiber automatisch geladen.
• Sollte der Kartenleser nicht erkannt werden,
nutzen Sie die Installationsanweisung für ein
Treiber-Update auf unserer Support Seite
www.cherry.de unter Service > Downloads. Dort
finden Sie auch den Link zum Linux-Treiber.
2 Chipkarten-Leser
verwenden
Zwei Chipkarten gleichzeitig im oder
am Chipkarten-Leser
Wenn Sie eine Chipkarte einlesen
möchten, obwohl sich bereits eine Chipkarte im
oder am Chipkarten-Leser befindet, greift der
Leser nur auf die erste Chipkarte zu. Es ist dabei
egal, ob es sich um eine kontaktbehaftete oder
kontaktlose Chipkarte handelt.
• Entfernen Sie die erste Chipkarte.
2.1 Kontaktbehaftete Chipkarten lesen
• Stecken Sie die Chipkarte mit dem Chip nach
unten und nach vorn zeigend in den ChipkartenSchacht.
Nachdem ein deutlicher Druckpunkt
überwunden ist, erfolgt die Kontaktierung.
2.2 Kontaktlose Chipkarten lesen
• Halten Sie die Chipkarte waagrecht zwischen die
Führungen an die Rückseite des ChipkartenLesers.
Wenn die Chipkarte vollständig und nah am
Gehäuse des Chipkarten-Lesers anliegt, werden
die Daten übertragen.
3 Secure PIN Entry (nur bei
kontaktbehafteten
Chipkarten)
Bei Unterstützung durch Ihre Applikation wird die
Eingabe der PIN nicht an das System übertragen,
sondern vom Nummernblock der Tastatur direkt
an die Chipkarte übergeben.
• Bestätigen Sie die PIN mit einer der beiden
„Enter“-Tasten.
• Brechen Sie den Vorgang mit der „Esc“-Taste
oder der „+“-Taste auf dem Nummernblock ab.
• Korrigieren Sie Ihre Eingabe mit der
„Backspace“-Taste oder der „–“-Taste auf dem
Nummernblock.
3.1 Statusanzeige PIN
Grün Rot Status
Leuchtet Aus Chipkarte erkannt
Flackert Aus Kommunikation mit der
Chipkarte
Blinkt Aus Chipkarten-Leser wartet
auf Antwort der Chipkarte
Aus Leuchtet Secure PIN Entry Modus
aktiv
4 Secure Modus
Die Tastatur kann durch das System in einen
sicheren Modus geschaltet werden. Sie kann dann
authentifiziert werden, wodurch Tasteneingaben
verschlüsselt übertragen werden.
Für den Secure Modus müssen vom Hersteller auf
dem System eine entsprechende Software
installiert sein. Hierzu stellen wir einen Software
Developer’s Guide zur Verfügung (siehe
www.cherry.de unter Service > Downloads).
4.1 Statusanzeige Schloss-Symbol
LED Status
Aus Standard HID-Tastatur Modus. Daten
werden an den Host-HID Treiber
gesendet.
Leuchtet Secure Modus, TLS-Kanal
eingerichtet. Daten werden
verschlüsselt gesendet.
Blinkt Der Secure Modus wird gerade
eingerichtet oder es wurde noch kein
Benutzerzertifikat bereitgestellt. Es
werden keine Daten gesendet.
Flackert Der Secure Modus wurde ohne
Autorisierung abgebrochen. Es werden
keine Daten gesendet.
5 Tipps
5.1 Tastatur reinigen
VORSICHT: Beschädigung durch
aggressive Reinigungsmittel oder
Flüssigkeit in der Tastatur
• Verwenden Sie zur Reinigung keine Lösungsmittel wie Benzin oder Alkohol und keine
Scheuermittel oder Scheuerschwämme.
• Verhindern Sie, dass Flüssigkeit in die Tastatur
gelangt.
• Entfernen Sie nicht die Tastenkappen der
Tastatur.
1 Schalten Sie den PC aus.
2 Reinigen Sie die Tastatur mit einem leicht
feuchten Tuch und etwas mildem
Reinigungsmittel (z. B.: Geschirrspülmittel).
3 Trocknen Sie die Tastatur mit einem
fusselfreien, weichen Tuch.
5.2 RSI-Syndrom
"Repetitive Strain Injury" = "Verletzung
durch wiederholte Beanspruchung".
RSI entsteht durch kleine, sich ständig
wiederholende Bewegungen.
Typische Symptome sind Beschwerden in den
Fingern oder im Nacken.
• Richten Sie Ihren Arbeitsplatz ergonomisch ein.
• Positionieren Sie Tastatur und Maus so, dass
sich Ihre Oberarme und Handgelenke seitlich
vom Körper befinden und ausgestreckt sind.
• Machen Sie mehrere kleine Pausen, ggf. mit
Dehnübungen.
• Ändern Sie oft Ihre Körperhaltung.
5.3 Hilfe im Problemfall
• Verwenden Sie einen anderen USB-Anschluss
am PC/Notebook.
• Um sicherzustellen, dass kein Defekt der
Tastatur vorliegt, testen Sie diese nach
Möglichkeit an einem anderen PC/Notebook.
• Setzen Sie im BIOS des PCs die Option "USB
Keyboard Support" bzw. "USB Legacy Mode" auf
enabled.
6 Entsorgung
Entsorgen Sie das Altgerät über eine
Sammelstelle für elektronischen Abfall
oder Ihren Händler.
7 Technische Daten
Bezeichnung Wert
Kartenleseeinheit 100 000 Steckzyklen
Protokolle T=0, T=1,T=CL
Versorgungsspannung 5,0 V/DC ±5 % SELV
Stromaufnahme Max. 100 mA
Lagertemperatur –20 °C ... +60 °C
Betriebstemperatur 0 °C ... +50 °C
64410057-01, DE, EN, FR, ES, IT, Sep 2019 (KC 1000 SC = Mod. JK-A04)
1
8Kontakt
EN
Bitte halten Sie bei Anfragen an den Technischen
Support folgende Informationen bereit:
• Artikel- und Serien-Nr. des Produkts
• Bezeichnung und Hersteller Ihres Systems
• Betriebssystem und ggf. installierte Version
eines Service Packs
Cherry GmbH
Cherrystraße
91275 Auerbach/OPf.
Internet: www.cherry.de
Telefon: +49 (0) 9643 2061-100*
*zum Ortstarif aus dem deutschen Festnetz, abweichende
Preise für Anrufe aus Mobilfunknetzen möglich
9 Allgemeiner
Anwenderhinweis
Technische Änderungen, die dem Fortschritt
dienen, behalten wir uns vor. Unsachgemäße
Behandlung und Lagerung können zu Störungen
und Schäden am Produkt führen.
Die vorliegende Anleitung ist nur gültig für das
mitgelieferte Produkt.
10 Gewährleistung
Es gilt die gesetzliche Gewährleistung.
Bitte wenden Sie sich an Ihren Händler oder
Vertragspartner.
Die Gewährleistung erlischt komplett, sofern
unautorisierte Änderungen am Produkt
durchgeführt worden sind. Führen Sie
eigenmächtig keine Reparaturen durch und öffnen
Sie das Produkt nicht.
11 Hinweis zum
GS-Zeichen
Aufgrund der Position der Nulltaste des
Nummernfelds ist die Tastatur für
Saldiertätigkeiten, die überwiegend blind erfolgen,
in Deutschland nicht anzuwenden. Eine Tastatur
mit nicht-deutscher Tastenknopfbelegung ist in
Deutschland aufgrund der Zeichenbelegung
(DIN 2137 Teil 2) nicht für den Dauereinsatz an
Bildschirmarbeitsplätzen zu verwenden.
Before you begin ...
Every device is different!
The operating instructions contain
information on effective and reliable
use.
• Read the operating instructions carefully.
• Keep the operating instructions and pass them
on to other users.
The CHERRY SECURE BOARD 1.0 is a keyboard
with an integrated chip card reader for contact and
contactless chip cards.
It is characterized by the following features:
• Secure PIN entry for the direct transmission of
the PIN to the chip card
• Secure mode for encrypted transmission of data
between the keyboard and system
For information on other products, downloads and
much more, visit us at www.cherry.de.
1 Attaching the keyboard to
the PC and installing the
driver
• Connect the USB connector on the keyboard to
the USB port on the PC/laptop.
The integrated card reader is recognized by
Windows and the driver is automatically loaded.
• If the card reader is not recognized, use the
installation instructions for a driver update on
our support page www.cherry.de under
Service > Downloads. You will also find the link
to the Linux driver there.
2 Using the chip card
reader
Two chip cards in or on the reader at
the same time
If you try to read a chip card when there
is already another one in or on the reader, the
reader will only access the first card. It does not
matter whether it is a contact or contactless chip
card.
• Remove the first chip card.
2.1 Reading a contact chip card
• Insert the chip card with the chip facing down
and forward into the chip card slot.
After a significant pressure point has been
reached, contact is made.
2.2 Reading a contactless chip card
• Hold the chip card horizontally between the
guides to the back of the chip card reader.
When the chip card fits completely tightly against
the housing of the chip card reader, the data are
transmitted.
3 Secure PIN entry (only for
contact chip cards)
If your application supports it, the entry of the PIN
is not transmitted to the system, but instead from
the numerical keypad of the keyboard directly to
the chip card.
• Confirm the PIN by using one of the two "Enter"
keys.
• Abort the process by using the "Esc" key or the
"+" key on the number block.
• Correct your entry with the "Backspace" key or
the "–" key on the number block.
3.1 PIN status display
Green Red Status
Lit up Off Chip card recognized
Flickers Off Communication with the
chip card
Flashing Off Chip card reader is waiting
for an answer from the chip
card
Off Lit up Secure PIN entry mode
active
4 Secure mode
The keyboard can be switched to secure mode by
the system. It can then be authenticated, so that
key entries will be transmitted in encrypted form.
For the secure mode, the corresponding software
must be installed on the system by the
manufacturer. We provide a Software Developer’s
Guide for this purpose (see www.cherry.de under
Service > Downloads).
4.1 Status display: lock symbol
LED Status
Off Standard HID keyboard mode. Data are
sent to the host HID driver.
Lit up Secure mode, TLS channel set up.
Data are sent in encrypted form.
Flashing Secure mode is currently being set up,
or no user certificate has been
provided yet. No data are sent.
Flickers Secure mode was aborted without
authorization. No data are sent.
5Tips
5.1 Cleaning the keyboard
CAUTION: Damage may be caused by
harsh cleaning agents or liquids in the
keyboard
• Do not use solvents such as gasoline or
alcohol and scouring agents or scouring
sponges for cleaning.
• Prevent liquids from entering the keyboard.
• Do not remove the keycaps of the keyboard.
1 Switch off the PC.
2 Clean the keyboard with a slightly damp cloth
and some mild cleaning agent (e.g. dish washing
liquid).
3 Dry off the keyboard with a soft, lint-free cloth.
5.2 RSI syndrome
RSI stands for "Repetitive Strain
Injury". RSI arises due to small
movements continuously repeated
over a long period of time.
Typical symptoms are discomfort in the fingers or
neck.
• Set up your workspace ergonomically.
• Position the keyboard and mouse in such a
manner that your upper arms and wrists are
outstretched and to the sides of your body.
• Take several short breaks, with stretching
exercises if necessary.
• Change your posture often.
5.3 Troubleshooting
• Use another USB port on the PC/laptop.
• To make sure that the keyboard is not defective,
test it if possible with another PC/laptop.
• Set the option "USB Keyboard Support" or "USB
Legacy Mode" to enabled in the BIOS of the PC.
6 Disposal
Dispose of the used device at an official
collection point for electronic waste or at
your local dealer.
2

7 Technical data
FR
Designation Value
Card reading unit 100,000 insertions
Protocols T=0, T=1, T=CL
Supply voltage 5.0 V/DC ±5% SELV
Current consumption Max. 100 mA
Storage temperature –20 °C ... +60 °C
Operating temperature 0 °C ... +50 °C
8Contact
Please provide the following information about the
device when contacting technical support:
• Item and serial no. of the product
• Name and manufacturer of your system
• Operating system and, if applicable, installed
service pack version
For Europe:
Cherry GmbH
Cherrystraße
91275 Auerbach/OPf.
Germany
Internet: www.cherry.de
For USA:
Cherry Americas, LLC
5732 95th Avenue
Suite 850
Kenosha, WI 53144
USA
Tel.: +1 262 942 6508
Email: sales@cherryamericas.com
Internet: www.cherryamericas.com
9 General advice
We reserve the right to make technical
modifications which serve the development of our
products. Improper use and storage can lead to
faults and damage to the product.
These instructions are only valid for the supplied
product.
10 Warranty
The statutory warranty applies. Please contact your
specialist dealer or contractual partner.
The warranty expires completely once unauthorized
modifications to the product have been carried out.
Do not carry out any unauthorized repairs and do
not open up the product.
11 Certifications
11.1 Federal Communications
Commission (FCC) Radio
Frequency Interference
Statement
This device complies with part 15 of the FCC Rules.
Operation is subject to the following two conditions:
(1) This device may not cause harmful interference,
and (2) this device must accept any interference
received, including interference that may cause
undesired operation.
Note: This equipment has been tested and found to
comply with the limits for a Class B digital device,
pursuant to part 15 of the FCC Rules. These limits
are designed to provide reasonable protection
against harmful interference in a residential
installation. This equipment generates, uses and
can radiate radio frequency energy and, if not
installed and used in accordance with the
instructions, may cause harmful interference to
radio communications. However, there is no
guarantee that interference will not occur in a
particular installation. If this equipment does cause
harmful interference to radio or television
reception, which can be determined by turning the
equipment off and on, the user is encouraged to try
to correct the interference by one or more of the
following measures:
• Reorient or relocate the receiving antenna.
• Increase the separation between the equipment
and receiver.
• Connect the equipment into an outlet on a circuit
different from that to which the receiver is
connected.
• Consult the dealer or an experienced radio/TV
technician for help.
Caution: Any changes or modifications not
expressly approved by the party responsible for
compliance could void the user's authority to
operate the equipment.
11.2 RF exposure statement
This device complies with the RF exposure
requirements for mobile and fixed devices.
However, the device shall be used in such a
manner that the potential for human contact during
normal operation is minimized.
11.3For UL
For use with Listed Personal Computers only!
Avant de commencer...
Chaque appareil est différent !
Le mode d’emploi contient des
consignes pour une utilisation
efficace et fiable.
• Lisez attentivement le mode d’emploi.
• Conservez le mode d’emploi et
transmettez-le aux autres utilisateurs.
CHERRY SECURE BOARD 1.0 est un clavier à
lecteur intégré pour cartes à puce à ou sans
contact.
Il se distingue par les caractéristiques suivantes :
• Entrée sécurisée du numéro d’identification
personnel (Secure PIN Entry) pour transmission
directe de celui-ci à la carte à puce
• Mode sécurisé de transmission cryptée de
données du clavier au système
Pour obtenir des informations sur d'autres
produits, sur les téléchargements et bien d'autres
choses, consultez le site www.cherry.de.
1 Connexion du clavier au
PC et installation de
pilote
• Branchez la prise USB au port USB du PC de
l’ordinateur portable.
Windows reconnaîtra le lecteur de carte intégré
et installera automatiquement le pilote.
• S’il ne reconnait pas le lecteur de carte,
consultez notre notice d’installation et observez
nos instructions de mise à jour de pilote en vous
rendant sur notre page d’assistance
www.cherry.de, Assistance > Téléchargement.
Vous y trouverez également le lien vers le pilote
Linux.
2 Exploitation du lecteur de
carte à puce
Deux cartes à puce en même temps
dans ou sur le lecteur de carte à puce
alors qu’une carte se trouve déjà dans ou sur le
lecteur de carte à puce : le lecteur n’a accès qu’à
la première carte qu’il s’agisse d’une carte à
puce à contact ou sans contact.
• Retirez la première carte à puce.
Si vous souhaitez lire une carte à puce
2.1 Lecture de carte à puce à contact
• Introduisez la carte dans la fente, la puce vers le
bas et dirigée vers l’avant.
Après dépassement du point de pression, le
contact est établi.
2.2 Lecture de carte à puce sans
contact
• Tenez la carte à l’horizontale entre les guidages
au dos du lecteur.
La transmission des données commencera dès
que la carte sera intégralement à proximité du
boîtier du lecteur.
3 Entrée sécurisée du
numéro d’identification
personnel (carte à
contact uniquement)
La saisie du PIN est prise en charge par votre
application et transmise directement du pavé
numérique du clavier à la carte à puce sans être
transmise au système.
• Validez le PIN avec l'une des deux touches
"Entrée".
• Vous pouvez interrompre la procédure à l'aide de
la touche "Echap" ou de la touche "+" du pavé
numérique.
• Utilisez la touche "Retour arrière" ou la touche
"–" du pavé numérique pour corrigez votre
saisie.
3.1 Affichage d’état de numéro
d’identification personnel
Vert Rouge État
Allumé(e) Éteint(e) Carte à puce détectée
Vacillement
Clignote
ment
Éteint(e) Allumé(e) Mode d’entrée sécurisée
Éteint Communication en cours
avec la carte à puce
Éteint(e) Le lecteur attend la
réponse de la carte à
puce
du numéro d’identification personnel activé
4 Mode de sécurité
Le système rend le clavier authentifiable en le
faisant passer en mode de sécurité ; cela permet le
cryptage de la transmission des entrées au clavier.
Le mode sécurisé requiert l’installation d’un logiciel par le fabricant sur le système. Nous mettons
à cet effet un guide de développeur de logiciels
(Software Developer’s Guide) à disposition (cf.
www.cherry.de, Assistance > Téléchargement).
3

4.1 Cadenas d’affichage d'état
ES
LED État
Éteint(e) Mode de clavier périphérique
Allumé(e) Mode sécurisé, canal TLS configuré.
Clignotement
Vacillement
d’interface humaine (HID) standard.
Envoi des données au pilote HID
hôte.
Envoi des données par cryptage.
Le mode sécurisé est en cours de
configuration ou un certificat
d'utilisateur n'est pas encore
disponible. Aucune donnée envoyée.
Interruption du mode sécurisé sans
autorisation. Aucune donnée
envoyée.
5Conseils
5.1 Nettoyage du clavier
ATTENTION : Détérioration en cas
d’utilisation de produits de nettoyage
agressifs ou de pénétration de liquide
dans le clavier
• Pour le nettoyage, n’utilisez pas de solvants
tels que l’essence ou l’alcool ni aucun produit
ou éponge abrasif.
• Empêchez tout liquide de pénétrer dans le
clavier.
• N’enlevez pas les capuchons des touches du
clavier.
1 Mettez le PC hors service.
2 Nettoyez le clavier avec un chiffon légèrement
humide et un produit de nettoyage doux (p. ex.
détergent vaisselle).
3 Séchez le clavier avec un chiffon doux non
peluchant.
5.2 Syndrome LMR
LMR signifie "Lésion due aux
mouvements répétitifs". Le syndrome
LMR apparaît suite à de petits
mouvements se répétant en
permanence.
Des symptômes typiques sont des douleurs dans
les doigts ou la nuque.
• Organisez votre poste de travail de manière
ergonomique.
• Positionnez le clavier et la souris de telle façon
que vos bras et vos poignets se trouvent latéralement par rapport au corps et soient étendus.
• Faites plusieurs petites pauses, le cas échéant
accompagnées d’exercices d’étirement.
• Modifiez souvent votre attitude corporelle.
5.3 Aide en cas de problème
• Utilisez une autre connexion USB du PC/
portable.
• Afin de s’assurer de l’absence de défaut du
clavier, testez celui-ci si possible sur un autre
PC/portable.
• Dans le BIOS du PC, réglez l’option "USB
Keyboard Support" ou "USB Legacy Mode" sur
enabled.
6 Elimination
Confiez votre appareil usagé à une
structure spécialisée dans le recyclage des
déchets électroniques ou à votre
revendeur.
7 Caractéristiques
techniques
Désignation Valeur
Unité de lecture de carte 100 000 insertions de
Protocoles T=0, T=1, T=CL
Alimentation 5,0 V/DC ±5 % SELV
Consommation de
courant
Température de
stockage
Température de
fonctionnement
carte
Max. 100 mA
–20 °C ... +60 °C
0 °C ... +50 °C
8Contact
En cas de questions, veuillez indiquer les
informations suivantes concernant l'appareil :
• N° d'article et n° de série du produit
• Désignation et fabricant de votre système
• Système d'exploitation et le cas échéant version
installée d'un Service Pack
Cherry GmbH
Cherrystraße
91275 Auerbach/OPf.
Allemagne
Internet : www.cherry.de
9 Généralités
Sous réserve de modifications techniques.
Un traitement et un stockage non conformes
peuvent entraîner des dysfonctionnements et des
dommages du produit.
La présente notice est valable uniquement pour le
produit avec lequel elle est fournie.
10 Garantie
La garantie légale s'applique. Veuillez contacter
votre revendeur ou votre partenaire contractuel.
La garantie devient complètement caduque si des
modifications non-autorisées sont effectuées sur le
produit. N'effectuez aucune réparation de votre
propre chef et n'ouvrez pas le produit.
Antes de empezar...
¡Cada aparato es distinto!
En las instrucciones de uso
utilización efectiva y segura del aparato.
• Lea las instrucciones detenidamente.
• Guarde las instrucciones de uso y
encontrará explicaciones sobre la
transmítalas a otros usuarios.
El CHERRY SECURE BOARD 1.0 es un teclado con
lector de tarjetas chip integrado para tarjetas chip
con y sin contacto.
Se distingue principalmente por las siguientes
características:
• Secure PIN Entry para la transmisión directa del
PIN a la tarjeta chip
• Modo Secure para la transmisión encriptada de
los datos entre teclado y sistema
En la dirección www.cherry.de podrá, entre otros,
encontrar y descargar información sobre los
productos.
1 Conexión del teclado al
PC e instalación del
controlador
• Conecte la clavija USB del teclado a la toma USB
del PC/ordenador portátil.
Windows detecta el lector de tarjetas integrado y
el controlador se carga automáticamente.
• Si el lector de tarjetas no se detecta, utilice las
instrucciones para instalar una actualización de
controlador en nuestra página de asistencia
técnica Asistencia > Descargas en
www.cherry.de. Aquí también encontrará el
enlace al controlador de Linux.
2 Uso del lector de tarjetas
chip
Dos tarjetas chip al mismo tiempo en
el lector de tarjetas chip
Si desea leer una tarjeta chip aunque ya
hay una en el lector de tarjetas chip, el lector solo
accede a la primera tarjeta chip. En este caso da
lo mismo si se trata de una tarjeta chip con
contacto o sin contacto.
• Retire la primera tarjeta chip.
2.1 Lectura de tarjetas chip con contacto
• Inserte la tarjeta chip con el chip hacia abajo y
hacia delante en dirección a la ranura para
tarjetas chip.
El contacto se produce una vez que se supera un
punto de presión evidente.
2.2 Lectura de tarjetas chip sin contacto
• Sostenga la tarjeta chip en horizontal entre las
guías de la parte trasera del lector de tarjetas
chip.
Los datos se transmiten cuando la tarjeta chip
completa se aproxima a la carcasa del lector de
tarjeta chip.
3 Secure PIN Entry (solo en
tarjetas chip con
contacto)
Gracias a la compatibilidad con su aplicación, la
introducción del PIN no se transmite al sistema,
sino que se transmite directamente desde el
bloque numérico del teclado a la tarjeta chip.
• Confirme el PIN con una de las dos teclas
“Enter”.
• Interrumpa el proceso con la tecla “Esc” o la
tecla “+” del bloque numérico.
• Corrija la introducción con la tecla de retroceso
o con la tecla “–” del bloque numérico.
4

3.1 Indicación de estado de PIN
IT
Verde Rojo Estado
Iluminado Apagado Tarjeta chip detectada
Destello Apagado Comunicación con la
Parpadeo Apagado El lector de tarjetas chip
Apagado Iluminado Modo Secure PIN Entry
tarjeta chip
espera a la respuesta de
la tarjeta chip
activo
4 Modo Secure
El teclado se conmuta a modo seguro con el
sistema. De esta forma, el teclado puede autenticar
cómo se deben transmitir encriptados los datos
introducidos con el teclado.
Para utilizar el modo Secure, el fabricante debe
haber instalado el software correspondiente en el
sistema. Proporcionamos una guía del
desarrollador de software (Software Developer’s
Guide) al respecto (véase Asistencia > Descargas
en www.cherry.de).
4.1 Indicación de estado de símbolo de candado
LED Estado
Apagado Modo de teclado HID estándar. Los
Iluminado
Parpadeo
Destello El modo Secure se ha cancelado sin
datos se envían al controlador de HID
anfitrión.
Modo Secure, canal TLS configurado.
Los datos se envían encriptados.
El modo Secure se está configurando o
todavía no se ha emitido un certificado
de usuario. No se envía ningún dato.
autorización. No se envía ningún dato.
5Consejos
5.1 Limpieza del teclado
ATENCIÓN: El teclado se daña con productos de limpieza agresivos o con
líquidos
• Para su limpieza, no utilice disolventes como
gasolina o alcohol, ni medios abrasivos o
esponjas abrasivas.
• Evite que entre líquido en el teclado.
• No extraiga las teclas del teclado.
1 Desconecte el PC.
2 Limpie el teclado con un paño ligeramente
humedecido y un poco de producto de limpieza
suave (p. ej. lavavajillas).
3 Seque el teclado con un paño suave sin pelusa.
5.2 Síndrome RSI
"Repetitive Strain Injury" = "Síndrome
del túnel carpiano". El RSI se origina
por movimientos pequeños, repetidos
continuamente.
Los síntomas típicos son molestias en los dedos
o en la nuca.
• Organice su puesto de trabajo de forma
ergonómica.
• Coloque el teclado y el ratón de modo que los
brazos y las muñecas se encuentren a los
lados del cuerpo y estirados.
• Haga varias pausas cortas, cuando sea
necesario con ejercicios de estiramiento.
• Cambie con frecuencia la postura corporal.
5.3 Solución a problemas
• Utilice otro conector USB en el PC/Notebook.
• Para asegurarse de que el teclado no tiene
ningún defecto, pruébelo cuando sea posible en
otro PC/Notebook.
• Marque la opción "USB Keyboard Support"
(Soporte del teclado USB) o "USB Legacy Mode"
(USB en modo legado) en el BIOS del PC como
enabled (activada).
6 Gestión
Cuando se quiera desahacer del aparato
usado, entréguelo en su establecimiento
comercial o en un punto de recogida para
residuos electrónicos.
7 Datos técnicos
Denominación Valor
Unidad lectora de
tarjeta
Protocolos T=0, T=1, T=CL
Suministro de tensión 5,0 V/CC ±5 % SELV
Consumo de corriente Max. 100 mA
Temperatura de
almacenamiento
Temperatura de
funcionamiento
100.000 ciclos de
conexión
–20 °C ... +60 °C
0 °C ... +50 °C
8Contacto
Si realiza alguna consulta, indique la siguiente
información sobre el dispositivo:
• Nº de artículo y de serie del producto
• Denominación y fabricante del PC, Notebook o
placa base
• Sistema operativo y, en su caso, versión
instalada de un paquete de servicios
Cherry GmbH
Cherrystraße
91275 Auerbach/OPf.
Alemania
Internet: www.cherry.de
9 Instrucciones generales
para el usuario
Nos reservamos el derecho de realizar
modificaciones técnicas destinadas a la mejora del
producto. Un manejo o almacenamiento
inadecuados pueden provocar averías o
desperfectos en el producto.
Las presentes instrucciones solo rigen para el
producto suministrado.
10 Garantía
Rige la garantía legal. Póngase en contacto con su
distribuidor o parte contratante.
La garantía pierde su validez tan pronto como se
introduzcan modificaciones no autorizadas. No
lleve a cabo ninguna reparación por su cuenta ni
abra el producto.
Prima di cominciare...
Ogni apparecchio è diverso!
Il presente manuale d’uso contiene
istruzioni per un uso efficiente e
affidabile.
•Leggere il manuale d’uso con attenzione.
• Conservare il manuale d’uso e
consegnarlo ad altri utenti.
CHERRY SECURE BOARD 1.0 è una tastiera con
lettore smart card integrato per carte chip a
contatto o senza contatto.
Si contraddistingue soprattutto per le seguenti
caratteristiche:
• Secure PIN Entry per la trasmissione diretta del
PIN alla smart card
• Secure Modus per la trasmissione cifrata dei
dati tra tastiera e sistema
Per informazioni su ulteriori prodotti, download e
molto altro ancora, visitate la pagina web
www.cherry.de.
1 Collegare la tastiera al
PC e installare il driver
• Inserire il connettore USB della tastiera nella
porta USB del PC/notebook.
Windows riconosce il lettore integrato della carta
e carica automaticamente il driver.
• Se il lettore non viene riconosciuto, consultare le
istruzioni d’installazione per l’aggiornamento del
driver sul nostro sito www.cherry.de seguendo
Service > Downloads. Qui si trova anche il link
per il driver Linux.
2 Funzionamento del
lettore smart card
Due smart card contemporaneamente
nel o sul lettore per smart card
Se si tenta di leggere una smart card
anche se vi è già una smart card nel o sul lettore,
il lettore accede soltanto alla prima smart card.
Non fa quindi differenza se si tratta di una smart
card con o senza contatto.
• Togliere la prima smart card.
2.1 Lettura delle smart card a contatto
• Inserire la carta nel vano apposito con il chip
rivolto verso il basso e in avanti.
Dopo aver oltrepassato un significativo punto di
pressione, avviene il contatto.
5

2.2 Lettura delle smart card senza contatto
• Tenere la carta in orizzontale tra le guide sul
retro del lettore smart card.
Quando la carta si trova interamente adiacente
all’involucro del lettore smart card avviene la
trasmissione dei dati.
3 Secure PIN Entry (solo
con smart card a
contatto)
Per il supporto mediante la vostra applicazione,
l’immissione del PIN non viene trasmessa al
sistema, ma trasferita dal tastierino numerico della
tastiera direttamente alla scheda con chip.
• Confermare il PIN con uno dei due tasti “Enter”.
• Interrompere l’operazione con il tasto “Esc” o il
tasto “+” del tastierino numerico.
• Correggere l’immissione con il tasto
“Backspace” o con il tasto “–” del tastierino
numerico.
3.1 Indicazione di stato PIN
Verde Rosso Stato
Acceso Spento Smart card riconosciuta
Sfarfalla Spento Comunicazione con la
smart card
Lampeggia Spento Il lettore smart card
attende la risposta della
carta
Spento Acceso Secure PIN Entry Modus
attivo
4 Secure Modus
La tastiera può essere attivata dal sistema in una
modalità sicura. Così può essere autenticata e i
dati digitati sulla tastiera saranno trasmessi in
modo cifrato.
Per Secure Modus deve essere installato sul
sistema dal produttore un software corrispondente.
È possibile consultare la Software Developer’s
Guide (vedi www.cherry.de e segui Service >
Downloads).
4.1 Indicazione di stato simbolo lucchetto
LED Stato
Spento Modalità tastiera HID standard. I
dati vengono inviati al drive HID
host.
Acceso Secure Modus, canale TLS
impostato. I dati vengono inviati
cifrati.
Lampeggia Secure Modus è in corso di
configurazione o non è ancora
disponibile il certificato utente. I
dati non vengono inviati.
Sfarfalla Secure Modus è stato interrotto
senza autorizzazione. I dati non
vengono inviati.
5 Suggerimenti
5.1 Pulizia della tastiera
ATTENZIONE: Detergenti o liquidi
aggressivi possono danneggiare la
tastiera
• Per la pulizia non utilizzare solventi come benzina o alcol né sostanze o spugne abrasive.
• Evitare l'ingresso di liquidi nella tastiera.
• Non rimuovere i tasti dalla tastiera.
1 Spegnere il PC.
2 Pulire la tastiera con un panno leggermente
inumidito e una piccola quantità di detergente
delicato (ad es. detergente per piatti).
3 Asciugare la tastiera con un panno morbido che
non lasci pelucchi.
5.2 Sindrome RSI
RSI è l'acronimo di "Repetitive Strain
Injury", ovvero sindrome da tensione
ripetuta. La sindrome RSI è causata da
piccoli e continui movimenti ripetuti.
Sintomi tipici sono dolori alle dita e alla nuca.
• Allestire la postazione di lavoro in modo
ergonomico.
• Posizionare la tastiera e il mouse in modo tale
che l'avambraccio e l'articolazione del polso si
trovino ai lati del corpo e siano distesi.
• Fare piccole pause, eventualmente praticando
esercizi di allungamento.
• Cambiare spesso posizione.
5.3 Aiuto in caso di problemi
• Utilizzare un'altra presa USB del PC/notebook.
• Per garantire che la tastiera non presenti difetti,
controllarne il funzionamento su un altro PC/
notebook.
• Nel BIOS del PC, attivare l'opzione "USB
Keyboard Support" o "USB Legacy Mode"
selezionando enabled.
6 Smaltimento
Smaltire il vecchio apparecchio presso un
apposito centro di raccolta per rifiuti
elettronici o presso il proprio rivenditore.
7 Dati tecnici
Denominazione Valore
Unità lettura schede 100 000 cicli di innesto
Protocolli T=0, T=1, T=CL
Tensione di
alimentazione
Corrente assorbita Max. 100 mA
Temperatura di
magazzinaggio
Temperatura d'esercizio 0 °C ... +50 °C
5,0 V/DC ±5% SELV
–20 °C ... +60 °C
8 Contatti
In caso di richieste, indicare le seguenti
informazioni sull'apparecchio:
• N° di articolo e di serie del prodotto
• Denominazione e produttore del PC, notebook o
scheda madre
• Sistema operativo ed eventualmente versione
installata di un service pack
Cherry GmbH
Cherrystraße
91275 Auerbach/OPf.
Germania
Internet: www.cherry.de
9 Avvertenza generale per
l'utente
Ci riserviamo il diritto di effettuare modifiche
tecniche che consentano un miglioramento del
prodotto. Un uso e uno stoccaggio del prodotto non
appropriati possono causare guasti e danni al
prodotto.
Il presente manuale vale solo per il prodotto in
dotazione.
10 Garanzia
L'apparecchio è coperto dalla garanzia legale. Per
qualsiasi informazione, contattare il proprio
rivenditore o parte contraente.
La garanzia decade completamente qualora sul
prodotto siano state apportate modifiche non
autorizzate. Non effettuare riparazioni in modo
arbitrario e non aprire il prodotto.
Leave us a comment
#cherrykeyboards
social.cherry.de/fbmx
social.cherry.de/twitter
blog.cherry.de
social.cherry.de/youtube
social.cherry.de/insta
6
 Loading...