

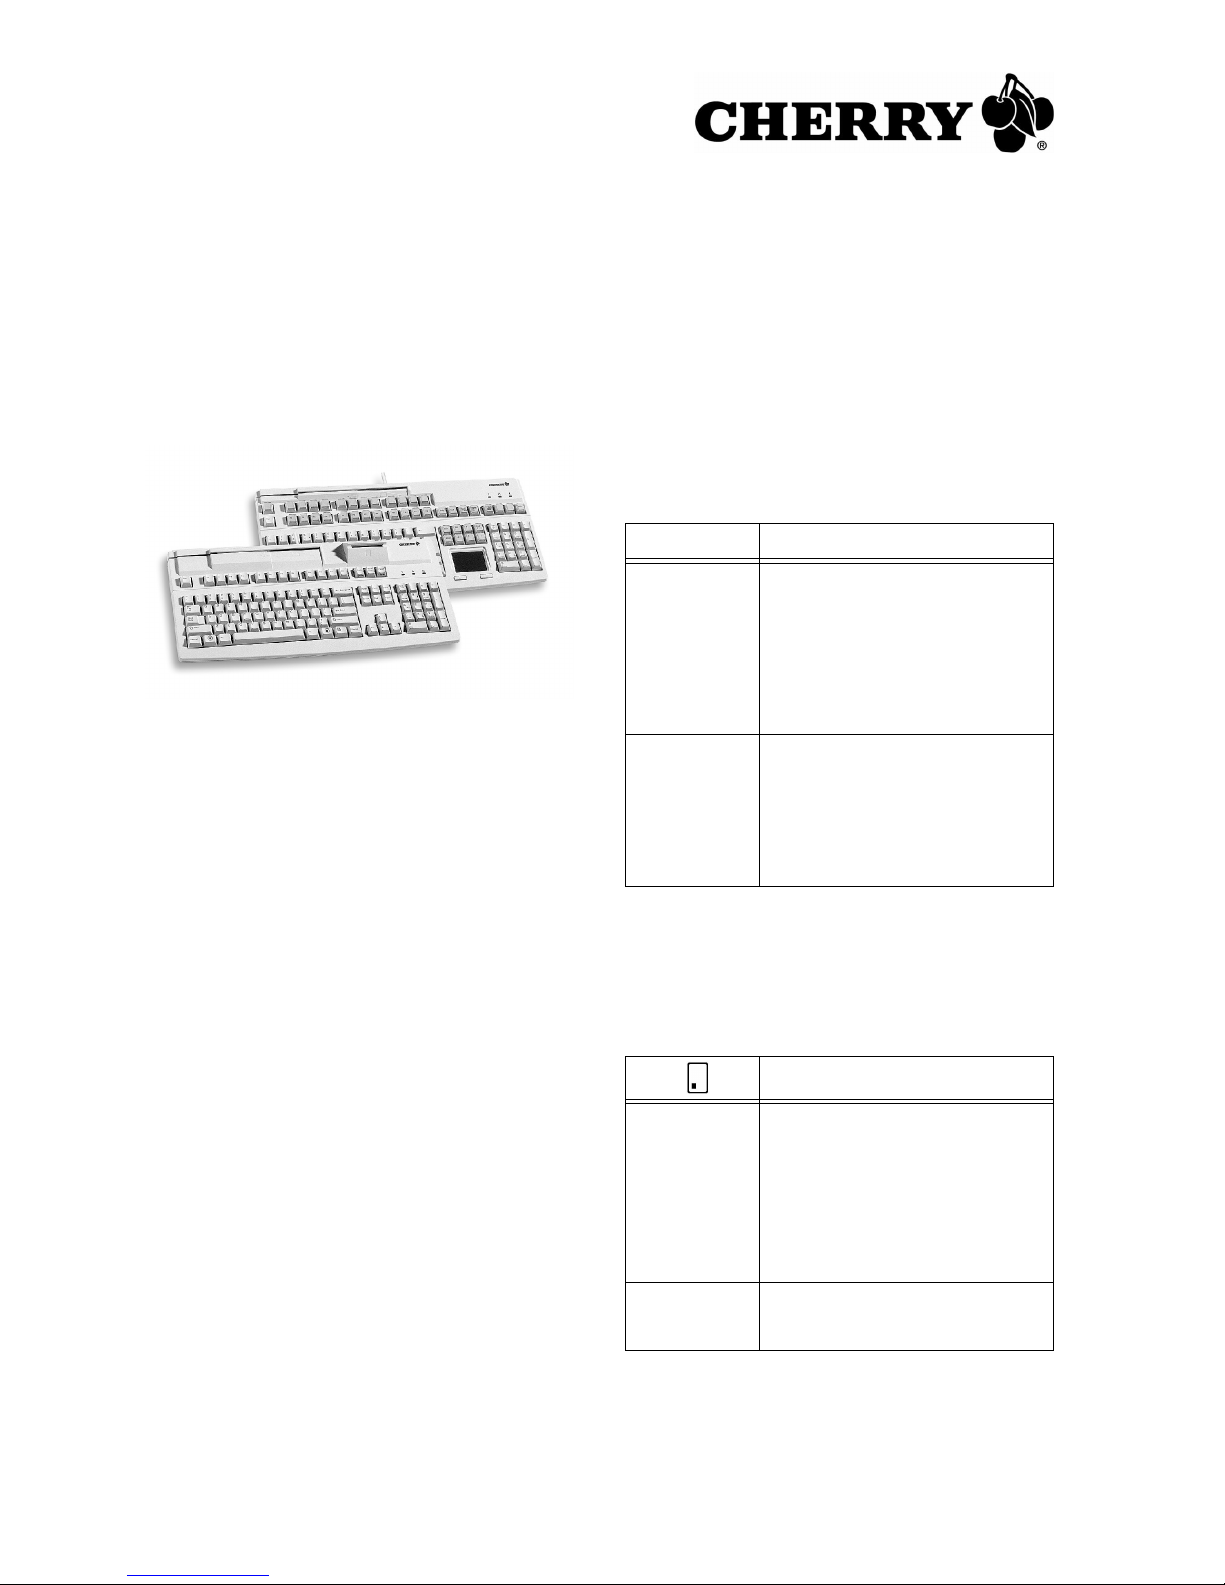
User Manual
MultiBoard
G8x-7xxx/-8xxx
1 Advantages
• Cherry MX key technology with Gold Crosspoint
contacts (G80)
• Cherry FTSC key technology (G81)
• Robust and reliable
• Fully programmable USB 2.0 keyboard
• Programming can be selected – manually or via
software macros
• UnifiedPOS supported (OPOS/JavaPOS)
• Integrated memory
• Provision of statistics data via WMI (Windows
Management Instrumentation)
Alongside the functions of a standard keyboard,
the MultiBoard keyboards offer the following additional functions depending on the model:
• Magnetic card reader
• PC/SC smartcard reader (EMV 2000 approved)
• Touchpad
• Additional keys (extended layout)
• Inscribable keys
2 Status displays
The left and center LEDs show the status of the
Caps Lock key, Num-Lock key and the shift key.
The right LED shows the status of the scroll key or
has different functions depending on the model as
outlined below:
2.1 Models with magnetic card reader
LED () Function
Lights up
green for
approx.
4 sec. (after
connecting or
switching on
the PC)
Lights up
green (after
the magnetic
card has
been swiped
through)
2.2 Models with smartcard reader,
Models with smartcard and magnetic
card reader
LED ( ) Function
Lights up
green
constantly
(after
connecting or
switching on
the PC)
Flashes red Communication with the
The magnetic card reader has
been numbered and can be used
(hardware ready for use).
The magnetic card has been
read correctly. Configuration via
Cherry Tools: On/Off and lightup duration (Standard: On,
200 ms).
The smartcard reader has been
numbered and can be used
(hardware ready for use).
smartcard.
6440502-03 US, RU, CN Jan 2009
1

3 Keyboard connection
5 Smartcard reader
3.1 Models with smartcard reader
¾ Only insert the USB connector in a USB hub,
which supplies 500mA electricity, or the
USB root hub (system USB connection).
3.2 Further models
¾ Insert the USB connector in any USB
connection in your system.
4 3-track magnetic card reader
The magnetic card reader reads all DIN ISO 7811/12,
Gemini, AAMVA and JIS compliant cards. It can read
the tracks individually, in pairs or all together. The
decoding of the data can take place either in the
keyboard (standard) or via the software as desired.
Using the magnetic card reader
1 Insert the magnetic card into the magnetic card
reader from the right with magnetic strips pointing downwards towards the keyboard.
2 Pull the magnetic card to the left through the
magnetic card reader.
An acoustic signal confirms the successful/
unsuccessful completion of the reading process:
1 x beep = Reading process successful.
The data is transferred.
2 x beeps = Reading process unsuccessful.
The data is not transferred.
Configuration via Cherry Tools: signal for suc-
cessful/unsuccessful reading process, duration.
Definition of headers and terminators
Headers and terminators mark the start and the
end of the magnetic card data transmission. The
header/terminator code is inserted before/after the
actual magnetic card data.
The integrated smartcard reader is available once
you have installed the software driver. It reads and
inscribes all smartcards in accordance with DIN
ISO 7816.
¾ Install the smartcard reader driver for the PC/SC
interface using the hardware assistant.
For additional CT-API support (MKT 1.0) and
homebanking:
¾ Run the Cherry SmartDevice setup.
Using the smartcard reader
¾ Insert the smartcard into the smartcard slot with
the chip pointing downwards and towards the
keyboard.
Contact is established after a clear pressure
point is passed.
6 Contact-free smartcard reader
The contact-free smartcard reader can be used following the installation of the software driver.
It reads and inscribes all smartcards in accordance with DIN ISO 14443A/B and ISO 15693.
Using the contact-free smartcard reader
¾ Place the smartcard on the transmission symbol
on the top right of the keyboard.
Different drivers must be installed depending on
the model:
G81-8070: Card Man RFID USB 5121
G81-8072: Card Man RFID USB 5125
2
7 Touchpad
The touchpad replaces the mouse. You can move
the mouse cursor with your finger, and select and
drag objects.
9 Software installation
Move the mouse cursor
¾ Move your finger across the touchpad.
Double-click
¾ Touch the touchpad twice in quick succession.
Configuration via Cherry Tools: touchpad on/off,
double click on/off.
8 Programming of keyboard/keys/
magnetic card reader
Configuration takes place via the software
Cherry Tools. You can program the keyboard either manually or virtually.
Manual programming
The configuration is written in the internal memory
of the keyboard. It also remains saved when the
connection cable is disconnected.
Virtual programming
The configuration is saved as software macro in
a file on the computer.
Latest software version on the internet
The software is subject to constant development.
The latest version is available on the Internet
under: http://support.cherry.de
1 Insert your CD in the CD-ROM drive.
The CD-ROM starts automatically.
2 If the CD-ROM does not start automatically,
double click on the CD-ROM drive in Windows-Explorer and then on the file auto-
start.exe.
3 Follow the installation instructions on the screen.
9.1 Cherry Tools
The following functions are supported:
• Configuration of keyboard/keys/magnetic
card reader
• Update of country-specific settings
(country table)
• Display of key configuration (KeyViewer)
9.2 Cherry UPOS support
¾ Install the software Cherry Tools.
You can configure all the functions of the keyboard via the Designer included in the software.
Operation instructions are included in the direct
help for the Cherry Tools software. It offers you
information where you need it and can be called up
with F1.
The standards OPOS and JavaPOS are combined
and constantly developed (www.nrf-arts.org) under
the umbrella of the UPOS (Unified Point of Sale)
specification.
If you use applications which access the keyboard
or the magnetic card reader via OPOS or JavaPOS:
Windows operating system
¾ Install the software Cherry OPOS Support or
Cherry JPOS Support.
Linux operating system
¾ Use the installation scripts for JavaPOS support
on the CD-ROM.
3
10 Cleaning of the keyboard
Caution!
Damage may be caused by harsh cleaning agents
or liquids in the keyboard
1 Do not use solutions such as gasoline or alcohol
and scouring agents or scouring sponges for
cleaning.
2 Prevent fluids from entering the devices.
3 Do not remove the keycaps of the keyboard.
1 Clean the keyboard with a slightly damp cloth
and some mild cleaning agent
(e.g.: dishwashing liquid).
2 Dry off the devices with a soft, lint-free cloth.
11 RSI syndrome
12 Disposal
Dispose of the old unit via a collecting point for electronic scrap or via
your dealer.
13 Technical specifications
13.1 Overview
Article No. Magnetic
card reader
G80-8113 X X
G80-8200,
G81-7000,
G81-8000
G81-7040,
G81-8040
X
XX
Smartcard
reader
Touchpad
RSI syndrome
RSI stands for "Repetitive Strain Injury". RSI arises
due to small movements continuously repeated
over a long period of time.
Typical symptoms are discomfort in the fingers or
neck. For further information see: www.cherry.de/
english/service/servicedownload_rsi.htm
1 Set up your workspace ergonomically.
2 Change the angle of the keyboard using the rear
supports.
3 Take several short breaks, with stretching exer-
cises if necessary.
4 Change your posture often.
G81-7043,
G81-8043
G81-8070,
G81-8072
O = depending on model
O
cont
X
X
act-free
13.2 Keyboard
Description Value
USB interface USB connector
Transmission rate to
the system
Power supply +5 V/DC ±5 % SELV
Current input max. 500 mA
Storage temperature: –20 °C to +60 °C
Operating temperature 0 °C to +50 °C
max. 12 Mbps
4
13.3 Magnetic card reader
Description Value
Tracks 1 + 2 + 3
Scanning speed 6.3 up to 250cm/s for
standard 75 to 210 dpi
Standards ISO 7811/-12, JIS 1,
AAMVA, Gemini
Magnet head > 1 mill. scanning cyc-
les
13.6 Contact-free smartcard reader
G81-8072
Description Value
Compatibility Omnikey
CardMan 5125
Standard 125 KHz
Protocol HID
® Proximity
14 Contact
13.4 Smartcard reader
Description Value
Compatibility Omnikey
CardMan 3121
Transmission rate to
the card
Standards ISO 7816, EMV 2000
Protocols T=0, T=1, S=8 (IIC),
Contacts Lowering contacts
Mating cycles approx. 200.000
max. 420 Kbps
Level1, CCID, PC/SC,
CT-API
S=9 (3-wire;
SLE 4418/28),
S=10 (2-wire;
SLE 4432/42)
13.5 Contact-free smartcard reader
G81-8070
ZF Electronics GmbH
Cherrystraße
91275 Auerbach
Germany
www.cherrycorp.com
www.cherry.de
E-mail: info@cherry.de
Telephone:
Sales: +49 (0) 180 5 243779* (0180 5 CHERRY*)
Technical support: +49 (0) 180 5 919108*
(*14 euro cent/min. from German landlines, prices
may vary for calls made from mobile networks.)
Please have the following information on hand
when contacting technical support:
• Item and serial no. of the product
• Name and manufacturer of your system
• Operating system and, if applicable, installed
service pack version
Description Value
Compatibility Omnikey
CardMan 5121
Standards 13.56 MHz,
ISO 14443A/B
(max. 424 Kbps),
ISO 15693
(max. 26 Kbps)
Protocol T=CL
5

15 General advice
Cherry, a brand of ZF Electronics GmbH,
continuously optimizes its products as new
technologies are developed. For this reason we
reserve the right to make technical alterations. The
evaluation of product reliability and the definition of
the product's technical performance are carried out
according to our own requirements in order to meet
internationally recognized regulations and
standards. Requirements in addition to these can
be met through mutual cooperation. Improper
usage, handling, storage and external influences
could lead to faults and defects during use.
We do not accept warranty for defects caused by
alterations to our product by the user and shall not
be held liable for unauthorized modifications. All
repairs must be made by us or an officially
appointed organization or person.
Possible compensation claims against
ZF Electronics GmbH or its nominated officers –
whatever the legal justification including physical or
stress related injuries – are excluded. Exceptions
to this exist in the case of intent or gross negligence on the part of ZF Electronics GmbH, infringements of Product Liability Law or in cases of
injury, bodily harm or risk to health. These operating instructions only apply to the accompanying
product.
Full details can be obtained from your distributor or
direct from us.
16 Certification
16.1 CE Declaration of Conformity
We, ZF Electronics GmbH, hereby declare that the
products MY 7000 USB, MY 8000 USB,
MY 8070 USB and MX 8100 USB fulfill the following requirement:
• EMC Directive 2004/108/EC (directive on
electromagnetic compatibility), tested in
accordance with EN 55022 and EN 55024
16.2 Federal Communications
Commission (FCC) Radio Frequency
Interface Statement
Information to the user: This equipment has been
tested and found to comply with the limits for
Class B digital device, pursuant to Part 15 of the
FCC Rules. These limits are designed to provide
reasonable protection against harmful interference
in a residential installation. This equipment
generates, uses and can radiate radio frequency
energy and, if not installed and used in accordance
with the instructions, may cause harmful
interference to radio communications. However,
there is no guarantee that interference will not
occur in a particular installation. If this equipment
does cause harmful interference to radio or
television reception, which can be determined by
turning the equipment off and on, the user is
encouraged to try to correct the interference by
one or more of the following measures:
• Reorientate or relocate the receiving antenna.
• Increase the separation between the equipment
and receiver.
• Connect the equipment into an outlet on a
circuit different from that to which the receiver is
connected.
• Consult the dealer or an experienced radio/
TV technician for help.
Caution: Any changes or modifications not
expressly approved by the party responsible for
compliance could void the user's authority to
operate the equipment.
16.3 For UL
For use with Listed Personal Computers only!
Tested according to the standard ZF Electronics
testing procedures.
6

Инструкция по эксплуатации
MultiBoard
G8x-7xxx/-8xxx
1 Преимущества
• Технология производства клавиш
с позолоченными контактами Gold
Crosspoint Cherry MX (G80)
• Технология производства клавиш Cherry
FTSC (G81)
• Прочность и надежность
• Полностью программируемая клавиатура
сразъемом USB 2.0
• Возможность физического или программного
программирования
• Поддержка объединенного стандарта
UnifiedPOS (OPOS/JavaPOS)
• Встроенная память
• Предоставление данных статистики по
подсистеме WMI (Windows Management
Instrumentation)
2 Индикация состояния
Левый и средний индикаторы обозначают
состояние цифровой клавиатуры или клавиш
переключения.
Правый индикатор обозначает состояние
клавиши прокрутки или обладает следующими
функциями, в зависимости от модели:
2.1 Модель с устройством чтения
магнитных карт
Индикатор
(
)
Горит зеленым
около 4 сек.
(после
подключения
или отключения
от компьютера)
Горит зеленым
(после
проведения
магнитной
карты)
2.2 Модель с устройством чтения
смарт-карт
Модель с устройствами чтения
смарт-карт и магнитных карт
Индикатор ()Функция
Функция
Производится регистрация
иподготовка к использованию
устройства чтения магнитных
карт (технически устройство
готово к эксплуатации).
Информация с магнитной
карты считана корректно.
Настройка в Cherry Tools:
вкл./выкл.
и продолжительность
горения (по умолчанию:
вкл., 200 мс)
Помимо стандартных функций клавиатуры
MultiBoard оснащены – в зависимости от
модели – следующими дополнительными
функциями:
• Устройство чтения магнитных
• Устройство чтения смарт-карт
с интерфейсом PC/SC (лицензия EMV 2000)
• Сенсорная панель
• Дополнительные клавиши (расширенная
раскладка)
• Немаркированные клавиши
карт
Постоянно
горит зеленым
(после
подключения
или отключения
от компьютера)
Мигает
красным
Производится регистрация
иподготовка к использованию
устройства чтения смарт-карт
(технически устройство готово
кэксплуатации).
Соединение со смарт-картой
7

3 Подключение клавиатуры
5 Устройство чтения смарт-карт
3.1 Модель с устройством чтения
смарт-карт
¾ Подключайте разъем USB только к узлу USB,
поддерживающему поток 500 мА, или
к корневому узлу USB (USB-порт системы).
3.2 Другие модели
¾ Подключайте разъем USB к любому порту
USB системы.
4 Устройство чтения магнитных
карт с 3-мя дорожками
Устройство чтения магнитных карт способно
считывать все карты форматов DIN ISO 7811/12,
Gemini, AAMVA и JIS. Дорожки могут быть
считаны по отдельности, попарно или все
вместе. Декодирование считанных данных
производится, по выбору пользователя, либо
клавиатурой (по умолчанию), либо программным
обеспечением.
Эксплуатация устройства чтения магнитных
карт
1 Вставьте карту в устройство чтения
магнитной полосой вниз и к клавиатуре
(направо).
2 Проведите карту через устройство чтения
налево.
Звуковой сигнал сообщает об успешном
считывании или ошибке:
1 x сигнал = считывание прошло успешно.
Данные переданы.
2 x сигнала = ошибка при чтении. Данные не
переданы.
Настройка в Cherry Tools: Сигнал при
успешном считывании/ошибке,
продолжительность.
Определение символов начала
и завершения
Символы начала и завершения обозначают
начало и конец процесса передачи данных
магнитной карты. Код начала и завершения
вводится перед/после собственно передачи
данных магнитной карты.
Встроенное устройство чтения смарт-карт
готово к использованию сразу после установки
программы-формирователя. Это устройство
считывает и описывает смарт-карты стандарта
DIN ISO 7816.
¾ Установите программу-формирователь для
устройства чтения смарт-карт с интерфейсом
PC/SC с помощью Мастера по установке
оборудования.
Для дополнительной поддержки CT-API (MKT 1.0)
и удаленного доступа к банковским счетам:
¾ Выполните настройку устройства Cherry
SmartDevice.
Эксплуатация устройства чтения смарт-карт
¾ Вставьте смарт-карту в устройство чтения
микрочипом вниз и к клавиатуре.
Контакт с картой будет установлен после
преодоления точки наибольшего
сопротивления в устройстве.
6 Бесконтактное устройство
чтения смарт-карт
Бесконтактное устройство чтения смарт-карт
готово к использованию сразу после установки
программы-формирователя. Это устройство
считывает и описывает смарт-карты стандартов
DIN ISO 14443A/B и ISO 15693.
Эксплуатация бесконтактного устройства
чтения смарт-карт
¾ Положите смарт-карту в правой части
клавиатуры, над символом радио:
В зависимости от модели клавиатуры следует
установить одну из следующих программформирователей:
G81-8070: Card Man RFID USB 5121
G81-8072: Card Man RFID USB 5125
8

7 Сенсорная панель
Сенсорная панель заменяет собой
компьютерную мышь. Прикосновением пальца
можно передвинуть указатель мыши, выбрать
и перетащить объект.
Перемещение указателя мыши
¾ Передвиньте палец по сенсорной панели.
Двойной щелчок
¾ Быстро произведите два последовательных
касания по сенсорной панели.
Настройка в Cherry Tools: сенсорная панель
вкл./выкл., двойной щелчок вкл./выкл.
8
Программирование клавиатуры/
клавиш/устройства чтения
магнитных карт
Настройка производится в программе
Cherry Tools. Клавиатура может быть
запрограммирована физически или
программно, по выбору пользователя.
Физическое программирование
Настройки записывается во встроенную память
клавиатуры. Они сохраняются даже после
отключении кабеля питания.
Виртуальное программирование
Настройки сохраняются в файл в памяти
компьютера в виде макроса.
¾ Установите программу Cherry Tools.
Приложение Designer, входящее в пакет
программ,
всех функций клавиатуры.
Работа с приложениями описывается
непосредственно в Справке программы Cherry
Tools. Нажатие клавиши F1 позволяет вызвать
Справку и получить необходимую информацию.
позволяет произвести настройку
9 Установка программного
обеспечения
Обновления программного обеспечения
через Интернет
Программное обеспечение постоянно
усовершенствуется. Последние версии ПО
находятся в Интернете по адресу:
http://support.cherry.de
1 Поместите CD в привод CD-ROM.
Работа CD-ROM будет автоматически
запущена.
2 Если CD-ROM не запускается автоматически,
дважды щелкните значок привода CD-ROM
в обозревателе Windows Explorer, а затем файл autostart.exe.
3 Выполните указания по установке на экране.
9.1 Cherry Tools
Поддерживаются следующие функции:
• Настройка клавиатуры/клавиш/устройства
чтения магнитных карт
• Активизация региональных установок
(список стран)
• Отображение настроек клавиш (KeyViewer)
9.2 Поддержка Cherry UPOS
Под общим названием «Спецификация UPOS»
(Unified Point of Sale - Объединенный кассовый
терминал) формально объединены
и усовершенствованы стандарты OPOS
и JavaPOS (www.nrf-arts.org).
При использовании приложений происходит
обращение к клавиатуре или устройству чтения
магнитных карт по стандарту OPOS или
JavaPOS:
Операционная система Windows
¾ Установите программу «Поддержка Cherry
OPOS» или «Поддержка Cherry JPOS».
Операционная система Linux
¾ Воспользуйтесь установочными скриптами
для программы «Поддержка JavaPOS»,
содержащимися на CD.
9

10 Чистка клавиатуры
Внимание!
Активные чистящие средства и жидкости могут
нанести вред оборудованию
1 Не используйте для чистки растворители
(бензин, спирт), моющие средства и губки.
2 Не допускайте попадания в клавиатуру
жидкостей.
3 Не снимайте крышки клавиш с клавиатуры.
1 Очищайте клавиатуру чуть влажной
салфеткой с небольшим добавлением
мягкого чистящего средства
(напр., средства для мытья посуды).
2 Осушите клавиатуру с помощью мягкой
безворсовой салфетки.
11 Синдром длительного
напряжения
12 Утилизация
Оборудование, отслужившее свой
срок, относите в сборные пункты
для электромусора.
13 Технические данные
13.1 Общие сведения
Артикул №.Устройст-
во чтения
магнитных
карт
G80-8113 X X
G80-8200,
G81-7000,
G81-8000
G81-7040,
G81-8040
G81-7043,
G81-8043
G81-8070,
G81-8072
X
XX
OX
Устройство
чтения
смарт-карт
X
Бесконтактное
Сенсорная
панель
Синдром длительного напряжения
Синдром длительного напряжения
обозначается на английском языке
аббревиатурой RSI: «Repetitive Strain Injury».
Этот синдром возникает вследствие
многократного повторения мелких движений
в течение длительного времени.
Типичными симптомами являются боли
в пальцах или в шее. Дополнительную
информацию можно получить на сайтах:
www.cherry.de/english/service/
servicedownload_rsi.htm
1 Рабочее место должно быть оборудовано
эргономично.
2 Измените наклон клавиатуры с помощью
задних «ножек».
3
Почаще делайте небольшие паузы и, при
необходимости, разминайте суставы.
4 Чаще меняйте положение тела.
O = в зависимости от модели
13.2 Клавиатура
Характеристика Значение
Интерфейс разъем USB
Скорость передачи
всистему
Электропитание +5 В пост. тока ±5%
Потребление
электроэнергии
Температура
хранения
Рабочая
температура
макс. 12 Мб/с
SELV (безопасное
низковольтное
напряжение)
макс. 500 мА
–20 °C - +60 °C
0 °C - +50 °C
10

13.3 Устройство чтения магнитных карт
Характеристика Значение
Дорожки 1 + 2 + 3
Скорость считывания 6,3 - 250 см/с для
стандарта 75 -
210 dpi
Стандарты ISO 7811/-12, JIS 1,
AAMVA, Gemini
Магнитная головка > 1 млн./цикл
13.6 Бесконтактное устройство чтения
смарт-карт G81-8072
Характеристика Значение
Совместимость Omnikey
CardMan 5125
Стандарт 125 КГц
Протокол HID
® Proximity
13.4 Устройство чтения смарт-карт
Характеристика Значение
Совместимость Omnikey
CardMan 3121
Скорость передачи
данных на карту
Стандарты ISO 7816, EMV 2000
Протоколы T=0, T=1, S=8 (IIC),
Соединение «Утопленные»
Циклы включения ок. 200000
макс. 420 Кб/с
Level1, CCID, PC/SC,
CT-API
S=9 (3-wire;
SLE 4418/28),
S=10 (2-wire;
SLE 4432/42)
контакты
13.5 Бесконтактное устройство чтения
смарт-карт G81-8070
14 Контакты
ZF Electronics GmbH
Cherrystraße
91275 Auerbach
Deutschland (Германия)
www.cherrycorp.com
www.cherry.de
Эл. почта: info@cherry.de
Телефон:
Отдел продаж: +49 (0) 180 5 243779*
(0180 5 CHERRY*)
Техническая поддержка: +49 (0) 180 5 919108*
(*14 центов/мин. для звонков из Германии,
стоимость звонков с мобильных телефонов
может отличаться.)
При обращении в службу технической
поддержки будьте готовы предоставить
следующую информацию:
• Артикул и серийный номер продукта
• Название и производитель ПК, ноутбука или
материнской платы компьютера
• Операционная
версия сервисного пакета
система и установленная
Характеристика Значение
Совместимость Omnikey
CardMan 5121
Стандарты 13,56 МГц,
ISO 14443A/B
(макс. 424 Кб/с),
ISO 15693
(макс. 26 Кб/с)
Протокол T=CL
11

15 Общая информация
о пользователе
Cherry, являясь торговой маркой фирмы
ZF Electronics GmbH, в ходе развития новых
технологий постоянно совершенствует свою
продукцию.
технические изменения.
общепринятым международным правилам и
нормам, установление надежности и
определение технических характеристик
осуществляется согласно внутреннему
контролю.
норм могут быть
согласию. Несоблюдение условий эксплуатации
и хранения, а также внешние воздействия могут
привести к неполадкам исбоям в работе
оборудования.
На дефекты, вызванные модификациями
продукта, произведенными пользователем, не
распространяются какие-либо гарантии; и мы не
несем никакой ответственности в случае
внесения несанкционированных изменений.
виды ремонта должны осуществляться нами
или официально уполномоченным лицом или
организацией.
Возможные претензии по возмещению ущерба
к фирме ZF Electronics GmbH или к ее законным
представителям – предъявляемые на любом
правовом основании (включая вызванные
стрессом телесные повреждения) – исключены,
если только не будет доказано, что это
произошло в результате умысла с нашей
стороны, грубой халатности
императивных правил гарантии производителя,
что вызвало повреждения, причинившие вред
здоровью или самой жизни человека. Данная
инструкция имеет силу только вотношении
продукта, с которым она поставляется.
Более подробную информацию об этом можно
получить у соответствующих дистрибьюторов
или непосредственно у нас.
Поэтому в устройствах возможны
Чтобы соответствовать
Претензии об отклонении от таких
удовлетворены
по обоюдному
или несоблюдения
Все
16 Сертификация
16.1 Заявление о соответствии CE
Мы, компания ZF Electronics GmbH, заявляем,
что клавиатуры MY 7000 USB, MY 8000 USB,
MY 8070 USB и MX 8100 USB соответствуют
следующим нормативам:
• Директива EMC 2004/108/EC (Директива
осовместимости электромагнитных
устройств), испытано в соответствии
с требованиями EN 55022 и EN 55024
Протестирована согласно контрольной
процедуре стандартизации ZF Electronics.
12

使用手册
MultiBoard
G8x-7xxx/-8xxx
1 优点
• Cherry MX- 按键技术,采用 Gold Crosspoint 黄
金触点 (G80)
• Cherry FTSC- 按键技术 (G81)
• 坚实耐用、可靠
• 完全可编程的 USB 2.0 键盘
• 编程方式可选 – 物理编程或者通过软件宏程序
进行编程
• 支持 UnifiedPOS (OPOS/JavaPOS)
• 集成式存储器
• 通过 WMI (Windows Management
Instrumentation)提供统计数据
除了标准键盘的功能之外, MultiBoard 键盘还具有
下列附加功能 (视型号而定):
• 磁卡读卡器
•PC/SC 芯片卡读卡器 (EMV 2000 认证)
• 触控板
• 热键 (扩展布局)
• 可重贴按键标签
2.1 带有磁卡读卡器的型号
✓)
LED (
发出大约 4 秒钟
绿光 (插接或者
启动 PC 机之后)
发出绿光 (在刷
过插卡之后)
功能
列出磁卡读卡器,之后就可
以使用了 (读卡器硬件已准
备就绪)。
已正确读出磁卡。通
过 Cherry Tools 进行配置:
开 / 关以及发光时长 (默
认:开, 200 ms)
2.2 带有芯片卡读卡器的型号, 带有芯片
卡和磁卡读卡器的型号
LED ( )
持续发出绿光
(插接或者启动
PC 机之后)
红光闪动 正在与芯片卡通讯
功能
列出芯片读卡器,之后就可
以使用了 (读卡器硬件已准
备就绪)。
3 键盘接口
3.1 带有芯片卡读卡器的型号
¾ 仅可将 USB 插接器插入能提供 500 mA 电流的
USB 集线器,或者插入 USB 根集线器 (系统的
USB 接口)。
3.2 其余型号
¾ 将 USB 插接器插入系统的任意一个 USB 接口。
2 状态指示
左侧与中间的 LED 用来指示数字键和换档键锁定功
能的状态。
右侧的 LED 用来指示滚屏锁定键的状态,或者视型
号而定显示以下区别:
13

4 三轨磁卡读卡器
6 无触点芯片卡读卡器
该磁卡读卡器可以读取所有符合 DIN ISO 7811/12、
Gemini、 AAMVA 和 JIS 标准的磁卡。可以逐一、
成对读取磁轨,或者读取全部磁轨。可以选择在键
盘中 (默认)或者通过软件对读取数据进行编码。
磁卡读卡器的使用方法
1 将磁卡有磁条的一面向下,并朝向键盘右侧插入
磁卡读卡器之中。
2 将磁卡向左刷过磁卡读卡器。
有声音信号确认读卡过程是否成功 / 失败:
1 声哔 = 读卡成功。传输数据。
2 声哔 = 读卡失败。不传输数据。
通过 Cherry Tools 进行配置:读卡成功 / 失败的
信号,时长。
起始码和终止码的定义
起始码和终止码表示磁卡数据的传输开始与终止。
在磁卡数据前端 / 后端插入起始码 / 终止码。
5 芯片卡读卡器
安装好软件驱动程序之后,即可使用集成式芯片卡
读卡器。可读、写符合 DIN ISO 7816 标准的所有
芯片卡。
¾ 通过硬件安装向导安装 PC/SC 接口的芯片卡读
卡器驱动程序。
用于附加的 CT-API 支持 (MKT 1.0)和
Homebanking:
¾ 请执行 Cherry SmartDevice Setup 安装程序。
芯片卡读卡器的使用方法
¾ 将芯片卡有芯片的一面向下,并朝向键盘插入芯
片卡读卡器之中。
明显感觉克服按压点之后,触点即已接通。
安装好软件驱动程序之后,即可使用无触点芯片卡
读卡器。可读、写符合 DIN ISO 14443A/B 和 ISO
15693 标准的所有芯片卡。
无触点芯片卡读卡器的使用方法
¾ 将芯片卡放到键盘右上方的无线电符号上:
必须根据型号安装不同的驱动程序:
G81-8070: Card Man RFID USB 5121
G81-8072: Card Man RFID USB 5125
7 触控板
触控板可替代鼠标。用手指进行触摸,即可移动鼠
标指针、选择以及拖动对象。
移动鼠标指针
¾ 将手指滑过触控板。
双击
¾ 用手指迅速点击两次触控板。
通过 Cherry Tools 进行配置:触控板开 / 关,双击
开 / 关
8 键盘 / 按键 / 磁卡读卡器的
编程方法
通过 Cherry Tools 软件进行配置。可选择以物理方
式或者虚拟方式对键盘进行编程。
物理编程
将配置写入键盘的内存之中。即使拔出电缆之后,
该配置仍然保留。
虚拟编程
将配置作为软件宏程序保存在计算机上的某一个文
件中。
14
¾ 请安装 Cherry Tools 软件。
可以通过其中所含有的 Designer 对键盘的所有
功能进行配置。
在 Cherry Tools 的帮助文件中有关于操作的说明。
这里有您所需要查看的说明,点击 F1 即可将其
打开。

9 软件的安装
10 清洁键盘
在互联网中下载最新版软件
本软件始终处于更新之中。可通过互联网下载最新
版本:http://support.cherry.de
1 将光盘放入光驱之中。
光驱自动启动。
2 如果光驱没有自动启动,请在 Windows 资源管
理器中双击光驱图标,然后双击文件
autostart.exe。
3 按照屏幕上的安装提示进行操作。
9.1 Cherry Tools
支持下列功能:
• 键盘 / 按键 / 磁卡读卡器的配置
• 更新区域设置 (区域代码表)
• 显示按键配置 (KeyViewer)
9.2 Cherry UPOS 支持
基于 UPOS(Unified Point of Sale)规范对 OPOS 和
JavaPOS 标准进行合并与开发 (www.nrf-arts.org)。
如果要使用通过 OPOS 或者 JavaPOS 对键盘或者
磁卡读卡器进行访问的应用程序:
Windows
¾ 请安装 Cherry OPOS 支持或者 Cherry JPOS 支
持软件。
Linux
¾ 请使用光驱上的 JavaPOS 支持程序的安装脚本。
操作系统
操作系统
小心!
腐蚀性清洁剂或者液体进入设备会造成损伤
1 不可使用汽油或酒精之类的溶剂,也不可使用研
磨剂或者硬海绵进行清洁。
2 要防止液体进入键盘之中。
3 不要移去键盘的键帽。
1 使用略微蘸湿的擦布或者温和的清洁剂对键盘进
行清洁 (例如餐具洗涤剂)
2 用没有毛絮的软擦布将键盘擦干。
11 RSI 综合症
综合症
RSI
RSI 表示 “ Repetitive Strain Injury” = “ 重复性劳
损” 。 RSI 的起因是较长时间内的小幅度持久重复
性运动。
典型症状是手指或者颈部疼痛。相关详细情况请访
问:www.cherry.de/english/service/
servicedownload_rsi.htm
1 请适当调整您的工作场所,使其符合人性化要求。
2 请通过后面的可调脚改变键盘的斜度。
3 中途应有多次短暂休息,必要时可做一些伸展
运动。
4 要经常变换身体姿态。
12 垃圾处理
请将旧设备交给电子垃圾回收站或者
经销商进行回收处理。
15

13 规格参数
13.4 芯片卡读卡器
13.1 概览
货号 磁卡读卡器 芯片卡读卡器 触控板
G80-8113 X X
G80-8200,
G81-7000,
G81-8000
G81-7040,
G81-8040
G81-7043,
G81-8043
G81-8070,
G81-8072
O = 视型号而定
X
XX
X
OX
无触点
13.2 键盘
名称 参数
接口 USB 插接器
至系统的传输率 最大 12 Mbps
电源电压
电流消耗 最大 500 mA
存放温度 – 20 °C 至 +60 °C
工作温度 0 °C 至 +50 °C
+5 V/DC
±5 % SELV
名称 参数
兼容性
至磁卡的传输率 最大 420 Kbps
标准
协议
触点连接 压接式触点
插接循环 大约 200,000
Omnikey
CardMan 3121
ISO 7816, EMV 2000
Level1, CCID, PC/SC,
CT-API
T=0, T=1, S=8 (IIC),
S=9 (3- 线制;
SLE 4418/28),
S=10 (2- 线制;
SLE 4432/42)
13.5 无触点芯片卡读卡器 G81-8070
名称 参数
兼容性
标准
协议
Omnikey
CardMan 5121
13.56 MHz,
ISO 14443A/B
(最大 424 Kbps),
ISO 15693
(最大 26 Kbps)
T=CL
13.3 磁卡读卡器
名称 参数
磁轨
读卡速度 6.3 ~ 250 cm/s,适用
标准
磁头 > 1 百万读取循环
16
1 + 2 + 3
于标准 75 ~ 210 dpi
ISO 7811/-12, JIS 1,
AAMVA, Gemini
13.6 无触点芯片卡读卡器 G81-8072
名称 参数
兼容性
标准
协议
Omnikey
CardMan 5125
125 KHz
HID
® Proximity

14 联系方式
16 CE 一致性声明
ZF Electronics GmbH
Cherrystraße
91275 Auerbach
Deutschland
www.cherrycorp.com
www.cherry.de
電子郵件地址:info@cherry.de
電話:
售貨專線:+49 (0) 180 5 243779*
(0180 5 CHERRY*)
技術支援:+49 (0) 180 5 919108*
(* 以德國市內電話費率 14 分 / 分鐘。手機費率視網
路而異 )
请在联系技术支持部门时提供下列信息:
• 产品货号与序列号
• 您所使用的 PC 机、笔记本或者主板的名称和制
造商
• 操作系统以及所安装的 Service Pack 版本
15 用户须知
ZF Electronics GmbH 的代表品牌 Cherry,一向致
力於發產新技術以最佳化產品。經內部依據國際規
定和標準檢驗,確立可靠度與技術資訊定義。如有
与此不同的要求,可以通过双方协作加以解决。使
用、存放不当以及外界影响因素均可能引起故障和
损坏。
对于因用户改装产品所引起的任何缺陷,我方概不
承担保修责任,也不承担因擅自改装所引起的任何
后果。所有的維修必須全由本公司或官方授權之人
士或組織支援。
ZF Electronics GmbH 或其代表對於任何提出損害
賠償 ( 包括壓力相關之傷害 ),無論法學基礎為何,
均無賠償責任。除非因蓄意、完全過失或無法符合
必要之產品責任規定造成生命、身體或健康的損
害。本手册仅适用于与其一并提供的产品。
詳細資訊請洽各代表或直接向本公司索取。
本公司, ZF Electronics GmbH,兹声明
MY 7000 USB、 MY 8000 USB、 MY 8070 USB 和
MX 8100 USB 型键盘符合下列要求:
•EMC 指令 (电磁兼容性指令) 2004/108/EC,
通过了 EN 55022 和 EN 55024 标准规定的测试
按 ZF Electronics 產品標準測試。
17
 Loading...