

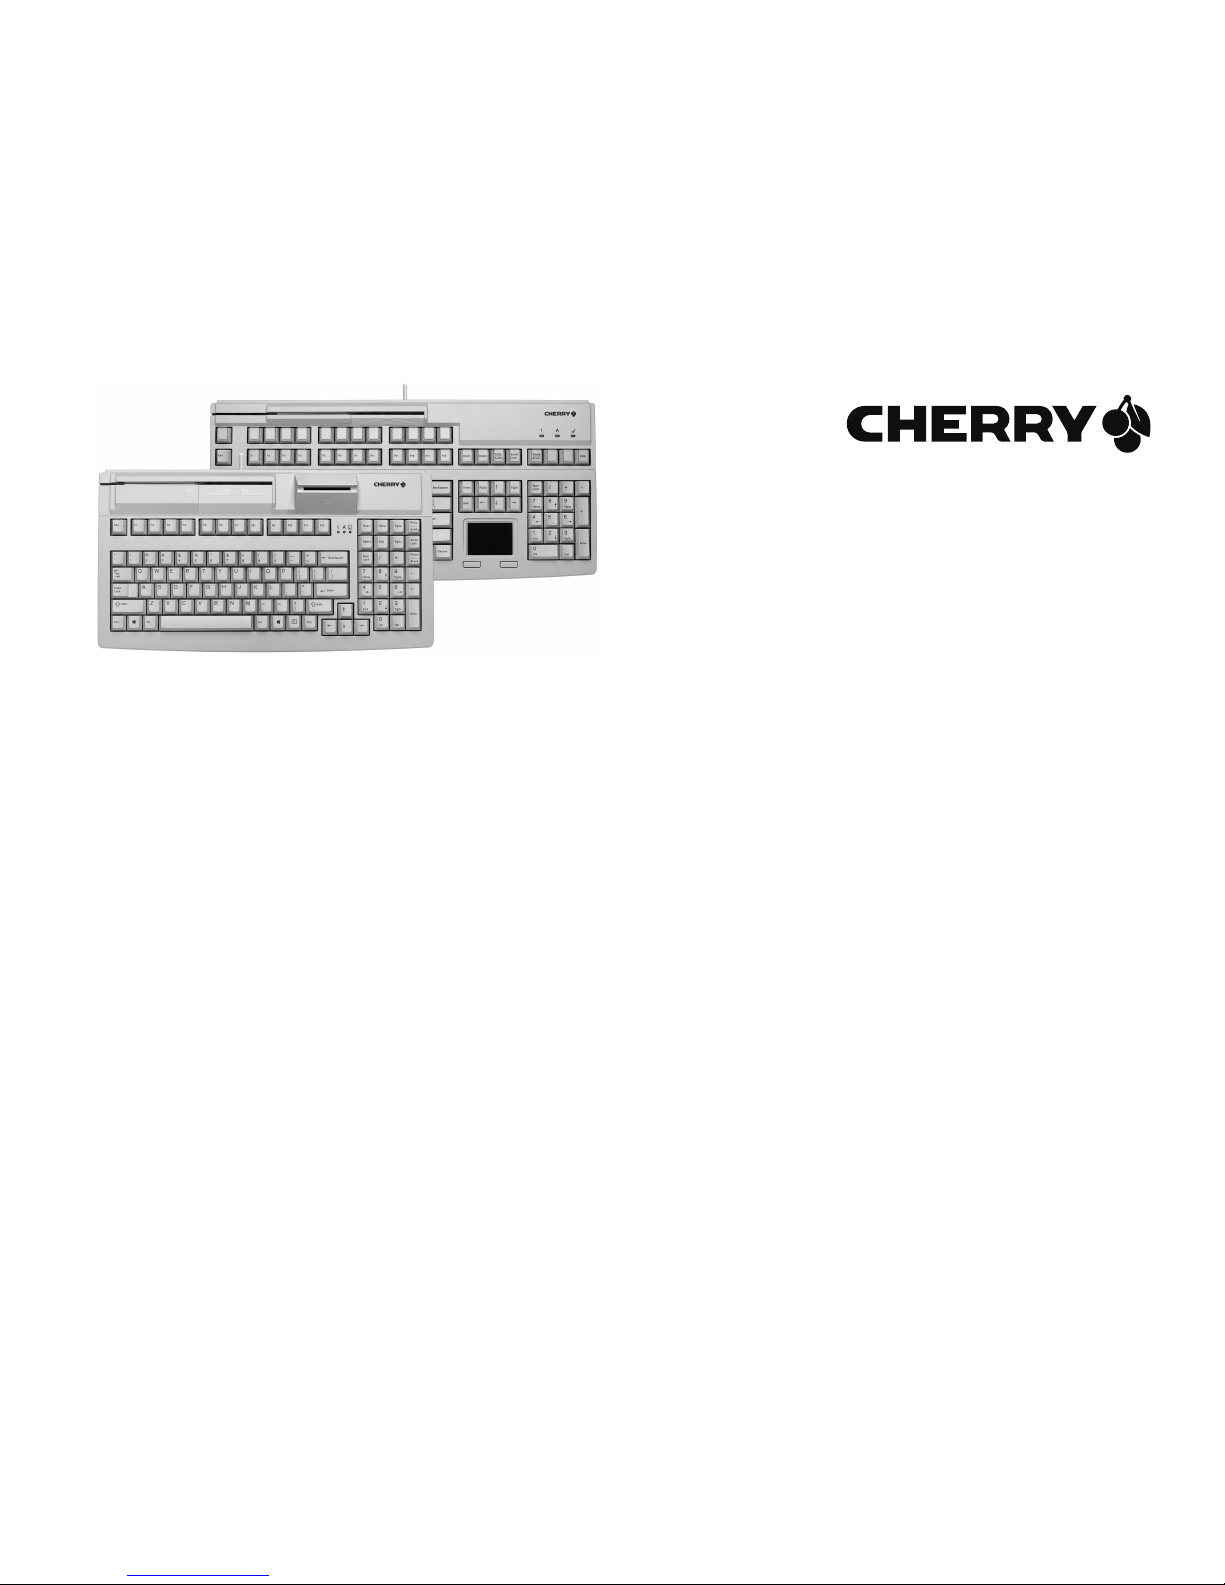
CHERRY MultiBoards G80-7xxx/-8xxx
Programmable Keyboards with Card Reader
Bedienungsanleitung ..................3
Operating Manual........................8
Mode d’emploi...........................13
Manual de instrucciones........... 18
6440630-00 DE, GB, FR, ES, Aug 2014 (G80-7xxx/8xxx = Mod. MX 7xxx/8xxxUSB)
2
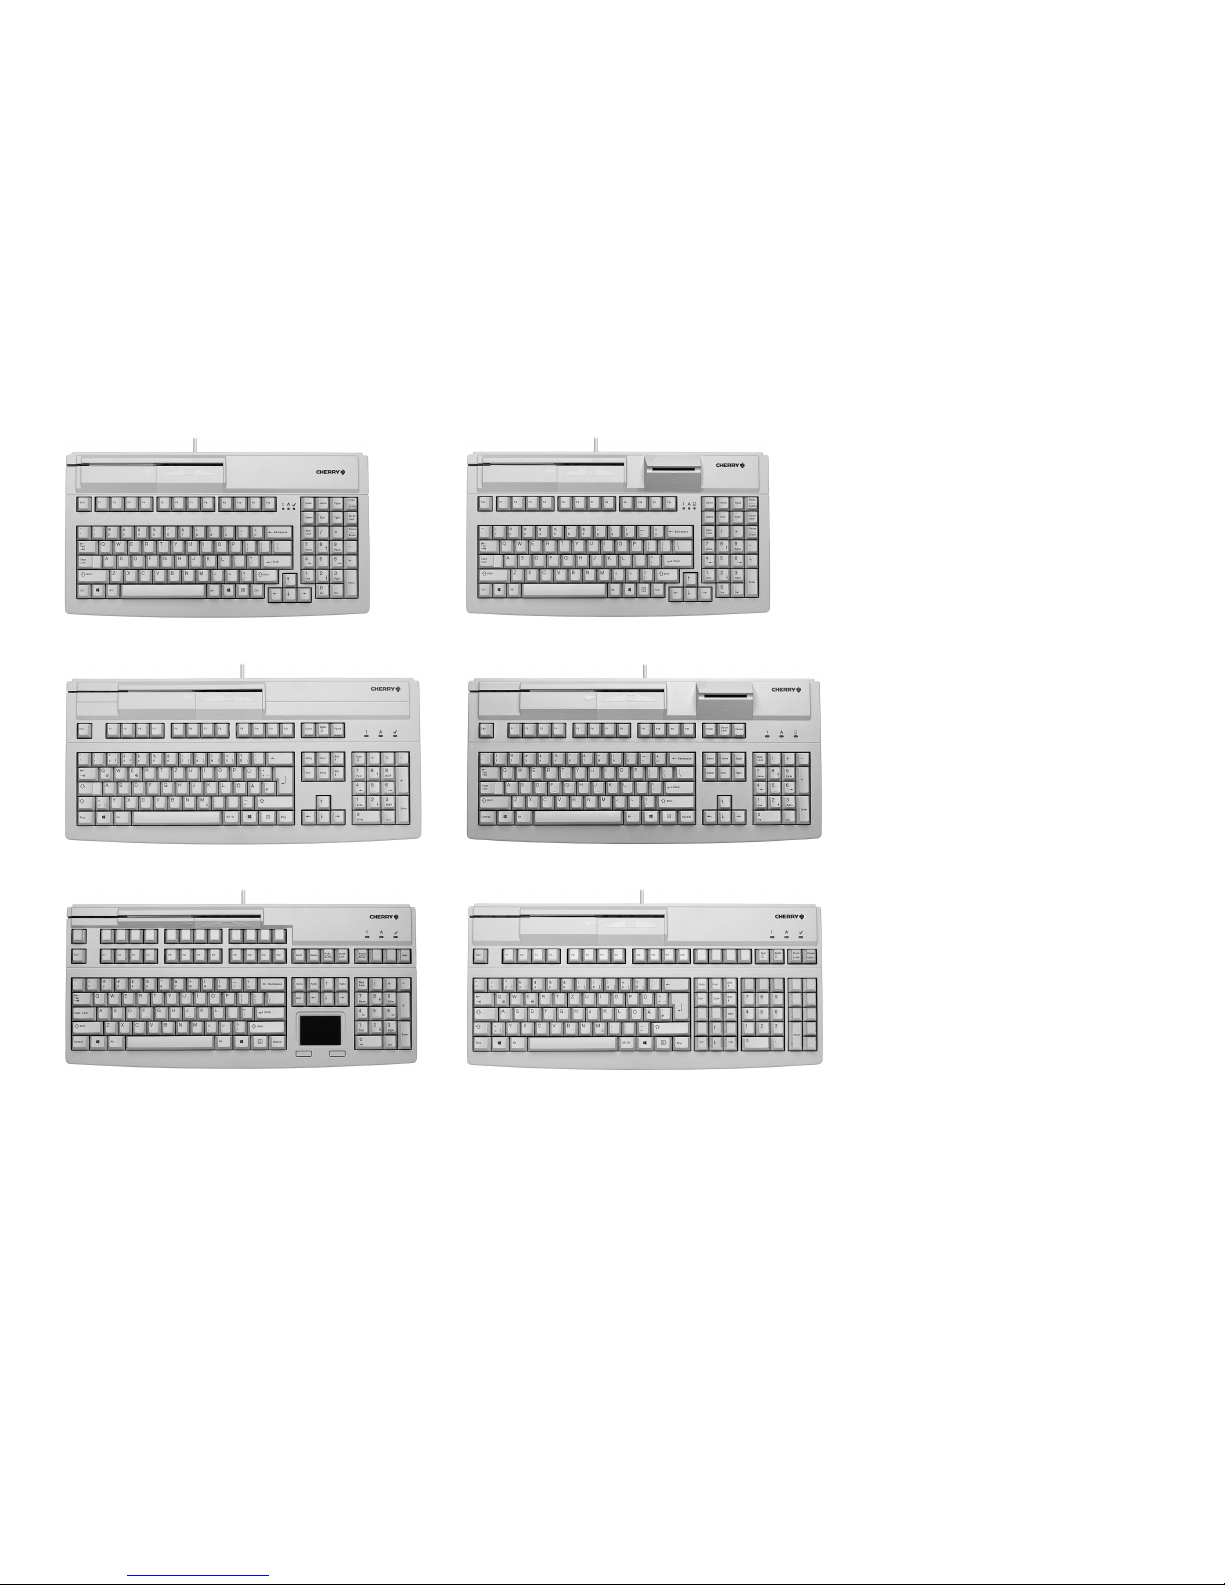
Modelle / Models / Modèles / Modelos
G80-7000 G80-7040
G80-8000 G80-8040
G80-8113 G80-8200
3
Herzlichen
Glückwunsch ...
CHERRY entwickelt und produziert seit 1967
innovative Eingabe-Systeme für Computer. Den
Unterschied in Qualität, Zuverlässigkeit und
Design können Sie jetzt mit Ihrem neuen
Lieblingsstück erleben.
Bestehen Sie immer auf Original CHERRY.
Für Informationen zu weiteren Produkten,
Downloads und vielem mehr, besuchen Sie
bitte www.cherry-world.com.
Ihr CHERRY MultiBoard zeichnet sich
besonders durch folgende Eigenschaften aus:
• CHERRY MX-Tastentechnologie mit Gold
Crosspoint Kontakten
• Robust und zuverlässig
• Über die Software CHERRY Tools vollständig
programmierbare USB 2.0 Tastatur
• Programmierung wählbar – physikalisch
oder über Software Makros
• UnifiedPOS-Unterstützung (OPOS/JavaPOS)
• Integrierter Speicher
• Bereitstellung von Statistikdaten über WMI
(Windows Management Instrumentation)
Neben den Funktionen einer StandardTastatur bieten Ihnen die MultiBoardTastaturen – je nach Variante – folgende
zusätzliche Funktionen:
• Magnetkarten-Leser
• PC/SC-Chipkarten-Leser (EMV 2000
zugelassen)
•Touchpad
• Zusatztasten (erweitertes Layout)
• Beschriftbare Tasten
1 Statusanzeigen
Die linke und mittlere LED zeigen den Status
der Feststellfunktion der Num- und
Umschalttaste an.
Die rechte LED zeigt den Status der RollenTaste an oder unterscheidet sich je nach
Ausführung wie folgt:
1.1 Modelle mit Magnetkarten-
Leser
LED () Funktion
Leuchtet ca. 4 sec
grün (nach
Anstecken bzw.
Einschalten des
PCs)
Der Magnetkarten-Leser
ist hardwareseitig
betriebsbereit.
1.2 Modelle mit ChipkartenLeser,
Modelle mit Chipkarten- und
Magnetkarten-Leser
Leuchtet grün
(nachdem die
Magnetkarte
durchgezogen
wurde)
Magnetkarte wurde
korrekt ausgelesen.
Konfiguration über
CHERRY Tools: Ein/Aus
und Leuchtdauer
(Standard: Ein, 200 ms).
LED ( ) Funktion
Leuchtet ständig
grün (nach
Anstecken bzw.
Einschalten des
PCs)
Der Chipkarten-Leser ist
hardwareseitig betriebsbereit.
Flackert rot Kommunikation mit der
Chipkarte.
LED () Funktion
DE
BEDIENUNGSANLEITUNG
CHERRY MultiBoards G80-7xxx/-8xxx – Programmable Keyboards with Card Reader

4
2 Anschluss der Tastatur
2.1 Modelle mit Chipkarten-Leser
• Stecken Sie den USB-Stecker nur in einen
USB Hub, der 500 mA Strom liefert, oder
den USB Root Hub (USB-Anschluss Ihres
Systems).
2.2 Übrige Modelle
• Stecken Sie den USB-Stecker in einen
beliebigen USB-Anschluss Ihres Systems.
3 Magnetkarten-Leser –
3-Spur-Version
Der Magnetkarten-Leser liest alle nach
DIN ISO 7811/-12, Gemini, AAMVA und JIS
beschriebenen Karten. Er kann die Spuren
einzeln, paarweise oder gesamt lesen. Die
Decodierung der Lesedaten erfolgt wahlweise
in der Tastatur (Standard) oder über die
Software.
3.1 Gebrauch des Magnetkarten-
Lesers
1 Magnetkarte mit Magnetstreifen nach unten
und zur Tastatur zeigend rechts in den
Magnetkarten-Leser stecken.
2 Magnetkarte nach links durch den
Magnetkarten-Leser ziehen.
Ein Tonsignal bestätigt den gültigen/
fehlerhaften Lesevorgang:
1 x Piep = Gültiger Lesevorgang. Die Daten
werden übertragen.
2 x Piep = Fehlerhafter Lesevorgang. Die
Daten werden nicht übertragen.
Konfiguration über CHERRY Tools: Signal bei
gültigem/fehlerhaften Lesevorgang, Dauer.
3.2 Definition von Header und
Termi nato r
Header und Terminator kennzeichnen Anfang
und Ende der Übertragung der Magnetkartendaten. Sie können über die Software
CHERRY Tools definiert werden. Der Header-/
Terminatorcode wird vor/nach den eigentlichen Magnetkartendaten eingefügt.
4Chipkarten-Leser
Der integrierte Chipkarten-Leser steht Ihnen
zur Verfügung, nachdem Sie die SoftwareTreiber installiert haben. Er liest und
beschreibt alle Chipkarten nach DIN ISO 7816.
• Installieren Sie die Treiber des Chipkarten-
Lesers für die PC/SC-Schnittstelle über den
Hardware-Assistent.
Für zusätzliche CT-API-Unterstützung
(MKT 1.0) und Homebanking:
• Führen Sie das CHERRY SmartDevice Setup
aus.
4.1 Gebrauch des ChipkartenLesers
• Chipkarte mit dem Chip nach unten und zur
Tastatur zeigend in den Chipkarten-Schacht
stecken.
Nachdem ein deutlicher Druckpunkt
überwunden ist, erfolgt die Kontaktierung.
5Touchpad
Das Touchpad ersetzt die Maus. Durch
Berührung mit Ihrem Finger können Sie den
Mauszeiger bewegen und Objekte auswählen
und ziehen.
5.1 Mauszeiger bewegen
• Ziehen Sie Ihren Finger über das Touchpad.
5.2 Doppelklicken
• Tippen Sie zweimal kurz nacheinander mit
dem Finger auf das Touchpad.
Konfiguration über CHERRY Tools: Touchpad
ein/aus, Doppelklick ein/aus
BEDIENUNGSANLEITUNG
CHERRY MultiBoards G80-7xxx/-8xxx – Programmable Keyboards with Card Reader
DE
5
6 Installation der
Software
1 Legen Sie die CD in Ihr CD-ROM-Laufwerk.
Die CD-ROM startet automatisch.
2 Wenn die CD-ROM nicht automatisch
startet, doppelklicken Sie im WindowsExplorer auf das CD-ROM-Laufwerk und
dann auf die Datei autostart.exe.
3 Folgen Sie den Installationsanweisungen auf
dem Bildschirm.
6.1 CHERRY Tools
Unterstützt werden folgende Funktionen:
• Konfigurieren von Tastatur/Tasten/
Magnetkarten-Leser
• Aktualisieren der länderspezifischen
Einstellungen (Ländertabelle)
• Anzeige der Tasten-Konfiguration
(KeyViewer)
Aktuelle Software im Internet
Die Software wird ständig weiterentwickelt. Die aktuelle Version
erhalten Sie im Internet unter:
www.cherry-world.com.
6.2 CHERRY UPOS Unterstützung
Unter dem Dach der UPOS (Unified Point of
Sale)-Spezifikation werden die Standards
OPOS und JavaPOS formell zusammengefasst
und weiterentwickelt (www.nrf-arts.org).
Wenn Sie Applikationen verwenden, die über
OPOS oder JavaPOS auf die Tastatur oder den
Magnetkarten-Leser zugreifen:
Windows Betriebssystem
• Installieren Sie die Software CHERRY OPOS
Unterstützung oder CHERRY JPOS
Unterstützung.
Linux Betriebssystem
• Verwenden Sie die Installationsscripte für
JavaPOS Unterstützung auf der CD-ROM.
7 Programmierung von
Tastatur/Tasten/
Magnetkarten-Leser
Die Konfiguration erfolgt über die Software
CHERRY Tools. Sie können die Tastatur
wahlweise physikalisch oder virtuell
programmieren.
7.1 Physikalische
Programmierung
Die Konfiguration wird in den internen
Speicher der Tastatur geschrieben. Sie bleibt
auch nach Abziehen des Anschlusskabels
erhalten.
7.2 Virtuelle Programmierung
Die Konfiguration wird als Software-Makro in
einer Datei auf dem Rechner gespeichert.
• Installieren Sie die Software CHERRY Tools.
Über den darin enthaltenen Designer
können Sie alle Funktionen der Tastatur
konfigurieren.
Die Bedienung ist in der Direkthilfe der
Software CHERRY Tools beschrieben. Sie
bietet Ihnen Informationen dort, wo Sie diese
benötigen und wird mit F1 aufgerufen.
DE
6
8 Tipps
8.1 Reinigen der Tastatur
1 Schalten Sie den PC aus.
2 Reinigen Sie die Tastatur mit einem leicht
feuchten Tuch und etwas mildem
Reinigungsmittel (z. B.: Geschirrspülmittel).
3 Trocknen Sie die Tastatur mit einem
fusselfreien, weichen Tuch.
8.2 RSI-Syndrom
VORSICHT: Beschädigung durch
aggressive Reinigungsmittel oder
Flüssigkeit in der Tastatur
• Verwenden Sie zur Reinigung keine
Lösungsmittel wie Benzin oder Alkohol
und keine Scheuermittel oder
Scheuerschwämme.
• Verhindern Sie, dass Flüssigkeit in die
Tastatur gelangt.
• Entfernen Sie nicht die Tastkappen der
Tastatur.
"Repetitive Strain Injury" =
"Verletzung durch wiederholte
Beanspruchung". RSI entsteht
durch kleine, sich ständig wieder-
holende Bewegungen.
Typische Symptome sind Beschwerden in den
Fingern oder im Nacken.
9Entsorgung
Entsorgen Sie das Altgerät über eine
Sammelstelle für elektronischen
Abfall oder Ihren Händler.
10 Technische Daten
10.1 Übersicht
• Richten Sie Ihren Arbeitsplatz ergonomisch ein.
• Positionieren Sie Tastatur und Maus so,
dass sich Ihre Oberarme und Handgelenke seitlich vom Körper befinden und
ausgestreckt sind.
• Machen Sie mehrere kleine Pausen,
ggf. mit Dehnübungen.
• Ändern Sie oft Ihre Körperhaltung.
Artikel-Nr. Magnet-
kartenLeser
ChipkartenLeser
Touchpad
G80-7000 X
G80-7040 X X
G80-8000 X
G80-8113 X X
G80-8200 X
G80-8040 X X
10.2 Tastatur
10.3 Magnetkarten-Leser
Bezeichnung Wert
Schnittstelle USB-Stecker
Übertragungsrate
zum System
Max. 12 Mbps
Spannungsversorgung
+5 V/DC ±5 % SELV
Stromaufnahme Max. 500 mA
Lagertemperatur –20 °C bis +60 °C
Betriebstemperatur 0 °C bis +50 °C
Bezeichnung Wert
Spuren 1 + 2 + 3
Lesegeschwindigkeit
6,3 bis 250 cm/s für Standard
75 bis 210 dpi
Standards ISO 7811/-12, JIS 1, AAMVA,
Gemini
Magnetkopf > 1 Mio. Lesezyklen
DE
BEDIENUNGSANLEITUNG
CHERRY MultiBoards G80-7xxx/-8xxx – Programmable Keyboards with Card Reader
7
10.4 Chipkarten-Leser
11 Kontakt
Bitte halten Sie bei Anfragen an den
Technischen Support folgende Informationen
bereit:
• Artikel- und Serien-Nr. des Produkts
• Bezeichnung und Hersteller Ihres Systems
• Betriebssystem und ggf. installierte Version
eines Service Packs
ZF Friedrichshafen AG
Electronic Systems
Cherrystraße
91275 Auerbach
Internet: www.cherry-world.com
E-Mail: info@cherry.de
Bezeichnung Wert
Kompatibilität Omnikey CardMan 3121
Übertragungsrate zur Karte
Max. 420 Kbps
Standards ISO 7816, EMV 2000 Level1,
CCID, PC/SC, CT-API
Protokolle T=0, T=1, S=8 (IIC),
S=9 (3-Draht; SLE 4418/28),
S=10 (2-Draht; SLE 4432/42)
Kontaktierung Absenkkontakte
Steckzyklen Ca. 200.000
Telefon – Vertrieb:
+49 (0) 7541 77499-01*
Telefon – Technischer Support:
+49 (0) 7541 77499-02*
*zum Ortstarif aus dem deutschen Festnetz,
abweichende Preise für Anrufe aus
Mobilfunknetzen möglich
12 Allgemeiner
Anwenderhinweis
Technische Änderungen, die dem Fortschritt
dienen, behalten wir uns vor. Unsachgemäße
Behandlung und Lagerung können zu
Störungen und Schäden am Produkt führen.
Die Gewährleistung erlischt komplett, sofern
unautorisierte Änderungen am Produkt
durchgeführt worden sind. Führen Sie
eigenmächtig keine Reparaturen durch und
öffnen Sie das Produkt nicht. Die vorliegende
Anleitung ist nur gültig für das mitgelieferte
Produkt.
13 Gewährleistung
Es gilt die gesetzliche Gewährleistung. Bitte
wenden Sie sich an Ihren Händler oder
Vertragspartner. Nähere Informationen zur
Gewährleistung finden Sie unter
www.cherry-world.com.
14 Hinweis zum
GS-Zeichen
Aufgrund der Position der Nulltaste des
Nummernfelds ist die Tastatur für
Saldiertätigkeiten, die überwiegend blind
erfolgen, in Deutschland nicht anzuwenden.
Eine Tastatur mit nicht-deutscher
Tastenknopfbelegung ist in Deutschland
aufgrund der Zeichenbelegung (DIN 2137
Teil 2) nicht für den Dauereinsatz an
Bildschirmarbeitsplätzen zu verwenden.
DE

8
Congratulations ...
CHERRY has developed and produced
innovative input systems for computers since
1967. You can now experience the difference in
quality, reliability and design with your new
favorite accessory.
Always insist on original CHERRY products…
For information on other products, downloads
and much more, visit us at
www.cherry-world.com.
Your CHERRY MultiBoard stands out especially
due to the following features:
• CHERRY MX key technology with Gold
Crosspoint contacts
• Robust and reliable
• Fully programmable USB 2.0 keyboard via
the software CHERRY Tools
• Programming can be selected – manually or
via software macros
• UnifiedPOS supported (OPOS/JavaPOS)
• Integrated memory
• Provision of statistics data via WMI (Windows
Management Instrumentation)
Alongside the functions of a standard
keyboard, the MultiBoard keyboards offer the
following additional functions depending on the
model:
• Magnetic card reader
• PC/SC smartcard reader (EMV 2000
approved)
•Touchpad
• Additional keys (extended layout)
• Inscribable keys
1 Status displays
The left and center LEDs show the status of the
Caps Lock key, Num-Lock key and the shift
key.
The right LED shows the status of the scroll
key or has different functions depending on the
model as outlined below:
1.1 Models with magnetic card
reader
LED () Function
Lights up green for
approx. 4 sec. (after
connecting or
switching on the PC)
The magnetic card
reader is ready to
operate on the hardware
side.
Lights up green
(after the magnetic
card has been
swiped through)
The magnetic card has
been read correctly.
Configuration via
CHERRY Tools: On/Off
and light-up duration
(Standard: On, 200 ms).
1.2 Models with smartcard
reader,
models with smartcard and
magnetic card reader
2 Keyboard connection
2.1 Models with smartcard reader
• Only insert the USB connector in a USB hub,
which supplies 500mA electricity, or the
USB root hub (system USB connection).
2.2 Further models
• Insert the USB connector in any USB
connection in your system.
LED ( ) Function
Lights up green
constantly (after
connecting or
switching on the PC)
The smartcard reader is
ready to operate on the
hardware side.
Flashes red Communication with the
smartcard.
GB
OPERATING MANUAL
CHERRY MultiBoards G80-7xxx/-8xxx – Programmable Keyboards with Card Reader

9
3 Magnetic card reader –
3-track version
The magnetic card reader reads all
DIN ISO 7811/-12, Gemini, AAMVA and JIS
compliant cards. It can read the tracks
individually, in pairs or all together. The
decoding of the data can take place either in
the keyboard (standard) or via the software as
desired.
3.1 Using the magnetic card
reader
1 Insert the magnetic card into the magnetic
card reader from the right with magnetic
strips pointing downwards towards the
keyboard.
2 Pull the magnetic card to the left through
the magnetic card reader.
An acoustic signal confirms the successful/
unsuccessful completion of the reading
process:
1 x beep = Reading process successful.
The data is transferred.
2 x beeps = Reading process unsuccessful.
The data is not transferred.
Configuration via CHERRY Tools: signal for
successful/unsuccessful reading process,
duration.
3.2 Definition of headers and
terminators
Headers and terminators mark the start and
the end of the magnetic card data
transmission. They can be defined using the
software CHERRY Tools. The header/
terminator code is inserted before/after the
actual magnetic card data.
4 Smartcard reader
The integrated smartcard reader is available
once you have installed the software driver.
It reads and inscribes all smartcards in
accordance with DIN ISO 7816.
• Install the smartcard reader driver for the
PC/SC interface using the hardware
assistant.
For additional CT-API support (MKT 1.0) and
homebanking:
• Run the CHERRY SmartDevice setup.
4.1 Using the smartcard reader
• Insert the smartcard into the smartcard slot
with the chip pointing downwards and
towards the keyboard.
Contact is established after a clear pressure
point is passed.
5Touchpad
The touchpad replaces the mouse. You can
move the mouse cursor with your finger, and
select and drag objects.
5.1 Move the mouse cursor
• Move your finger across the touchpad.
5.2 Double-click
• Touch the touchpad twice in quick
succession.
Configuration via CHERRY Tools: touchpad on/
off, double click on/off.
6 Software installation
1 Insert your CD in the CD-ROM drive.
The CD-ROM starts automatically.
2 If the CD-ROM does not start automatically,
double click on the CD-ROM drive in
Windows-Explorer and then on the file
autostart.exe.
3 Follow the installation instructions on the
screen.
Latest software version on the
internet
The software is subject to constant
development. The latest version is available
on the Internet under:
www.cherry-world.com.
GB

10
6.1 CHERRY Tools
The following functions are supported:
• Configuration of keyboard/keys/magnetic
card reader
• Update of country-specific settings
(country table)
• Display of key configuration (KeyViewer)
6.2 CHERRY UPOS support
The standards OPOS and JavaPOS are
combined and constantly developed
(www.nrf-arts.org) under the umbrella of the
UPOS (Unified Point of Sale) specification.
If you use applications which access the
keyboard or the magnetic card reader via
OPOS or JavaPOS:
Windows operating system
• Install the software CHERRY OPOS Support
or CHERRY JPOS Support.
Linux operating system
• Use the installation scripts for JavaPOS
support on the CD-ROM.
7Programming of
keyboard/keys/
magnetic card reader
Configuration takes place via the software
CHERRY Tools. You can program the keyboard
either manually or virtually.
7.1 Physical programming
The configuration is written in the internal
memory of the keyboard. It also remains saved
when the connection cable is disconnected.
7.2 Virtual programming
The configuration is saved as software macro
in a file on the computer.
• Install the software CHERRY Tools.
You can configure all the functions of the
keyboard via the Designer included in the
software.
Operation instructions are included in the
direct help for the CHERRY Tools software. It
offers you information where you need it and
can be called up with F1.
8Tips
8.1 Cleaning the keyboard
1 Switch off the PC.
2 Clean the keyboard with a slightly damp
cloth and some mild cleaning agent (e.g.
dishwashing liquid).
3 Dry off the keyboard with a soft, lint-free
cloth.
CAUTION: Damage may be caused
by harsh cleaning agents or liquids
in the keyboard
• Do not use solvents such as gasoline or
alcohol and scouring agents or scouring
sponges for cleaning.
• Prevent liquids from entering the
keyboard.
• Do not remove the keycaps of the
keyboard.
GB
OPERATING MANUAL
CHERRY MultiBoards G80-7xxx/-8xxx – Programmable Keyboards with Card Reader

11
8.2 RSI syndrome
9 Disposal
Dispose of the used device at an
official collection point for electronic
waste or at your local dealer.
RSI stands for "Repetitive Strain
Injury". RSI arises due to small
movements continuously repeated
over a long period of time.
Typical symptoms are discomfort in the
fingers or neck.
• Set up your workspace ergonomically.
• Position the keyboard and mouse in such a
manner that your upper arms and wrists
are outstretched and to the sides of your
body.
• Take several short breaks, with stretching
exercises if necessary.
• Change your posture often.
10 Technical
specifications
10.1 Overview
10.2 Keyboard
Article No. Magnetic
card
reader
Smartcard
reader
Touchpad
G80-7000 X
G80-7040 X X
G80-8000 X
G80-8113 X X
G80-8200 X
G80-8040 X X
Description Value
USB interface USB connector
Transmission rate to
the system
max. 12 Mbps
Power supply +5 V/DC ±5 % SELV
Current input max. 500 mA
Storage temperature: –20 °C ... +60 °C
Operating temperature
0 °C ... +50 °C
10.3 Magnetic card reader
10.4 Smartcard reader
Description Value
Tracks 1 + 2 + 3
Scanning
speed
6.3 up to 250 cm/s for
standard 75 to 210 dpi
Standards ISO 7811/-12, JIS 1, AAMVA,
Gemini
Magnet head > 1 mill. scanning cycles
Description Value
Compatibility Omnikey CardMan 3121
Transmission
rate to the card
max. 420 Kbps
Standards ISO 7816, EMV 2000 Level1,
CCID, PC/SC, CT-API
Protocols T=0, T=1, S=8 (IIC),
S=9 (3-wire; SLE 4418/28),
S=10 (2-wire; SLE 4432/42)
Contacts Lowering contacts
Mating cycles approx. 200.000
GB

12
11 Contact
Please provide the following information about
the device when you make an enquiry:
• Item and serial no. of the product
• Name and manufacturer of your system
• Operating system and, if applicable,
installed service pack version
ZF Friedrichshafen AG
Electronic Systems
Cherrystraße
91275 Auerbach
Germany
Internet: www.cherry-world.com
E-mail: info@cherry.de
For USA:
ZF Electronic Systems
11200 - 88th Avenue
53158 Pleasant Prairie
USA
Tel.: +001 800 510-1689
Internet: www.cherrycorp.com
E-mail: keyboardsupport@zf.com
12 General advice
We reserve the right to make technical
modifications which serve the development of
our products. Improper use and storage can
lead to faults and damage to the product.
The warranty expires completely once
unauthorized modifications to the product have
been carried out. Do not carry out any
unauthorized repairs and do not open up the
product. These instructions are only valid for
the supplied product.
13 Warranty
The statutory warranty applies. Please contact
your specialist dealer or contractual partner.
You can find more information on the warranty
under www.cherry-world.com.
14 Certifications
14.1 Federal Communications
Commission (FCC) Radio
Frequency Interference
Statement
Information to the user: This equipment has
been tested and found to comply with the limits
for Class B digital device, pursuant to Part 15
of the FCC Rules. These limits are designed to
provide reasonable protection against harmful
interference in a residential installation. This
equipment generates, uses and can radiate
radio frequency energy and, if not installed and
used in accordance with the instructions, may
cause harmful interference to radio
communications. However, there is no
guarantee that interference will not occur in a
particular installation. If this equipment does
cause harmful interference to radio or
television reception, which can be determined
by turning the equipment off and on, the user is
encouraged to try to correct the interference by
one or more of the following measures:
• Reorientate or relocate the receiving
antenna.
• Increase the separation between the
equipment and receiver.
• Connect the equipment into an outlet on a
circuit different from that to which the
receiver is connected.
• Consult the dealer or an experienced radio/
TV technician for help.
Caution: Any changes or modifications not
expressly approved by the party responsible for
compliance could void the user's authority to
operate the equipment.
14.2 For UL
For use with Listed Personal Computers only!
OPERATING MANUAL
CHERRY MultiBoards G80-7xxx/-8xxx – Programmable Keyboards with Card Reader
GB

13
Félicitations...
Depuis 1967, CHERRY développe et produit des
systèmes de saisie innovants pour ordinateurs.
Nos produits se distinguent par leur qualité,
leur fiabilité et leur design. Le dernier né de
notre gamme en est la preuve vivante.
Exigez toujours un produit CHERRY d'origine.
Pour obtenir des informations sur d'autres
produits, sur les téléchargements et bien
d'autres choses, consultez le site
www.cherry-world.com.
Votre CHERRY MultiBoard se distingue par les
caractéristiques suivantes :
• Technologie de touches CHERRY MX avec
contacts à barres d'or croisées
• Solide et fiable
• Clavier USB 2.0 entièrement programmable à
l'aide du logiciel CHERRY Tools
• Au choix, programmation physique ou par
macro logicielles
• Conformité à UnifiedPOS (OPOS/JavaPOS)
•Mémoire intégrée
• Mise à disposition de données statistiques via
WMI (Windows Management Instrumentation)
En plus des fonctions d'un clavier standard, les
claviers MultiBoard proposent, selon les
versions, les fonctions suivantes :
• Lecteur de cartes magnétiques
• Lecteur de cartes à puce conforme à PC/SC
(homologation EMV 2000)
•Touchpad
• Touches additionnelles (layout élargi)
• Touches relégendables
1 Affichage d'état
La DEL de gauche et celle du milieu indiquent
l'état d'activation de la touche de verrouillage
numérique et de la touche Majuscules.
La DEL de droite affiche l'état de la touche
d'arrêt du défilement ou, selon les modèles :
1.1 Modèles à lecteur de cartes
magnétiques
DEL () Fonction
Allumée en vert
pendant 4 s env.
(après branchement ou allumage
de l'ordinateur)
Le lecteur de cartes
magnétiques est prêt à
l'emploi.
Allumée en vert
(après passage de la
carte magnétique)
La carte magnétique a
été lue correctement.
Configuration avec
CHERRY Tools : marche/
arrêt et durée
d'allumage (standard :
marche, 200 ms).
1.2 Modèles à lecteur de cartes à
puce,
modèles à lecteur de cartes à
puce et lecteur de cartes
magnétiques
2 Raccordement du
clavier
2.1 Modèles à lecteur de cartes à
puce
• Brancher la fiche USB uniquement sur un
concentrateur USB délivrant 500 mA ou sur
le concentrateur racine USB (prise USB de
votre système).
2.2 Autres modèles
• Brancher la fiche USB sur une prise USB au
choix de votre système.
DEL ( ) Fonction
Allumée en vert en
continu (après
branchement ou
allumage de
l'ordinateur)
Le lecteur de cartes à
puce est prêt à l'emploi.
Clignote en rouge Communication en
cours avec la carte à
puce.
FR
MODE D’EMPLOI
CHERRY MultiBoards G80-7xxx/-8xxx – Programmable Keyboards with Card Reader

14
3 Lecteur de cartes
magnétiques à 3 pistes
Le lecteur de cartes magnétiques lit toutes les
cartes écrites conformément à DIN ISO 7811/
12, Gemini, AAMVA et JIS. Il peut lire les pistes
séparément, par deux ou par trois. Le
décodage des données se fait au choix via le
clavier (standard) ou le logiciel.
3.1 Utilisation du lecteur de
cartes magnétiques
1 Introduire la carte magnétique par la droite
dans le lecteur de cartes magnétiques, la
bande magnétique vers le bas et dirigée vers
le clavier.
2 Passer la carte magnétique vers la gauche
dans le lecteur de cartes magnétiques.
Un signal sonore indique le résultat de la
lecture :
1 bip = lecture réussie. Les données sont
transmises.
2 bips = échec de la lecture. Les données ne
sont pas transmises.
Configuration avec CHERRY Tools : signal
après lecture réussie/échec, durée.
3.2 Définition de l'en-tête et du
terminateur
L'en-tête et le terminateur marquent le début
et la fin du transfert des données de la carte
magnétique. Ils peuvent être définis à l'aide du
logiciel CHERRY Tools. Les codes d'en-tête/de
terminateur sont insérés avant/après les
données de carte.
4 Lecteur de cartes à
puce
Le lecteur de cartes à puce intégré est
disponible après installation du pilote logiciel.
Il permet la lecture (et l'écriture) de toutes les
cartes à puce conformes à DIN ISO 7816.
• Installer les pilotes du lecteur de cartes à
puce pour l'interface PC/SC à l'aide de
l'Assistant Ajout de matériel.
Pour la prise en charge CT-API supplémentaire
(MKT 1.0) et les opérations de banque à
domicile :
• Exécuter l'installation CHERRY
SmartDevice.
4.1 Utilisation du lecteur de
cartes à puce
• Introduire la carte à puce dans la fente
correspondante, la puce vers le bas et
dirigée vers le clavier.
Après dépassement du point de pression, le
contact est établi.
5Touchpad
Le touchpad remplace la souris. Le contact du
doigt sur le touchpad permet de déplacer le
pointeur de la souris et de sélectionner et
déplacer des objets.
5.1 Déplacement du pointeur de
la souris
• Déplacer le doigt sur le touchpad.
5.2 Double-clic
• Tapoter le touchpad brièvement deux fois de
suite.
Configuration avec CHERRY Tools : touchpad
marche/arrêt, double-clic marche/arrêt.
MODE D’EMPLOI
CHERRY MultiBoards G80-7xxx/-8xxx – Programmable Keyboards with Card Reader
FR

15
6 Installation du logiciel
1 Insérer le CD dans le lecteur de CD-ROM.
Le CD-ROM démarre automatiquement.
2 Si le CD-ROM ne démarre pas
automatiquement, double-cliquer sur le
lecteur de CD-ROM dans l'Explorateur
Windows puis sur le fichier autostart.exe.
3 Suivre les consignes d'installation à l'écran.
6.1 CHERRY Tools
Prise en charge des fonctions suivantes :
• Configuration du clavier/des touches/du
lecteur de cartes magnétiques
• Mise à jour des réglages spécifiques aux
différents pays (tableau des pays)
• Affichage de la configuration des touches
(KeyViewer)
Version actuelle de logiciel sur
Internet
Le logiciel est perfectionné en
permanence. La version actuelle est
disponible sur Internet à l'adresse :
www.cherry-world.com.
6.2 Prise en charge UPOS
CHERRY
La spécification UPOS (Unified Point of Sale)
rassemble et développe les normes OPOS et
JavaPOS (www.nrf-arts.org).
Si vous utilisez des applications accédant au
clavier ou au lecteur de cartes magnétiques via
OPOS ou JavaPOS :
Système d'exploitation Windows
• Installer le logiciel Prise en charge OPOS
CHERRY ou Prise en charge JPOS CHERRY.
Système d'exploitation Linux
• Utiliser les scripts d'installation du CD-ROM
pour la prise en charge JavaPOS.
7 Programmation du
clavier/des touches/du
lecteur de cartes
magnétiques
La configuration se fait à l'aide du logiciel
CHERRY Tools. Vous pouvez programmer le
clavier de manière physique ou virtuelle.
7.1 Programmation physique
La configuration est inscrite dans la mémoire
interne du clavier. Elle est conservée même
lorsque le câble de raccordement a été
débranché.
7.2 Programmation virtuelle
La configuration est sauvegardée sous forme
de macro logicielle dans un fichier sur
l'ordinateur.
• Installer le logiciel CHERRY Tools.
Le Designer qu'il contient permet la
configuration de toutes les fonctions du
clavier.
La commande est décrite dans l'aide directe
du logiciel CHERRY Tools. Pour obtenir les
informations souhaitées, ouvrir l'aide avec la
touche F1.
FR

16
8Conseils
8.1 Nettoyage du clavier
1 Mettez le PC hors service.
2 Nettoyez le clavier avec un chiffon
légèrement humide et un produit de
nettoyage doux (p. ex. détergent vaisselle).
3 Séchez le clavier avec un chiffon doux non
peluchant.
ATTENTION : Détérioration en cas
d’utilisation de produits de nettoyage agressifs ou de pénétration
de liquide dans le clavier
• Pour le nettoyage, n’utilisez pas de
solvants tels que l’essence ou l’alcool ni
aucun produit ou éponge abrasif.
• Empêchez tout liquide de pénétrer dans le
clavier.
• N’enlevez pas les capuchons des touches
du clavier.
8.2 Syndrome LMR
9Élimination
Confiez votre appareil usagé à une
structure spécialisée dans le
recyclage des déchets électroniques
ou à votre revendeur.
LMR signifie "Lésion due aux
mouvements répétitivs".
Le syndrome LMR apparaît suite à
de petits mouvements se répétant
en permanence.
Des symptômes typiques sont des douleurs
dans les doigts ou la nuque.
• Organisez votre poste de travail de
manière ergonomique.
• Positionnez le clavier et la souris de telle
façon que vos bras et vos poignets se
trouvent latéralement par rapport au
corps et soient étendus.
• Faites plusieurs petites pauses, le cas
échéant accompagnées d’exercices
d’étirement.
• Modifiez souvent votre attitude corporelle.
10 Caractéristiques
techniques
10.1 Aperçu
Référence Lecteur
de cartes
magnétiques
Lecteur
de cartes
à puce
Touchpad
G80-7000 X
G80-7040 X X
G80-8000 X
G80-8113 X X
G80-8200 X
G80-8040 X X
MODE D’EMPLOI
CHERRY MultiBoards G80-7xxx/-8xxx – Programmable Keyboards with Card Reader
FR

17
10.2 Clavier
10.3 Lecteur de cartes
magnétiques
Désignation Données
Interface Fiche USB
Débit de transmission au système
max. 12 Mbit/s
Alimentation
électrique
+5 V/CC ±5 % SELV
Consommation max. 500 mA
Température de
stockage
−20 °C ... +60 °C
Température de
service
0 °C ... +50 °C
Désignation Données
Pistes 1 + 2 + 3
Vitesse de
lecture
de 6,3 à 250 cm/s pour 75 à
210 dpi standard
Normes ISO 7811/-12, JIS 1, AAMVA,
Gemini
Tête
magnétique
> 1 million de cycles de
lecture
10.4 Lecteur de cartes à puce
11 Contact
En cas de questions, veuillez indiquer les
informations suivantes concernant l'appareil :
• N° d'article et n° de série du produit
• Désignation et fabricant de votre système
• Système d'exploitation et le cas échéant
version installée d'un Service Pack
ZF Friedrichshafen AG
Electronic Systems
Cherrystraße
91275 Auerbach
Allemagne
Internet : www.cherry-world.com
E-mail : info@cherry.de
Désignation Données
Compatibilité Omnikey CardMan 3121
Débit de
transmission sur
la carte
max. 420 kbit/s
Normes ISO 7816, EMV 2000 Level1,
CCID, PC/SC, CT-API
Protocoles T=0, T=1, S=8 (IIC),
S=9 (3 fils ; SLE 4418/28),
S=10 (2 fils ; SLE 4432/42)
Contacts Contact par basculement
Cycles d'insertion
de carte
env. 200 000
12 Généralités
Sous réserve de modifications techniques.
Un traitement et un stockage non conformes
peuvent entraîner des dysfonctionnements et
des dommages du produit.
La garantie devient complètement caduque si
des modifications non-autorisées sont
effectuées sur le produit. N'effectuez aucune
réparation de votre propre chef et n'ouvrez pas
le produit. La présente notice est valable
uniquement pour le produit avec lequel elle est
fournie.
13 Garantie
La garantie légale s'applique. Veuillez
contacter votre revendeur ou votre partenaire
contractuel. Pour tout complément
d'information concernant la garantie, veuillez
consulter notre site www.cherry-world.com.
FR

18
¡Felicidades!
Desde 1967 CHERRY viene desarrollando y
produciendo innovadores sistemas de
introducción de datos para ordenadores. Su
nuevo teclado le hará notar la diferencia en
calidad, fiabilidad y diseño.
Exija siempre un CHERRY original.
En la dirección www.cherry-world.com podrá,
entre otros, encontrar y descargar información
sobre los productos.
El CHERRY MultiBoard se distingue
principalmente por las siguientes
características:
• Tecnología de teclas MX de CHERRY con
contactos Gold Crosspoint
• Sólida y fiable
• Teclado USB 2.0 completamente programable mediante el software CHERRY Tools
• Programación seleccionable - físicamente
o mediante las macros de software.
• Compatibilidad-UnifiedPOS (OPOS/JavaPOS)
• Memoria integrada
• Suministro de datos técnicos a través de
WMI (Windows Management
Instrumentation: Instrumental de
administración de Windows)
Aparte de las funciones propias de un teclado
estándar, las teclas MultiBoard le ofrecen las
siguientes funciones adicionales según la
versión:
• Lector de tarjetas magnéticas
• Lector de tarjetas chip PC/SC (EMV 2000
admitido)
• Touchpad (almohadilla táctil)
• Teclas adicionales (diseño ampliado)
• Teclas rotulables
1 Mensajes de estado
El LED central y el izquierdo indican el estado
de la función de fijación de la tecla de bloqueo
numérico.
El led derecho indica el estado de la tecla de
desplazamiento o se distingue según el modelo
como dice a continuación:
1.1 Modelos con lector de tarjetas
magnéticas
LED ()Función
Se ilumina aprox. 4
s. en verde
(al conectar o enceder el PC)
El lector de tarjetas
magnéticas forma parte
del hardware y está listo
para su uso.
1.2 Modelos con lector de tarjetas
chip,
modelos con lector de tarjetas
magnéticas y lector de
tarjetas chip
Se ilumina en verde
(tras pasar la tarjeta
magnética)
La tarjeta magnética se
leyó correctamente.
Configuración a través
de CHERRY Tools:
encendido/apagado y
duración de iluminación
(estándar: encendido,
200 ms).
LED ( ) Función
Se ilumina continuamen-te en verde
(tras conectar
o encender el PC)
El lector de tarjetas chip
forma parte del
hardware y está listo
para su uso.
Parpadea en rojo Comunicación con la
tarjeta chip.
LED () Función
MANUAL DE INSTRUCCIONES
CHERRY MultiBoards G80-7xxx/-8xxx – Programmable Keyboards with Card Reader
ES

19
2 Conexión del teclado
2.1 Modelos con lector de tarjetas
chip
• Conecte el enchufe USB sólo a un Hub
USB que suministra una corriente de
500 mA, o al Hub raíz USB (conexión USB de
su sistema).
2.2 Demás modelos
• Conecte el enchufe USB a cualquier
conexión USB de su sistema.
3 Lector de tarjetas
magnéticas de 3 pistas
El lector de tarjetas magnéticas es capaz de
leer todas las tarjetas Gemini, AAMVA y JIS
descritas conforme a DIN ISO 7811/12. Puede
leer las pistas individualmente, a pares o en
conjunto. La decodificación de los datos de
lectura se produce opcionalmente mediante el
teclado (estándar) o el software.
3.1 Uso del lector de tarjetas
magnéticas
1 Introduzca la tarjeta magnética en el lector
de tarjetas magnéticas con la banda hacia
abajo y señalando hacia la derecha del
teclado.
2 Pase la tarjeta magnética por el lector de
tarjetas magnéticas hacia la izquierda.
Una señal audible confirma si se produjo una
lectura válida o errónea:
Tono x 1 = proceso de lectura válido.
Se transmiten los datos.
Tono x 2 = proceso de lectura erróneo. No se
transmiten los datos.
Configuración a través de CHERRY tools:
señal durante un proceso de lectura válido/
erróneo, duración.
3.2 Definición de cabecera y
terminal
La cabecera y el terminal señalan el principio y
el final de la transmisión de datos de las tarjetas magnéticas. Estos pueden configurarse
mediante el software CHERRY Tools. El código
de terminal/cabecera se añade antes/después
de los auténticos datos de las tarjetas magnéticas.
4 Lector de tarjetas chip
Tendrá a su disposición el lector de tarjetas
chip integrado una vez instalados los
controladores del software. Lee y describe
todas las tarjetas chip conforme a
DIN ISO 7816.
• Instale los controladores del lector de
tarjetas chip de la interfaz PC/SC a través
del asistente de hardware.
Para una compatibilidad CT-API adicional
(MKT 1.0) y banca a distancia:
• Ejecute la instalación del CHERRY
SmartDevice.
4.1 Uso del lector de tarjetas
magnéticas
• Introduzca la tarjeta chip con el chip hacia
abajo en la bandeja de tarjetas chip
señalando hacia el teclado.
Al haber superado un punto de presión
evidente, se produce el contacto.
ES

20
5 Touchpad (almohadilla
táctil)
La almohadilla táctil sustituye el ratón. Puede
desplazar el cursor, seleccionar y arrastrar los
objetos tocando la almohadilla con su dedo.
5.1 Desplazar el cursor
• Deslice su dedo por la almohadilla táctil.
5.2 Hager doble clic
• Pulse ligeramente dos veces consecutivas
en la almohadilla táctil con el dedo.
Configuración a través de CHERRY Tools:
almohadilla táctil encendida/apagada, doble
clic encendido/apagado.
6 Instalación del
software
1 Introduzca el CD en su unidad de CD-ROM.
El CD-ROM se inicia automáticamente.
2 En caso de que el CD-ROM no se inicie
automáticamente, haga doble clic en la
Software actual en internet
El software se desarrolla
continuamente. Para obtener la
versión actual acuda al sitio web:
www.cherry-world.com.
unidad de CD-ROM del explorador de
Windows y luego en el archivo autostart.exe.
3 Siga las instrucciones de instalación que
aparecen en la pantalla.
6.1 CHERRY Tools
Son compatibles las funciones siguientes:
• Programación del lector de tarjetas
magnéticas/teclas/teclado
• Actualización de los ajustes por países
(tabla de países)
• Indicación de la configuración de teclas
(KeyViewer)
6.2 Compatibilidad CHERRY
UPOS
Los estándares OPOS y JavaPOS se resumen
y desarrollan (www.nrf-arts.org) al amparo de
UPOS (Unified Point of Sale: punto de venta
unificado).
Cuando utilice aplicaciones que accedan al
teclado o al lector de tarjetas magnéticas
mediante OPOS o JavaPOS:
Sistema operativo de Windows
• Instale el software Compatibilidad CHERRY
OPOS o Compatibilidad CHERRY JPOS.
Sistema operativo Linux
• Utilice las secuencias de comandos de
instalación para compatibilidad de JavaPOS
del CD-ROM.
7 Programación del
lector de tarjetas
magnéticas/teclas/
teclado
La configuracion se produce mediante el
software CHERRY Tools. Puede programar el
teclado opcionalmente de forma física o
virtual.
7.1 Programación física
La configuración se graba en la memoria
interna del teclado. Se mantiene incluso una
vez retirado el cable de conexión.
7.2 Programación virtual
La configuracion se guarda como macrosoftware en un archivo del ordenador.
• Instale el software CHERRY Tools.
A través del Designer que contiene, puede
configurar todas las funciones del teclado.
El manejo se describe en la Ayuda directa del
software CHERRY Tools. Facilita información
siempre que la necesite y se acceda a ella
pulsando F1.
MANUAL DE INSTRUCCIONES
CHERRY MultiBoards G80-7xxx/-8xxx – Programmable Keyboards with Card Reader
ES

21
8 Consejos
8.1 Limpieza del teclado
1 Desconecte el PC.
2 Limpie el teclado con un paño ligeramente
humedecido y un poco de producto de
limpieza suave (p. ej. lavavajillas).
3 Seque el teclado con un paño suave sin
pelusa.
8.2 Síndrome RSI
ATENCIÓN: El teclado se daña con
productos de limpieza agresivos o
con líquidos
• Para su limpieza, no utilice disolventes
como gasolina o alcohol, ni medios
abrasivos o esponjas abrasivas.
• Evite que entre líquido en el teclado.
• No extraiga las teclas del teclado.
"Repetitive Strain Injury" =
"Síndrome del túnel carpiano".
El RSI se origina por movimientos
pequeños, repetidos
continuamente.
Los síntomas típicos son molestias en los
dedos o en la nuca.
9Gestión
Cuando se quiera desahacer del
aparato usado, entréguelo en su
establecimiento comercial o en un
punto de recogida para residuos
electrónicos.
10 Datos técnicos
10.1 Visión de conjunto
• Organice su puesto de trabajo de forma
ergonómica.
• Coloque el teclado y el ratón de modo que
los brazos y las muñecas se encuentren a
los lados del cuerpo y estirados.
• Haga varias pausas cortas, cuando sea
necesario con ejercicios de estiramiento.
• Cambie con frecuencia la postura
corporal.
Nº de
artículo
Lector de
tarjetas
magnéticas
Lector de
tarjetas
chip
Touchpad
(almohadilla táctil)
G80-7000 X
G80-7040 X X
G80-8000 X
10.2 Teclado
G80-8113 X X
G80-8200 X
G80-8040 X X
Denominación Valor
Interfaz Conector USB
Tasa de transmisión
al sistema
máx. 12 Mbps
Suministro de
corriente
+5 V/CC ±5 % SELV
Consumo de
corriente
máx. 500 mA
Temperatura de
almacenamiento
−20 °C ... +60 °C
Temperatura de
funcionamiento
0 °C ... +50 °C
Nº de
artículo
Lector de
tarjetas
magnéticas
Lector de
tarjetas
chip
Touchpad
(almohadilla táctil)
ES

22
10.3 Lector de tarjetas
magnéticas
10.4 Lector de tarjetas chip
Denominación Valor
Pistas 1 + 2 + 3
Velocidad de
lectura
6,3 a 250 cm/s para el
estándar 75 a 210 dpi
Estándares ISO 7811/-12, JIS 1, AAMVA,
Gemini
Cabeza
magnética
> 1 millón de ciclos de lectura
Denominación Valor
Compatibilidad Omnikey CardMan 3121
Tasa de
transmisión a la
tarjeta
máx. 420 Kbps
Estándares ISO 7816, EMV 2000 Level1,
CCID, PC/SC, CT-API
Protocolos T=0, T=1, S=8 (IIC),
S=9 (3 hilos; SLE 4418/28),
S=10 (2 hilos; SLE 4432/42)
Contacto Contactos de bajada
Ciclos de
contacto
aprox. 200,000
11 Contacto
Si realiza alguna consulta, indique la siguiente
información sobre el dispositivo:
• Nº de artículo y de serie del producto
• Denominación y fabricante del PC, Notebook
o placa base
• Sistema operativo y, en su caso, versión
instalada de un paquete de servicios
ZF Friedrichshafen AG
Electronic Systems
Cherrystraße
91275 Auerbach
Alemania
Internet: www.cherry-world.com
Correo electrónico: info@cherry.de
12 Instrucciones
generales para el
usuario
Nos reservamos el derecho de realizar
modificaciones técnicas destinadas a la mejora
del producto. Un manejo o almacenamiento
inadecuados pueden provocar averías o
desperfectos en el producto.
La garantía pierde su validez tan pronto como
se introduzcan modificaciones no autorizadas.
No lleve a cabo ninguna reparación por su
cuenta ni abra el producto. Las presentes
instrucciones solo rigen para el producto
suministrado.
13 Garantía
Rige la garantía legal. Póngase en contacto
con su distribuidor o parte contratante.
Encontrará más información acerca de la
garantía en www.cherry-world.com.
MANUAL DE INSTRUCCIONES
CHERRY MultiBoards G80-7xxx/-8xxx – Programmable Keyboards with Card Reader
ES
 Loading...