

Cherry CyBo@rd Plus M 83-13900, CyBo@rd Plus RS 13800WL, CyBo@rd Plus M-7000, CyBo@rd Plus R-3000 Quick Start Instructions
1
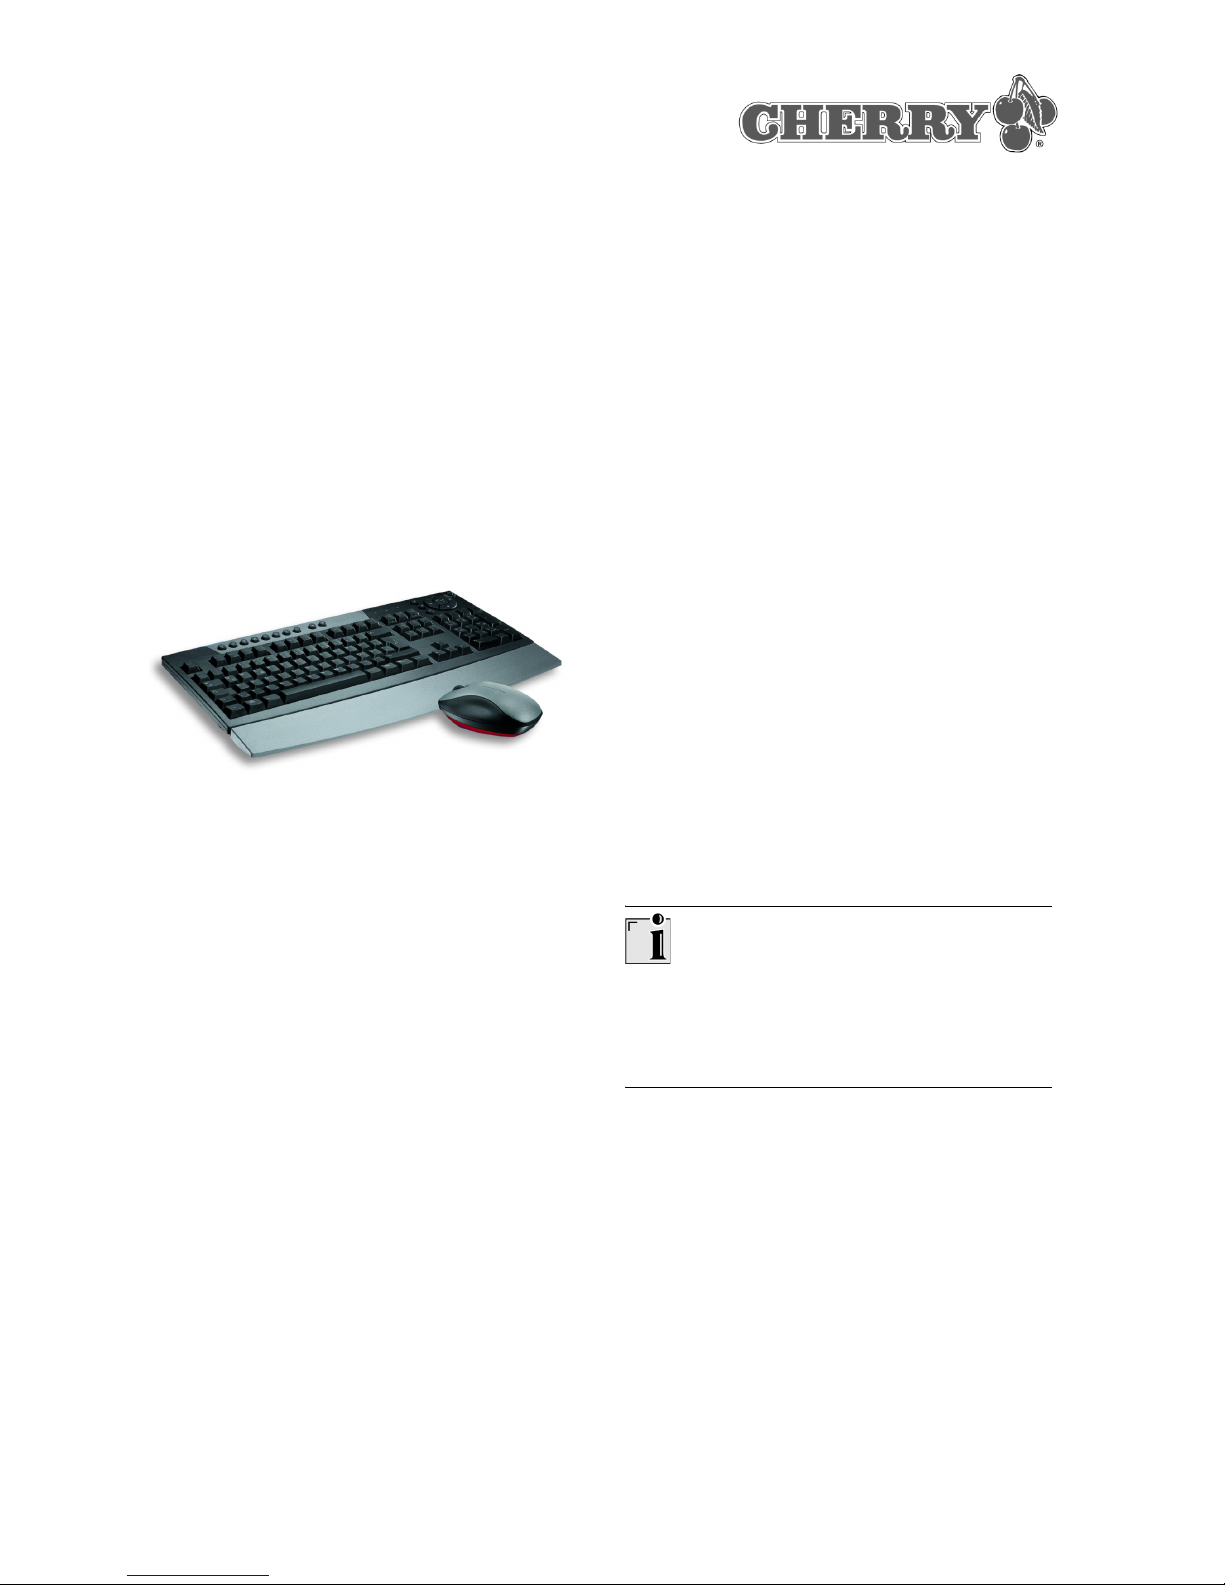
CyBo@rd Plus
wireless optical
CyBo@rd-Funktastatur mit
optischer Funkmaus
M 83-13900
1 Informationen auf Papier, als
Direkthilfe und auf CD
Informationen zu Inbetriebnahme, Bedienung und
Konfiguration erhalten Sie in der vorliegenden
Kurzanleitung, als Direkthilfe und als Bedienungsanleitung. Bitte beachten Sie die allgemeinen
Anwenderhinweise und die Lizenzvereinbarungen.
Die Informationen sind nach folgenden Kriterien
aufgeteilt:
• Die Kurzanleitung beschreibt im Wesentlichen
den Anschluss des Geräts und die Installation
der Software.
• Die Direkthilfe bietet Ihnen Informationen zur
Bedienung dort, wo Sie diese benötigen. Sie
wird mit F1 aufgerufen.
• Die Bedienungsanleitung beschreibt die Bedienung und Konfiguration. Sie befindet sich als
PDF auf der beiliegenden CD (CD-ROM/Manu-
als). Hier können Sie die gewünschten Inhalte
am Bildschirm lesen oder ausdrucken.
Dadurch, dass wir Ihnen nur die wichtigsten Informationen gedruckt liefern, verringern wir den
Papierverbrauch und leisten einen Beitrag zum
Umweltschutz.
2 Vorteile des CyBo@rd Plus
Das CyBo@rd Plus besteht aus der Tastatur, der
Maus und dem Funk-Empfänger für beide Geräte.
Es sind keine störenden Kabel im Weg. Sie bedienen Ihren PC - je nach örtlichen Gegebenheiten bis ca. 5 m vom Empfänger entfernt.
2.1 Die Tastatur
Die Tastatur bietet Ihnen, neben den Funktionen
einer Standard-Tastatur, folgende zusätzliche
Funktionen:
• 8 Sondertasten zur Bedienung von MultimediaProgrammen
• 7 Sondertasten zur Bedienung des InternetBrowsers
• 3 Sondertasten zum Aufruf von Programmen:
E-Mail, Arbeitsplatz, Windows-Rechner
• Standby-Taste
Standby-Taste
Ältere PCs unterstützen den Standby-Modus nicht.
Die Betätigung der Standby-Taste kann dann zum
Absturz des PCs führen.
Mit der Cherry-Software KeyMan können Sie die
19 Sondertasten mit anderen Funktionen belegen.
2.2 Die Maus
Folgende Merkmale und Funktionen machen die
Arbeit mit der Maus effizient und bequem:
• Energiesparfunktion für eine lange Batterielebensdauer
• Auflösung von bis zu 800 dpi für präzises Arbeiten
• Optischer Sensor, der die Kugel ersetzt und
das Reinigen der Maus überflüssig macht
Kurzanleitung
644-0297.00 DE, US, FR Nov 2002
2
Voraussetzung für eine optimale Nutzung
Eine helle, strukturierte Fläche als Mausuntergrund steigert die Effektivität der Maus:
• optimale Bewegungserkennung
• längere Batterielebensdauer
Eine spiegelnde Fläche ist als Mausuntergrund
nicht geeignet.
3 Funk-Tastatur (RS 13800WL)
Bezeichnung Wert
Tastaturtyp 105-Tasten-Tastatur
mit 19 Sondertasten
Spannungsversorgung 2 Batterien der Größe
LR6 (AA)
Versorgungsspannung 2,2 bis 3,3 V SELV
Lebensdauer der
Batterien
> 1 Jahr, bei typ.
Benutzung im OfficeBereich
Sendefrequenz 2400,5 bis
2483,5 MHz
Zahl der einstellbaren
Frequenzkanäle
16
Zahl der einstellbaren
ID-Codes
16
Übertragungsreichweite
typ. 5 m
Lagertemperatur -20 °C bis +60 °C
Betriebstemperatur 0 °C bis +50 °C
Abmessungen
(L x B x H)
458 x 184 x 40 mm
(mit Handballenauflage 458 x 244 x
40 mm)
4 Funk-Maus (M-7000)
5 Funk-Empfänger (R-3000)
Bezeichnung Wert
Maustyp 3-Tasten-Wheel-
Mouse
Auflösung 800 dpi
Spannungsversorgung 2 wieder aufladbare
Alkali-Batterien,
Typ LR6 (AA)
Lebensdauer der
Batterien
> 3 Monate, bei typ.
Benutzung im OfficeBereich
Versorgungsspannung 2,2 bis 3,3 V SELV
Sendefrequenz 2400,5 bis
2483,5 MHz
Zahl der einstellbaren
Frequenzkanäle
16
Zahl der einstellbaren
ID-Codes
16
Übertragungsreichweite
typ. 5 m
Lagertemperatur -20 °C bis +60 °C
Betriebstemperatur 0 °C bis +50 °C
Bezeichnung Wert
Schnittstellen 2 x PS/2-Schnittstelle
zum gleichzeitigen
Betrieb von Tastatur
und Maus
Empfangsfrequenz 2400,5 bis
2483,5 MHz
Zahl der einstellbaren
Frequenzkanäle
16
Zahl der einstellbaren
ID-Codes
16
Übertragungsreichweite
typ. 5 m
3
6 Frequenzkanäle und ID-Codes
Voreinstellung
Bei Lieferung des CyBo@rd Plus ist am Empfänger, an der Tastatur und an der Maus bereits ein
Frequenz-Kanal (2450 MHz, Kanal 10) und ein
ID-Code (Nr. 0) voreingestellt.
Diese Voreinstellung müssen Sie nur ändern,
wenn jemand in Ihrer Nähe (d. h. innerhalb der
Übertragungsreichweite der Geräte) mit dem gleichen Tastatur- und Mausmodell arbeitet und seine
Geräte ebenfalls auf die gleiche Frequenz und den
gleichen ID-Code eingestellt hat.
Die Frequenz-Kanäle und ID-Codes werden mit 8
DIP-Schaltern eingestellt (Schalterpositionen:
ein = on oder aus = off). Die Stellungen der
DIP-Schalter 1 bis 4 ergeben 16 Möglichkeiten der
Frequenz-Kanalwahl, die Stellungen der Schalter
5 bis 8 ergeben 16 mögliche ID-Codes.
Prinzipiell muss die Stellung der Schalter bei allen
3 Geräten eines PCs (Tastatur, Maus, Empfänger)
identisch sein.
Einstellungen der Frequenzkanäle
Lagertemperatur -20 °C bis +60 °C
Betriebstemperatur 0 °C bis +50 °C
DIP-Schalter Fre-
quenzKanal
1234Nr.
on on on on 1
offononon2
on off on on 3
off off on on 4
on on off on 5
Bezeichnung Wert
Einstellungen der ID-Codes
off on off on 6
on off off on 7
offoffoffon8
on on on off 9
off on on off 10
on off on off 11
off off on off 12
on on off off 13
offonoffoff14
on off off off 15
offoffoffoff16
DIP-Schalter ID-
Codes
5678Nr.
on on on on 0
offononon1
on off on on 2
off off on on 3
on on off on 4
off on off on 5
on off off on 6
offoffoffon7
on on on off 8
off on on off 9
on off on off 10
off off on off 11
on on off off 12
DIP-Schalter Fre-
quenzKanal
1234Nr.
4
6.1 Frequenz-Kanäle und ID-Codes
einstellen
Verwendung mehrerer CyBo@rd Plus im
Umkreis von 5 m
Werden mehrere Geräte des gleichen Modells im
Umkreis von ca. 5 m auf dem gleichen FrequenzKanal betrieben, kann es zu Störungen bei der
Übertragung der Funksignale kommen.
Frequenz-Kanal/ID-Code am Empfänger ändern
1 Öffnen Sie die Abdeckung an der Unterseite des
Funk-Empfängers.
2 Bringen Sie die DIP-Schalter 1 bis 4 mit einem
spitzen Gegenstand in eine Position, die keine
der im Umkeis arbeitenden Personen an seinen
Geräten eingestellt hat.
3 Wenn bereits alle Möglichkeiten der Frequenz-
einstellung ausgeschöpft sind (siehe Tabelle),
wechseln Sie den ID-Code, indem Sie die Stellung der DIP-Schalter 5 bis 8 verändern.
4 Schließen Sie die Abdeckung.
offonoffoff13
on off off off 14
off off off off 15
DIP-Schalter ID-
Codes
5678Nr.
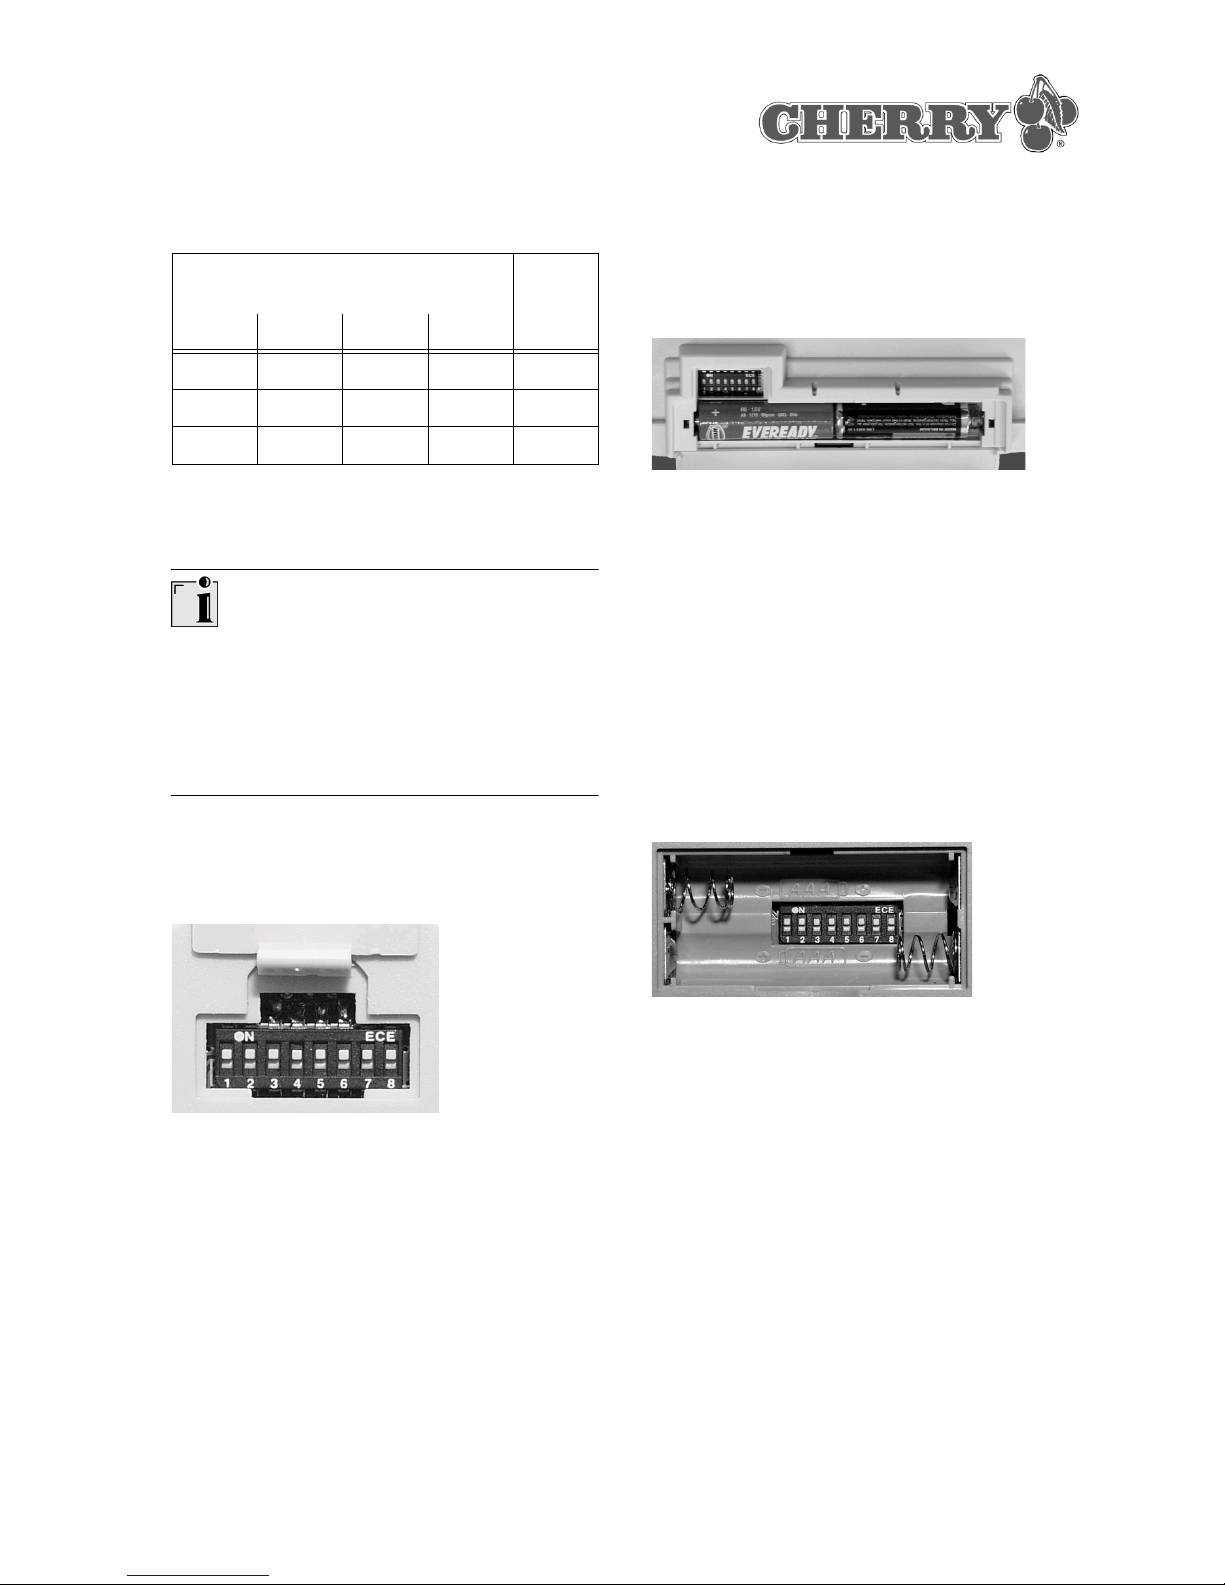
Frequenz-Kanal/ID-Code an der Tastatur ändern
1 Öffnen Sie das Batteriefach an der Unterseite
der Funk-Tastatur.
2 Entnehmen Sie die Batterien.
Die alte Einstellung ist gelöscht.
3 Bringen Sie die DIP-Schalter 1 bis 8 mit einem
spitzen Gegenstand in die gleiche Position wie
beim Empfänger.
4 Legen Sie die Batterien wieder ein.
Die neue Einstellung ist gespeichert.
5 Schließen Sie das Batteriefach.
Frequenz-Kanal/ID-Code an der Maus ändern
1 Öffnen Sie das Batteriefach an der Unterseite
der Funk-Maus.
2 Entnehmen Sie die Batterien.
3 Bringen Sie die DIP-Schalter 1 bis 8 mit einem
spitzen Gegenstand in die gleiche Position wie
beim Empfänger.
4 Legen Sie die Batterien wieder ein.
Die neue Einstellung ist gespeichert.
5 Schließen Sie das Batteriefach.
5
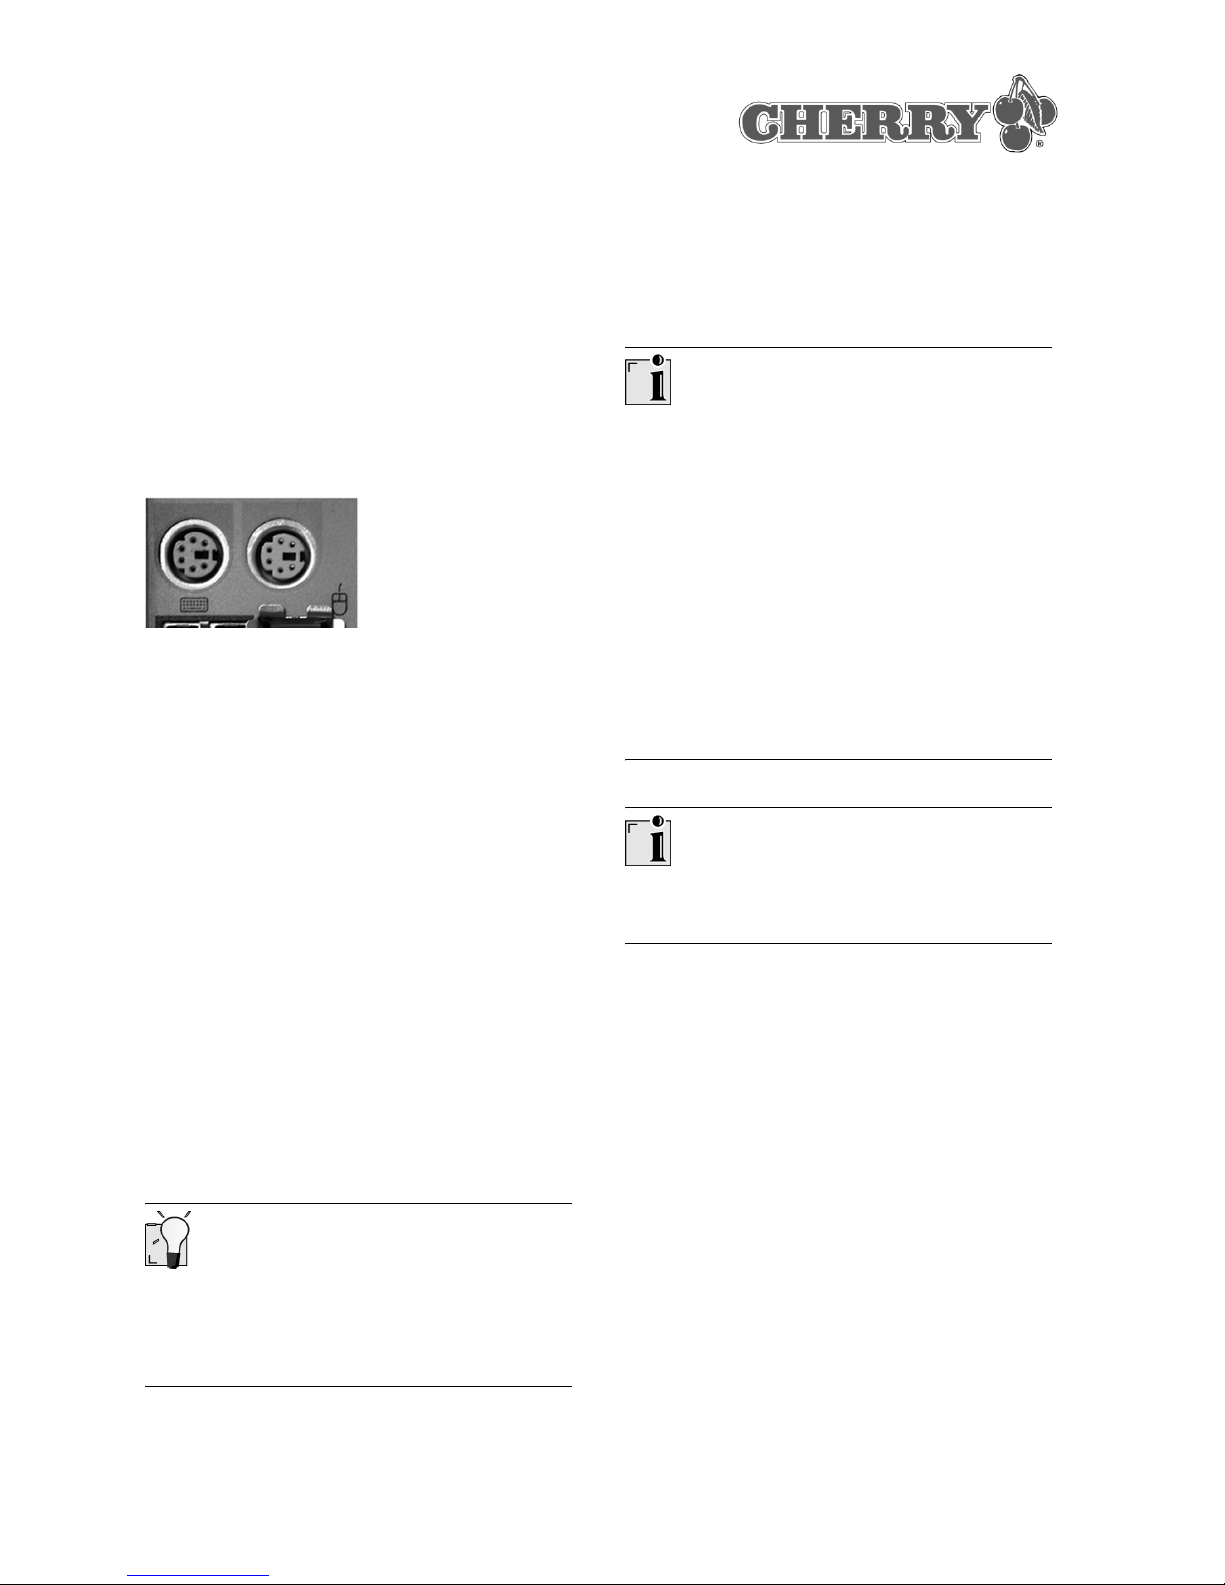
7 Geräte anschließen
7.1 Empfänger über den PS/2-Anschluss
an den PC anschließen
1 Schalten Sie den PC aus.
2 Ermitteln Sie die beiden runden 6-poligen PS/2-
Anschlüsse für Tastatur und Maus an der Rückseite des PCs.
3 Stecken Sie den violetten Stecker des Empfän-
gers in die violett gekennzeichnete PS/2-Buchse
für die Tastatur.
4 Stecken Sie den grünen Stecker des Empfän-
gers in die grün gekennzeichnete PS/2-Buchse
für die Maus.
5 Schalten Sie den PC an.
7.2 Batterien in Tastatur einlegen
1 Öffnen Sie das Batteriefach an der Unterseite
der Funk-Tastatur.
2 Legen Sie die beiden mitgelieferten Batterien,
Typ LR6 (AA), ein.
3 Schließen Sie das Batteriefach.
7.3 Batterien in Maus einlegen
1 Öffnen Sie das Batteriefach an der Unterseite
der Funk-Maus.
2 Legen Sie die beiden mitgelieferten wieder auf-
ladbaren Alkali-Batterien, Typ LR6 (AA), ein.
Ladezustand der Alkali-Batterien
Die Alkali-Batterien sind sofort betriebsbereit und
müssen vor der ersten Benutzung nicht geladen
werden.
3 Schließen Sie das Batteriefach.
8 Ladefunktion der Maus
verwenden
Verwendbarer Batterietyp
Die Ladeelektronik funktioniert nur mit wieder aufladbaren Alkali-Batterien (Beispiel: AccuCell
AC 1800). Wieder aufladbare NiMH- und NiCd-Batterien werden in der Maus nicht geladen.
Wieder aufladbare Alkali-Batterien haben folgende
Vorteile:
• hohe Kapazität (1800 mAh)
• geringe Selbstentladung
• jederzeit nachladbar ohne Memory-Effekt
• mehrere 100-mal wieder aufladbar
• hohe Ausgangsspannung (1,5 V)
• umweltschonend, da schadstoffreduziert
Ladekabel
Verwenden Sie nur das beiliegende Ladekabel.
1 Entfernen Sie den PS/2-Stecker der Tastatur
von der PS/2-Buchse des PCs.
2 Stecken Sie den PS/2-Stecker der Tastatur in
die PS/2-Buchse des Ladekabels.
3 Stecken Sie den PS/2-Stecker des Ladekabels
in die PS/2-Buchse des PCs.
4 Stecken Sie den Hohlstecker des Ladekabels in
die Buchse an der Vorderseite der Maus.
Solange der PC eingeschaltet ist, wird die Maus
geladen.
6
Tipps zum Laden der Alkali-Batterien
• Laden Sie die Alkali-Batterien in der Maus,
sobald die Ladezustands-LED des Empfängers
rot blinkt. Tiefentladung kann den inneren Aufbau und die chemischen Bestandteile der
Alkali-Batterien beschädigen.
• Vollständiges Laden der Alkali-Batterien dauert
12 bis 18 Stunden. Die Ladeschaltung verhindert ein Überladen. Da die wieder aufladbaren
Alkali-Batterien keinen sog. Memory-Effekt
haben, kann der Ladevorgang mehrmals unterbrochen werden.
• Zum Laden der Alkali-Batterien muss der PC
eingeschaltet sein.
9 Energiesparfunktion der Maus
nutzen
Die Energiesparfunktion schaltet die Maus nach
15-minütiger Bewegungslosigkeit aus. Die Batterielebensdauer verlängert sich dadurch deutlich.
9.1 Energiesparfunktion aktivieren
1 Entnehmen Sie die Batterien der Maus.
2 Halten Sie gleichzeitig die linke und rechte
Maustaste gedrückt und legen Sie die Batterien
wieder ein.
Automatisches Deaktivieren der Energiesparfunktion
Die Energiesparfunktion wird deaktiviert, wenn Sie
die Batterien der Maus entnehmen. Deshalb muss
die Energiesparfunktion nach jeder Entnahme der
Batterien erneut aktiviert werden.
9.2 Maus im Energiesparmodus
aktivieren
Wenn die Maus länger als 15 Minuten nicht bewegt
wurde, müssen Sie sie manuell einschalten.
• Drücken Sie eine beliebige Taste.
Die Maus ist aktiviert.
Sleep-Modus bei inaktiver Energiesparfunktion
Bei inaktiver Energiesparfunktion ist die Maus im
Sleep-Modus, der weniger Energie spart. Nach 15minütiger Bewegungslosigkeit wird der Untergrund
nur noch einmal pro Sekunde abgetastet. Eine
Bewegung der Maus oder ein Tastendruck beendet den Sleep-Modus.
10 Installation der Cherry-Software
KeyMan
Befinden sich bereits Treiber/Software auf dem
PC?
Wenn auf dem PC bereits Treiber oder Software
für eine Tastatur installiert sind, müssen diese
zunächst deinstalliert werden. Zur Deinstallation
gelangen Sie i. d. R. über das Windows-Start-
menü/Einstellungen/Systemsteuerung/Software.
Aktuelle Cherry-Software KeyMan im Internet
Die Cherry-Software KeyMan wird ständig weiterentwickelt. Die aktuelle Version können Sie vom
CHERRY INTERNET SUPPORT SYSTEM (CISS)
herunterladen: http://support.cherry.de.

7
Software KeyMan unter
Windows 98/ME/2000/XP installieren
1 Legen Sie die Cherry-CD in Ihr CD-ROM-Lauf-
werk.
Die CD-ROM startet automatisch. Die Seite
Installation öffnet sich.
2 Wenn die CD-ROM nicht automatisch startet,
doppelklicken Sie im Windows-Explorer auf das
CD-ROM-Laufwerk und dann auf die Datei
Start.exe.
Die Seite Installation öffnet sich.
3 Klicken Sie auf das Cherry-Produkt, für das Sie
die Software installieren möchten.
Die Installation beginnt.
4 Folgen Sie den Installationsanweisungen auf
dem Bildschirm.
Die Cherry-Software KeyMan ist installiert.
11 Support
Bei Problemen mit der Installation von Tastatur
oder Software bieten wir Ihnen einen kostenlosen
Support.
Unter http://support.cherry.de erreichen Sie das
CHERRY INTERNET SUPPORT SYSTEM (CISS).
Dort können Sie Ihre Anfragen rund um die Uhr,
sieben Tage in der Woche, direkt an uns übermitteln.
Sollten Sie über keinen Internet-Zugang verfügen,
kontaktieren Sie uns bitte unter folgender Adresse:
Cherry GmbH
Cherrystrasse
D-91275 Auerbach
Hotline:
Tel. +49(0)9643-18-206
Fax: +49(0)9643-18-545
Wir stehen Ihnen Mo bis Do von 7:15 bis 16:00 Uhr
und Fr von 7:15 bis 13:30 Uhr (GMT + 1h) zur Verfügung.
12 Allgemeiner Anwenderhinweis
Cherry optimiert seine Produkte ständig im Zuge
der Entwicklung neuer Technologien. Technische
Änderungen behalten wir uns deshalb vor. Die
Ermittlung der Zuverlässigkeit sowie die Definition
von technischen Angaben erfolgt gemäß Cherryinterner Prüfung, um international anerkannte Vorschriften bzw. Normen zu erfüllen. Davon abweichende Anforderungen können durch gegenseitige
Zusammenarbeit erfüllt werden. Unsachgemäße
Behandlung, Lagerung und äußere Einflüsse können zu Störungen und Schäden im Einsatz führen.
Wir übernehmen keinerlei Gewährleistung, falls
unser Produkt anwenderseitig verändert wird, und
haften nicht im Falle unbefugter Veränderungen.
Alle Reparaturen müssen durch Cherry oder eine
offiziell berechtigte Person oder Organisation
durchgeführt werden. Etwaige Schadensersatzansprüche gegen Cherry oder seine eingesetzten
Vertreter - gleich aus welchem Rechtsgrund (einschließlich stressbedingte körperliche Schäden) sind ausgeschlossen, soweit uns nicht Vorsatz
oder Nichtbeachtung gültiger Produkthaftungsbestimmungen trifft. Die vorliegende Bedienungsanleitung ist nur gültig für das mitgelieferte Produkt.
Weitere Informationen darüber sind bei den jeweiligen Cherry Distributoren oder direkt über die
Cherry GmbH erhältlich.
13 Zertifizierungszeichen
13.1 CE Konformitätserklärung
Wir, Cherry GmbH, erklären, dass das Produkt
CyBo@rd Plus wireless optical (Tastatur RS
13800WL, Maus M-7000 und Empfänger R-3000)
mit folgender Anforderungen übereinstimmt:
• Niederspannungsrichtlinie 73/23/EWG, geprüft
nach EN 60950:1992 + A1:1993 + A2:1993 +
A3:1995 + A4:1997
• EMV-Richtlinie 89/336/EWG, sichergestellt
durch Prüfung nach EN 61000-4-2 Level 2,
EN 61000-4-3 Level 2 und EN 61000-4-6
Level 2, festgelegt in EN 55024 (1998) und
EN 55022 (1998), Klasse B
• Gesetz über Funkanlagen und Telekommunikationsendeinrichtungen (FTEG) und Richtlinie
1999/5/EG (R&TTE), sichergestellt durch Prüfung nach I-ETS 300 440 (1995) und ETS 300
683 (1997)
Getestet gemäß Cherry Standard-Testverfahren.
8
13.2 Hinweis zum GS-Zeichen
Aufgrund der Position der Nulltaste des numerischen Bereichs ist die Tastatur für Saldiertätigkeiten, die überwiegend blind erfolgen, in Deutschland nicht anzuwenden. Eine Tastatur mit nichtdeutscher Tastenknopfbelegung ist in Deutschland aufgrund der Zeichenbelegung (DIN 2137
Teil 2) nicht für den Dauereinsatz an Bildschirmarbeitsplätzen zu verwenden.
13.3 Federal Communications
Commission (FCC) Radio Frequency
Interference Statement
Information to the user: This equipment has been
tested and found to comply with the limits for
Class B digital device, pursuant to Part 15 of the
FCC Rules. These limits are designed to provide
reasonable protection against harmful interference
in a residential installation. This equipment generates, uses and can radiate radio frequency energy
and, if not installed and used in accordance with
the instructions, may cause harmful interference to
radio communications. However, there is no guarantee that interference will not occur in a particular
installation. If this equipment does cause harmful
interference to radio or television reception, which
can be determined by turning the equipment off
and on, the user is encouraged to try to correct the
interference by one or more of the following measures:
• Reorientate or relocate the receiving antenna.
• Increase the separation between the equip-
ment and receiver.
• Connect the equipment into an outlet on a cir-
cuit different from that to which the receiver is
connected.
• Consult the dealer or an experienced radio/TV
technician for help.
Caution: Unauthorized changes or modifications
could void the authority to operate the equipment.
This device complies with Part 15 of the FCC
Rules. Operation is subject to the following two
conditions:
• This device may not cause harmful interference.
• This device must accept any interference
received, including interference that may cause
undesired operation.
13.4 Canadian Radio Interference
Regulations
Notice of CSA C 108.8 (DOC Jan. 1989)
This digital apparatus does not exceed the Class B
limits for radio noise emissions from digital apparatus set out in the Radio Interference Regulations of
the Canadian Department of Communications.
Le présent appareil numérique n'émet pas de
bruits radioélectriques dépassant les limites applicables aux appareils numériques de la classe B
prescrites dans le Règlement sur le brouillage
radioélectrique édicté par le ministère des Communications du Canada.
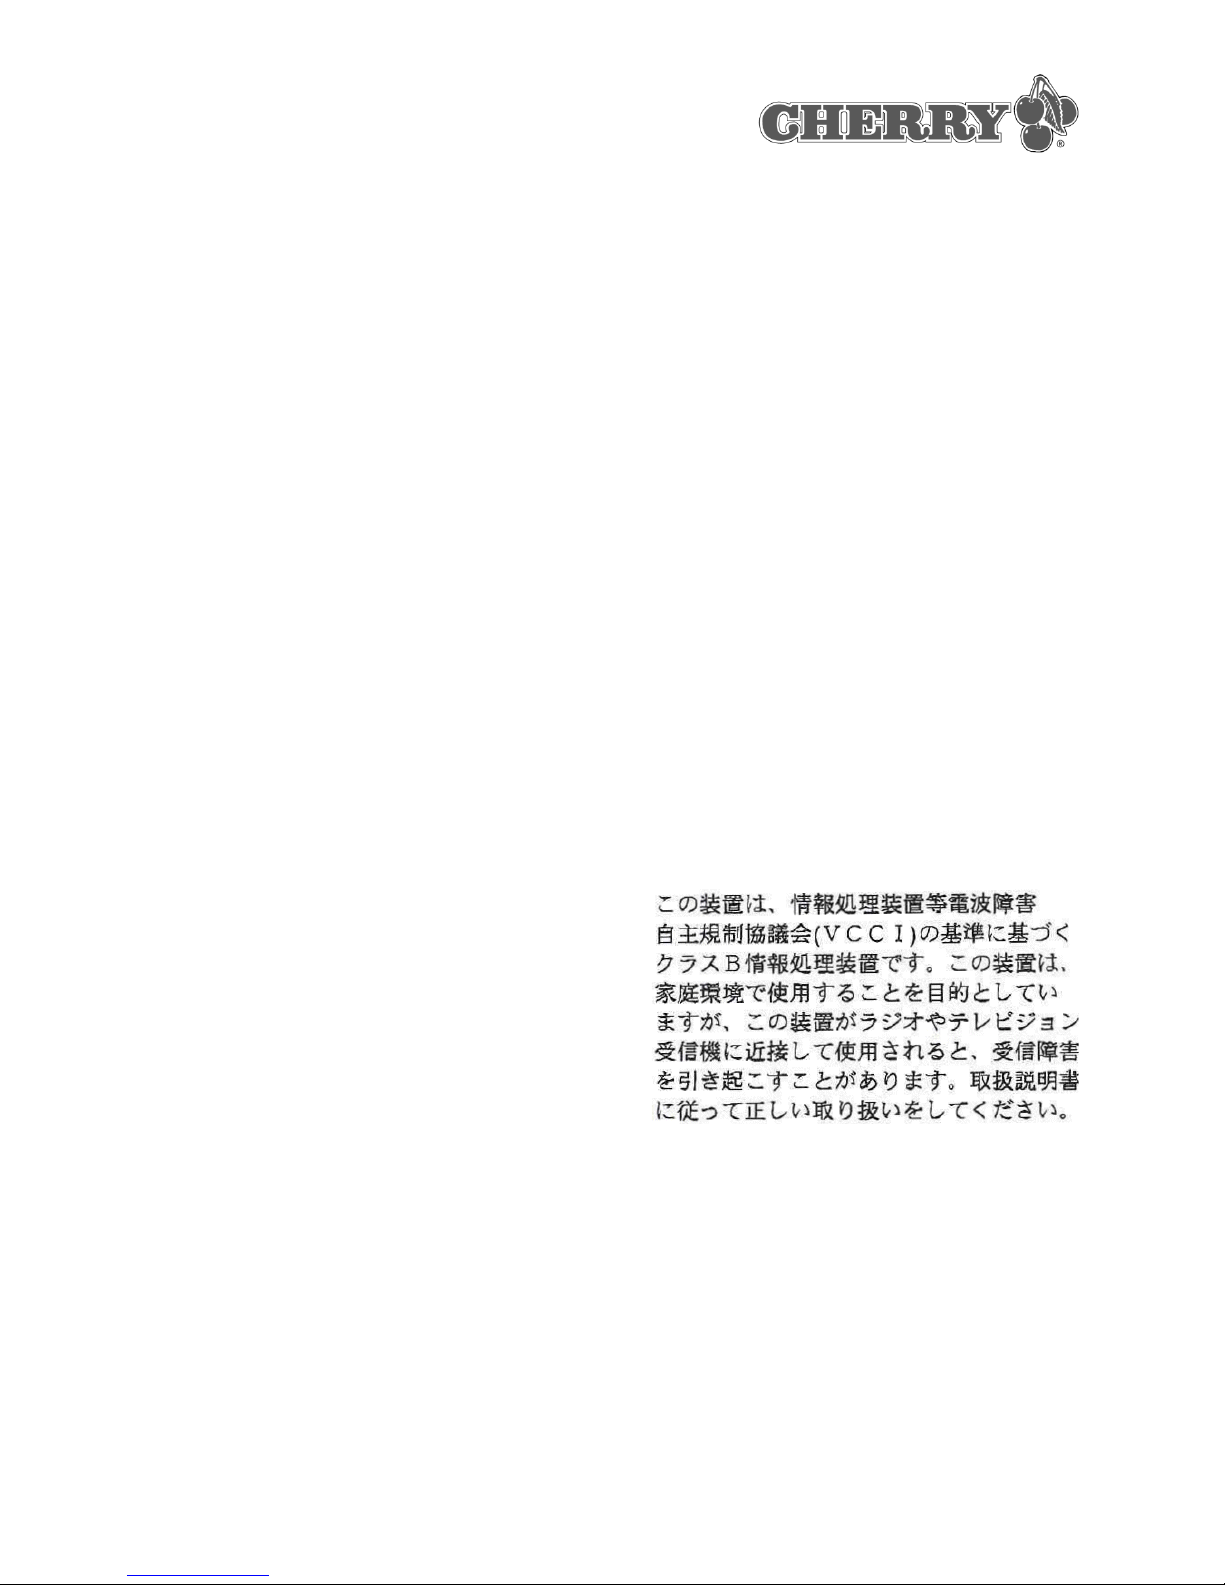
13.5 VCCI-Statement

9
CyBo@rd Plus
wireless optical
CyBo@rd wireless keyboard
with optical wireless mouse
M 83-13900
1 Information available as
hardcopy, direct help and on CD
Information on setup, operation and configuration
can be obtained in these quick-start instructions,
as direct help and as operating instructions. Please
observe the general user information and the
license agreements.
The information is split up based on the following
criteria:
• The quick-start instructions essentially describe
connection of the device and software installation.
• The direct help offers information on operation
right where you need it. This is called up via F1.
• The operating instructions describe operation
and configuration. They are contained in a PDF
file on the accompanying CD (CD-ROM/
Manuals). You can read the desired content on
the screen or print it out here.
By supplying only the most essential information as
a printout, we are reducing the unnecessary use of
paper and thus making our contribution towards
environmental protection.
2 Advantages of the
CyBo@rd Plus
The CyBo@rd Plus consists of the keyboard, the
mouse and the wireless receiver for both devices.
There are no annoying cables in the way. Depending on your workplace conditions, you can operate
your PC up to approx. 5 m away from the receiver.
2.1 The keyboard
In addition to the functions of a standard keyboard, this keyboard offers the following additional
functions:
• 8 special keys for the operation of multimedia
programs
• 7 special keys for the operation of the Internet
browser
• 3 special keys for calling up programs: E-Mail,
My Computer, Windows Calculator
• Standby key
Standby key
Older PCs do not support Standby Mode. Pressing the Standby key may cause the PC to crash.
Using the Cherry KeyMan software, you can
assign other functions to the 19 special keys.
2.2 The mouse
The following features and functions make working with the mouse efficient and comfortable.
• Power-save function for long battery life
• Resolution up to 800 dpi allows precise movement
• Optical sensor which replaces the ball and eliminates the need to clean the mouse
Quick-Start Instructions

10
Prerequisite for optimal use
Using the mouse on a bright, textured surface
increases its effectiveness:
• optimum movement detection
• longer battery life
Reflective surfaces are not suitable for use with the
mouse.
3 Wireless keyboard
(RS 13800WL)
Designation Value
Keyboard type 105 key keyboard with
19 special keys
Power supply 2 type AA (LR6) bat-
teries
Supply voltage 2.2 to 3.3 V SELV
Battery life > 1 year of normal use
in an office setting
Transmit frequency 2400.5 to 2483.5 MHz
Number of settable
frequency channels
16
Number of settable
ID codes
16
Transmit range 5 m (typical)
Storage temperature
range
-20 °C to +60 °C
Operating temperature range
0 °C to +50 °C
Dimensions
(L x W x H)
458 x 184 x 40 mm
(with palm rest:
458 x 244 x 40 mm)
4 Wireless mouse (M-7000)
5 Wireless receiver (R-3000)
Designation Value
Mouse type 3-key wheel mouse
Resolution 800 dpi
Power supply 2 rechargeable alka-
line batteries,
of type AA (LR6)
Battery life > 3 months of normal
use in an office setting
Supply voltage 2.2 to 3.3 V SELV
Transmit frequency 2400.5 to 2483.5 MHz
Number of settable
frequency channels
16
Number of settable
ID codes
16
Transmit range 5 m (typical)
Storage temperature
range
-20 °C to +60 °C
Operating temperature range
0 °C to +50 °C
Designation Value
Interfaces 2 x PS/2 interfaces for
the simultaneous use
of keyboard and
mouse
Receive frequency 2400.5 to 2483.5 MHz
Number of settable
frequency channels
16
Number of settable
ID codes
16
Transmit range 5 m (typical)
Storage temperature
range
-20 °C to +60 °C

11
6 Frequency channels and
ID codes
Default setting
When the CyBo@rd Plus is delivered, a frequency channel (2450 MHz, channel 10) and an
ID code (No. 0) is already preset on the receiver,
keyboard and mouse.
This default setting must only be changed if someone else is working with the same keyboard and
mouse model in your area (i.e. within the transmit
range of the device) and has their devices set to
the same frequency and ID code.
The frequency channels and ID codes are set via 8
DIP switches (switch positions: on or off). The settings of DIP switches 1 to 4 allow 16 different frequency-channel selections and the settings of
switches 5 to 8 allow 16 different ID code selections.
In principle, the switch settings must be identical
on all three devices of a PC (keyboard, mouse,
receiver).
Frequency channel settings
Operating temperature range
0 °C to +50 °C
DIP switches Fre-
quency
channel
1234No.
on on on on 1
offononon2
on off on on 3
off off on on 4
on on off on 5
Designation Value
ID code settings
off on off on 6
on off off on 7
offoffoffon8
on on on off 9
off on on off 10
on off on off 11
off off on off 12
on on off off 13
offonoffoff14
on off off off 15
offoffoffoff16
DIP switches ID
codes
5678No.
on on on on 0
offononon1
on off on on 2
off off on on 3
on on off on 4
off on off on 5
on off off on 6
offoffoffon7
on on on off 8
off on on off 9
on off on off 10
off off on off 11
DIP switches Fre-
quency
channel
1234No.

12
6.1 Setting the frequency channels and
ID codes
Use of multiple CyBo@rd Plus units within 5 m
of each other
If multiple devices of the same model are used
within 5 m of each other on the same frequency,
malfunctions can occur with the transmission of
wireless signals.
Changing the frequency channel/ID code at the
receiver
1 Open the cover on the underside of the wireless
receiver.
2 Using a pointed object, set the DIP switches
1 to 4 to a position which is not used by any
other persons working in your area.
3 If all frequency channel possibilities have
already been used (see table), use DIP switches
5 to 8 to change the ID code.
4 Close the cover.
on on off off 12
offonoffoff13
on off off off 14
off off off off 15
DIP switches ID
codes
5678No.
Changing the frequency channel/ID code at the
keyboard
1 Open the battery compartment on the under-
side of the wireless keyboard.
2 Remove the batteries.
The old setting is deleted.
3 Set DIP switches 1 to 8 to match the receiver
using a pointed object.
4 Reinsert the batteries.
The new setting is saved.
5 Close the battery compartment.
Changing the frequency channel/ID code at the
mouse
1 Open the battery compartment on the under-
side of the wireless mouse.
2 Remove the batteries.
3 Set DIP switches 1 to 8 to match the receiver
using a pointed object.
4 Reinsert the batteries.
The new setting is saved.
5 Close the battery compartment.

13
7 Connecting the devices
7.1 Connecting the receiver to the PC via
the PS/2 connection
1 Switch off the PC.
2 Locate the two round 6-pin PS/2 connections for
the keyboard and mouse on the back of the PC.
3 Insert the purple plug of the receiver into the
purple PS/2 connection for the keyboard.
4 Insert the green plug of the receiver into the
green PS/2 connection for the mouse.
5 Switch on the PC.
7.2 Inserting the batteries into the
keyboard
1 Open the battery compartment on the under-
side of the wireless keyboard.
2 Insert both accompanying AA (LR6) batteries.
3 Close the battery compartment.
7.3 Inserting the batteries into the mouse
1 Open the battery compartment on the under-
side of the wireless mouse.
2 Insert both accompanying rechargeable alkaline
AA (LR6) batteries.
Charge level of alkaline batteries
The alkaline batteries are ready for operation right
away and do not need to be charged before the initial use.
3 Close the battery compartment.
8 Using the charging function of
the mouse
Usable battery type
The charging electronics only function with
rechargeable alkaline batteries (example: AccuCell
AC 1800). Rechargeable NiMH and NiCd batteries
are not charged in the mouse.
Rechargeable alkaline batteries have the following
advantages:
• high capacity (1800 mAh)
• minimal self-discharge
• can be recharged at any time without the memory effect
• rechargeable several hundred times
• high output voltage (1.5 V)
• environmentally friendly due to less waste
Charging cable
Use only the accompanying charging cable.
1 Remove the keyboard PS/2 connector from the
PS/2 socket on the PC.
2 Insert the keyboard PS/2 connector into the
PS/2 socket of the charging cable.
3 Insert the charging cable PS/2 connector into
the PS/2 socket on the PC.
4 Insert the hollow connector of the charging cable
into the socket on the front of the mouse.
The mouse is charged as long as the PC is
switched on.

14
Tips for charging the alkaline batteries
• Charge the alkaline batteries in the mouse as
soon as the charging status LED on the
receiver flashes. A total discharge can damage
the inner structure and chemical components of
the alkaline batteries.
• A complete charge of the alkaline batteries lasts
12 to 18 hours. The charging circuit prevents
overcharging. As the rechargeable alkaline batteries do not exhibit the so-called memory
effect, the charging procedure can be interrupted several times.
• The PC must be switched on to charge the
alkaline batteries.
9 Using the power-save function of
the mouse
The power-save function switches the mouse off
after 15 minutes of non-use. The battery life is
notably lengthened by this.
9.1 Activating the power-save function
1 Remove the batteries from the mouse.
2 Keep the left and right mouse buttons pressed
simultaneously and reinsert the batteries.
Automatic deactivation of the power-save function
The power-save function is deactivated when you
remove the batteries from the mouse. For this reason, the power-save function must be reactivated
each time after the batteries are removed.
9.2 Activating the mouse in power-save
mode
If the mouse has not been moved for longer than
15 minutes, you must switch it on manually.
• Press any key.
The mouse is activated.
Sleep mode with inactive power-save function
When the power-save function is inactive, the
mouse is in sleep mode, which saves less power.
After 15 minutes of non-use, the surface on which
the mouse is used is scanned only once per second. Moving the mouse or pressing a key exits
sleep mode.
10 Installation of the Cherry
KeyMan software
Is a driver/software already installed on the PC?
If drivers or software for a keyboard are already
installed on the PC, they must be uninstalled first.
In general, the uninstall is carried out via Windows
Start menu/Settings/Control Panel/Software.
Current Cherry KeyMan software on the Internet
The Cherry KeyMan software is constantly being
developed and updated. You can download the
current version from the CHERRY INTERNET
SUPPORT SYSTEM (CISS):
http://support.cherry.de.

15
Installing the KeyMan software under
Windows 98/ME/2000/XP
1 Place the Cherry CD in your CD-ROM drive.
The CD-ROM starts automatically. The page
Installation is opened.
2 If the CD-ROM does not start automatically,
double-click the CD-ROM drive in Windows
Explorer and then the Start.exe file.
The page Installation is opened.
3 Click on the Cherry product for which you would
like to install the software.
Installation begins.
4 Follow the installation instructions on the screen.
The Cherry KeyMan software is installed.
11 Support
To help you with any problems you may encounter
in the installation of the keyboard or the software,
we provide you with a free support service.
At http://support.cherry.de, you can contact the
CHERRY INTERNET SUPPORT SYSTEM (CISS).
There you can submit your questions to us directly
around the clock and seven days a week.
If you do not have an Internet connection, please
contact us at the following address:
Cherry GmbH
Cherrystrasse
D-91275 AuerbachGermany
Hotline:
Tel.: +49(0)9643-18-206
Fax: +49(0)9643-18-545
We are available to help you Monday to Thursday
from 7:15 a.m. to 4:00 p.m. and Friday from
7:15 p.m. to 1:30 p.m. (GMT + 1 h).
12 General User Information
Cherry constantly optimizes its products in the
course of the development of new technologies.
We therefore reserve the right to implement technical alterations. The reliability is determined and the
technical specifications are defined in accordance
with the Cherry-internal test in order to fulfill the
internationally recognized regulations and stand-
ards. Any deviating requirements can be fulfilled by
mutual cooperation. Improper handling, storage
and external influences can lead to faults and damage in use. We do not accept any guarantee if our
product is modified by the user and are not liable
for any unauthorized modifications. All the repairs
have to be carried out by Cherry or an officially
authorized person or organization. Any claims for
compensation against Cherry or its appointed representatives - irrespective of the legal justification
(including bodily harm caused by stress) - are
excluded, unless we are guilty of intent or nonobservance of current product liability regulations.
These operating instructions are only valid for the
product supplied with them.
Further information can be obtained from the
respective Cherry distributors or directly from
Cherry GmbH.
13 Certification
13.1 Declaration of CE Conformity
We, Cherry GmbH, hereby declare that the product CyBo@rd Plus wireless optical (keyboard
RS 13800WL, mouse M-7000 und receiver
R-3000) fulfills the following requirements:
• Low-Voltage Directive 73/23/EEC tested in
accordance with EN 60950:1992 + A1:1993 +
A2:1993 + A3:1995 + A4:1997
• EMC Directive 89/336/EEC, ensured via testing in accordance with EN 61000-4-2 Level 2,
EN 61000-4-3 Level 2 and EN 61000-4-6
Level 2, specified in EN 55024 (1998) and
EN 55022 (1998), Class B
• Law regulating wireless systems and telecommunication terminal equipment (FTEG) and
Directive 1999/5/EC (R&TTE), ensured via testing in accordance with I-ETS 300 440 (1995)
and ETS 300 683 (1997)
Tested according to the standard Cherry testing
procedures.

16
13.2 Information on the GS Approval
Due to the position of the zero key on the number
block the keyboard is not to be used in Germany
for balancing work which is carried out blind to a
great extent. A keyboard with non-German key button assignment is not to be used on a long-term
basis at computer workplaces in Germany in view
of the character assignment (DIN 2137, Part 2).
13.3 Federal Communications
Commission (FCC) Radio Frequency
Interference Statement
Information to the user: This equipment has been
tested and found to comply with the limits for
Class B digital device, pursuant to Part 15 of the
FCC Rules. These limits are designed to provide
reasonable protection against harmful interference
in a residential installation. This equipment generates, uses and can radiate radio frequency energy
and, if not installed and used in accordance with
the instructions, may cause harmful interference to
radio communications. However, there is no guarantee that interference will not occur in a particular
installation. If this equipment does cause harmful
interference to radio or television reception, which
can be determined by turning the equipment off
and on, the user is encouraged to try to correct the
interference by one or more of the following measures:
• Reorientate or relocate the receiving antenna.
• Increase the separation between the equip-
ment and receiver.
• Connect the equipment into an outlet on a cir-
cuit different from that to which the receiver is
connected.
• Consult the dealer or an experienced radio/TV
technician for help.
Caution: Unauthorized changes or modifications
could void the authority to operate the equipment.
This device complies with Part 15 of the FCC
Rules. Operation is subject to the following two
conditions:
• This device may not cause harmful interfer-
ence.
• This device must accept any interference
received, including interference that may cause
undesired operation.
13.4 Canadian Radio Interference
Regulations
Notice of CSA C 108.8 (DOC Jan. 1989)
This digital apparatus does not exceed the Class B
limits for radio noise emissions from digital apparatus set out in the Radio Interference Regulations of
the Canadian Department of Communications.
Le présent appareil numérique n'émet pas de
bruits radioélectriques dépassant les limites applicables aux appareils numériques de la classe B
prescrites dans le Règlement sur le brouillage
radioélectrique édicté par le ministère des Communications du Canada.
13.5 VCCI-Statement

17
CyBo@rd Plus
wireless optical
Clavier sans fil CyBo@rd
avec souris optique sans fil
M 83-13900
1 Informations sur papier,
contextuelle et sur CD
Vous trouverez les informations concernant la mise
en service, la manipulation et la configuration dans
le présent mode d'emploi abrégé, comme aide
contextuelle et sous forme de mode d'emploi.
Veuillez tenir compte des remarques générales
pour l'utilisateur et des conventions de licence.
Les informations sont classées suivant les critères
suivants:
• Le mode d'emploi abrégé décrit essentiellement le raccordement de l'appareil et l'installation du logiciel.
• L'aide contextuelle vous offre des informations
de manipulation là où vous en avez besoin.
Vous y accédez à l'aide de la touche F1.
• Le mode d'emploi décrit la manipulation et la
configuration. Il se trouve sous forme de fichier
PDF sur le CD d'accompagnement (CD-ROM/
Manuals). Vous pouvez lire ce qui vous intéresse à l'écran ou l'imprimer.
En vous donnant seulement les informations
essentielles sur papier, nous réduisons la consommation de feuilles et contribuons à la protection de
l'environnement.
2 Avantages du produit
CyBo@rd Plus
L'ensemble CyBo@rd Plus se compose du cla-
vier, de la souris et du récepteur RF pour les deux
appareils. Il n'y a pas de câbles gênants dans le
chemin. Vous commandez votre PC - selon les
données locales - jusqu'à une distance d'env. 5 m
du récepteur.
2.1 Le clavier
En plus de toutes les fonctions d'un clavier standard, le clavier vous offre les fonctions supplémentaires suivantes:
• 8 touches spéciales de commande de programmes multimédia
• 7 touches spéciales de commande du navigateur internet
• 3 touches spéciales de lancement de programmes: courrier électronique, poste de travail, calculatrice Windows
• Touche de mise en attente
Touche de mise en attente
Les PC plus anciens ne supportent pas le mode
d'attente. L'actionnement de la touche de mise en
attente peut alors provoquer un plantage du PC.
Avec le logiciel Cherry KeyMan, vous pouvez
affecter d'autres fonctions aux 19 touches spéciales.
2.2 La souris
Les caractéristiques et fonctions suivantes rendent le travail avec la souris efficient et confortable:
• Fonction d'économie d'énergie pour une longue durée de vie des piles
Mode d'emploi abrégé

18
• Résolution de jusqu'à 800 ppp pour un travail
précis
• Un capteur optique remplace la boule et supprime la nécessité de nettoyer la souris
Conditions pour une utilisation optimale
L'utilisation de la souris sur une surface claire,
structurée augmente son effectivité:
• détection optimale de mouvement
• longue durée de vie des piles
Une surface réfléchissante ne convient pas pour la
souris.
3 Clavier RF (RS 13800WL)
Désignation Valeur
Description Clavier 105 touches
avec 19 touches spéciales
Tension d'alimentation 2 piles LR6 (AA)
Alimentation 2,2 à 3,3 V SELV
Durée de vie des piles > 1 an, pour une utili-
sation bureautique
typique
Fréquence d'émission 2400,5 à 2483,5 MHz
Nombre de canaux de
fréquence réglables
16
Nombre de codes ID
réglables
16
Portée de transmission
5 m (typ.)
Température de stockage
-20 °C à +60 °C
Température de fonctionnement
0 °C à +50 °C
4 Souris RF (M-7000)
5 Récepteur RF (R-3000)
Dimensions
(L x l x H)
458 x 184 x 40 mm
(avec appui pour les
paumes 458 x 244 x
40 mm)
Désignation Valeur
Description Souris à 3 boutons
avec roulette
Résolution 800 ppp
Tension d'alimentation 2 piles alcalines
rechargeables,
type LR6 (AA)
Durée de vie des piles > 3 mois, pour une uti-
lisation bureautique
typique
Alimentation 2,2 à 3,3 V SELV
Fréquence d'émission 2400,5 à 2483,5 MHz
Nombre de canaux de
fréquence réglables
16
Nombre de codes ID
réglables
16
Portée de transmission
5 m (typ.)
Température de stockage
-20 °C à +60 °C
Température de fonctionnement
0 °C à +50 °C
Désignation Valeur
Interfaces 2 x interface PS/2
pour le fonctionnement simultané du clavier et de la souris
Désignation Valeur

19
6 Canaux de fréquence et
codes ID
Configuration
Lors de la livraison du produit CyBo@rd Plus, le
récepteur, le clavier et la souris sont préréglés sur
un canal de fréquence (2450 Mhz, canal 10) et un
code ID (N° 0).
Vous ne devez modifier cette configuration que si
quelqu'un autour de vous (c'est à dire dans le
rayon de transmission de l'appareil) utilise le
même type de clavier et de souris que le vôtre et si
son matériel fonctionne à la même fréquence et
avec le même code ID.
Les canaux de fréquence et les codes ID se
règlent à l'aide de 8 commutateurs DIP (positions
de commutation: marche = on ou arrêt = off). Les
positions des commutateurs DIP 1 à 4 permettent
la sélection de 16 canaux de fréquence différents,
les positions des commutateurs DIP 5 à 8 permettent la sélection de 16 codes ID différents.
Par principe, le réglage des commutateurs DIP doit
être le même pour les trois appareils d'un PC (clavier, souris, récepteur).
Fréquence de réception
2400,5 à 2483,5 MHz
Nombre de canaux de
fréquence réglables
16
Nombre de codes ID
réglables
16
Portée de transmission
5 m (typ.)
Température de stockage
-20 °C à +60 °C
Température de fonctionnement
0 °C à +50 °C
Désignation Valeur
Réglages des canaux de fréquence
Réglages des codes ID
Commutateur DIP Canal
de fréquence
1234N°
on on on on 1
offononon2
on off on on 3
off off on on 4
on on off on 5
off on off on 6
on off off on 7
offoffoffon8
on on on off 9
off on on off 10
on off on off 11
off off on off 12
on on off off 13
offonoffoff14
on off off off 15
offoffoffoff16
Commutateur DIP Codes
ID
5678N°
on on on on 0
offononon1
on off on on 2
off off on on 3
on on off on 4
off on off on 5
on off off on 6

20
6.1 Régler les canaux de fréquence et
les codes ID
Utilisation de plusieurs CyBo@rd Plus dans un
rayon de 5 m
Si plusieurs appareils du même type fonctionnent
dans un rayon de 5 m sur le même canal de fréquence, des interférences radio peuvent survenir.
Modifier le canal de fréquence/le code ID sur le
récepteur
1 Soulevez le compartiment à piles situé sous le
récepteur R.F.
2 A l'aide d'un objet pointu, placez les commuta-
teurs DIP 1 à 4 dans une position qu'aucune des
personnes autour de vous n'a réglée pour ses
appareils.
off off off on 7
on on on off 8
offononoff9
on off on off 10
off off on off 11
on on off off 12
offonoffoff13
on off off off 14
off off off off 15
Commutateur DIP Codes
ID
5678N°
3 Si toutes les possibilités de fréquence des
canaux ont déjà été utilisées (voir tableau), utilisez les commutateurs DIP 5 à 8 pour changer le
code ID.
4 Fermez le couvercle.
Modifier le canal de fréquence/le code ID sur le
clavier
1 Ouvrez le compartiment à piles situé sous le cla-
vier R.F.
2 Enlevez les piles.
L'ancien réglage est effacé.
3 A l'aide d'un objet pointu, placez les commuta-
teurs DIP 1 à 8 dans la même position que sur
le récepteur.
4 Replacez les piles en place.
Le nouveau réglage est mémorisé.
5 Fermez le compartiment à piles.
Modifier le canal de fréquence/le code ID sur la
souris
1 Ouvrez le compartiment à piles situé sous la
souris R.F.
2 Enlevez les piles.
3 A l'aide d'un objet pointu, placez les commuta-
teurs DIP 1 à 8 dans la même position que sur
le récepteur.
4 Replacez les piles en place.
Le nouveau réglage est mémorisé.
5 Fermez le compartiment à piles.

21
7 Brancher les appareils
7.1 Raccorder le récepteur via le
raccordement PS/2 au PC
1 Mettez le PC hors service.
2 Trouvez les deux connecteurs ronds PS/2 à 6
broches pour clavier et souris à l'arrière du PC.
3 Raccordez la fiche violette du récepteur dans la
douille PS/2 marquée en violet pour le clavier.
4 Raccordez la fiche verte du récepteur dans la
douille PS/2 marquée en vert pour la souris.
5 Allumez votre PC.
7.2 Placer les piles dans le clavier
1 Ouvrez le compartiment à piles situé sous le cla-
vier R.F.
2 Mettez en place les deux piles fournies de type
LR6 (AA).
3 Fermez le compartiment à piles.
7.3 Placer les piles dans la souris
1 Ouvrez le compartiment à piles situé sous la
souris R.F.
2 Mettez en place les deux piles alcalines rechar-
geables fournies de type LR6 (AA).
Etat de charge des piles alcalines
Les piles alcalines sont immédiatement prêtes à
fonctionner et ne doivent pas être chargées avant
la première utilisation.
3 Fermez le compartiment à piles.
8 Utiliser la fonction de
chargement de la souris
Type de pile utilisable
L'électronique de chargement fonctionne uniquement avec des piles alcalines rechargeables
(exemple: AccuCell AC 1800). Les piles rechargeables NiMH et NiCd ne se chargent pas dans la
souris.
Les piles alcalines rechargeables offrent les avantages suivants:
• capacité élevée (1800 mAh)
• faible décharge spontanée
• rechargeables à tout moment sans effet de
mémoire
• rechargeables plusieurs centaines de fois
• tension de sortie élevée (1,5 V)
• ménageant l'environnement, grâce à une teneur
réduite en substances polluantes
Câble de chargement
Utilisez uniquement le câble de chargement fourni.
1 Détachez la fiche PS/2 du clavier de la douille
PS/2 du PC.
2 Connectez la fiche PS/2 du clavier à la douille
PS/2 du câble de chargement.
3 Insérez la fiche PS/2 du câble de chargement
dans la douille PS/2 du PC.
4 Insérez la fiche creuse du câble de chargement
dans la douille à la face avant de la souris.
Tant que le PC est branché, la souris est en
charge.

22
Conseils de chargement des piles alcalines
• Chargez les piles alcalines dans la souris dès
que la LED d'état de charge du récepteur clignote en rouge. Une décharge profonde peut
endommager la structure interne et les composants chimiques des piles alcalines.
• La charge complète des piles alcalines dure de
12 à 18 heures. Le circuit de charge empêche
la surcharge. Comme les piles alcalines rechargeables n'ont pas d'effet mémoire, le processus de chargement peut être interrompu
plusieurs fois.
• Le PC doit être enclenché pour le chargement
des piles alcalines.
9 Utiliser la fonction d'économie
d'énergie de la souris
La fonction d'économie d'énergie désactive la souris après une période d'inactivité de 15 minutes.
Ceci augmente nettement la durée de vie des
piles.
9.1 Activer la fonction d'économie
d'énergie
1 Enlevez les piles de la souris.
2 Maintenez le bouton de gauche et le bouton de
droite de la souris simultanément enfoncés et
replacez les piles.
Désactivation automatique de la fonction d'économie d'énergie
La fonction d'économie d'énergie est désactivée
lorsque vous enlevez les piles de la souris. Pour
cette raison, la fonction d'économie d'énergie doit
être réactivée chaque fois que vous enlevez les
piles.
9.2 Activer la souris dans le mode
d'économie d'énergie
Si la souris n'a pas été déplacée pendant plus de
15 minutes, vous devez l'enclencher manuellement.
• Appuyez sur une touche quelconque.
La souris est activée.
Mode Sleep lorsque la fonction d'économie
d'énergie est inactive
Si la fonction d'économie d'énergie est inactive, la
souris est en mode Sleep, qui économise moins
d'énergie. Après une absence de mouvement de
15 minutes, le support n'est plus exploré qu'une
fois par seconde. Un mouvement de la souris ou
une pression sur une touche met fin au mode
Sleep.
10 Installation du logiciel
Cherry KeyMan
Y a-t-il déjà des pilotes ou un logiciel sur le PC?
Si des pilotes ou un logiciel pour un clavier sont
déjà installés sur le PC, vous devez d'abord les
désinstaller. Vous accédez en général au programme de désinstallation via le menu Windows
Démarrer/Paramètres/Panneau de configuration/Ajout-Suppression de programmes.
Logiciel Cherry KeyMan actualisé sur internet
Le logiciel Cherry KeyMan est en développement
permanent. Vous pouvez télécharger la dernière
version depuis CHERRY INTERNET SUPPORT
SYSTEM (CISS): http://support.cherry.de.

23
Installation du logiciel KeyMan sous Windows
98/ME/2000/XP
1 Placez le CD Cherry dans votre lecteur de CD-
ROM.
Le CD-ROM démarre automatiquement. La page
d'Installation s'ouvre.
2 Si le CD-ROM ne démarre pas automatique-
ment, faites un double clic sur le lecteur de CDROM dans l'Explorateur et ensuite sur le fichier
Start.exe.
La page d'Installation s'ouvre.
3 Cliquez sur le produit Cherry pour lequel vous
voulez installer le logiciel.
L'installation commence.
4 Suivez les instructions d'installation à l'écran.
Le logiciel Cherry KeyMan est installé.
11 Assistance
En cas de problèmes lors de l'installation du clavier ou du logiciel, nous vous offrons une assistance gratuite.
Vous pouvez contacter le "Cherry Internet Support
System" (CISS) à l'adresse Internet suivante :
http://support.cherry.de. Vous pourrez ainsi nous
transmettre directement vos questions 7 jours sur
7 et 24 h sur 24.
Si vous ne disposez pas d'un accès Internet,
veuillez nous contacter à l'adresse suivante:
Cherry GmbH
Cherrystrasse
D-91275 Auerbach
Ligne d'assistance:
Tel. +49(0)9643-18-206
Fax: +49(0)9643-18-545
Nous sommes à votre disposition Lu-Je de 7:15 à
16:00 heures et le Ve de 7:15 à 13:30 heures
(GMT + 1h).
12 Indication générale pour
l'utilisateur
Cherry optimise ses produits en permanence dans
le cadre du développement de nouvelles technologies. Nous nous réservons pour cette raison le
droit de procéder à des modifications techniques.
La détermination de la fiabilité ainsi que la définition d'indications techniques se font suivant contrôle interne de Cherry, afin de répondre aux
prescriptions et normes internationalement reconnues. Les exigences qui s'en écartent peuvent être
réalisées par collaboration mutuelle. La manipulation ou le stockage inappropriés ainsi que des
influences extérieures peuvent conduire à des
dérangements et dommages lors de l'utilisation.
Nous déclinons toutes prestations de garantie si
notre produit est modifié par l'utilisateur et nous
déclinons toute responsabilité dans le cas de modifications non autorisées. Toutes les réparations
doivent être effectuées par Cherry ou une personne ou organisation officiellement habilitée. Toutes revendications de dédommagement vis-à-vis
de Cherry ou de ses représentants - quelle qu'en
soit la raison (y compris dommages corporels dus
au stress) - sont exclues, sauf en cas d'intention
délictueuse ou de non-respect de clauses valables
de responsabilité de produit. Le présent mode
d'emploi est uniquement valable pour le produit
fourni.
Des informations plus détaillées à ce sujet sont
disponibles auprès des distributeurs Cherry respectifs ou directement auprès de Cherry GmbH.
13 Certifications
13.1 Déclaration de conformité CE
Nous, Cherry GmbH, déclarons que le produit
CyBo@rd Plus wireless optical (clavier
RS 13800WL, souris M-7000 et récepteur
R-3000) est conforme aux exigences suivantes:
• Directive basse tension 73/23/CEE, contrôle
suivant EN 60950:1992 + A1:1993 + A2:1993
+A3:1995 + A4:1997
• Directive CEM 89/336/CEE, vérification par
contrôle suivant EN 61000-4-2 Level 2,
EN 61000-4-3 Level 2 et EN 61000-4-6 Level 2,
défini dans EN 55024 (1998) et EN 55022
(1998), classe B
• Loi sur les installations radio et installations de
télécommunication (FTEG) et directive 1999/5/
CE (R&TTE), vérification par contrôle suivant
I-ETS 300 440 (1995) et ETS 300 683 (1997)
Testé suivant procédure de test standard Cherry.

24
13.2 Indication concernant le sigle GS
En raison de la position de la touche zéro du pavé
numérique, le clavier ne doit pas être utilisé en
Allemagne pour des activités de comptabilité qui
se font principalement à l'aveugle. En raison de
l'attribution des touches (DIN 2137 partie 2), un
clavier avec une attribution des touches différente
du clavier allemand ne doit pas être utilisé en Allemagne pour des travaux permanents sur écran.
13.3 Federal Communications
Commission (FCC) Radio Frequency
Interference Statement
Information to the user: This equipment has been
tested and found to comply with the limits for
Class B digital device, pursuant to Part 15 of the
FCC Rules. These limits are designed to provide
reasonable protection against harmful interference
in a residential installation. This equipment generates, uses and can radiate radio frequency energy
and, if not installed and used in accordance with
the instructions, may cause harmful interference to
radio communications. However, there is no guarantee that interference will not occur in a particular
installation. If this equipment does cause harmful
interference to radio or television reception, which
can be determined by turning the equipment off
and on, the user is encouraged to try to correct the
interference by one or more of the following measures:
• Reorientate or relocate the receiving antenna.
• Increase the separation between the equip-
ment and receiver.
• Connect the equipment into an outlet on a cir-
cuit different from that to which the receiver is
connected.
• Consult the dealer or an experienced radio/TV
technician for help.
Caution: Unauthorized changes or modifications
could void the authority to operate the equipment.
This device complies with Part 15 of the FCC
Rules. Operation is subject to the following two
conditions:
• This device may not cause harmful interference.
• This device must accept any interference
received, including interference that may cause
undesired operation.
13.4 Canadian Radio Interference
Regulations
Notice of CSA C 108.8 (DOC Jan. 1989)
This digital apparatus does not exceed the Class B
limits for radio noise emissions from digital apparatus set out in the Radio Interference Regulations of
the Canadian Department of Communications.
Le présent appareil numérique n'émet pas de
bruits radioélectriques dépassant les limites applicables aux appareils numériques de la classe B
prescrites dans le Règlement sur le brouillage
radioélectrique édicté par le ministère des Communications du Canada.
13.5 VCCI-Statement
 Loading...