


-1-
Cherry Mobile
C8
User Guide

-2-
1 Safety and General Information
1.1.1 Brief Introduction
Thank you for choosing the Cherry Mobile C8 GSM Dual-SIM Mobile
Phone. This guide will help you fully understand the functions of your
mobile phone and enjoy all its features.
The Cherry Mobile C8 is designed for use on the GSM Network. It is
packed with features to satisfy your needs such as Phonebook, Audio
Player, Video Player, Camera and FM Radio.
The Cherry Mobile C8 meets the GSM technical criteria, and is certified
by both local and international authorities.
Cherry Mobile reserves the right to modify any content in this User
Manual without prior notice.
1.1.2 Important Safety Precautions
Please read these guidelines before using your mobile phone. Utmost
compliance with these precautions is highly recommended for your
safety. Non-compliance may pose danger to you and your mobile phone,
and may be illegal.

-3-
1.1.3 General Precautions
Use only authorized accessories and batteries by the
manufacturer. The use of incompatible batteries and accessories
may cause battery leaks, overheating, rupture or fire. This may
also nullify your warranty.
Do not put the battery, phone and charger in a high-pressure
container or microwave, as this may result in circuit damage or
fire.
Do not use the mobile phone near flammable and explosive
materials. Doing such may cause explosion or fire.
Do not store the phone in areas with high temperature as this can
cause extensive damage to the handset.
Keep the phone out of children’s reach.
1) Phone
DO turn off your mobile phone inside aircrafts, hospitals and other
locations where its use is restricted. Use of handsets in prohibited
areas is dangerous as it may cause interference in the operation
of electrical and medical equipment.
DO keep your mobile phone away from moisture. Contact with
water or other liquid may cause malfunctioning and overheating.
DON’T disassemble or remodel your phone as this may cause
permanent and irreparable damage. This may also void your
mobile phone’s warranty.
DON’T use sharp or pointed objects in pressing you phone’s keys
as this can cause damage.

-4-
DON’T use your handset if you notice any damage (e.g. broken
antenna) as this may cause injury to the user.
2) Battery
Each Cherry Mobile handset is equipped with a rechargeable
battery. Use only authorized Cherry Mobile batteries and
accessories.
For better performance and longer battery life, initial charging of at
least four (4) hours is recommended when using the mobile phone
for the first time.
The optimum performance of a new battery is achieved only after
two or three complete charge and discharge cycles. Overcharging,
however, may also affect battery life.
Do not use a damaged battery or charger. If battery life becomes
noticeably shorter than usual, it is recommended to replace it with
a new one.
While the mobile phone is being charged, keep it out of children’s
reach.
Store the battery in a cool and dry place away from direct sunlight,
dust and water.
Avoid exposing batteries to extreme temperature (below -10°C
(14°F) or above 45°C (113°F)).
Unplug the charger from the electrical outlet when not in use.
Avoid using the charger in a wet environment. If the charger
comes in contact with water or any form of liquid, immediately
unplug it from the outlet to reduce the risk of overheating, charger

-5-
malfunction, electric shock or fire.
Be careful with the disposal of spent batteries. Avoid throwing
them in a fire, as this may cause explosion. It is recommended to
abide by local environmental laws and guidelines on proper waste
disposal.
Do not short-circuit the batteries (i.e. when metal objects such as
coins, are directly connected to the metal side of the battery). This
will damage your phone. It is advisable to handle spare batteries
with extra care.
3) Cleaning and Maintenance
The handset, battery and charger are not water-resistant and
should always be kept dry. Avoid using them in excessively moist
areas.
Use a soft, dry cloth to clean the handset, battery and charger.
Do not use alcohol, thinner, benzene or other solvents to clean
the handset.
Avoid charging the mobile phone through a dirty outlet as this
causes poor electrical contact and results in power lost and
charging failure.
-6-
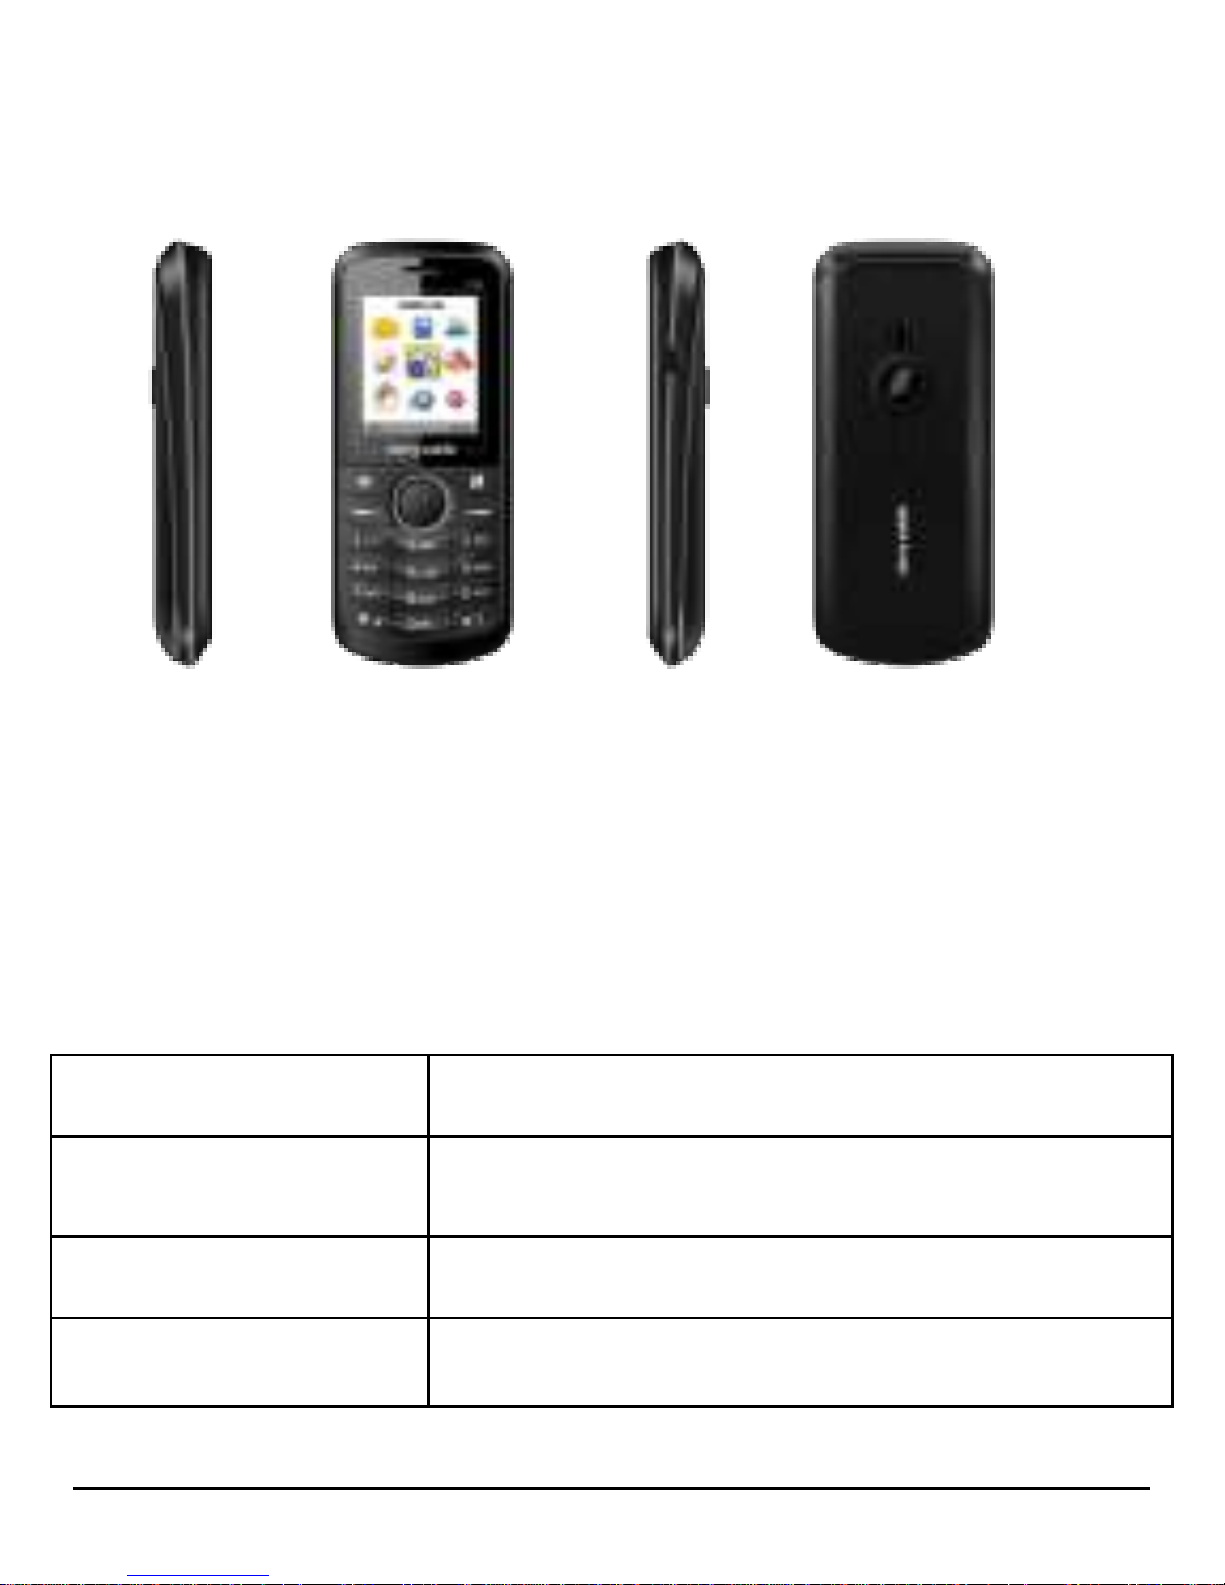
2 Overview
3 Keys Specification
3.1.1 Keys specification
General keypad definitions:
Left soft key (LSK)
confirms an action
Right soft key (RSK)
deletes or clears a character or lets you go
back to previous action
Navigation keys
move the cursor up, down, left or right
#
switches between different input methods
-7-
*
shows a variety of symbols
Call
calls a dialed number
End
ends a call
1
,.-?!’@:#$/_1
2
ABC, abc, 2
3
DEF, def, 3
4
GHI, ghi, 4
5
JKL, jkl, 5
6
MNO, mno, 6
7
PQRS, pqrs, 7
8
TUV, tuv, 8
9
WXYZ, wxyz, 9
0
0, space
Press LSK then (*)
locks/unlocks keypad

-8-
3.1.2 Icons
Icon
Specification
Network signal strength
The more stripes visible, the stronger network signal.
The top left number indicates the line in use; bottom
left number indicates current SIM card in use
Message
Indicates new SMS received
Indicates new MMS received
Keypad lock
The keypad is locked
Earphone
An earphone is connected
Alarm
Sets the alarm time and activate the function
Incoming call alert types:
Uses a ringing tone
Vibrate only
Vibrate and ring
Vibrate and then ring
Battery
Indicates the status your phone’s battery

-9-
4 User Guide
4.1.1 Installing/ Removing the battery
Note
Always switch the device off and disconnect the charger before
removing and installing the battery.
1) Removing the battery
Remove the battery cover.
Carefully remove the battery from the battery slot
2) Installing the battery
Remove the battery cover.
Insert the battery into place, making sure the metal
terminals are aligned.
Put the battery cover back on.
4.1.2 Charging the battery
Plug the charger into the electrical outlet.
Plug the charger connector into the mobile phone.

-10-
The battery indicator icon starts to flash until charging is finished.
The battery indicator icon ceases to flash when charging is
complete. Disconnect the charger connector from the mobile
phone and unplug the charger from the electrical outlet.
Attention:
You can still use the phone while charging, but charging time will
increase. When you are charging the handset in its power off state, a
charging indicator will appear on the screen.
4.1.3 Inserting/Removing the SIM card/s
Note
Always switch off the device and disconnect from charger before
removing and installing the SIM Card/s.
Remove the battery cover.
Remove the battery.
Insert/remove the SIM card/s by sliding them in or out.
Insert the battery back into place.
Put the battery cover back on.
Note:
(a) Your SIM card contains important personal data (Phonebook,
PIN (personal identification number), PIN2, PUK (PIN Unlock
Code), PUK2(PIN2 Unlock Code)), network information, call
history and SMS (Short Message Service) data, so be careful
when handling, inserting or removing it. Bending or scratching
 Loading...