

Page 1

BLUETOOTH INTERCOM
Operaon Manual
Attention
Thank you for purchasing G2 helmet Bluetooth intercom . For
best use experiences , please read manual before use .
:
Page 2

Installaon
Clip
Headphone & Mic Kits
Press
Insert the main unit, press to the
buttom of kits, main unit locked and
installation completed.
Press
Slide up
Take away the main unit by press the
button and slide it up, disassmble
compeleted.
01
1
3
4
2
Fix the headphone & Mick Kits on the
right position, adjust the speakerand
mic, then hide the speaker cable.
5
Mic should be close enougn
Remark:
to moutg, and speaker near to ear.
plase use sponge if the speaker
postion is too deep.
Page 3

Operaon
1.Outlook / Function
2 3 4 5 6
1
7 8 9
Intercom
1
Volume - / Previous
2
Volume + / Next
3
LED Indicator
4
Function
5
Charge / Data
6
7
Headphone & Mic Kits
8
Passersby Communication
9
Aux In
02
Page 4

2. Charge
2.1 How to Charge
Charge / Data Port
For rst time use , please recharge the device until the red light is o .
1. Connect the cable with device and PC USB port ;
2. After cable connected , the red light on and start to charge , when
battery is full , the red light will be o automatically . (Need 2 hours to
fulll the battery ) .
* Do not use power from car or motorcycle directly , unstable power may
damage the device .
03
Page 5

2.2 Power Detect & Notication Function
Low Power Notication:When power lower than 10% , red light ash in
the function button and voice message will remind power lower than
10% , please recharge immediately .
Power Detect Function:G2 has power detect function , when device is
on , short press volume - and volume + button at the same time ,
recorded voice message will tell you :
Power over 90%
Power over 50%
Power lower 50%
Power lower 10% please recharge immediately
04
Page 6

3. Switch On / OFF
3.1 Switch On
3 Seconds
Press Intercom + Function button for 3 seconds until the LED indicator
ash blue light , a voice prompt “Welcome” will be heard .
3.2 Switch O
3 Seconds
When device is on , press Press Intercom + Function button for 3
seconds until the LED indicator ash red light , a voice prompt “Power
O” will be heard .
05
Page 7
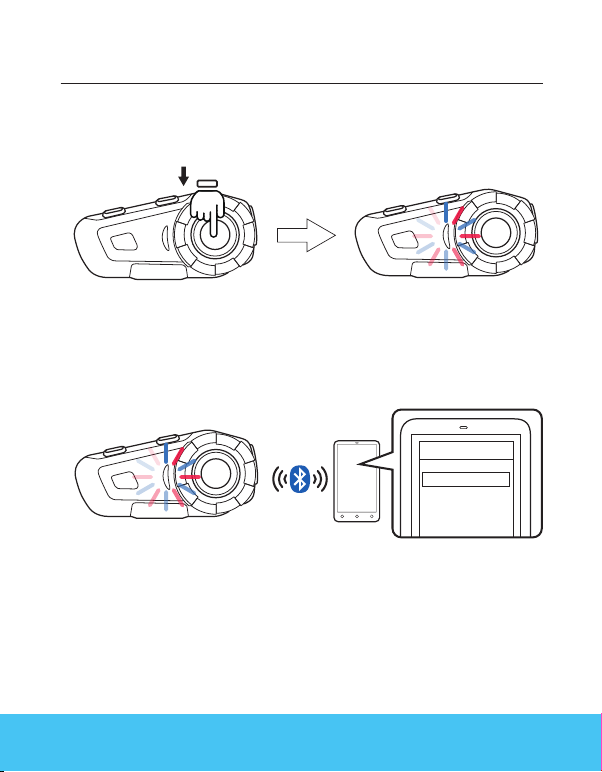
4. Cellphone Funcon
4.1 Pair with Cellphone
STEP
1.
About 5 sec
When device is on , long press function button, red and blue light ash
in the function button , entering pairing mode .
STEP
2.
Name
G2
Switch cellphone Bluetooth , choose G2, the pairing is complete . Voice
message will also say pairing complete .
Remark:
and media audio are all chosen , otherwise call or music can not be
processed .
when pairing complete , please check both cellphone audio
06
Page 8

4.2 Cellphone Function
Answering Call: Short press function once .
Hangup Call: After call , short press function once .
Refuse Call: Long press function button for 2 seconds .
Redial: Short press function button twice .
Volume Up: Press Volume + while talking .
Volume Down: Press Volume - while talking .
Manual/Auto Switch: Long press Function , Volume+ and Volume- at
the same time for 3S when Stand by .
07
Page 9
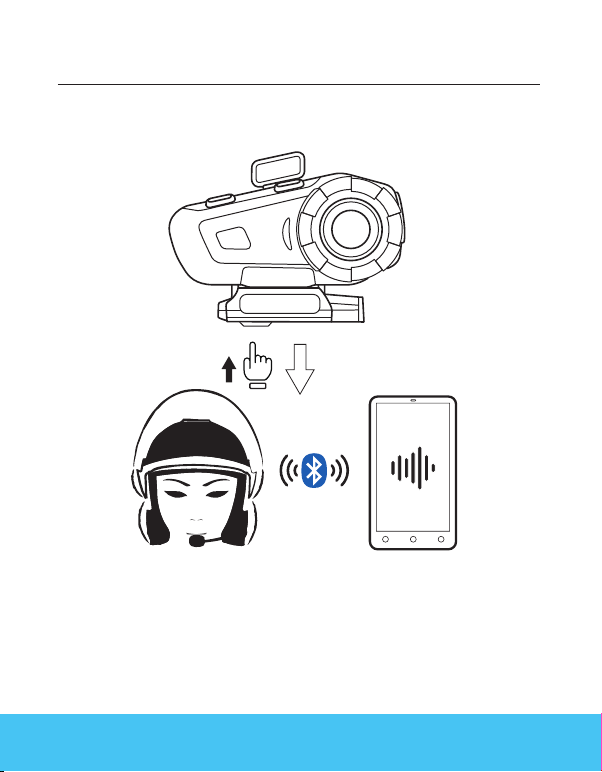
5. Voice Command
When your G2 is paired up with cellphone , long press
Communication
function .
*Cellphone must equipped with this function .
button , will automatically switch on the voice command
Passersby
08
Page 10
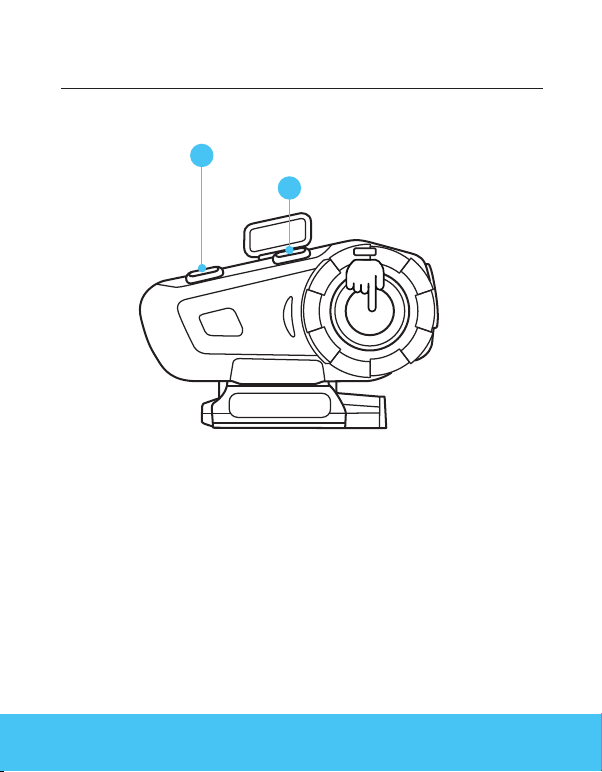
6. Music Play
Volume - / Previous
2
Volume + / Next
3
Play: When device is on , short press Function .
Pause: When music is playing , short press Function .
Volume Up : When music playing ,short press volume + once .
Volume Down : When music playing ,short press volume - once .
Play Previous: When music playing ,long press volume - for 2 seconds .
Play Next: When music playing ,long press volume + for 2 seconds .
09
Page 11
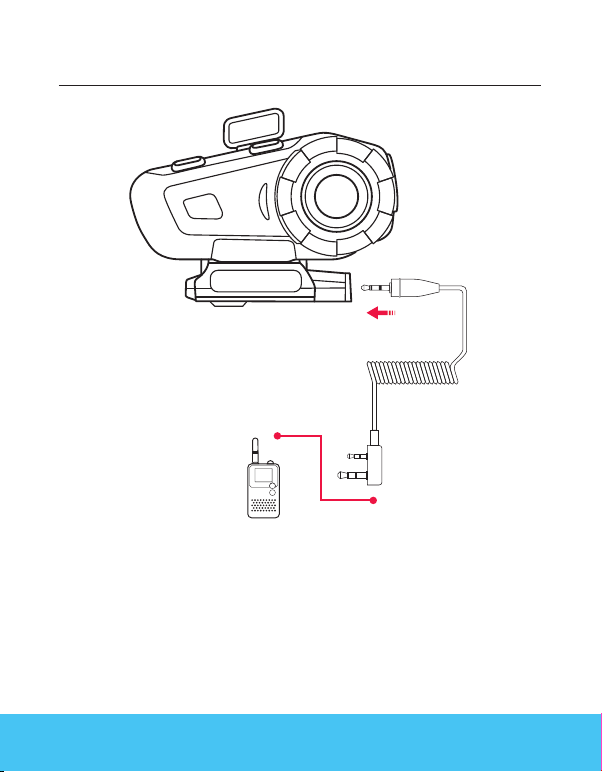
7. Wire Connecon
(Needs professional radio connect cable)
Two-Way Radio
Any device with 3.5mm connector can transmit voice signal to G2.
through the transfer line.
10
Page 12
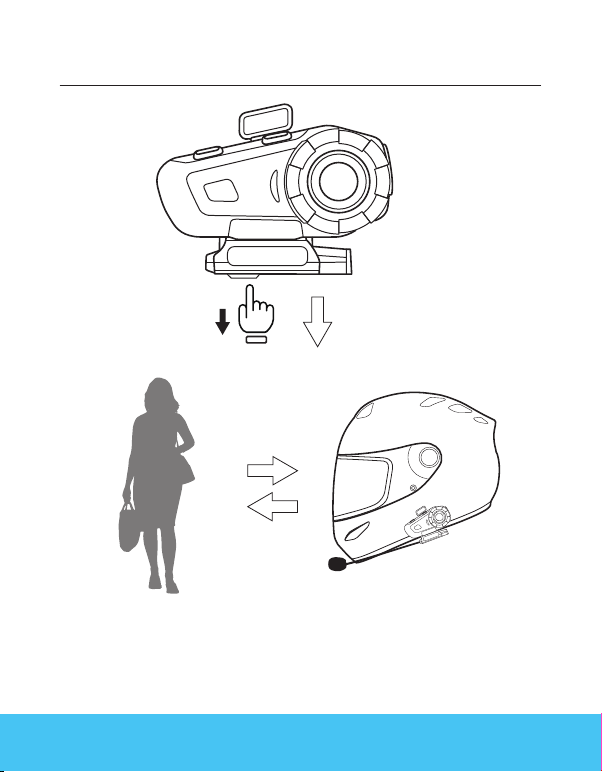
8. Passersby Communicaon
Passersby Communication
Short Press Passersby communication button to switch on this function ,
and re-press will switch o this function .
*This function allows rider talk to passersby without take o helmet .
11
Page 13
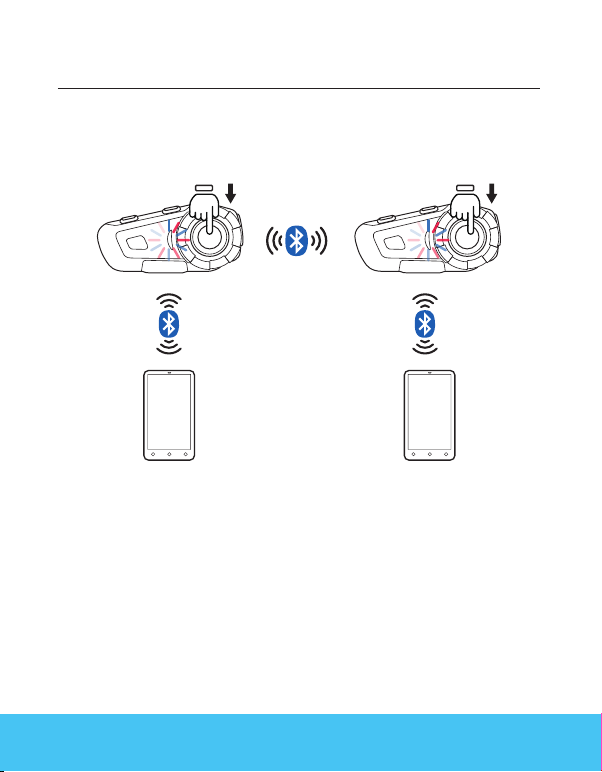
9. Intercom Funcon ( Rider to Rider )
Headset A Headset B
Cellphone A Cellphone B
When device on , press both Headset A and B’s function button until
1.
red and blue light to enter pairing mode .
Short press Headset A or B’s intercom button , the red and blue light
2.
will be ashed slowly . once LED indicator turns into blue , the device
connection completed .
3.
After connection completed , you can switch on the intercom
function by press any of the headset’s intercom button .
12
Page 14
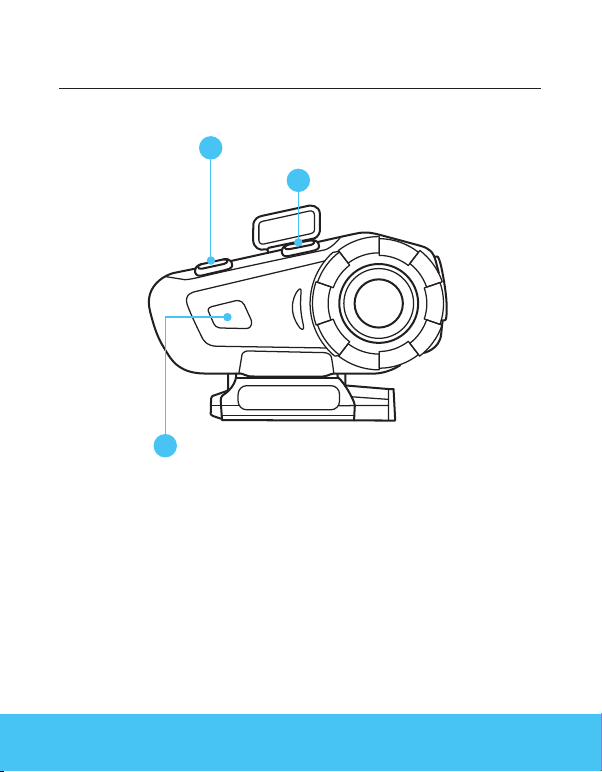
10.FM
Volume - / Previous
2
Volume + / Next
3
Intercom
1
FM Switch On: Press Intercom button for 3 seconds when device is
stand by ;
FM Switch O: Press Intercom button for 3 seconds when FM is on ;
Volume Up : When FM On , short press volume + once .
Volume Down : When FM On , short press volume - once .
Search Previous: When FM On , long press volume - for 2 seconds .
Search Next : When FM On , long press volume + for 2 seconds .
13
Page 15
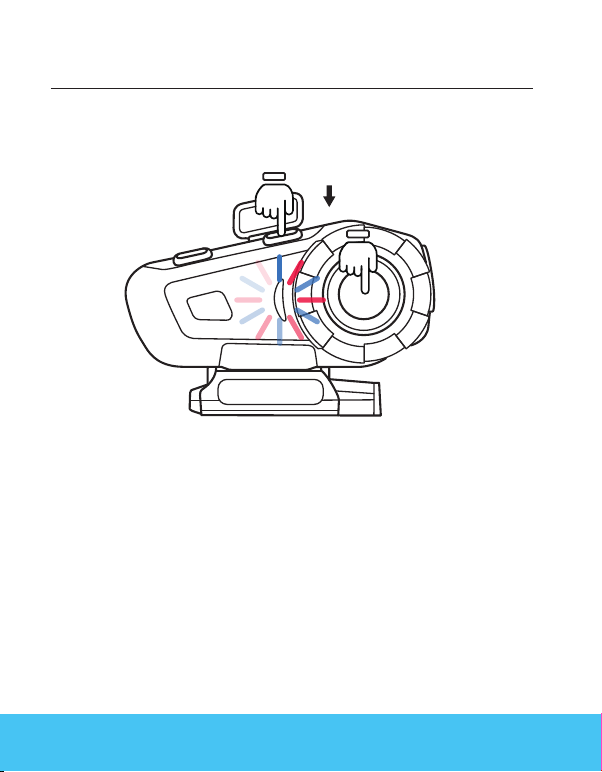
11. Memory Clean
Memory Clear:When device is on , press Volume + and function button
at the same time for 3 seconds . Then G2 will clear the pairing memory
with other devices .
14
Page 16

12. Q&A
12.1 Q&A
No sounds from one or two side speaker
Q1:
Check device plug , needs to rmly connected
A1:
Can it be recharged from bike USB charger while riding ?
Q2:
A2.1:
Not recommended , unstable power source will cause damage on
internal circuit , may cause unable to recharge/can’t fully
charged/can’t switch on.
Power bank will be good .
A2.2:
When using radio , not transmission or continuous transmission
Q3:
Check 2.5mm pin , has to insert rmly . The pin equipped with
A3:
waterproof aprons , user might think its already plugged .
New device can’t switch on
Q4:
Recharged at least 30 minutes before switch use .
A4:
12.2 Warning
12.21 Sound Volume Warning
Long period or too loud may hurt hearing ability .
12.22 Disassemble or Modication
The G2 is precisely made in factory . Any disassemble or modication
may damage the device , please do not tear any of the safety regulation
and serial sticker from the device , that will void the warranty . Please
contact us directly if needed .
15
Page 17

FCC Statement
This equipment has been tested and found to comply with the limits for a Class B
digital device, pursuant to part 15 of the FCC rules. These limits are designed to
provide reasonable protection against harmful interference in a residential installation.
This equipment generates, uses and can radiate radio frequency energy and, if not
installed and used in accordance with the instructions, may cause harmful interference
to radio communications. However, there is no guarantee that interference will not
occur in a particular installation. If this equipment does cause harmful interference to
radio or television reception, which can be determined by turning the equipment off
and on, the user is encouraged to try to correct the interference by one or more of the
following measures:
-Reorient or relocate the receiving antenna.
-Increase the separation between the equipment and receiver.
-Connect the equipment into an outlet on a circuit different from that to which the
receiver is connected.
-Consult the dealer or an experienced radio/TV technician for help.
To assure continued compliance, any changes or modifications not expressly
approved by the party.
Responsible for compliance could void the user’s authority to operate this
equipment. (Example- use only shielded interface cables when connecting to
computer or peripheral devices).
This equipment complies with Part 15 of the FCC Rules. Operation is subject to
the following two conditions:
(1) This device may not cause harmful interference, and
(2) This device must accept any interference received, including interference that
may cause undesired operation.
RF warning statement:
The device has been evaluated to meet general RF exposure requirement.
device can be used in portable exposure condition without restriction.
The
 Loading...