

Chefscape L5721A User Manual
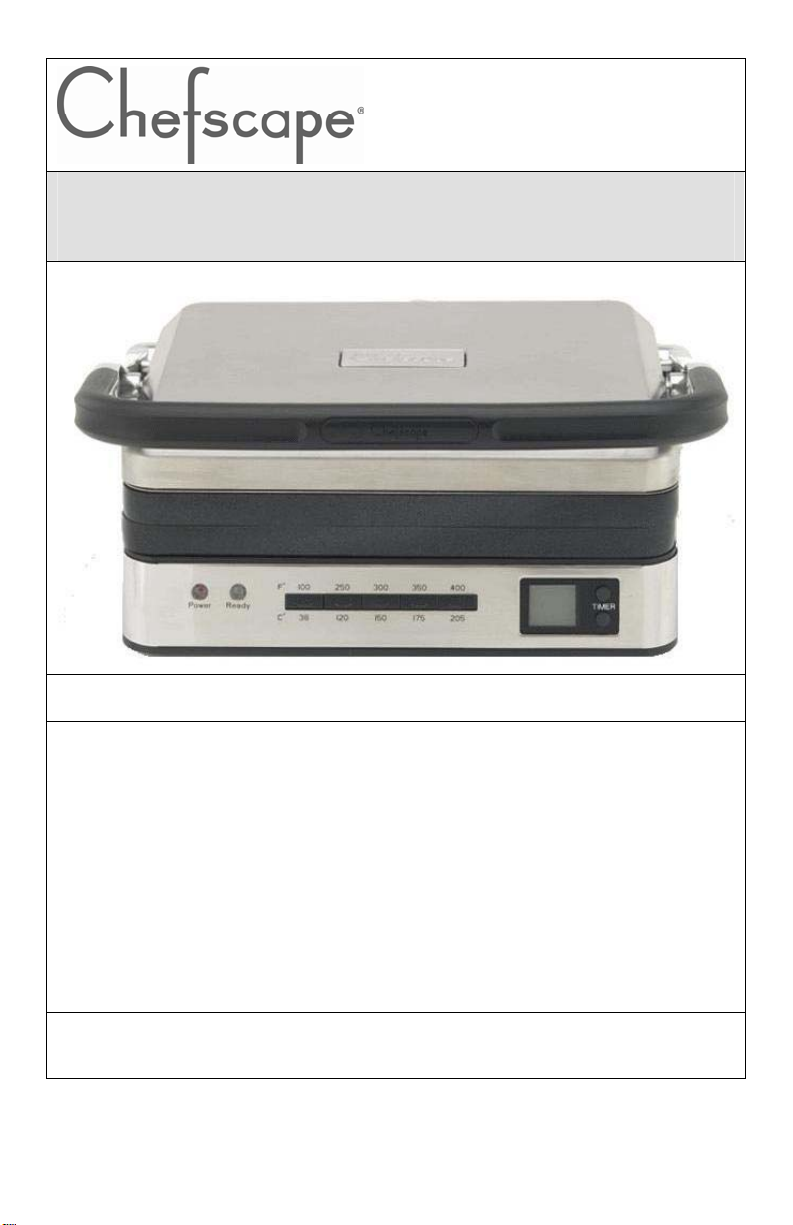
VERSAGRILL™
Instruction Manual
Register this and other Focus Electrics products through our website:
www.focuselectrics.com
Important Safeguards...............................................................................................2
Operating Precautions..............................................................................................3
Assembling Your Versagrill
Using Your Versagrill
Cleaning Your Versagrill™........................................................................................9
Storage...................................................................................................................10
Helpful Hints...........................................................................................................11
Warranty.................................................................................................................12
™
....................................................................................4
™
.............................................................................................6
SAVE THIS INSTRUCTION MANUAL FOR FUTURE REFERENCE
© 2008 Chefscape®, a Brand of Focus Electrics, LLC.
www.focuselectrics.com

IMPORTANT SAFEGUARDS
To prevent personal injury or property damage, read and follow all instructions
and warnings.
When using electrical appliances, basic safety precautions should always be
followed including:
• Read all instructions, including these important safeguards and the care and use
instructions in this manual.
• Do not touch hot surfaces. Use handles or knobs.
• To protect against electric shock, do not immerse cord, plugs, or other electric
parts in water or other liquids.
• Close supervision is necessary when this appliance is used by or near children.
• Always unplug from outlet when not in use and before cleaning. Allow to cool
before putting on or taking off parts and before cleaning.
• Do not operate any appliance with a damaged cord or plug or after the appliance
malfunctions, or has been damaged in any manner. For service information see
warranty page.
• The use of accessory attachments not recommended by Focus Electrics may
cause injuries.
• Do not use this appliance outdoors.
• Do not let cord hang over edge of table or counter, or touch hot surfaces.
• Do not place on or near a hot gas or electric burner or in a heated oven.
• Extreme caution must be used when moving an appliance containing hot oil or
other hot liquids.
• To disconnect, turn any control to “OFF,” then remove plug from wall outlet.
• Do not use appliance for other than intended use.
• To ensure continued protection against risk of electric shock, connect to properly
grounded outlets only.
• Do not attempt to repair this appliance yourself.
• Do not leave appliance unattended while it is operating.
2

To prevent personal injury or property damage, read and follow all instructions
and warnings.
OPERATING PRECAUTIONS
• A short power-supply cord is provided to reduce risks resulting from becoming
entangled in or tripping over a longer cord.
• Longer detachable power-supply cords or extension cords are available and may
be used if care is exercised in their use. While use of an extension cord is not
recommended, if you must use one, the marked electrical rating of the
detachable power-supply cord or extension cord should be at least as great as
the electrical rating of the appliance. If the appliance is of the grounded type, the
extension cord should be a grounding-type 3-wire cord. The cord should be
arranged so that it will not drape over the counter top or tabletop where it can be
pulled by children or tripped over.
• Do not use an outlet or extension cord if the plug fits loosely or if the outlet or
extension cord feels hot.
• Keep the cord away from hot parts of the appliance and hot surfaces during
operation.
• Do not place plastic cooking or serving containers or utensils directly on heating
surface as melting of plastic could occur.
• Do not remove the cooking plates until the appliance is fully cooled.
SAVE THESE INSTRUCTIONS
3
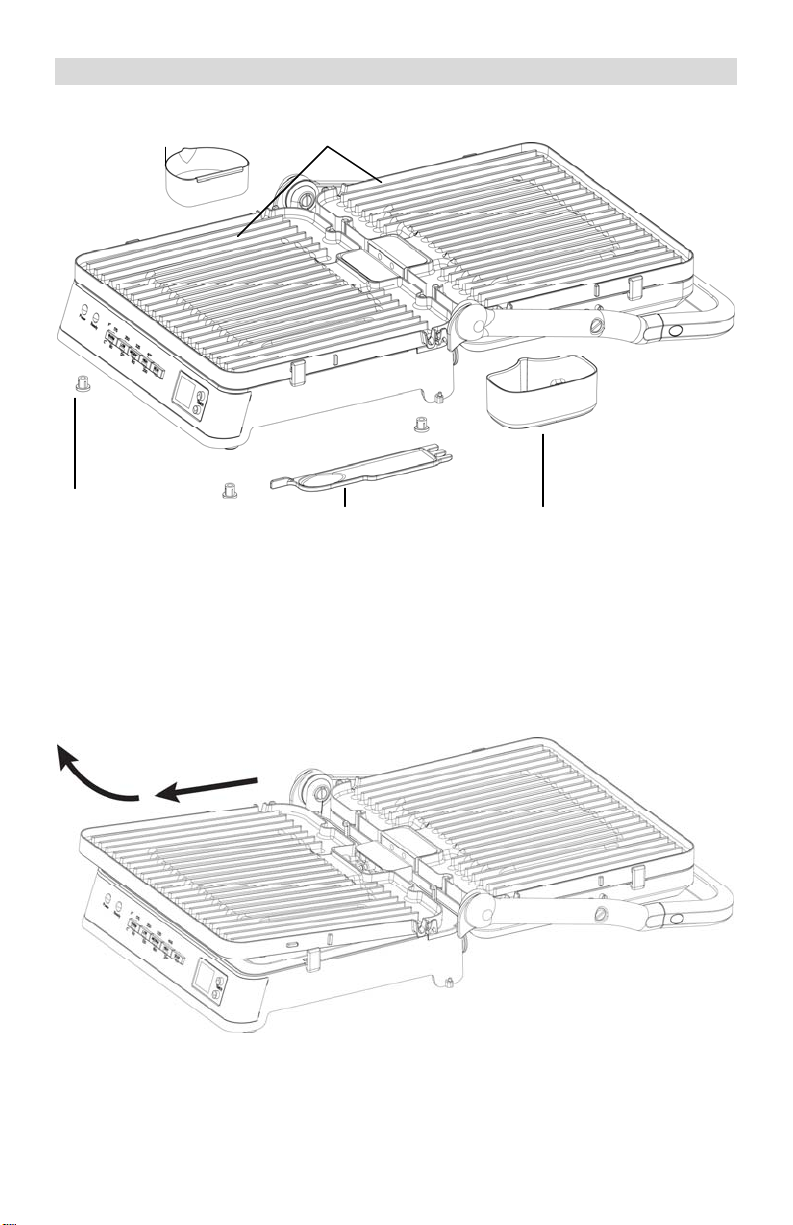
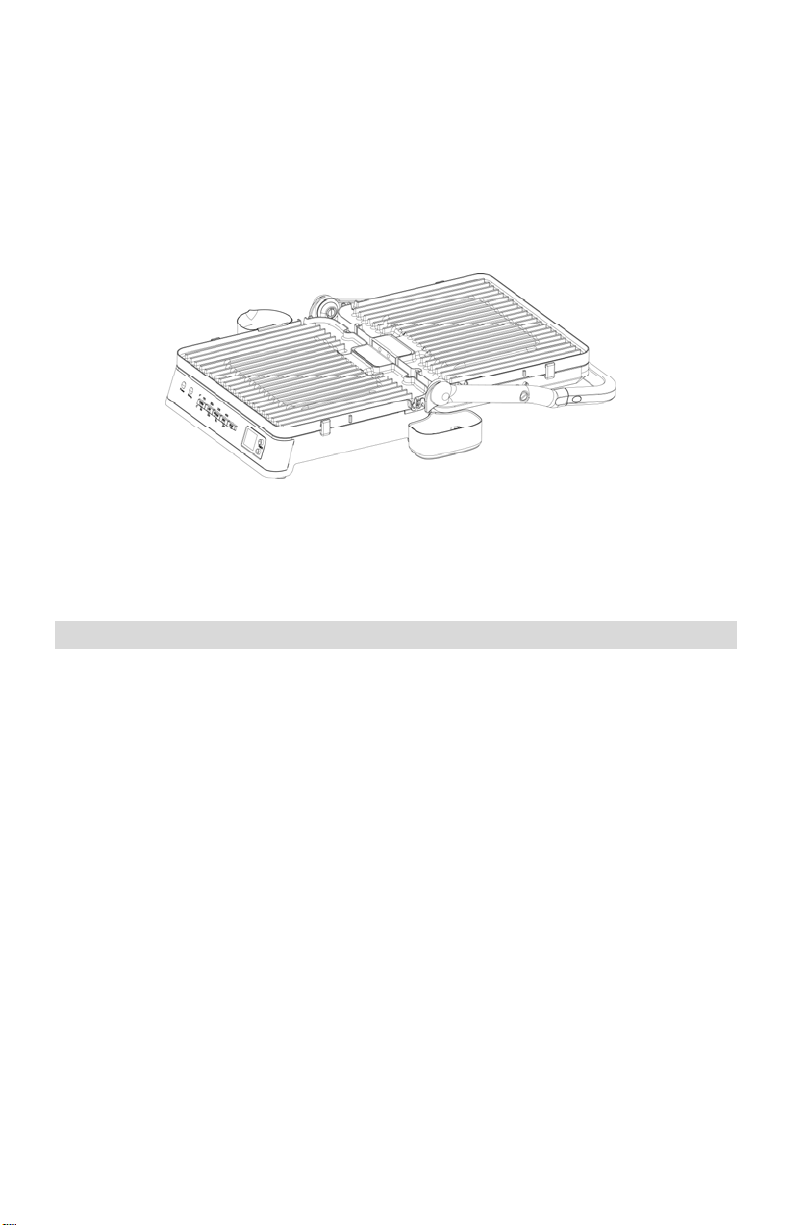
ASSEMBLING YOUR VERSAGRILL™
Warming Cup Cooking Plates
Rubber Feet (4) Grill Scraper Grease Cup (2)
Cooking plates: The removable and reversible, upper and lower cooking plates are
interchangeable. The cooking plates are reversible with a grilling surface, ribbed on
one side and a griddle surface, flat on the other side. Both cooking plates have a
non-stick surface for easy cleanup.
Pull to unplug and then lift out in the direction of the arrow.
4
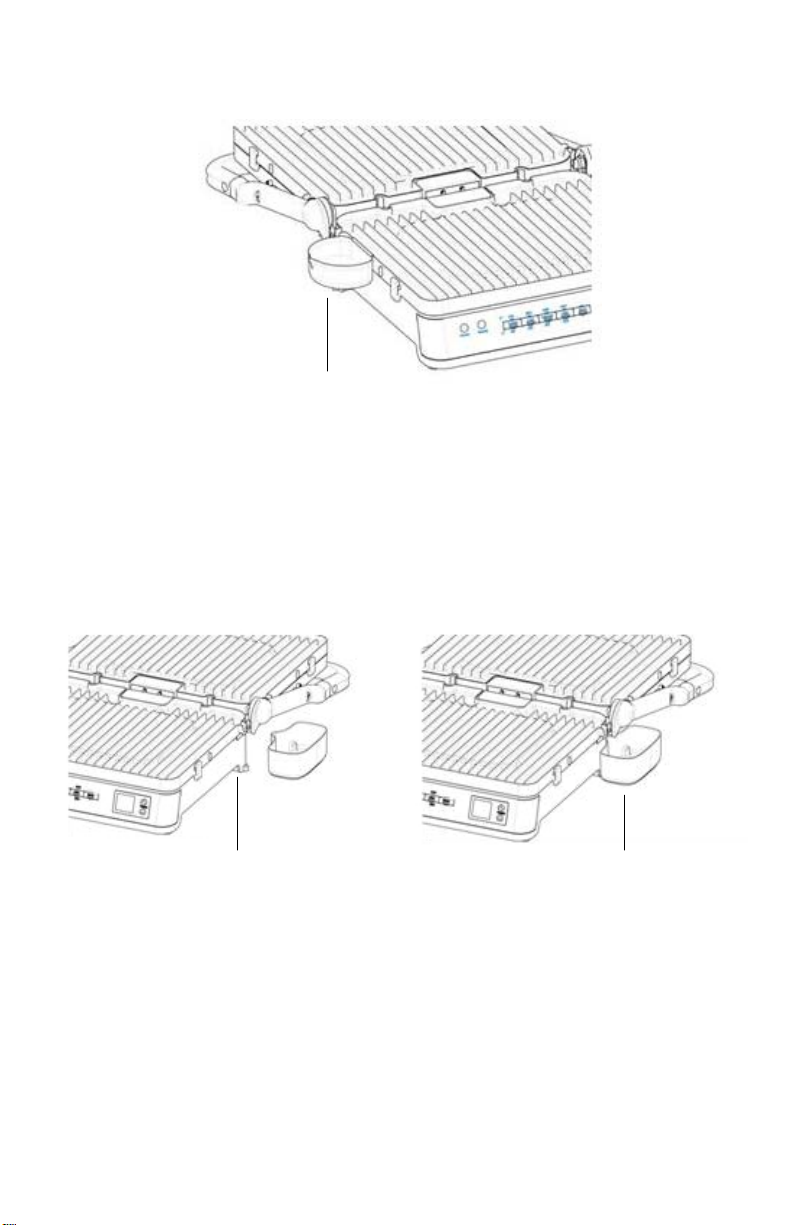
Warming cup: The warming cup can be used, as shown, to warm condiments such
as butter, gravy or syrup.
The warming cup can be placed as shown on either side.
Grease cups: Two grease cups are provided. The grease cups should be mounted
in place, as shown, whenever the appliance is in operation to protect the counter and
catch any grease or condensation.
Locate the grease cups onto the locating
pins as shown.
Grease cup shown properly located.
Grill scraper: The grill scraper is intended to aid in grill cleanup without damaging
the non-stick surface of the cooking plates.
5

USING YOUR VERSAGRILL™
BEFORE USING THE FIRST TIME: Wipe the exterior with a clean, soft, damp
cloth. Dry thoroughly. Wash the cooking plates, grease cups, warming cup and grill
scraper in warm, soapy water to remove any manufacturing oils. Rinse thoroughly
and dry.
After cleaning, condition the non-stick finish by lightly wiping two teaspoons of
cooking oil with a paper towel or a soft cloth over the entire surface. Let the cooking
oil remain on the finish. Do not use butter or shortening to condition the non-stick
surface.
CONTROL OPERATION: The control panel is made up of seven push buttons:
Arrow Down, Arrow Up, Warm, Low, Medium, High and Sear. There are seven
indicator lights; Power, Ready and one indicator light for each of the five temperature
settings. A timer setting is also available indicated by the 2-digit LCD screen.
TEMPERATURE SELECTION
Warm (175°F, 79°C) – Used to keep cooked food warm or to warm-up sandwiches
when toasting is not desired. Also recommended for keeping food warm in
foodservice pans or when used as a chafer.
Low (250°F, 121°C) – Used to cook thicker cuts which require slower cooking to
ensure the center is done without overcooking the outside. Also recommended for
delicate foods, which would be destroyed by higher temperatures.
Medium (325°F, 162°C) – Ideal for cooking a variety of foods, meats, fish,
vegetables and sandwiches. A common setting for most griddle operations.
High (400°F, 204°C) – Ideal for browning, grilling and toasting.
Sear (475°F, 246°C) – Use this setting for searing food products including steaks,
fish, vegetables, ahi tuna, etc. This setting is not recommended for cooking as the
food will burn on the outside long before it has cooked on the inside. CAUTION:
Grilling at this temperature may cause grease to splatter.
6

GENERAL OPERATION
1. Always use on a dry, level, heat-resistant surface. Be sure the grease cu ps are
in place below the drain holes on the grill surface. CAUTION: Do not block the
airflow under the griddle. Plug cord into a 120-volt, AC electrical outlet ONLY.
The grill will beep one time, for one second when plugged in. The grill is in
standby mode, the LCD display is blank, and no indicator lights are il luminated.
2. Select the desired temperature setting: “WARM,” “LOW,” “MEDIUM,” “High,” or
“Sear.” The selected indicator light will illuminate. Note: The temperature
selection may be changed at any time by pressing the desired temper ature
setting however the appliance may need to preheat or cool down to attain the
newly selected temperature.
3. Program the desired cooking time by pressing the “Arrow Down” or “Arrow Up”
buttons. The cooking time can be set from 01 to 99 minutes. The set cook time
will be visible in the LCD display. When set, the timer will begin to count down
automatically in one minute increments. Note: If a cook time is not selected
the appliance will remain at the selected temperature for 99 minutes and the
LCD screen will display “- -.“ After 99 minutes the appliance will automatically
turn off.
4. When the appliance reaches the selected temperature, the ready indicator light
will illuminate and the appliance will beep 3 times indicating the appliance is
ready for cooking. Place the food on the grill.
Note: Foods may be prepared with or without fats. When frying, the use of a
small amount of butter, fat, or oil will improve the flavor, color, and crispness of
foods. When frying fatty foods such as bacon or sausage, excess grease will
drain into the grease cups through the drain hole located on the surface of the
griddle. Do not remove the grease cups during cooking.
Note: Nylon, plastic, wooden, or rubber cooking tools are recommended for use
on the non-stick surface. Smooth-edged metal cooking tools may be used with
care. Do not use sharp-edged cooking tools such as forks, knives or food
choppers as scratching may occur. Minor scratching will affect only the
appearance of the finish and will not harm its non-stick property.
5. When the selected cooking time has expired the LCD display will show “00” and
the appliance will beep 5 times. After one-minute the appliance will turn off (all
indicator lights will be off).
Note: If additional cooking time is needed, repeat steps 2 and 3.
Note: You can turn the appliance off at any time by pressing the illuminated
temperature setting button. The indicator light will go out and the appliance will
be off.
6. Disconnect the cord from the wall outlet. Let the appliance cool complete ly
before removing the cooking plates and grease cups.
7. Clean your appliance after each use by following the directions in the “Cleaning
Your Versagrill
™
” section.
7
• A small amount of smoke and/or odor may occur upon heating due to the
release of manufacturing oils – this is normal.
• Some minor expansion/contraction sounds may occur during heating and
cooling – this is normal.
Contact Grill Operation: Used as a contact grill, the cooking plates are typically
placed with the grill side showing. The food to be cooked is placed on the bottom
surface and the top is closed over and in contact with the food. This application is
great for cooking burgers, steaks, boneless meats or anything that may benefit from
the speed of grilling both sides of the food simultaneously. The ribs on the grill plate
provide the traditional “grill” marks in the food product and allow excess grease to
drain away from the bottom. When multiple items are placed on the cooking surface,
ensure the pieces are all about the same thickness so the top cooking surface
contacts them evenly and all the items cook at the same speed.
Panini Press Operation: A Panini is a bread sandwich, typically warmed and
toasted. Any number of ingredients such as meats, vegetables and cheeses are
placed between two pieces of bread and warmed or grilled. Used as a Panini press,
the cooking plates are often placed with the griddle surface, flat side showing.
However, the plates can be oriented either way as desired. An ideal orientation for
warming and grilling a Panini sandwich is to use the bottom cooking plate in the
griddle orientation and the top cooking plate in the grill orientation. The hinge design
of this appliance will allow you to “float” the top cooking surface over the sandwich if
it is delicate and could be damaged by the weight of the top. When multiple
sandwiches are placed on the cooking surface, ensure the sandwiches are all a bo ut
the same thickness so the top cooking surface contacts them evenly and they all
cook at the same speed.
8
Open Grill Operation: The grill can be operated with the top cooking surface
opened all the way and resting on the counter thus creating a double op en grilling
surface. This will allow the cooking of a larger amount of food at one time or cooking
different foods on the two separate cooking surfaces. Using as an open grill also
allows the cooking of a variety of items with varying thicknesses.
Open Griddle Operation: Used as an open griddle, the appliance allows you to
griddle more at one time or different foods on the different surfaces. For example,
bacon could be cooked on one surface while at the same time pancakes are cooked
on the other surface.
Warming/Buffet Operation: To use the appliance in a warming buffet scenario,
open the top cooking surface all the way until the handle is resting on the c ounter.
The cooking plates need to be in place with both grill surfaces up. Most any stove
top pan, foodservice pan, or baking pan, must be high temperature capable, can be
set on the surface to keep the contents of the pan warm.
CLEANING YOUR VERSAGRILL™
1. Unplug the appliance from the electrical outlet and let the gri ll cool completely
after each use.
2. Remove and immerse the cooking plates and accessories in warm, soapy water
using a non-metal cleansing pad.
or sponge may give the non-stick surface a clean look, but will not remove the
tiny food particles that can settle in the finish. Do not use metal scouring pads
or harsh scouring powders.
Cooking plates and accessories can be cleaned in a dishwasher, positioned so
they do not touch one another or other objects being washed. Cooking plates
should always be placed in the dishwasher with the electrical contacts facing
down.
3. Wipe the exterior with a clean, soft, damp cloth. If necessary, dampen the cloth
with warm, soapy water to clean stubborn areas. Dry thoroughly. Note: Do not
wet or flood the appliance with water, place the base in a dishwasher, or
submerge in water.
4. Reassemble the cooking plates to the appliance. Note: Always unplug this
appliance when not in use.
CAUTION: Do not attempt to repair this appliance yourself. For service information
see warranty page.
.
Rinse and dry thoroughly. Note: A dishcloth
9
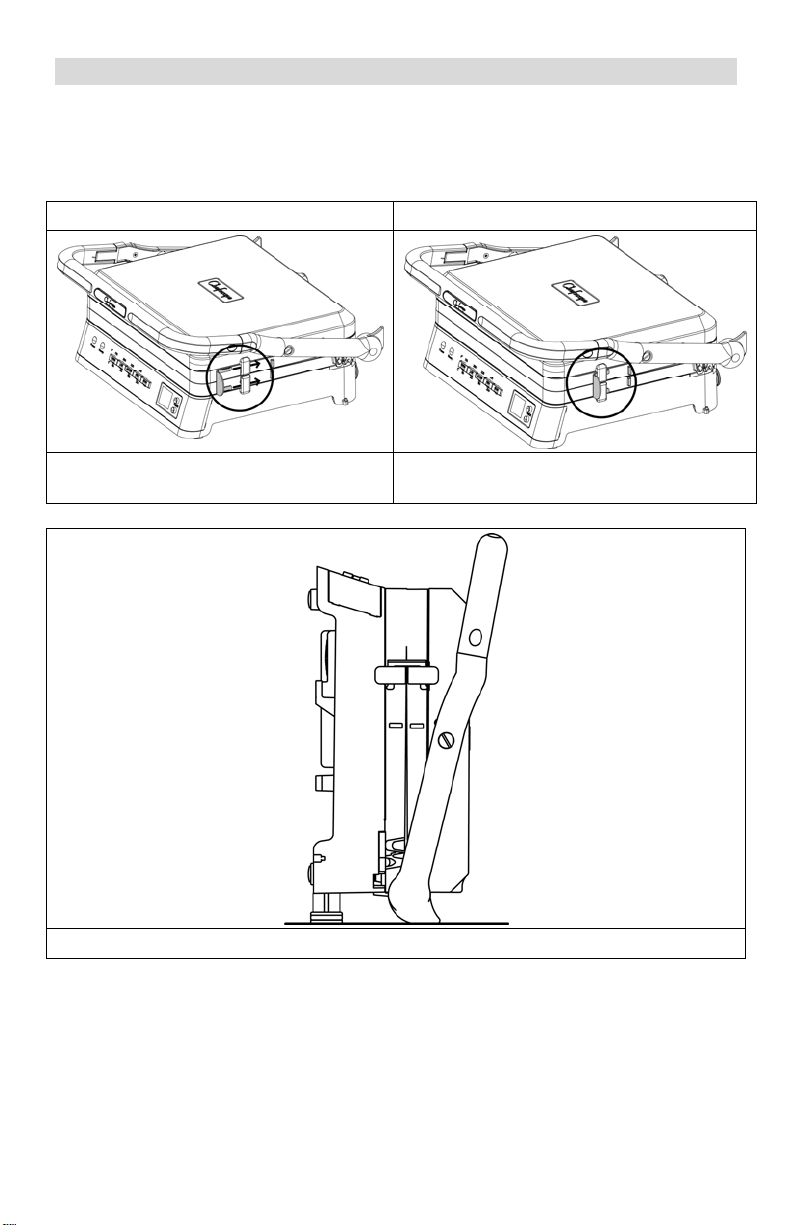
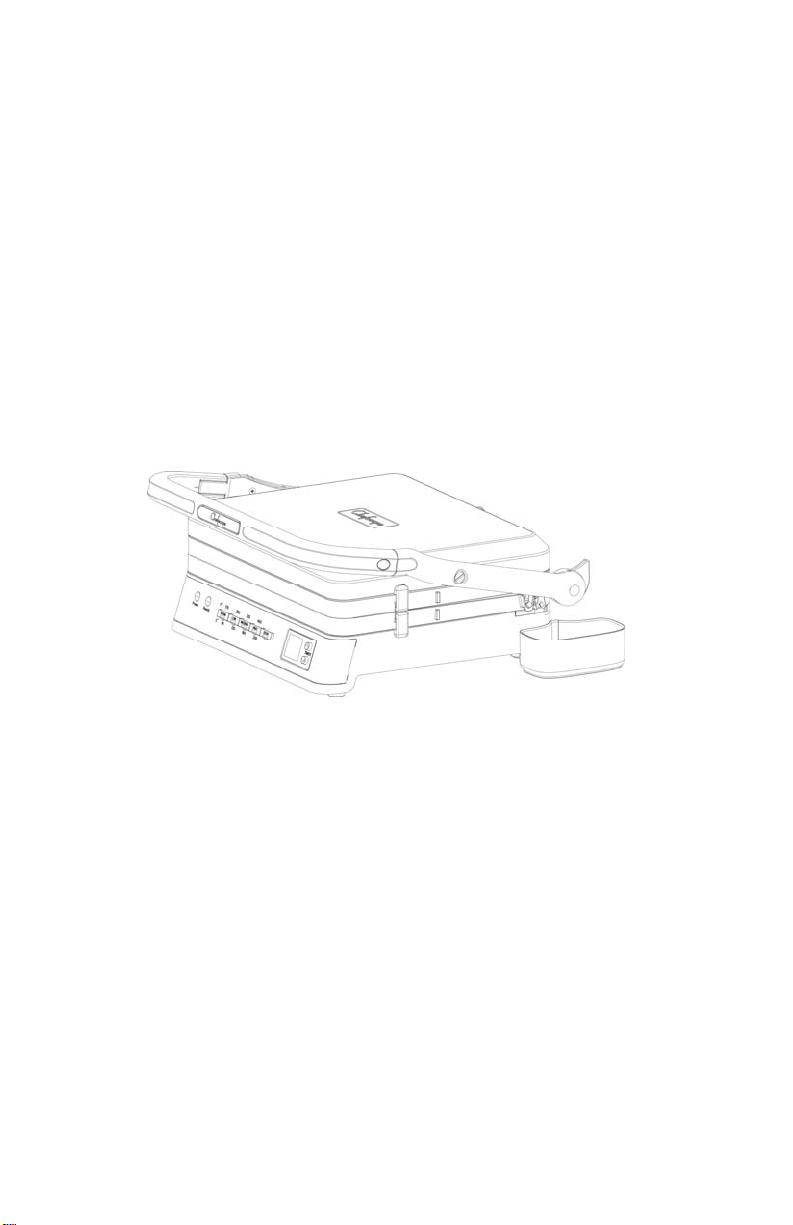
STORAGE
To save counter or cabinet space, the appliance may be stored vertically on or under
the countertop. When storing vertically, use the storage clips as shown below.
Note: You must use the storage clips when storing the appliance vertically to ensure
the appliance does not open unexpectedly.
Storage Clip Open Storage Clip Closed
Insert a storage clip on each side of the appliance as shown.
The Versagrill™ in a vertical positon ready to be stored.
Slide the clip until it latches.
10

HELPFUL HINTS
• Always start with clean, dry cooking plates, thoroughly rinsed to remove any
soap residue.
• Always clean the cooking surfaces between cooking of different food items to
ensure there is no cross contamination.
• There is no need for preheating the unit, but for consistent, repeatable cooking
results, always allow the appliance to preheat before placing food on the
cooking plates. You will then be able to reliably use the cooking timer for
consistent results.
• Always place the grease cups in their proper location prior to preheating.
• Always monitor the food temperature and follow the safe temperature guidelines
for the product you are cooking.
• Do not use metal utensils as they may permanently damage the non-stick
cooking surfaces.
• Do not use spray-on or aerosol type non-stick coatings, as this will affect the
performance of the non-stick surfaces of the cooking plates.
11
 Loading...