Page 1

For example on the DTX-40, if the CCW reading is 50.30 and CW
reading is 50.50
Step 1 Determine actual deviation. (50.50 – 50.30) ÷ 2 = 0.10
(which is smaller than the allowable tolerance of 0.25).
Step 2 Calculate target calibration value, which is capacity less
actual deviation calculated above. 50.00 – 0.10 = 49.90.
Step 3 Determine calibration direction (only one direction calibra-
tion is required). Take the smaller number’s direction,
which in this case is CCW (50.30).
Step 4 Zero the display. Rehang the calibration weight (2.5 kg
only for DTX-40) and calibrate in the CCW direction.
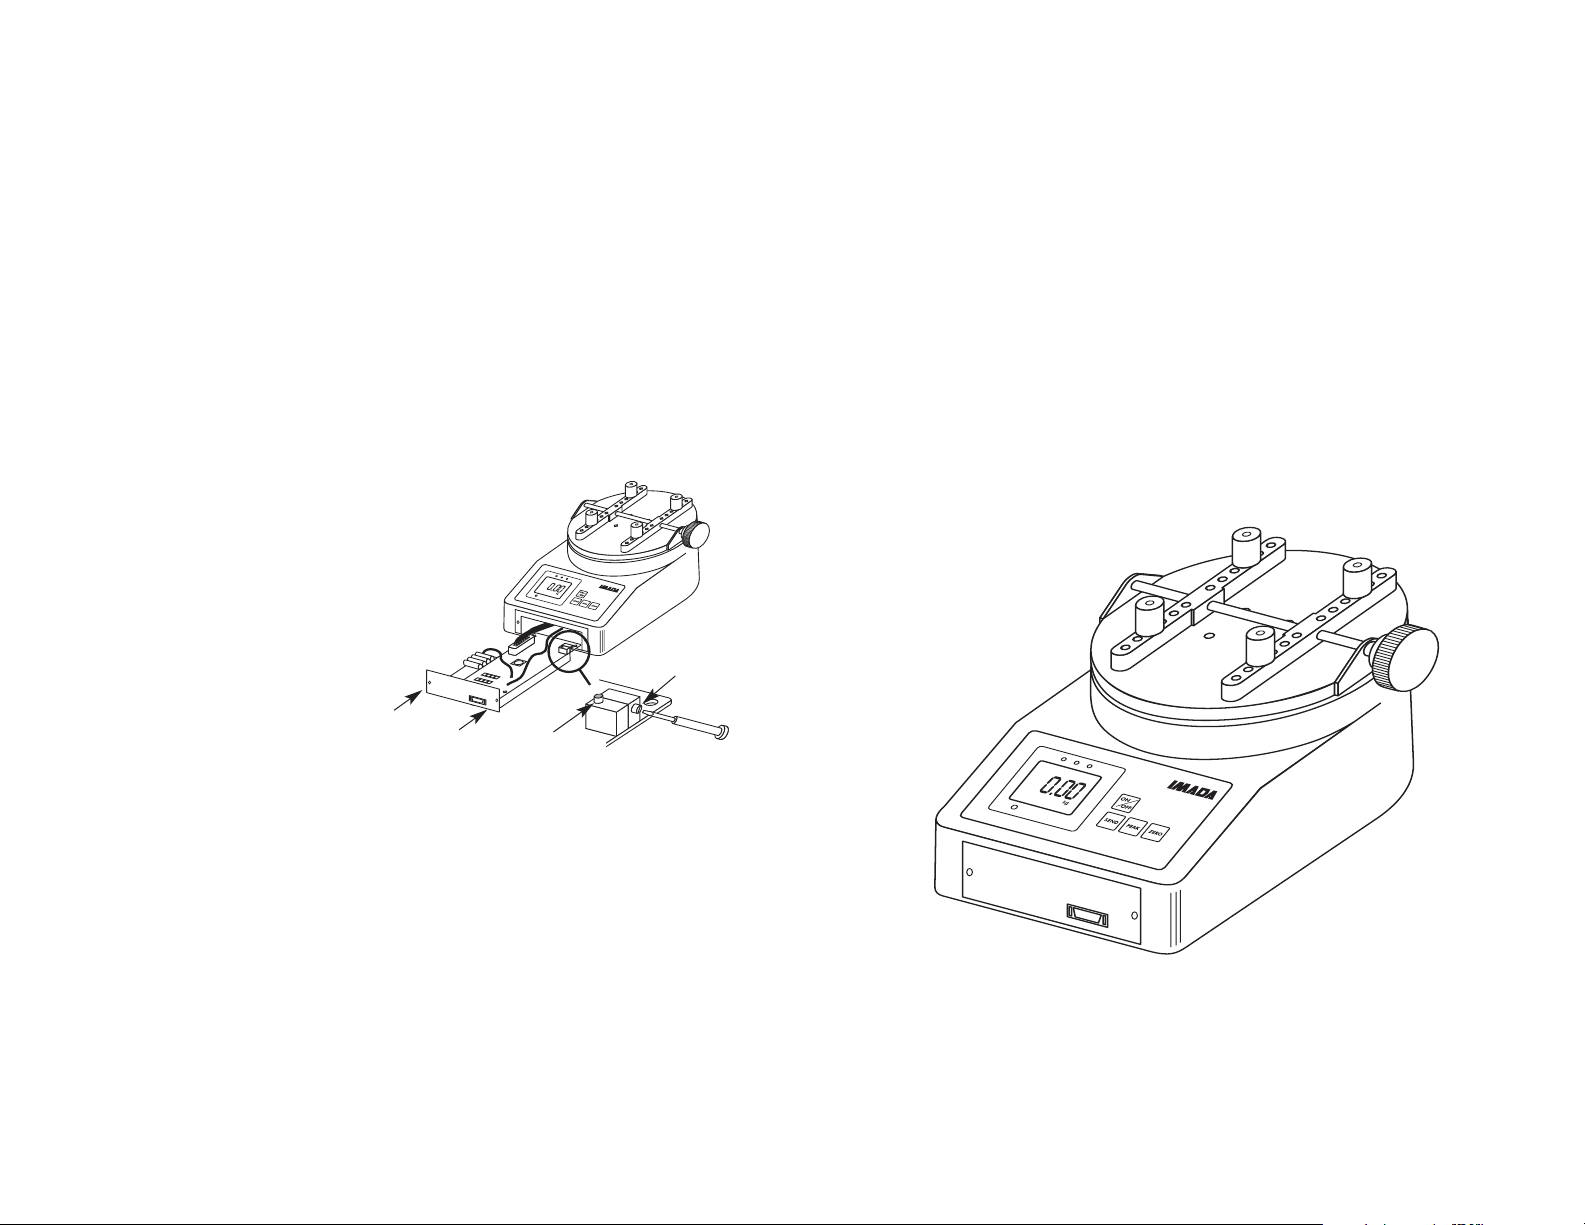
Making Adjustments
1. Remove the 2 screws in the front
cover and the warranty seal.*
2. Gently pull the front cover forward
to expose the PC board.
CALIBRATION MANUAL
Cap Torque Tester
Note: The PC board is mounted on
the front cover and cables are connected to it. Do not force.
3. Using a small flathead screwdriver adjust the VR2 pot adjustment screw to the appropriate setting (screw faces right).
Doo nnoott aaddjjuusstt VVRR11
D
4. After adjustment, slide the PC board back and replace the screws.
*Note: Removing the warranty seal automatically voids the warranty.
(screw faces top).
SCREWS
Specifications subject to change without notice.
VR1 POT
DO NOT ADJUST
VR2 POT
Models:
DTX and DTX2
Page 2

Digital Cap Torque Tester
CALIBRATION PROCEDURE
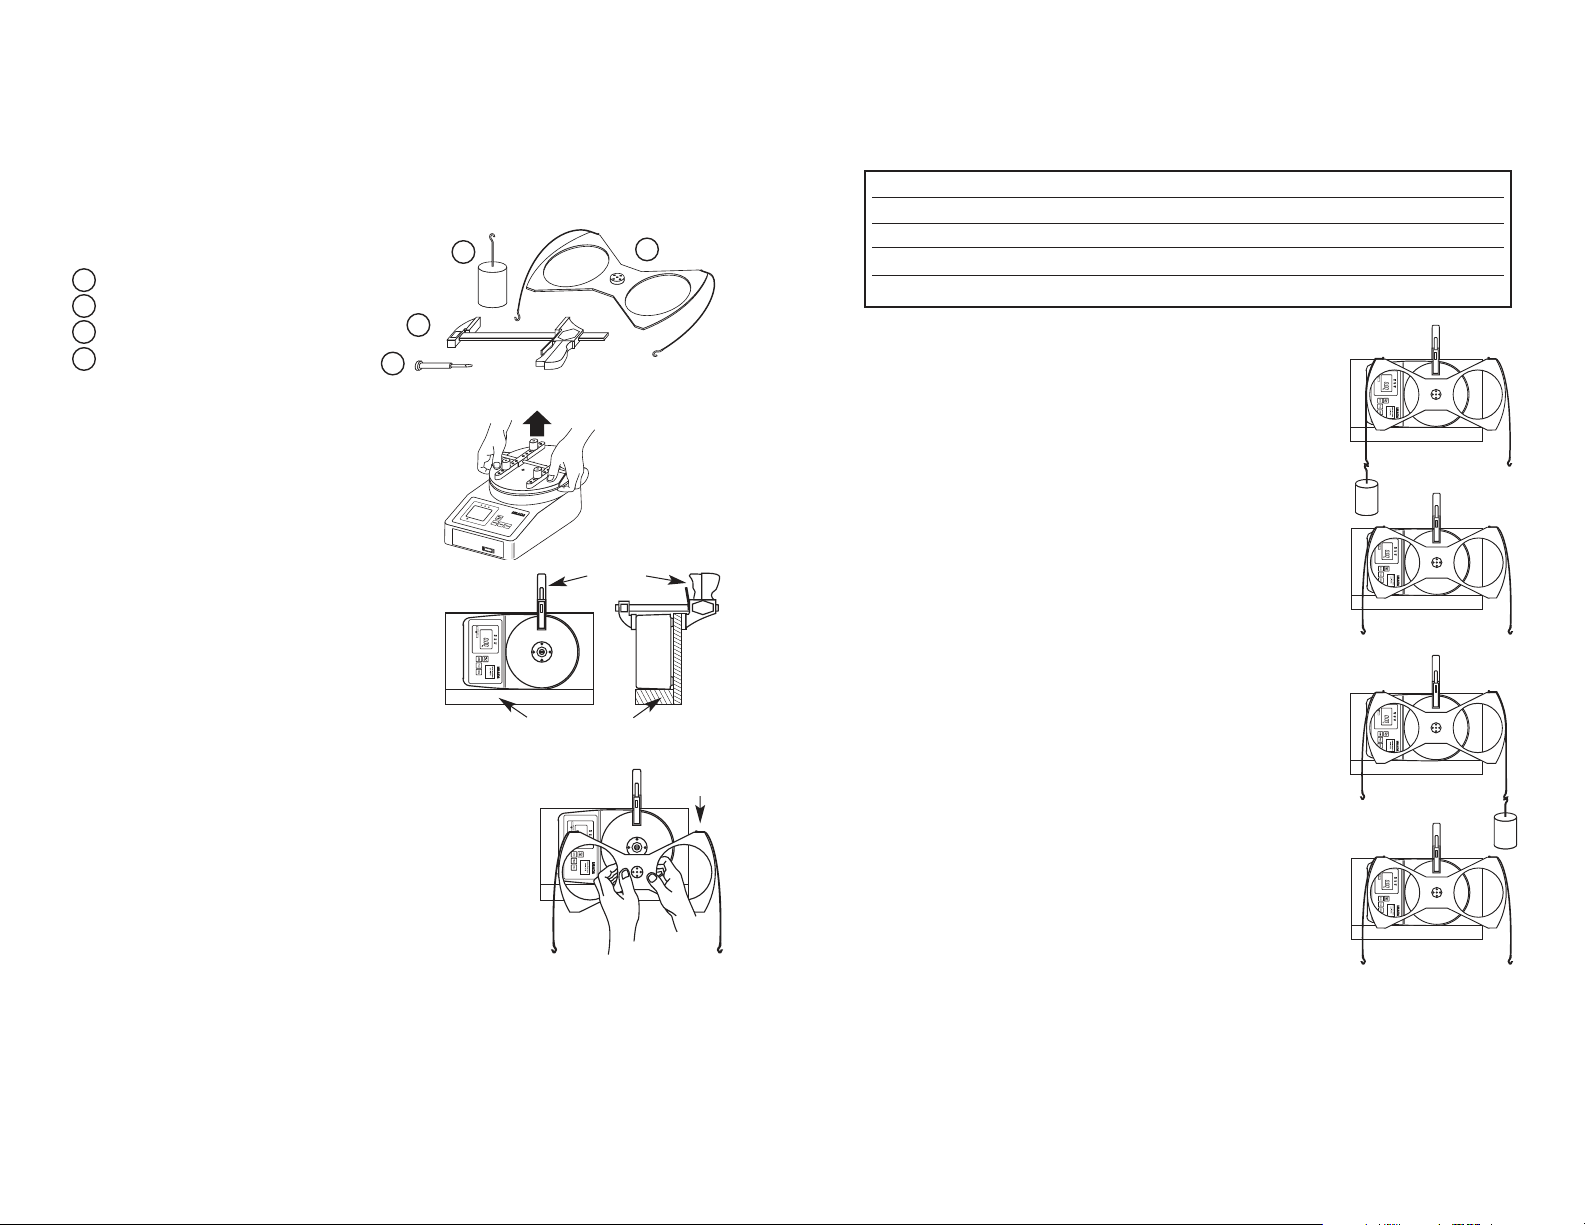
List of Equipment
Calibration arm (20 cm radius)
1
Small Screwdriver
2
Clamp
3
Calibration weight
4
Calibration Setup
3
2
Temperature: 72° (±15°F)
4
CLAMP TABLE
Conditions:
Humidity: 10 - 60%
1
1. Verify the temperature is within
the allowable range (32°-100°F)
and record it.
2. Pull up to remove clamp table
from cap torque tester.
Do Not Twist or Jerk! Permanent
CLAMP
damage may result, whether the
unit is on or off.
3. Place the cap torque tester against
the vertical wall of the test stand
and clamp it to the wall as shown.
4. Place the calibration arm on the cap torque
tester with the 2 wires hanging down,
TEST STAND
TOP
engage the coupling and press in firmly
(make sure the calibration arm doesn’t
touch the clamp and allow clearance to
hang the calibration weight).
5. Connect AC adapter/charger,plug into
115VAC outlet and turn on the cap torque
tester, select Real Time Mode (not Peak Mode) and change units
to kg-cm (press unit switch and hold for 4 seconds to select units).
6. Press the Zero switch to zero the display.
Before hanging the calibration weight,refer to the following table to
be sure the correct weight is used to prevent overload. (kgf-cm)
Specification Table
MODEL DTX/DTX2-15 DTX/DTX2-40 DTX/DTX2-85
CAPACITY (kgf-cm) 20.00 50.00 100.0
ALLOWABLE RANGE (kgf-cm) 19.90~20.10 49.75~50.25 99.5~100.5
ALLOWABLE TOLERANCE (kgf-cm) 0.10 0.25 0.5
*WEIGHT (kg) 1 2.5 5
*Weight is appropriate for 20 cm radius calibration arm
CCW Calibration
6. Hang the correct weight (see Specification
Table above) on the left hook and record the
torque value (make sure the wire stays on
the edge of the calibration arm, use scotch
tape if necessary).
7. Remove the weight and see if the display
returns to zero.
8. If not, repeat from steps 7 - 9 until it does.
CW Calibration
9. Zero the display.
10. Hang the weight on the right hook and
record the torque value.
11. Remove the weight and see if the display
returns to zero.
12. If not, repeat from steps 11 - 13 until it does.
Check the table to make sure the CCW & CW
readings are within the allowable range before
making adjustments.
13. Subtract the smaller from the larger reading, and divide the result
by 2 to determine actual deviation. If actual deviation is larger
than allowable tolerance (see Specification Table), the unit needs
repair before calibration.
If actual deviation is smaller than allowable tolerance, the unit
can be calibrated by the following procedure.
page 3page 2
 Loading...