

Page 1
PosiTector DPM
Dew Point Meter
INSTRUCTION MANUAL v. 2.0
Simple. Durable. Accurate.
Page 2
Introduction
Introduction
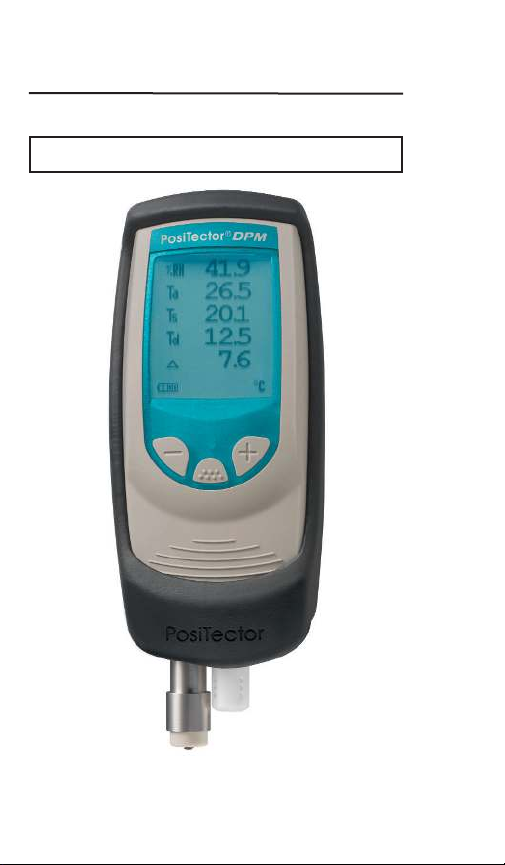
The Dew Point Meter is a hand-held, electronic
instrument that measures, calculates and records
climatic parameters, quickly and accurately.
Measured parameters are:
RH - Relative Humidity
Ta - Air Temperature
Ts - Surface Temperature
Td - Dew Point Temperature
- Surface minus Dew Point
Temperature
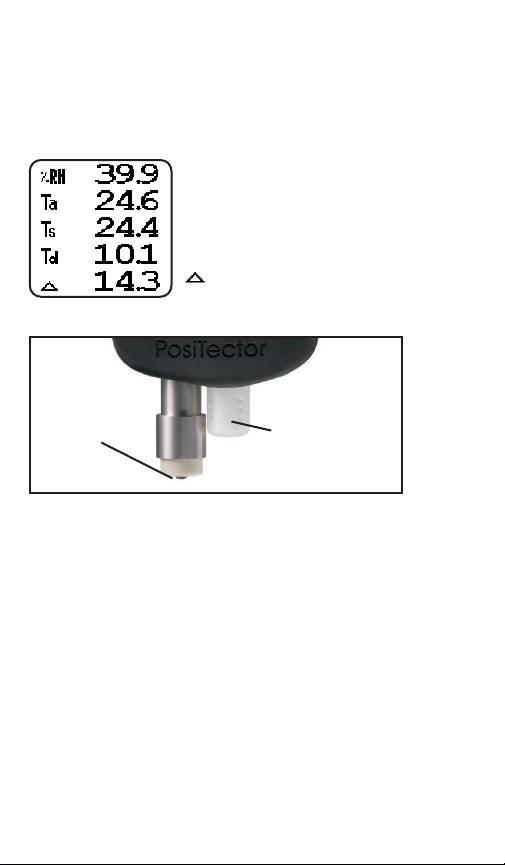
Surface
Temperature
Sensor
Air temperature
and humidity
sensor
Power-up / Power-down
Power-up / Power-down
The PosiTector DPM powers-up when any button is
pressed. To preserve battery life, the instrument
powers-down after approximately 3 minutes of no
button activity. To power-down immediately, hold
both (-)(+) buttons for 5 seconds. Settings are
retained during power-down.
2
Page 3

Operation Overview
Operation Overview
Upon power-up, the following 5 parameters are
displayed and updated automatically each second.
RH - The relative humidity
the white plastic housing. The sensor may require a
longer period to stabilize in the event of extreme
humidity changes.
Ta - The air temperature
inside the white plastic housing.
sensor is located inside
sensor is also located
Ts - A surface temperature thermocouple is located
on the tip of the silver probe. It is spring loaded and
designed to quickly self-align on a surface. Press it
against a surface and allow a few seconds for the
value to stabilize. Do not drag the sensor over the
surface. Wet the surface for a faster response.
NOTE:
For surface temperature measurement over
a long period of time, consider using the optional
Magnetic Surface Temperature kit (pg. 11).
Td - The dew point temperature is a function of air
temperature and relative humidity (see ISO 8502-4
Annex A). It is the temperature to which a volume of
air must be cooled in order to reach saturation.
- The delta value is the surface minus dew poin
temperature (Ts - Td). This value is important in
judging the risk of condensation, or dew, forming on
a surface. For example, ISO 8502-4 recommends
that, unless otherwise agreed, the temperature of a
steel surface generally should be at least 3°C (5°F)
above the dew point when paints are applied.
NOTE:
before the above climatic parameters stabilize. This
is most noticeable when the instrument is relocated
from one extreme environment to another (i.e. from
a warm location to a cold location). A period of up to
30 minutes should provide adequate time for
stabilization.
The instrument may require a period of time
t
3
Page 4
Smart Trend
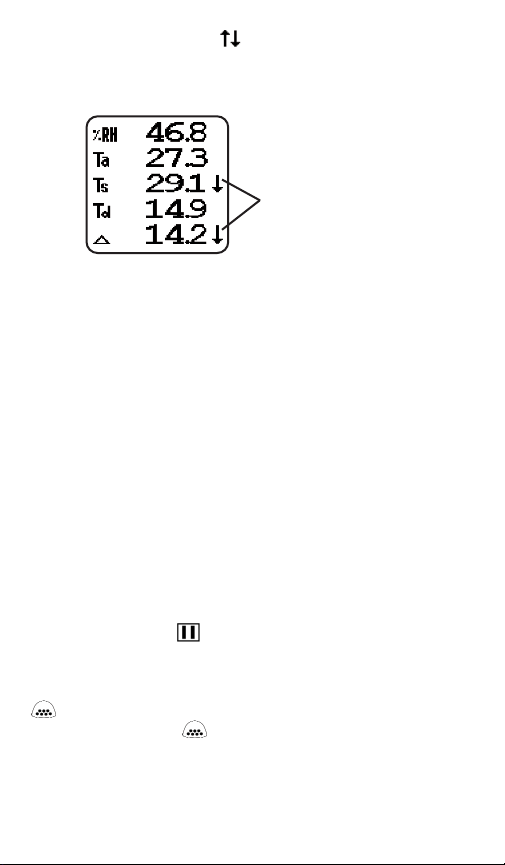
or stable readings. The instrument compares each
measurement with the average of recent values in
an attempt to provide the current direction of change.
While the absence of an arrow does not necessarily
signify stability, it can be taken to mean that particular parameter is undergoing little or no change. Slow
changes in a parameter could therefore occur
without being noted by an indicator arrow. When
instructed to manually store a dataset into memory
(pg. 6), the instrument will wait for these Smart Trend
Indicators to disappear before recording all values to
memory.
Button Shortcuts:
(-) Button: causes the display to rotate 180°. Ideal
for right-side-up viewing when sensors are pointing
away from you. Press (-) again to restore display
position.
(+) Button: freezes the display. The instrument will
measure one more time, then hold all values and
display the hold icon . Press (+) again to unfreeze
the display. This feature does not work while in
Memory Mode.
TM
Indicators - identify rising, falling
Smart Trend
Indicators
Button: accesses the instrument menu (pg. 5).
Within the menu, the button is used to select an
option.
4
Page 5
Menu Operation
Menu Operation
Instrument functions are menu controlled. To access
the Menu, turn the instrument on, then press the
button.
Memory
Auto Log
Alarm
9
Setup
Current selection is displayed
with darkened background
To navigate, press (-) to scroll DOWN, (+) to scroll UP
and to SELECT. Press both (-)(+) buttons at any
time to exit any menu or select Exit from the Menu.
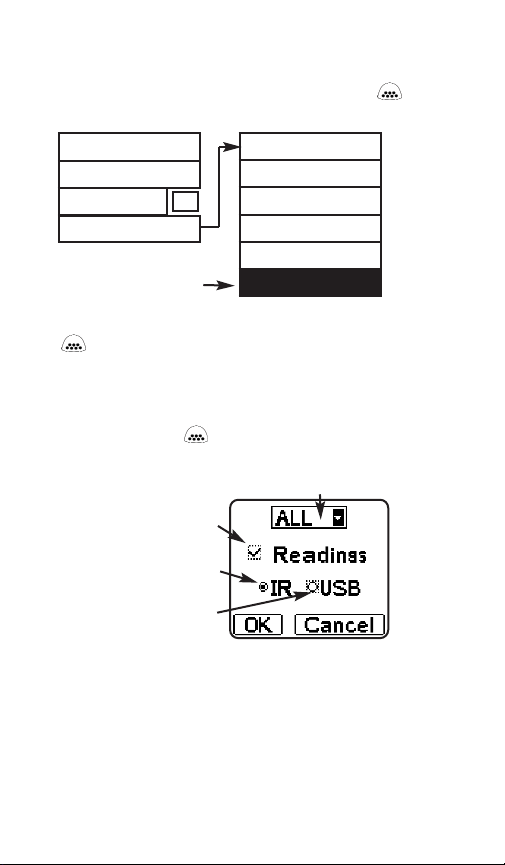
List boxes have a down arrow on the right-hand side.
Use the (-) and (+) buttons until your desired choice
appears, then press to select this choice and
move focus onto the next item.
a “tick” indicates this square
box has been selected
“Radio” buttons. Only one
can be selected at a time.
“Focus” is currently at this
unselected (empty) Radio button
Reset
Gage Info
Flip Display
Units
Language
Set Clock
“List“ box
5
Page 6

Memory Management
Memory Management
Memory
The PosiTector DPM can record 2,500 datasets in
up to 100 groups (batches) for on-screen analysis,
for printing to an optional IR printer, or for
downloading to a personal computer using optional
PosiSoft software and USB cable.
NOTE:
A dataset contains 6 values: RH, Ta, Ts, Td,
Delta and the date/time when they were
recorded.
New Batch
-closes any currently opened batch and creates a
new batch name using the next higher number. For
example, if only Batch 1 and Batch 3 exist, then Batch
4 would be created and made the current batch.
Memory is activated and the icon appears. New
batches are date stamped when they are created.
Current
Batch
Storing a dataset into memory manually
Place the surface temperature sensor on the
surface. Press (+) to store the current dataset into
memory. If the Smart Trend Indicators indicate one
or more values are changing, the instrument will
beep and blink once every second until the dataset
values stabilize. When the dataset values have
stabilized, the LED will blink twice and the instrument
will emit a double beep. Dataset values are now
stored in memory along with the current time.
No. of
stored datasets in
the current batch
Current
(live) dataset
6
Page 7

Open
-selects a previously created batch name to open
and make current. The current batch name and
number of stored datasets will be displayed.
Close
-stops the recording process, closes the current
batch, and removes batch information from the
display.
Delete
-removes a batch completely from memory. The
name is deleted and its datasets are erased.
View
-lists all datasets beginning with the current or most
recently used batch.
First to appear is a graph of
individual data points as
shown in Figure 1. Scroll
through each dataset
parameter using the (-).
Press or (+) button to
view batch statistics and
individual datasets (see Figure 2).
Scroll datasets using the (-) or
(+) buttons. Hold for 1 second
to scroll a page at a time.
- Average
- Standard Deviation
- Minimum value
- Maximum value
To return to graph view or to exit press .
Shortcut:
To exit press (-)(+) buttons simultaneously.
Figure 1
Figure 2
7
Page 8

Print
-prints stored datasets and/or summary to the
optional IR printer or to a PC’s default Windows
printer via the optional USB cable and PosiSoft
software. Press (-)(+) simultaneously to cancel
printing.
Downloading Measurements Stored in Memory
Datasets stored in the instrument’s memory (in
batches) can be downloaded to a computer using
optional PosiSoft software and USB cable (pg. 12).
Datasets are not erased from memory after
downloading.
Auto Log
Automatically displays and records datasets at user
selected time intervals for unattended operation.
When selected, the Log Interval
menu will appear on the display
as shown.
Navigate using the (-) (+)
buttons. Press to select the
element in focus, then select
OK.
The instrument will display the Auto Log symbol
and will begin recording. An
audible tick sound will emit from
the instrument every few
seconds to indicate recording is
in progress. At each interval,
the displayed values update,
the LED flashes and the dataset
is stored into memory.
Recording will continue until memory is full, the
instrument loses power, or the user turns off Auto
Log.
8
Page 9

NOTE:
To conserve battery life, displayed values
only update at the Log Interval. The last recorded
values will remain “frozen” on the display until the
next interval values have been stored.
Recorded datasets are stored into the currently
opened batch. If no batch is open, a new batch will
be created. Datasets are recorded regardless of the
state of the Smart Trend Indicators (see pg. 4).
To turn off Auto Log, press the button and hold
until the next tick sound. A final dataset will be stored
in memory and the current batch will remain open.
Recorded datasets can be viewed on the LCD,
viewed graphically for quick trend analysis on-site
(see pg. 7) or downloaded to a printer or PC.
Downloading to a PC requires optional PosiSoft
Software (pg. 12).
NOTES:
-It is recommended that fresh alkaline batteries be
installed prior to an extended Auto Log.
-Auto Log works best with optional Magnetic Surface
Temperature kit (see pg. 11)
-If memory becomes full, or the instrument loses
power and shuts off, all previously stored readings
will remain in memory.
Alarm
When tick box is checked, the
instrument will alert the user
when the surface temperature
is less than 3°C (5°F) above
the dew point temperature (
value). According to ISO 85024 and ASTM D3276, steel surfaces should generally be 3°C (5°F) above the dew point when painting.
The instrument will alert the user with an audio tone
and the LCD screen will reverse (see above) when
conditions may be unsuitable for painting.
9
9
Page 10

Setup Menu
Setup Menu
Setup
Reset
Reset restores factory settings and returns
the instrument to a known, out-of-the-box
condition. It is handy when you want to “start all
over”. The following occurs:
- all batches are closed and stored datasets are
erased.
- menu settings are returned to the following:
A more thorough Reset can be performed by holding
the (+) button when the instrument is powered
down until the Reset symbol appears. It
performs the same function as a menu Reset with
addition of Units = °C, and Language = English.
NOTE:
Memory = OFF Alarm = ON
Date and Time are not affected by any Reset.
Units
This menu button converts the display and all stored
datasets from Celsius to Fahrenheit or vice versa.
Set Clock
All batches are date-stamped when created, and all
datasets are time-stamped (24 hour format) when
stored into these batches. It is therefore important to
keep both the date and time current using this menu
button. Alternatively, the date and time can be
updated when the instrument is connected to the
optional PosiSoft software (pg. 12).
Flip Display
This option causes the display to rotate 180°. Ideal
for right-side-up viewing in any position.
Shortcut:
The (-) button flips the display.
10
Page 11

vailable Options
AAvailable Options
Magnetic Surface Temperature Kit
Allows the instrument and surface temperature
probe to be conveniently attached onto steel
structures for hands-free recording. Ideal for
unattended data logging during the work shift and
overnight.
Interchangeable
lower unit
(push to disconnect)
Magnetic surface
temperature
probe
Kit Includes:
-Interchangeable lower unit with built-in air tempera-
ture/humidity sensor and a K-type connector that
accepts the magnetic surface temperature probe.
-Magnetic surface temperature probe with armored
cable and locking device to prevent accidental
disconnection from the instrument during
unattended operation.
-Additional rubber holster with magnetic clip to
attach the instrument body onto steel structures.
-PosiSoft Software and USB cable
-Durable, hard shell carrying case
-Certificate of Calibration
11
Page 12

This lower unit accepts other optional K-type
thermocouple probes including:
Hand-held Surface Temperature Probe
-for spot checking hard-to-reach surfaces
Self-adhering Surface Temperature Probe
-sticks to solid materials including aluminum,
wood, concrete, etc. Ideal for unattended
monitoring.
Liquid Temperature Probe
-general purpose probe with stainless steel shaft
PosiSoft® for Windows®analysis software
exported to a document or spreadsheet.
PosiSoft also allows climatic values to be transferred
live to an FTP (File Transfer Protocol) site. Ideal for
viewing climatic conditions from a remote location.
Downloads stored datasets to a PC
with included USB cable. Allows entry
of notes and annotations, prints
histograms and basic charts,
manages data, and datasets can be
AC Power Cable
Provides continuous operation. Ideal
for extended Auto Log use.
Portable IR Printer
Receives data via wireless invisible
infrared beam. Battery operated.
Ideal for use in the field or shop floor.
12
Page 13

roubleshooting
TTroubleshooting
When the surface temperature probe is not on a
surface, Air Temperature and Surface Temperature
appear to be different:
Under normal conditions with the surface probe in air
Ta and Ts should be within the combined tolerance
of each sensor (typically 1°C). It is possible for the
difference to be larger if the surface probe has
recently been in contact with surfaces that are at a
different temperature than air.
RH value is slow to st
abilize:
If the probe is exposed to a very low humidity for an
extended time period and then placed in a high
humidity environment the displayed Relative
Humidity (RH) may appear to respond slowly. Allow
the probe to stabilize 30 minutes for a change of RH
greater than 50%. It may take longer if the probe
was left at low RH for several months. To increase
response time soak the sensor in a damp face cloth
overnight to recondition the RH sensor.
Surface T
emperature reads much higher than expected:
The probe tip may be dirty or damaged. Clean the
probe tip by soaking in water or solvent. If Ts continues to read high then return the probe for service.
Surface temperature value does not agree with expect
ed surface temperature or surface temperature probe is
slow to respond:
In some cases the surface being measured is very
rough and a good thermal connection from the probe
tip to the surface is not possible. If possible place a
small drop of water on the surface and then place
the probe tip into the water drop. Extremely quick
and accurate results can be obtained in this manner.
-
13
Page 14

Changing The Batteries
Changing The Batteries
The battery icon displays four bars with fresh
alkaline batteries installed. As the batteries weaken,
the number of bars will be reduced. When the batteries become very weak the Power Warning
image will display and the instrument
will automatically power-down. To
maintain user settings and stored
measurements, the batteries must be
replaced. USE ONLY “AAA” ALKALINE
BATTERIES
This image appears if the memory of the
instrument has become corrupt. This can
occur in the event that the batteries were removed
while the instrument was powered-on and was not
able to self power-down. If this message appears it
will be followed by a full reset. All readings in
memory will be erased and instrument settings will
be reset to "out-of-the-box" settings.
NOTES:
To retain all user settings and stored memory
readings, only replace the batteries after the instrument has automatically powered-down.
-Nickel-cadmium and nickel-metal hydride rechargeable batteries will work but the instrument may
appear to have weak batteries.
Power Warning
14
Page 15

Returning for Service
Returning for Service
Before returning the instrument for service…
1.Install new Alkaline batteries in the proper
alignment as shown within battery compartment.
2.Examine the surface temperature probe tip for dirt
or damage.
3.Perform a Reset (pg. 10)
If you must return the instrument for service,
describe the problem fully and include measurement
results, if any.
echnical Dataa
TTechnical Dat
Conforms to: ISO 8502-4, BS7079-B and ASTM D3276
Range Accuracy Resolution
Surface
Temperature
Air
Temperature
Humidity
Operating
Range
Instrument body: Dimensions: 178 x 64 x 31 mm (7" x 2.5" x 1.2")
Battery Life: 100 hours continuous; 80 hours Auto Log
-40° to 80° C
80° to 190° C
-40° to 175° F
175° to 375° F
-40° to 80° C
-40° to 175° F
0 to 100% ±3 % 0.1 %
-40° C to +80° C
-40° F to +175° F
Weight: 185g (6.5 oz) without batteries
±0.5° C
±1.5° C
±1° F
±3° F
±0.5° C
±1° F
0.1° C
0.1° C
0.1° F
0.1° F
0.1° C
0.1° F
15
Page 16

Certification
Certification
All PosiTector DPM instruments ship with a
Certificate of Calibration. For organizations with recertification requirements, instruments may be
returned at regular intervals for calibration.
DeFelsko recommends that customers establish
calibration intervals based upon their own
experience and work environment. Based on our
product knowledge, data and customer feedback, a
one year calibration interval from either the date of
calibration, date of purchase, or date of receipt is a
typical starting point.
Limited W
Limited W
DeFelsko's sole warranty, remedy, and liability are
the express limited warranty, remedy, and limited
liability that are set forth on its website:
This manual is copyrighted with all rights reserved and may not be reproduced or
transmitted, in whole or part, by any means, without written permission from
DeFelsko Corporation.
DeFelsko, PosiTector and PosiSoft are trademarks of DeFelsko Corporation
registered in the U.S. and in other countries. Other brand or product names are
trademarks or registered trademarks of their respective holders.
Every effort has been made to ensure that the information in this manual is
accurate. DeFelsko is not responsible for printing or clerical errors.
ELECTROMATIC
E Q U I P M E N T C O., I N C.
arranty
arranty
and Limited Liability
and Limited Liability
© DeFelsko Corporation USA 2007. All Rights Reserved
, Sole Remedy
, Sole Remedy
600 Oakland Ave., Cedarhurst, NY 11516–U.S.A.
TEL: 516-295-4300
• FAX: 516-295-4399
16
 Loading...