

Page 1

NOTES
TABLE OF CONTENTS
1.0 Measuring procedure …………………………………………………. 2
2.0 Selection of calibration curve ………………………………………… 3
3.0 Determination of the reference water content ……………………… 3
4.0 Contact-free temperature sensor ……………………………………... 4
5.0 Calibration curves …………………………………………………….. 4
6.0 List of calibration curves ……………………………………………… 4
7.0 Design of the device ………………………………………………….. 5
8.0 Device maintenance instructions ……………………………………. 5
9.0 Menu level overview ………………………………………………….. 6
10.0 Checking the calibration ……………………………………………… 7
11.0 Calibration ……………………………………………………………… 8
12.0 Changing the batteries ……………………………………………….. 9
13.0 Exemption from liability ………………………………………………. 9
14.0 Transfer saved data to the PC ………………………………………. 10
15.0 Print saved data (logs) ……………………………………………….. 11
16.0 Technical data …………………………………………………………. 12
17.0 Common reasons for incorrect measurements ……………………. 13
18.0 Warranty ………………………………………………………………... 14
Electromatic Equipment Co., Inc
-16-
Electromatic Equipment Co., Inc
-1-
Page 2
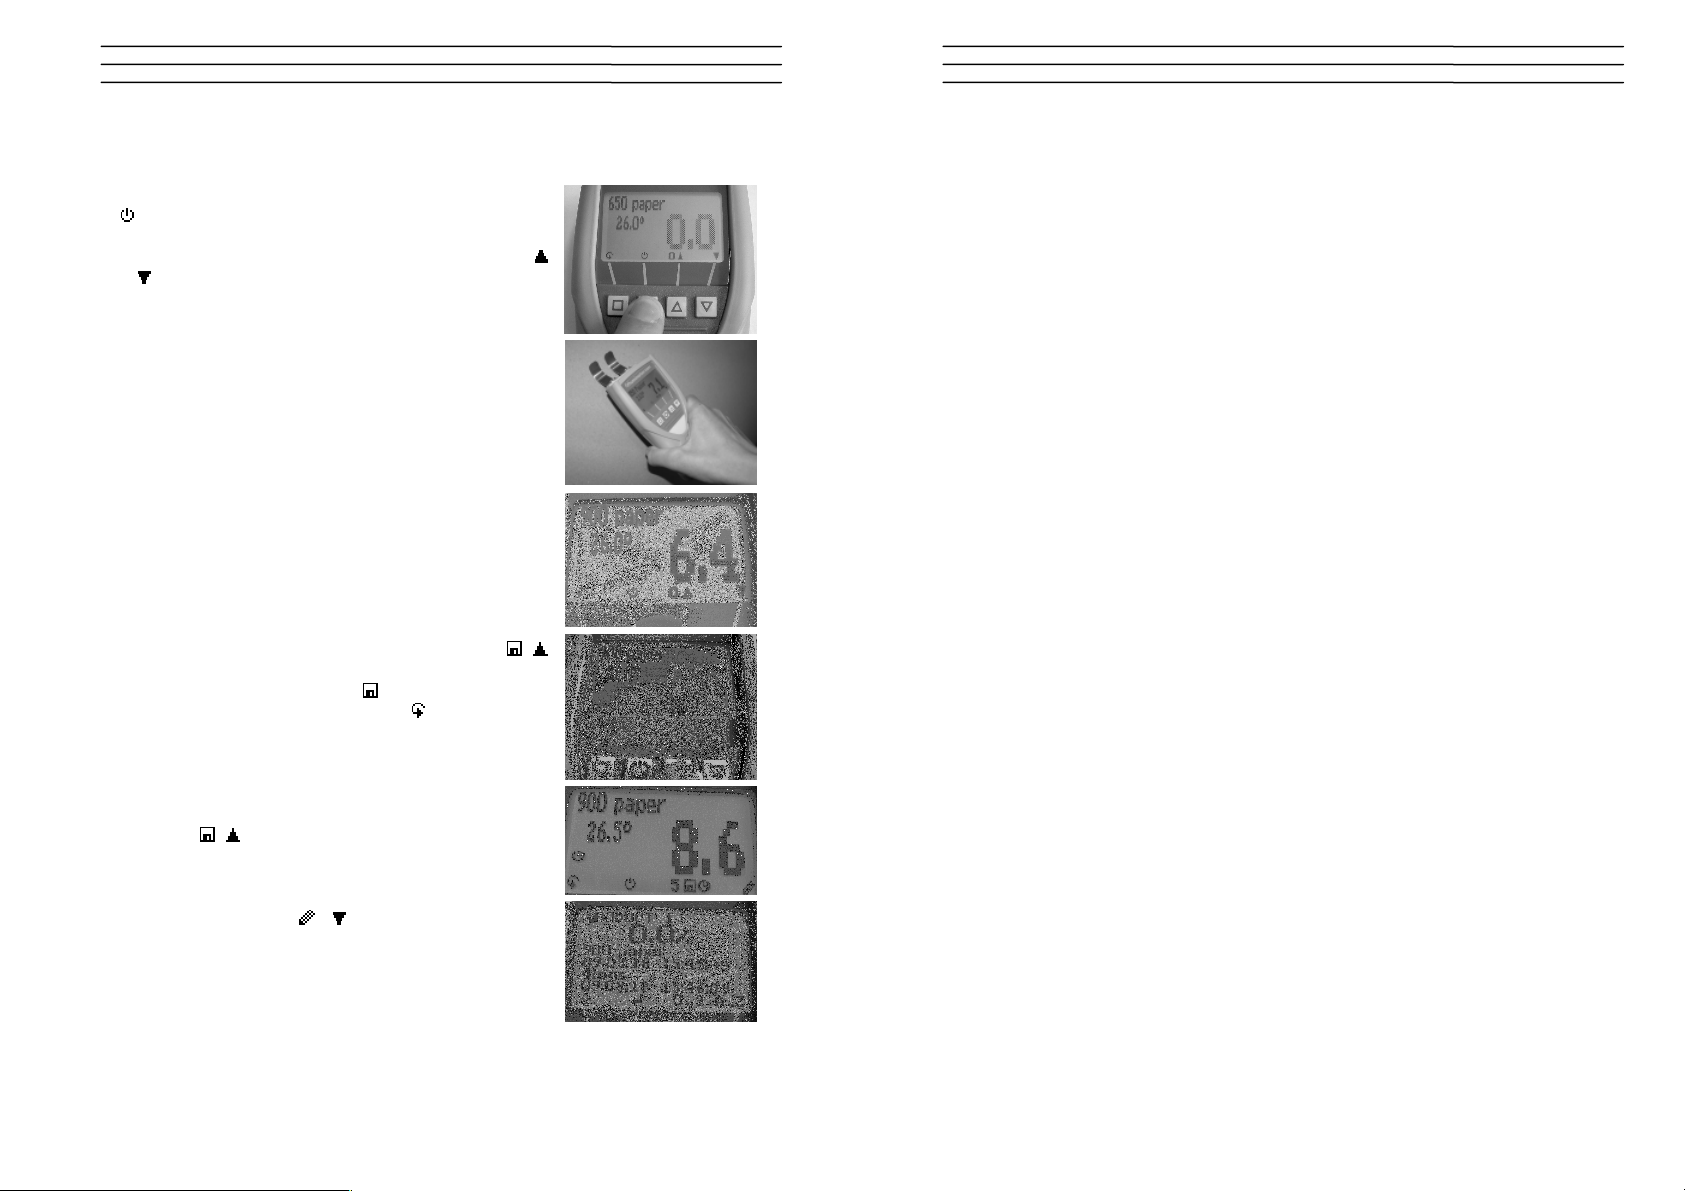
1.0 MEASURING PROCEDURE
1. Switch on the device by pressing the power button
(
) for 3 sec.
2. Select the right calibration curve using the buttons
or
. The name of the calibration curve is shown at
the top of the display. Please see the instructions for
selection of calibration curve below.
3. Hold the device in one hand and press it onto the
paper roll (at the breadth) resp. onto the paper pile
with gentle compacting pressure (1,0 kg). For
measurement at running rolls the PM4 (contactfree temperature measurement) is necessary!
4. Now the display shows the water content. The
temperature is shown on the left.
5. To save the results in the save menu press the
(
button). The storage was successful when the
number in front of the symbol
the store menu please press the left (
increased. To reach
) button.
6. The menu level „Options -> Log time” offers the
possibility to activate the menu item „3 sec.“. If you
press the
( button) in the measuring window after
activation, the device will save a measuring value
every 3 seconds.
7. Pressing the button ( button) completes the
saving series. Now you can name the saved values
using the arrow keys (supplier 1).
NOTES
Electromatic Equipment Co., Inc
-2-
Electromatic Equipment Co., Inc
-15-
Page 3

18.0 WARRANTY
−=Mn
Electromatic Equipment Co., Inc. (Electromatic) warrants to the original purchaser
that this product is of merchantable quality and confirms in kind and quality with the
descriptions and specifications thereof. Product failure or malfunction arising out of
any defect in workmanship or material in the product existing at the time of delivery
thereof which manifests itself within one year from the sale of such product, shall be
remedied by repair or replacement of such product, at Electromatic’s option, except
where unauthorized repair, disassembly, tampering, abuse or misapplication has
taken place, as determined by Electromatic. All returns for warranty or non-warranty
repairs and/or replacement must be authorized by Electromatic, in advance, with all
repacking and shipping expenses to the address below to be borne by the
purchaser.
THE FOREGOING WARRANTY’S IN LIEU OF ALL OTHER WARRANTIES,
EXPRESSED OR IMPLIED, INCLUDING BUT NOT LIMITED TO, THE
WARRANTY OF MERCHANTABILITY AND FITNESS FOR ANY PARTICULAR
PURPOSE OR APPLICATION. ELECTROMATIC SHALL NOT BE RESPONSIBLE
NOR LIABLE FOR ANY CONSEQUENTIAL DAMAGE, OF ANY KIND OR
NATURE, RESULTING FROM THE USE OF SUPPLIED EQUIPMENT, WHETHER
SUCH DAMAGE OCCURS OR IS DISCOVERED BEFORE, UPON OR AFTER
REPLACEMENT OR REPAIR, AND WHETHER OR NOT SUCH DAMAGE IS
CAUSED BY MANUFACTURER’S OR SUPPLIER’S NEGLIGENCE WITHIN ONE
YEAR FROM INVOICE DATE.
Some State jurisdictions or States do not allow the exclusion or limitation of
incidental or consequential damages, so the above limitation may not apply to you.
The duration of any implied warranty, including, without limitation, fitness for any
particular purpose and merchantability with respect to this product, is limited to the
duration of the foregoing warranty. Some states do not allow limitations on how long
an implied warranty lasts but, not withstanding, this warranty, in the absence of such
limitations, shall extend for one year from the date of invoice.
Electromatic Equipment Co., Inc.
600 Oakland Ave. Cedarhurst, NY 11516 - USA
Tel: 1-800-645-7330 / Tel: 516-295-4300 / Fax: 516-295-4399
Every precaution has been taken in the preparation of this manual. Electromatic assumes no
responsibility for errors or omissions. Neither is any liability assumed for damages resulting
from the use of information contained herein. Any brand or product names mentioned herein
are used for identification purposes only, and are trademarks or registered trademarks of their
respective holders.
2.0 SELECTION OF CALIBRATION CURVE
Due to the countless number of paper types there is no standardised allocation of
calibration curves. The different calibration curves refer to the different densities of
paper or paper rolls.
The list of calibration curves below shows suggestions for paper types.
To ensure the best accuracy of your measurement you have to carry out a
comparison measurement using your online moisture measuring system or by kilndrying (according to DIN 287) once.
1. Measure the water content of your paper (on the roll or the pile) using all
calibration curves that offer realistic results and write down the measuring
results of the different calibration curves.
2. Now please note the effective water content determined by your online
measurement system or carry out a reference measurement according to EN
ISO 287.
3. Compare the determined reference water content with the measuring results of
the different calibration curves. Use the calibration curve with the measuring
result nearest to the reference water content. Info: The name of the calibration
curve can be modified to your specific paper name!
3.0 DETERMINATION OF THE REFERENCE WATER CONTENT
The humimeter PM3 determines the water content, which means that it calculates
the moisture referred to the total mass (EN ISO 287):
WG
MtMn
100% ×
Mn: Mass of the sample before drying
Mt: Mass of the dried sample
Electromatic Equipment Co., Inc
-14-
Electromatic Equipment Co., Inc
-3-
Page 4
4.0 CONTACT-FREE TEMPERATURE SENSOR
name
paper type
density
600 paper
650 paper
700 paper
750 paper
800 paper
850 paper
900 paper
950 paper
1000 paper
1050 paper
1100 paper
1200 paper
1300 paper
1400 paper
1500 paper
1600 paper
Empty 1700
Empty 975
Empty 550
reference
The back side of the humimeter PM4 contains
an embedded temperature sensor for the
contact-free temperature measurement below
the sensor. This ensures the determination of
the temperature of the product within seconds
and consequently the temperature
compensation of the displayed water content.
The sensor must not be covered by a hand or
any other object!
5.0 CALIBRATION CURVES
Very low density paper 600 kg/m³
Low density paper 650 kg/m³
Low density paper 700 kg/m³
Fluting, Schrenz 750 kg/m³
Newsprint paper 800 kg/m³
Kraftliner brown 850 kg/m³
Kraftliner White Top, Testliner brown 900 kg/m³
Testliner white, copy paper 950 kg/m³
Copy paper, LWC raw 1000 kg/m³
Copy paper calendered 1050 kg/m³
Copy paper calendered 1100 kg/m³
LWC calendered 1200 kg/m³
Flysheet paper 1300 kg/m³
Flysheet paper 1400 kg/m³
Flysheet paper high density 1500 kg/m³
Flysheet paper very high density 1600 kg/m³
For creation of customer calibration curve
For creation of customer calibration curve
For creation of customer calibration curve
! Only for checking the instrument !
6.0 LIST OF CALIBRATION CURVES
By pressing one of the arrow keys in the measuring
window for approx. 3 seconds a list of all available
calibration curves opens. Now you can select your
desired curve using the arrow keys and confirm by
pressing
.
17.0 COMMON REASONS FOR INCORRECT MEASUREMENTS
• Wrong calibration curve
Double-check the correct selection of the calibration curve before measuring.
The calibration curve „reference“ must NOT be used.
• Inadequate thickness of the paper pile
A single sheet of paper must NOT be measured. Make sure that the paper pile
below the steel clamps has a thickness of at least 100 mm.
• Electro conductive material
Every metallic object as well as electro conductive packing material e.g. paper
coloured by soot or wire has a negative effect on the accuracy of your
measurement. Make sure that in an area of 20 cm below the sensor steel
clamps there is no such material.
• Product temperature out of application range
The application range is between 0 and +60°C.
• Discrepancy in temperature between device and material
Please ensure that the device and the material under test are being stored at
nearly the same temperature before measuring. A high temperature difference
has a negative effect on the stability of the measurement results.
• Measurement at the front side
A measurement at the front side of a paper roll will bring different measuring
results. For that you have to select a different calibration curve.
• Bended steel clamps
If the steel clamps (measuring area) are bended you might get wrong measuring
results.
Please note:
• After measuring at the running paper roll for a longer period the steel clamps will
get hot – don´t touch! => risk of getting burned!
• Measuring fine paper at the running roll may cause pressure marks on the paper
=> for possible damages at the paper we refuse any liability.
Electromatic Equipment Co., Inc
-4-
Electromatic Equipment Co., Inc
-13-
Page 5

16.0 TECHNICAL DATA
(backside)
calibration curve
Measuring depth 50 mm
Minimum material thickness 100 mm
Resolution 0,1% water content; 0,1°C; 0,3°F
Measuring range 1 to 25% water content
Angle temperature sensor 90°
Paper temperature 0°C to +80°C; 32°F to 176°F
Surrounding temperature 0°C to +50°C; 32°F to 122°F
(for measuring device)
Storage temperature -20°C to +60°C; 32°F to 122°F
(for measuring device)
Temperature compensation automatically
Memory for measured values approx. 10.000 values
Menu languages German, English, French, Italian, Spanish,
Russian
Power supply 4 pcs. 1,5 Volt AA Alkaline batteries
(for approx. 900 measurements)
Switch off time after approx. 4 minutes
Power consumption 60 mA (with display lighting)
Display 128 x 64 matrix display, with LED backlighting
Dimensions 182 x 75 x 54 mm (with rubber housing)
Weight 340g (incl. accu and rubber housing)
Protection class IP 40
Scope of supply humimeter PM4, accumulator, USB data
interface, contact-free temp. sensor, plastic
case, proof plate, protective rubber housing, user
manual
Options Mobile printer
7.0 DESIGN OF THE DEVICE
steel clamp
(sensor area)
name of
calibration curve
measuring value
temperature
rolling menu
button
ON-OFF button
8.0 DEVICE MAINTENANCE INSTRUCTIONS
To provide a long life of your device please do not expose it to strong mechanical
loads or heat e.g. dropping it or direct sunlight exposure.
The instrument is not rainproof. Keep it in dry areas. Clean the device only with a
dry cloth. For cleaning the steel clamps you can also use alcohol. Please do not
deform the steel clamps.
Do not touch the contact-free temperature sensor. Clean it by blowing, but do
not use compressed air.
If the device is not used for a longer period (2 months) or when the batteries are
empty, they should be removed to prevent a leakage of the battery acid.
USB Socket
measuring value
water content
changing the
protective rubber
housing
(removable)
batteries slot
Electromatic Equipment Co., Inc
-12-
Electromatic Equipment Co., Inc
-5-
Page 6

9.0 MENU LEVEL OVERVIEW
Keypad symbols
OK
Type selection menu
Next calibration curve
Previous calibration curve
Power off (3 sec.)
Store menu
Watch last saved data
Save new value
Power off (3 sec.)
Main menu
Data storage
Manual logs
Auto logs
Clear logs
Print logs
Last logs
All logs
Clear logs
Send logs
Manual Logs
Auto logs
Clear Logs
Options
Switch upper
Switch lower
Open this menu / Enter
Overview main menu
Measuring window:
data
data
Menu:
Options
Date / Time
Log Time
Language
Unlock
°C / °F
Calibrate
o Userlevel
BL On Time
Auto Off Time
Materialcalib.
Password
Reset
SN.
Logo
TM
Admin
Rolling Menu
Power ON / OFF
Switch upper
Switch lower
Save
Hold
Watch saved
Add supplier’s
Enter
Switch upper
Switch lower
Back
Enter numbers
Enter letters
Next or right
Left
Yes
No
Shift
15.0 PRINT SAVED DATA (LOGS)
To print your saved data, connect the device to the printer
using the printer cable that was delivered with your
device. Carefully loose the protection cap on the
humimeter PM3. At first plug in the side of the connector
with the close plastic casing at the humimeter PM3. Then
switch on the device.
Not till then the other side of the cable has to be plugged
in at the printer. Switch on the printer by pressing
the green LED is blinking. If it does not blink, please
change the batteries and try again.
Press the
menu (see image on the right). Select „Print Logs“ and
confirm by pressing
Now you can select if you want to print the last saved
measuring series or all saved measuring series (logs).
Confirm by pressing
printed out now.
To save paper, please think of clearing the data storage
regularly.
Emission ratio
The infrared temperature measurement depends on the
emission ratio of the measured product. By default, the
humimeter PM4 contains the emission ratio of paper
(0.950). For changing this value, please proceed as
follows:
Press the
Choose the menu item “Options” and confirm by pressing
. Then choose the item “emission ratio” and confirm
with
button at your humimeter until you reach the
.
again. The selected logs are
key as long as you reach the main menu.
again.
. Now
Electromatic Equipment Co., Inc
-6-
Electromatic Equipment Co., Inc
-11-
Page 7

14.0 TRANSFER SAVED DATA TO THE PC
To send your saved logs to the PC, connect the humimeter device to your PC using
the USB cable that was delivered with your device. Carefully loose the protection
cap on your humimeter and plug in the USB mini B connector. The bigger connector
has to be connected to a USB slot on your PC.
Start the LogMemorizer software on your PC and switch
on your humimeter PM4.
The data transfer can be started on your humimeter or on
the software:
Starting the data transfer on the humimeter:
Press the
key until you reach the menu (see image on
the right). Then select „Send Logs“ and confirm by
pressing the
confirm by pressing
key. Now select „Manual Logs“ and
again. All saved logs will be sent to
your PC.
Starting the data transfer on your PC:
Press the button „remote control“ in the LogMemorizer
software. A drop-down menu with several options opens
(see image below).
For transferring the data you can select „Import last
manual log“ (the last saved measuring series is
transferred) or „Import all manual logs“ (all saved logs are
transferred).
If you click on one of these menu items, the transfer starts
immediately.
For the basic adjustments of the software please look
through the instructions on the LogMemorizer CD.
10.0 CHECKING THE CALIBRATION
We recommend to check the calibration of your humimeter PM4 every 4 weeks,
using the proof plate delivered with the device. For this check the device has to
show a temperature between 18,0 and 24,0°C.
Switch on the instrument and select the calibration curve
„reference“ using the arrow keys. Hold the humimeter
PM4 in one hand and press it onto the grey proof plate
(compacting pressure of 1,0kg). Make sure that you hold
the device horizontally and the steel clamps are
positioned at least 1 cm from the edge of the proof plate.
The shown measuring value should range between 18.5 and 20,5. If the shown
value is out of this range, you have to carry out a calibration (see instructions
below).
Electromatic Equipment Co., Inc
-10-
Electromatic Equipment Co., Inc
-7-
Page 8

11.0 CALIBRATION
By a zero point adjustment you can correct a too high deviation at the calibration
check.
For that please proceed as follows:
Press the left key twice to reach the menu level. Navigate
to the menu item „Options“ using the arrow keys. Confirm
by pressing the
button.
Select the menu item „Calibrate“ using the arrow keys
and confirm by pressing
.
This menu item has to be unlocked. For that you have to enter the 4-digit serial
number of your humimeter PM4. You can find the serial number on the top right
edge of the display a short time after switching on the instrument, or on the sticker in
the battery slot.
Press the third button as long as the black bar stands on
the first digit of the serial number. After a waiting time of a
few seconds the device accepts the entered digit. Now
the other 3 digits have to be entered. When the 4-digit
number has been entered correctly (see picture), press
the
button to confirm.
Hold the humimeter PM4 in one hand up in the air and
make sure that nothing stands behind the steel clamps
(distance min. 200 mm). Now press the second button
(
) with one finger.
The calibration procedure will take a few seconds. During
that time, the instrument has to be held up in the air and
the measuring field (steel clamps) must NOT be touched.
The device is ready when the shown picture on the right
disappears automatically.
12.0 CHARCHING THE BATTERIES
Connect the provided USB cable to the device and the
other end of the cable to a PC or another USB charging
adapter. It takes about 6 hours to charge the completely
discharged batteries. Please make sure that the
temperature during the charging process is between
0°C and 45°C , as otherwise the batteries may be
destroyed.
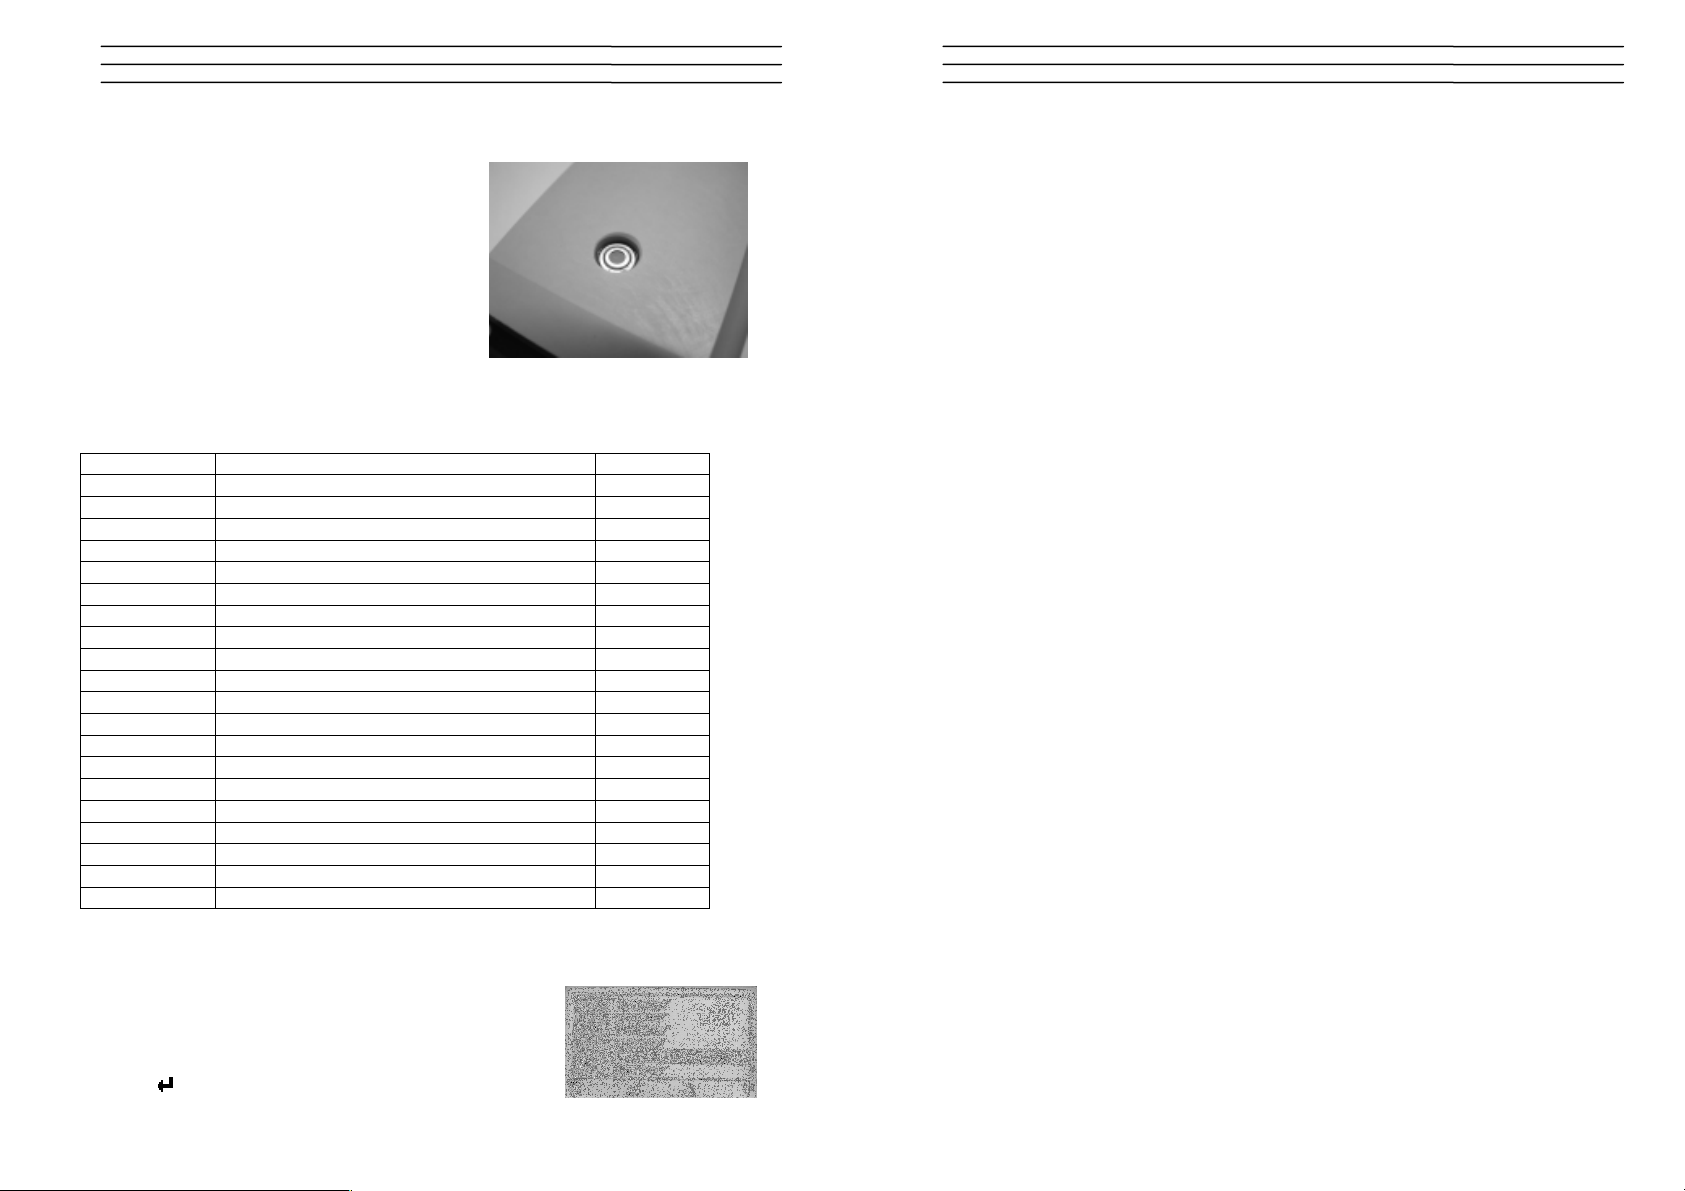
Hardware Reset
In case that your humimeter device does not respond to any
key press or cannot be switched on, there can be carried
out a hardware reset directly by the customer. Please note:
the accumulator must be charged before your start the
following procedure:
Slide a pair of tweezers or a small screw driver below the
cover cap. If your tool stick, try again at another position
(the arrows on the image show the positions). Do not use
any force. Open the cover cap and push the push button
using your tool. Now the humimeter will restart. Fix the
cover cap again.
If it will not restart, please contact your technical support.
13.0 EXEMPTION FROM LIABILITY
For miss-readings and wrong measurements and of this resulting damage we refuse
any liability. This is a device for quick determination of moisture. The moisture
depends on multiple conditions and multiple materials. Therefore we recommend a
plausibility check of the measuring results. Each device includes a serial number
and the guarantee stamp. If those are broken, no claims for guarantee can be
made. In case of a faulty device, please contact Checkline Europe.
Electromatic Equipment Co., Inc
-8-
Electromatic Equipment Co., Inc
-9-
Page 9

PAPER ROLL MOISTURE METER
PM4
OPERATING INSTRUCTIONS
 Loading...