

Page 1

TABLE OF CONTENTS
1.0 General information ………………………………………………….. 2
2.0 Unlock the humimeter ………………………………………………. 2
3.0 Change the calibration curve name ……………………………….. 3
4.0 Take values ………………………………………………………….. 3
5.0 Temperature compensation ………………………………………… 5
6.0 Measuring range …………………………………………………….. 6
7.0 Completion …………………………………………………………… 6
8.0 Technical Support …………………………………………………… 6
9.0 Warranty …………………..………………………………………… 7
Electromatic Equipment Co. Inc.
-8-
Electromatic Equipment Co. Inc.
-1-
Page 2
1.0 GENERAL INFORMATION
In the device different calibration curves are stored. If the material to be
measured does not conform to any of the stored curves, a new calibration curve
can be created by the customer himself. In the following pages you will find
instructions for creating your own calibration curve.
Depending on the material that you want to test it is up to you to select the
appropriate drying method and moisture determination.
In principle it the setting of your own curve is done assigning a moisture
percentage to a reference voltage that is measured by the gauge.
2.0 UNLOCK THE HUMIMETER
In this menu, the hidden functions (grey letters) of the device can temporarily be
unlocked until the next turn-off of the device. You just have to enter the superuser password.
To use this protected features, you have to enter the four digit password.
Provided by the factory, this password is the serial number. The four digit serial
number is shown in the menu item “status” or when the device is booting.
How to enter the menu point „unlock“:
Press the “Rolling menu” button as long as you enter the main menu.
Navigate to the menu item „options“ and press the
menu item „unlock“ and press the
button again.
button. Navigate to the
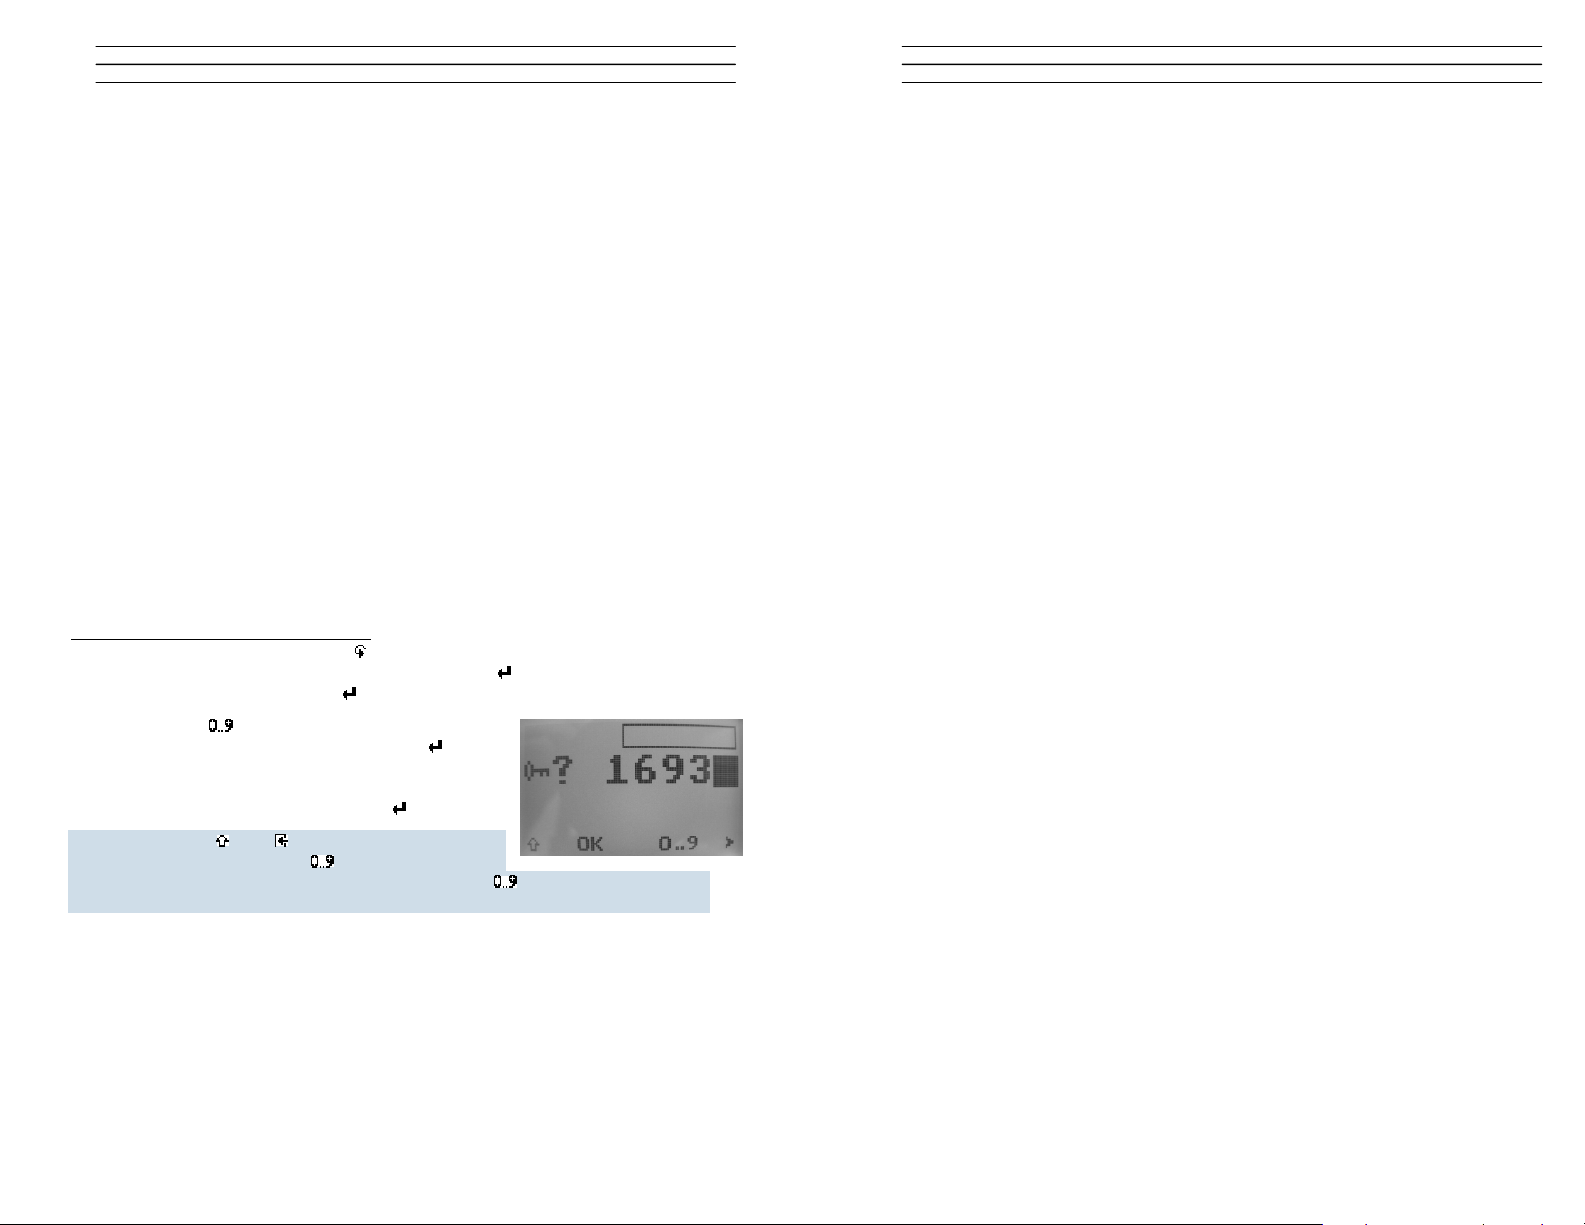
Press the button as long as you have reached the
right number and affirm this by pressing the
button.
The character will be affirmed and the cursor jumps to
the next position. Enter the four numbers of your
password and confirm it by pressing the
button.
Press the button and successively to abort the
password check. The button also contains a fast
forward function, starting when you press the button for a few seconds. The
character is affirmed after a few seconds automatically.
9.0 Warranty
Electromatic Equipment Co., Inc. (Electromatic) warrants to the original
purchaser that this product is of merchantable quality and c onfirms in kind and
quality with the descriptions and specifications thereof. Product failure or
malfunction arising out of any defect in workmanship or material in the product
existing at the time of delivery thereof which manifests itself within one year
from the sale of such product, shall be remedied by repair or replacement of
such product, at Electromatic’s option, except where unauthorized repair,
disassembly, tampering, abuse or misapplication has taken place, as
determined by Electromatic. All returns for warranty or non-warranty repairs
and/or replacement must be authorized by Electromatic, in advance, with all
repacking and shipping expenses to the address below to be borne by the
purchaser.
THE FOREGOING WARRANTY’S IN LIEU OF ALL OTHER WARRANTIES,
EXPRESSED OR IMPLIED, INCLUDING BUT NOT LIMITED TO, THE
WARRANTY OF MERCHANTABILITY AND FITNESS FOR ANY PARTICULAR
PURPOSE OR APPLICATION. ELECTROMATIC SHALL NOT BE
RESPONSIBLE NOR LIABLE FOR ANY CONSEQUENTIAL DAMAGE, OF
ANY KIND OR NATURE, RESULTING FROM THE USE OF SUPPLIED
EQUIPMENT, WHETHER SUCH DAMAGE OCCURS OR IS DISCOVERED
BEFORE, UPON OR AFTER REPLACEMENT OR REPAIR, AND WHETHER
OR NOT SUCH DAMAGE IS CAUSED BY MANUFACTURER’S OR
SUPPLIER’S NEGLIGENCE WITHIN ONE YEAR FROM INVOICE DATE.
Some State jurisdictions or States do not allow the exclusion or limitation of
incidental or consequential damages, so the above limitation m ay not apply to
you. The duration of any implied warrant y, including, without limitation, fitness
for any particular purpose and merchantabilit y with respect to this product, is
limited to the duration of the foregoing warranty. Some states do not allow
limitations on how long an implied warranty lasts but, not withstanding, this
warranty, in the absence of such limitations, shall extend for one year fro m the
date of invoice.
Electromatic Equipment Co., Inc.
600 Oakland Ave. Cedarhurst, NY 11516 - USA
Tel: 1-800-645-7330 / Tel: 516-295-4300 / Fax: 516-295-4399
Every precaution has been taken in the preparation of this manual. Electromatic assumes
no responsibility for errors or omissions. Neither is any liability assumed for damages
resulting from the use of information contained herein. Any brand or product names
mentioned herein are used for identification purposes only, and are trademarks or
registered trademarks of their respective holders.
Electromatic Equipment Co. Inc.
-2-
Electromatic Equipment Co. Inc.
-7-
Page 3
6.0 MEASURING RANGE
V
In the menu item „Valid“ the measuring range of the calibration curve is defined.
A valid measuring value is shown in black in the measuring windo w. An invalid
measuring value is shown in grey and is blinking when the water content is out
of range.
This feature can be explained best by an example.
Wanted is a valid range from 16.0% up to 45.0% water content.
Enter the following values in the shown order:
Idx(1) Idx(2) Idx(3) Idx(4) Idx(5) Idx(6)
90.0% 45.1% 45.0% 16.0% 15.9% 0.0%
3 3 0 0 1 1
The measuring range should be defined within the area of the measured
samples!
Explanation:
between 0.0% und 15.9% the value is shown in grey invalid
between 16.0% und 45.0% the value is shown in black valid
between 45.1% und 90.0% the value is grey and blinks invalid
7.0 COMPLETION
If all values of the created calibration curve are stored in the humimeter device,
you can use the new calibration curve for measuring!
8.0 TECHNICAL SUPPORT
Checkline Europe BV
Dennenweg 225B
7545 WE Enschede
Tel: +31-53-4356060
Fax: +31-53-4333570
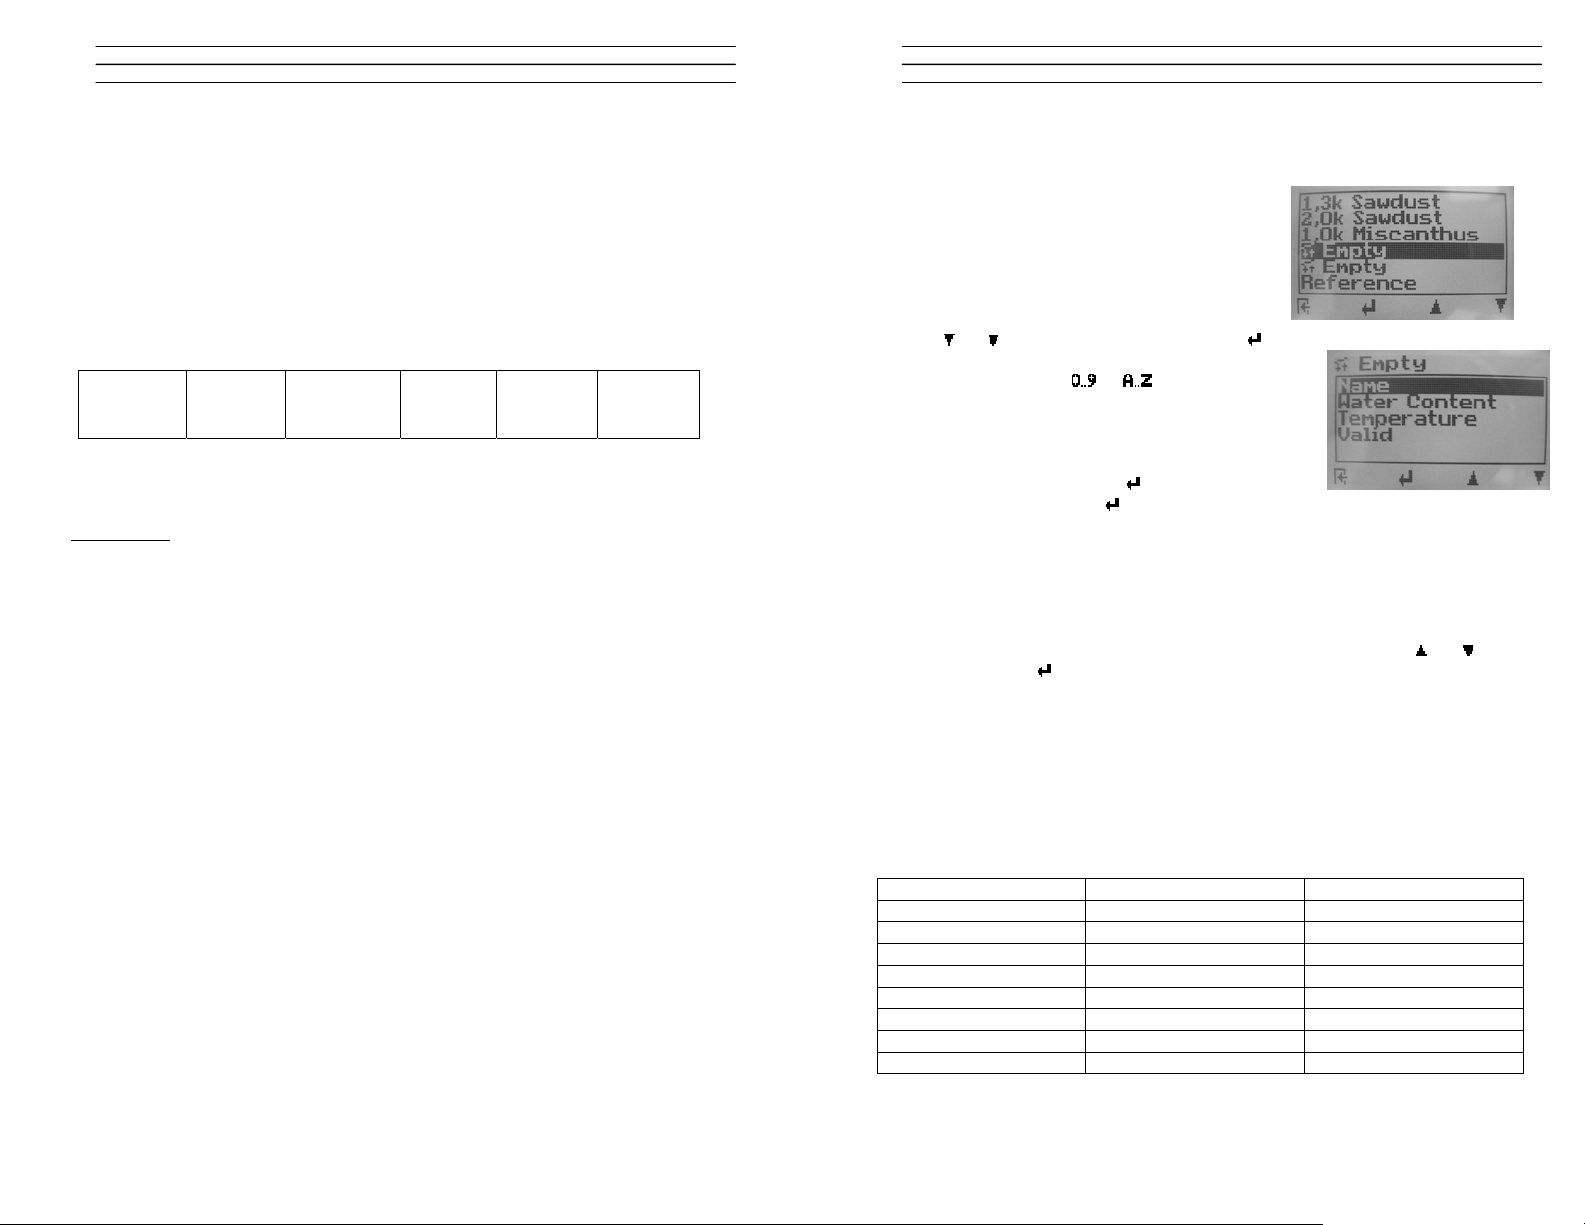
3.0 CHANGE THE CALIBRATION CURVE NAME
If the device is unlocked, the menu point
„Materialcalib.“ is available. A list with all
calibration curves is shown on the display!
Choose an “empty” calibration curve, or a curve
you do not need.
Choose the menu item “Name” by pressing the
buttons
name can contain up to ten characters. Enter the
name using the buttons or . The name should
consist of the filling quantity and the variety (e.g.
2,50k material). If you press the button for a few
seconds, the fast forward modus will be activated. If
the cursor is in the right position and shows the right
letter or character, press the
whole name by pressing the
4.0 TAKE VALUES
Select the menu item “water content” by pressing the buttons
confirm by pressing
There are 8 index points that make up the curve.
It is IMPORTANT that you do not change the first (1) and last index point
(8)!
These values set the measuring range of the gauge within a reasonable limit.
Another important point is that the index points start at the highest moisture
value and run down to the lowest moisture content value.
For example:
or and confirm by pressing the button. Your calibration curve
button. Confirm the
button.
.
Index point [ldx]
oltage Value [V] Moisture Value [%]
1 7.990 99.0
2 4.810 99.0
3 4.800 70.0
4 3.500 47.0
5 2.050 22.0
6 0.452 0.0
7 0.450 0.0
8 0.000 0.0
or and
Electromatic Equipment Co. Inc.
-6-
Electromatic Equipment Co. Inc.
-3-
Page 4

In order for you to create a curve you need to take several measurements of
material with different moisture contents.
You need to log the voltage and assign a moisture value to this voltage.
It is possible to do this live while taking a measurement by p[alcing the ga uge
on the material.
Then you have to press the right button
(„V“). By
pressing this button you transfer the voltage value of
the sample. If this was successful, you will jump
automatically to the next line. The actual calculated
water content has to be typed in by hand.
To save the values you have to leave the menu item
by pressing the shift button (
the symbol with the opened door (
) first, and afterwards
).
In case you have no moisture content value at the point you take this
measurement, it is best you create a list and enter the curve at a later point in
time.
Both values can be set manually.
There is a maximum of 16 index points available. Ho wever, as many calibration
points as possible should be affiliated.
With the final calibration curve you can measure up to the driest calibration
point you determinate. For example: lowest measured point: 22.0% => material
over 22.0% water content can be measured!
We recommend that the captured voltage and water contents are inscribed in a
graphic. Not linear points can be corrected. The values should be (as shown in
the example below) almost on a straight line.
V%
2,878 49,20
2,722 44,90
2,488 41,00
2,311 36,70
2,102 32,50
1,798 28,20
1,600 24,50
1,400 19,10
50,00
40,00
30,00
20,00
10,00
11,522,53
1,200 15,60
To save the values you have to leave the menu item by pressing the shift
button (
) first, and afterwards the symbol with the opened door ( ).
To be sure that all values are correct and in the right order, please double
check the whole values in the calibration curve!
5.0 TEMPERATURE COMPENSATION
For the temperature compensation a factor is specified by the manufacturer.
In almost all products the entered values will be correct. You do not have to
change this value in general!
If you however still need to determine some new values, please advance as
follows: To achieve a very precise factor take several pr obes of your sample
with exactly the same water content and pack them into air proof plastic bags
(or something else). Now you have to align the samples to different
temperatures. One sample at 20°C (68°F), a further at 5°C (41°F) and a third at
40°C (104°F). After the aligning you have to measure the three samples again.
IMPORTANT: Let your humimeter also align to the different temperatures.
Using the following calculation you can determinate the temperature
compensation coefficient. e.g.: You measure the sample with the humimeter at
20°C and get a value of 30% water content, and the sample at 5°C you
measure just 28%.
So you can calculate:
30
TK
28
So the factor is: 1.07 at 5°C
07.1
Electromatic Equipment Co. Inc.
-4-
Electromatic Equipment Co. Inc.
-5-
Page 5

Calibration Manual
PM3/PM4
OPERATING INSTRUCTIONS
 Loading...