

Page 1
CHECK•LINE
BY ELECTROMATIC
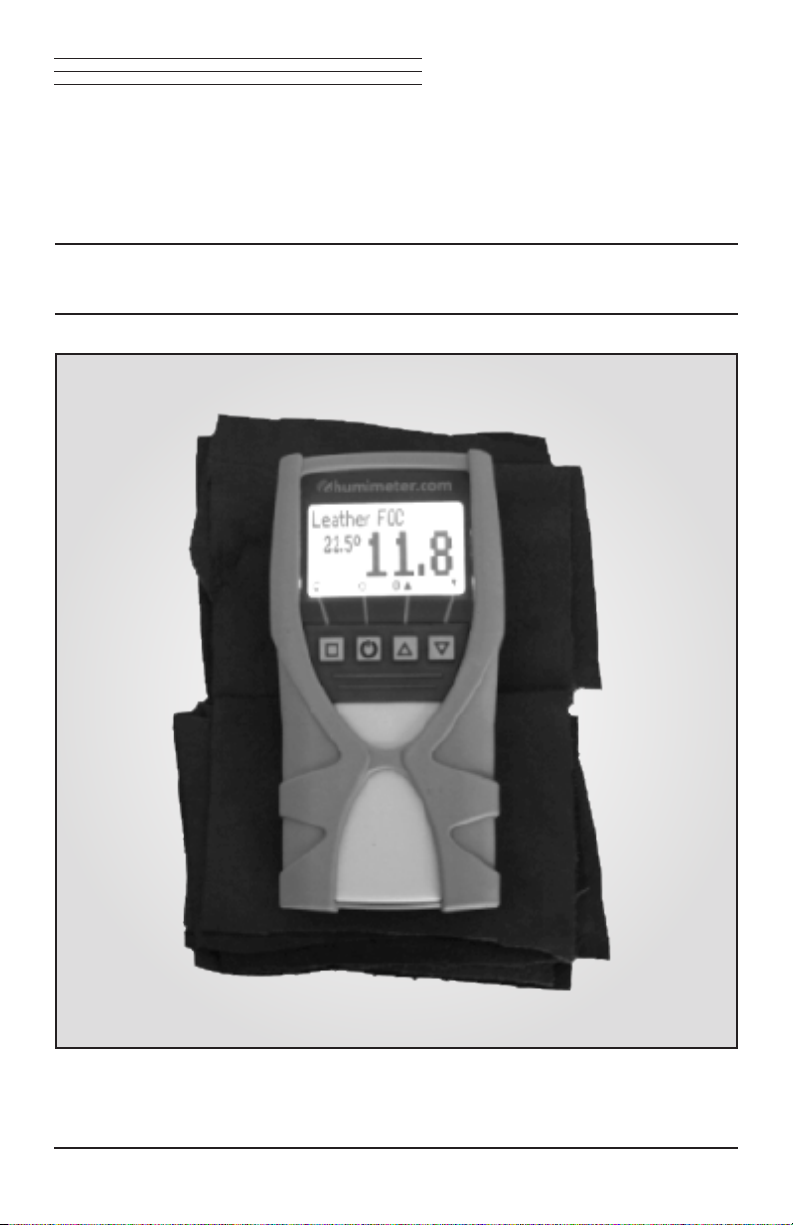
LM6
LEATHER MOISTURE METER
®
Operating Manual
Page 2

TABLE OF CONTENTS
1.0 Introduction ………………………………………………………..… ................... 2
1.1 Operation and handling
1.2 Measuring procedure
2.0 Calibration curves ……………….………………………………...… ................ 3
2.1 Selection of calibration curves
3.0 Determination of the reference water content ………………….… .......................... 4
3.1 Short description of norm DIN53304
4.0 Design of the device… ................................................................................................ 5
4.1 Menu
4.2 Key functions in the menu
5.0 Common reasons for incorrect measurements …….…….………..… ...................... 7
6.0 Looking after the instrument ………………………………..………… ................. 7
6.1 Exemption from liability
7.0 Changing the batteries ………………………………………………..… ................ 8
8.0 Calibration ………………………………………….……………………… ............ 9
8.1 Checking the calibration
8.2 Calibration procedure
9.0 Technical data ….…………………………………………………….… ................ 11
10.0 Warranty ………………………………………………………….…… .............. 12
0
–1 –
Page 3
1.0 INTRODUCTION
1.1 Operation and handling
Switching on: Press the button for 3 seconds.
Changing the calibration curve: or key.
Switching on the display lighting: Press the button briey; the lighting
switches off automatically after approx. 20 seconds. Pressing any key activates the
lighting again and prolongs the switch-off time to 4 minutes.
Switching off: Press the key for 5 seconds; the device will switch off after releasing
the key. After approx. 4 minutes the device will switch off automatically.
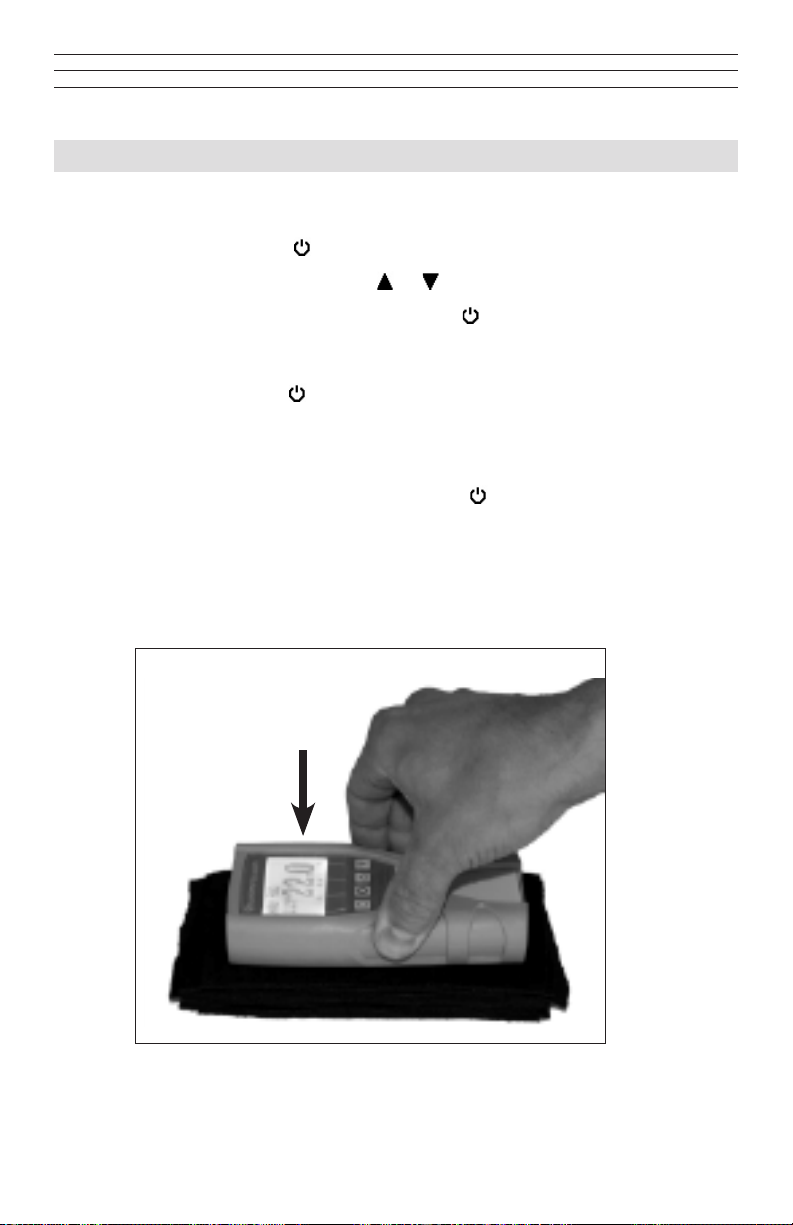
1.2 Measuring procedure
1. Switch on the humimeter LM6 by pressing the key for 3 seconds.
2. Select the appropriate calibration curve using the arrow keys. Hold the device in
one hand and press it onto the leather well-setted (4 kg compacting pressure).
The leather pile has to be at least 10mm high!
3. The display shows the water content immediately (large numbers).
– 2 –
Page 4
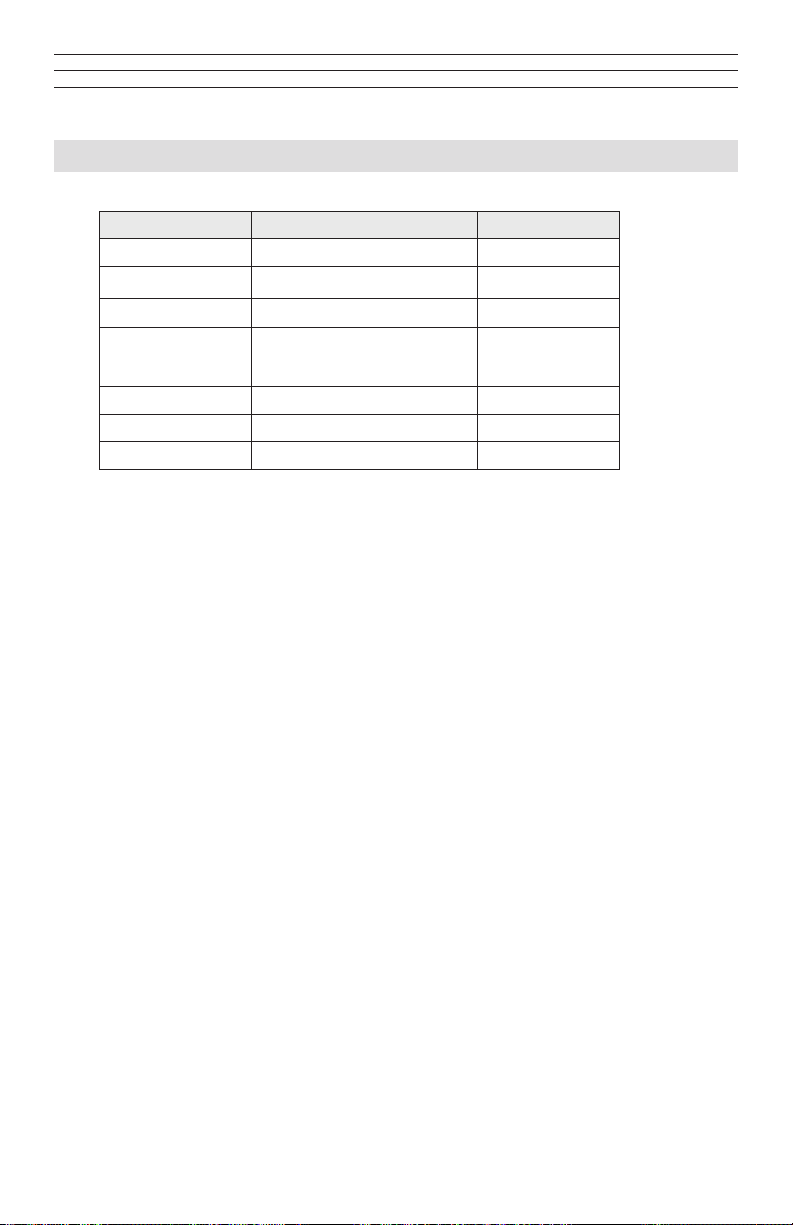
2.0 CALIBRATION CURVES
NAME CALIBRATION CURVE DENSITY
Leather LD Leather of low density 0.55 g/cm³
Leather CR Leather chrome tanned 0.60 g/cm³
Leather MD Leather of medium density 0.65 G/CM³
Leather FOC
Leather HD Leather of high density 0.75 g/cm³
Leather VHD Leather of very high density 0.80 g/cm³
Reference Only for checking the instrument
Leather free of chrome, re
protection leather
0.70 g/cm³
2.1 Selection of calibration curves
Due to different manufacturing methods and different densities of the leather there is no
standardised allocation of calibration curves.
In the above list of calibration curves you can nd information regarding manufacturing
methods and density that enables a preselection of the calibration curve.
To ensure the best accuracy of your measurement, we recommend to carry out a
comparison measurement by kiln-drying (norm DIN 53304) once:
1. Take a leather pile of 10-15mm of the format A6 with average moisture content.
2. Measure the water content of this leather pile using all available calibration curves
and write down the measuring results of the different calibration curves.
3. Take the 2 top leather pieces of the pile and carry out a reference measurement
according to DIN 53304.
4. Compare the determined reference water content with the measuring results of the
different calibration curves. Use the calibration curve with the measuring result
nearest to the reference water content.
– 3 –
Page 5

3.0 DETERMINATION OF THE REFERENCE WATER CONTENT
100% ×
−
=
Mn
MtMn
WG
Mn: Mass with average moisture content
The humimeter LM6 determines the water content, which means that it calculates the
moisture referred to the total mass (DIN53304):
Mt: Mass of the dried sample
%WG: Calculated water content
3.1 Short description of norm DIN53304
Take a leather piece according to DIN 53302 T2 or DIN 53303 T2. For the
determination of the water content, weigh the leather piece with an accuracy of 0,001
g (mass Mn). Put the piece of leather in a glass bowl that was dried at (102 ± 2) °C
and was weighed after cooling to room temperature. Dry the opened glass bowl in a
drying chamber at (102 ±2) °C for 5 hours. After closing the glass bowl cool it in an
exsiccator. Now determine the mass (Mt). After that, go on with the above described
drying procedure in the drying chamber for one further hour, cool and weigh again. If
the weight after the second drying period decreases less than 0.1 % of the initial weight,
the assay is nished. If the decrease of weight is higher than 0.1 %, the drying has to be
continued. The total period of drying must not exceed 8 hours.
–4 –
Page 6

4.0 DEVICE DESIGN
Calibration Curve
Measuring Value
Temperature
Measuring Value
Moisture
Rolling Menu
Resp, Hold Key
ON/OFF Button
Changing
Calibration Curve
Rubber Protective
Housing
Batteries Slot
(flipside)
– 5 –
Page 7

4.1 Menu
There are 3 menu levels Main menu
The symbols show the key functions in Edit logs
the different menus. Manual logs
1. Type selection: Clear logs
2. Saving: Print logs
3. Main Menu Last Logs
Rolling menu: Use this key to enter the All logs
different menu levels and main menu. Clear logs
Power: Press this key for 3 seconds to Send logs
switch the instrument off or on. Press this Manual logs
key briey to activate the display lighting. Clear logs
Up: This key moves you to the next Options
type/calibration curve. Date / Time
Down: This key moves you to the Logtime
previous type/calibration curve. Language
Disk: Use this key to save measurement Unlock
values. °C / °F
If the number in front of the disk symbol Calibrate
increases, the measuring value has been saved o Userlevel
BL On Time
Alternatively: Auto Off time
Hold: The currently shown Materialcalib.
measurement value is held. It is released Password
when another key is pressed. Reset
View logs: If no logs are active, you can use this SN
symbol to view the saved measuring series Logo
Tm
Alternatively: Admin
Edit logs: If logs are active, Status
you can press this symbol and then enter
e.g. batch number and supplier’s data for the series.
In the saving level, press (rolling menu) to enter the main menu.
4.2 Key functions in the menu
: Conrm – activates menu item
: Up – long press => jumps to the start of the menu
: Down – long press => jumps to the end of the menu
: Exit – exits the menu item or menu
– 6 –
Page 8

5.0 COMMON REASONS FOR INCORRECT MEASUREMENTS
• Wrong calibration curve
Double check the correct selection of the calibration curve before measuring. The
calibration curve “reference” must NOT be used.
• Inadequate thickness of the leather pile
A single leather hide must NOT be measured. Pile the leather to ensure a thickness
of at least 10 mm.
• Metal below the material
During the measurement there must NOT be any metal for at least 100 mm under
the measured material.
• Product temperature out of application range
The application range is between 0 °C and +40 °C
• Discrepancy in temperature between device and material
Please ensure that the device and the material under test are being stored at nearly
the same temperature before measuring. A high temperature difference has a
negative effect on the stability of the measurement results.
6.0 LOOKING AFTER THE INSTRUMENT
Do not drop the instrument or expose it to excessive temperatures. Only clean it with a
lint-free, dry cloth. The instrument is not waterproof.
How often you need to check the instrument depends on the use and the required level
of accuracy in your eld of operation. For a fee, Messtechnik Schaller GmbH can also
carry out a calibration at their factory. In this case you will also receive a calibration
certicate.
6.1 Exemption from liability
For miss-readings and wrong measurements and of this resulting damages we refuse
any liability. As this rapid measurement procedure is inuenced by product-specic and
application-specic conditions, we recommend to carry out a plausibility check on the
measurement results. Each instrument has a serial number and a warranty seal. If this is
broken we cannot provide warranty. If the instrument is defective, contact Messtechnik
Schaller GmbH or your supplier.
–7 –
Page 9

7.0 CHANGING THE BATTERIES
Your new device is provided with batteries.
Please nd enclosed the manual for changing of batteries:
1. At rst remove the rubber protective housing. For that, hold the rubber housing at
the upper side and pull it over. If your humimeter is provided with an optional USB
port, you have to remove the protection cap before. Press with your nger onto the
arrow of the battery cap und pull it back.
2. Remove the empty batteries.
3. Put four new batteries in the device. Make sure that the position of the battery poles
is correct.
4. Press down the batteries and close the cap.
– 8 –
Page 10
8.0 CALIBRATION
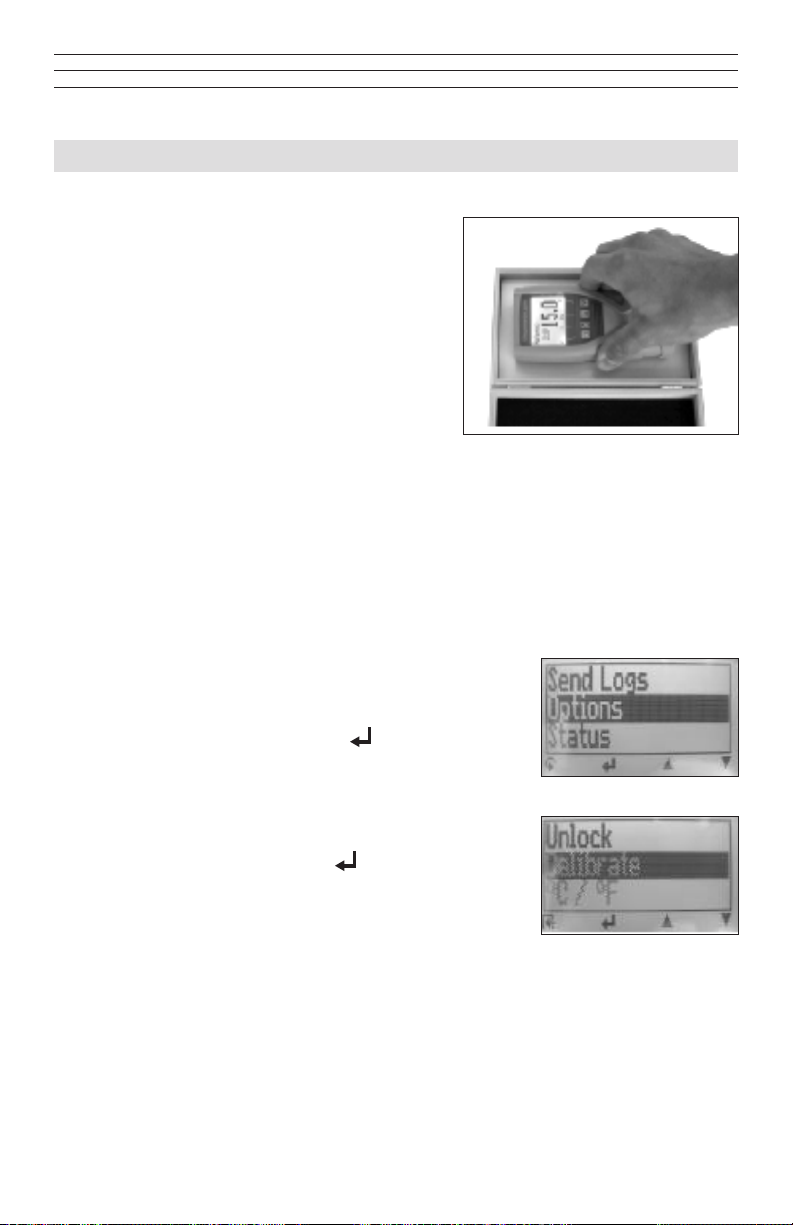
8.1 Checking the calibration
We recommend to check the calibration of the
humimeter LM6 every 4 weeks, using the proof
plate delivered with the device. For this check
the device has to show a temperature between
18.0 and 24.0°C.
1. Switch on the instrument and select the
calibration curve “reference” using the
arrow keys.
2. Hold the humimeter LM6 in one hand and
press it onto the grey proof plate (compacting pressure of 4.0kg). The shown
measuring value should range between 14.5 and 15.5.
3. If the shown value is out of this range, you have to carry out a calibration
(see instructions below)
8.2 Calibration procedure
By a zero point adjustment you can correct a too high deviation of the calibration check.
For that please proceed as follows:
1. Press the left key twice to reach the menu level.
Navigate to the menu item Options using the arrow
keys. Conrm by pressing the button.
2. Select the menu item Calibrate using the arrow keys a
znd conrm by pressing the button.
3. This menu item has to be unlocked. For that you have to enter the 4-digit serial
number of your humimeter LM6. You can nd the serial number on the top right
edge of your display a short time after switching on the instrument, or on the sticker
in the battery slot.
– 9 –
Page 11
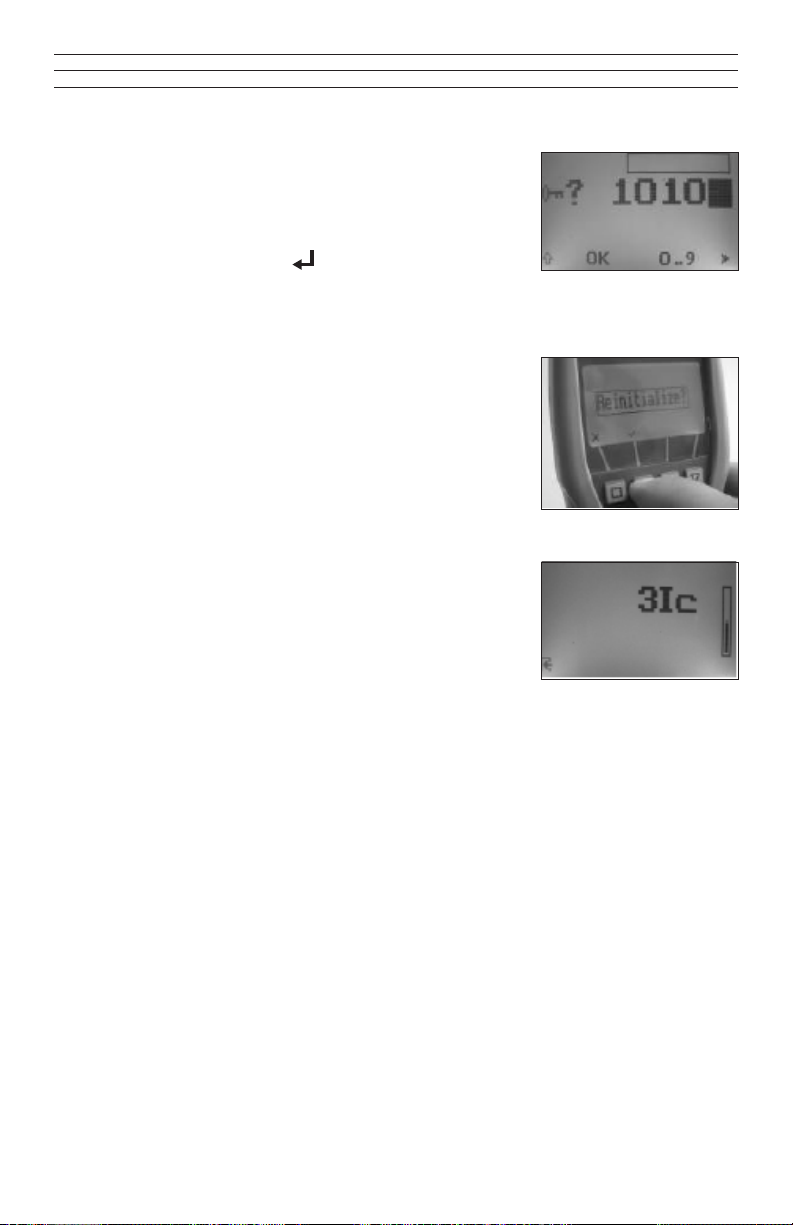
4. Press the third button as long as the black bar stands
on the rst digit of the serial number. After a waiting
time of a few seconds the device accepts the entered
digit. Now the other 3 digits have to be entered.
When the 4-digit number has been entered correctly
(see picture), press the button to conrm.
5. The request Reinitialize? will appear at the display.
Hold the humimeter LM6 in one hand and make sure
that nothing stands behind the measuring eld (black
plate).
6. Now press the second button (✔) with one nger. The
calibration procedure will take a few seconds. During
that time, the instrument has to be held up in the air
and the measuring eld must NOT be touched.
7. The device is ready when the shown picture on the
right disappears automatically.
– 10 –
Page 12

9.0 TECHNICAL DATA
Measuring depth 0.197 in (5mm)
Minimum material thickness 0.394 (10mm)
Resolution 0.1% water content ; 0.1°C ; 0.3°F
Measuring range 3% to 65% water content
Temperature measuring range 14 °C to 122 °F (–10°C to +50°C)
Operation temperature range 32 °F to 104 °F (0 °C to +40 °C )
Storage temperature –4 °F to 140 °F (–20°C to 60°C)
Temperature compensation Automatic
Memory for measured value Approx. 10.000 values
Menu language German, English, French, Italian,
Spanish, Russian
Power supply 4 x 1.5 Volt AA Alkaline batteries
(for approx. 900 measurements)
Switch off time After approx. 4 minutes
Power consumption 60 mA (with display lighting)
Display 28 x 64 matrix display,
with LED- backlighting
Dimensions 5.79 in x 2.95 x 1.18 in
(147mm x 75mm x 30mm)
Weight (incl. batteries) 9.35 oz. (265g)
Protection class IP 40
Scope of supply LM6, 4 x 1.5 Volt AA Alkaline batteries,
wooden case, proof plate, rubber
protective housing, user manual
Options PC interface including software and cable,
mobile printer (only with option 1)
– 11 –
Page 13

WARRANTY
ELECTROMATIC Equipment Co., Inc. (ELECTROMATIC) warrants to the original
purchaser that this product is of merchantable quality and conrms in kind and quality
with the descriptions and specications thereof. Product failure or malfunction arising
out of any defect in workmanship or material in the product existing at the time of
delivery thereof which manifests itself within one year from the sale of such product,
shall be remedied by repair or replacement of such product, at ELECTROMATIC’s
option, except where unauthorized repair, disassembly, tampering, abuse or
misapplication has taken place, as determined by ELECTROMATIC. All returns
for warranty or non-warranty repairs and/or replacement must be authorized by
ELECTROMATIC, in advance, with all repacking and shipping expenses to the address
below to be borne by the purchaser.
THE FOREGOING WARRANTY IS IN LIEU OF ALL OTHER WARRANTIES,
EXPRESSED OR IMPLIED, INCLUDING BUT NOT LIMITED TO, THE
WARRANTY OF MERCHANTABILITY AND FITNESS FOR ANY PARTICULAR
PURPOSE OR APPLICATION. ELECTROMATIC SHALL NOT BE RESPONSIBLE
NOR LIABLE FOR ANY CONSEQUENTIAL DAMAGE, OF ANY KIND OR
NATURE, RESULTING FROM THE USE OF SUPPLIED EQUIPMENT, WHETHER
SUCH DAMAGE OCCURS OR IS DISCOVERED BEFORE, UPON OR AFTER
REPLACEMENT OR REPAIR, AND WHETHER OR NOT SUCH DAMAGE IS
CAUSED BY MANUFACTURER’S OR SUPPLIER’S NEGLIGENCE WITHIN ONE
YEAR FROM INVOICE DATE.
Some State jurisdictions or States do not allow the exclusion or limitation of incidental
or consequential damages, so the above limitation may not apply to you. The duration
of any implied warranty, including, without limitation, tness for any particular
purpose and merchantability with respect to this product, is limited to the duration of
the foregoing warranty. Some states do not allow limitations on how long an implied
warranty lasts but, not withstanding, this warranty, in the absence of such limitations,
shall extend for one year from the date of invoice.
ELECTROMATIC Equipment Co., Inc.
600 Oakland Ave. Cedarhurst, NY 11516—USA
Tel: 1-800-645-4330/ Tel: 516-295-4300/ Fax: 516-295-4399
Every precaution has been taken in the preparation of this manual. Electromatic
Equipment Co., Inc., assumes no responsibility for errors or omissions. Neither is any
liability assumed for damages resulting from the use of information contained herein.
Any brand or product names mentioned herein are used for identication purposes only,
and are trademarks or registered trademarks of their respective holders.
– 12 –
Page 14

CHECK•LINE
INSTRUMENTS
®
ELECTROMATIC
E Q U I P M E N T C O., I N C.
600 Oakland Ave., Cedarhurst, NY 11516 – USA
TEL: 516-295-4300 • FAX: 516-295-4399
 Loading...