

Page 1
MODEL: PSF
FITTING INSTRUCTIONS FOR UNIVERSAL
PRECISION TABLE SAW FENCE
The PSF is a universal rip fence which can be fitted to a wide variety of table saws. It can be fitted to any
table where 3 x 8mm diameter holes can be drilled into the front face of the table, 20mm below the table
surface.
It can be retro-fitted to Charnwood models W619, W629 and W625.
Page 2
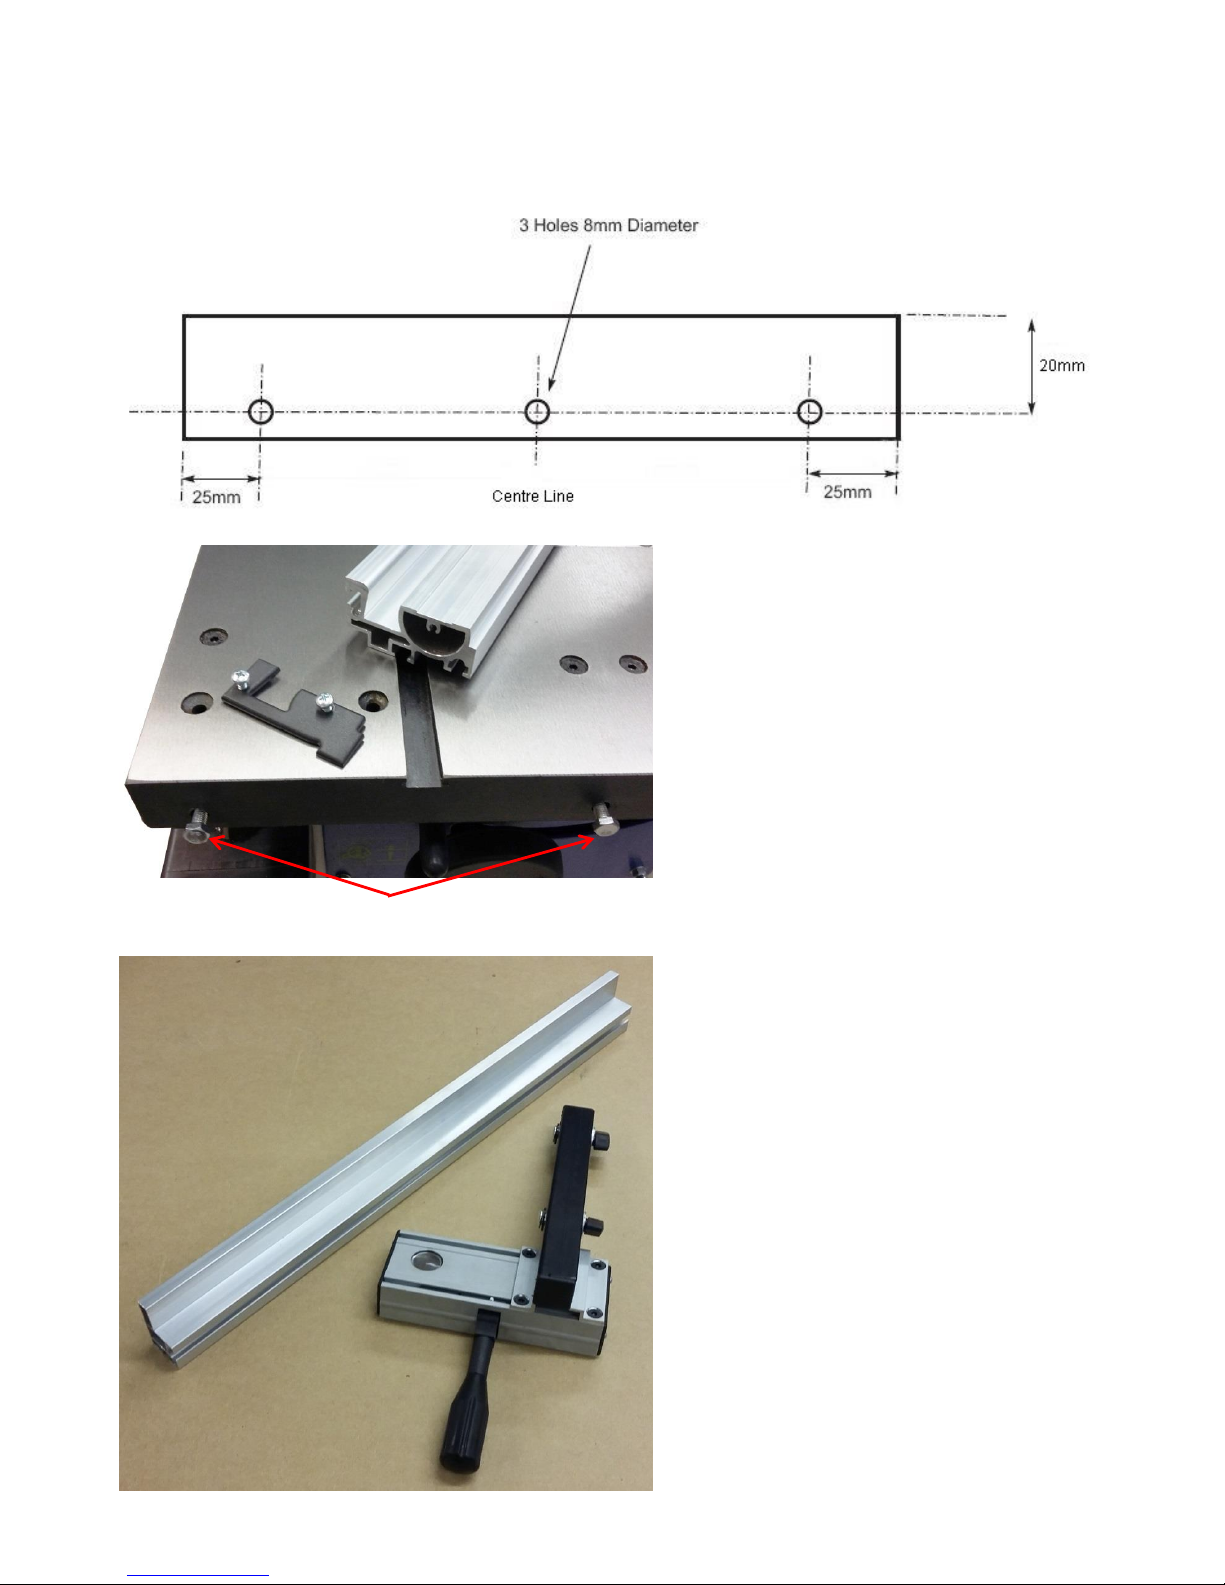
When choosing the position of the holes ensure that the rear face of the hole is flat and will allow access to
tighten the nuts. Adjust the position of the holes as necessary.
Drilling Template
Loosely fit 3 fixing bolts
Having drilled the 3 holes, remove the end
cap from the front fence rail and slide out
the three M6 mounting bolts.
Loosely fit the 3 fixing bolts through the
holes with the nut and washer fitted.
Slide the front fence rail onto the three bolt
heads and tighten the nuts. If your saw has
a sliding carriage, check it is not obstructed
by the fence rail before tightening.
Refit the plastic end cap to the front rail.
Identify the rip fence carrier and the fence
extrusion.
Page 3

Undo the 2 wing nuts on the fence carrier
until the fence extrusion can slide over the
square head bolts as shown.
Place the rip fence onto the front rail so
that the face of the fence is up against the
saw blade.
Press down the front handle to lock it in
place.
This will be the Zero position for setting the
scale.
Note: There are two Zero points on the scale, read below
to ensure you use the correct one for setting.
Slide the scale under the rip fence so that
the Zero position on the scale, is in line with
the red line on the scale reader.
Using a pencil, mark the position of the left
hand end of the scale piece onto the fence
rail.
Remove the rip fence from the front rail.
Fix the self-adhesive scale by peeling off the
backing paper and using the mark to align
the left end of the scale piece.
Trim off any excess from the right hand end
of the scale if necessary.
High Fence Scale Low Fence Scale
The rip fence can be assembled in two
different ways; High and Low.
The standard assembly is in the High
position.
The low position is used when making
narrow cuts and allows the fence to get
closer to the blade without fouling on the
crown guard.
There is a dual scale on the front rail
depending on which way the fence is being
used.
Take care to read off the correct scale.
 Loading...