

Charmglow Side island, Side island 814-6820-0 Owner's Manual

SIDE ISLAND
OWNER’S MANUAL / MANUAL DEL PROPIETARIO
ASSEMBLY AND CARE INSTRUCTIONS / INSTRUCCIONES DE ARMADO Y MANTENIMIENTO
WARNING/ADVERTENCIA
HAZARDOUS EXPLOSION MAY RESULT IF THESE WARNINGS AND INSTRUCTIONS
ARE IGNORED. READ AND FOLLOW ALL WARNINGS AND INSTRUCTIONS IN THIS
MANUAL TO AVOID PERSONAL INJURY, INCLUDING DEATH OR PROPERTY DAMAGE.
SE PUEDE PRODUCIR UNA EXPLOSIÓN PELIGROSA SI SE HACE CASO OMISO A
ESTAS ADVERTENCIAS E INSTRUCCIONES. LEA Y SIGA TODAS LAS ADVERTENCIAS
E INSTRUCCIONES EN ESTE MANUAL PARA EVITAR LESIONES PERSONALES,
INCLUSO LA MUERTE, O LOS DAÑOS MATERIALES.
SAVE THIS MANUAL FOR FUTURE REFERENCE
GUARDE ESTE MANUAL PARA REFERENCIA FUTURA
IIMMPPOORRTTAANNTT SSAAFFEETTYY WWAARRNNIINNGGSS
WE WANT YOU TO ASSEMBLE AND USE YOUR SIDE ISLAND AS SAFELY AS POSSIBLE.
THE PURPOSE OF THIS SAFETY ALERT SYMBOL IS TO ATTRACT YOUR ATTENTION
TO POSSIBLE HAZARDS AS YOU ASSEMBLE AND USE YOUR SIDE ISLAND.
WHEN YOU SEE THE SAFETY ALERT SYMBOL
PAY CLOSE ATTENTION TO THE INFORMATION WHICH FOLLOWS!
READ ALL SAFETY WARNINGS AND INSTRUCTIONS CAREFULLY
BEFORE ASSEMBLING AND OPERATING YOUR SIDE ISLAND.
WWAARRNNIINNGG
• Keep children and pets away. DO NOT allow children to use or play near the bar island.
• For household use only. DO NOT use bar island for anything other than its intended purpose.
AASSSSEEMMBBLLYY IINNSSTTRRUUCCTTIIOONNSS
READ ALL SAFETY WARNINGS & ASSEMBLY INSTRUCTIONS CAREFULLY
BEFORE ASSEMBLING OR OPERATING YOUR SIDE ISLAND.
The following tool is required to
assemble this Brinkmann Side Island:
• Screwdrivers (Included)
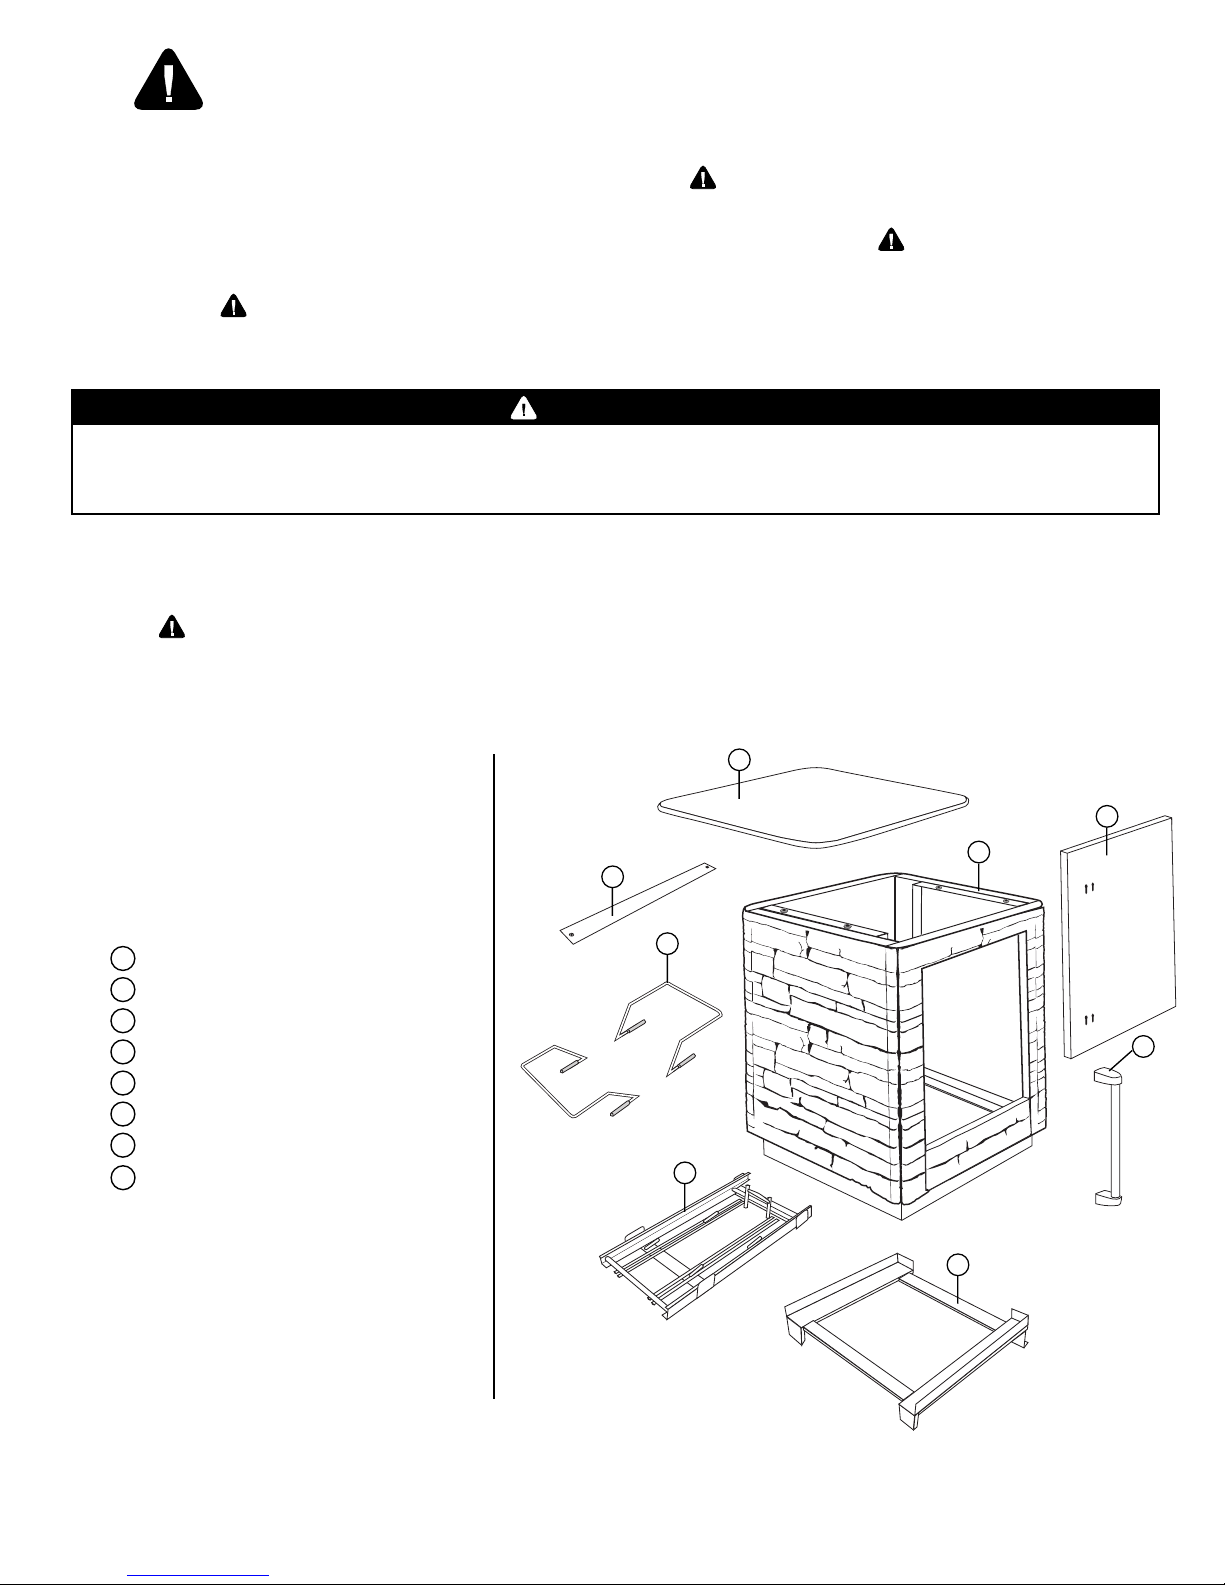
PARTS LIST:
1
1 Granite Top
2
1 Side Island Base
3
1 Stainless Steel Door
4
1 Top Bar Support Bracket
5
2 Tray Brackets
6
1 Door Handle
7
1 Tray Assembly
8
1 Base Stand
FOR MISSING PARTS, PLEASE CALL
CUSTOMER SERVICE AT
800-527-0717.
1
3
2
4
5
6
7
8
(Proof of purchase will be required.)
Inspect contents of the box to ensure all
parts are included and undamaged.
11
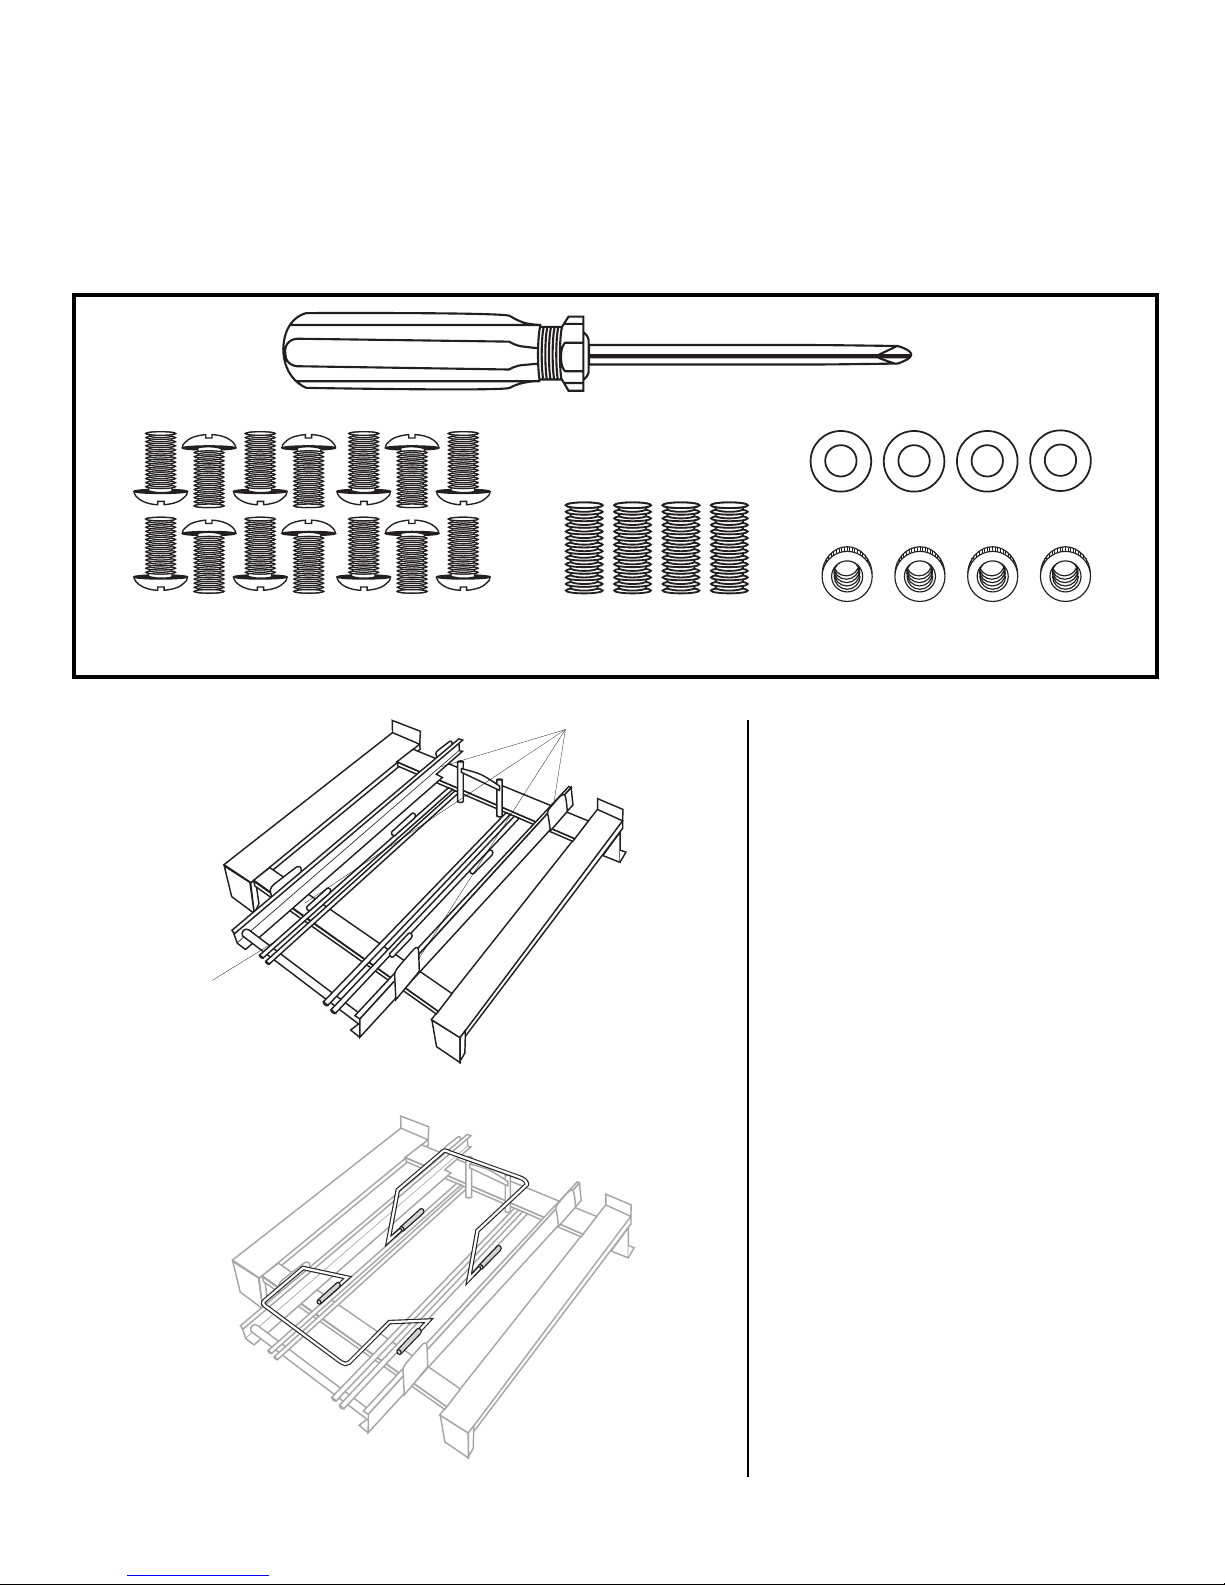
PARTS CARD CONTENTS
Screwdriver
M6 x 12mm Bolts M8 Full Thread Studs
M8 Nuts
M8 Washers
Make sure you have all items listed under PARTS LIST and PARTS CARD CONTENTS before
you begin the installation process. Your Parts Card will include:
Qty.
1 Screwdriver
4 M8 Full Thread Studs
4 M8 Washers
14 M6 x 12mm Bolts
4 M8 Nuts
(4) Bolts
ASSEMBLY STEPS
Choose a good, cleared assembly
area and get a friend to help you
put your side island together.
Extensions
Step 1
Attach the tray assembly to the
base stand by using four
M6 x 12mm bolts. Make sure the
sliding tray faces forward.
Step 2
Slide the two tray brackets into
the slots which are located at
the tray slide.
22
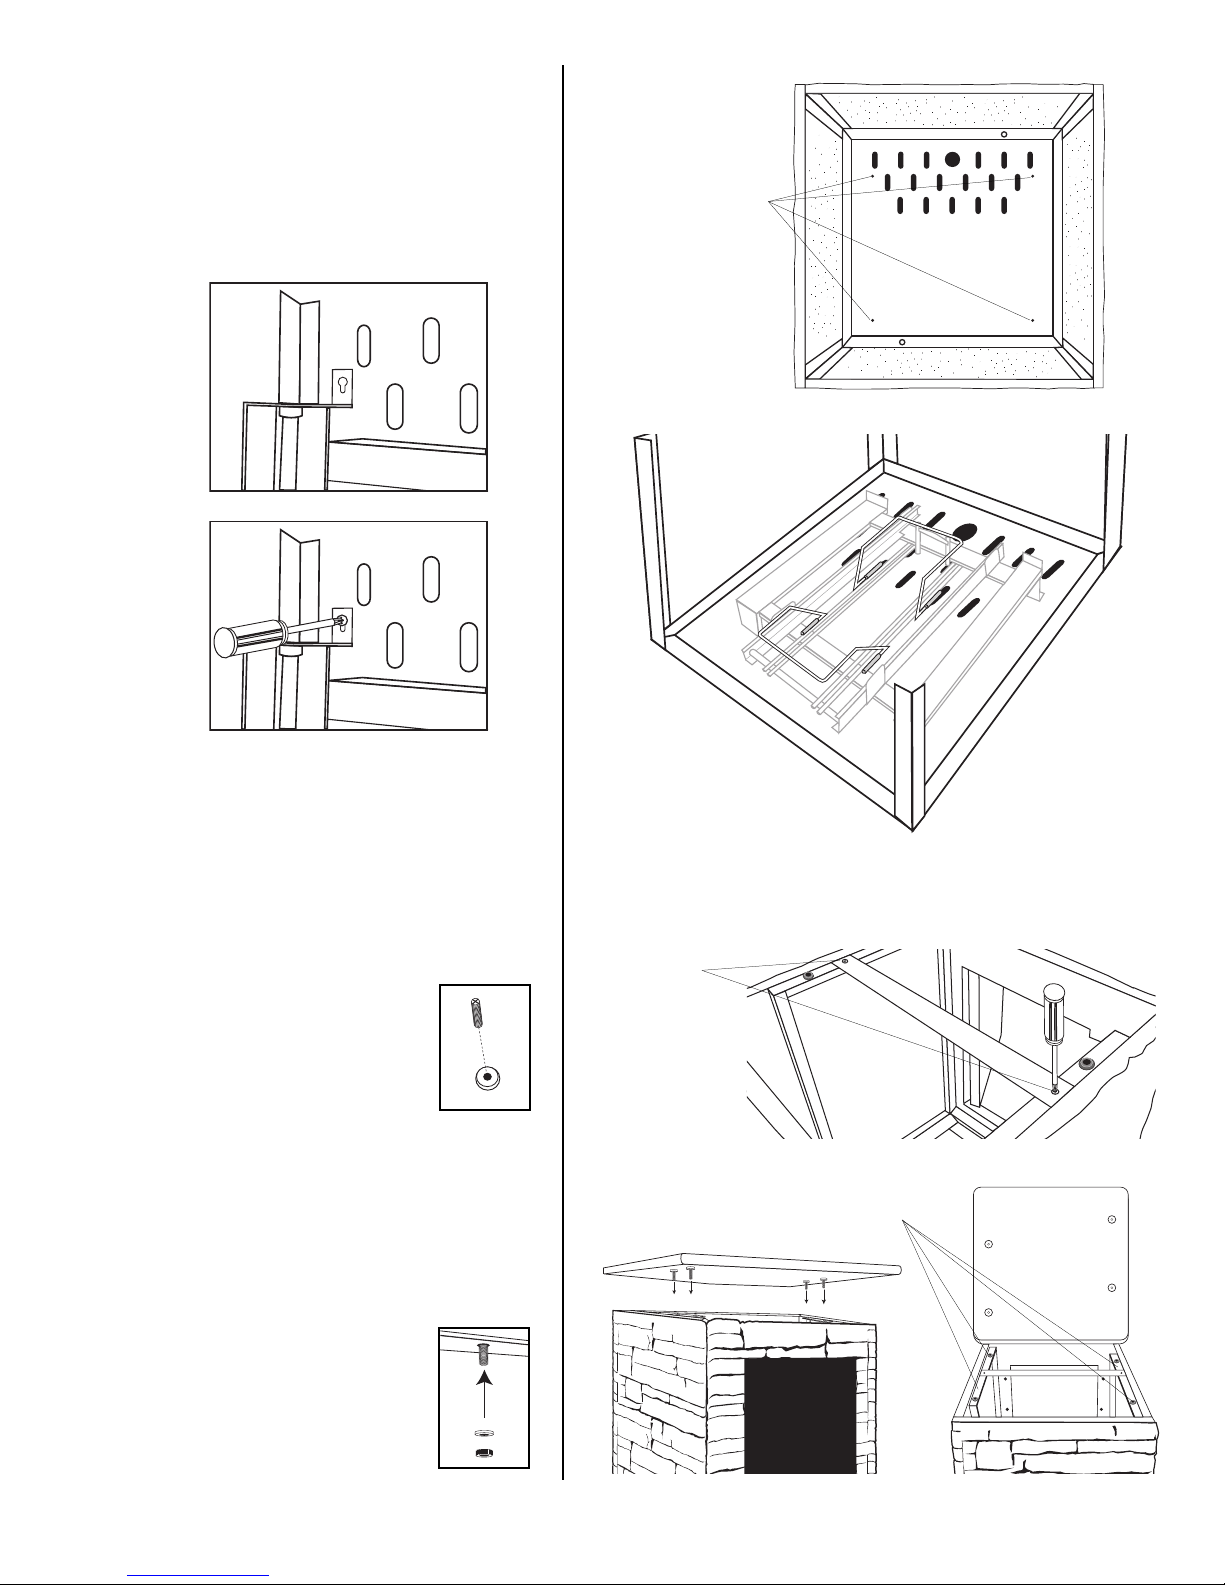
Step 3
Attach the base assembly to the
side island base. Insert four
M6 x 12mm bolts halfway into the
base panel. Place base assembly
over bolts and slide backward, then
tighten securely.
Four Bolts
Step 4
Attach the top bar support bracket
to the frame using two M6 x 12mm
bolts, then tighten securely.
Step 5
Insert the four full threaded
studs into the bottom of
the granite top.
Step 6
With a help of a friend, place the
granite top onto the side island
base. Insert the threaded studs
through the rubber rings which are
located on the top of the frame and
fasten using four M8 nuts
and washers onto
the threaded studs.
(Hand tighten only)
(2) Bolts
Rubber Holes
33
 Loading...