

Page 1

1
Thank you for purchasing the
CharJi EVO CLOUD. This CharJi
EVO CLOUD brings you a high
speed wireless network
connection.
This document will help you understand your CharJi
EVO CLOUD so you can start using it right away. Please
read this document carefully before using your CharJi
EVO CLOUD.
For detailed information about the functions and
configurations of the CharJi EVO CLOUD, refer to the
online help on the web management page that comes
with the CharJi EVO CLOUD.
For detailed instructions for logging in to the web
management page, refer to "Logging In to the Web
Management Page".
Getting to Know Your CharJi EVO
CLOUD
Note:
The CharJi EVO CLOUD function descriptions and
illustrations in this document are for your
reference only. The product you have purchased
may vary.
Page 2

2
Application Scenarios
Wi-Fi devices (such as smartphones, tablet computers,
and game consoles) or computers can all access the
Internet through CharJi EVO CLOUD. The specific
connection procedure depends on the operating
system of the Wi-Fi device or computer. Establish a
connection according to your device's specific
instructions.
Scenario 1: Accessing the Internet Using an CharJi, 3G,
or 2G Network
The CharJi EVO CLOUD uses your operator's CharJi, 3G,
or 2G network to access the Internet.
CharJi/3G/2G
Page 3

3
Scenario 2: Accessing the Internet Using a Wi-Fi
Network
When you use the CharJi EVO CLOUD in Wi-Fi
coverage areas, for example, an airport, cafe, hotel, or
your home, the CharJi EVO CLOUD can access the
Internet via Wi-Fi networks, helping save your CharJi,
3G, or 2G network usage.
WLAN
Appearance
MENU
1
3
4
2
Power button
Screen
Micro USB port
MENU button
Page 4
4
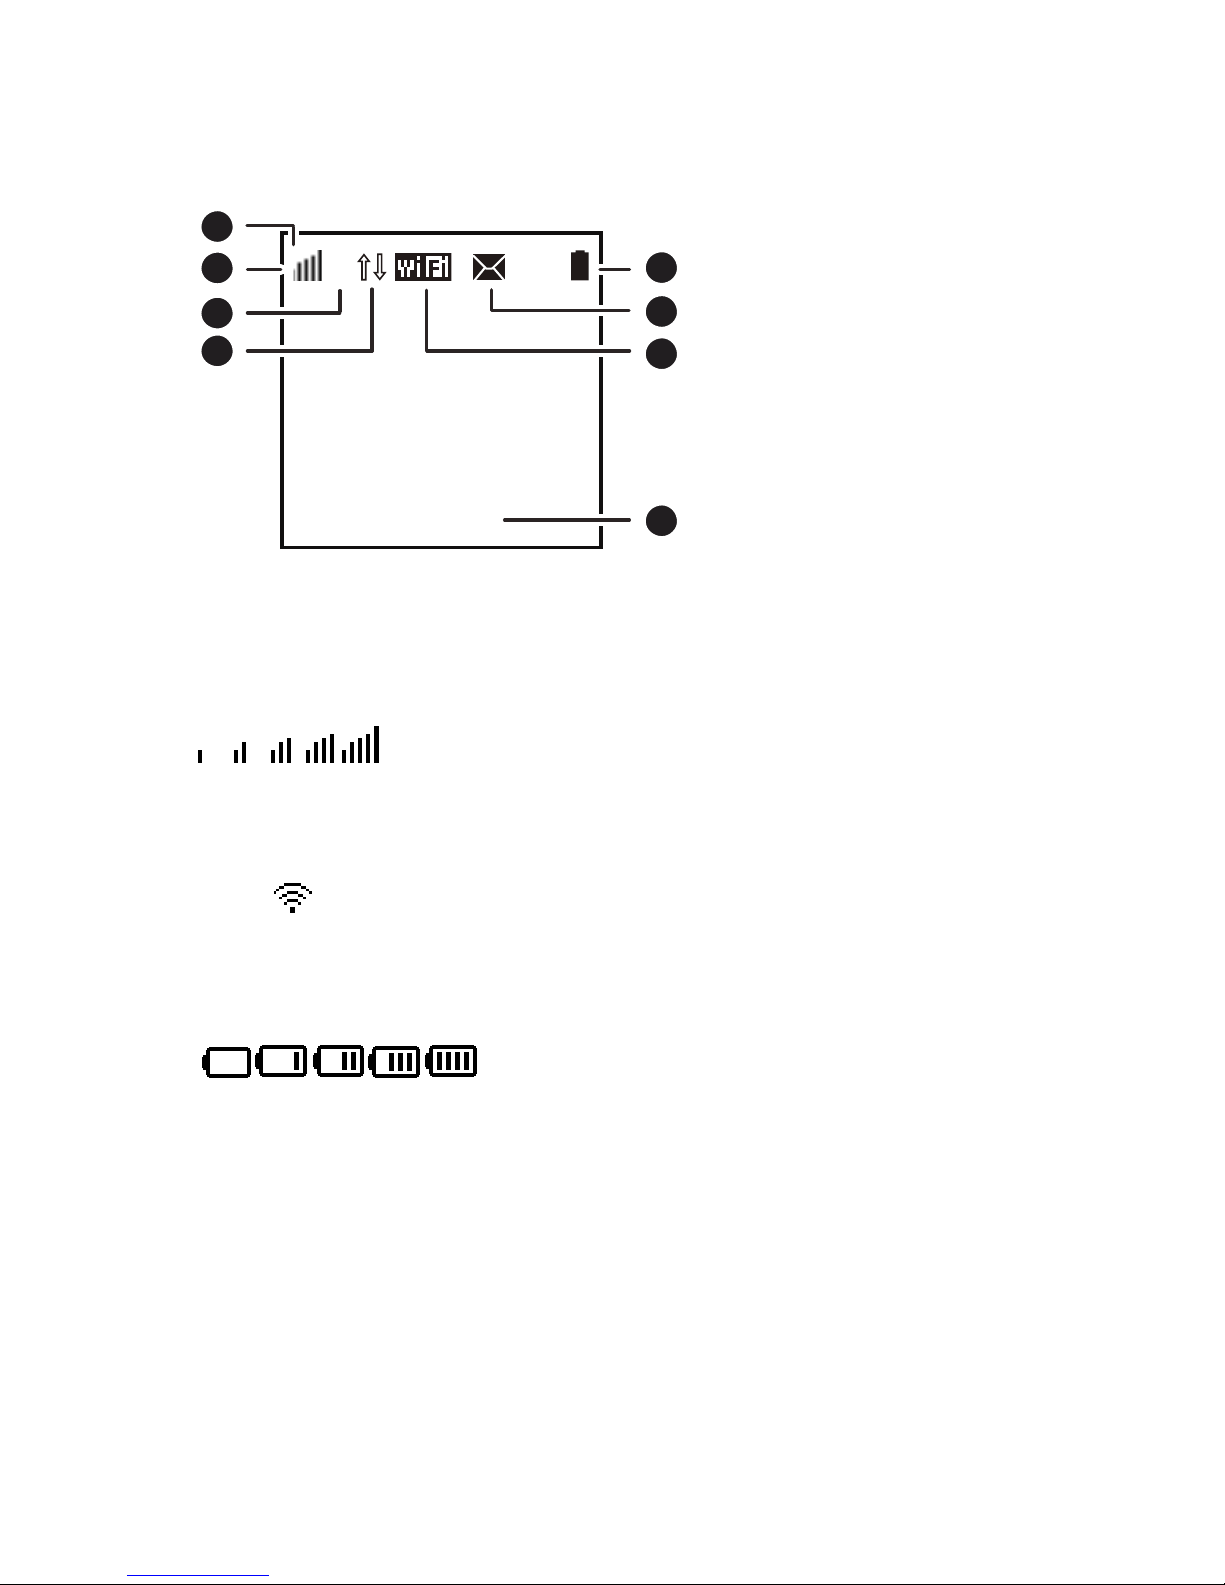
Screen
Home screen
CJ
R
1
0 B/2GB
1
2
3
4
5
7
6
8
100%
1
Roaming
R: Data roaming turned on.
Signal strength
: Signal strength from weak to strong.
Network type
CJ/3G/2G: Connected to a CharJi/3G/2G network.
: Connected to WLAN.
Network connection status
Battery
: Battery level from low to high.
SMS
New messages.
Number of new messages.
Wi-Fi
Wi-Fi turned on.
Number of connected Wi-Fi devices.
Traffic statistics
Page 5
5
Data usage this month.
Monthly data usage limit.
Note:
To set the start date of the monthly data usage
statistics and data usage limit, go to the web
management page.
Data traffic information is for your reference
only. For more accurate data traffic
information, please consult your service
provider.
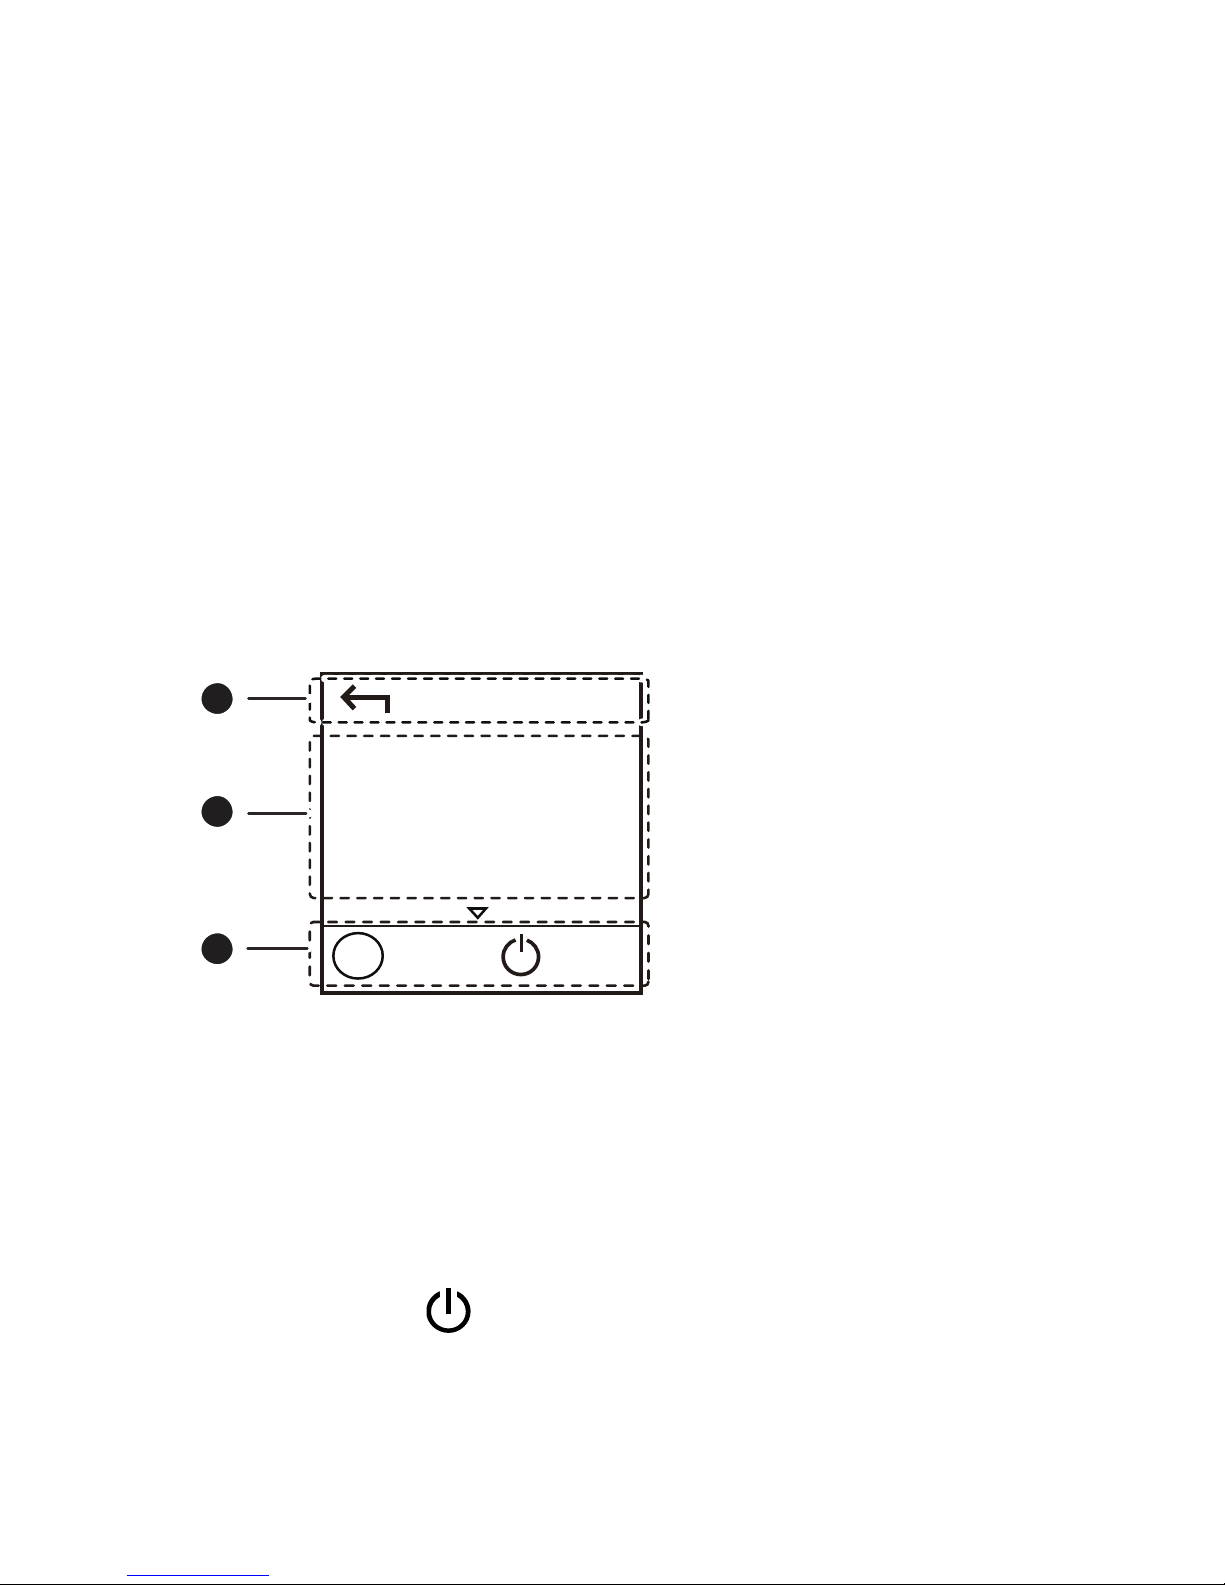
Menu screen
Press the MENU button to display the menu.
Back
XXXXXXXXX
XXXXXXXXX
Next
OK
XXXXXXXXX
Menu
1
2
3
Back
Return to the previous screen.
Options
Operation tips
Press the MENU button to scroll down.
Press the button to confirm your selection.
Page 6

6
Update screen
When updates are available, you will be prompted to
update the CharJi EVO CLOUD.
New Software
Update
Ignore
1
2
Next
OK
Menu
CJ
1
100%
1
Update
When Update is selected, press the
button to
update the CharJi EVO CLOUD.
Ignore
When Ignore is selected, press the
button to
ignore the update.
Page 7
7
SSID and Wireless Network Encryption
Key
When a Wi-Fi device establishes a connection to
the CharJi EVO CLOUD for the first time, you
may need to enter the default Service Set
Identifier (SSID) and wireless network
encryption key.
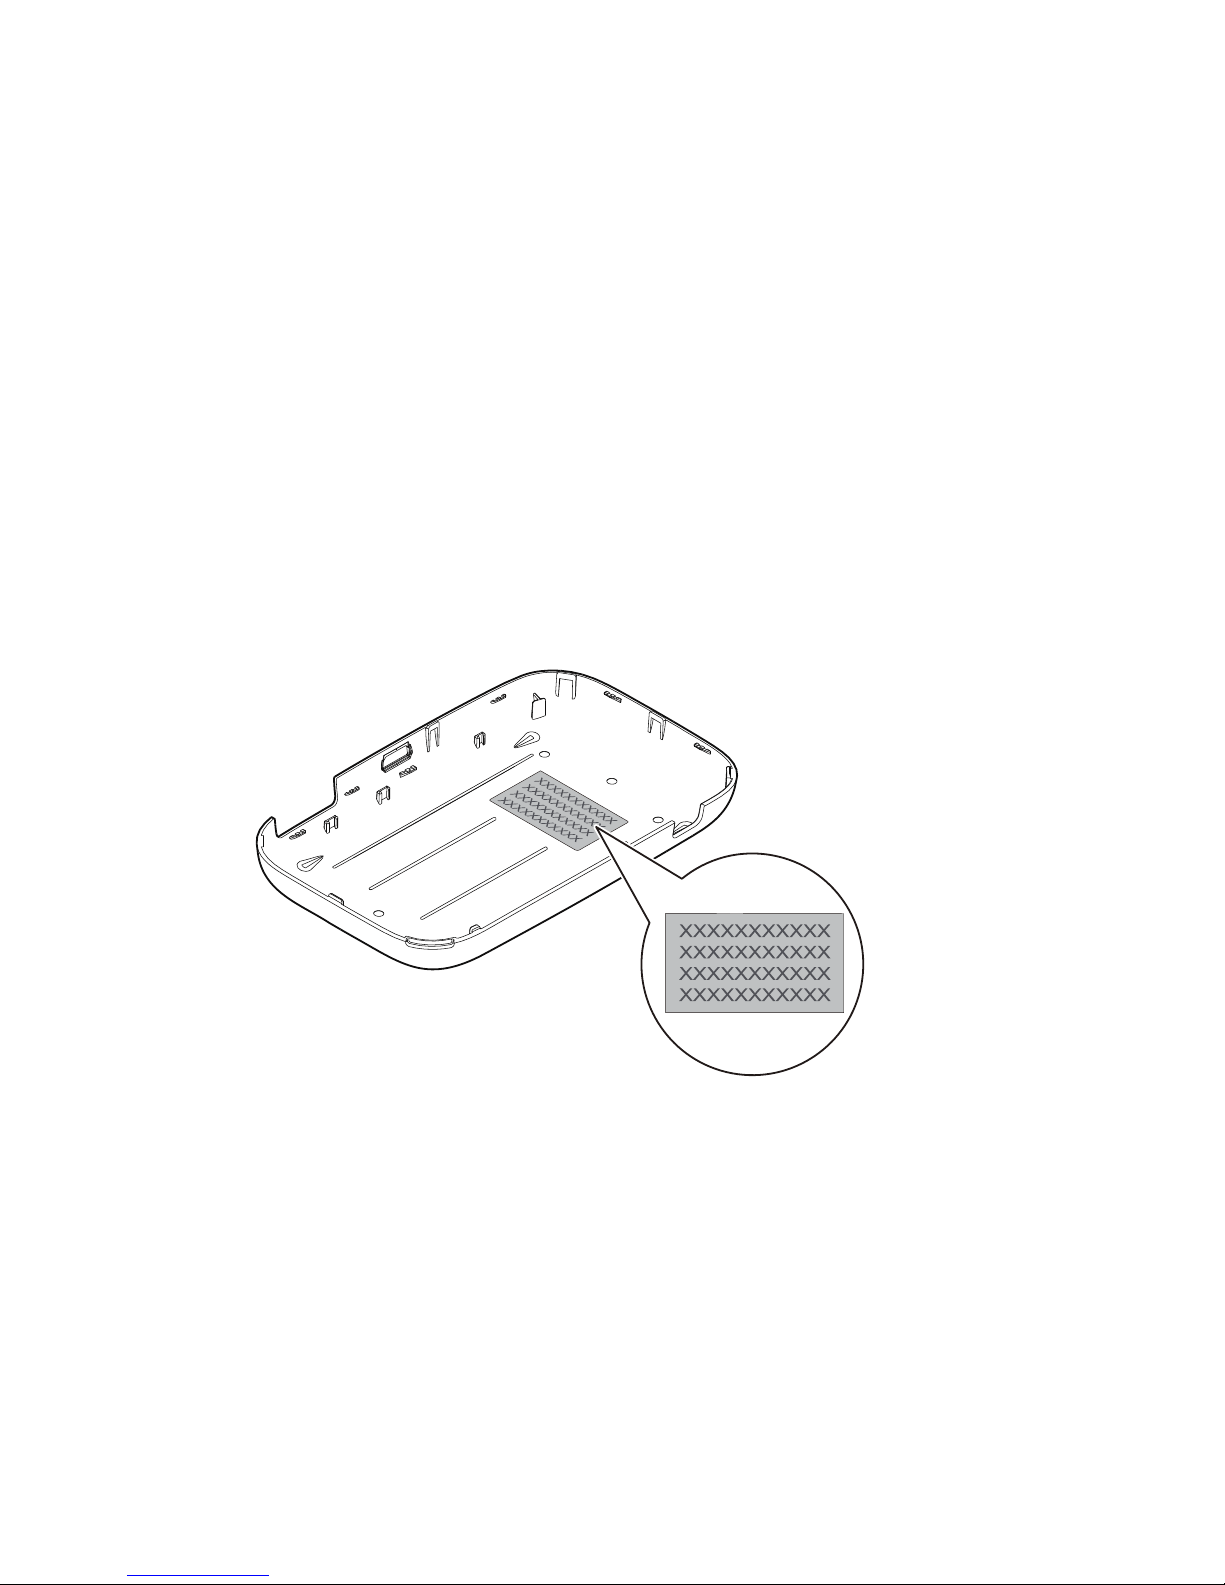
The default SSID and encryption key are printed
on the CharJi EVO CLOUD label.
It is recommended that you log in to the web
management page and change your SSID and
network encryption key.
Page 8

8
To view the current SSID and wireless network
encryption key on the screen:
1. Press the MENU button to display the menu.
2. Press the MENU button to scroll to Device Info.
3. Press the
button to enter Device Info.
Getting Started
Installing
Install the SIM card, microSD card, and battery
according to the illustration.
4
1
2
3
RESET
MENU
MENU
MENU
RESET
RESET
MENU
RESET
1
2
2
1
2
1
Note:
The microSD card is an optional accessory. If no
microSD card is included in the package, please
purchase one separately.
Back
Device Info
Next
OK
Menu
Back
SSID: XXXXXXXXXX
PWD: XXXXXX
Next
OK
Menu
Page 9

9
Charging the Battery
If the CharJi EVO CLOUD has not been used for a long
time or if the battery is fully depleted, the CharJi EVO
CLOUD may not power on immediately after the
charger is plugged in. Please charge the battery for a
while before attempting to power on the CharJi EVO
CLOUD.
Method 1: Use the charger to charge the device
Note:
Only use chargers compatible with the CharJi
EVO CLOUD and provided by a designated
manufacturer. Use of an incompatible charger
or one from an unknown manufacturer may
cause the CharJi EVO CLOUD to malfunction,
fail, or could even cause a fire. Such use voids
all warranties, whether expressed or implied,
on the product.
Page 10
10
The charger is an optional accessory. If it is not
included in the package, you may contact an
authorized dealer to buy a charger compatible
with the CharJi EVO CLOUD.
The CharJi EVO CLOUD's charger model is
HW-050100XYW. X and Y represent letters or
numbers that vary by region. For details about
the specific charger model, contact an
authorized dealer.
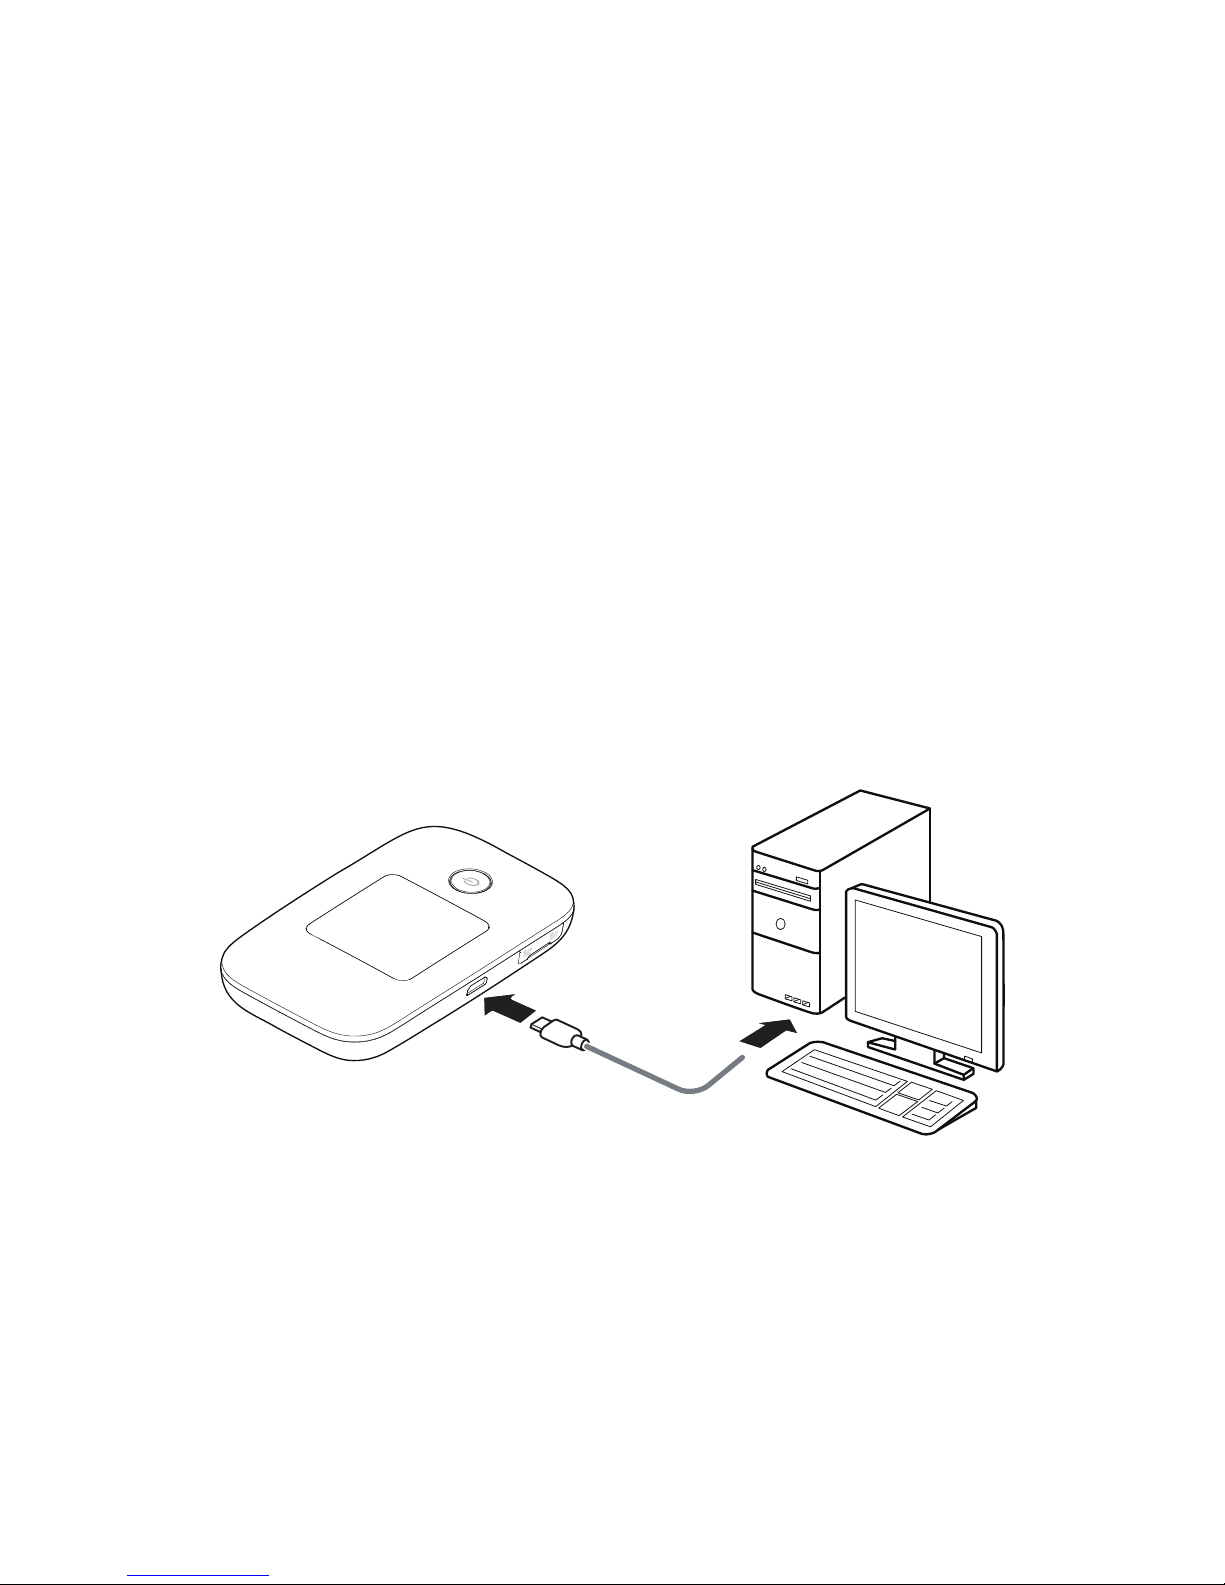
Method 2: Charge the device through a computer
connection
Use the data cable provided with your device to
connect the CharJi EVO CLOUD to the computer.
Page 11
11
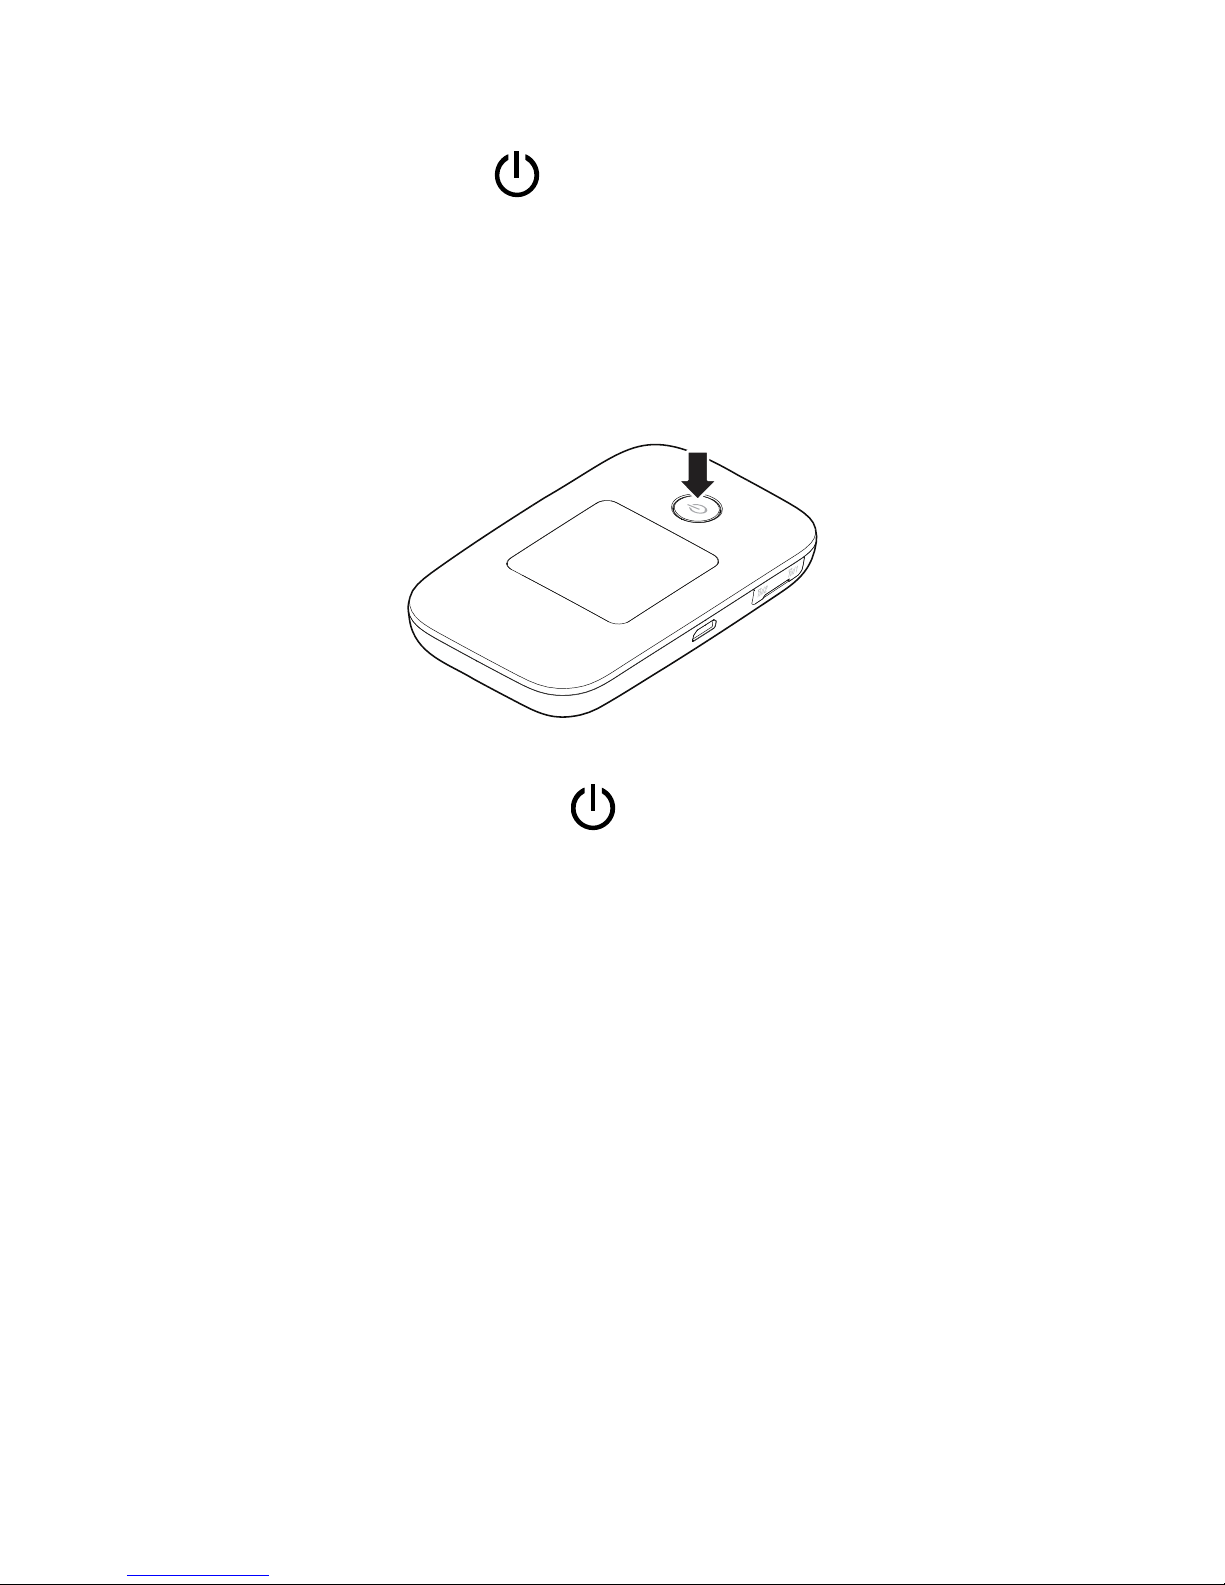
Turning on the CharJi EVO CLOUD
Press and hold the button until the screen lights
up, indicating that the CharJi EVO CLOUD is turned on.
You can use the menu screen or log in to the web
management page and turn the fast boot function on
or off. This function greatly reduces the CharJi EVO
CLOUD's boot-up time.
Note:
Press and hold the
button to turn off the
CharJi EVO CLOUD.
Verifying the PIN
If the CharJi EVO CLOUD's network parameters have
been correctly configured but you cannot access the
Internet after powering it on, PIN verification may be
enabled. Log in to the web management page and
enter the PIN when prompted. To avoid entering the
PIN every time you power on the CharJi EVO CLOUD,
disable PIN verification from the web management
page.
The PIN/PUK is delivered with your SIM card. For more
details, contact your service provider.
Page 12

12
Connecting to the Internet
Using a CharJi, 3G, or 2G Network
By default, the CharJi EVO CLOUD's management
parameters have been preset according to your
operator's requirements. The CharJi EVO CLOUD will
be connected to the Internet after its startup.
If data is transmitted, the CharJi EVO CLOUD will
automatically connect to the Internet. If data is not
transmitted for a period of time, the CharJi EVO
CLOUD will automatically disconnect from the network
connection.
Note:
You can use the menu screen or log in to the web
management page to enable or disable the
automatic dialing while roaming function. If this
function is turned off, when the CharJi EVO
CLOUD enters a roaming network, it will
automatically disconnect from the Internet
connection that has already been established.
You will need to manually establish this network
connection again.
Page 13

13
Using a Wi-Fi Network
1. Ensure that the Internet WLAN function is
enabled.
2. The CharJi EVO CLOUD automatically connects to
a Wi-Fi hotspot set by your service provider or
yourself. When the CharJi EVO CLOUD is
connected to a Wi-Fi network,
and the Wi-Fi
hotspot SSID are displayed on the screen.
Note:
After connecting to a Wi-Fi network, the
CharJi EVO CLOUD automatically reconnects to
the network the next time you are under that
network's coverage.
For details about adding Wi-Fi hotspots, see
"Adding a Wi-Fi Hotspot".
Page 14

14
Logging In to the Web Management
Page
1. Make sure the connection between the CharJi
EVO CLOUD and the Wi-Fi device or computer is
working normally.
2. Open the browser, and enter http://192.168.8.1
in the address box.
Note:
If the IP address conflicts with other IP addresses
on the network, the IP address of the CharJi EVO
CLOUD automatically changes. Check the current
IP address on the CharJi EVO CLOUD screen.
3. Enter the user name and password to log in to
the web management page.
Note:
The default user name is admin.
The default password is admin.
Page 15

15
Wi-Fi Sharing
1. Log in to the web management page
http://192.168.8.1. Login by entering the
Username “admin” and Password “admin”.
2. From the sharing page, choose the “Web share
mode”.
3. Set up the following options according to your
needs then click “Select” > “Apply”.
4. Under web share mode settings you may select
the Access type as “Read only” or “Read/Write
only”. Read only option is only for viewing the
files from SD card – copying or downloading the
file is restricted while with Read/write option you
can download the file from SD card.
5. Under the Shared path option you can select the
Entire SD card or Custom setting. When you
select the entire SD card allow access to all
files/folders on your SD card. If you select the
custom setting you may specify the files/folders.
6. For uploading a file in the SD card you need to
select the upload option and then browse the file
from your PC which you want to upload followed
by clicking the upload button.
Page 16

16
IP Sharing
1. Log in to the web management page
http://192.168.8.1. Login to the device by typing
in “admin” in both login and password fields.
2. Click on “Settings” option.
3. Check the IP address from “Settings” page click
on “System” > “Device Information” from here
you can check the Wan IP address.
4. From the “Settings” page, choose “Security” >
“Firewall Switch”.
5. Select the “Enable firewall” and “Open Wan IP
sharing”, and then click “Apply”.
6. The “IP Sharing” link now is available.
7. By typing the Wan IP address, the other users can
remotely access the web management page and
view the SD files.
Page 17
17
Battery Saving Mode
If the CharJi EVO CLOUD has been inactive for some
time, the CharJi EVO CLOUD enters the standby mode,
in which the display screen turns off. Pressing any
button causes the display screen to light up.
When the CharJi EVO CLOUD is being powered only by
the battery, you can choose to enable or disable the
automatic Wi-Fi turnoff function. If this function is
enabled and if no Wi-Fi devices access the CharJi EVO
CLOUD for a period of time, the Wi-Fi turns off
automatically. You can press any button to turn the
Wi-Fi on again.
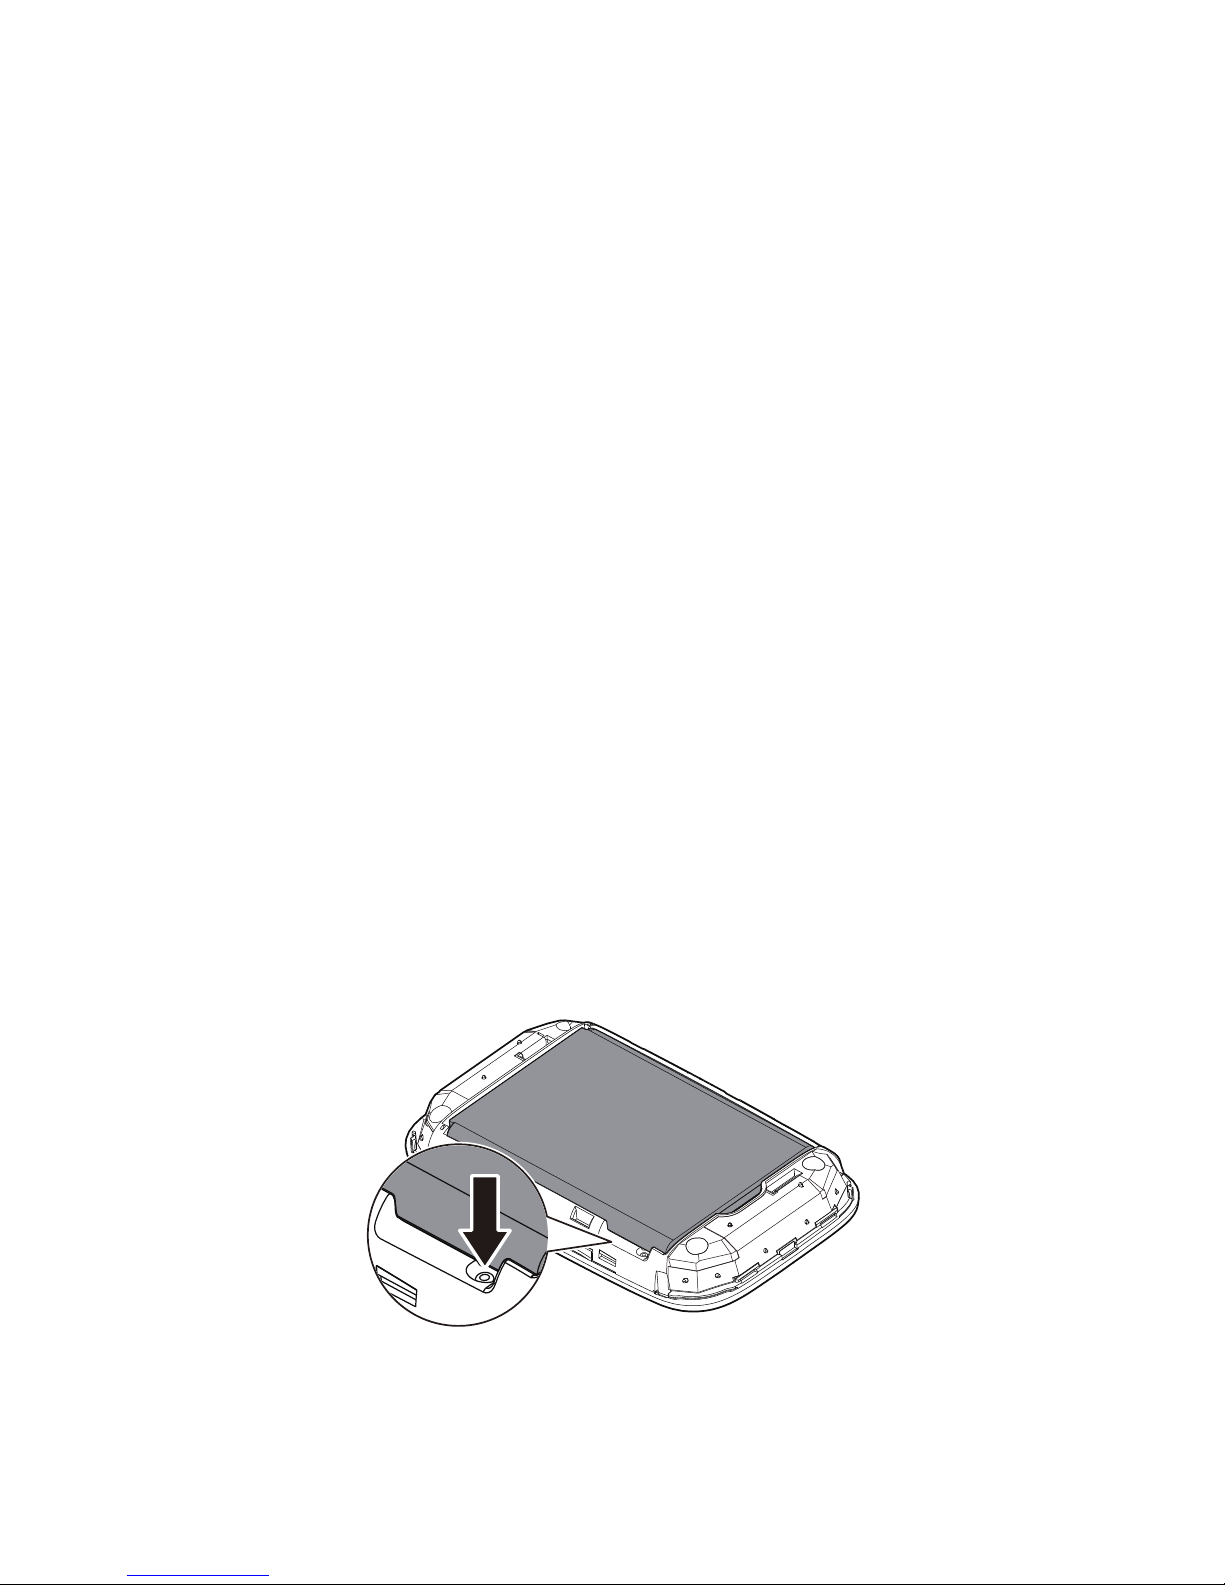
Restoring to Factory Settings
If you forget the user name, password, or SSID you
have set, you can restore the CharJi EVO CLOUD to its
factory settings.
To do so, simply press and hold the RESET button until
the CharJi EVO CLOUD restarts.
RESET
MENU
RESET
Page 18
18
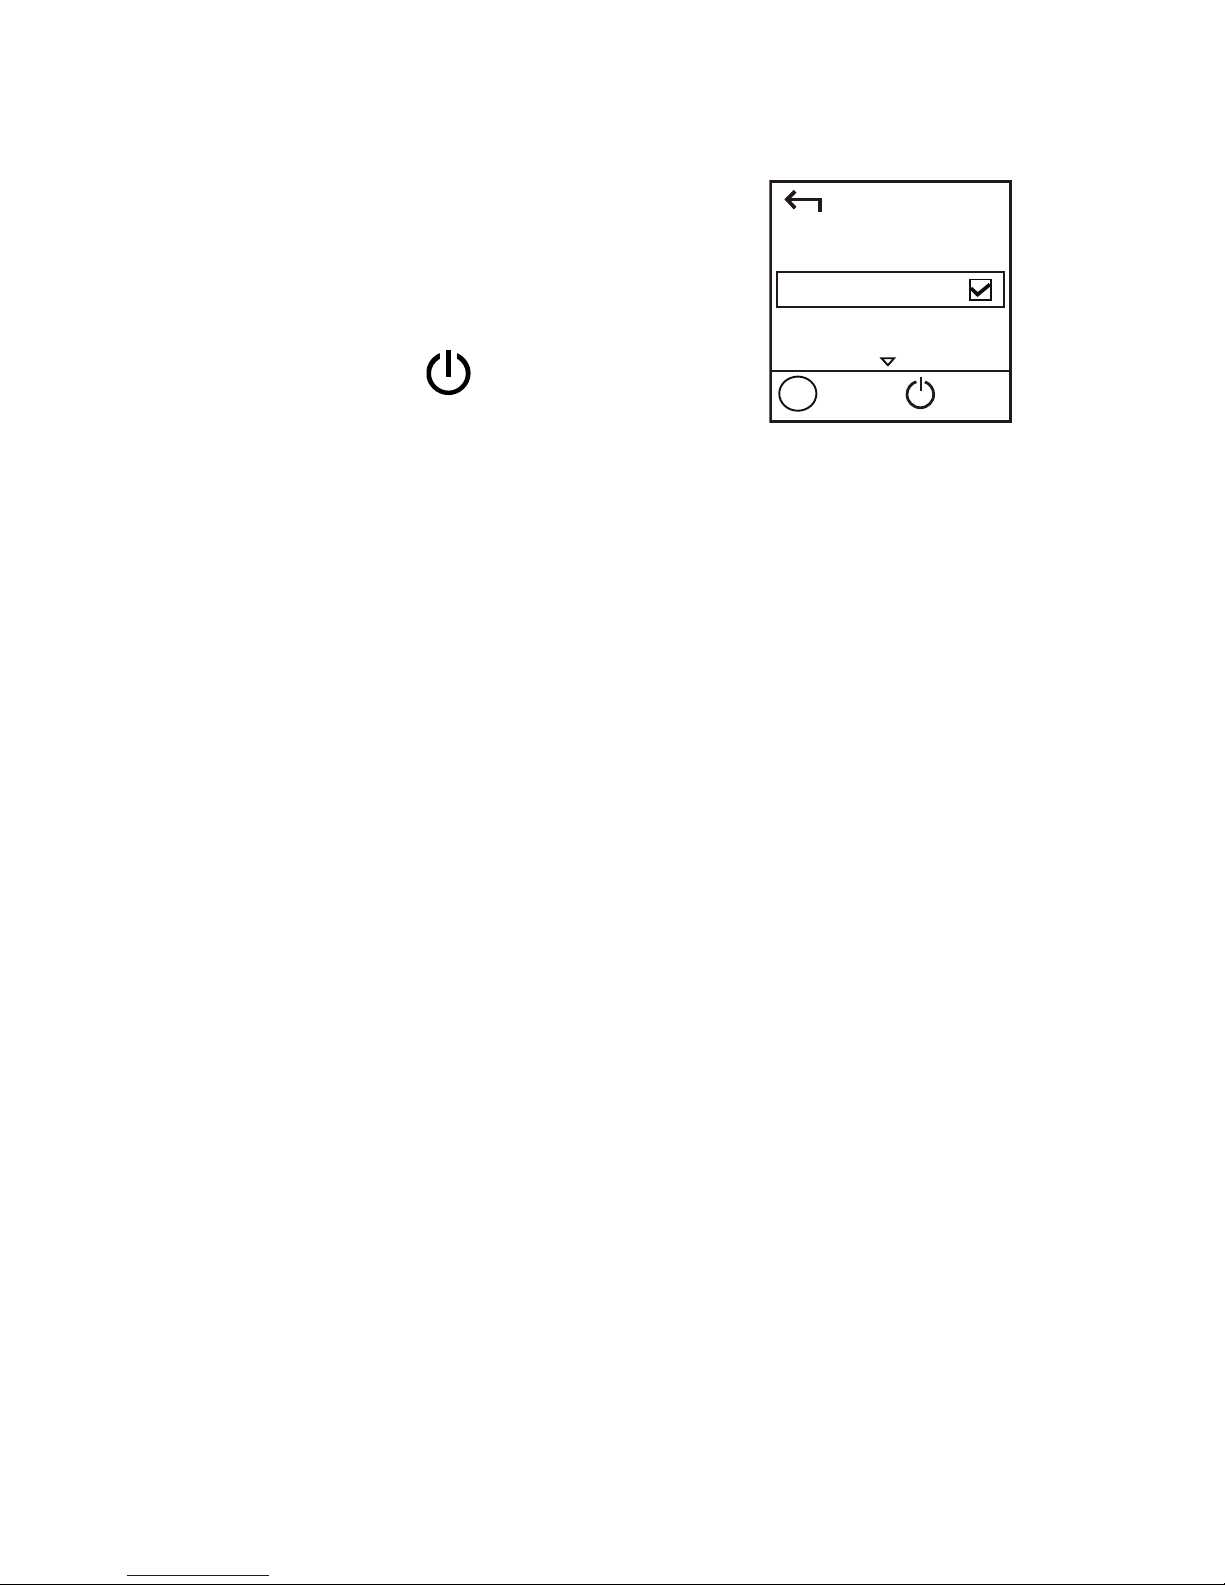
Turning Internet WLAN On or Off
1. Press the MENU button to
display the menu.
2. Press the MENU button to
scroll to Internet WLAN.
3. Press the
button to turn
Internet WLAN on or off.
Note:
Alternatively, you can log in to the CharJi EVO
CLOUD's web management page to enable or
disable Internet WLAN.
After the Internet WLAN function is enabled,
up to 9 Wi-Fi devices can be connected to the
CharJi EVO CLOUD.
Adding a Wi-Fi Hotspot
1. Log in to the web management page.
2. From the settings page, choose Internet WLAN.
3. Scan for Wi-Fi hotspots and connect to the
desired one.
Back
Next
OK
Menu
Internet WLAN
Page 19
19
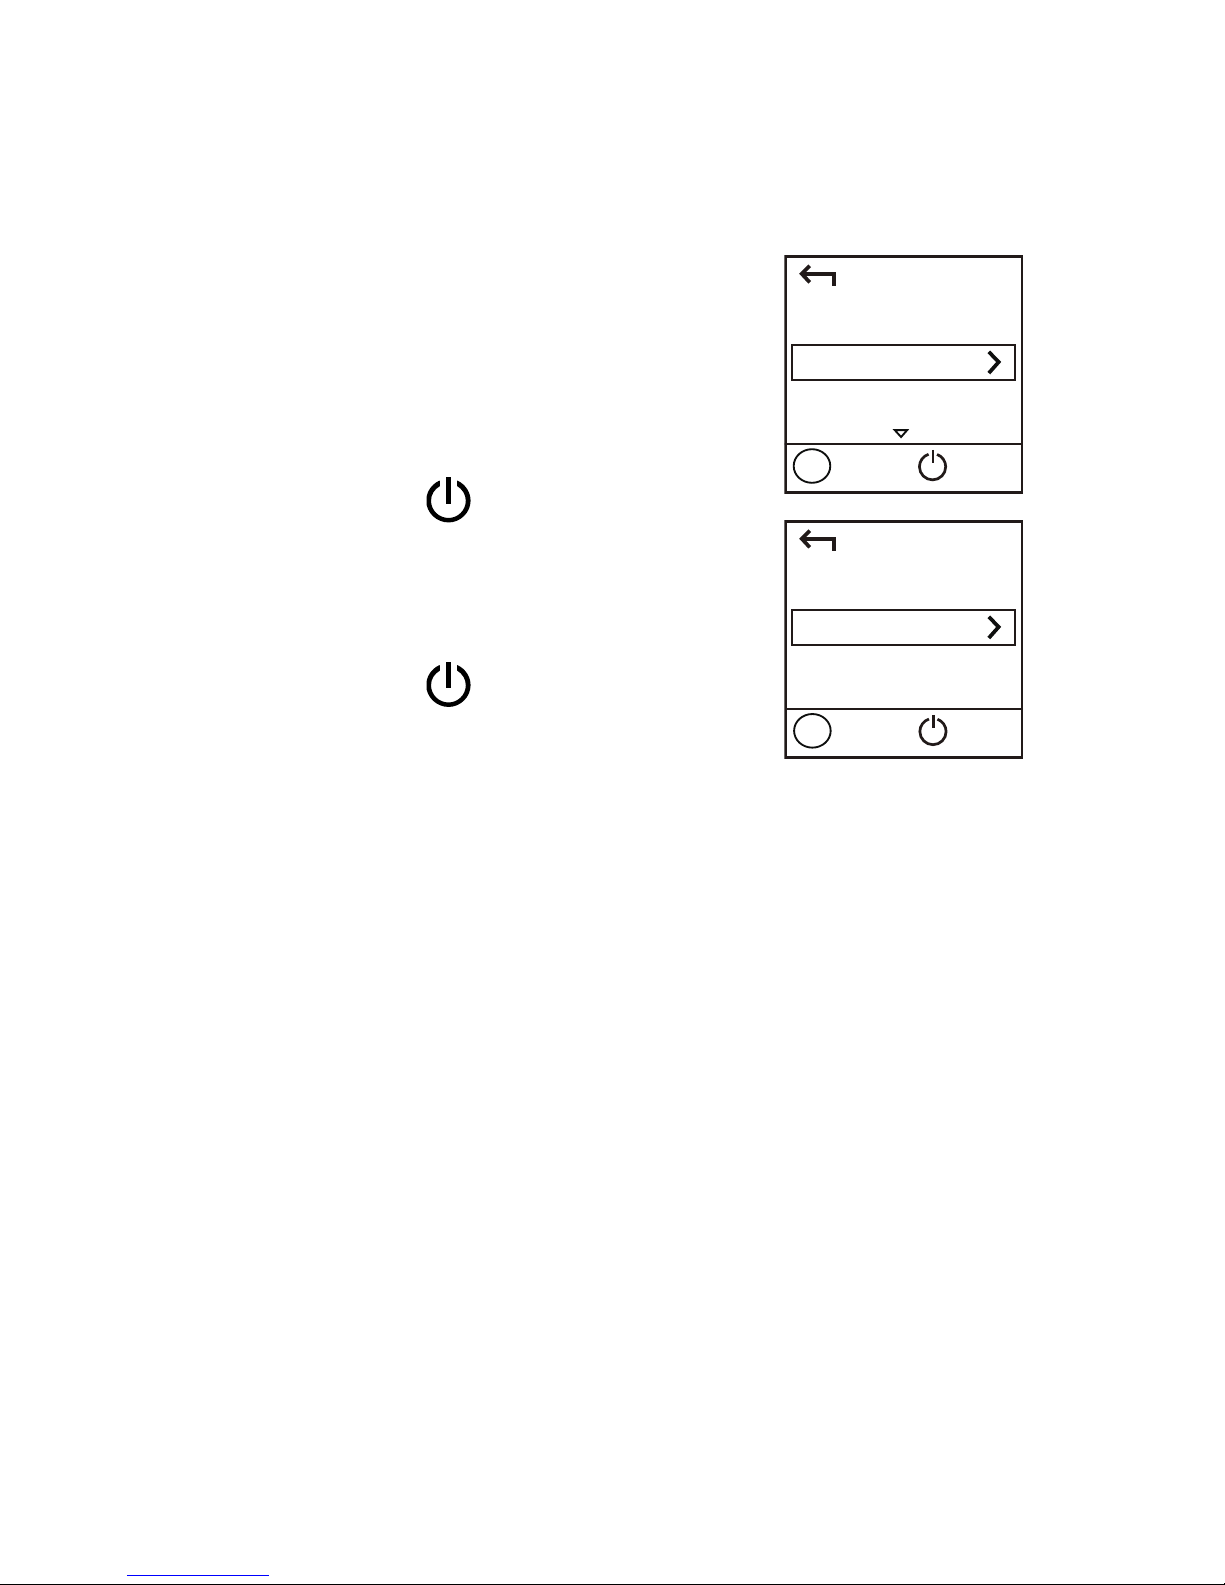
Downloading the HUAWEI Mobile WiFi
App for an Android Device Using a 2D
Barcode
On the CharJi EVO CLOUD:
1. Press the MENU button to
display the menu.
2. Press the MENU button to
scroll to 2D Barcode.
3. Press the
button to enter
2D Barcode.
4. Press the MENU button to
scroll to Mobile app.
5. Press the
button to
display the Mobile app screen.
On your Android device:
6. Scan the 2D Barcode on the CharJi EVO CLOUD
to download the HUAWEI Mobile WiFi App.
Note:
Alternatively, you can search for HUAWEI Mobile
WiFi in Google Play or HUAWEI App Center and
download the app to your device.
Back
2D Barcode
Next
OK
Menu
Back
Mobile app
Next
OK
Menu
Page 20
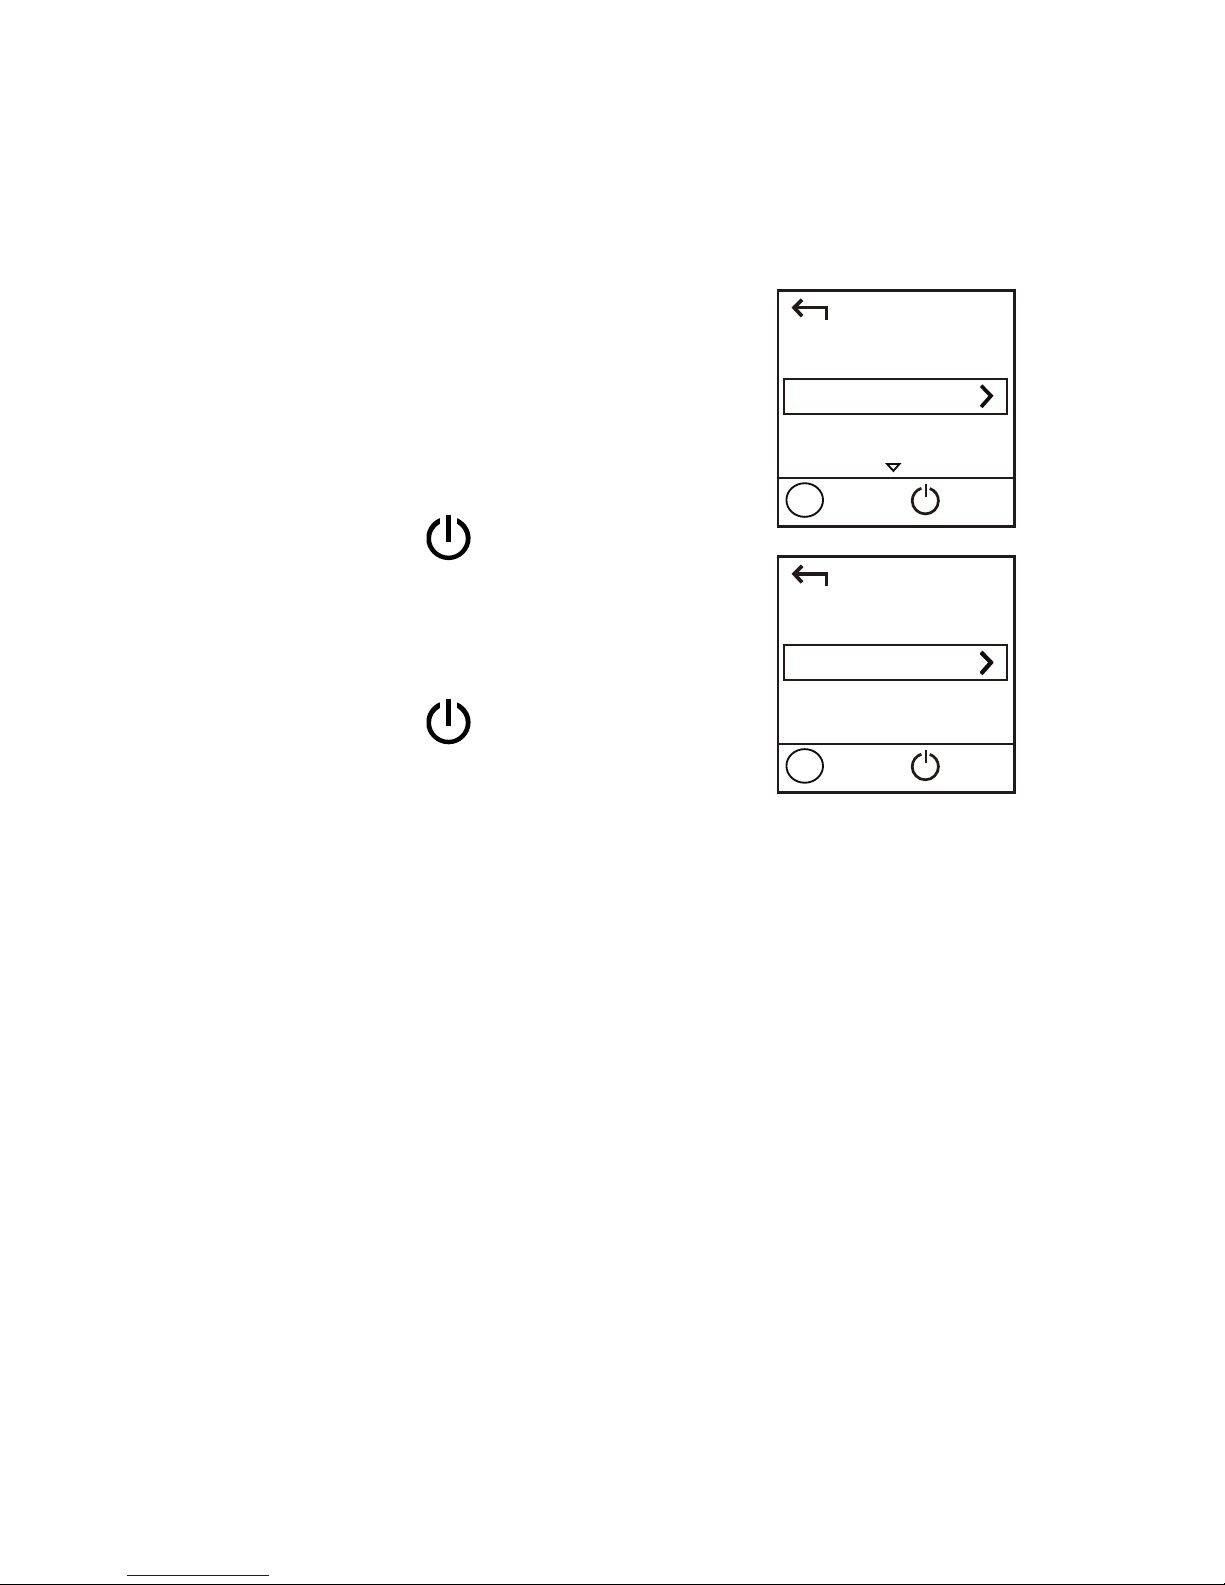
20
Connecting an Android Device to the
CharJi EVO CLOUD Using a 2D
Barcode
On the CharJi EVO CLOUD:
1. Press the MENU button to
display the menu.
2. Press the MENU button to
scroll to 2D Barcode.
3. Press the
button to enter
2D Barcode.
4. Press the MENU button to
scroll to Wi-Fi key.
5. Press the
button to
display the Wi-Fi key screen.
On your Android device:
6. Scan the 2D Barcode on the CharJi EVO CLOUD
using the HUAWEI Mobile WiFi App.
Your Android device will then connect to the CharJi
EVO CLOUD.
Back
2D Barcode
Next
OK
Menu
Back
Wi-Fi key
Next
OK
Menu
Page 21
21
Establishing a WPS Connection
If the Wi-Fi device to be connected to the CharJi EVO
CLOUD supports WPS, the wireless network encryption
key is generated automatically and there is no need to
enter it manually.
The steps for WPS connection are as
follows:
1. Turn on the CharJi EVO CLOUD.
2. Turn on the Wi-Fi device to be
connected to the CharJi EVO
CLOUD.
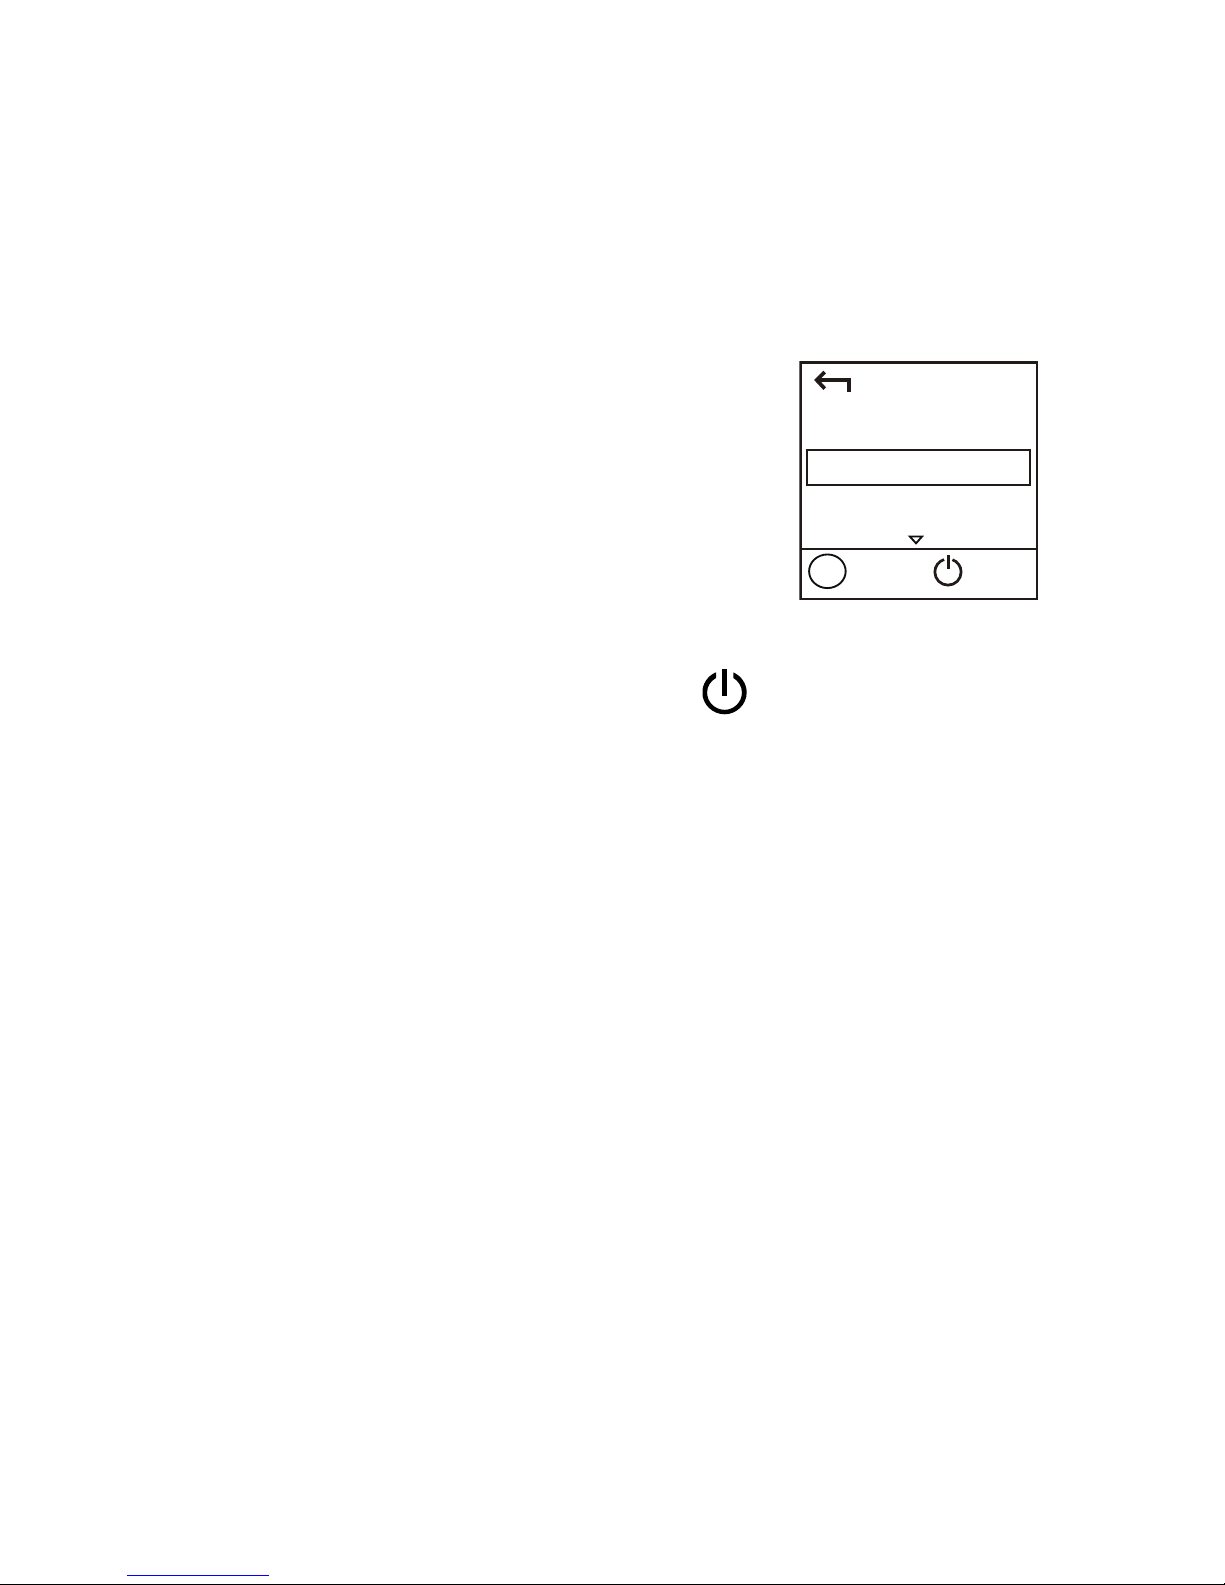
3. Press the MENU button to display the menu, scroll
to WPS, and then press the
button to
activate CharJi EVO CLOUD's WPS.
4. Activate the Wi-Fi device's WPS.
Note:
For specific instructions for the Wi-Fi device, refer
to the device's user manual.
Example 1: Connecting to a Computer
(for example, running the Windows 7
operating system) through Wi-Fi
1. Ensure that the CharJi EVO CLOUD's Wi-Fi
function is on.
2. Select Start > Control Panel > Network and
Internet > Network and Sharing Center > Connect
to a network.
Back
WPS
Next
OK
Menu
Page 22

22
Note:
Before establishing a Wi-Fi connection, ensure
that the computer is equipped with a wireless
network adapter. If the computer indicates a
wireless network connection, the wireless
network adapter can be used. Otherwise, verify
that your wireless network adapter is working
properly.
3. Select the wireless network connection with the
CharJi EVO CLOUD's SSID and click Connect.
Note:
If the wireless network connection is
encrypted, enter the correct wireless network
encryption key.
To view the current SSID and wireless network
encryption key, see the operations in the
“SSID and Wireless Network Encryption Key”
section.
4. Wait a moment for the wireless network
connection icon to appear in the system tray in
the lower right corner of the computer screen.
The wireless network connection is then
established.
Page 23
23
Example 2: Connecting to a Tablet
Computer (for example, iPad)
through Wi-Fi
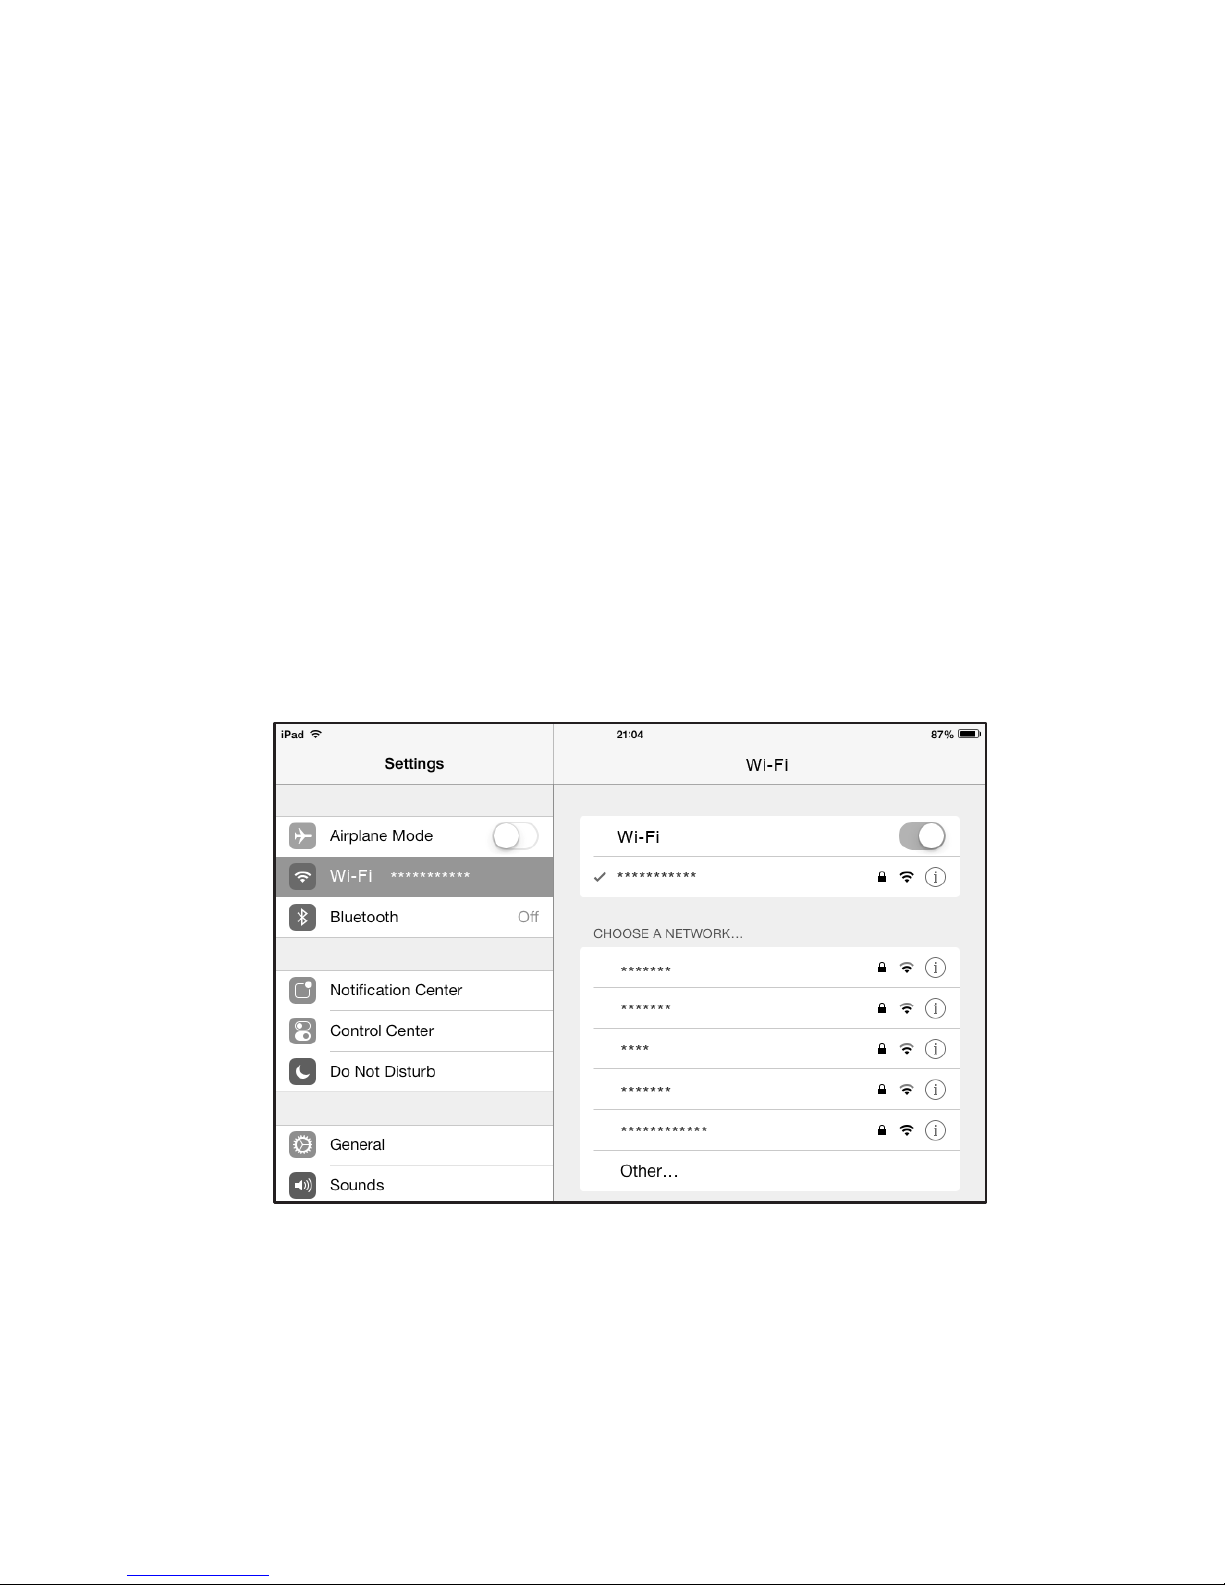
1. Touch Settings > Wi-Fi to turn on Wi-Fi.
2. The tablet computer automatically searches for
wireless connections and displays a list of access
points.
3. Select the access point with the CharJi EVO
CLOUD's SSID.
4. If required, enter the correct wireless network
encryption key, and tap Join.
(The lock icon indicates that the encryption key is
required to connect to this wireless network.)
Note:
Wi-Fi devices, such as an iPhone, iPod touch, PS3
and NDSi, can all access the Internet through the
CharJi EVO CLOUD. For specific operations, refer
to the Wi-Fi device's user manual.
Page 24

24
Tips
When the CharJi EVO CLOUD is in use for an extended
period of time, it will become warm and may overheat.
Should this happen, the CharJi EVO CLOUD will
automatically close the network connection and turn
off to protect itself from damage. If this occurs, place
the CharJi EVO CLOUD in a well ventilated space to
allow the heat to dissipate, then turn it on and
continue to use it as normal.
If you are unable to use the CharJi EVO CLOUD as
normal, try the following:
Consult the online help on the web management
page.
Restart the CharJi EVO CLOUD.
Restore the CharJi EVO CLOUD to the factory
settings.
Consult your operator.
31010TKM_01
 Loading...