

Char-griller 22424 User Manual

OWNER’S MANUAL
Portable Table Top Grill
OR
Side Fire Box
Model # 22424
Keep your receipt with this manual for Warranty.
CUSTOMER SERVICE
1-912-638-4724
Service@CharGriller.com
Contents of this manual are Trademarked and Copyrighted by Char-Griller | A&J Manufac-
turing. Using the information contained in this manual without consent of Char-Griller and/
A&J Manufacturing is strictly prohibited.
or
OM22424 B.2 ™ & © Char-Griller / A&J Mfg.
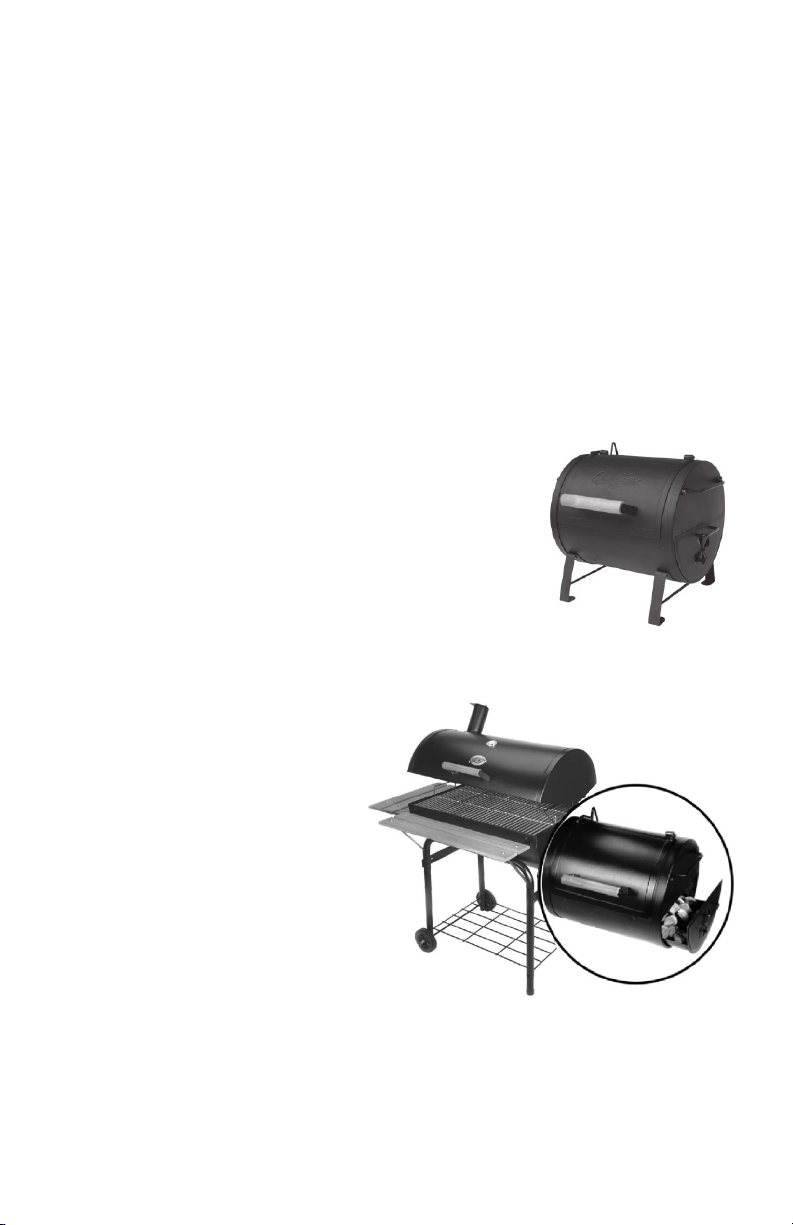
Congratulations on your purchase of this
You have purchased a product that can be used as
Char-Griller® product!
EITHER
a Portable Table Top Charcoal Grill
OR
as a mounted side fire box on a Char-Griller barrel grill.
Assembly instructions for use as a
Portable Table Top grill can be
found on page 3.
Assembly
instructions for use
as a Side Fire Box
can be found
on page 10.
This application turns your existing Char-Griller
barrel grill into an authentic Texas-style Offset Smoker!
OM22424 B.2 ™ & © Char-Griller / A&J Mfg. 2
PORTABLE TABLE TOP GRILL
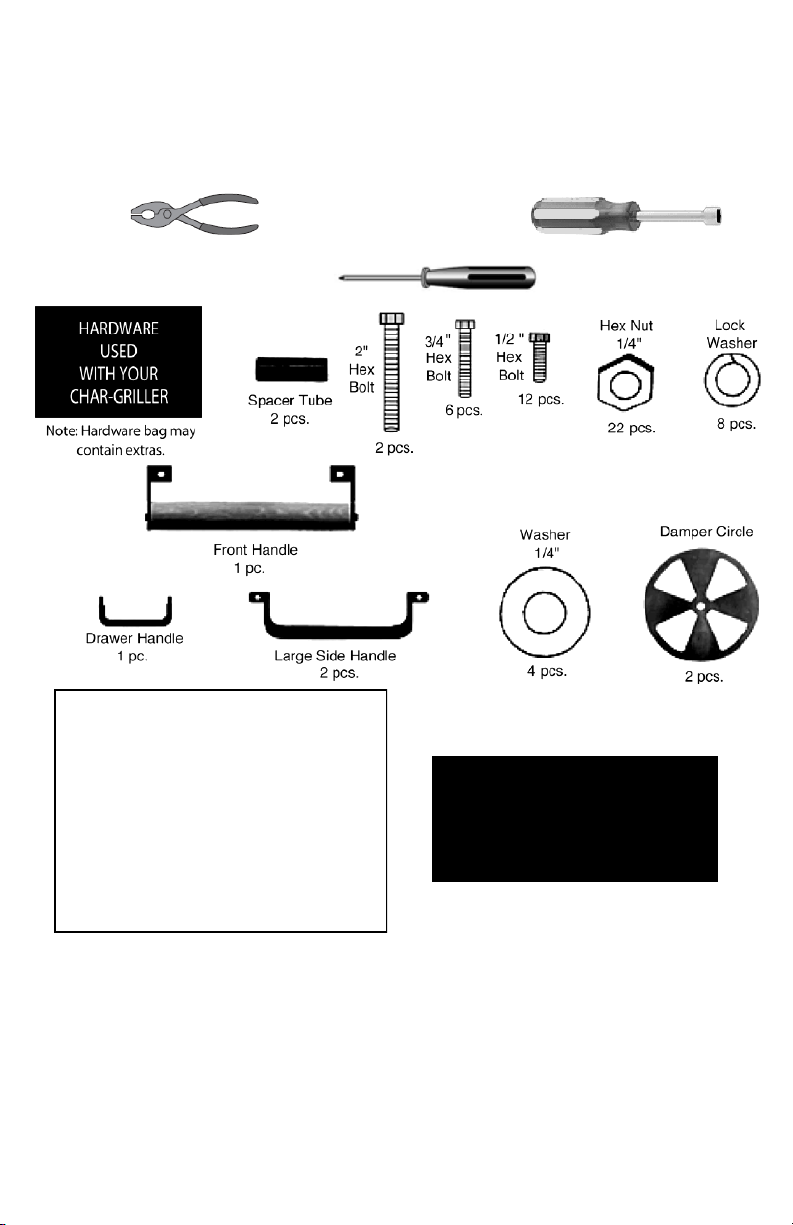
PARTS LIST AND TOOLS REQUIRED
(Tools Not Included)
Pliers 7/16" nut driver
Phillips Head Screwdriver
Parts List::
1 Cooking Chamber
2 Damper Circle
2 Cast Iron Grates
2 Metal rod handle
1 Wood handle
1 Wire rack (for wood)
1 Side Drawer / Ash pan / Fire grate
1 Cast Iron Lifter
1 Lock Bracket
No Returns on
Used Grills
STOP! CALL Char Griller FIRST! DO NOT RETURN PRODUCT TO STORE
CALL Char Griller (912) 638-4724 This product has been built to the highest quality
standards. Call us should you have any questions not addressed in these instructions, or for service information.
Have your grills serial number (located on the back of the grill body or on the leg)
when calling.
OM22424 B.2 ™ & © Char-Griller / A&J Mfg. 3
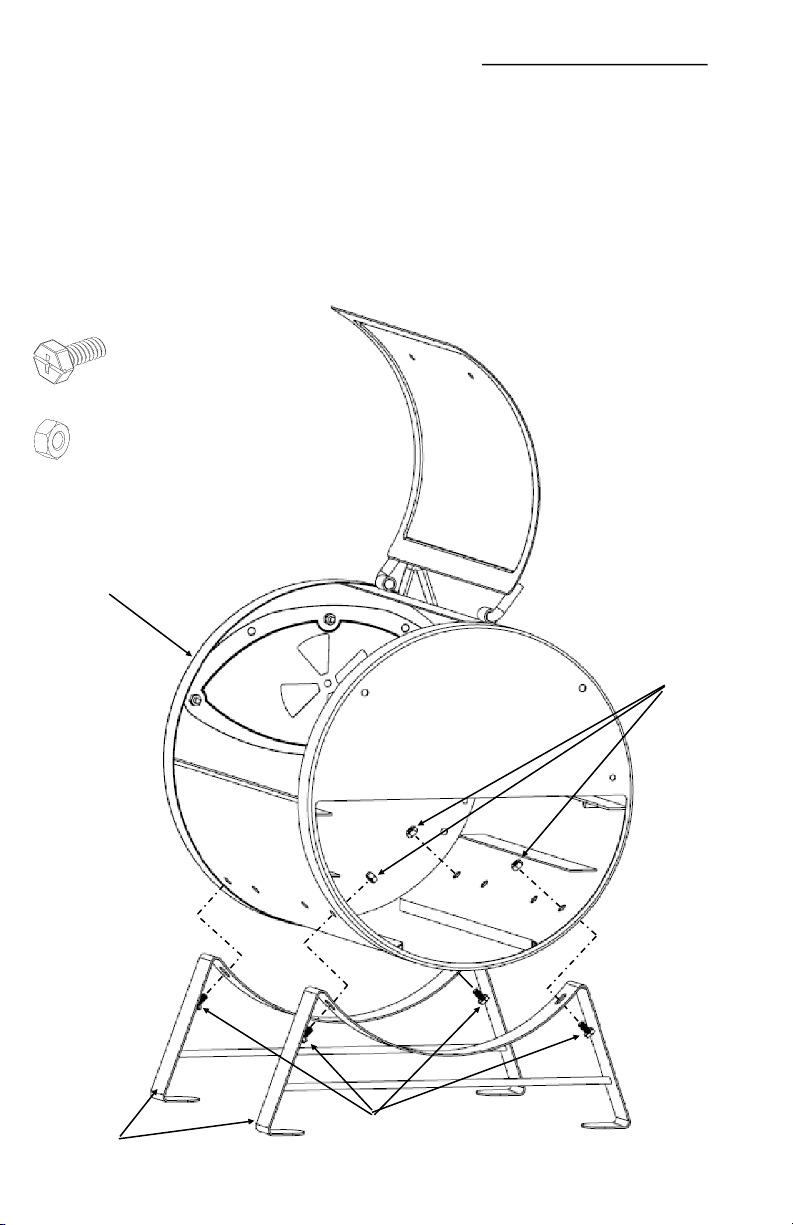
ASSEMBLY INSTRUCTIONS– PORTABLE GRILL
Read all safety warnings and instructions carefully before
assembling and operating your grill.
IMPORTANT HINT: DO NOT TIGHTEN ANY NUTS AND BOLTS UNTIL
GRILL IS FULLY ASSEMBLED.
Note: All nuts go on the inside of the grill.
Remove and unwrap the grill and all of its parts from the packaging.
Step 1: Attach LEGS to GRILL BODY with four 1/2” HEX BOLTS and four HEX
NUTS, see below.
(4) 1/2” Hex Bolts
(4)Hex Nuts
Grill Body
Hex Nuts
Legs
OM22424 B.2 ™ & © Char-Griller / A&J Mfg. 4
Hex Bolts
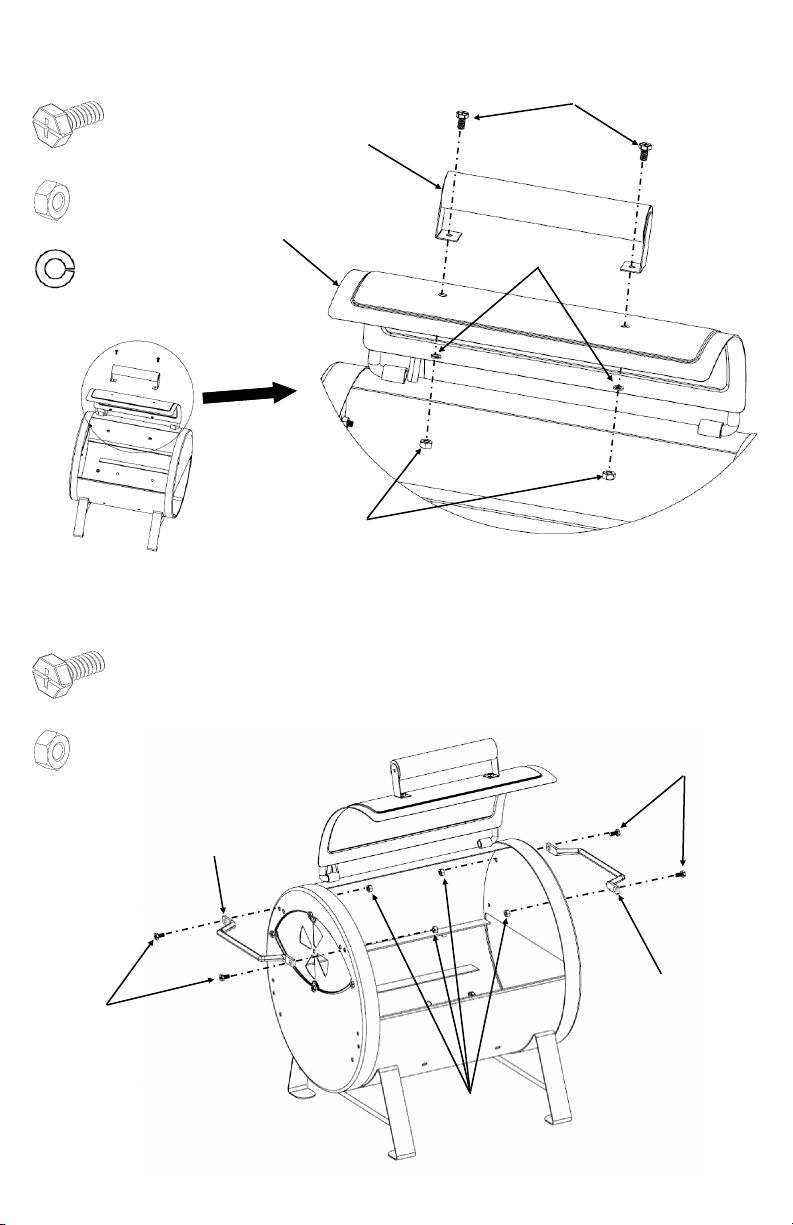
Step 2: Attach WOOD HANDLE to GRILL HOOD with two HEX BOLTS, two LOCK
WASHERS, and two HEX NUTS, see below.
Hex Bolts
Wood Handle
(2) 1/2” Hex Bolts
(2)Hex Nuts
Lock Washers
(2)Lock Washers
Hex Nuts
Step 3: Attach WIRE HANDLE to GRILL BODY with four HEX BOLTS and four HEX
NUTS, see below.
(4) 1/2” Hex Bolts
Hex Bolts
(4)Hex Nuts
Grill Hood
Wire Handle
Wire Handle
Hex Bolts
Hex Nuts
OM22424 B.2 ™ & © Char-Griller / A&J Mfg. 5

Step 4: Attach DAMPER CIRLCE to GRILL BODY with one 3/4” HEX BOLTS, one
FLAT WASHER, one LOCK WASHER, and one HEX NUT.
Flat Washer
(1) 3/4” Hex Bolt
(1)Hex Nut
Lock Washer
Hex Nut
Hex Bolt
(2)Flat Washer
(1)Lock Washer
Damper Circle
Flat Washer
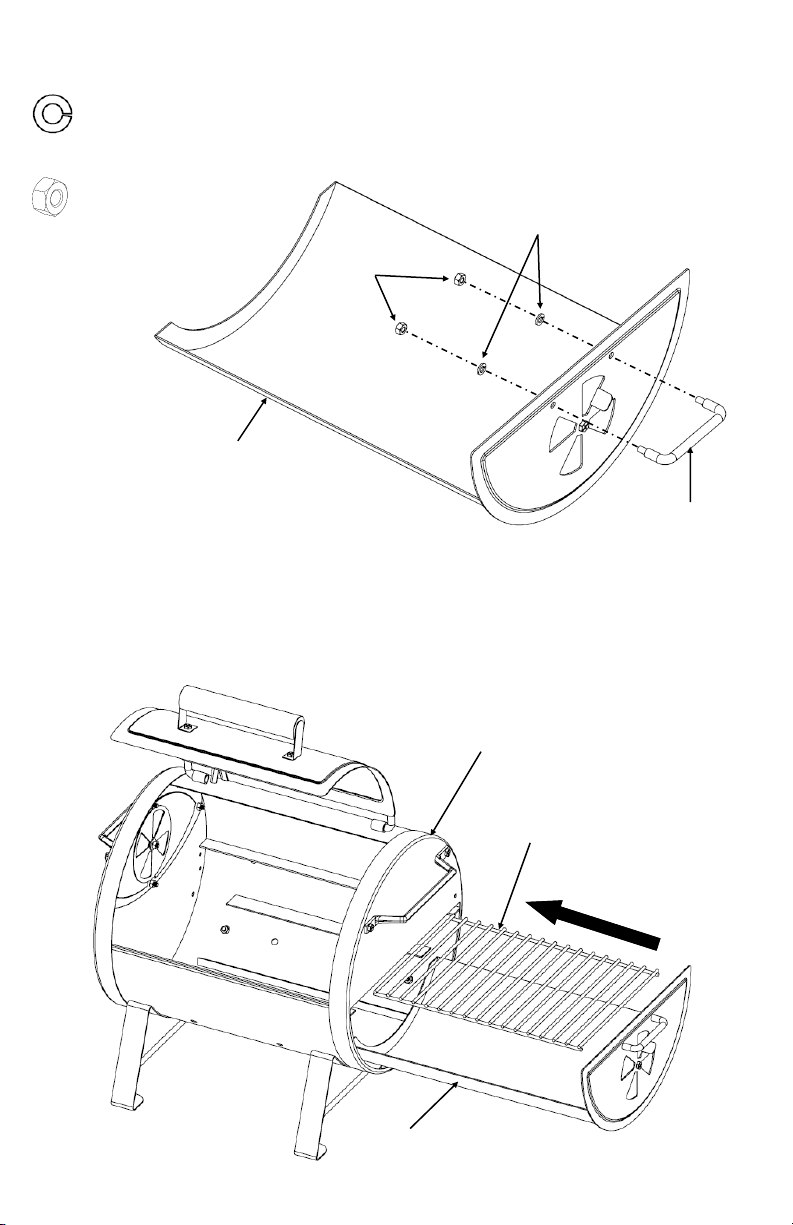
Step 5: Attach DAMPER CIRCLE to the ASH DRAWER with 3/4” HEX BOLT, FLAT
WASHER, LOCK WASHER, and HEX NUT, see below.
(1) 3/4” Hex Bolt
Hex Nut
Damper Circle
(1)Hex Nut
(2)Flat Washer
Lock Nut
(1)Lock Washer
Ash Drawer
Flat Washer
Hex Bolt
OM22424 B.2 ™ & © Char-Griller / A&J Mfg. 6
Step 6: Attach U HANDLE to ASH DRAWER with two LOCK WASHERS and two
HEX NUTS.
(2)Lock Washers
Lock Washers
(2)Hex Nuts
Ash Drawer
Step 7: Tighten ALL BOLTS and NUTS. Insert a 1/2” BOLT and tighten with a NUT for
any open holes in Grill BODY after assembly.
Hex Nuts
U Handle
Step 8: Place FIRE GRATE onto ASH DRAWER then slides it into GRILL BODY.
Grill Body
Fire Grate
Ash Drawer
OM22424 B.2 ™ & © Char-Griller / A&J Mfg. 7
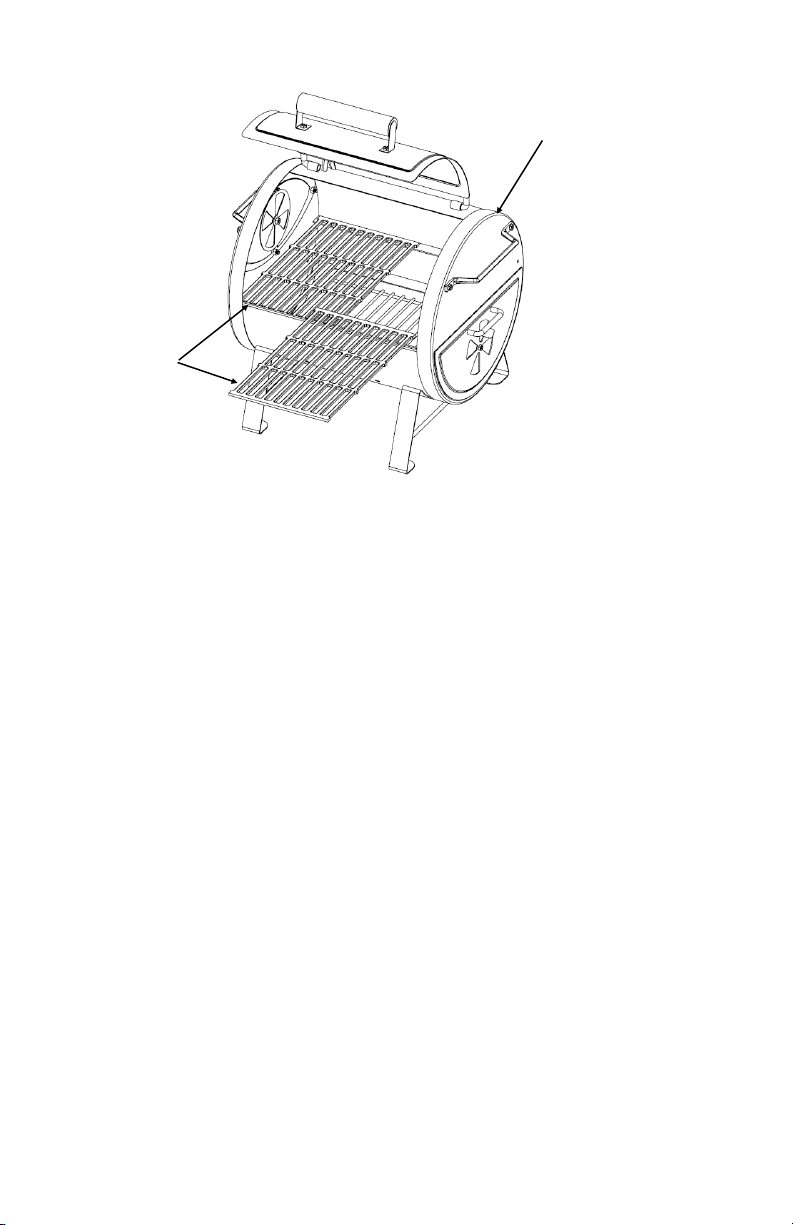
Step 9: Place COOKING GRATES onto the GRILL BODY.
Cooking Grates
NO RETURNS ON USED GRILLS.
Grill Body
OM22424 B.2 ™ & © Char-Griller / A&J Mfg. 8
 Loading...